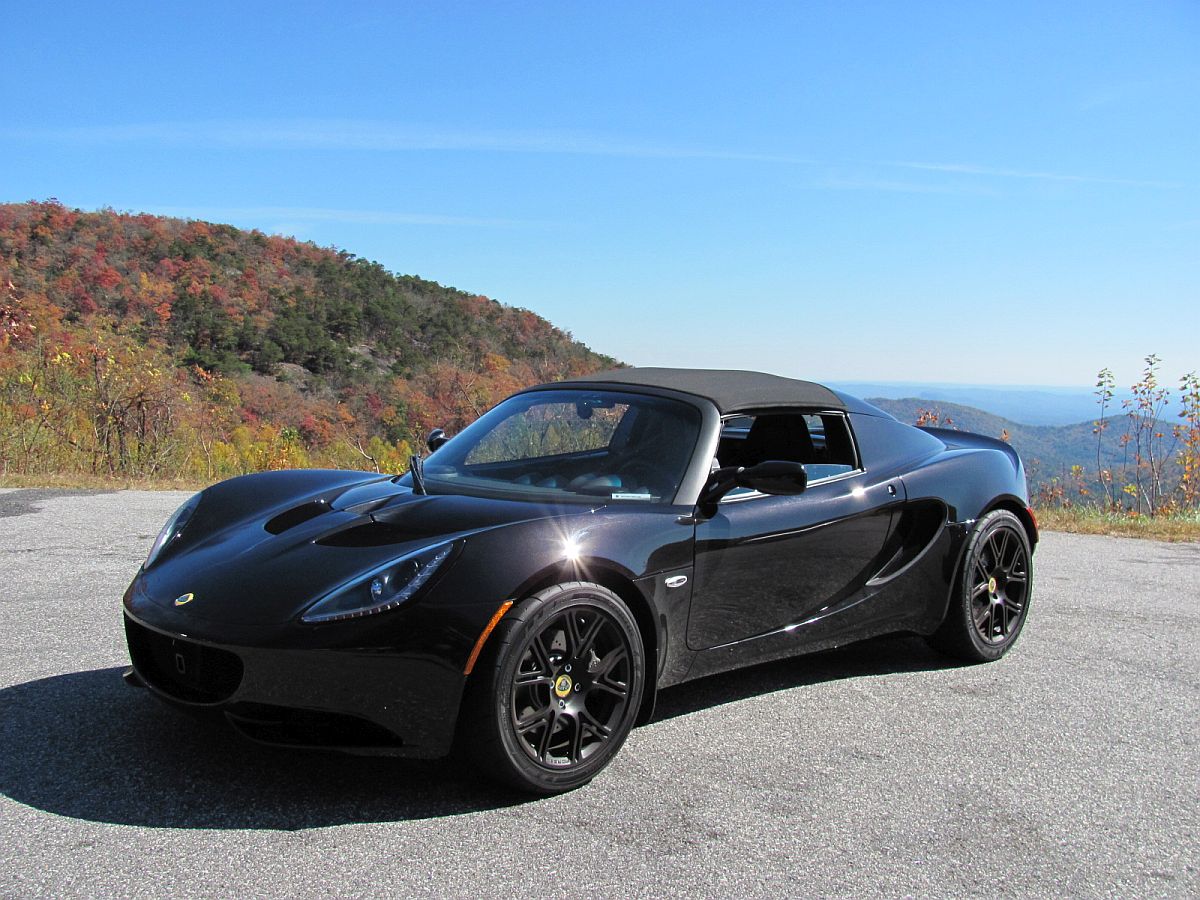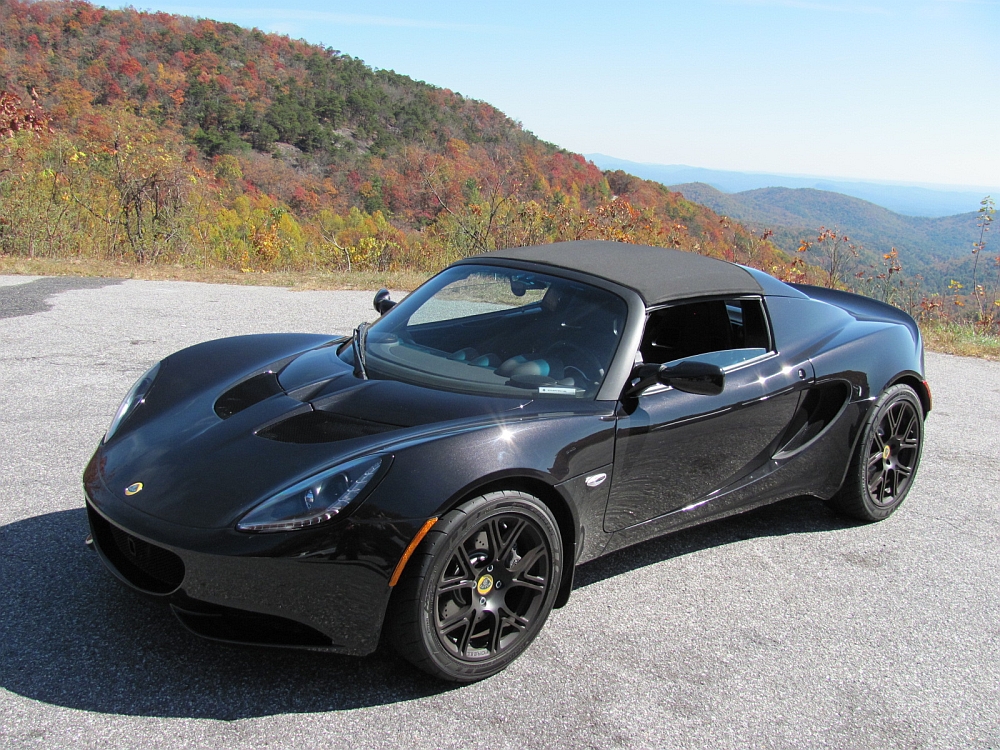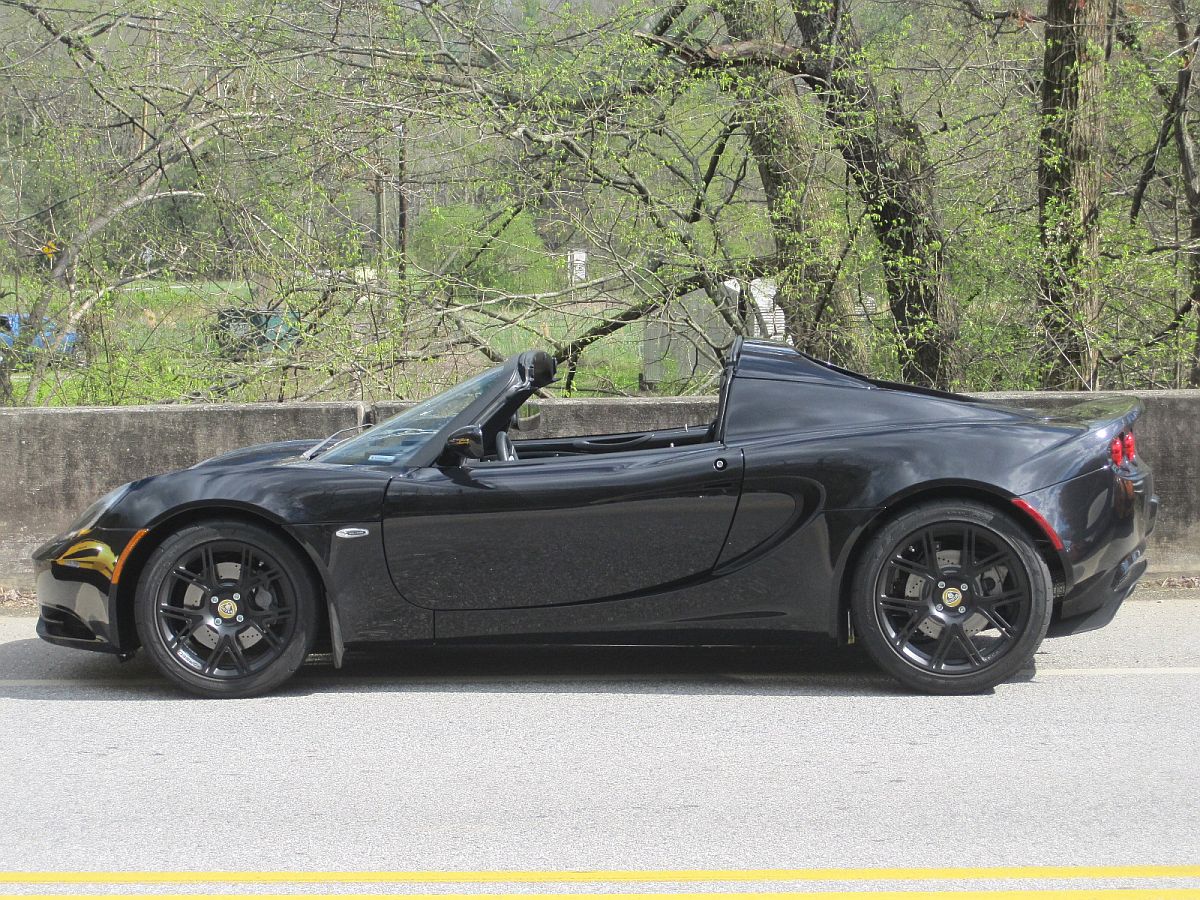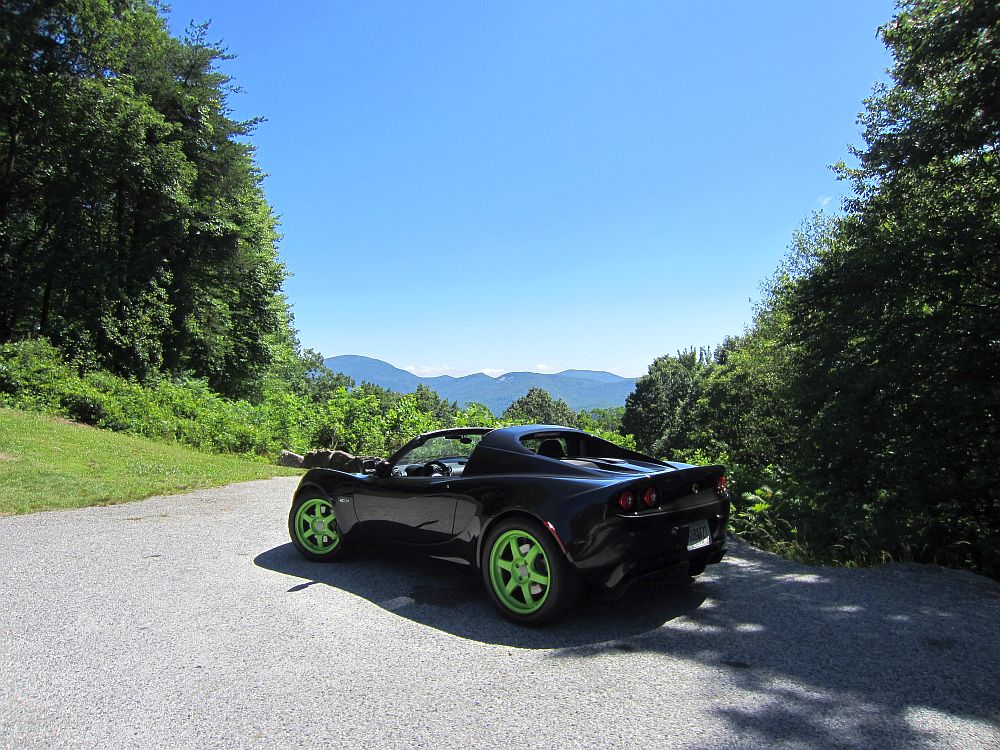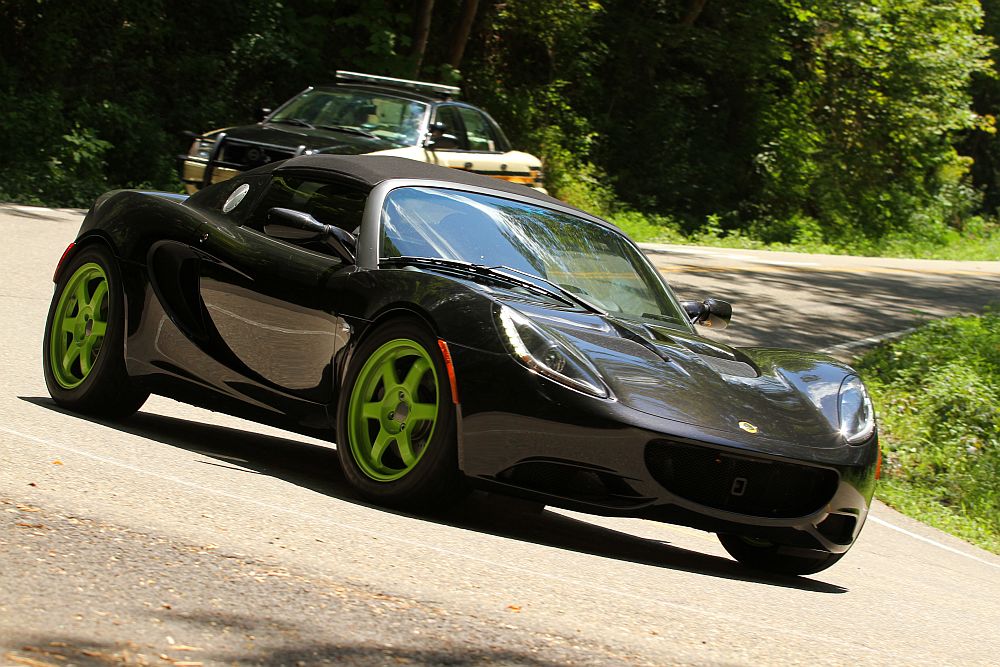

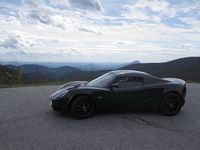
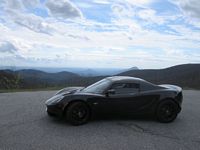
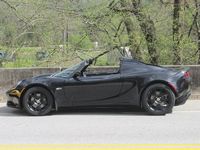
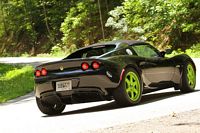
 2011 Lotus Elise R
Click on thumbnails below for larger pics....
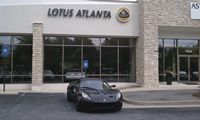
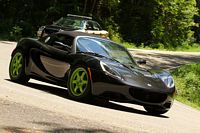
This new 2011 Elise R was purchased from Bill Nuccio at Motorcars of GA- Lotus of Atlanta. Click HERE for the listing and pics as it was posted when I bought it. This Elise had the Sport Pack, Touring Pack, and Black Pack with no LSD (as Lotus intended
). Window Sticker HERE.
I had gone with a friend to look at the new Evora S and found the new 2011 Elise body style appealing, when I found out that this was the end of the road for the US spec 111R I had to have it. As reported by most of the car journals, Autoweek / Edmund's Inside Line / AutoBlog listed the reasons for ceasing US production as expiration of federal safety exemptions and Toyota end-of-production for the 2ZZ motor. 2011 Lotus Elise Press Pack HERE.
I had owned a 2005 (first year for US) Elise a few years ago and felt the desire to get back to the go-kart feel (my 2005 Lotus Elise Web Page HERE). This car spoils ALL other cars out there where feedback and involvement is concerned.

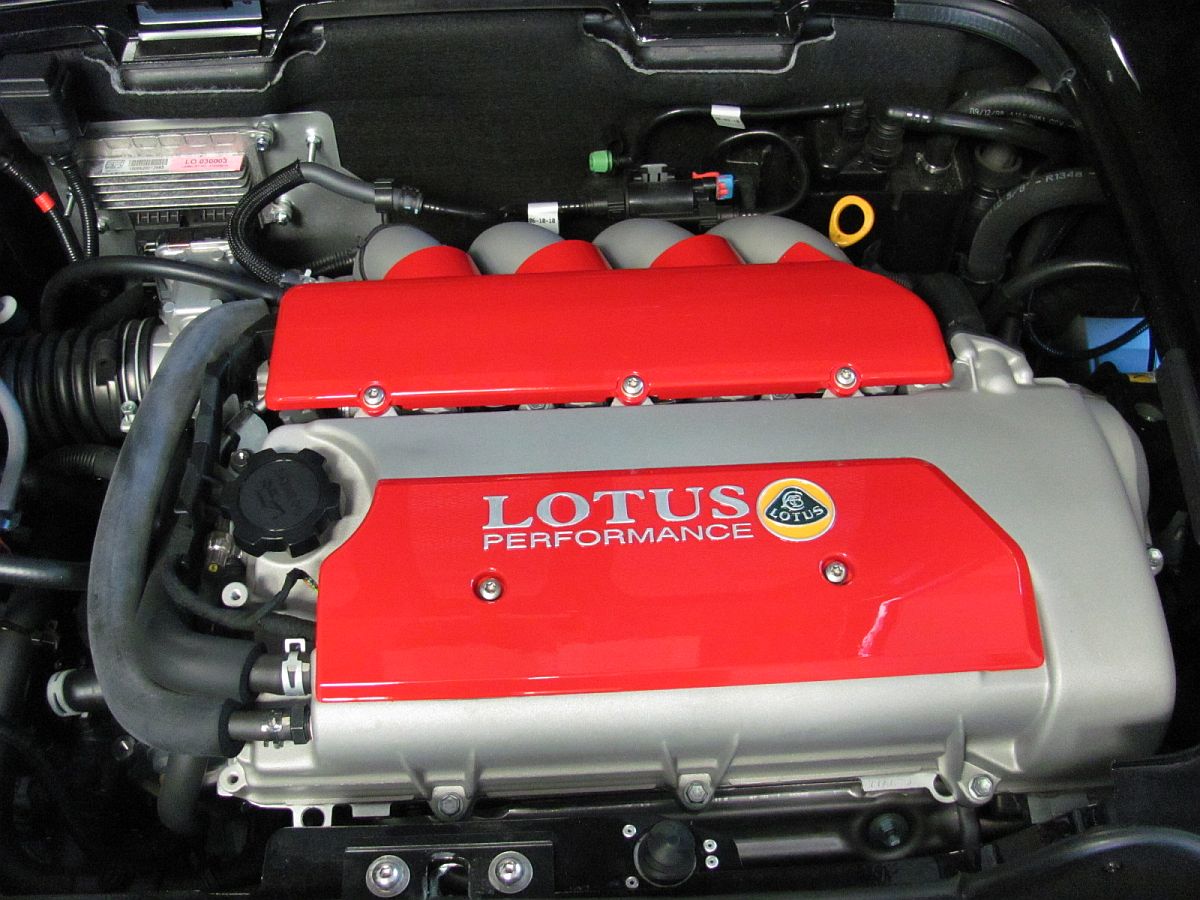
Toyota (with some help from Yamaha) provides the 1.8L VVTLi motor, a 2ZZ GE with variable valve timing and lift also found in the Toyota Matrix XRS / Celica GT-S...
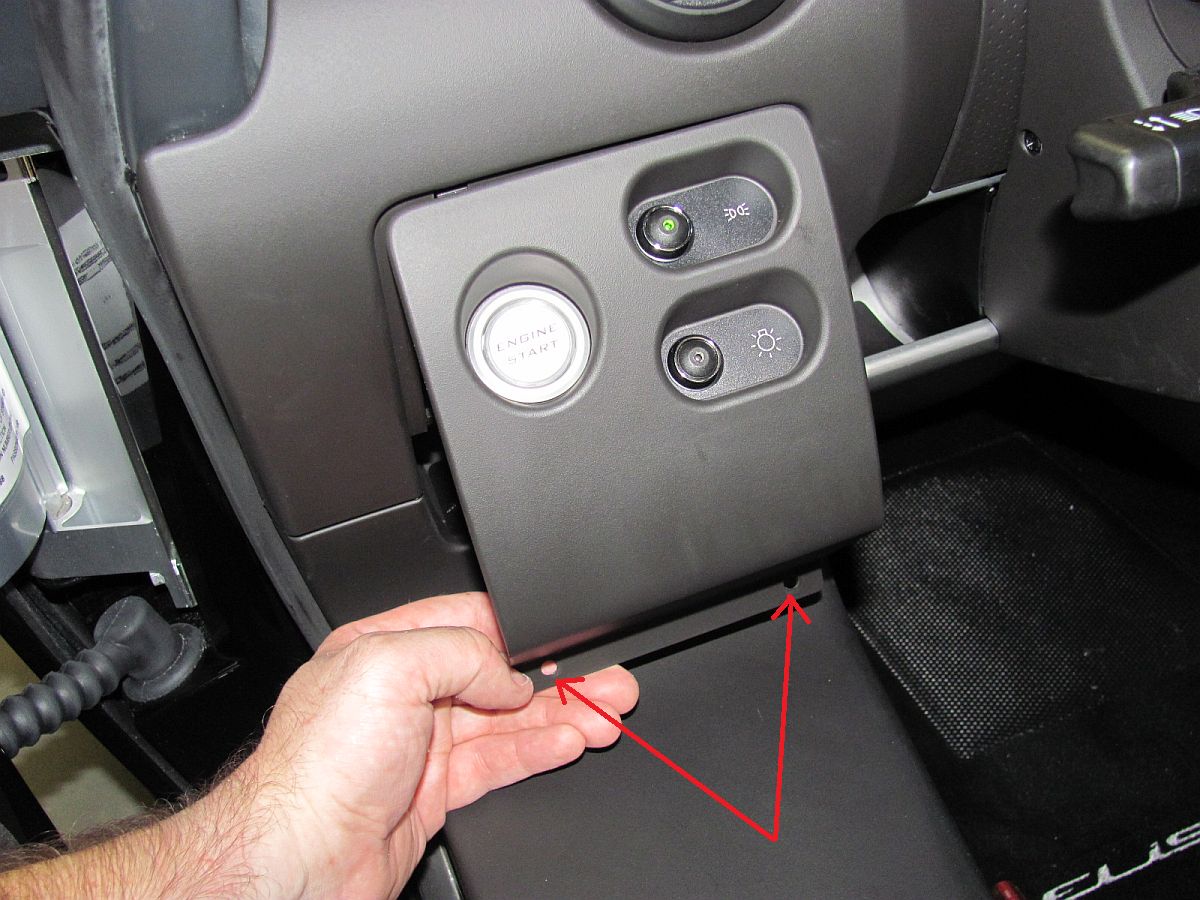
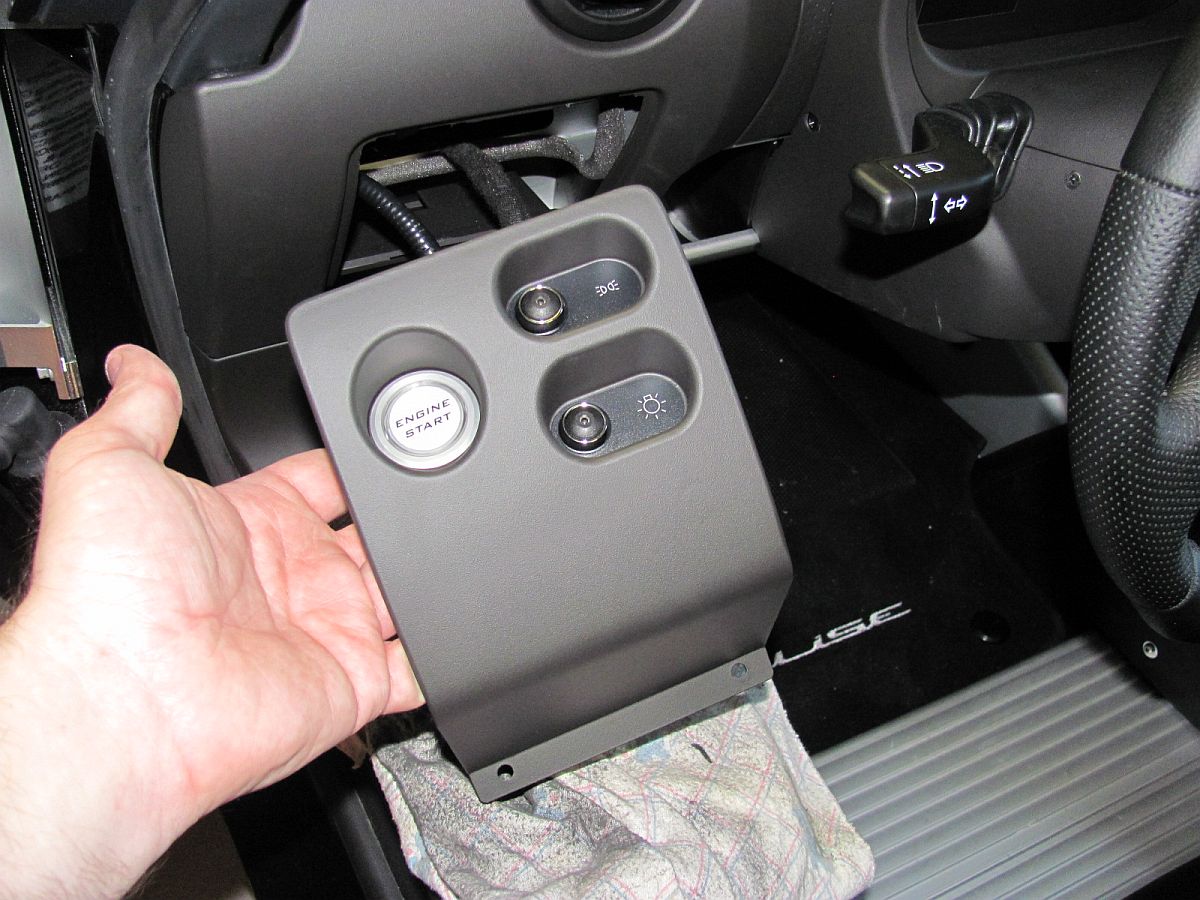
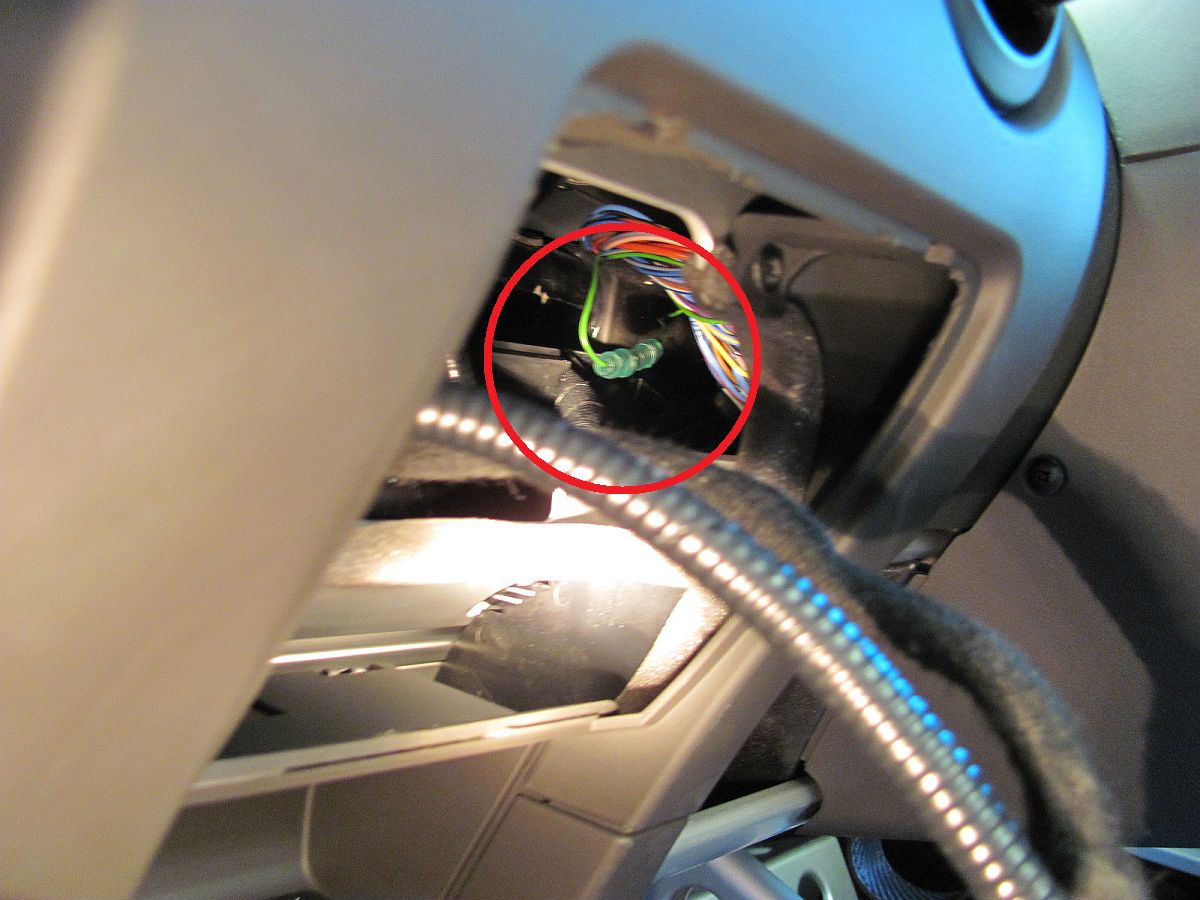
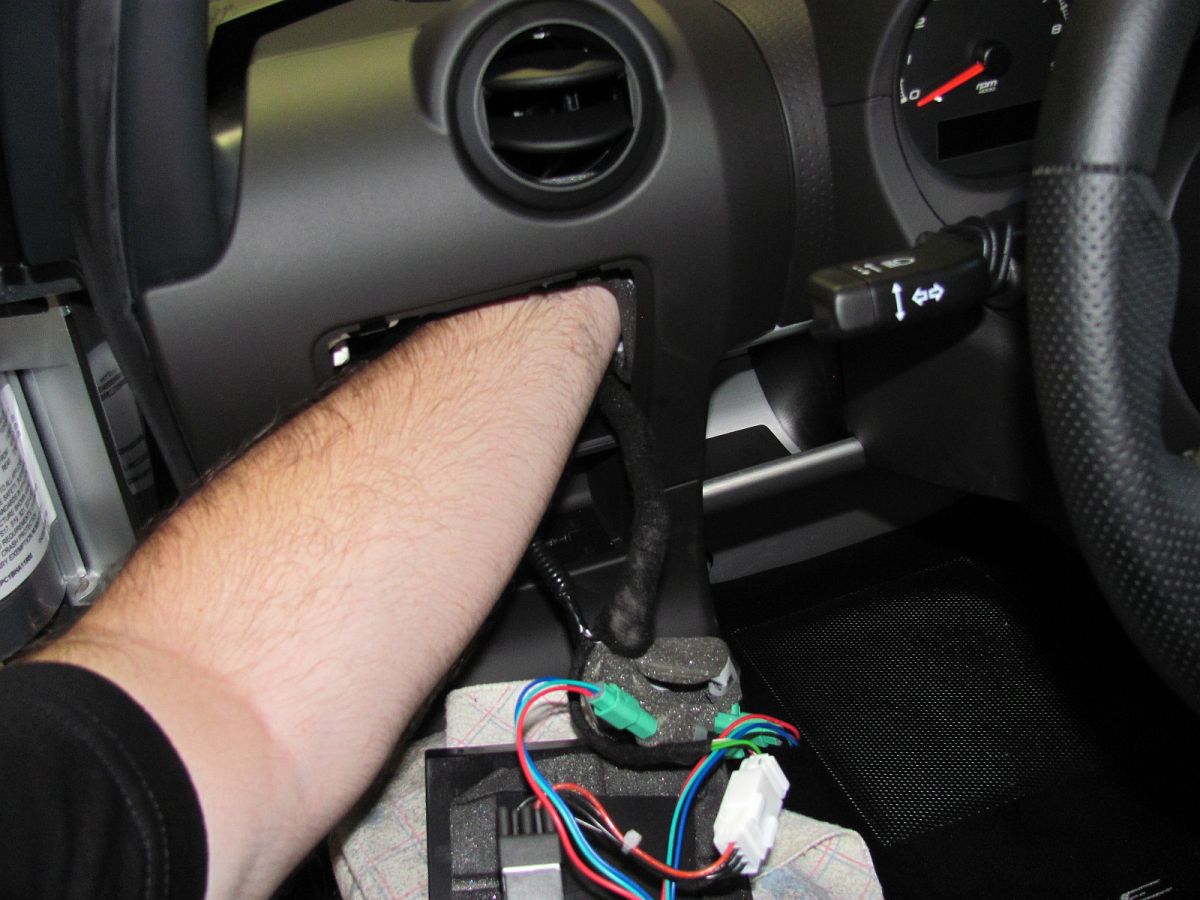
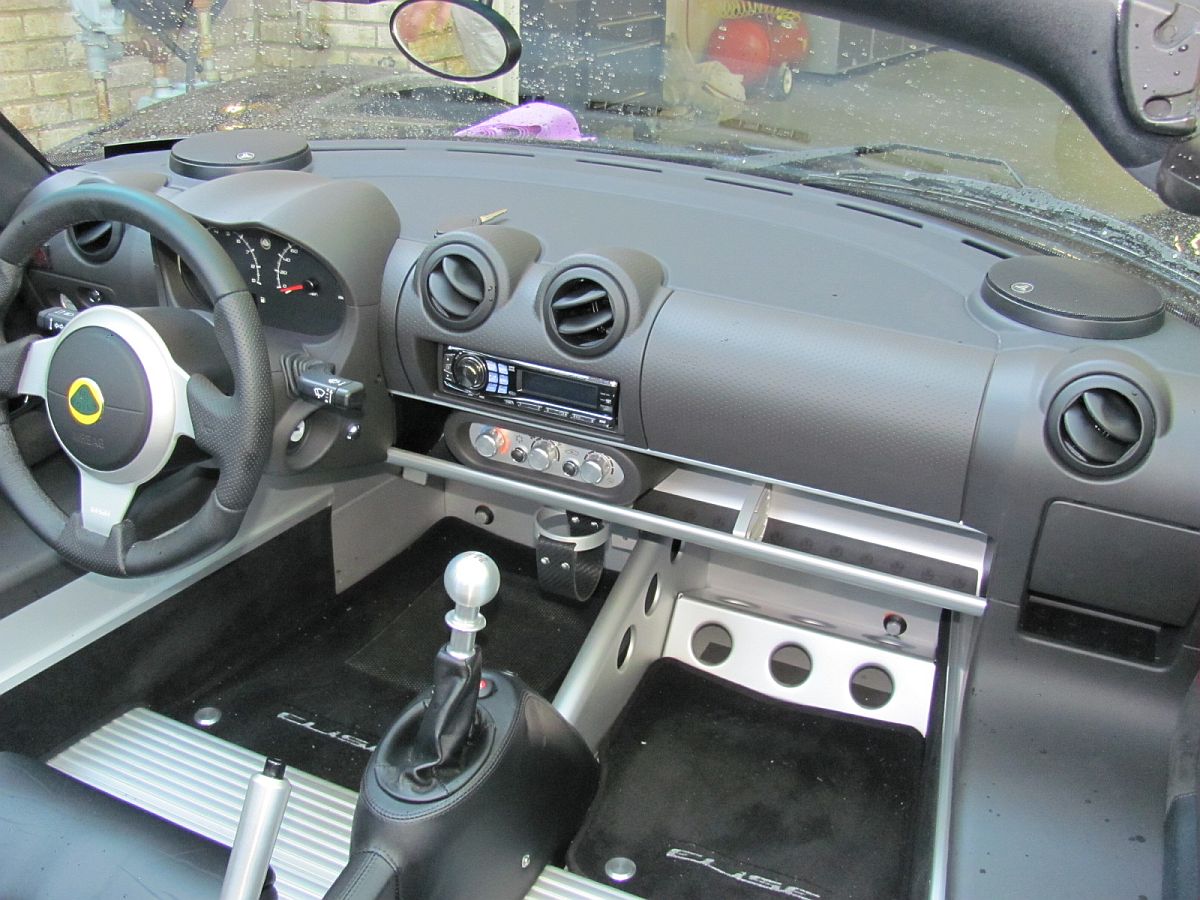
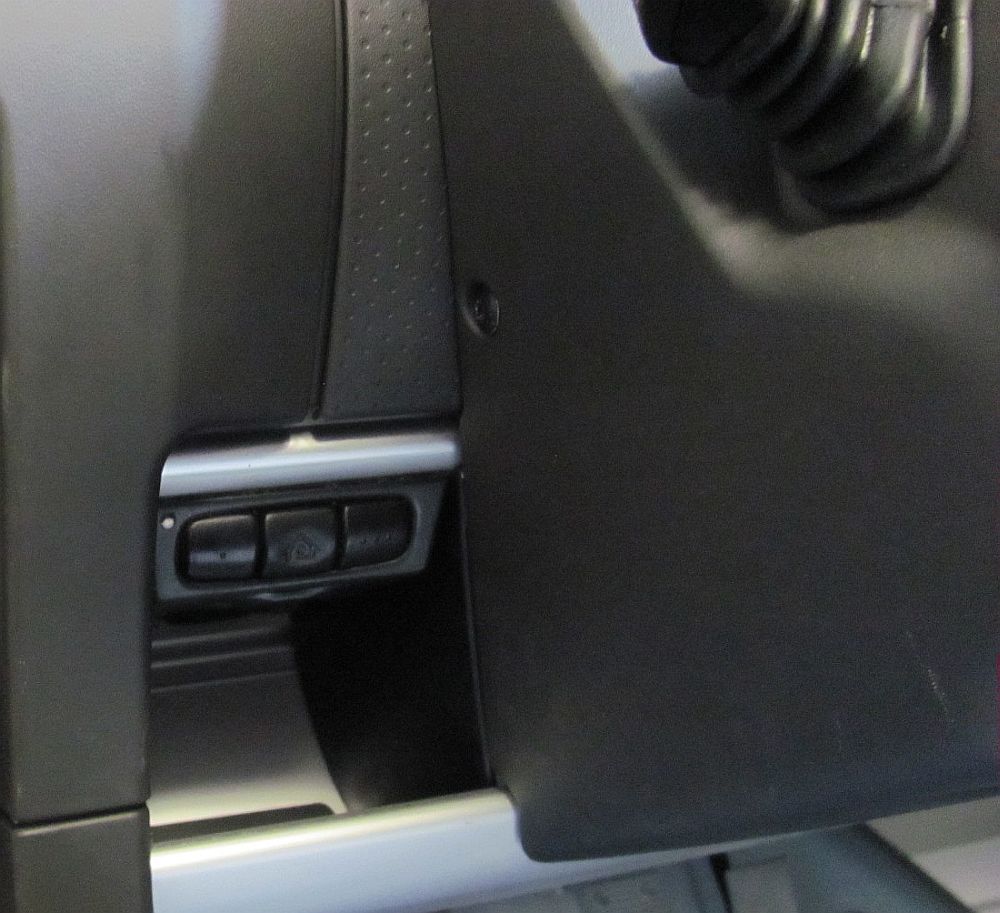
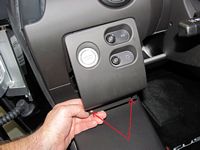
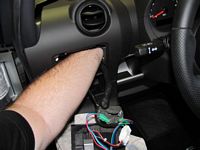
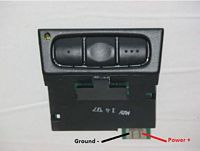
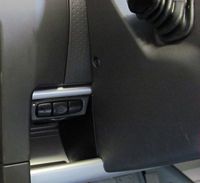
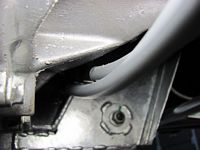
First thing to go was the low beam supplement to the LED DRLs (Daytime Running Lights). With the LEDs I felt it unneccesary to have the low beams on and this would be hard on the HIDs that will replace the low beam bulbs in the near future. Simple to do, remove the two bottom screws holding the light switch panel in, tilt out and pull down to free, find the green wires with the connectors, unplug and tape the exposed connector (I slipped vaccuum line over mine):

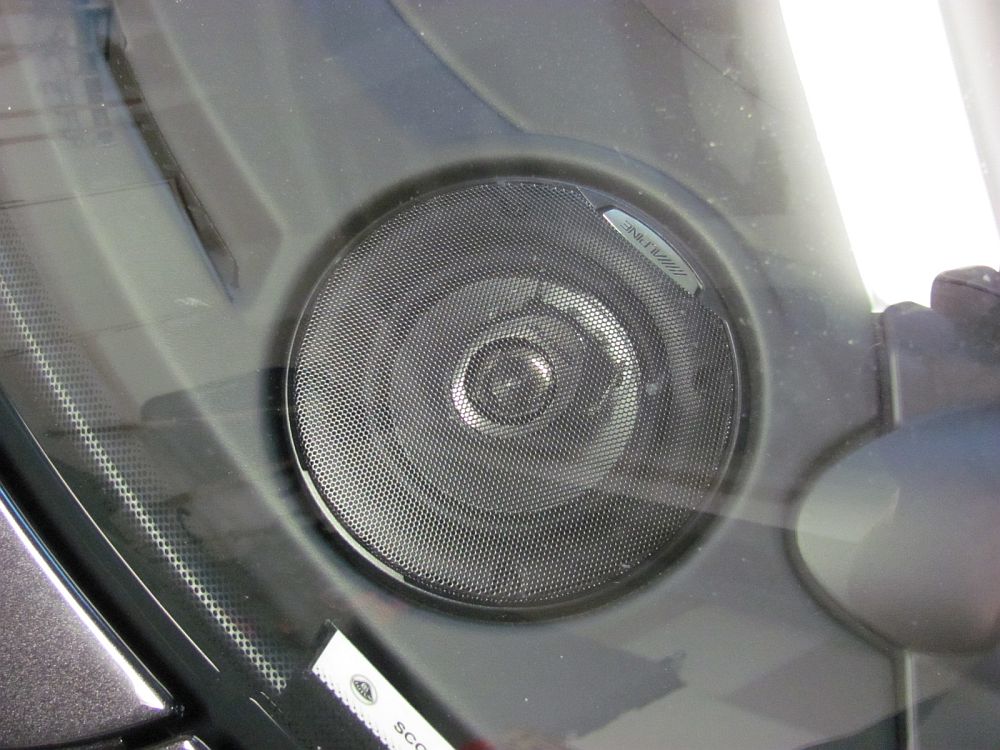
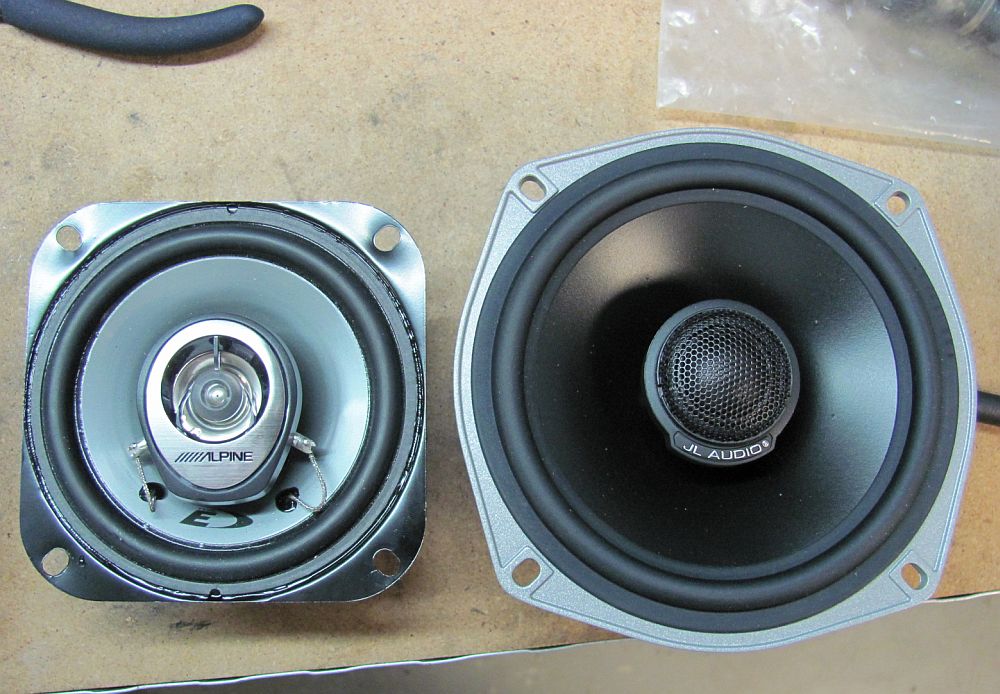
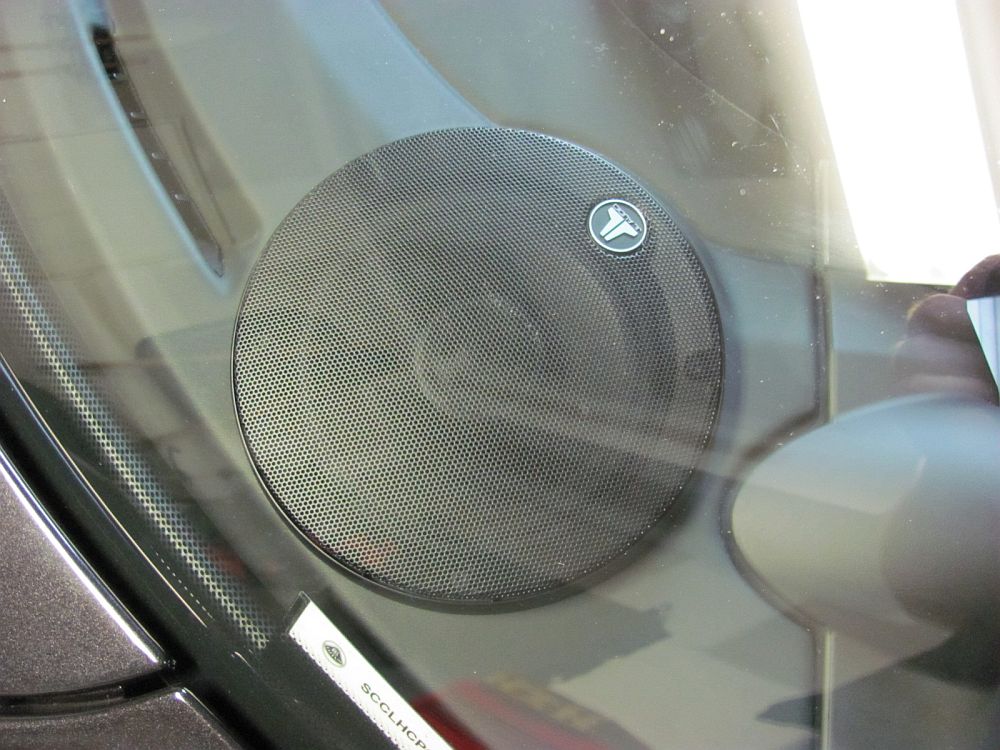
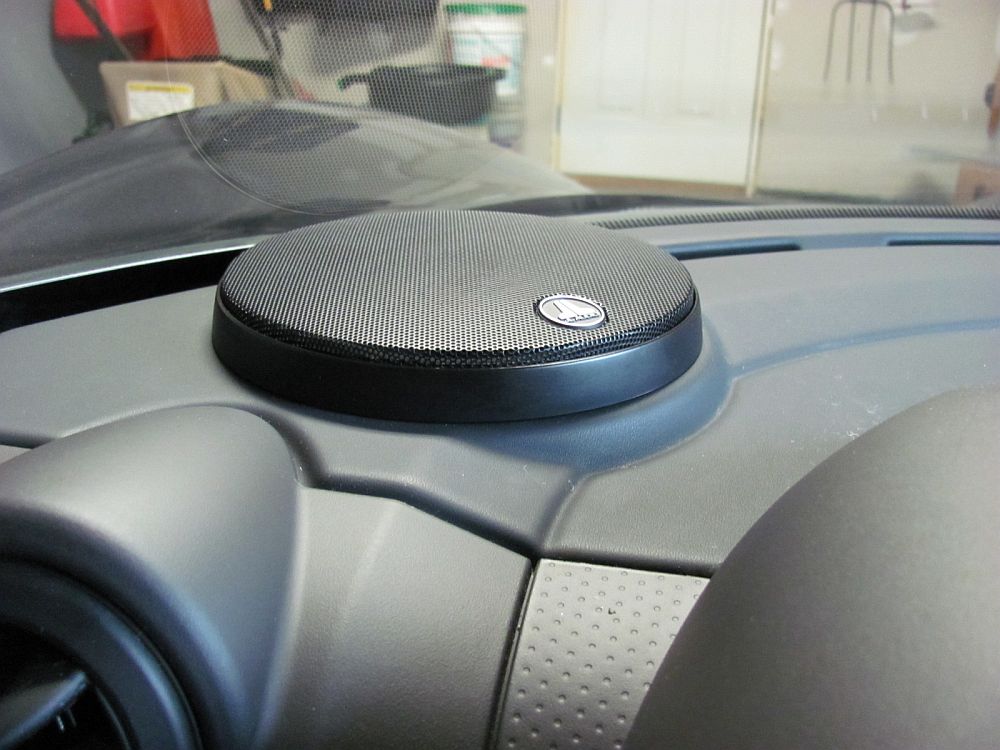
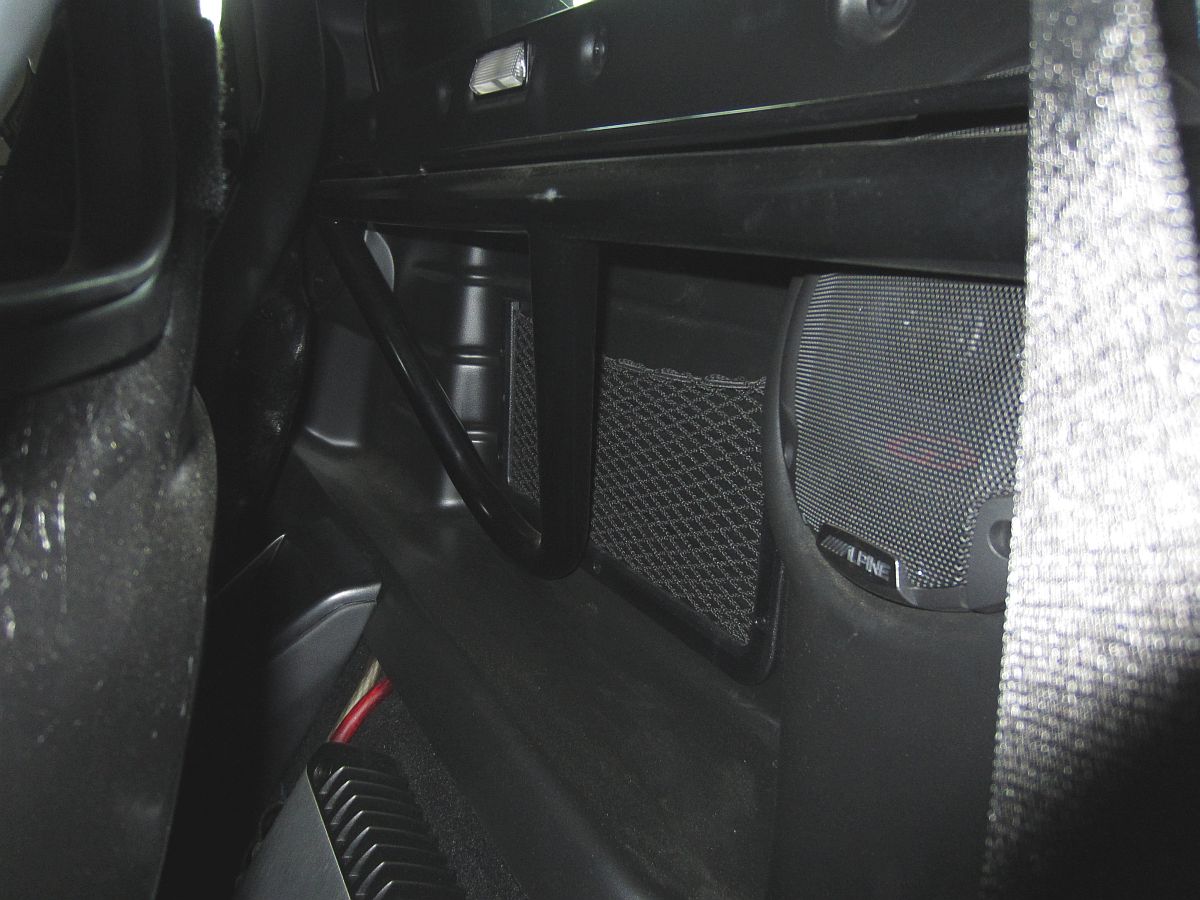
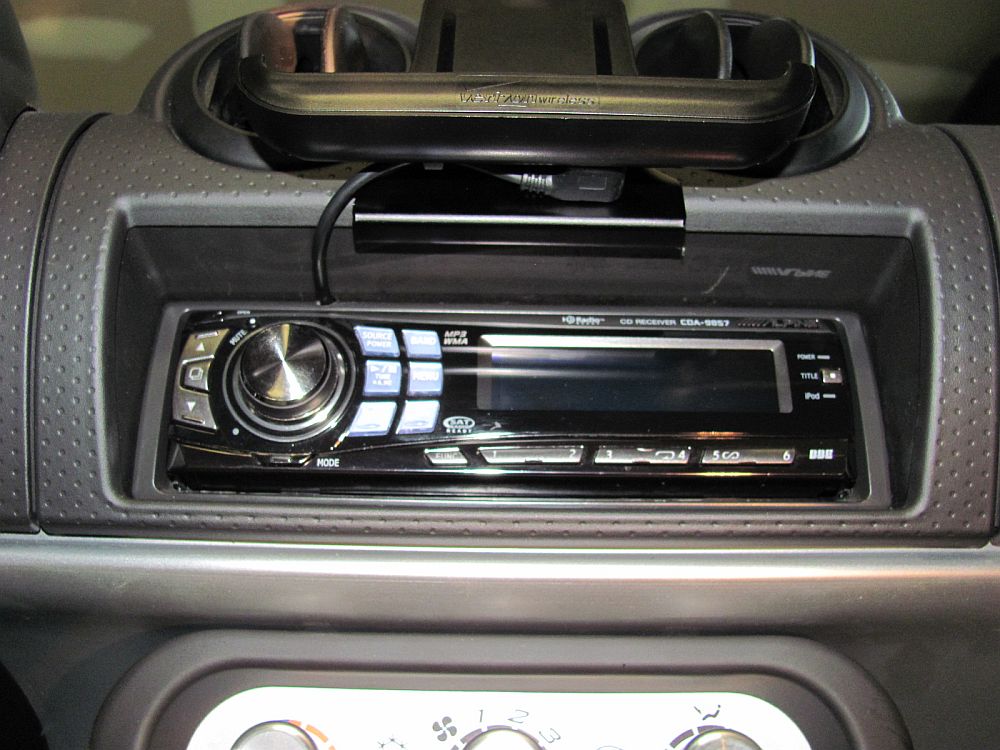
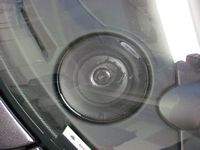
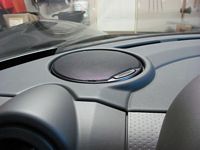
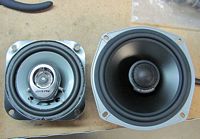
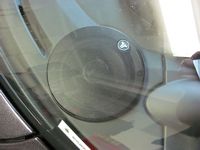
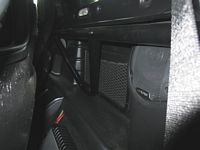
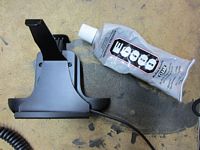
Very shortly after bringing the car home, maybe the day after, I contacted Jim Clayton to source some 5.25" speaker ring adapters. I had done this before in my 2005 Elise as seen HERE and it made a HUGE improvement in sound and being able to hear the stereo. Super easy doing these the second time around: use an Exacto knife to trim the covering around the base of the speaker and then find the metal plate and PULL out with needle nose pliers, kind of like opening an old can. BE CAREFUL NOT TO SCRATCH/CUT/HARM the surrounding dash while doing this. Dremel the speaker hole out, I use a drill bit like a RotoZip. Test fit the adapter with speaker and then attach with E6000 or similar- see more pics on my 2005 Elise web page writeup. The 5.25" JL Audio C5-525X (manual HERE,.....seems they have been discontinued) I chose to go with this time around required a careful bit of grinding on the metal grill so that it would clear the windshield to go into place in the plastic trim ring recess. These speakers sound great, to be joined soon by a JLA Stealthbox and HD600.4 when I get some time to install them. I also removed the Alpine CDE-102 that came in the car and installed an Alpine CDA-9857 like the one I had in the 2005 Elise.

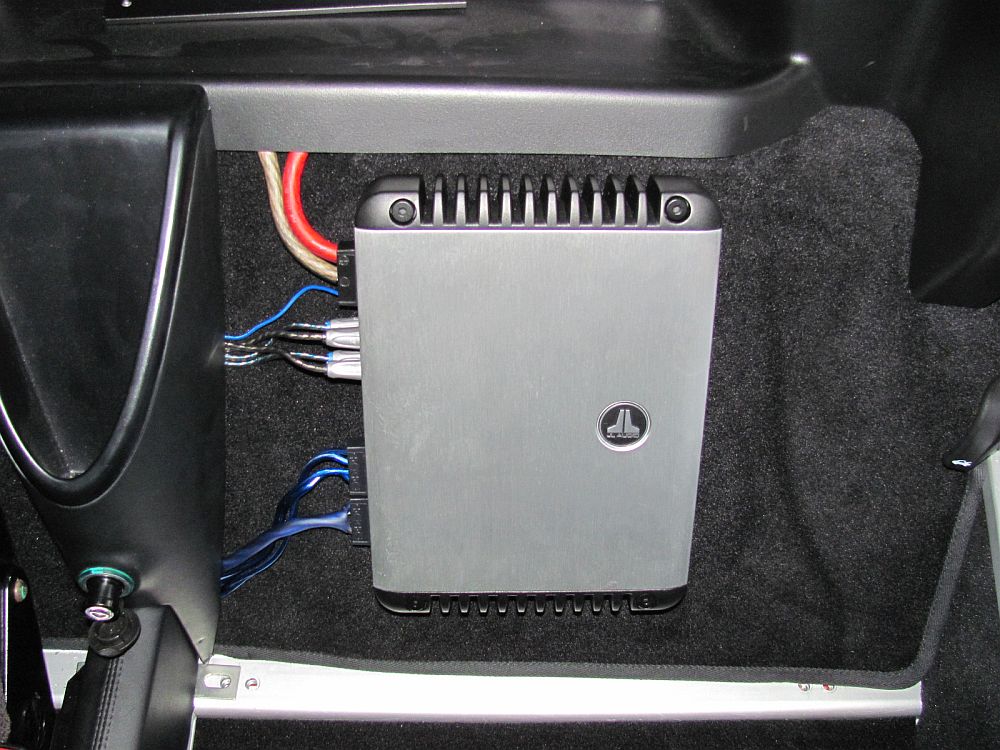
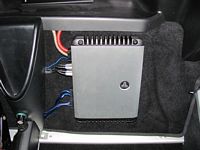
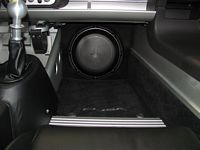
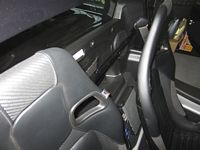
JL Audio HD600/4 digital amplifier (owners manual is HERE) and JL Audio Stealthbox installed (installation instructions are HERE,.....seems they have been discontinued).
Like the 5.25" dash speakers, I had done this before in my 2005 Elise as seen HERE and assembled some information and pics during the course of that installation: My Elise Amplifier Installation.
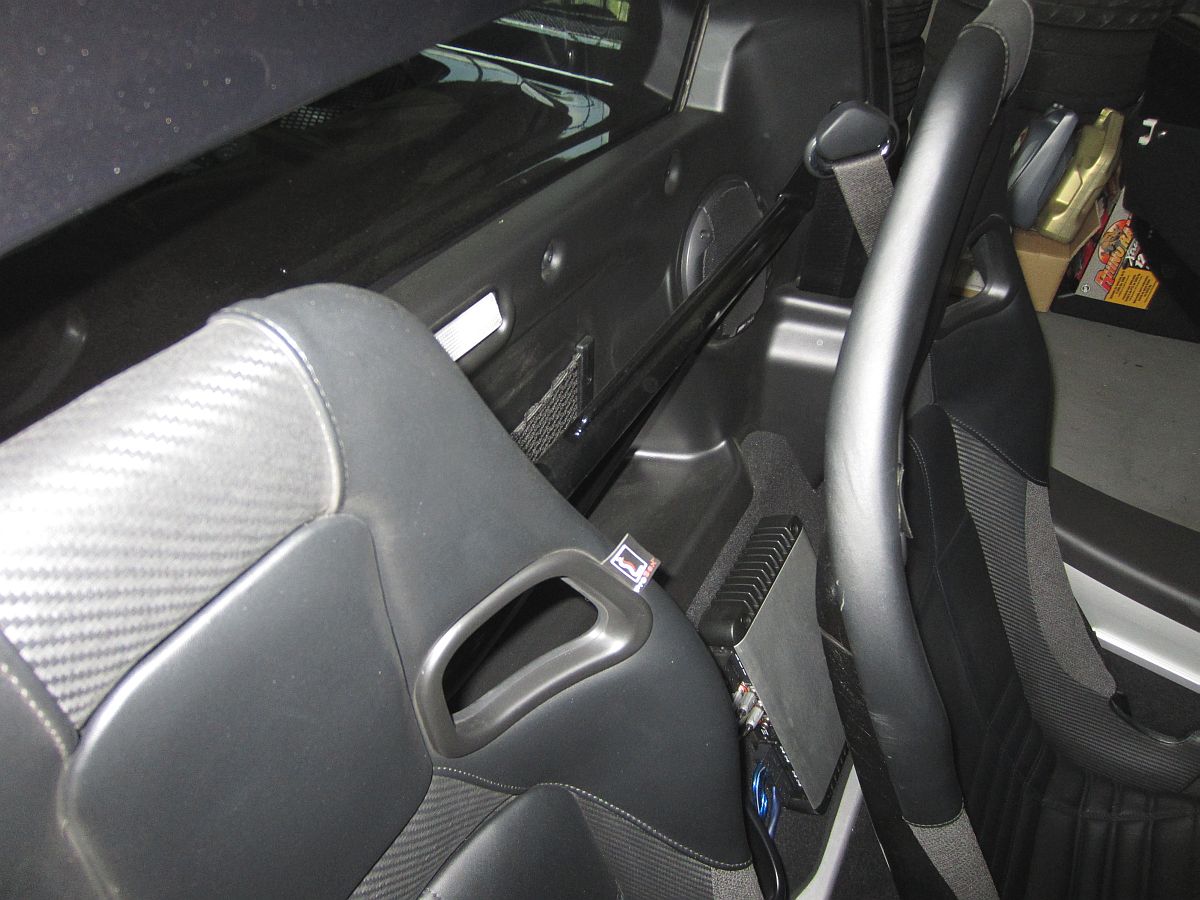
One thing I did different was to use a single 4-channel amp to power the front speakers and sub, radio power was used for the rears since they don't need to be very loud for rear fill and this made the wiring a little cleaner as well. The JLA amplifier fit perfect within the seat recess, I used some peel and stick felt on the back of the seat to prevent the amp from rubbing on the fiberglass- amp was mounted using velcro to adhere to the carpet. I lost no clicks of adjustment and the amp is easily accessed for adjustments behind the driver seat. The stereo sounds GREAT and can be heard above wind and motor.
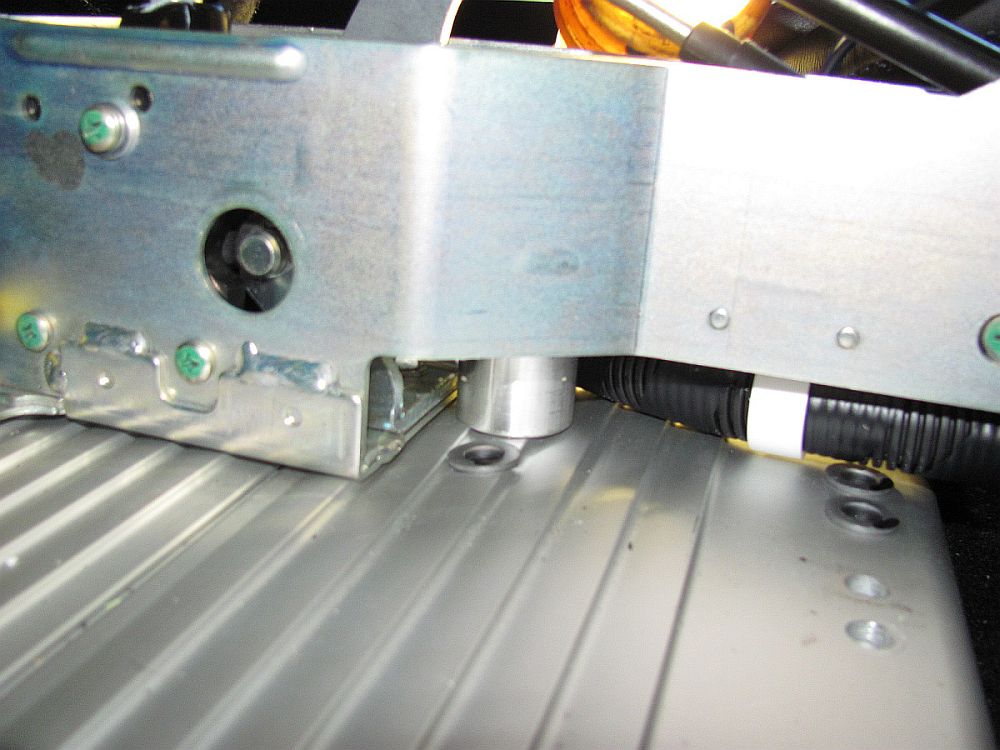
I also found the reason why this 2011 shifter feels so much better than my 2005 shifter: it is more robust and already has the "Stan Shifter Mods" from the factory, there is NO play in the 2011 shifter cage.

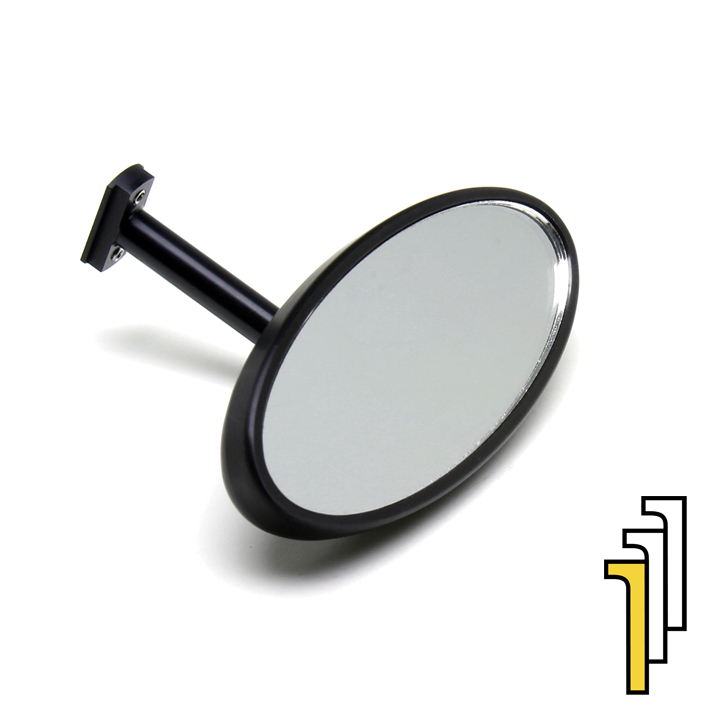
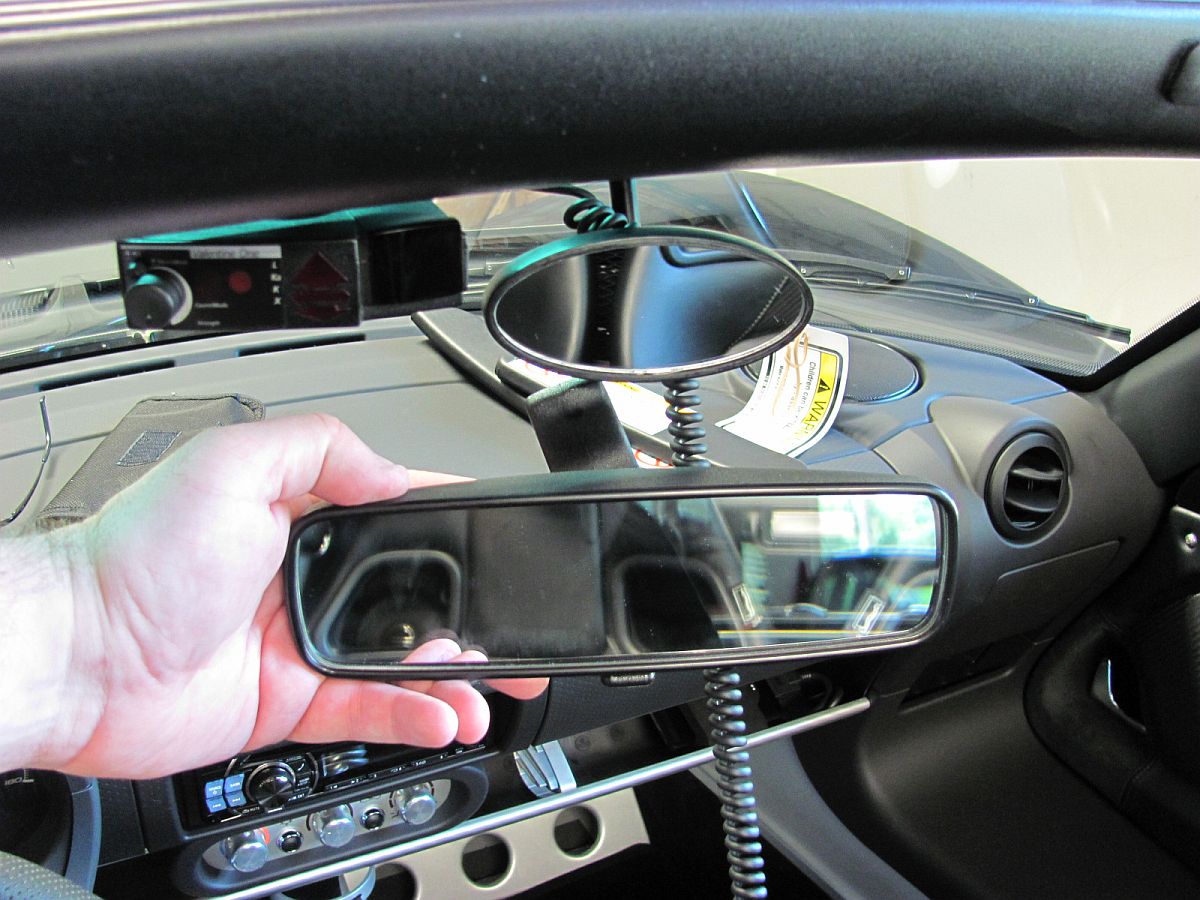
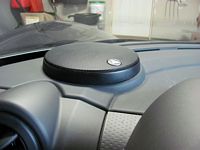
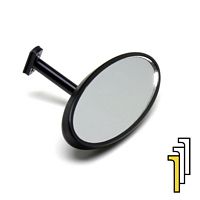
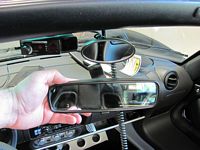
Sector 111 - First order arrives consisting of a MicroMirror (installation instructions HERE ). As seen in pictures the MicroMirror is MUCH smaller than the Hummer one that GM provided from the factory and installation was a piece-of-cake, although caution should be exercised as the window has been cracked by others during the R&R procedure.
You can also see the temporary mounting/wiring solution for the V1 and the removed sun visors....
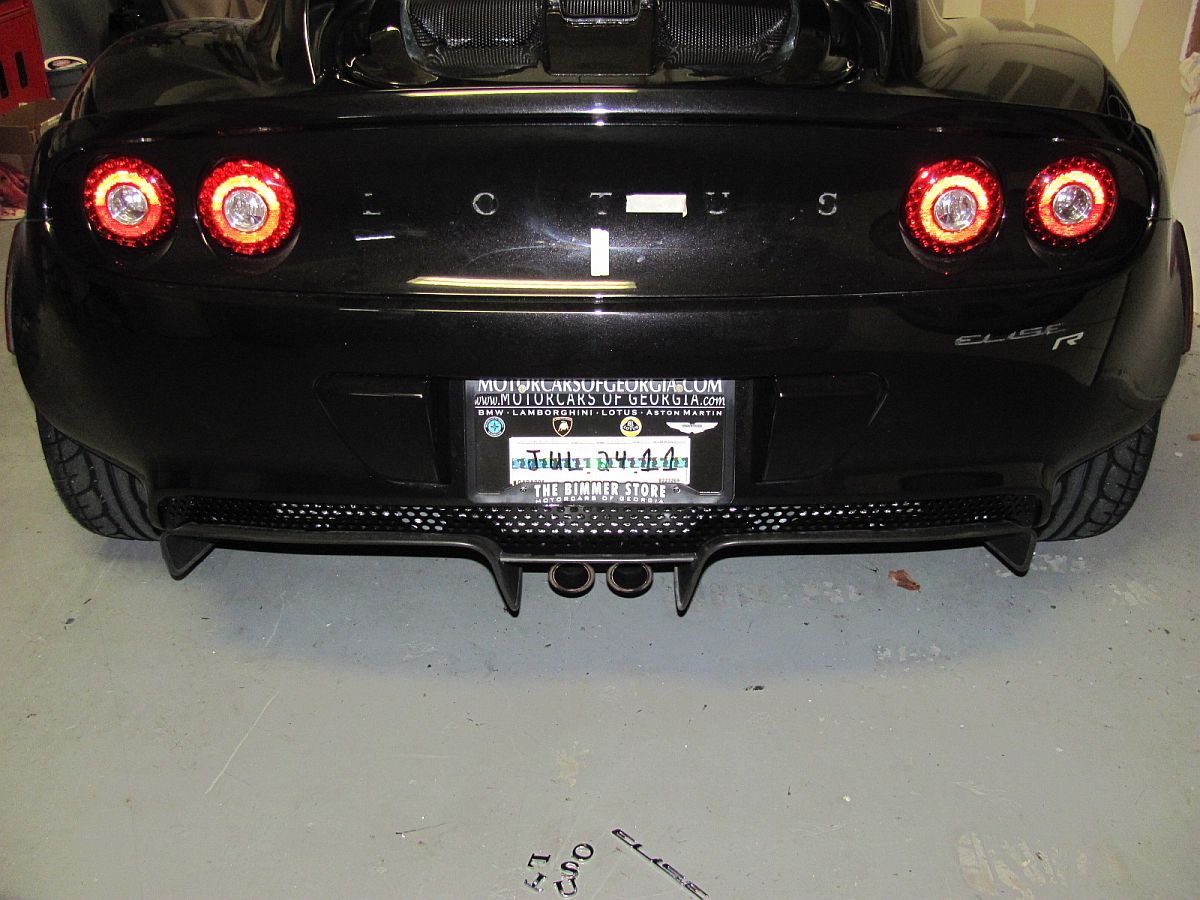
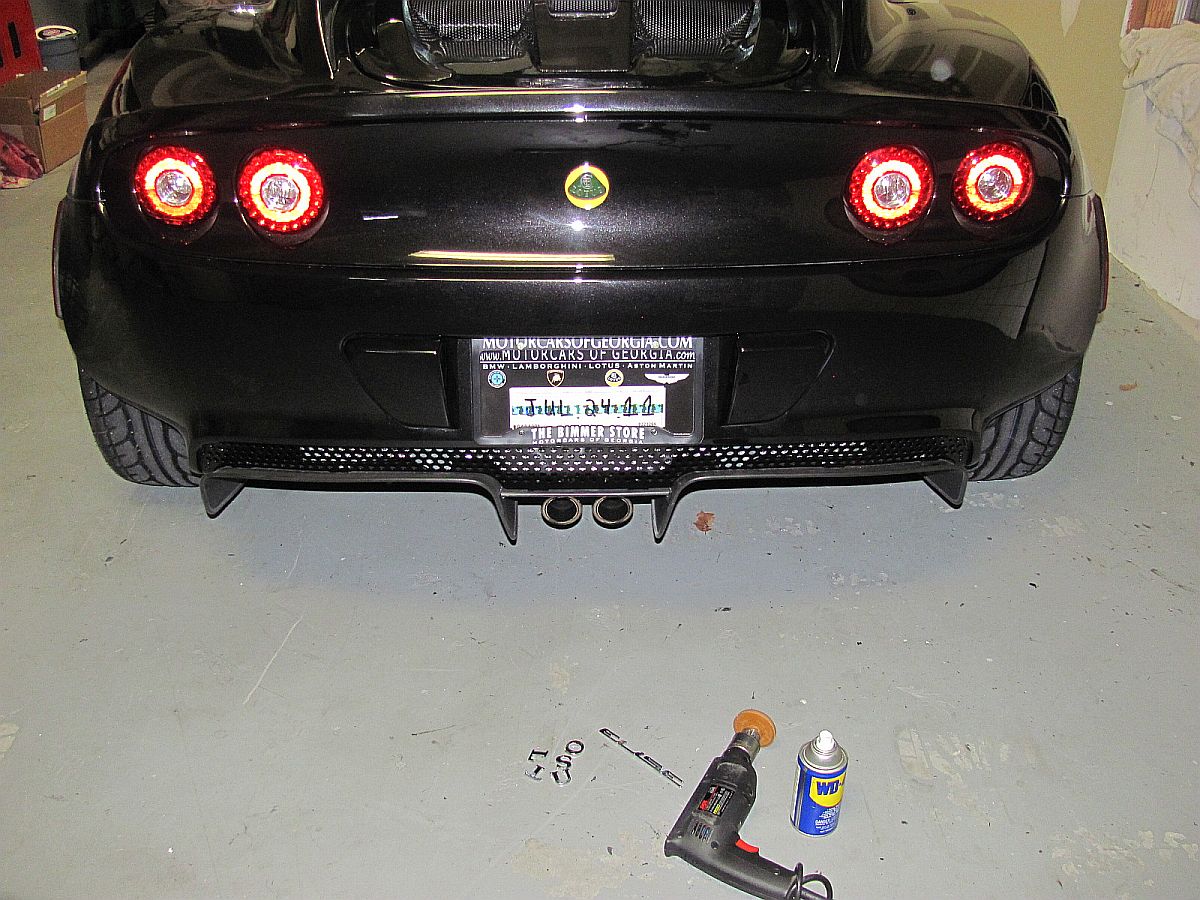
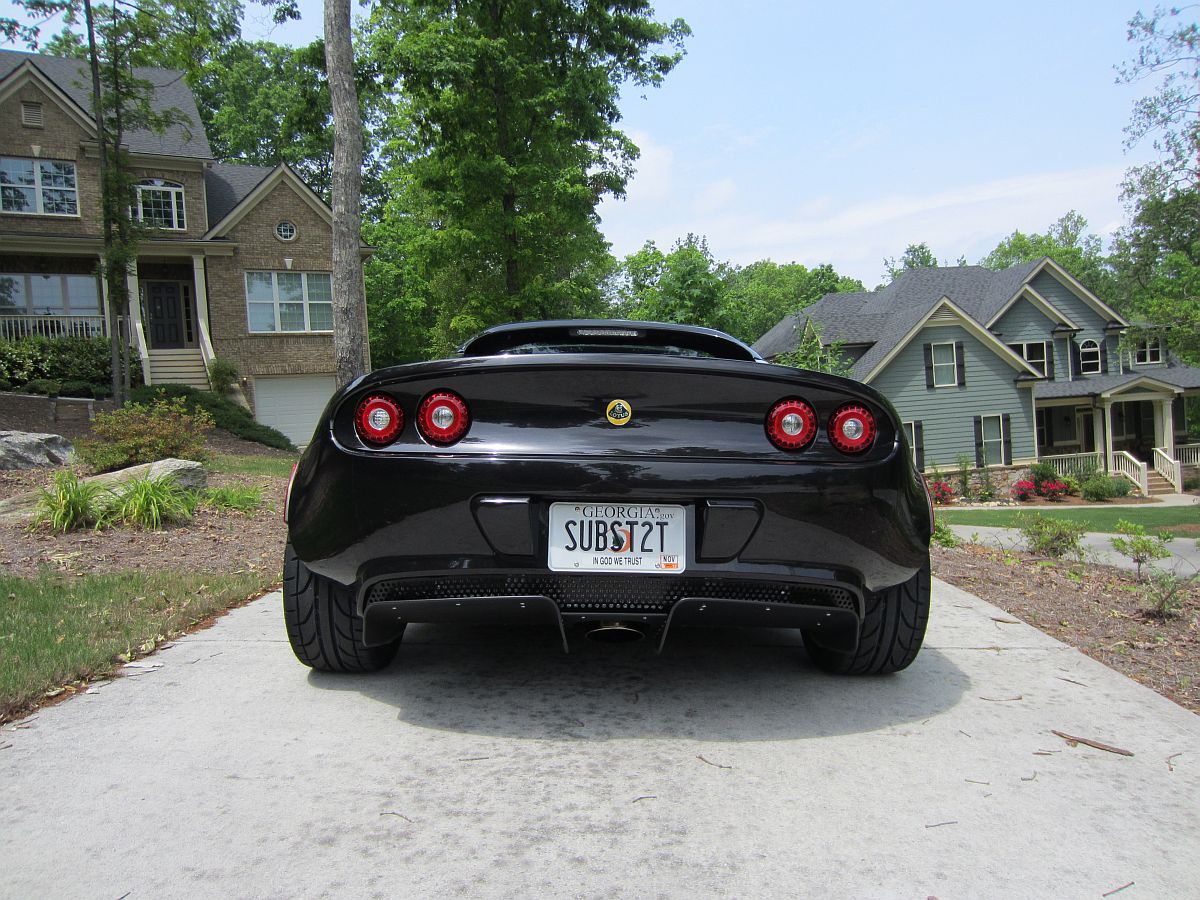
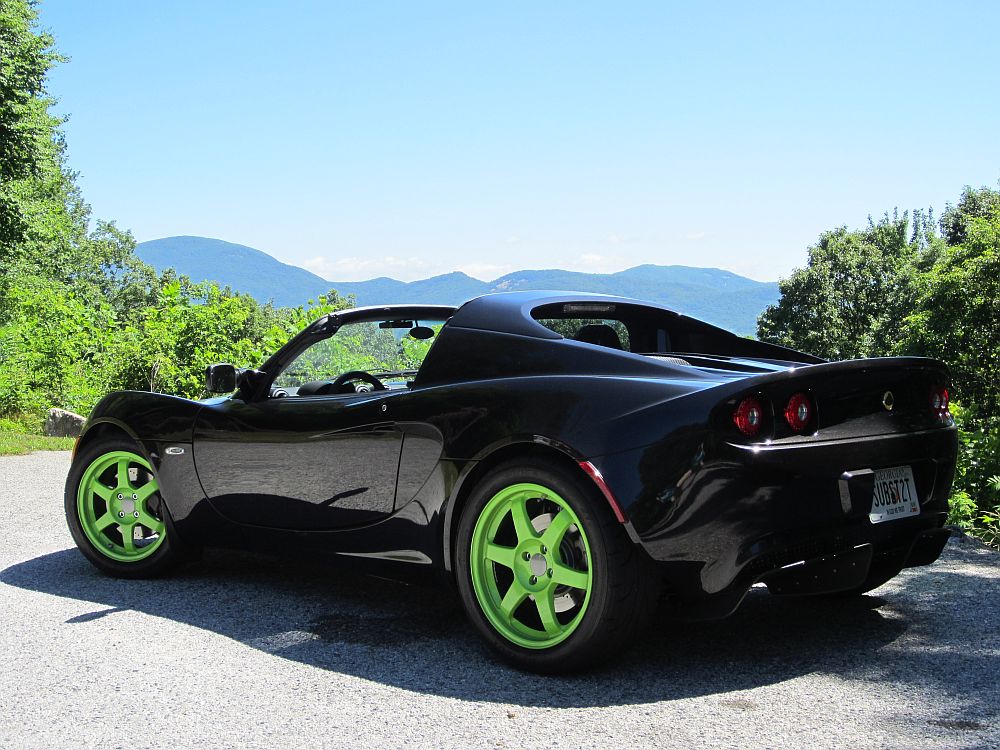
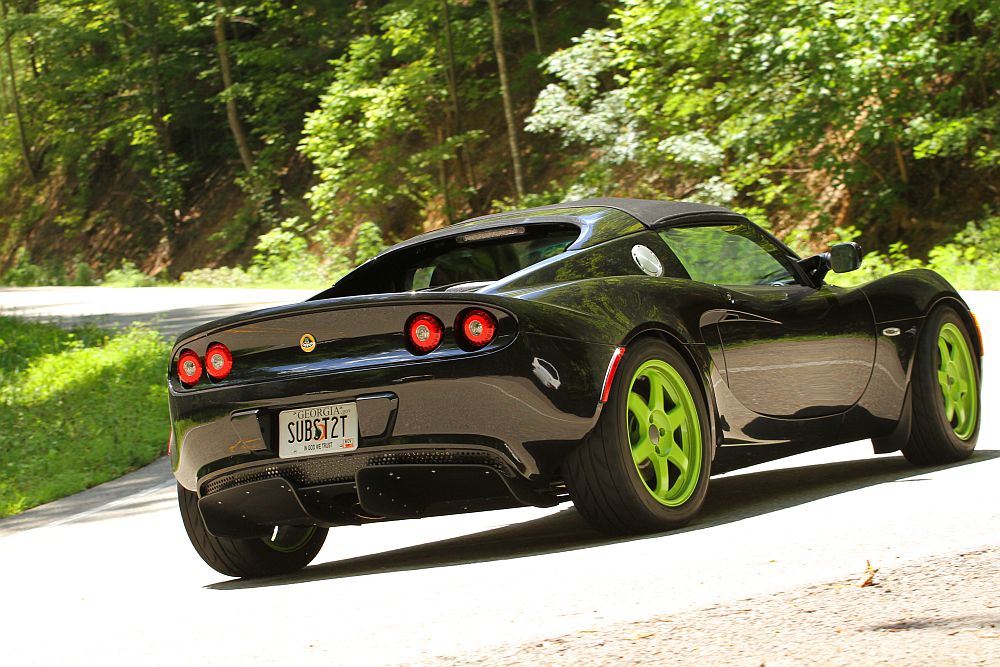
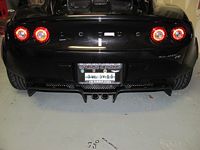
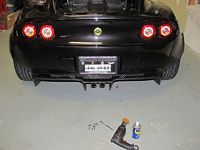
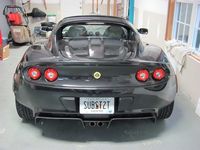
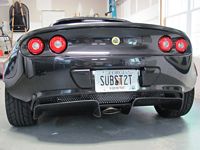
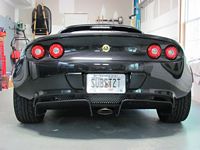
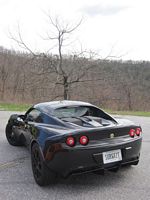
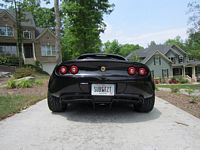
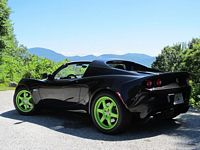
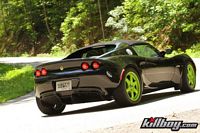
"LOTUS" and "ELISE R" letters/stickers removed and replaced with OE Lotus rear emblem from Sector 111. Doubled up dental floss (mint) was worked in between LOTUS/ELISE emblems and used to cut through double sided tape. This will leave residue but I already had the pinstripe removal wheel (uses drill) to remove the R logo sticker and it did well in removing the double side tape residue as well. WD-40 was used on a soft cotton towel to completely cleanup any remaining adhesive followed by soap/water and finally wax. Looks MUCH better (to me):

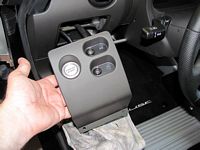
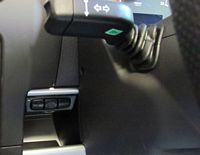
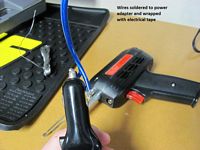
Homelink purchased on eBay and installed. This Homelink module was removed from a Cadillac and was rolling code compatible. It is almost like the cubby to the left of the steering wheel was MADE for this Homelink module to fit. These can be purchased on eBay for ~$30 with and without the connector, I actually cut the circuit board down and soldered wires to the traces and then coated with epoxy and wrapped with electrical tape so there would be no shorts. The tab at the bottom can be glued down for a cleaner look. The wire was snaked around the plastic piece at the left side of the cubby and tied in to my V1 wiring that uses the radio ignition source- works great and no garage door opener to deal with.
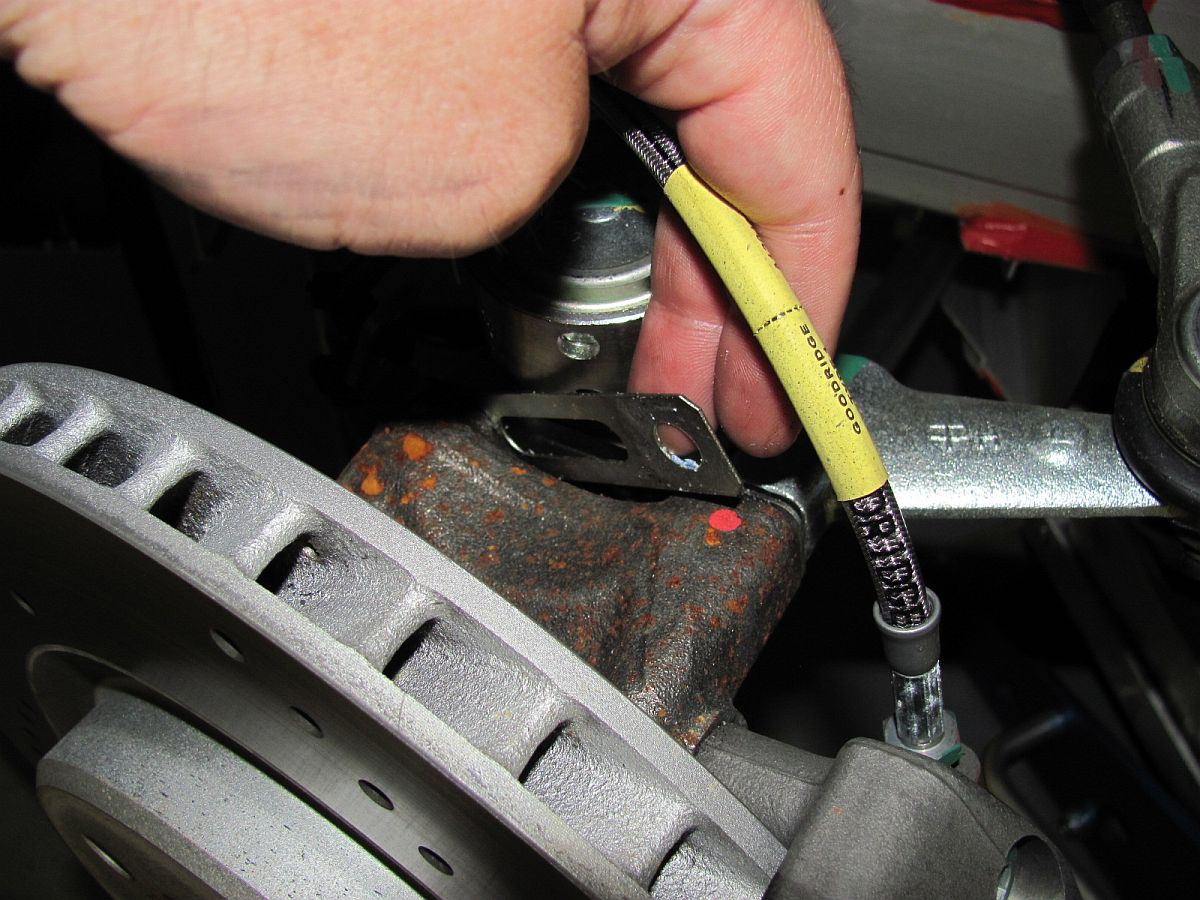
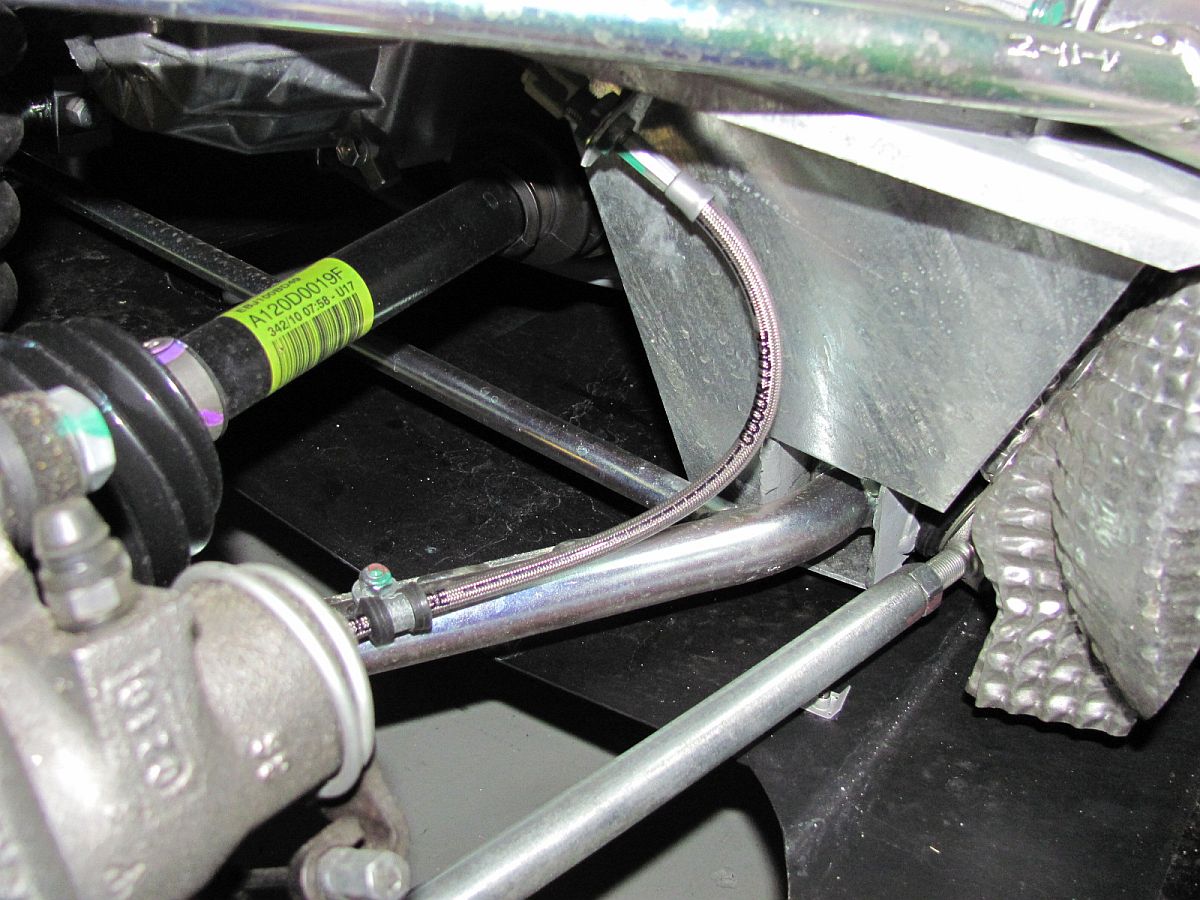
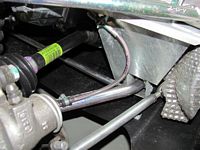
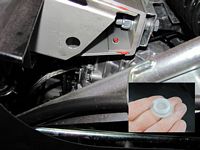
Front steering arm shim removed to increase negative camber and steering response- my DIY writeup can be found HERE. You may also notice that my car came from the factory with the Lotus Sport Goodridge Stainless Steel Brake Lines (P/N BLS3J0047F), a nice surprise for me. I am not sure if this is now included in the sport package or was a factory snafu.

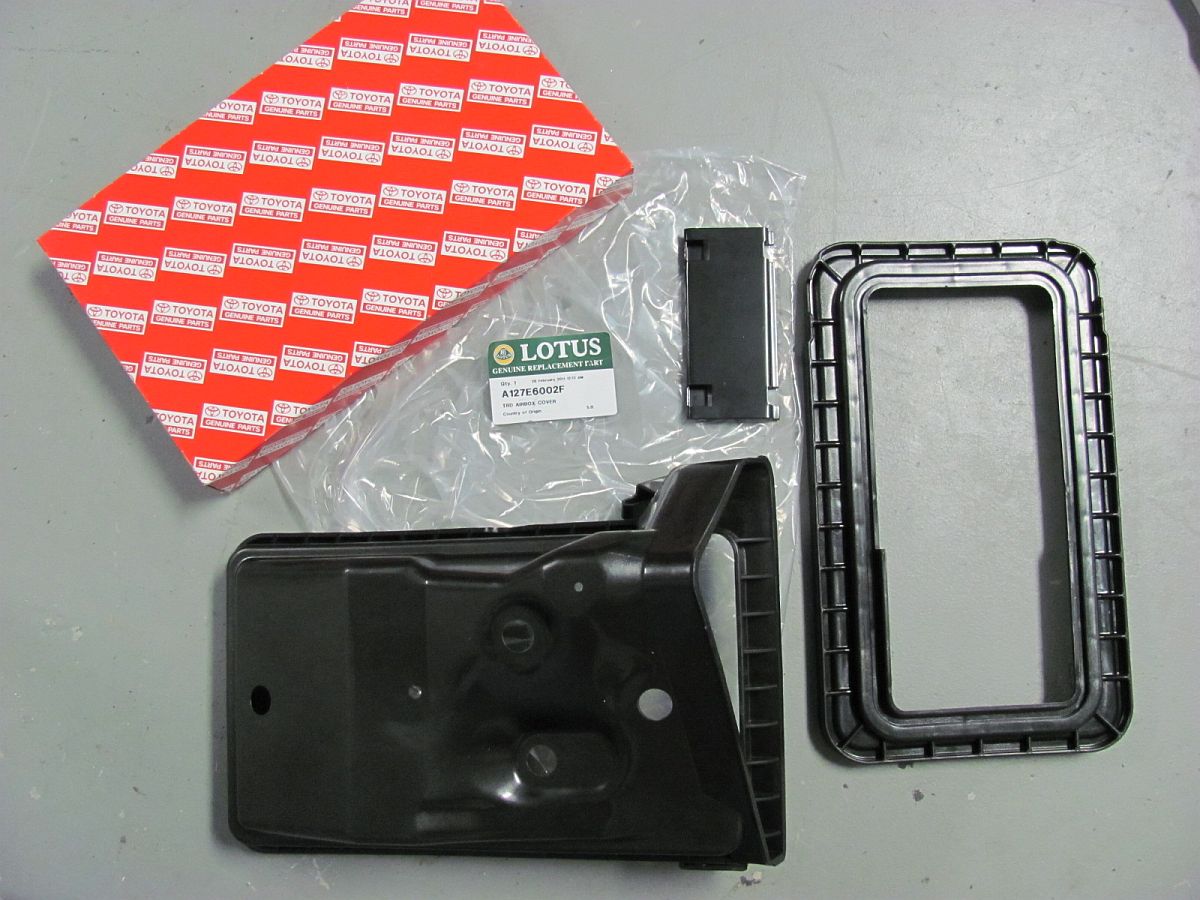
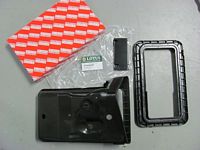
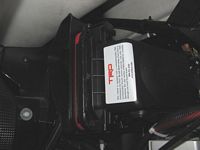
Lotus Cup Airbox (P/N ALS3E0157, can be seen on P.19 of Lotus Sports brochure HERE) purchased from Sector111 and installed. I had to call to order this, it was not listed on their website. But since it is a Lotus factory part you should be able to source it at a dealer as well.
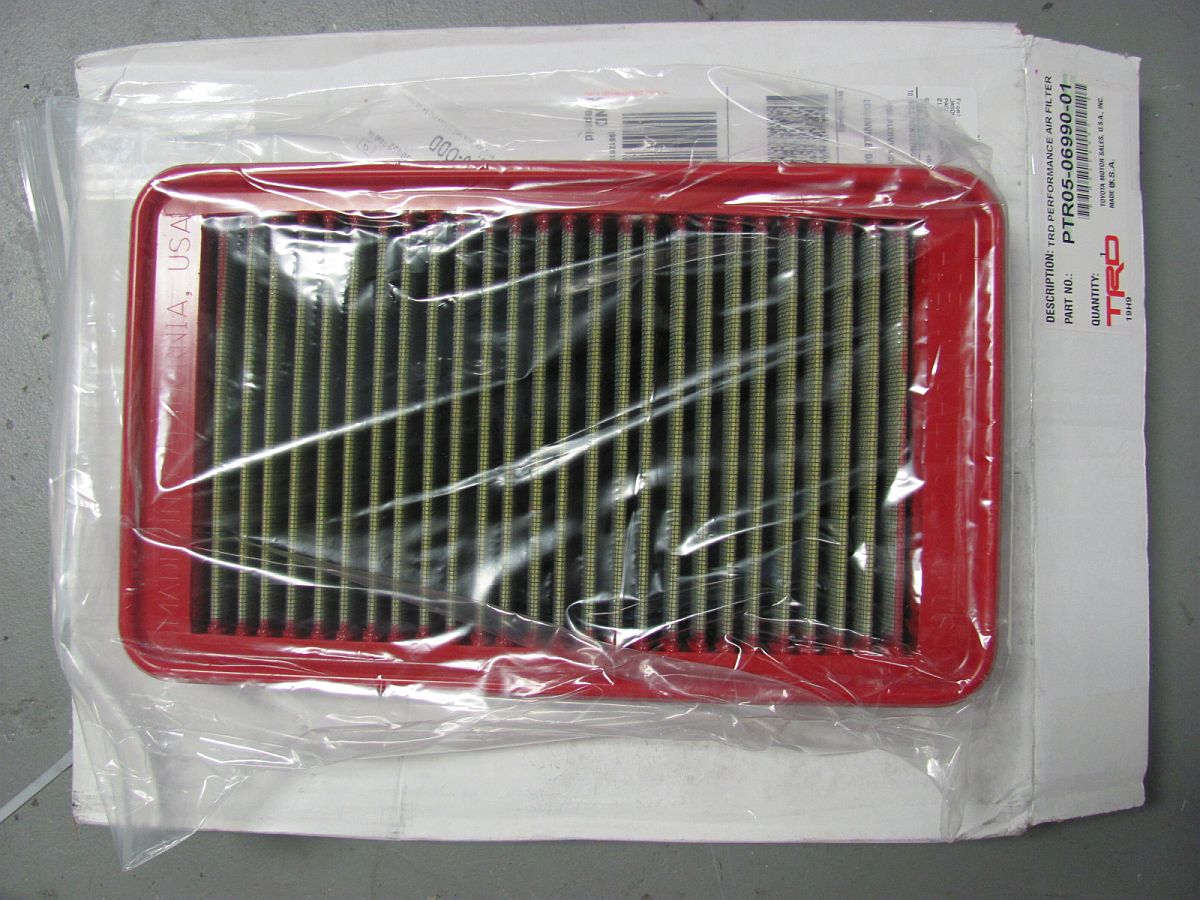
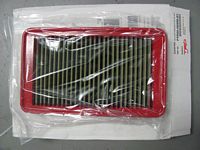
I also ordered the TRD air filter (P/N PTR05-06990-01) for the airbox from Page Auto (aka Toyota-Parts-Dealer.com). Similar to K&N but a TRD part.
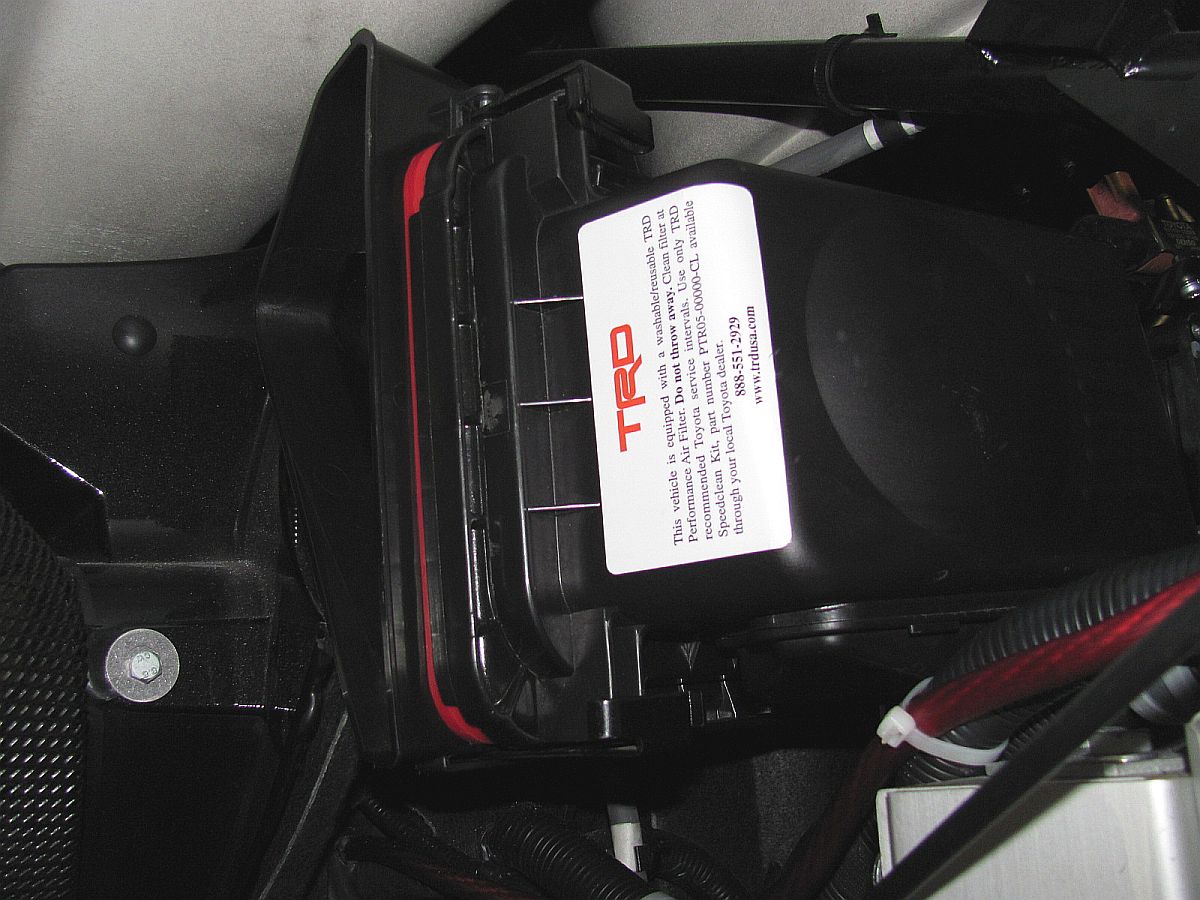
There is a good write-up HERE that I used for installation along with forum posts. I also took some pics and put together a write-up that can be found HERE.
This airbox sounds better (read louder and sportier) and I'm sure provides some minimal gains. I also verified that I had the Goodridge SS brake Lines in the rear, as discovered above while removing the front shims.
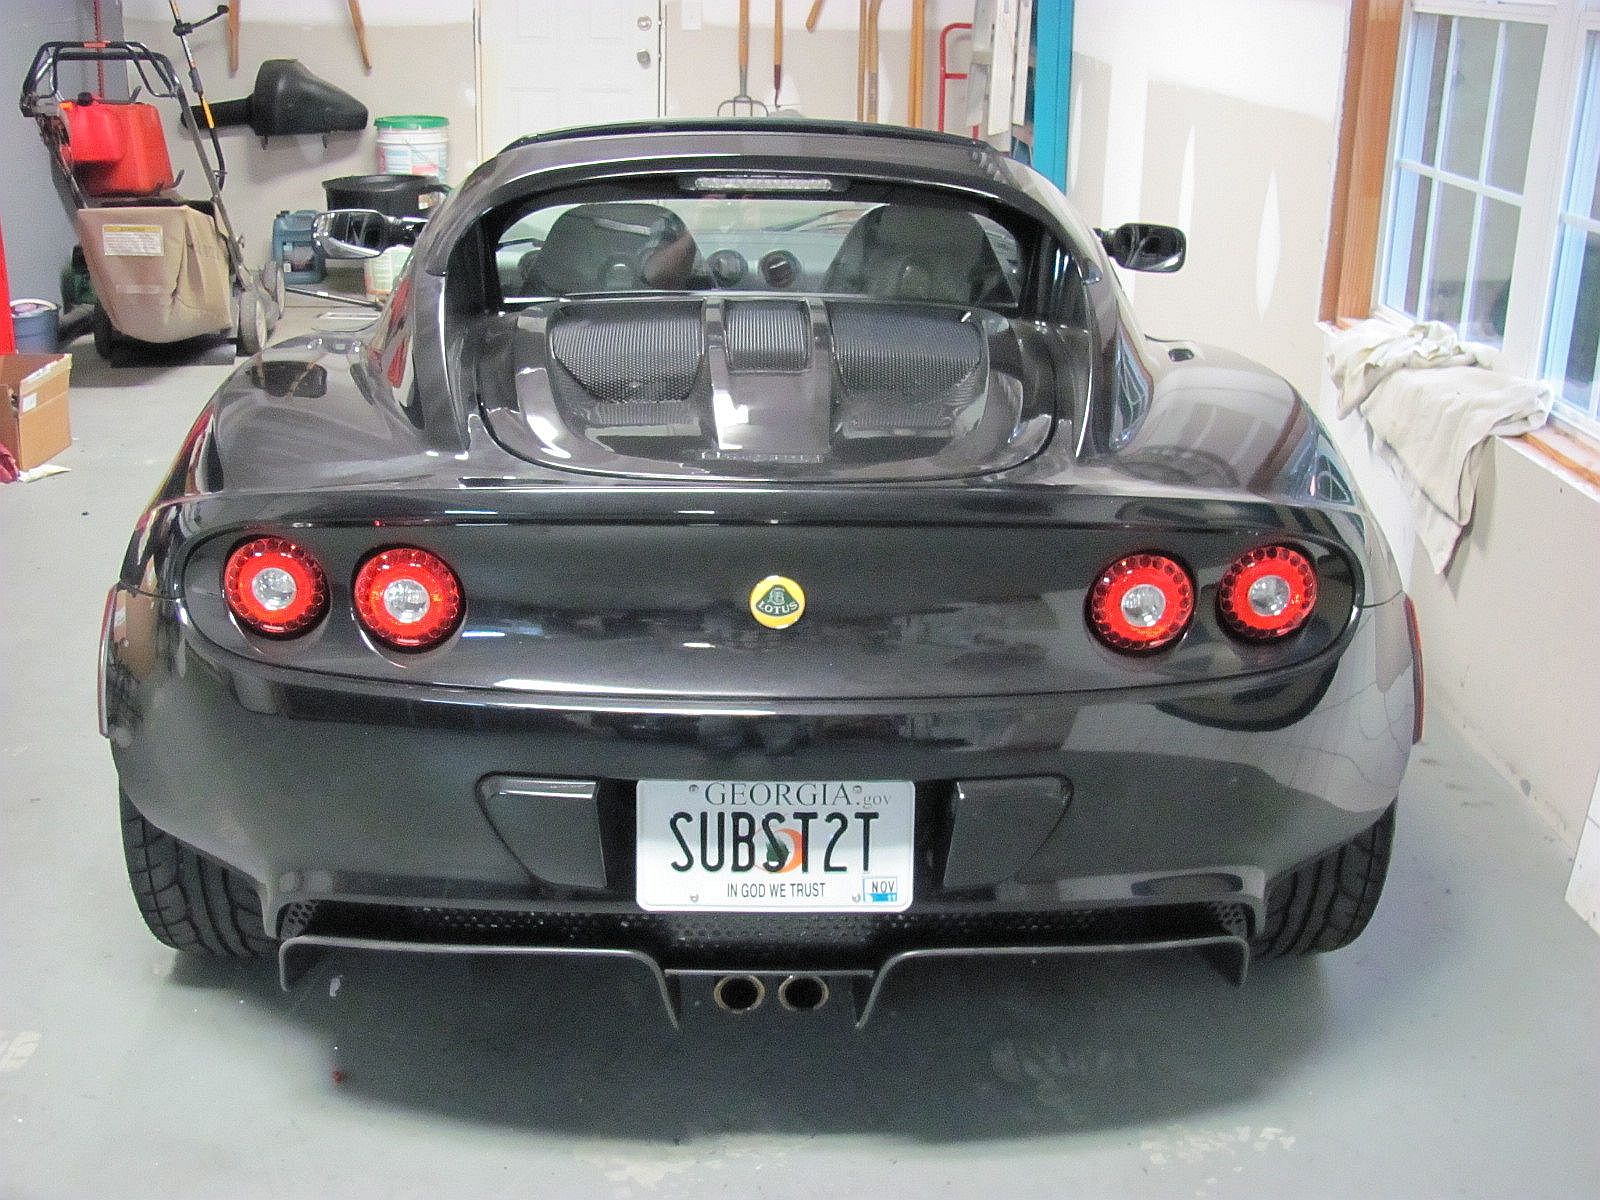
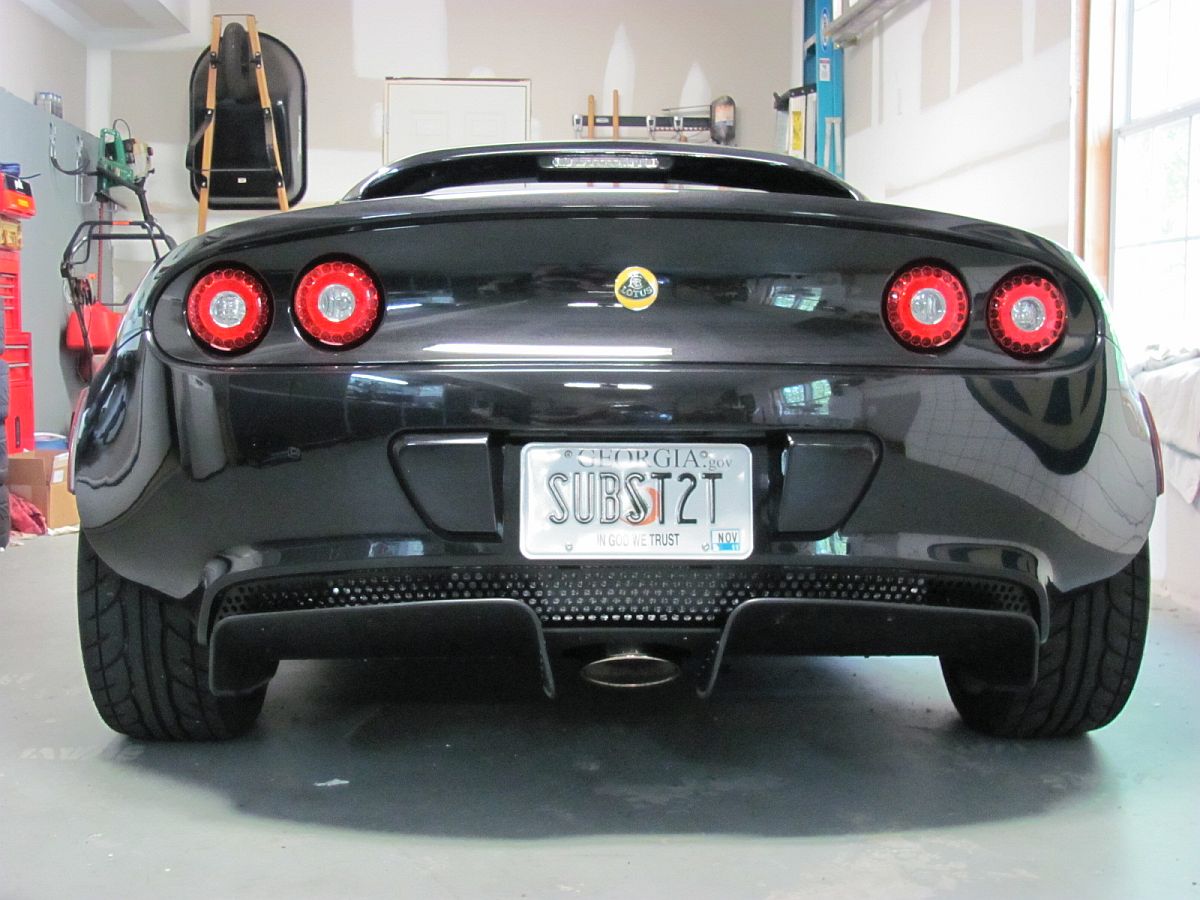
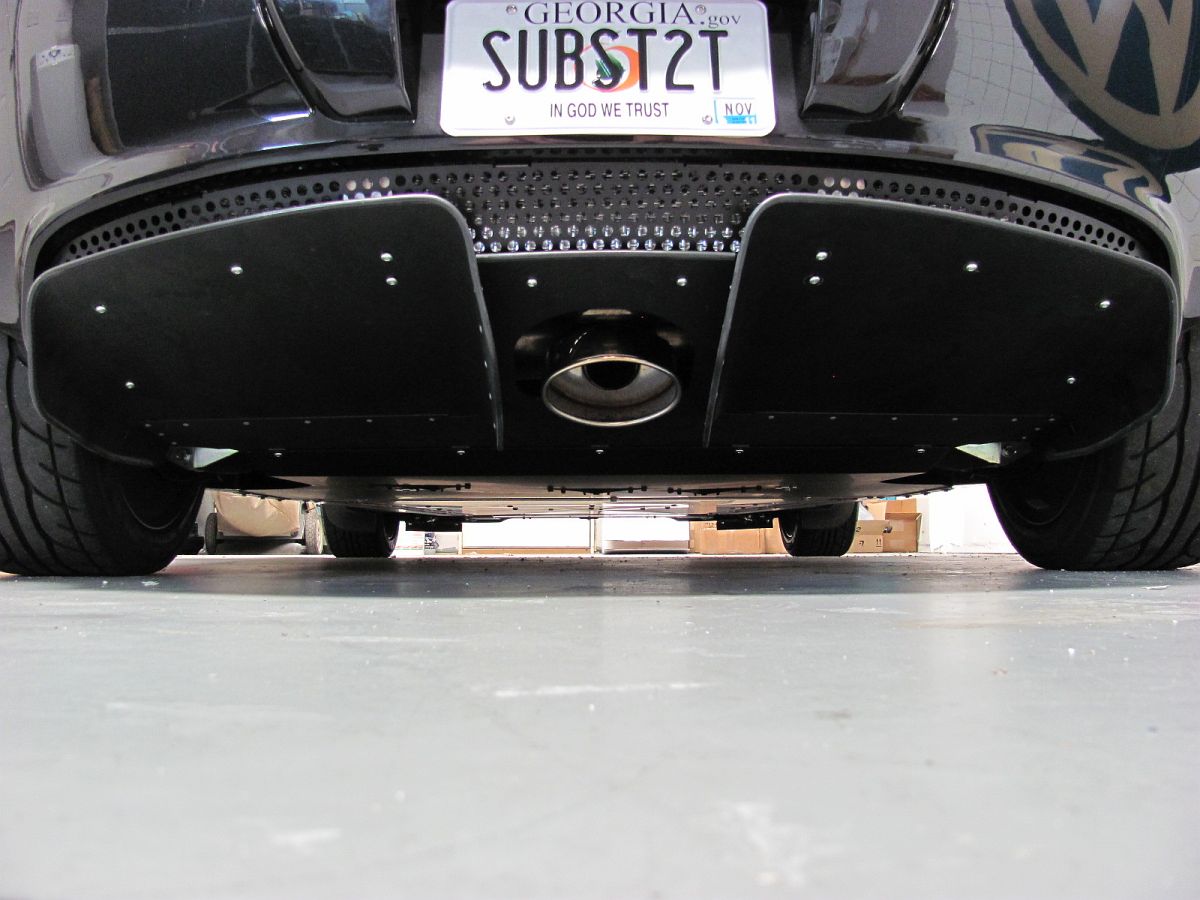
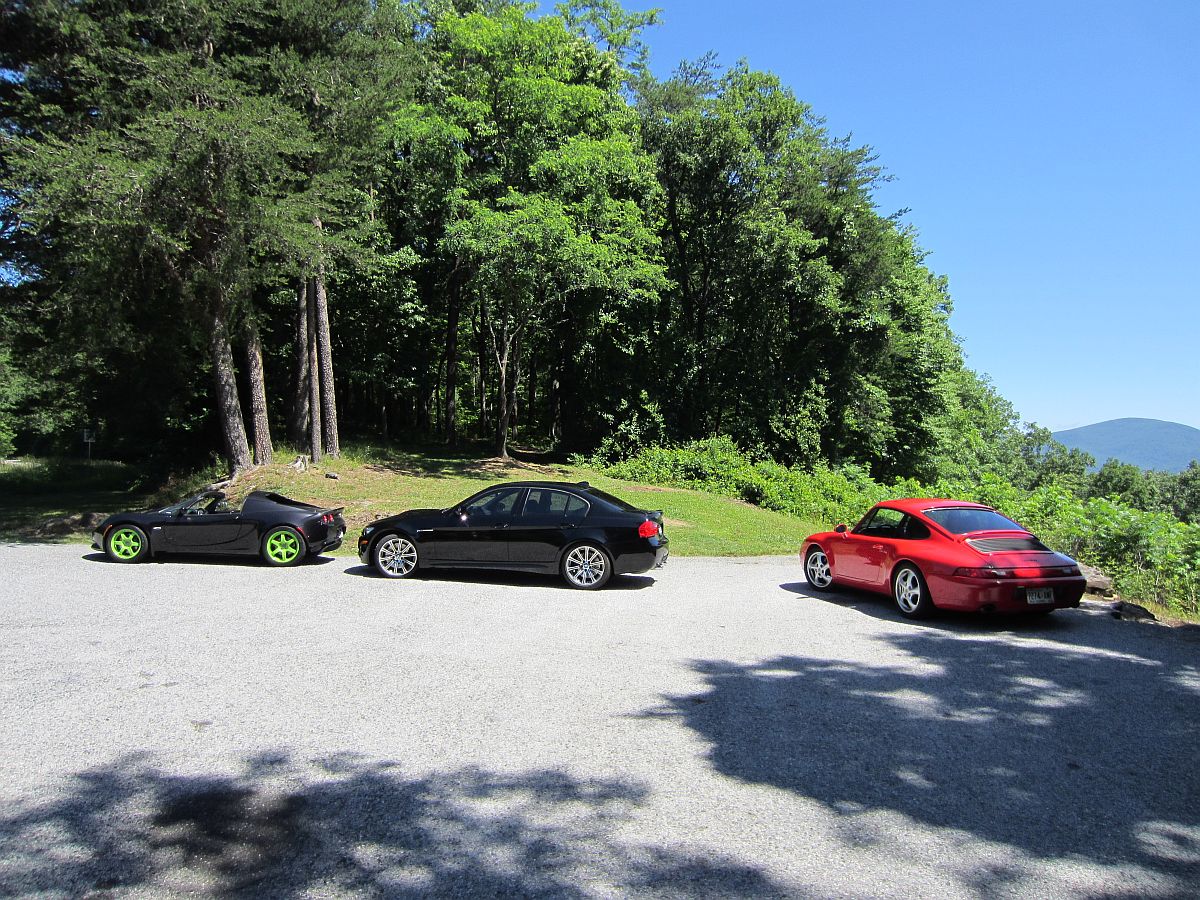
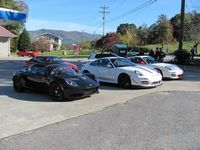
New tag : SUBST2T (Substitute). Remember the old Porsche commercials, "There Is No Substitute" ? This is kind of a poke at my wife and friends that do own a Porsche, I think the Lotus is better
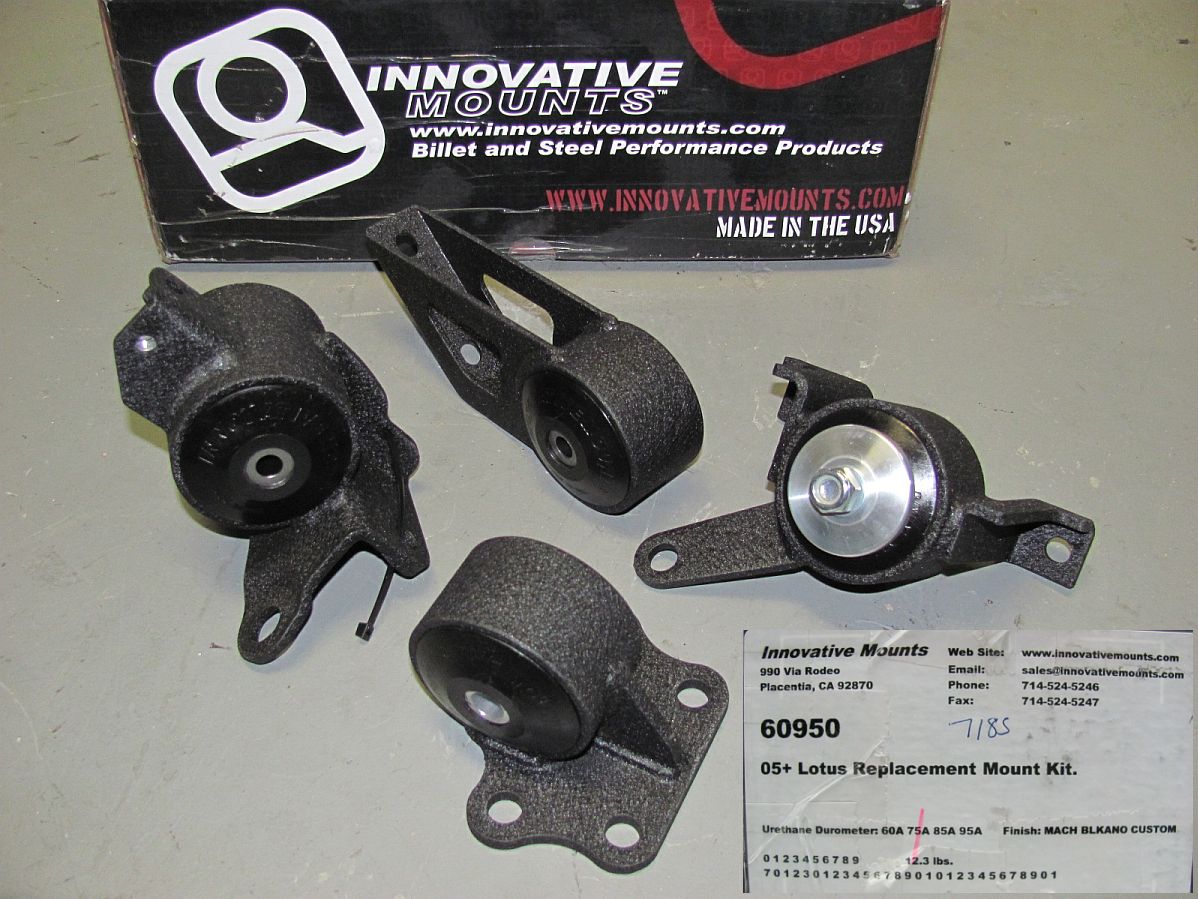
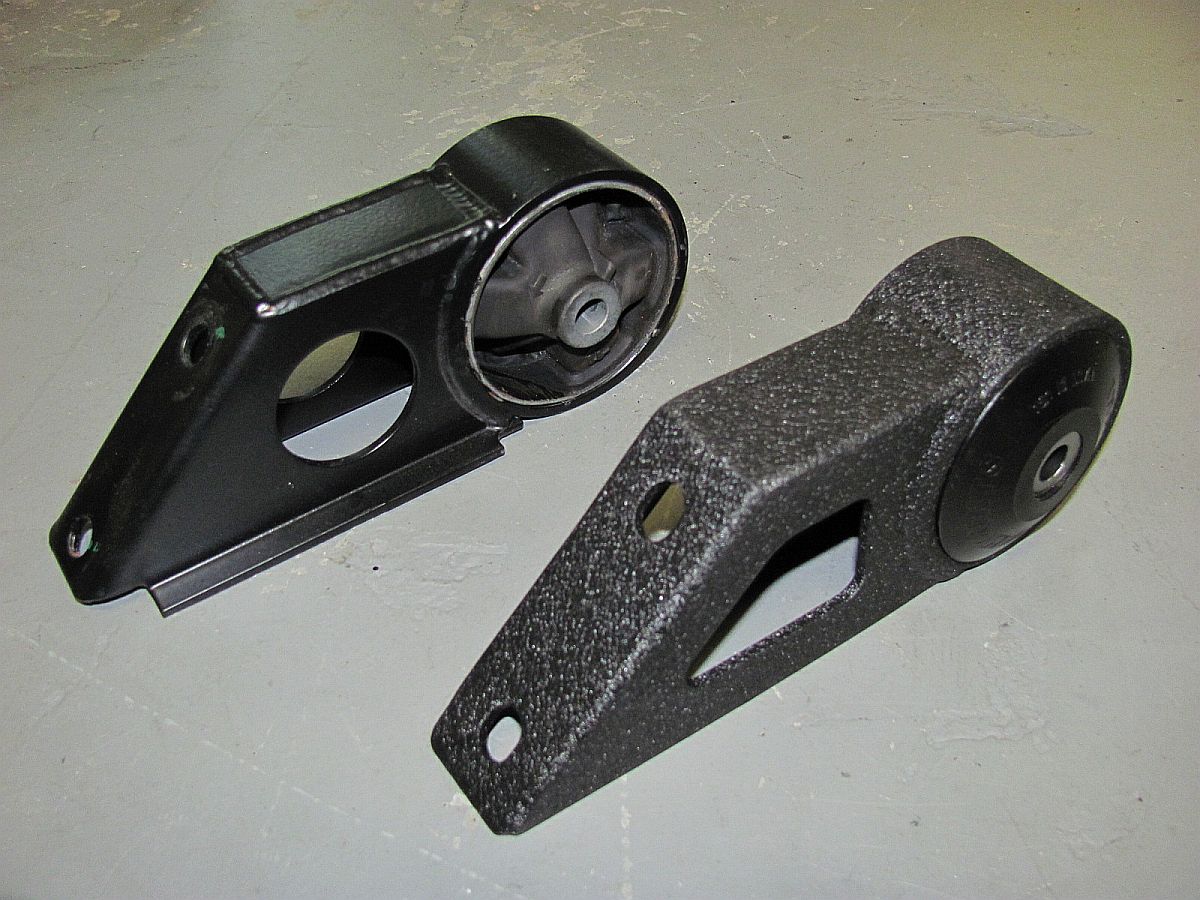
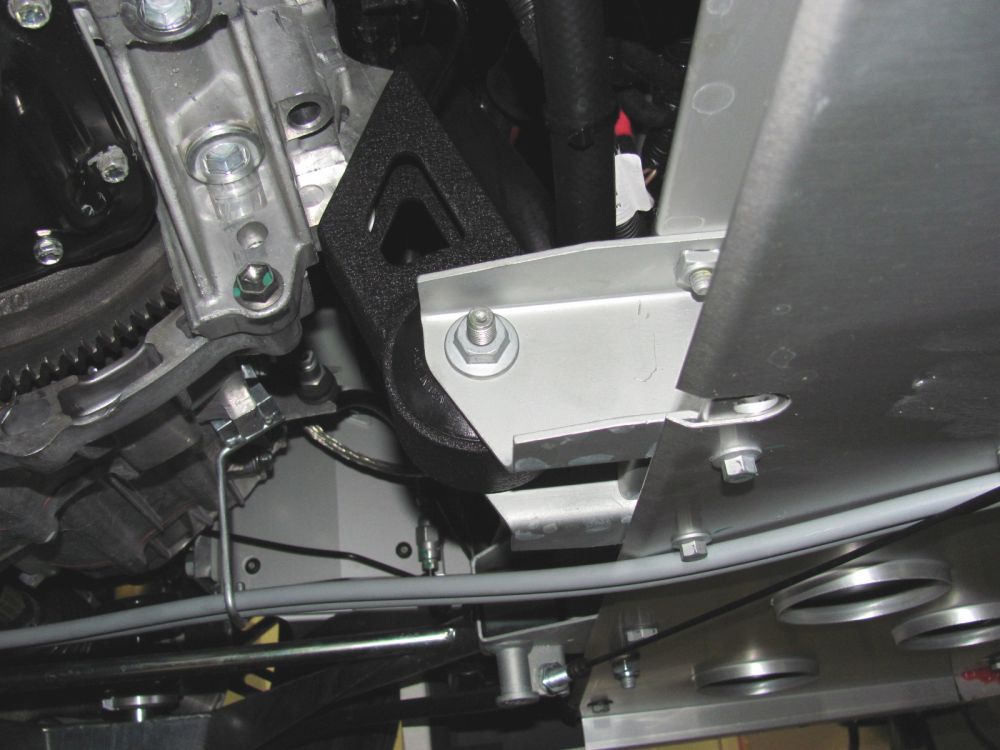
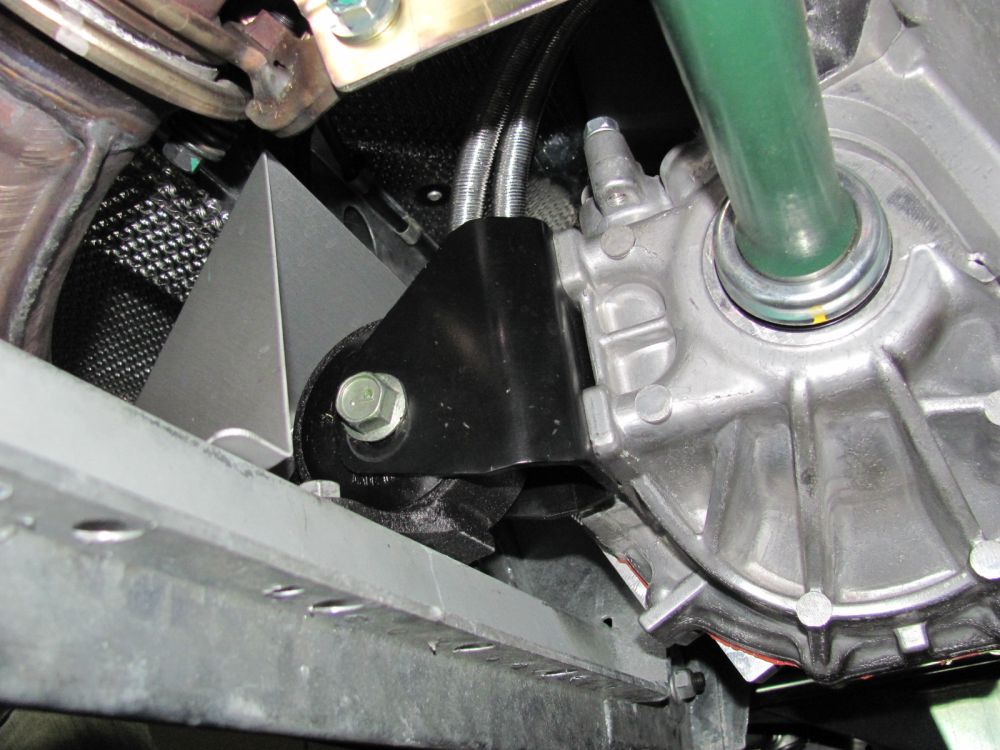
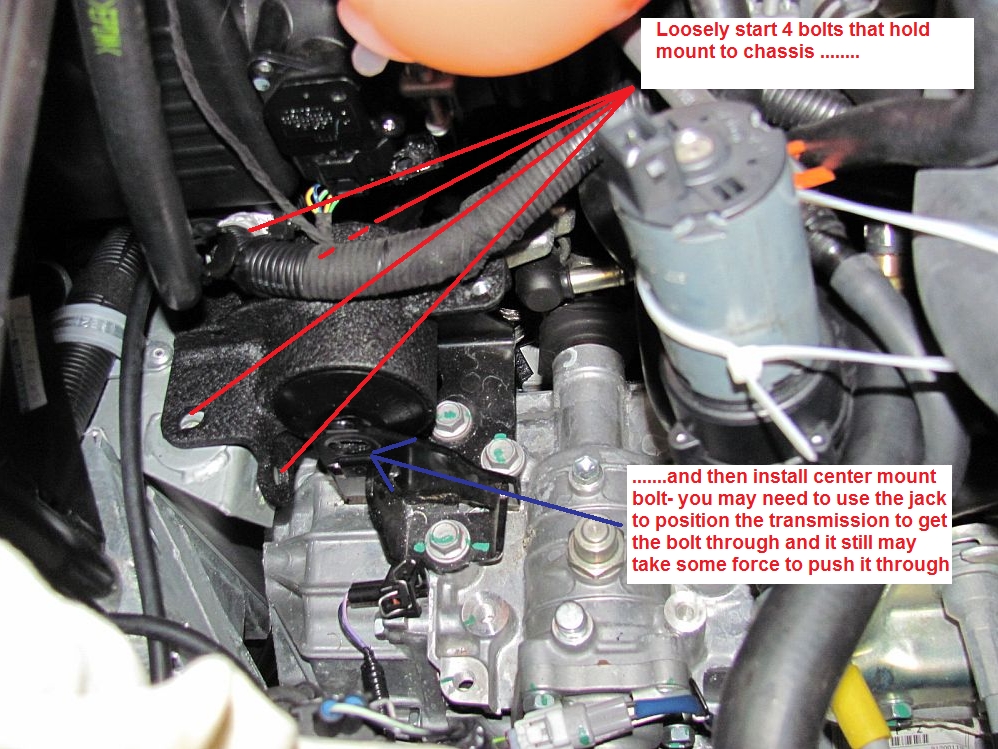
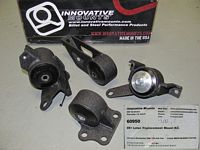
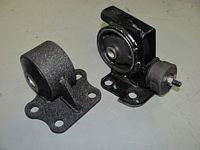
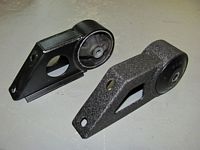
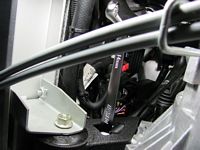
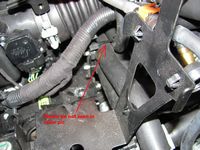
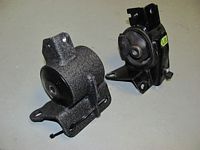
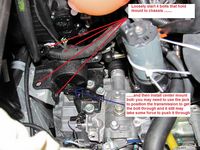
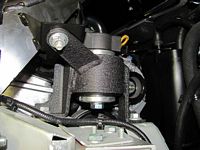
Innovative Mounts 75A Motor/Transmission mounts installed. I almost went with the softer 60A durometer but have run 75A in other cars and once the poly beds in the vibration dies down a bit- we'll see.
I used the guides HERE and HERE to install these, the torque specs I used can be found HERE and HERE- the write-ups I used either had no torque specs or some that seemed a bit high. I also found the Toyota torque specs for the ENGINE and the TRANSMISSION.
LotusTalk thread about the mounts is HERE and a thread discussing the different durometers is HERE.
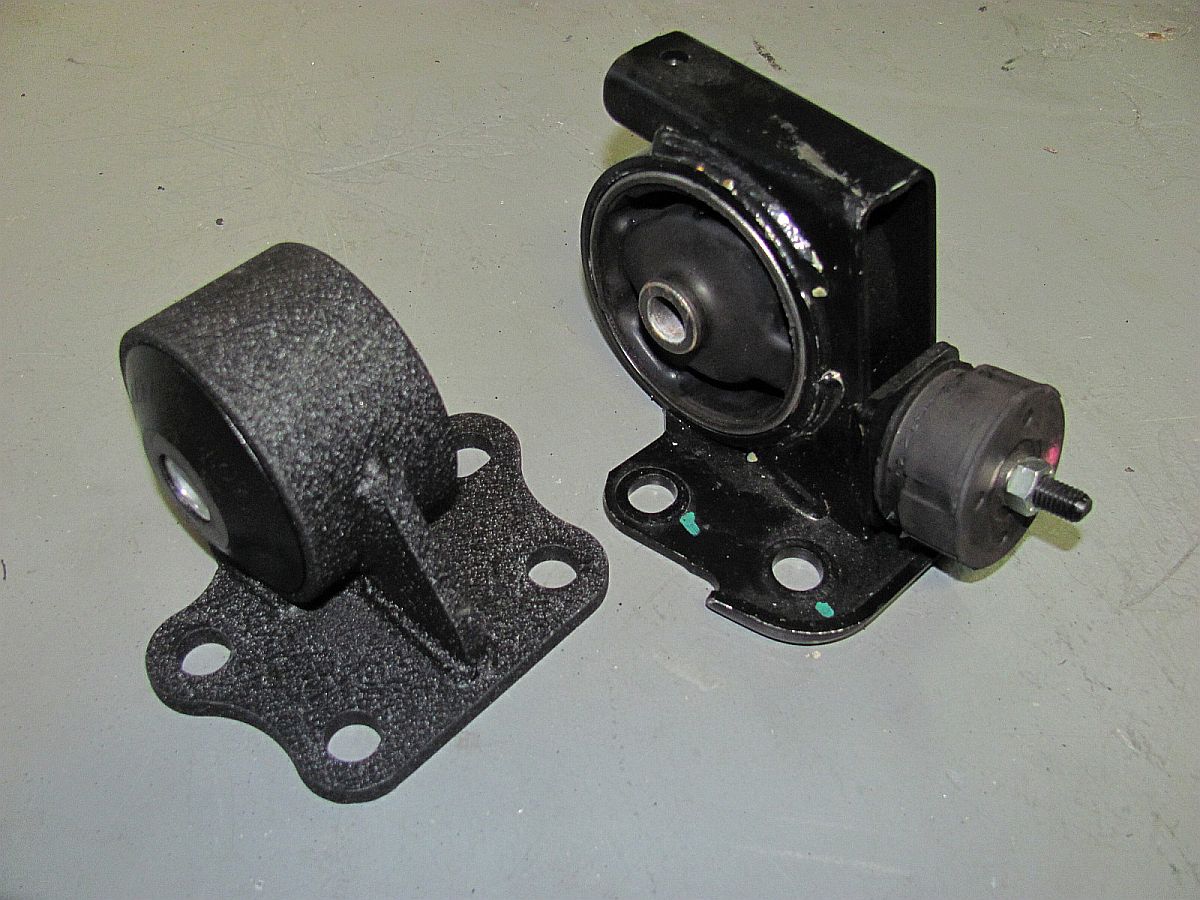
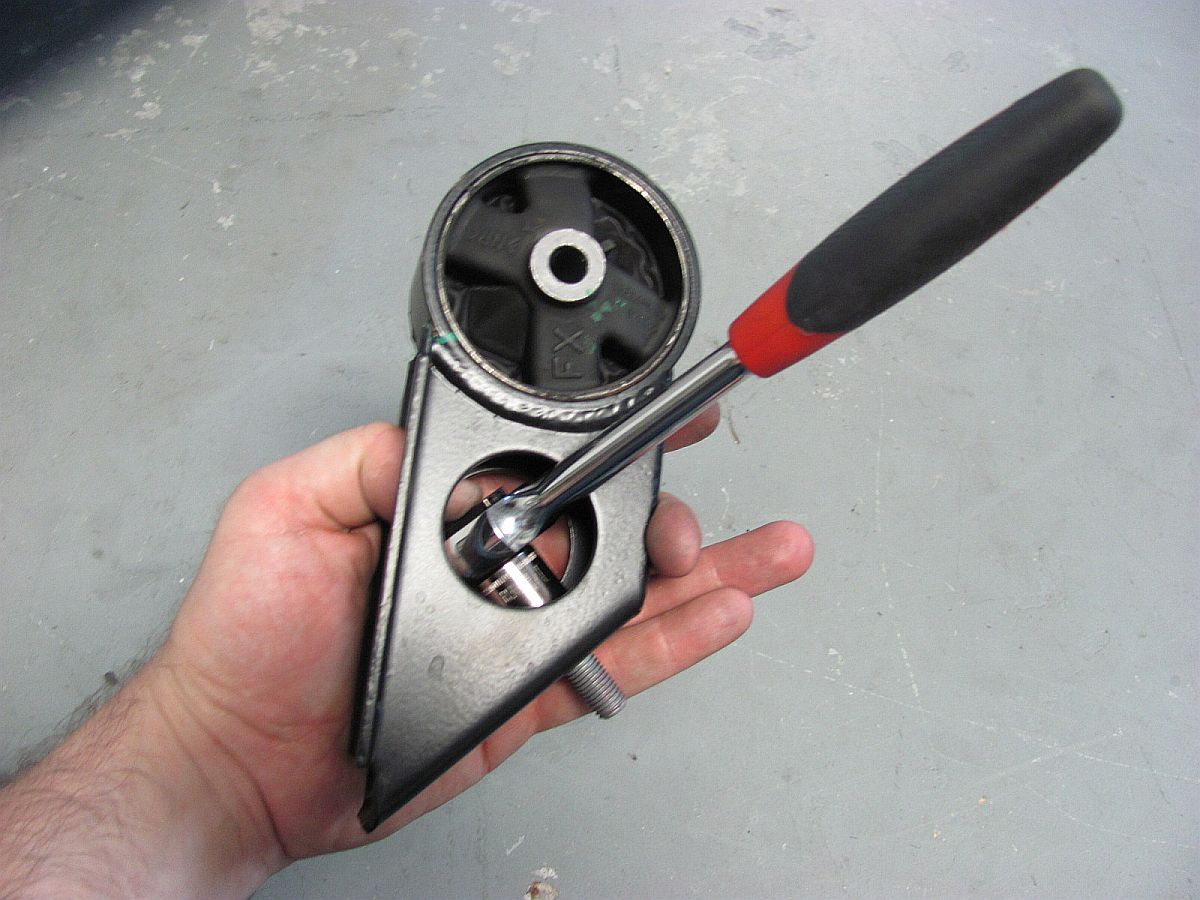
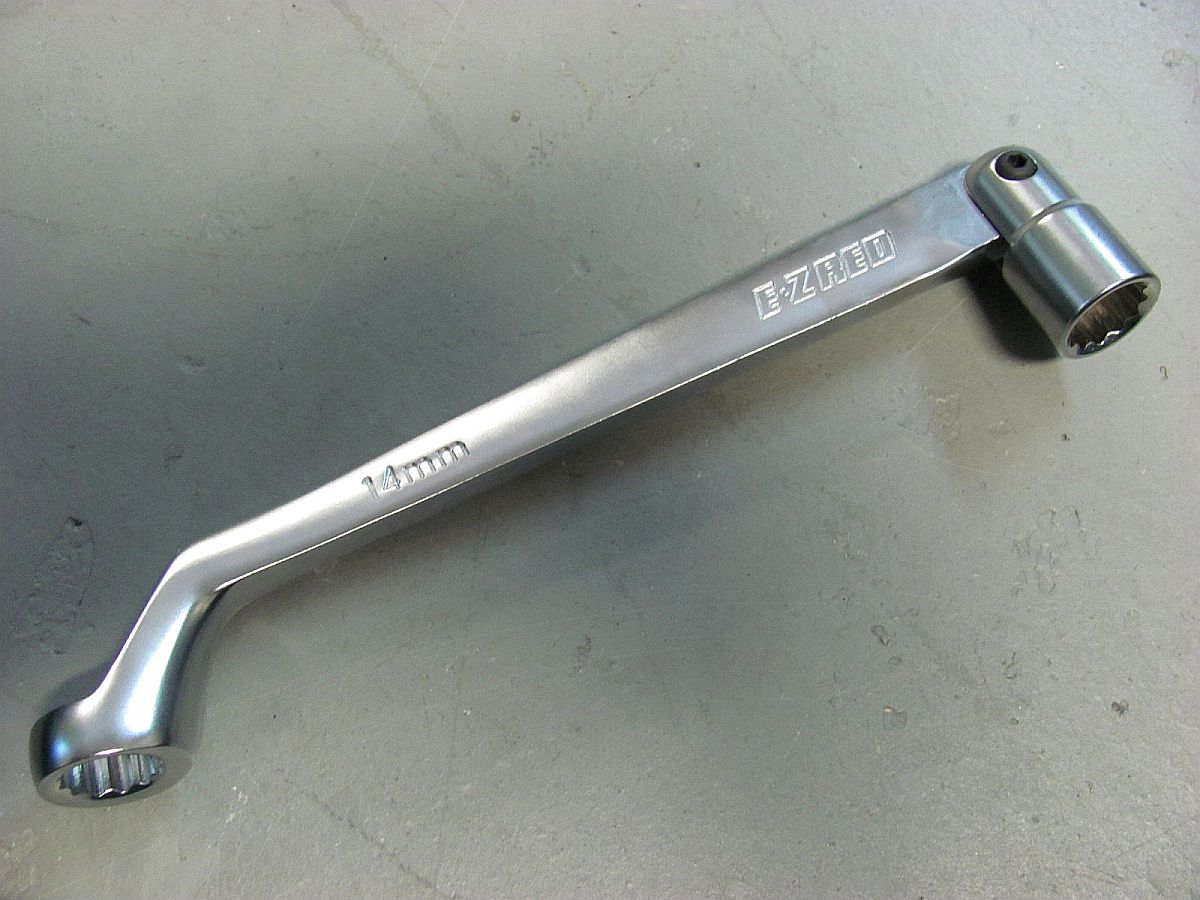
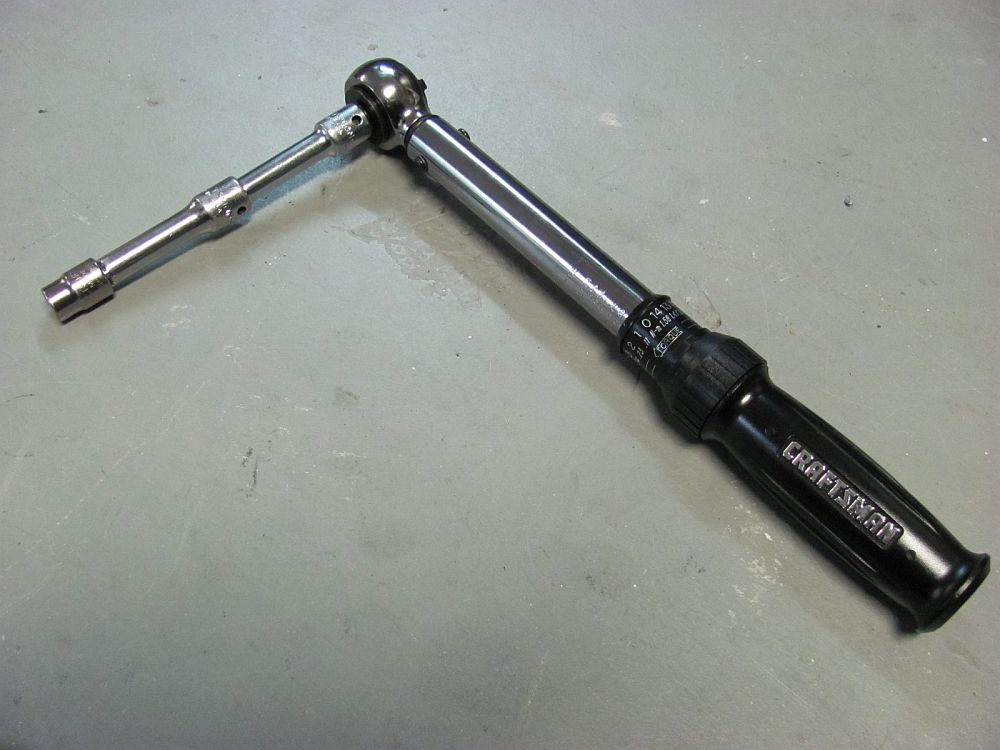
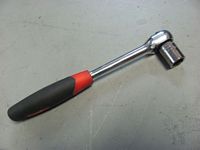
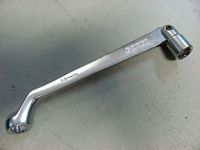
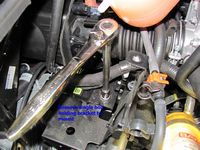
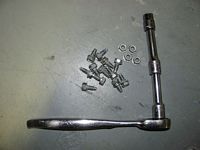
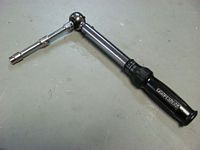
I installed just the front/rear first because I wanted to see how they compared to having all four installed (and I ran out of time). I did find that my small head ratchet/socket worked great to remove the OE front mount and should work just as well reinstalling, but not as well when installing the new Innovative mount- I had to break out the angle/swivel socket head offset wrench I bought just for this task and it worked great.
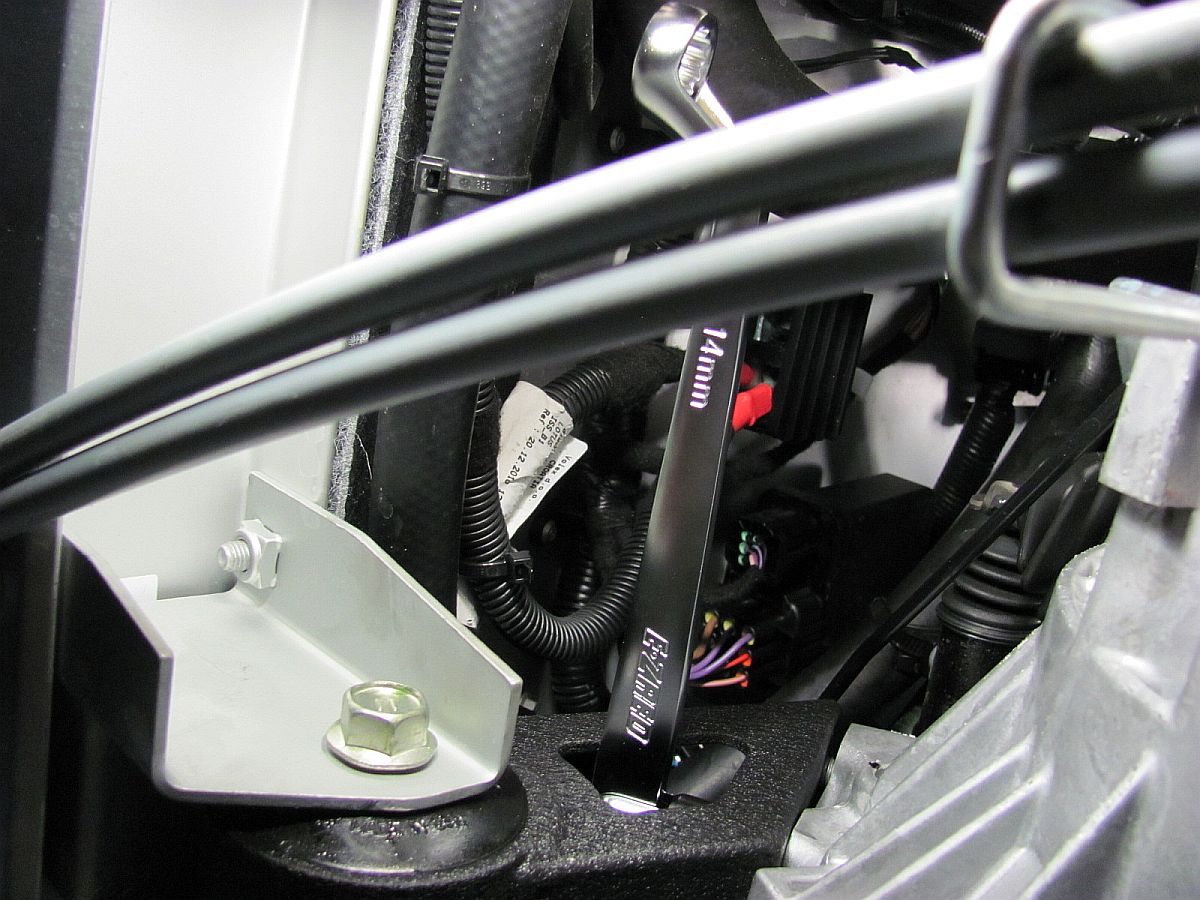
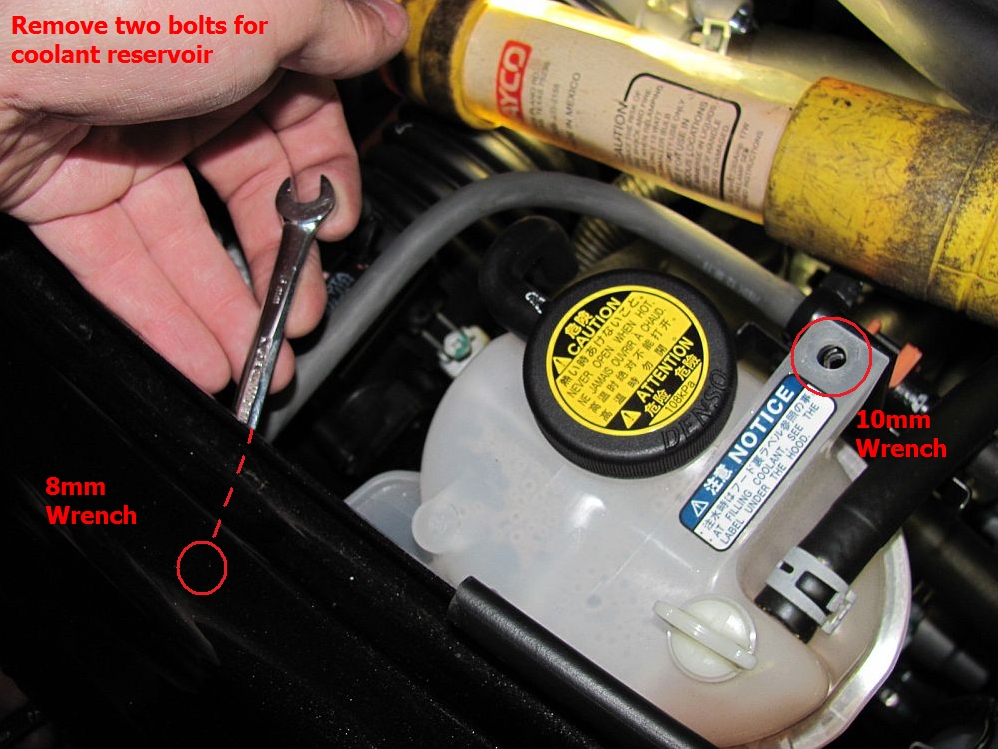
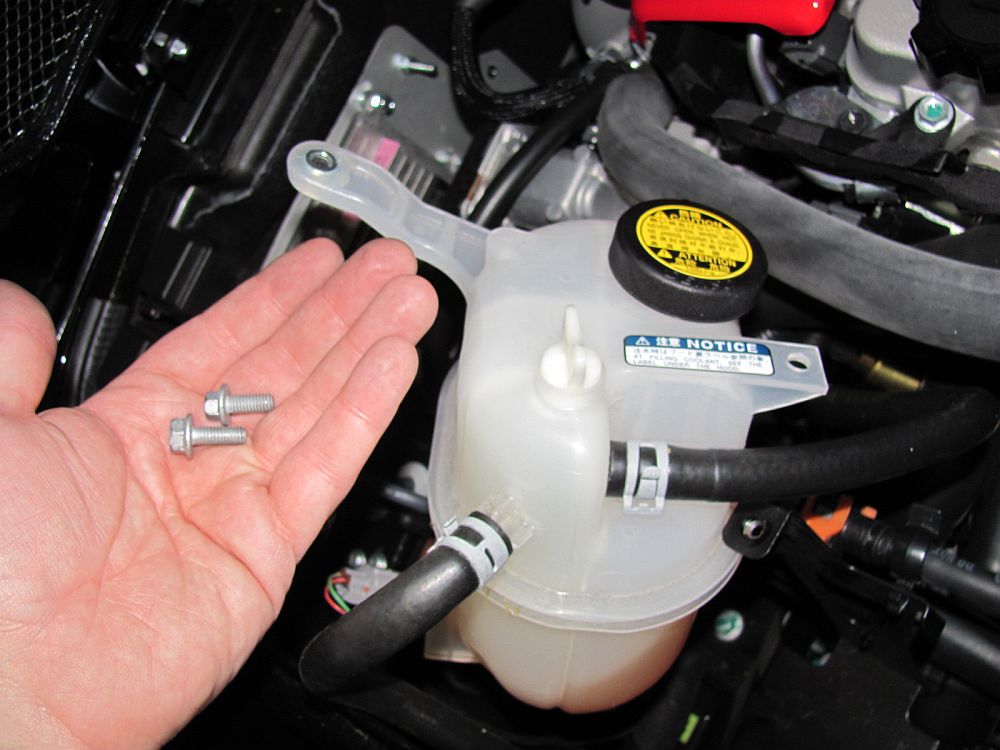
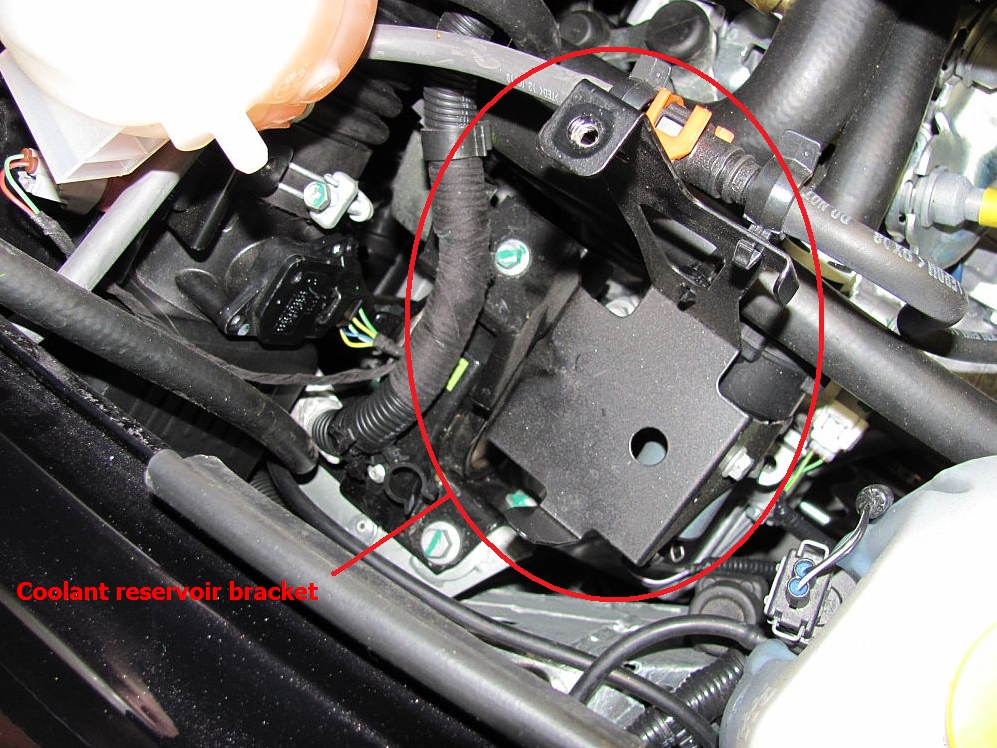
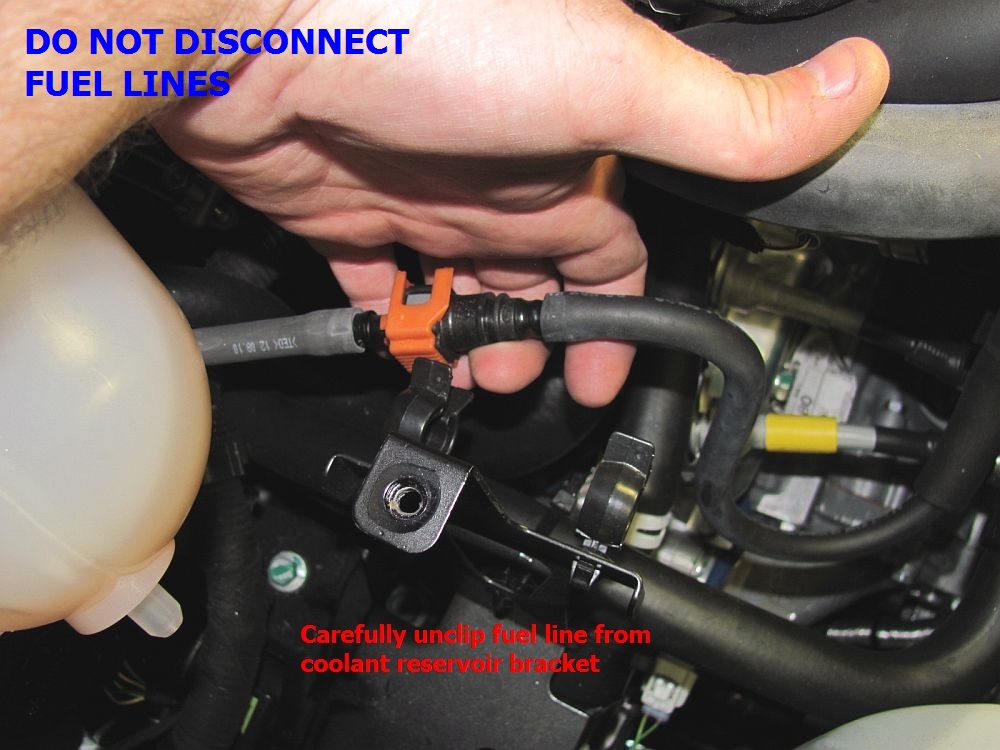
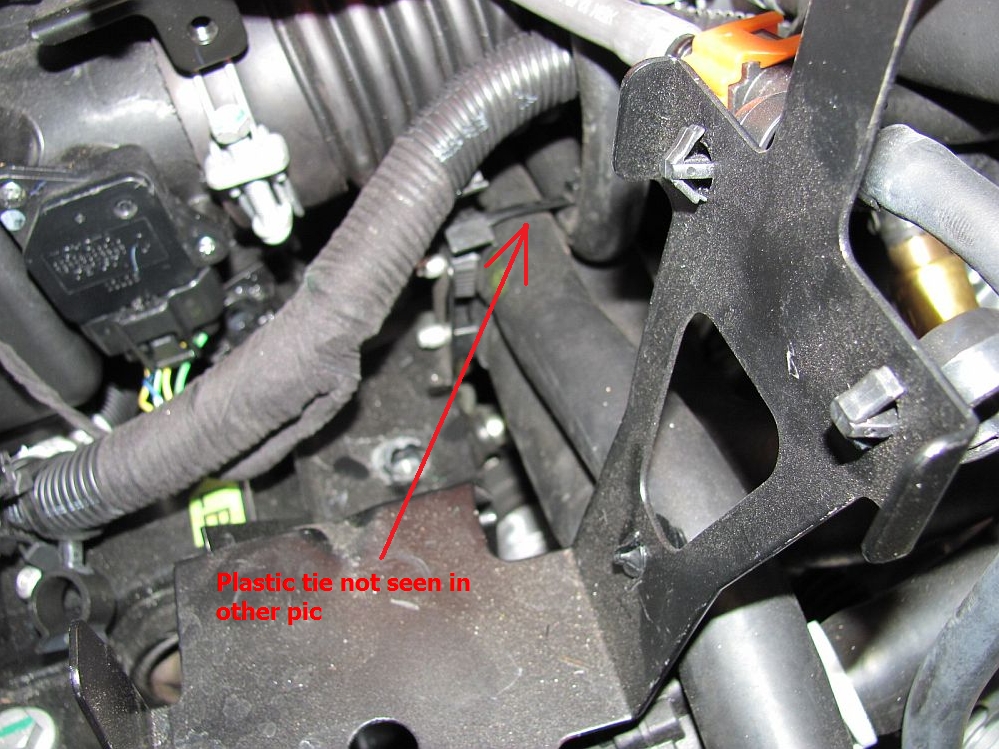
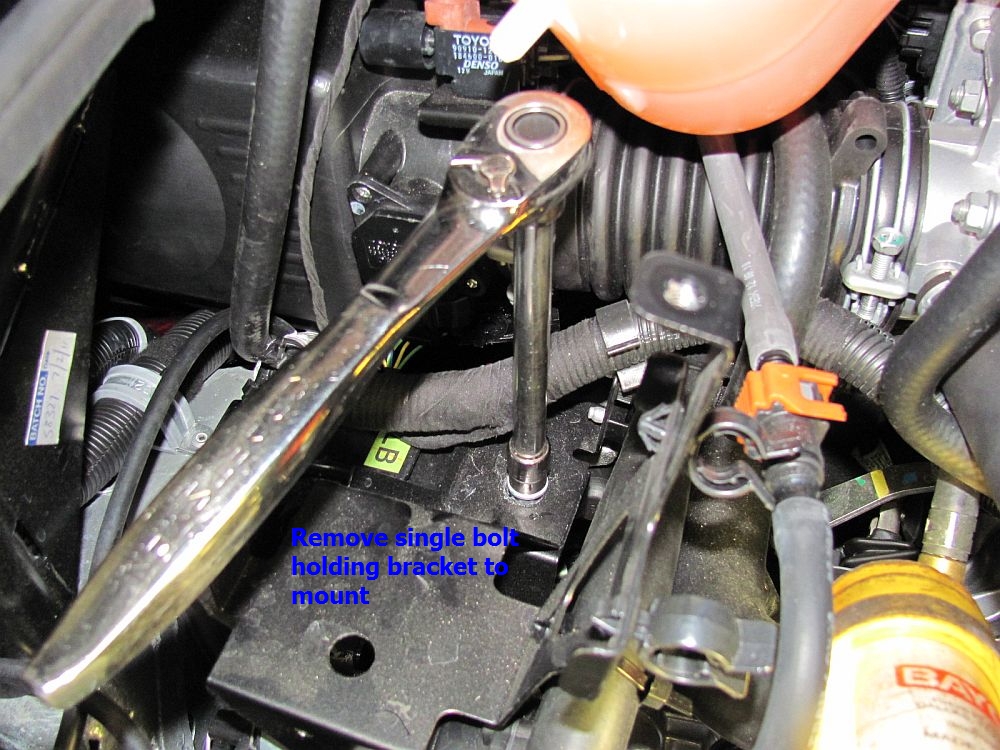
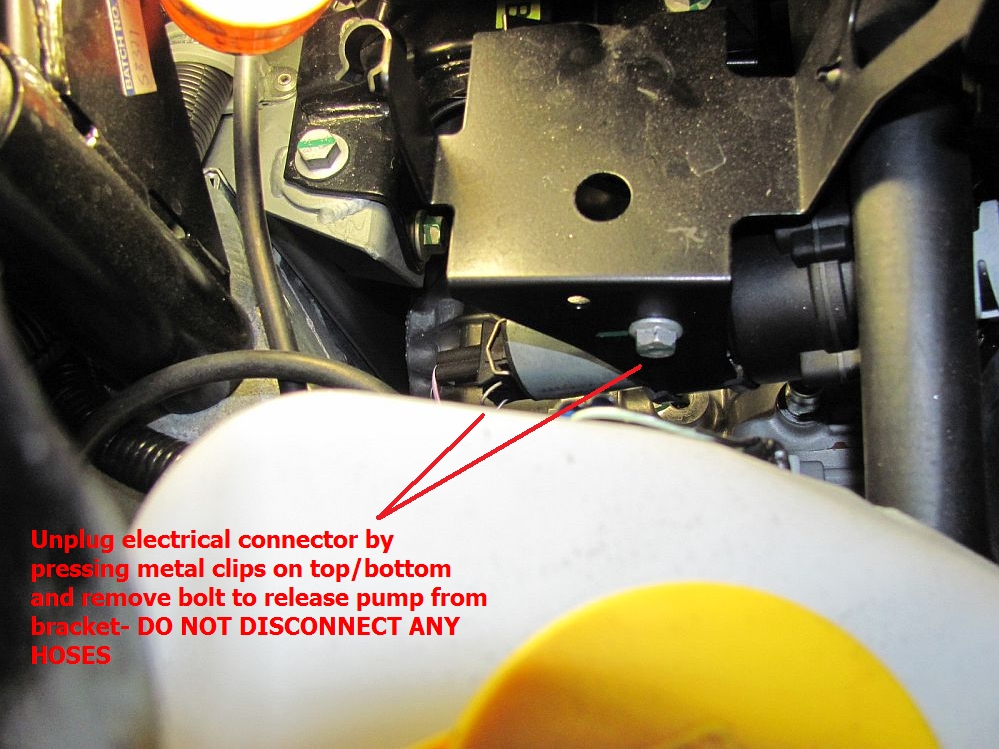
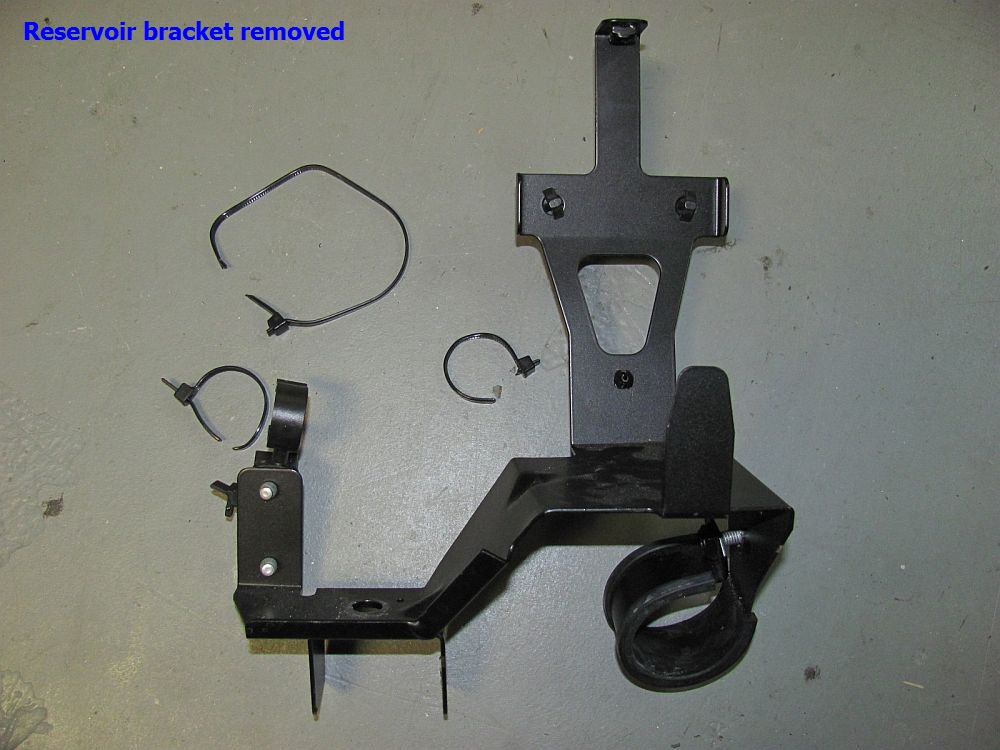
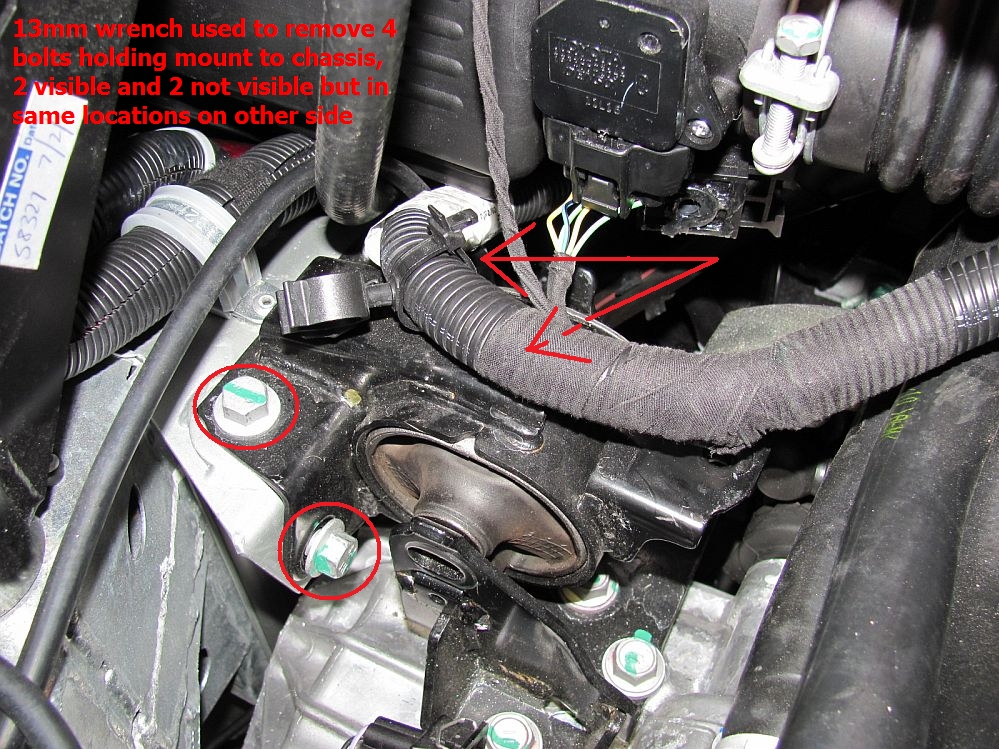
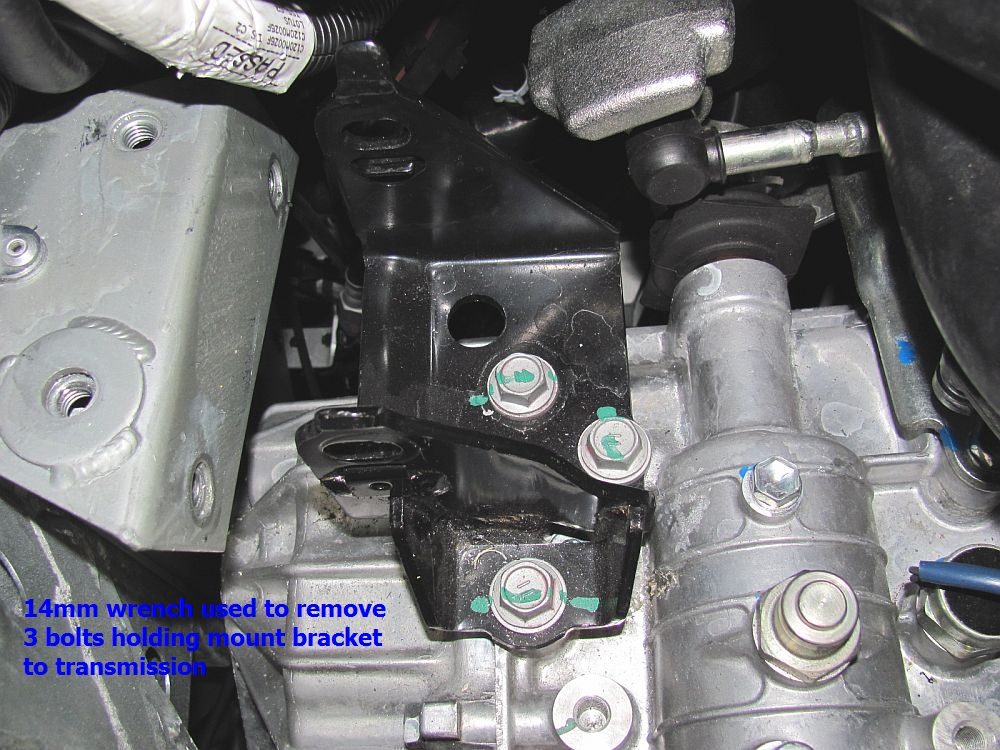
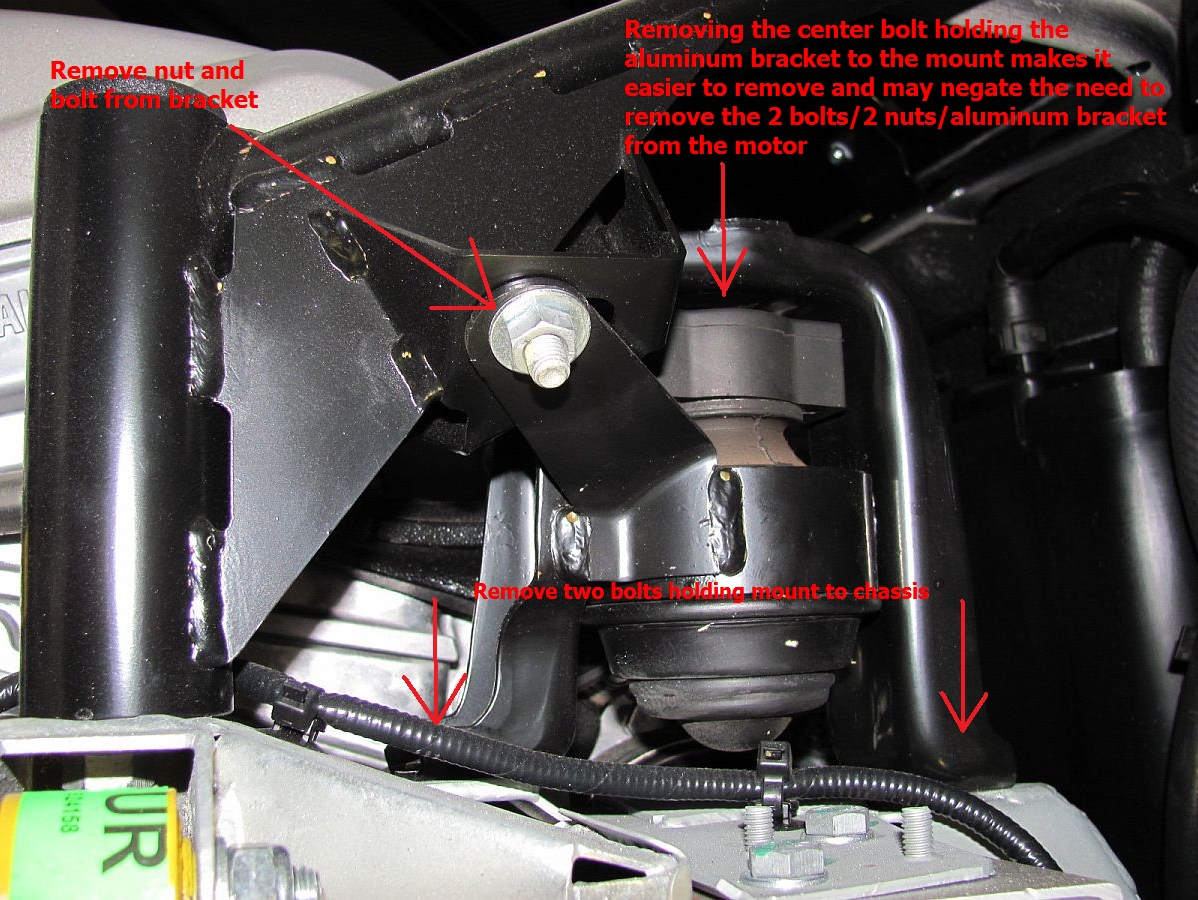
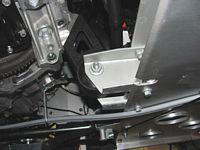
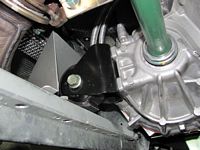
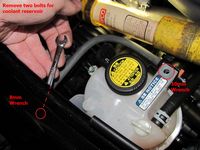
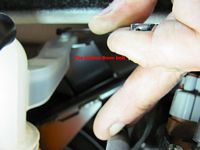
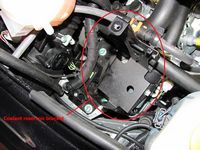
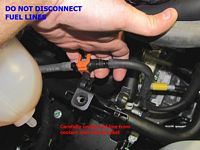
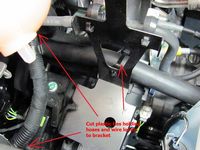
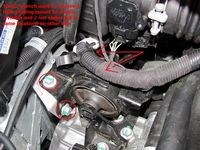
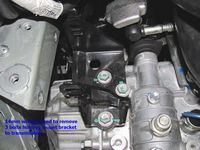
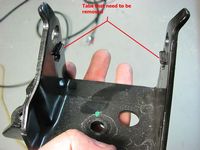
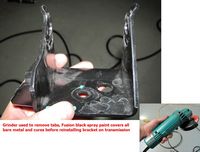
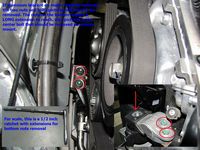
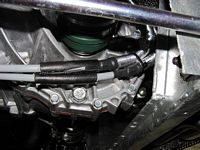
[UPDATE] Finally found time to install the side mounts and it was definitely more involved than the front and rear. Lining up the side mounts requires the front/rear mount center bolts to be loosened so that the jack can be used to help alignment- be sure to re-torque all bolts. For the driver side the coolant reservoir has to be moved to the side and the reservoir bracket removed- bracket removal requires three zip ties to be cut. DON'T DISCONNECT ANY FUEL LINES OR HOSES. The transmission side of the mount has to be removed to grind off the tabs that interfere with the new mount.
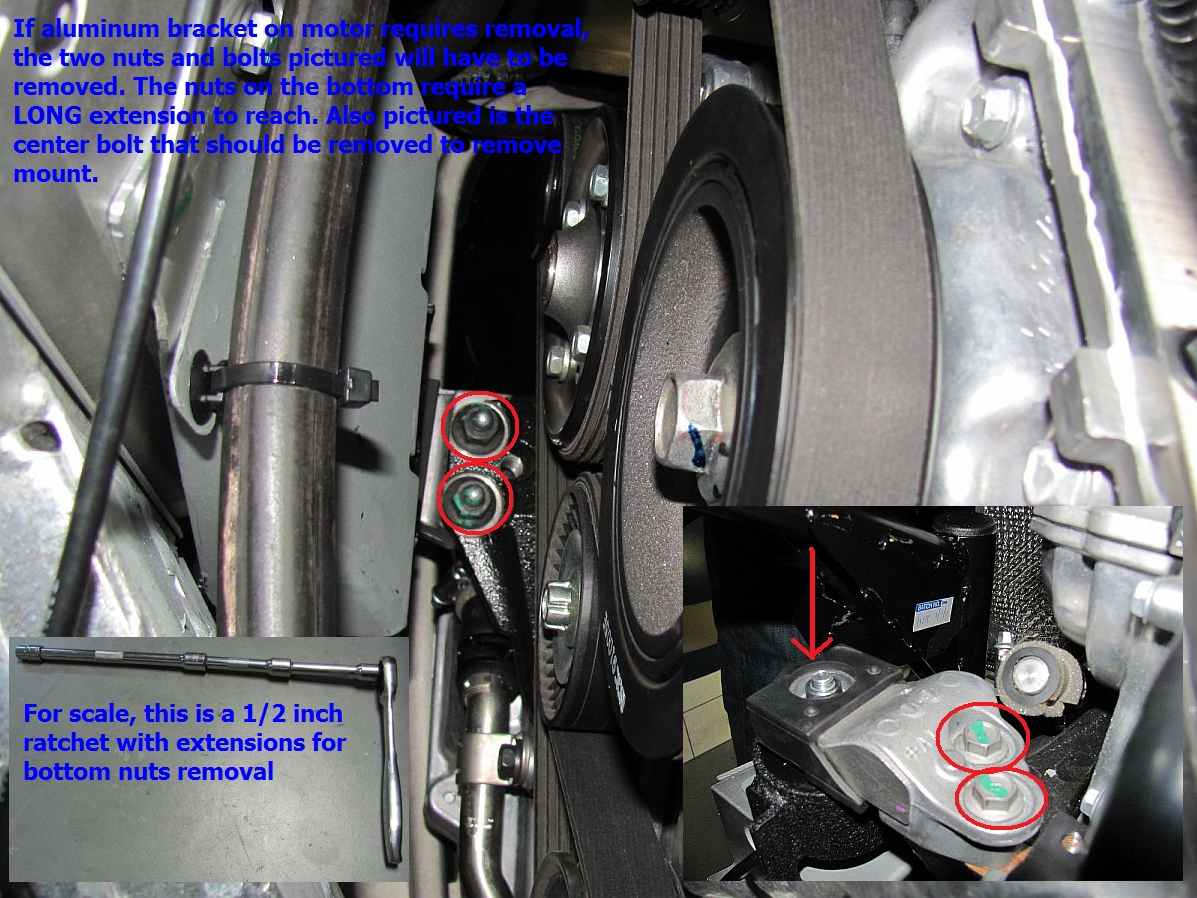
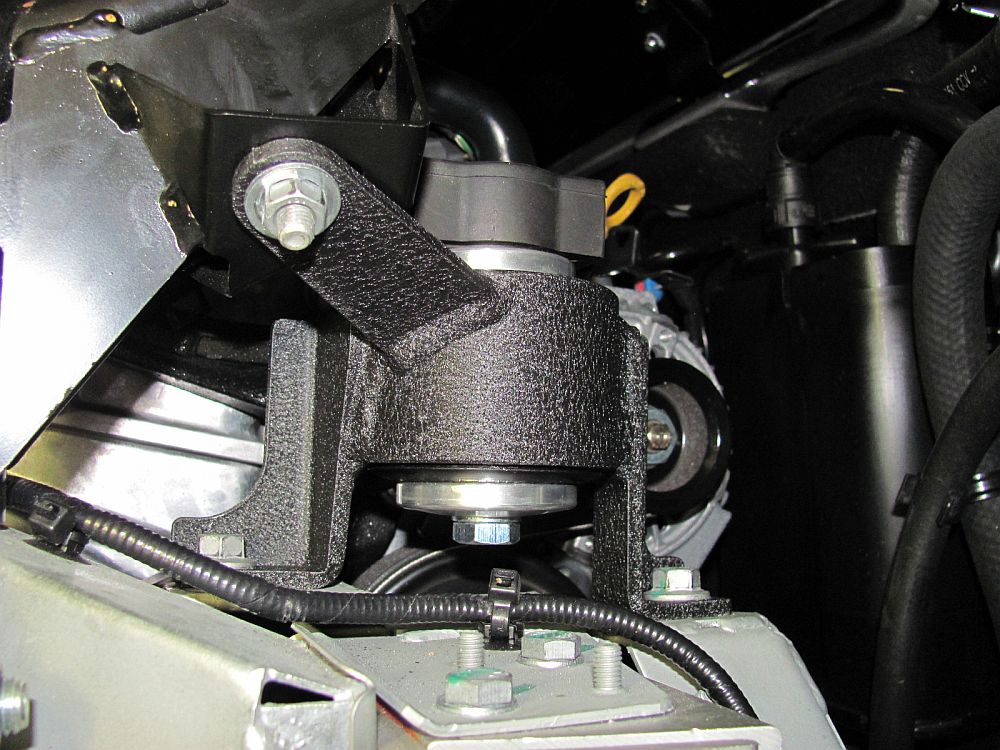
The passenger side mount is a bit easier, but you will need to loosen the center bolt where the aluminum piece that will be reused is joined to the mount. In retrospect, I might have tried to get the mount out without removing the two bolts/two nuts that hold it to the motor and assemble the new mount with it in place. You will need LONG extensions to do these mounts.
End result, all four mounts feel better to me with a bit more vibration but YMMV.


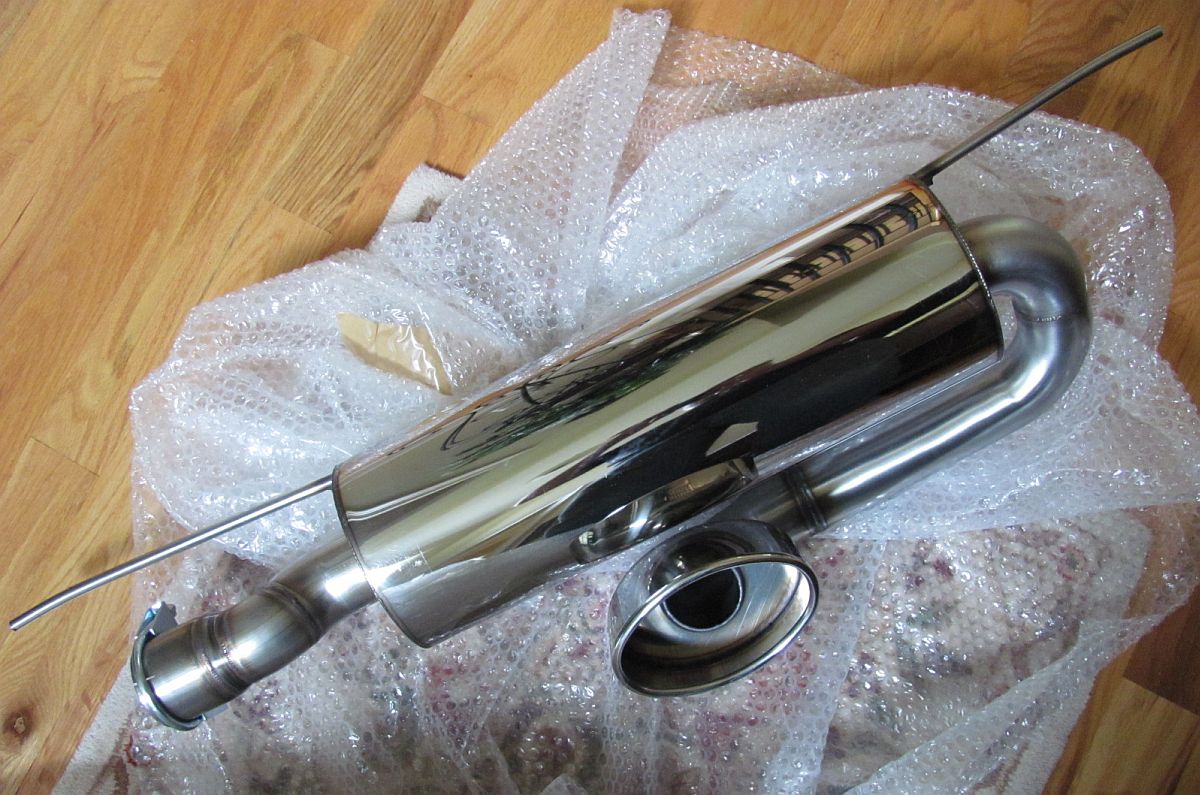
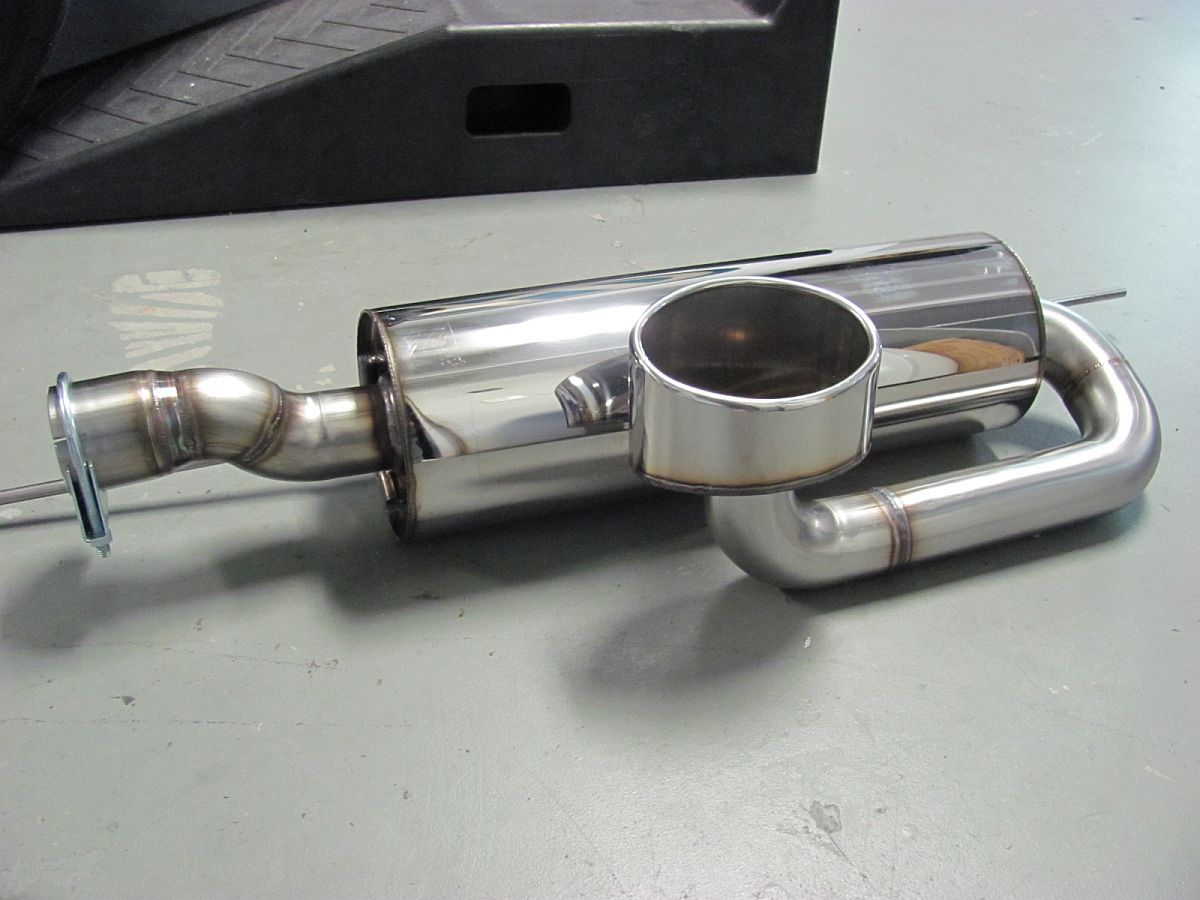
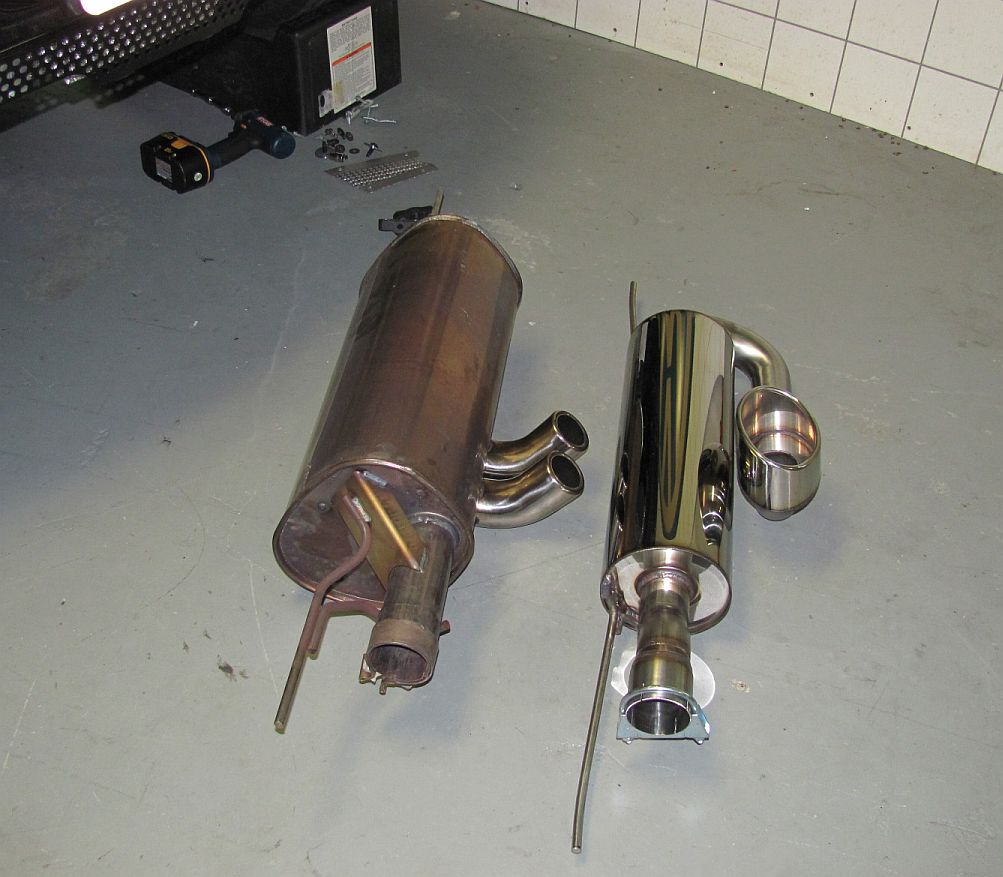
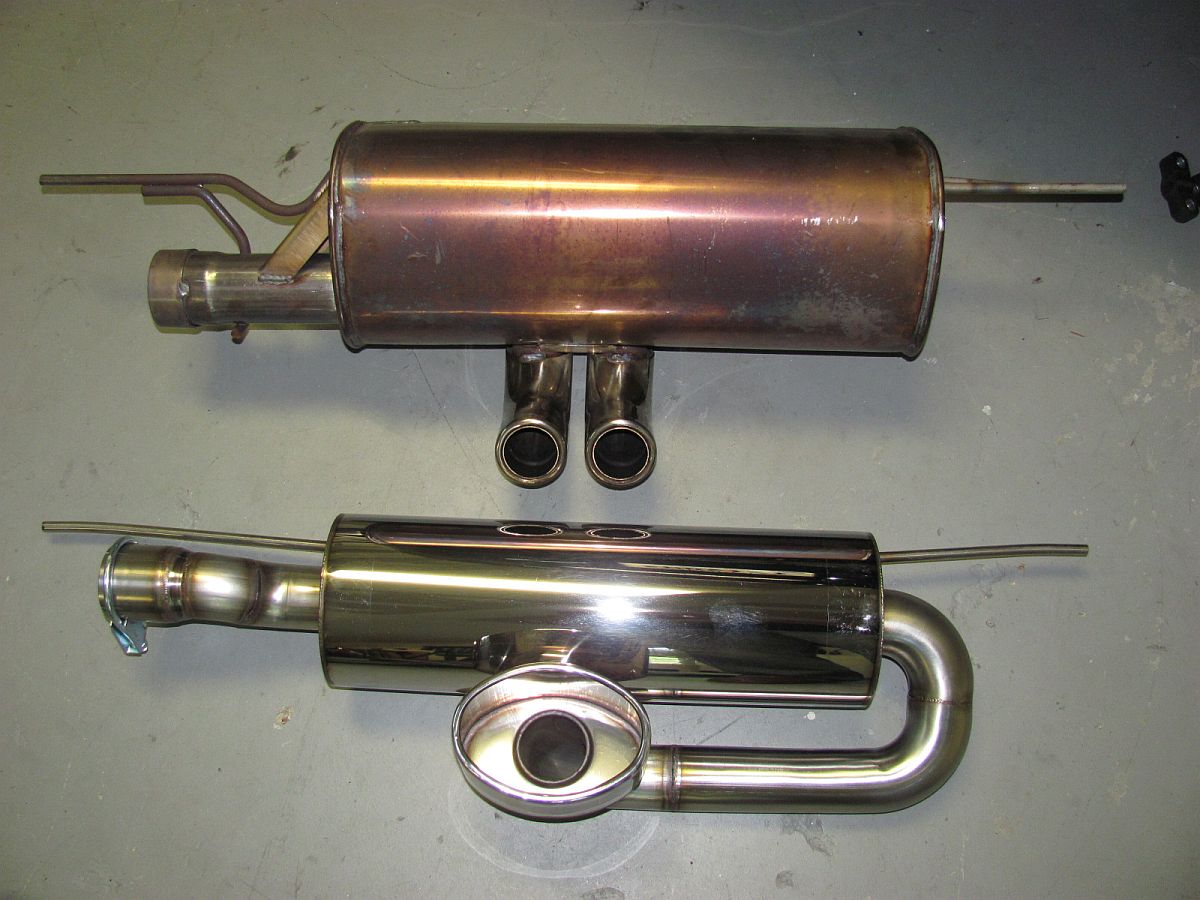
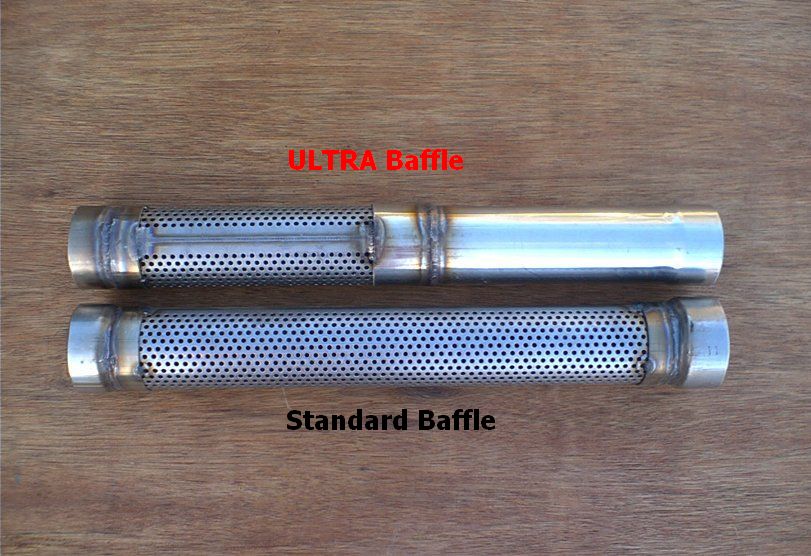
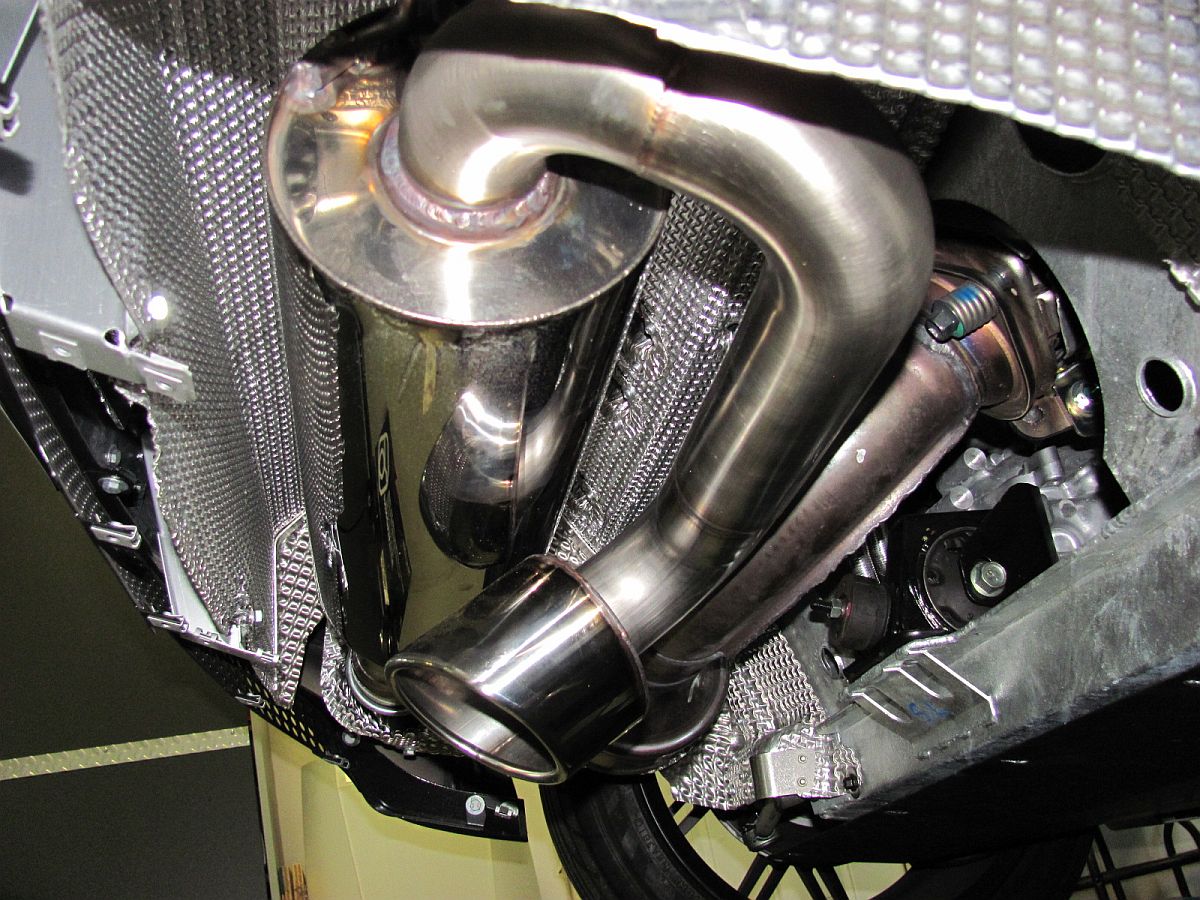
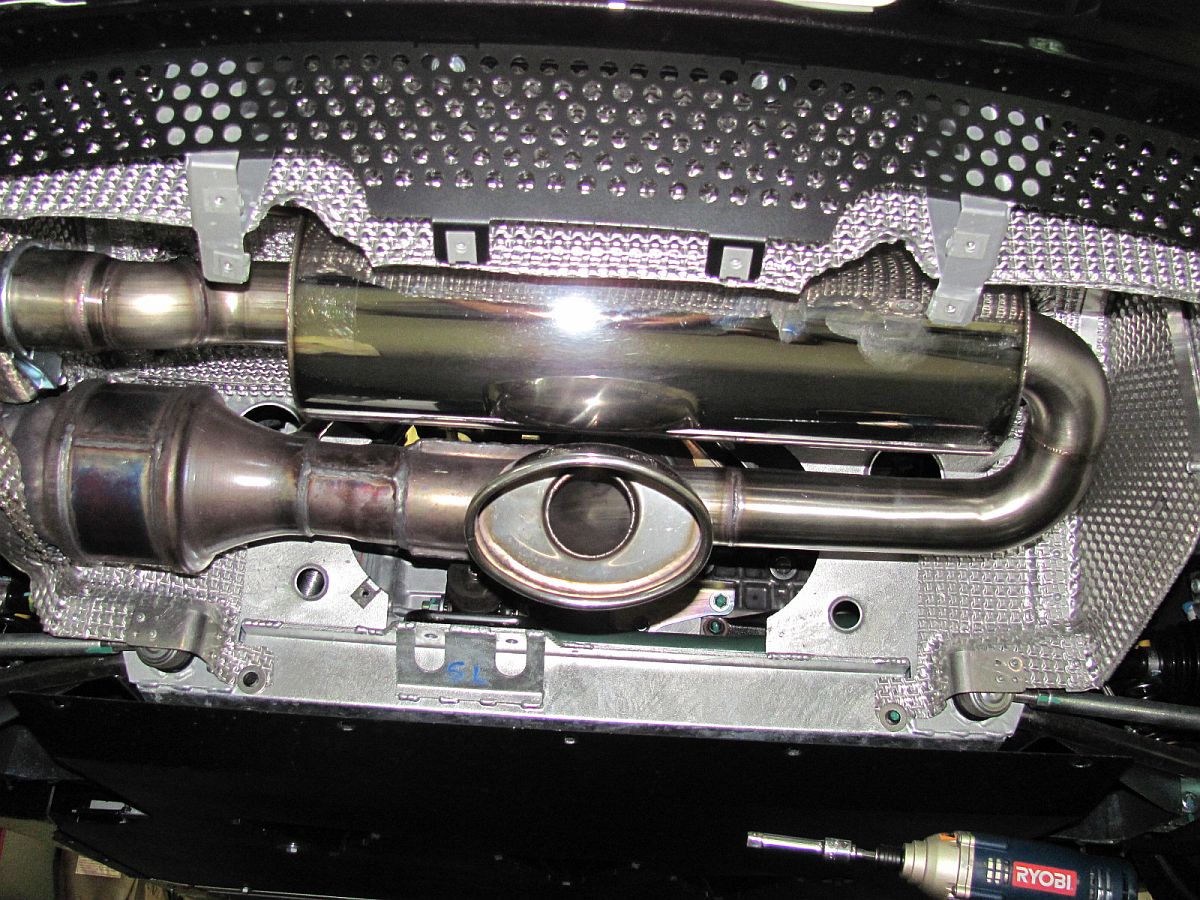
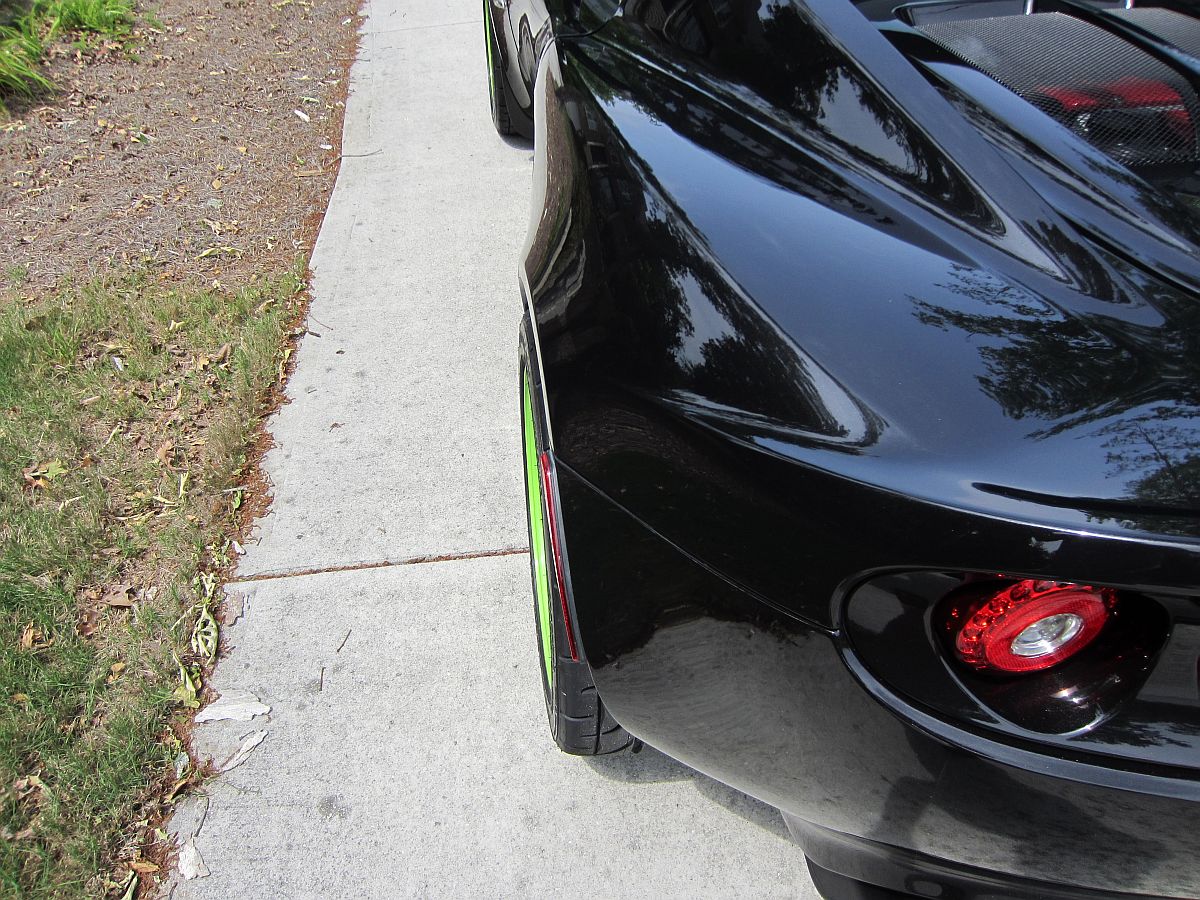
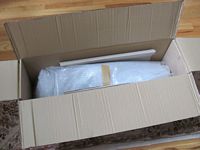
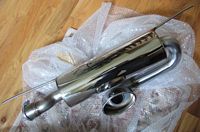
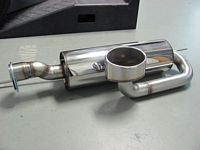
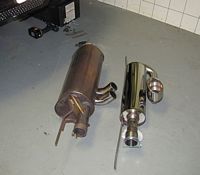
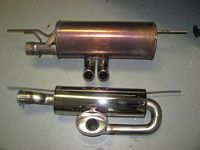
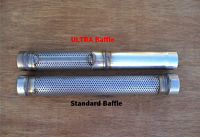
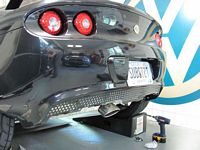
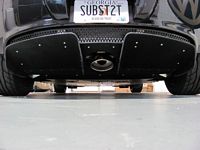
Custom exhaust from 2Bular in the UK. I initially thought I had a deal and bought a slightly used 2Bular exhaust to find it would not clear the new-for-2011 diffuser. After several emails with Jim Valentine, the proprietor of 2Bular, I had him build the 6"x18" exhaust with a more aggressive sound (less perforations in the baffle tube) and with the large 6"x4" oval tip in a StageII type configuration. For the new diffuser he adds a slight bend on the pipe at the cat connection so that the exhaust sits higher with no interference- fits perfect and sounds GREAT. Not super loud at idle or when driven non-aggressively but wails like a banshee on the second cam
Arrived well packed and almost looks too nice to install- Thanks Jim, worth the wait


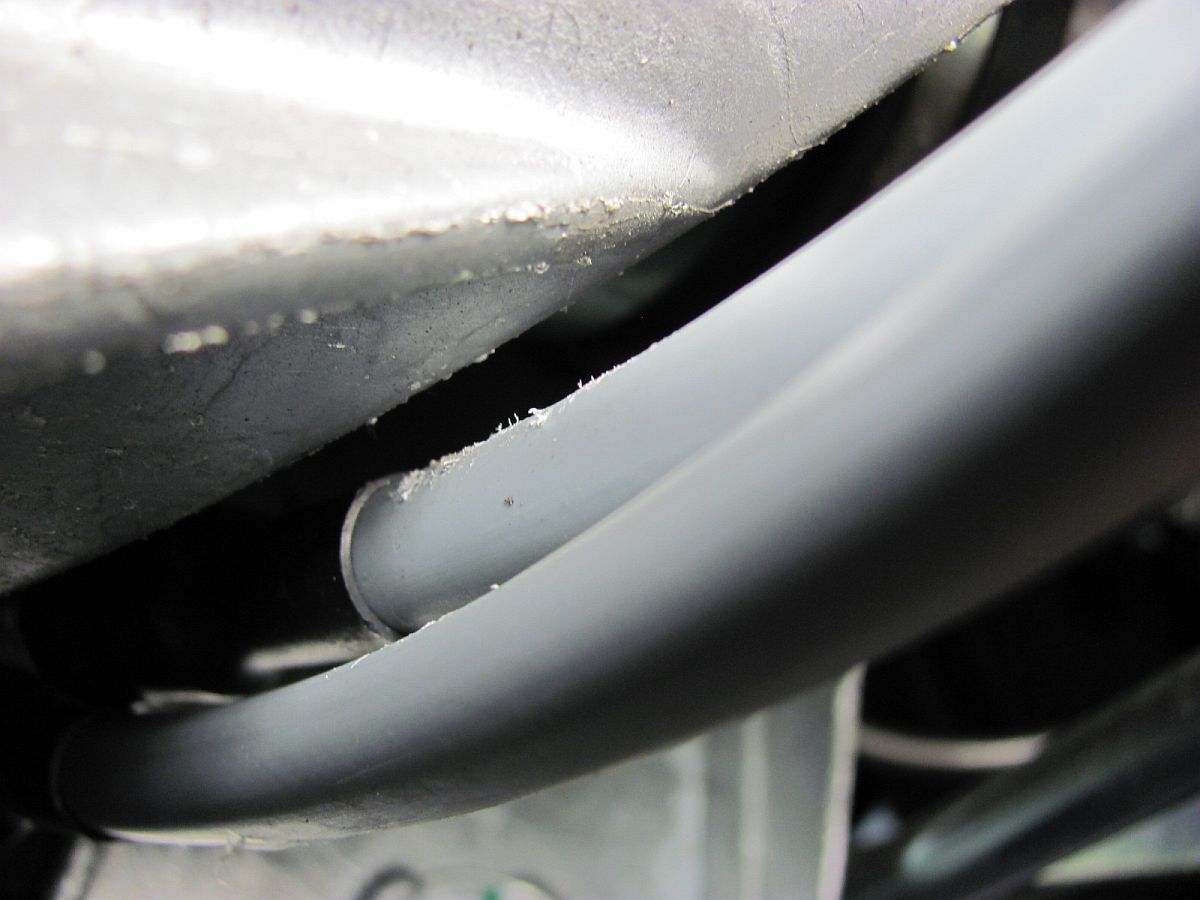
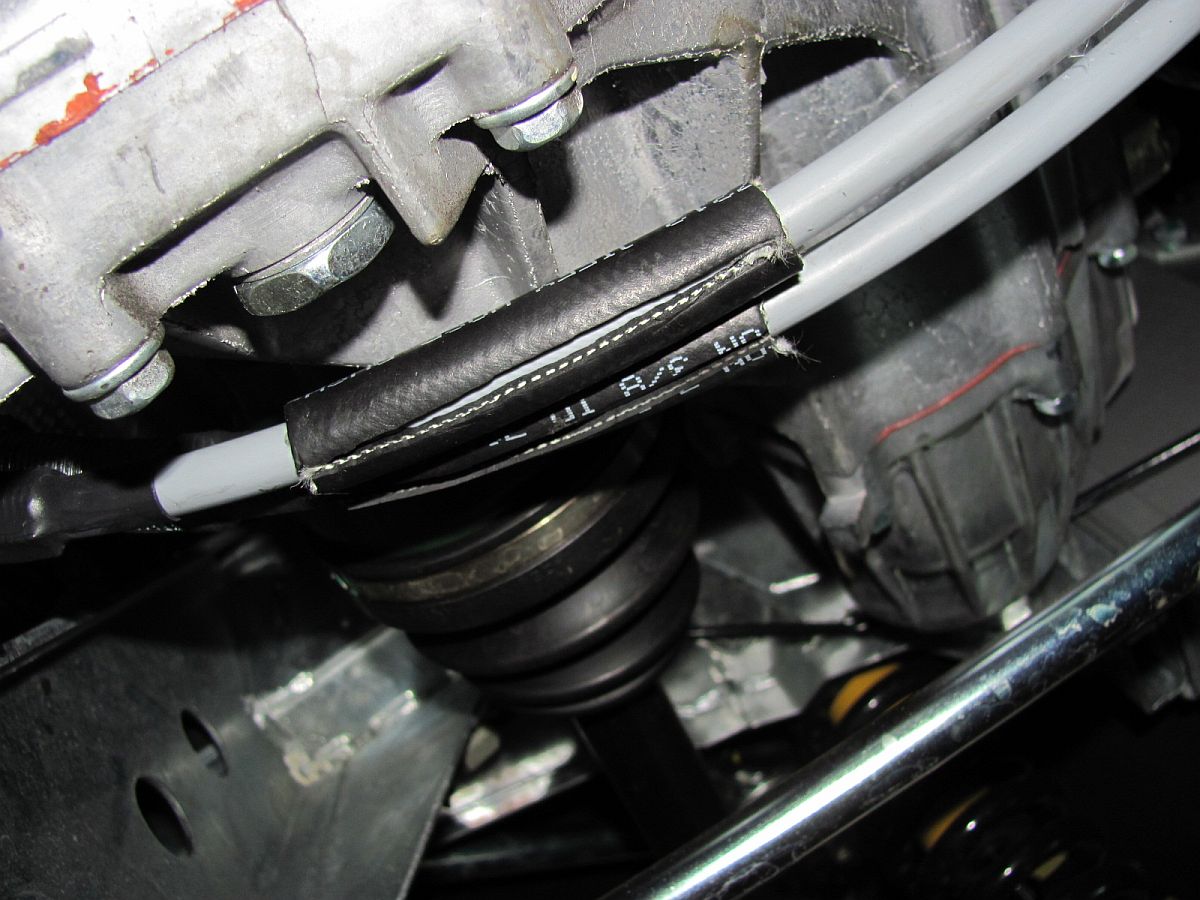
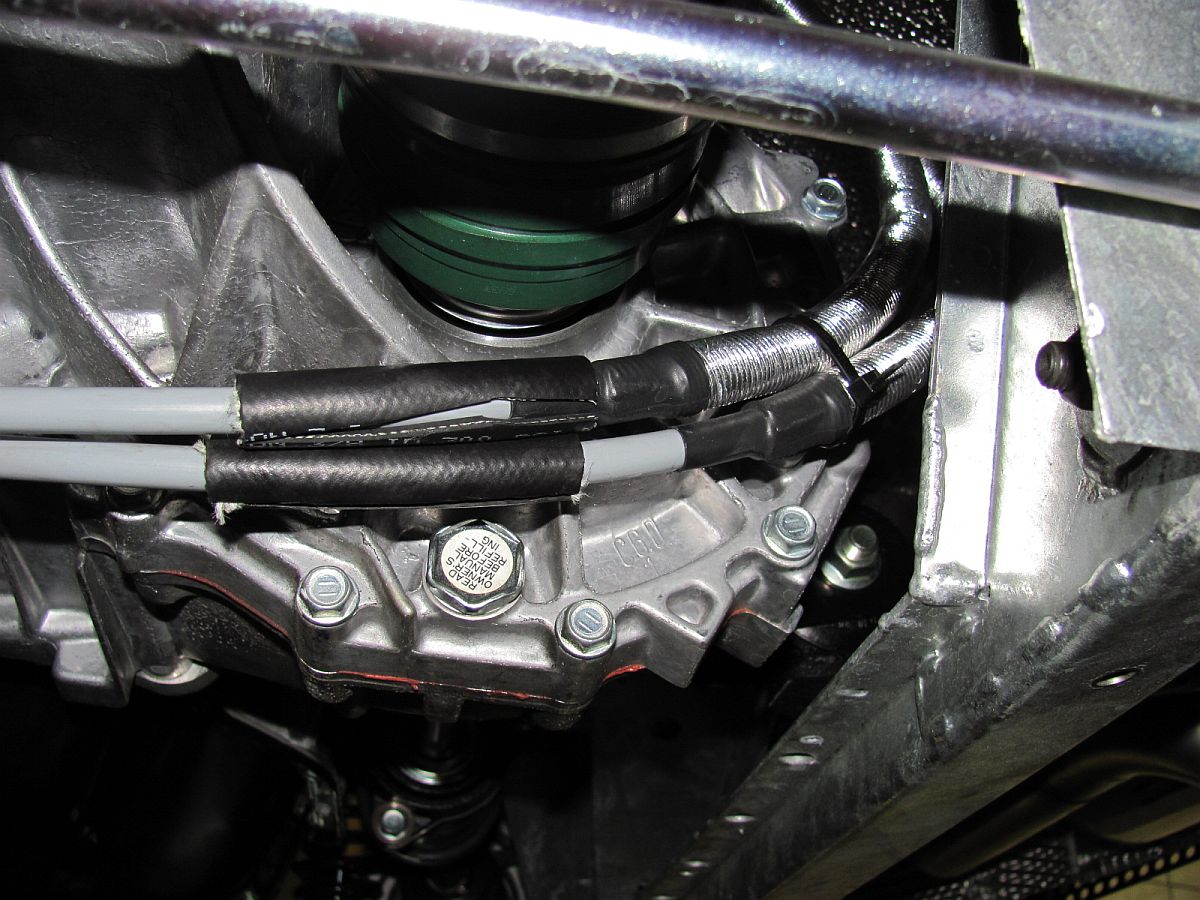
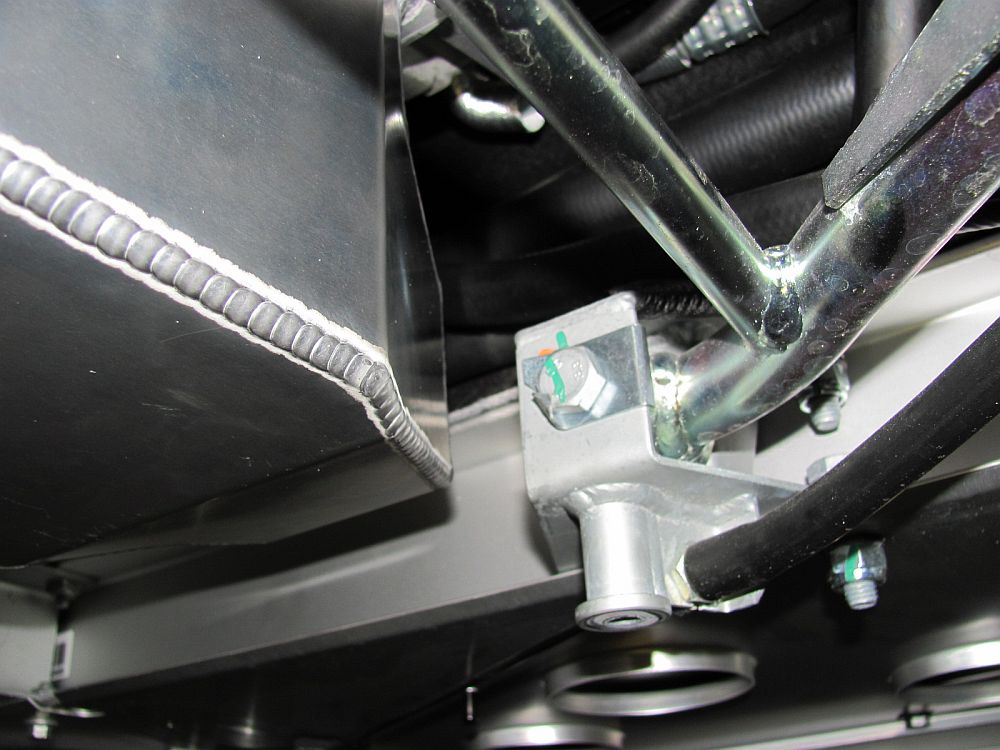
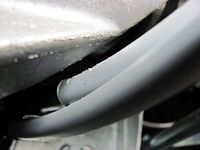
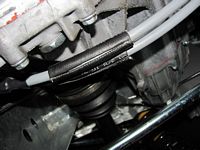
I discovered a small issue while under the car installing mounts and exhaust- the shifter cables were chaffing on the transmission case where they were rubbing. Some of this might be alleviated with replacement of the OE sponge mounts with the better Innovative mounts, but I used some spare rubber hose to cover both cables just in case. I'll check them when I change the oil in another 200 miles.
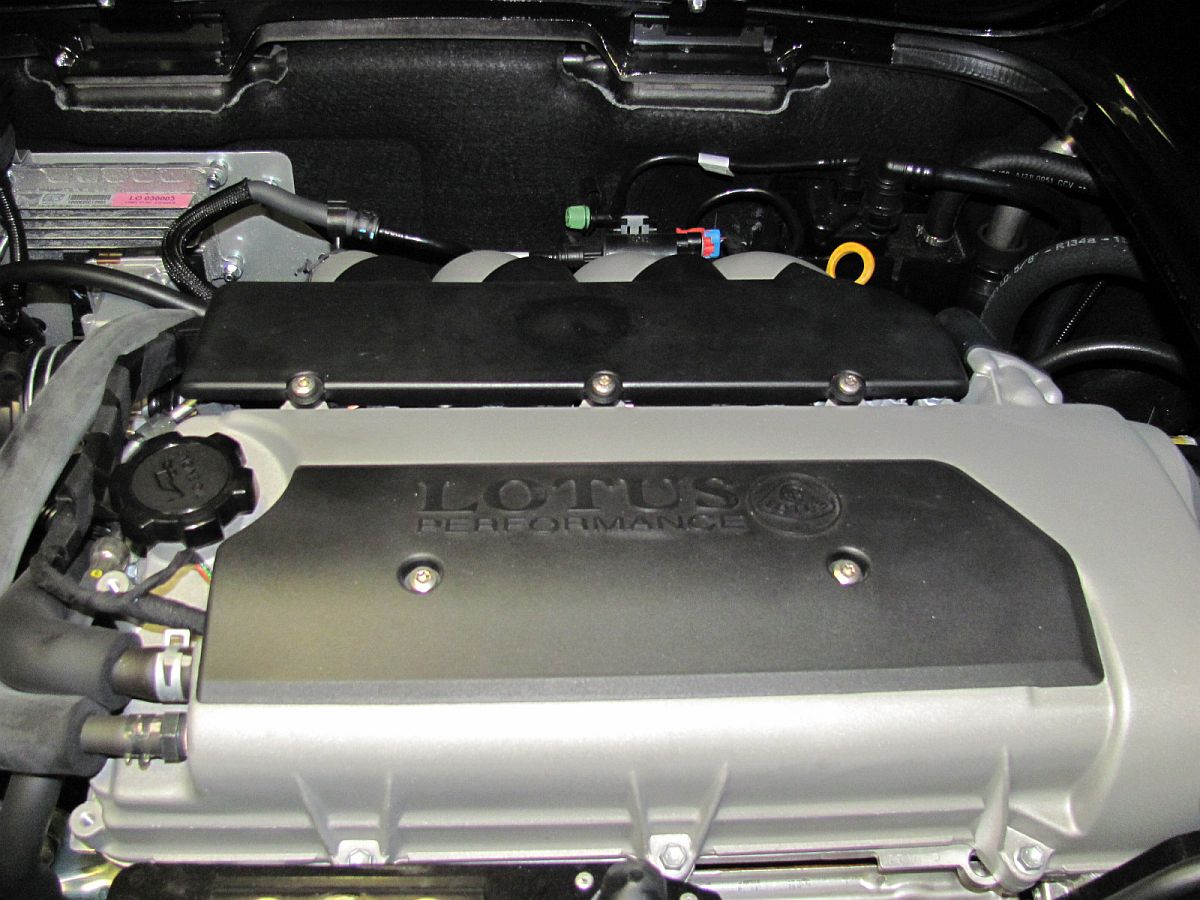
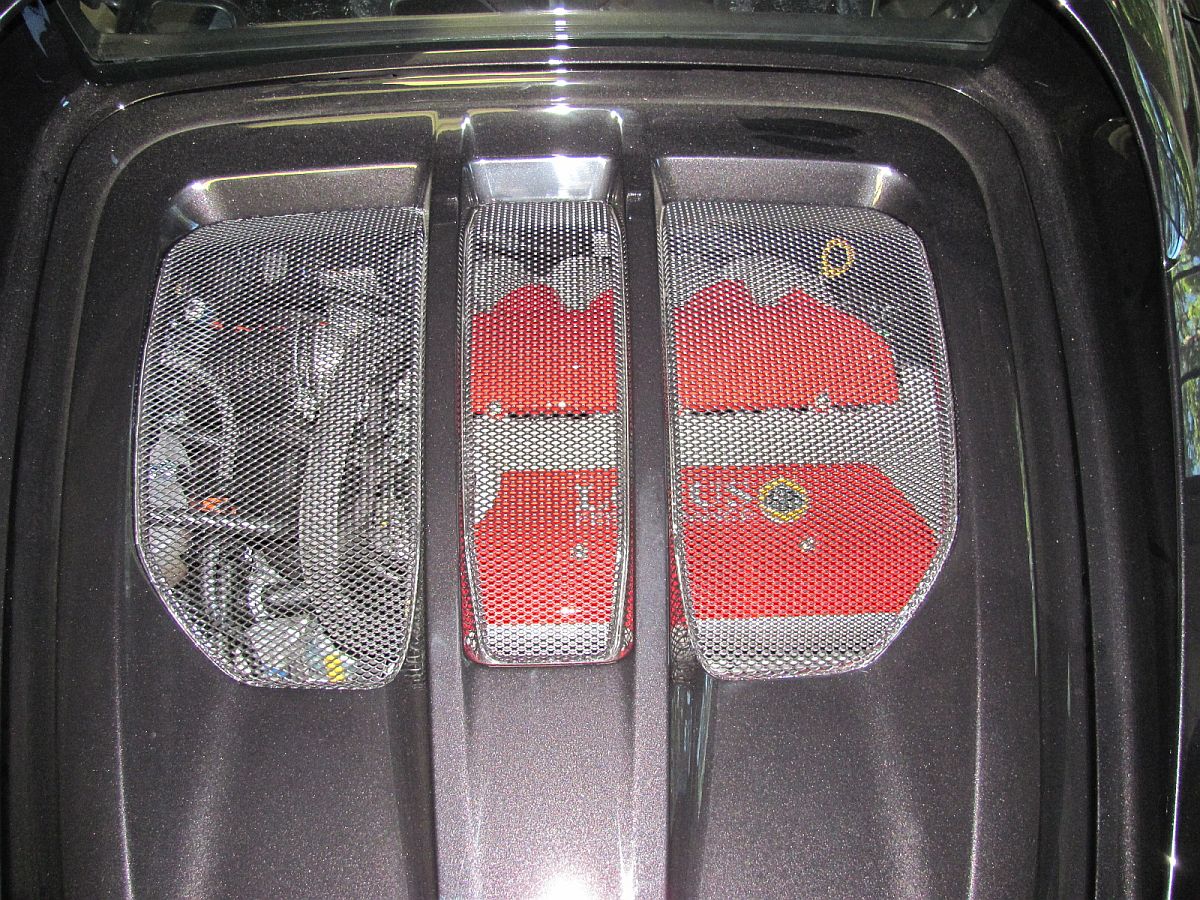
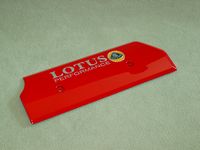
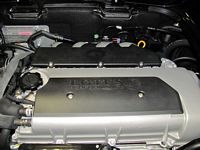
Painted engine covers from Chuck Risen installed. Look great through the new Elise mesh grill

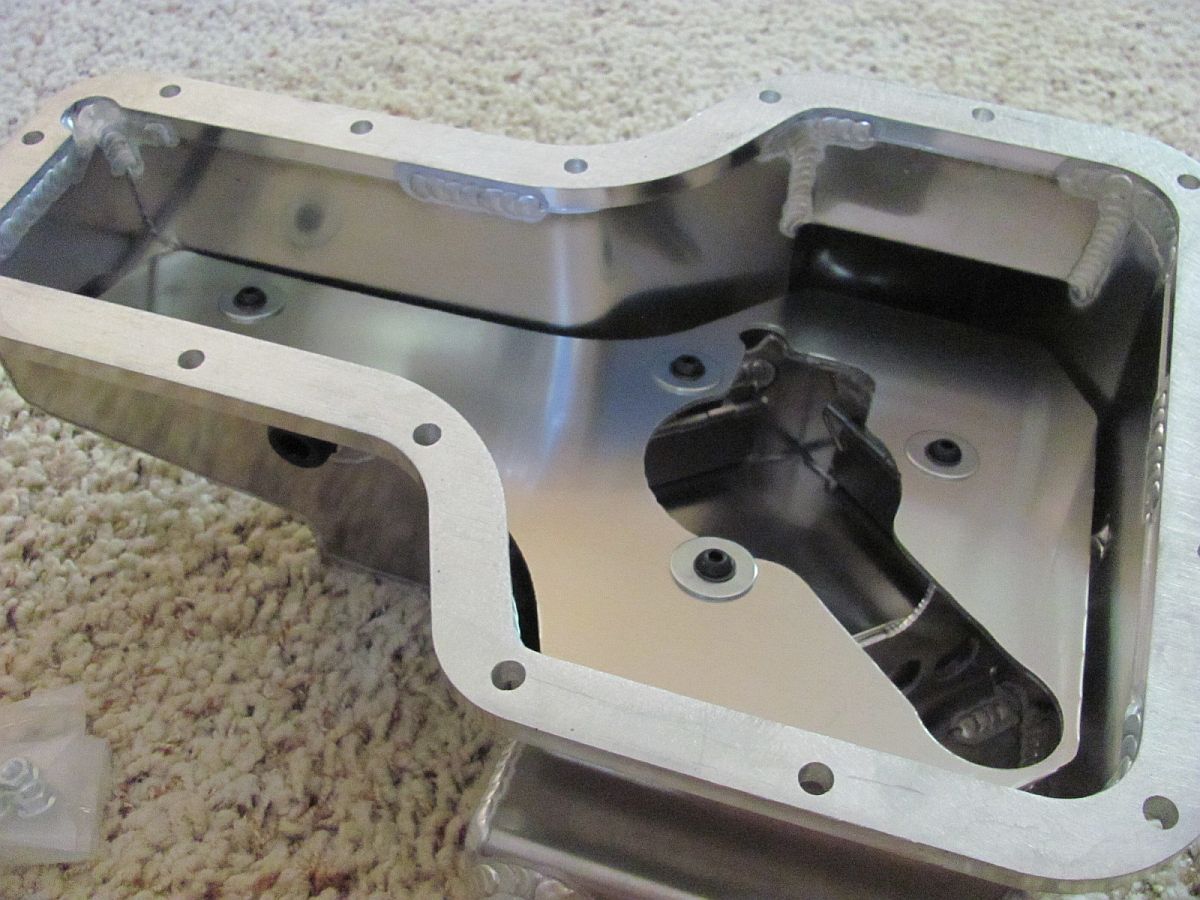
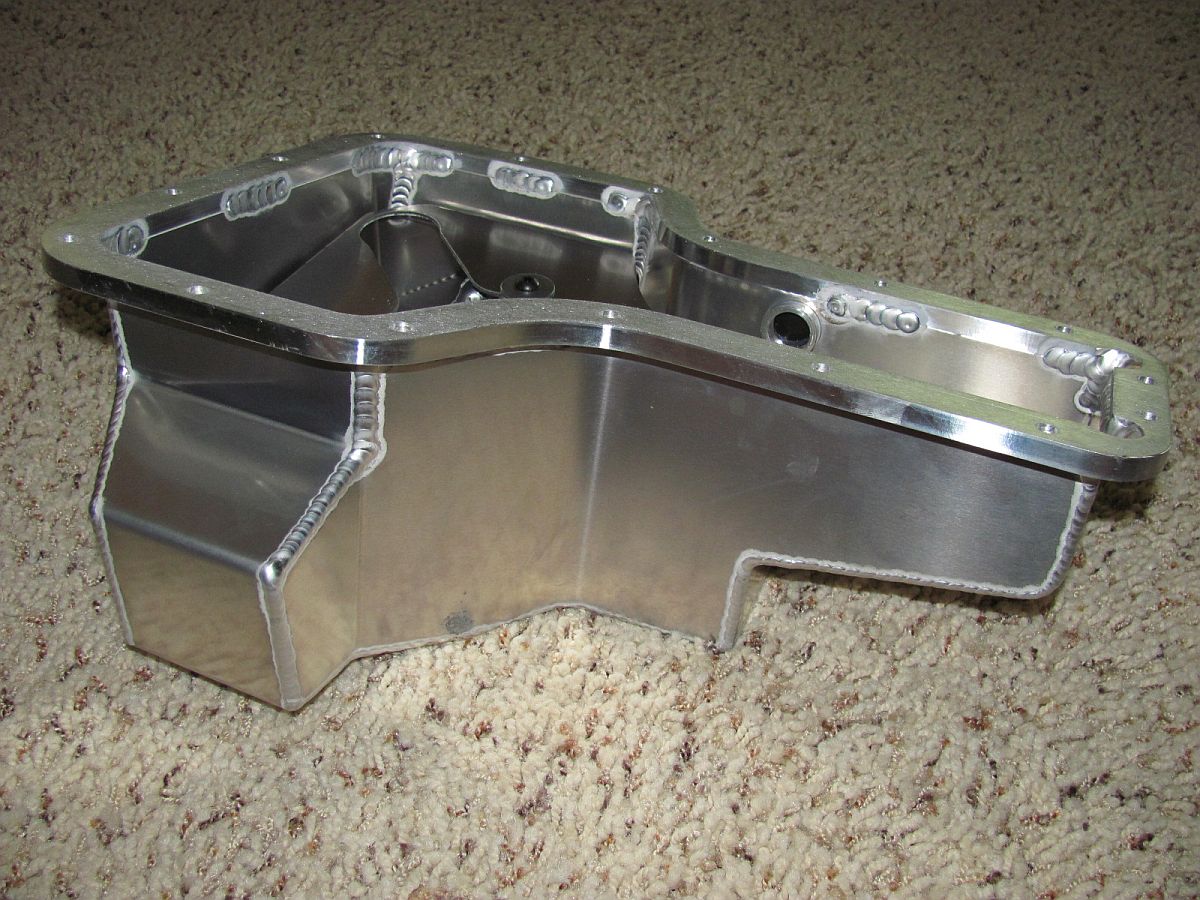
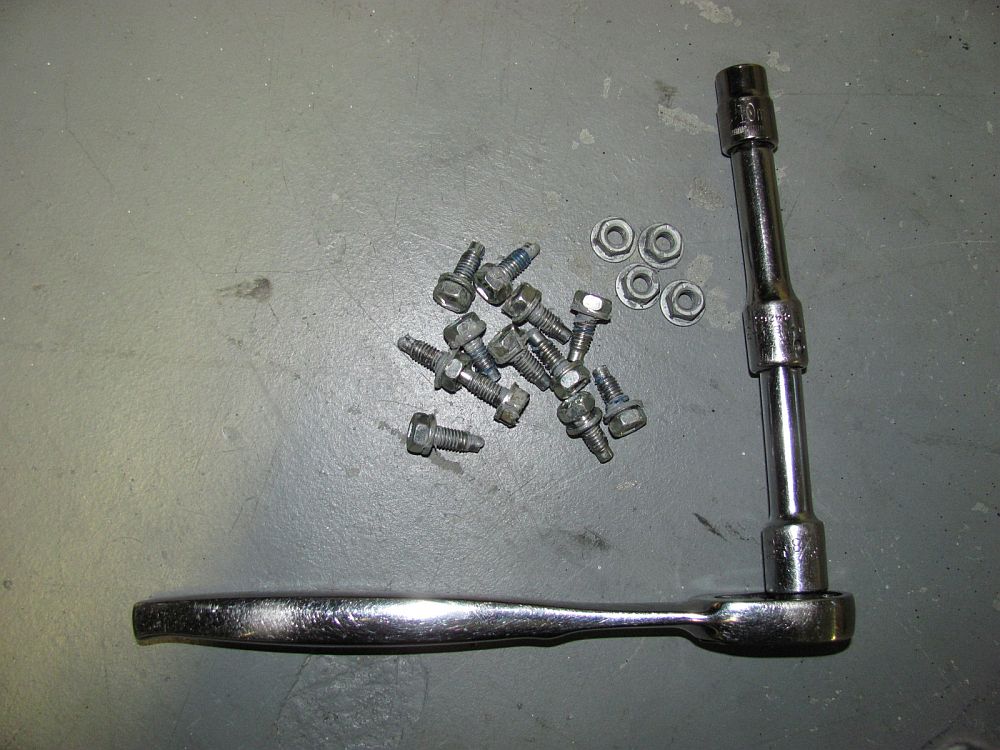
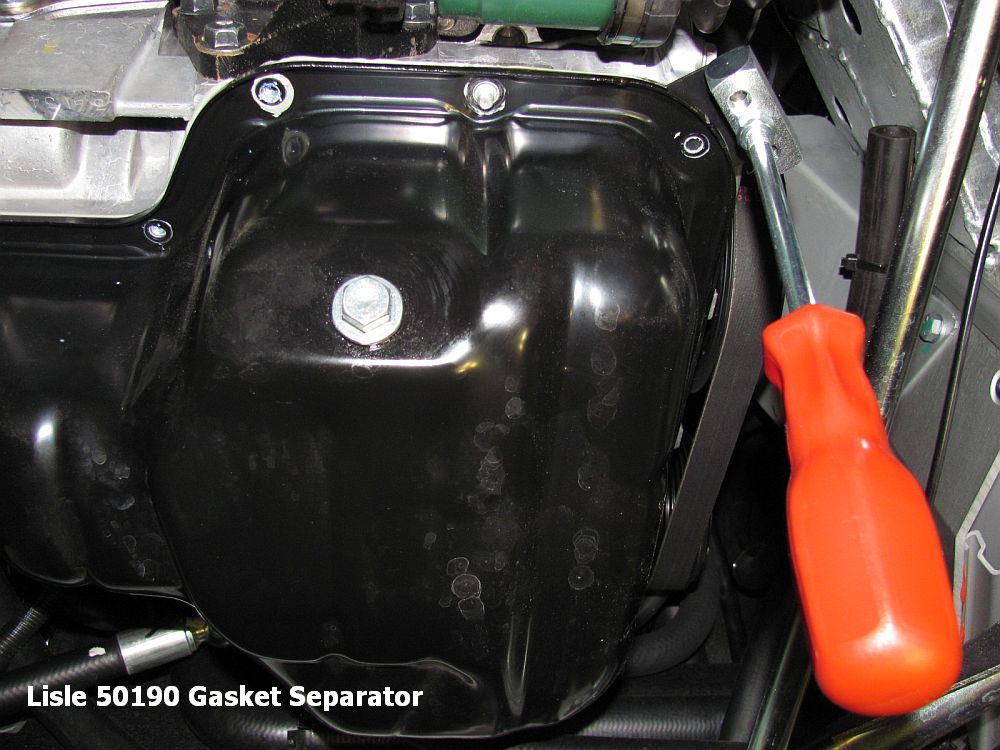
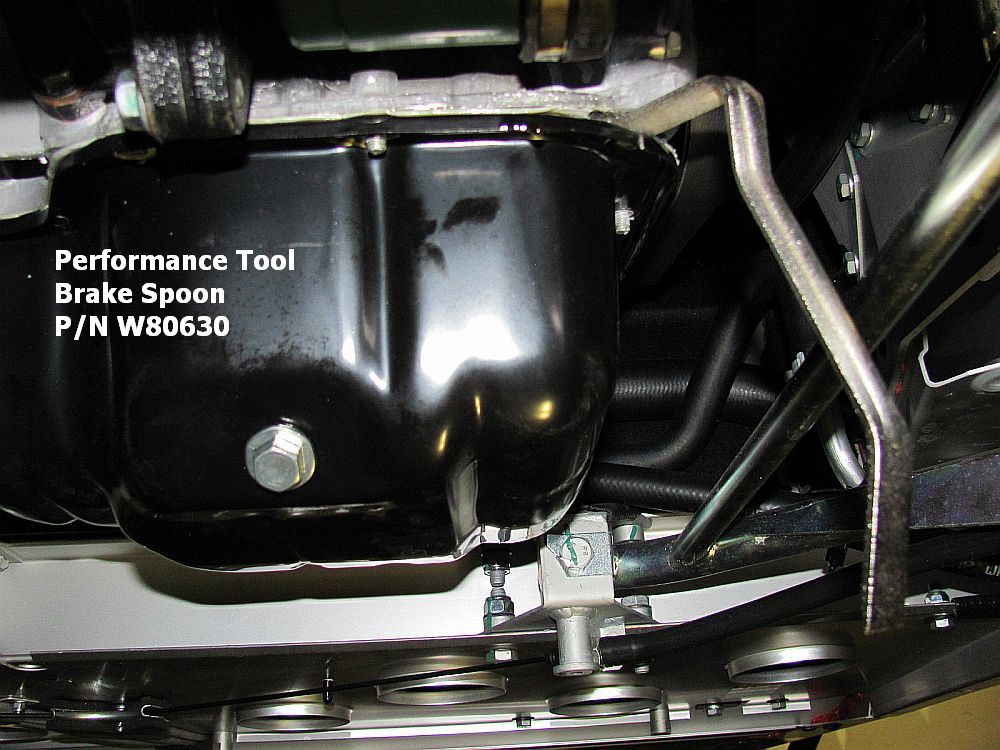
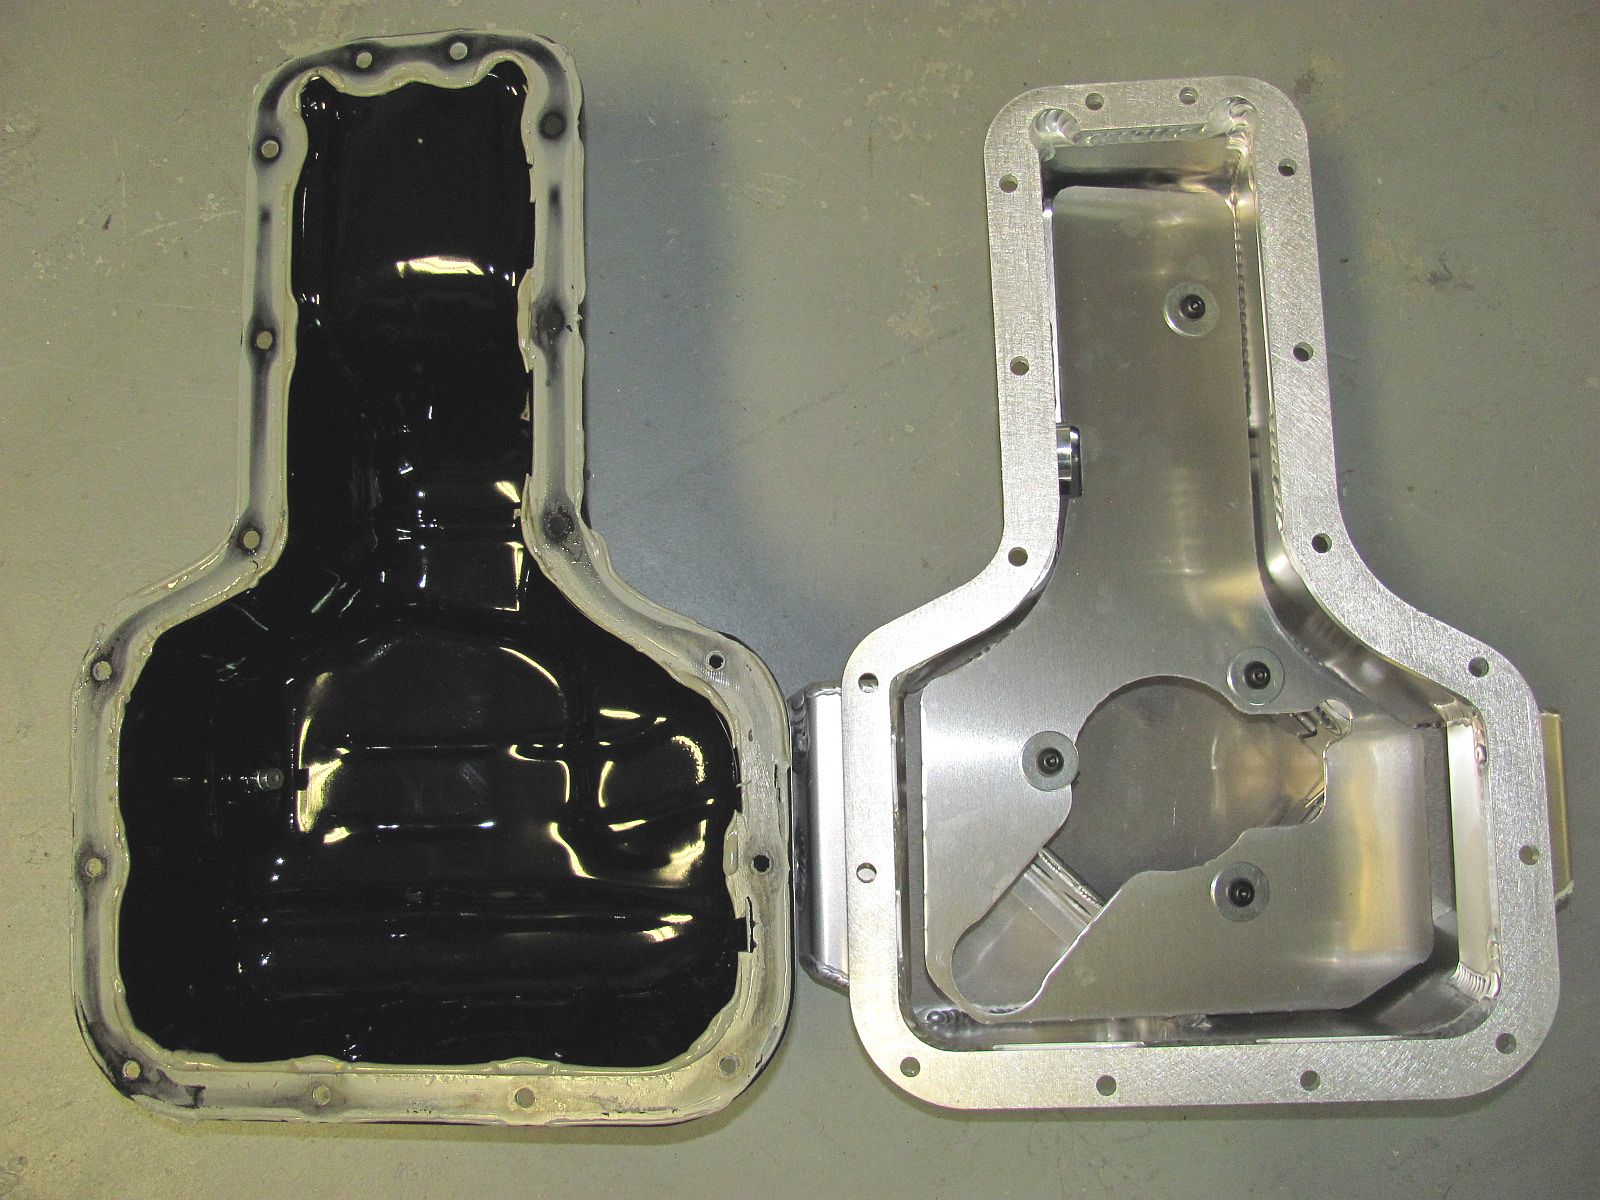
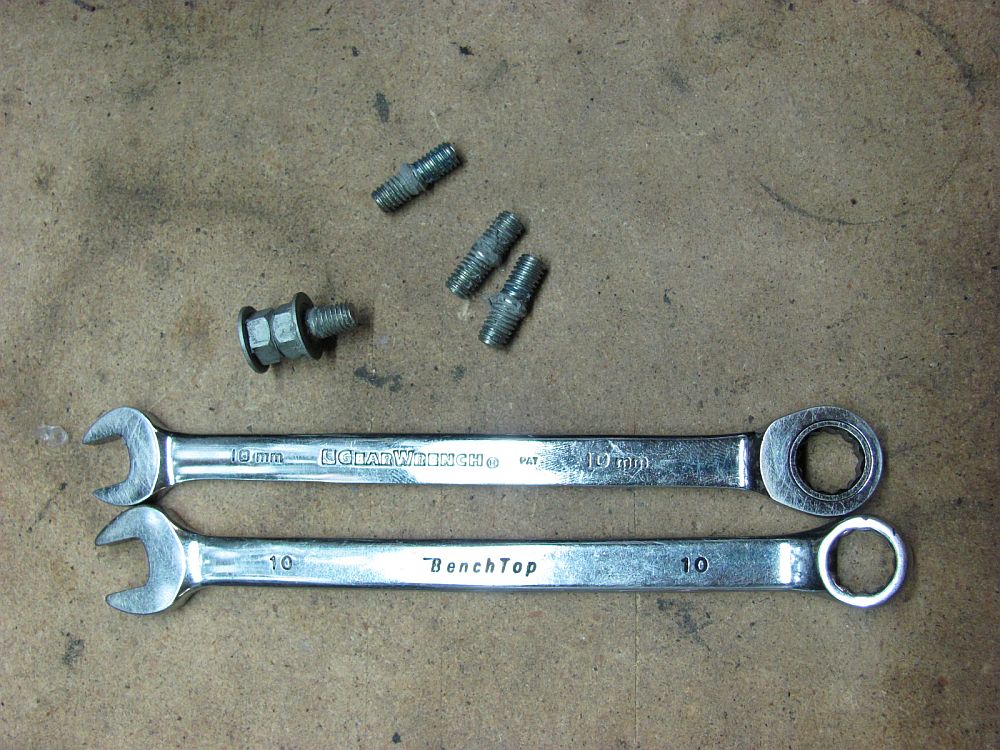
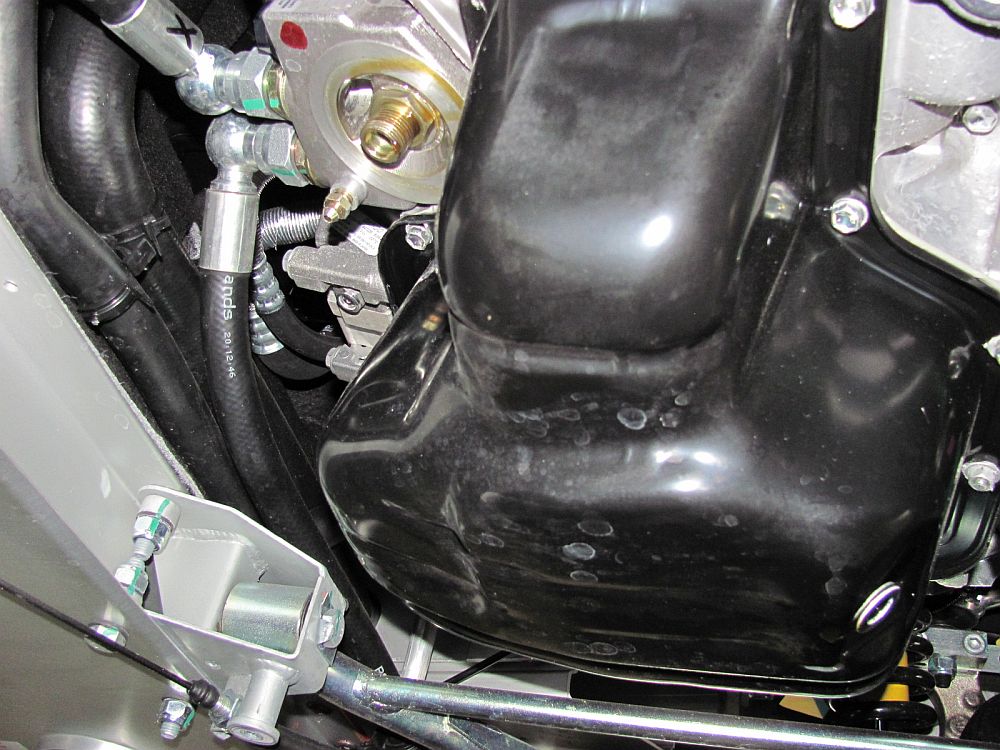
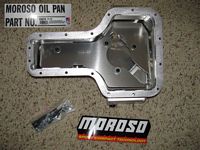
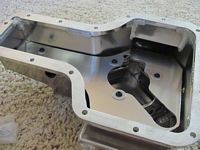
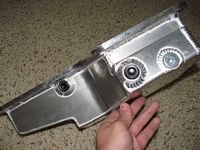
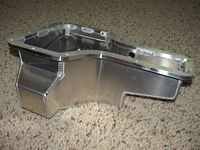
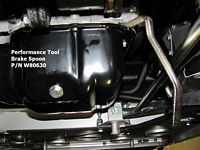
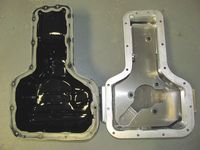
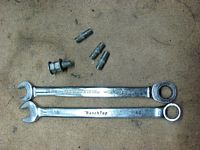
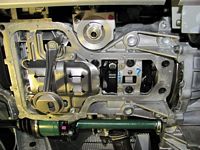
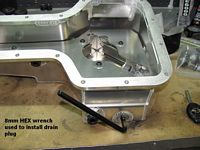
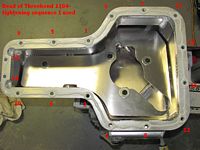
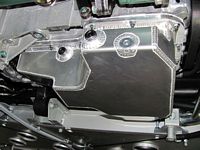
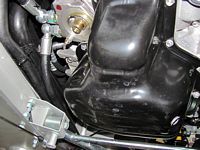
Moroso oil pan (P/N 20970) from Race-Mart arrived in time for my 1k mile oil change. The hardest part of the job is removing the OE oil pan. The flywheel has a plastic cover that is removed by snapping it out of place at the end of the pan. All of the nuts and bolts are removed using a ratchet/extension/10mm socket. I then used a Lisle Gasket Separator (P/N 50190) to start the process at the pry tab located on the right rear corner. This puts a small dent in the job but since the separator does not have the strength to pry the pan off, a Brake Spoon is used as a mini pry bar to pull the pan down and break the sealant bond, pan is easily removed by hand at this point. Oil pan removal VIDEO is HERE. Not nearly as bad as I thought it would be. The remaining four studs can be removed using the double nut trick or vice grips.
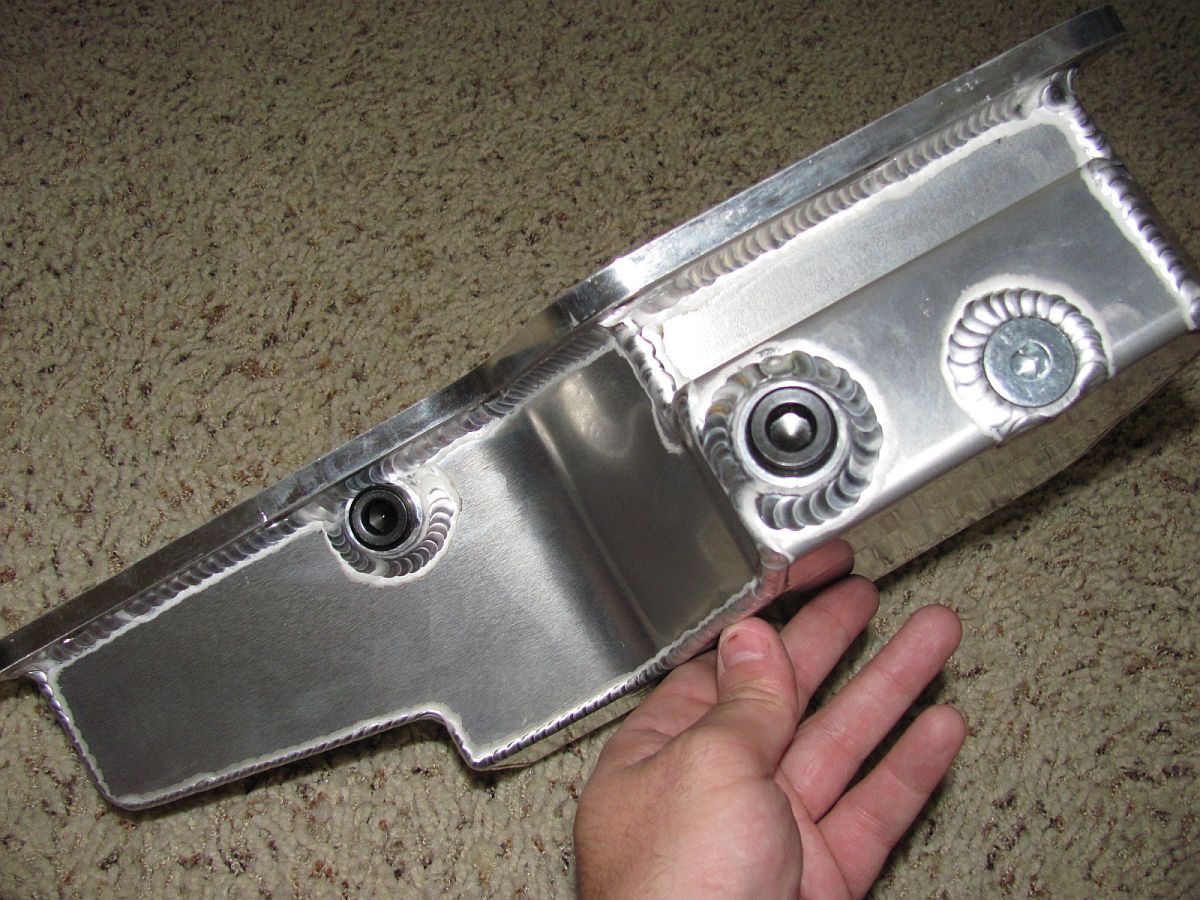
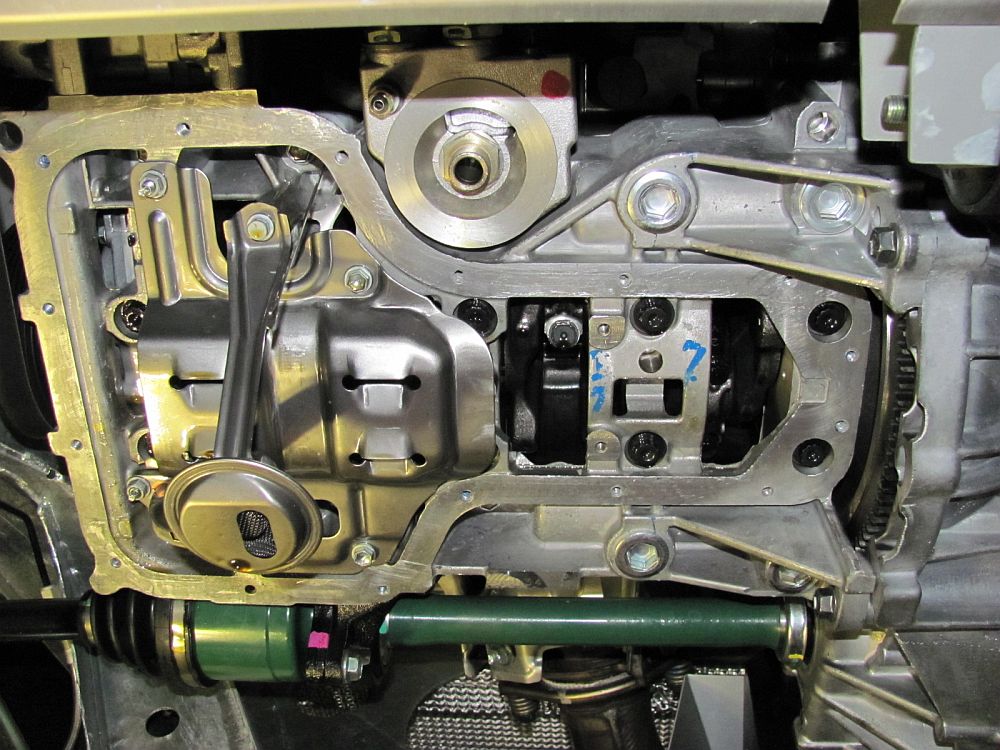
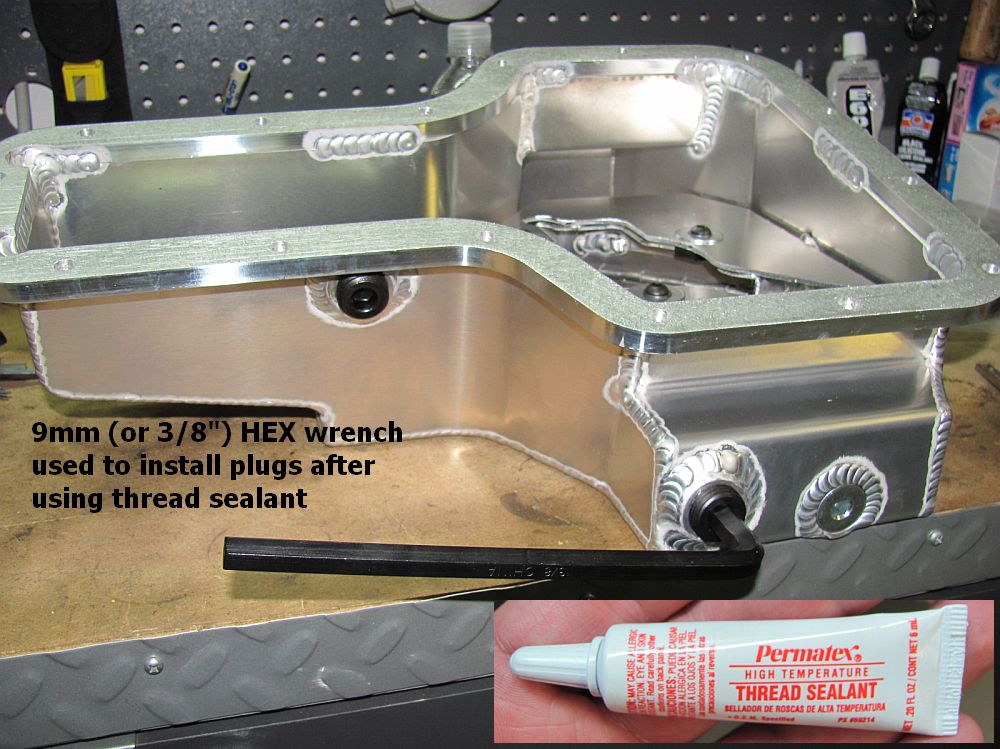
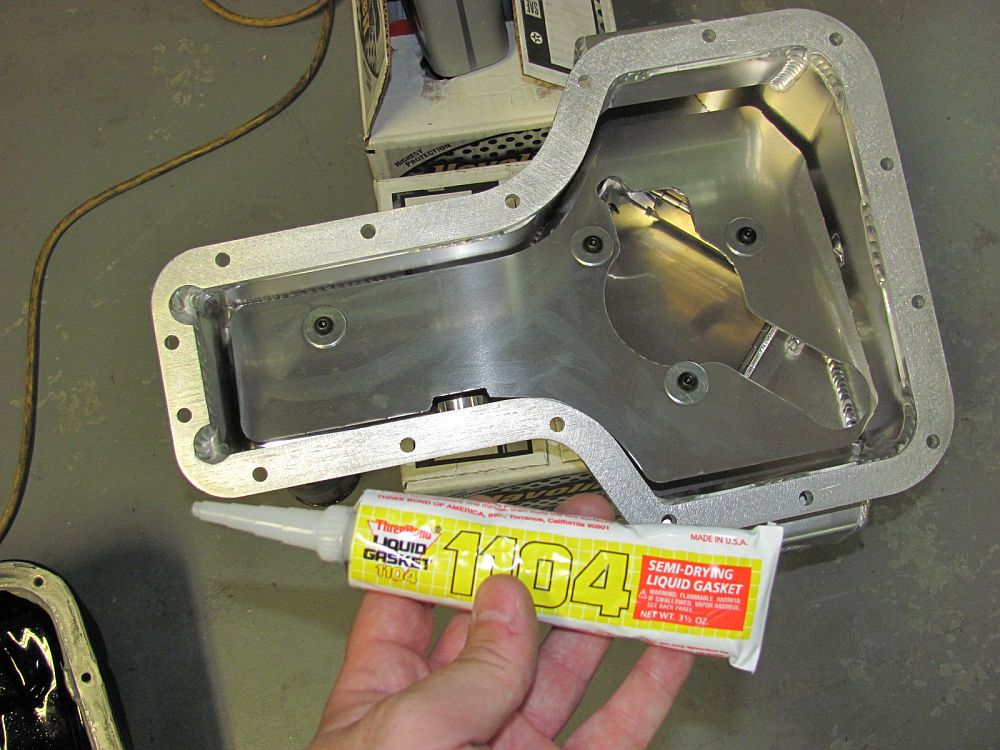
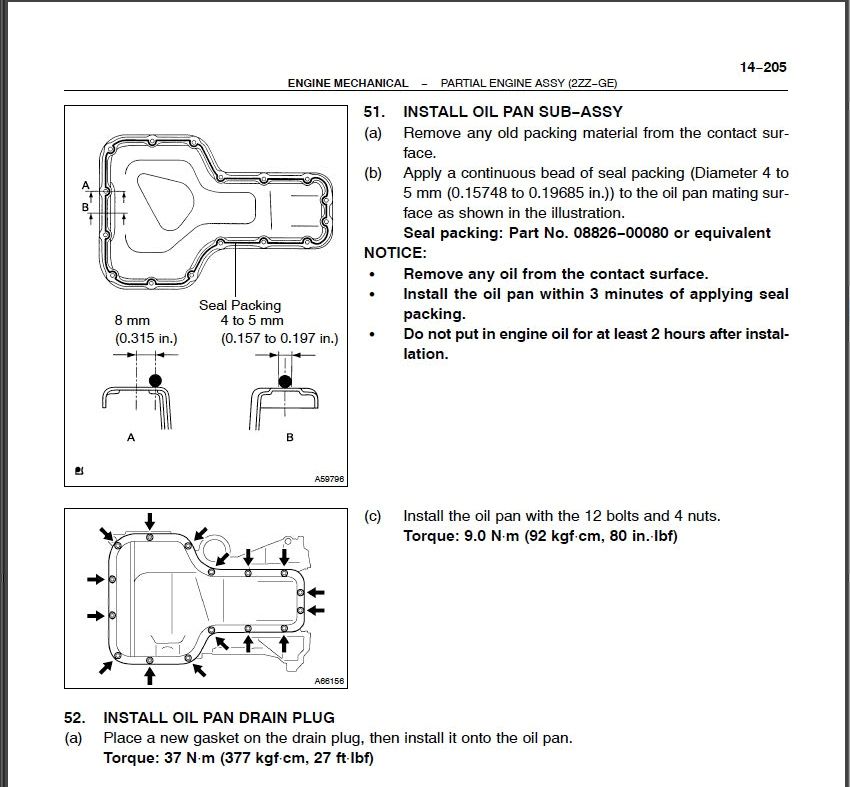
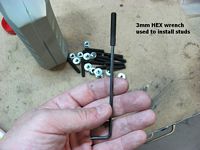
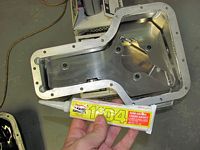
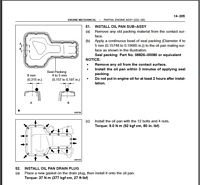
After cleaning the small amount of gasket sealer off the motor with a razor blade, I used brake cleaner to wipe down the oil pan and motor contact points. The supplied Moroso studs were then installed with blue LocTite using a 3mm HEX wrench, but the four studs closest to the flywheel were NOT installed to allow the pan to slide in place easily- these were installed once the pan was in place and the other nuts were installed hand tight. I used ThreeBond 1104 (new part number is ThreeBond 1194) as my gasket of choice, a 1/8" bead was applied around the pan and each bolt hole on the pan. For the 1104 it only takes a minute to set and then the pan can be installed. Nuts were installed less than hand tight all around and then hand tightened (not super tight) starting at the center and working alternating sides and outward left to right until all were installed. I bought an inch/lbs torque wrench for this project, the Toyota specified torque is 80 inch/lbs. Again, the same sequence was used to torque the nuts. I let the pan set for a few hours and then added 6 quarts of oil, this was near the 3/4 mark to full after the engine was started and the oil filter filled.
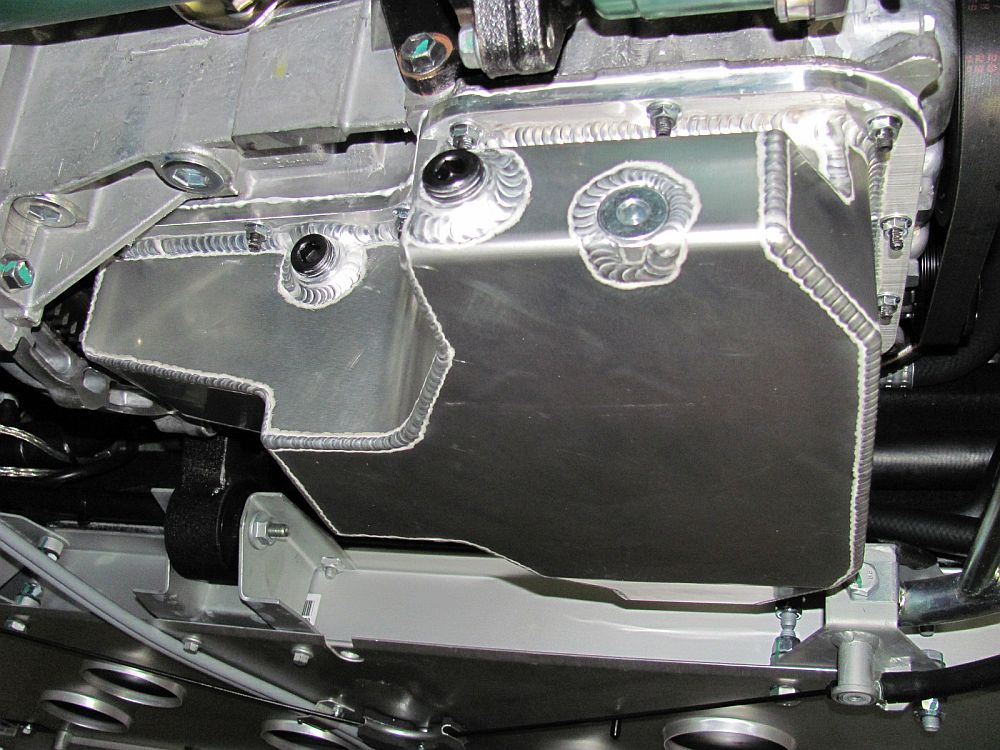
I did not have to modify the pan or engine in any way during the installation, dipstick fully functional but does need to be inserted the same way it has been since the engine was installed as it has a natural curve now and trying to install it 180 degrees the other way it will hit the baffle. Also note that the a-arm bolt can be removed for service with the oil pan in place.
Some forum threads about the Moroso oil pan are HERE (compares oil pans) and HERE (discusses two types of Moroso oil pans), article about manufacturing process is HERE.


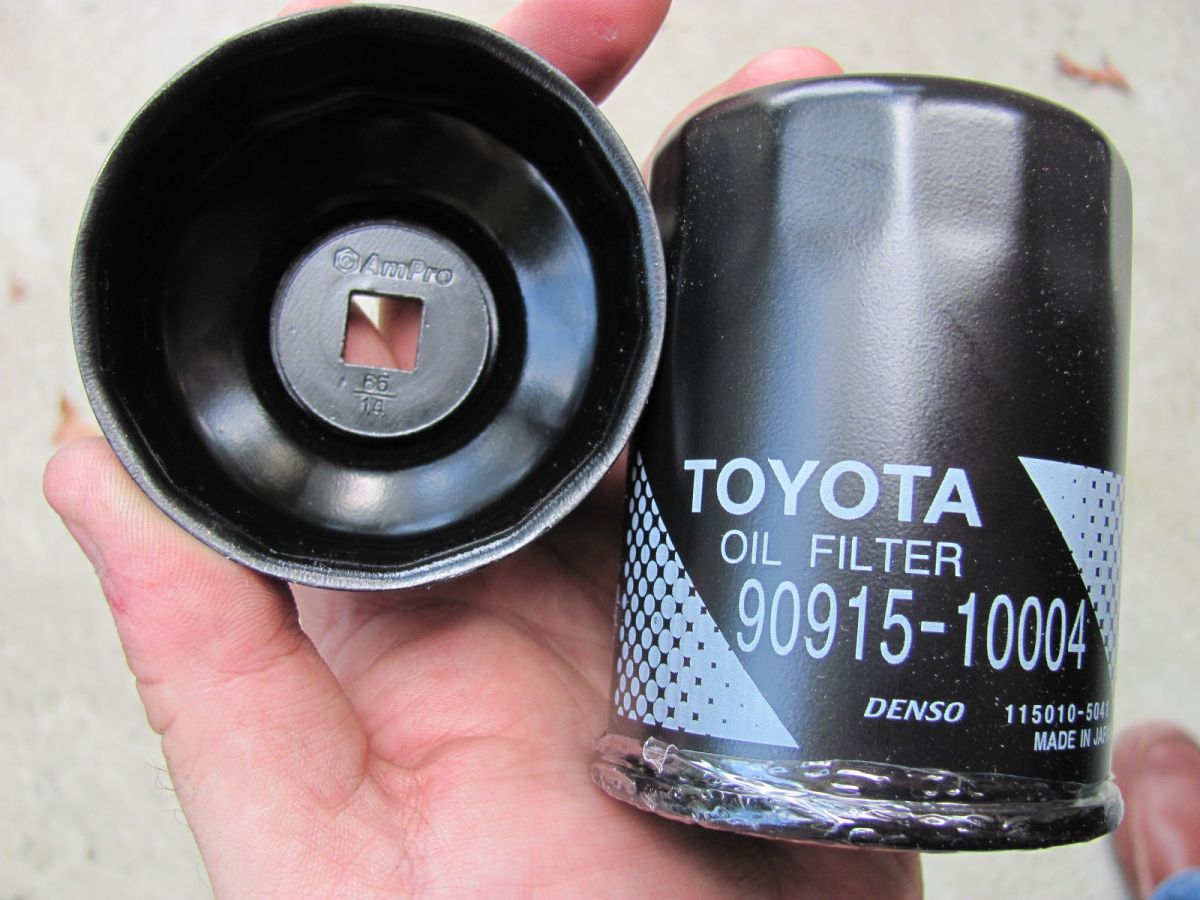
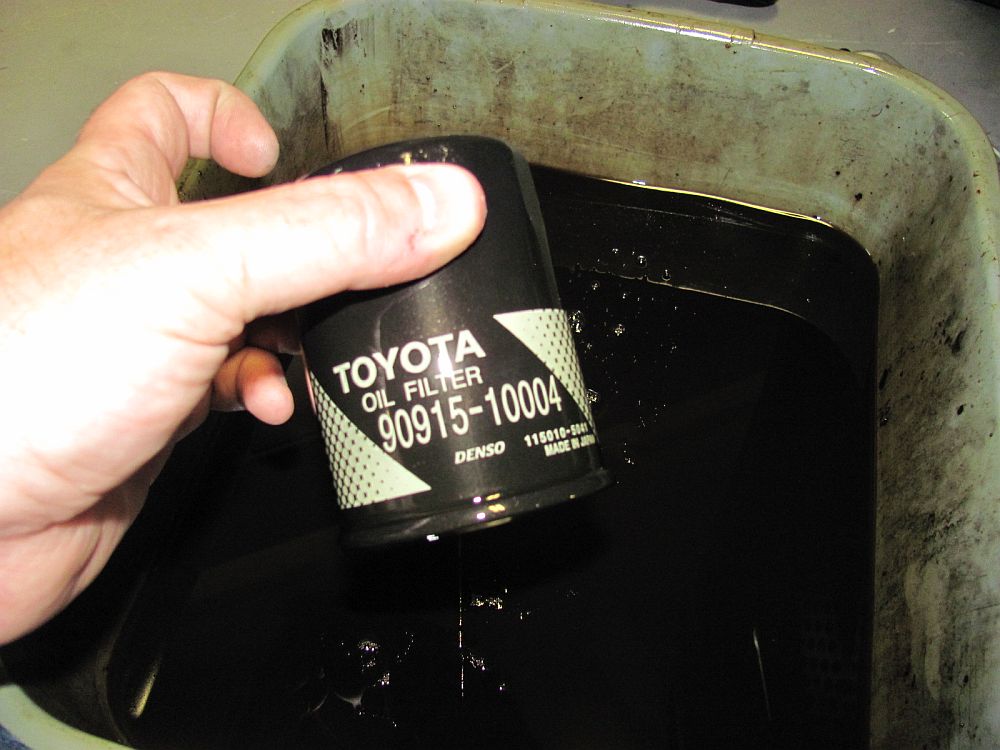
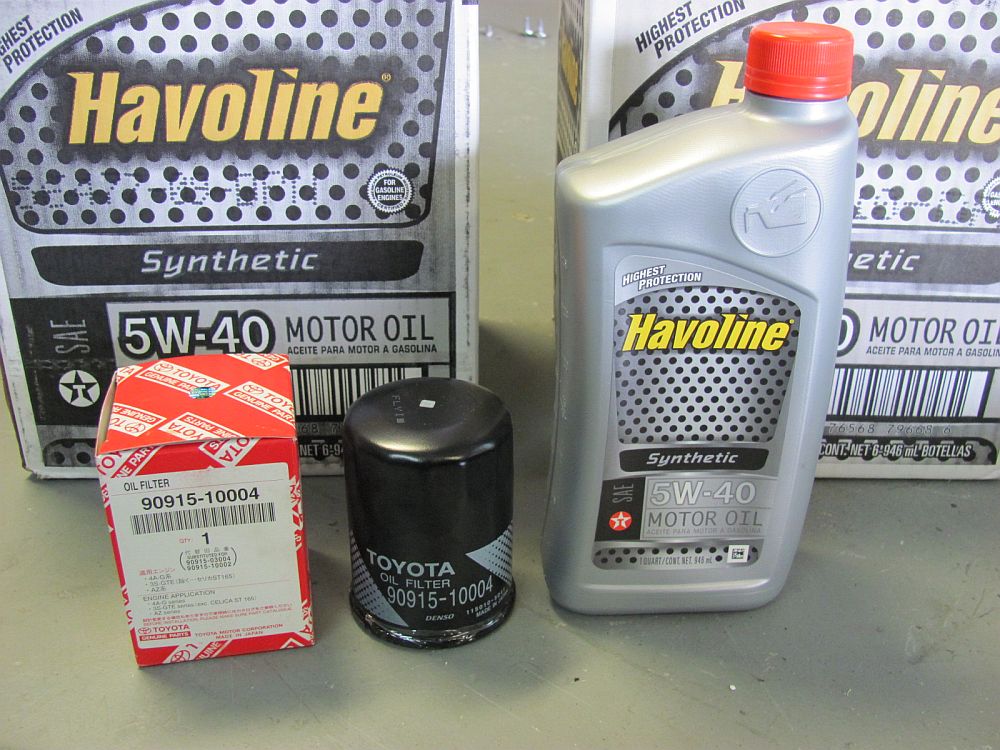
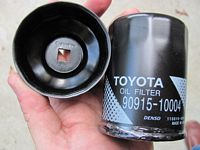
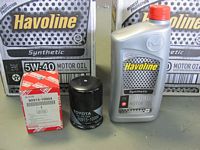
Oil was changed while installing the Moroso oil pan above. I stuck with factory oil and filters for this 1k mile oil change, Havoline 5w40 Synthetic and Toyota Oil Filter P/N 90915-10004 (order as P/N 90915-10004A from Lithia Toyota Parts- thanks to Karl for the heads up since these are supposedly NLA in the US).
The oil change details at Sands Mechanical Museum were used and can be found HERE. I used an AmPro 65/14 oil filter wrench to remove the old filter (65 mm, 14 flutes).
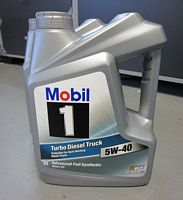
[UPDATE] From the second change forward I will keep using the "good" Japanese Toyota oil filters (stocked up on these for future) but will change to the same Mobil1 Turbo Diesel Truck 5W40 Synthetic Oil that other owners use here in the USA- it is readily available and still has the high ZDDP content these motors need (data sheet HERE and product guide HERE).

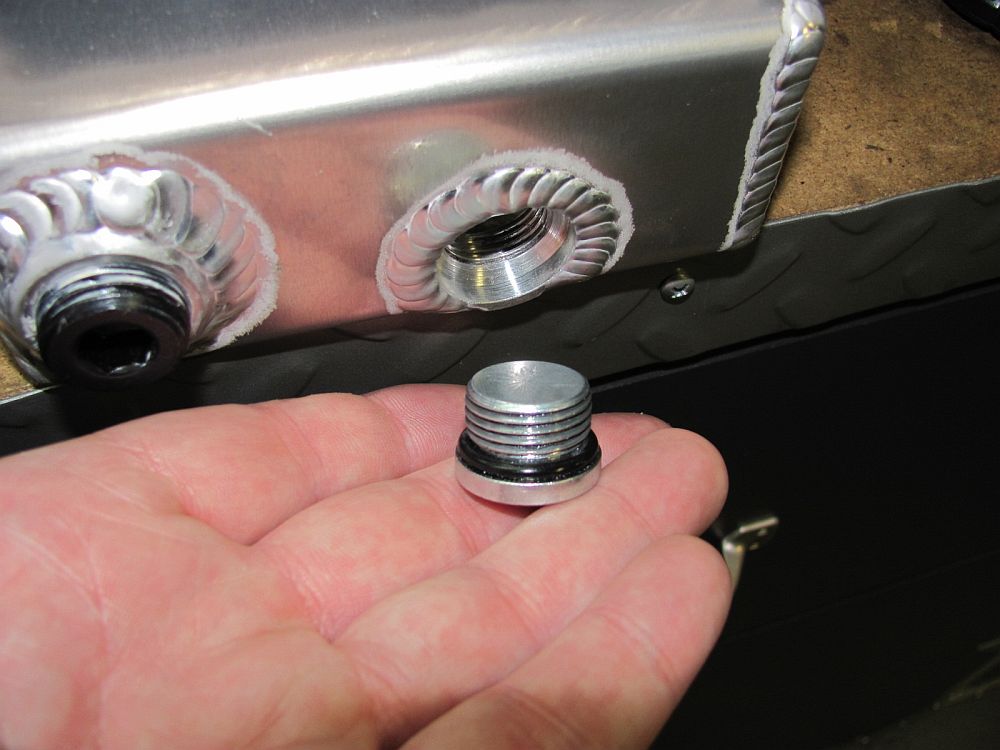
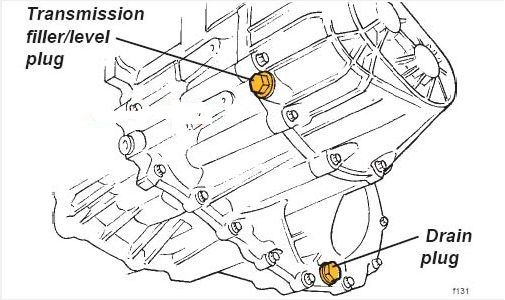
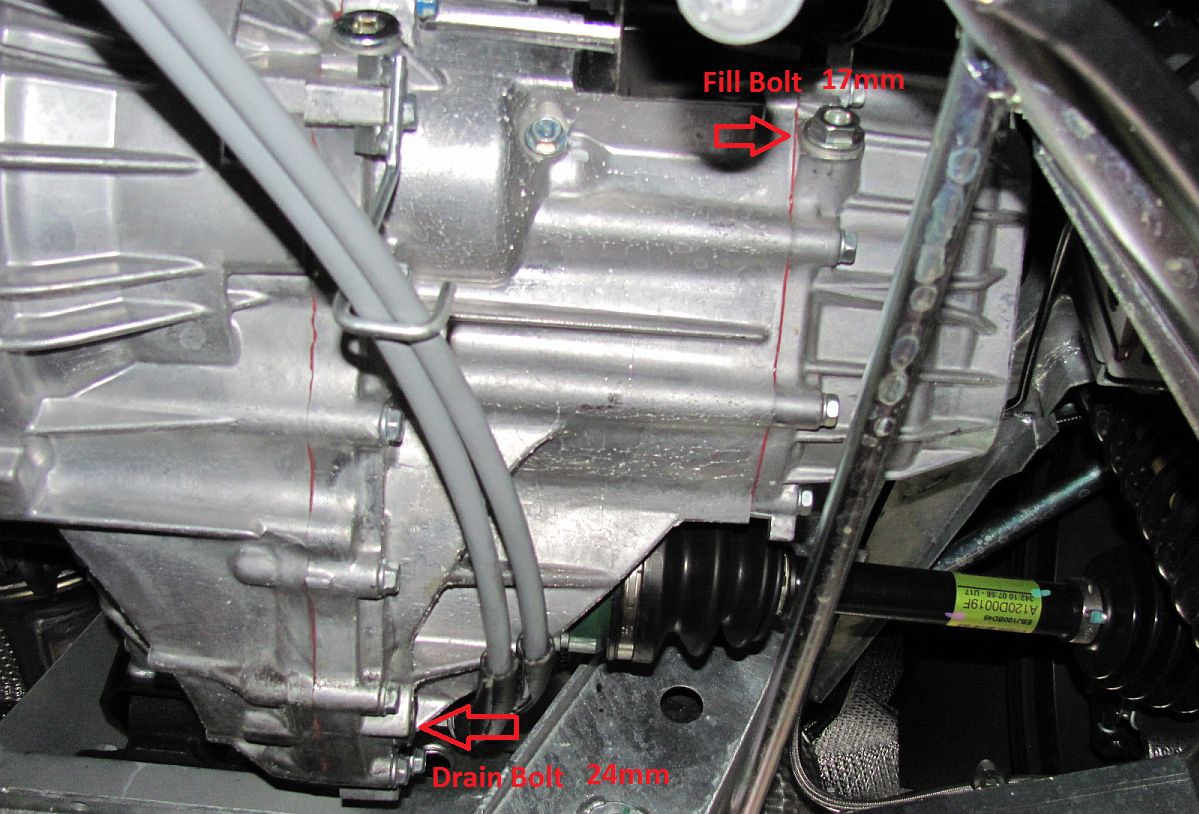
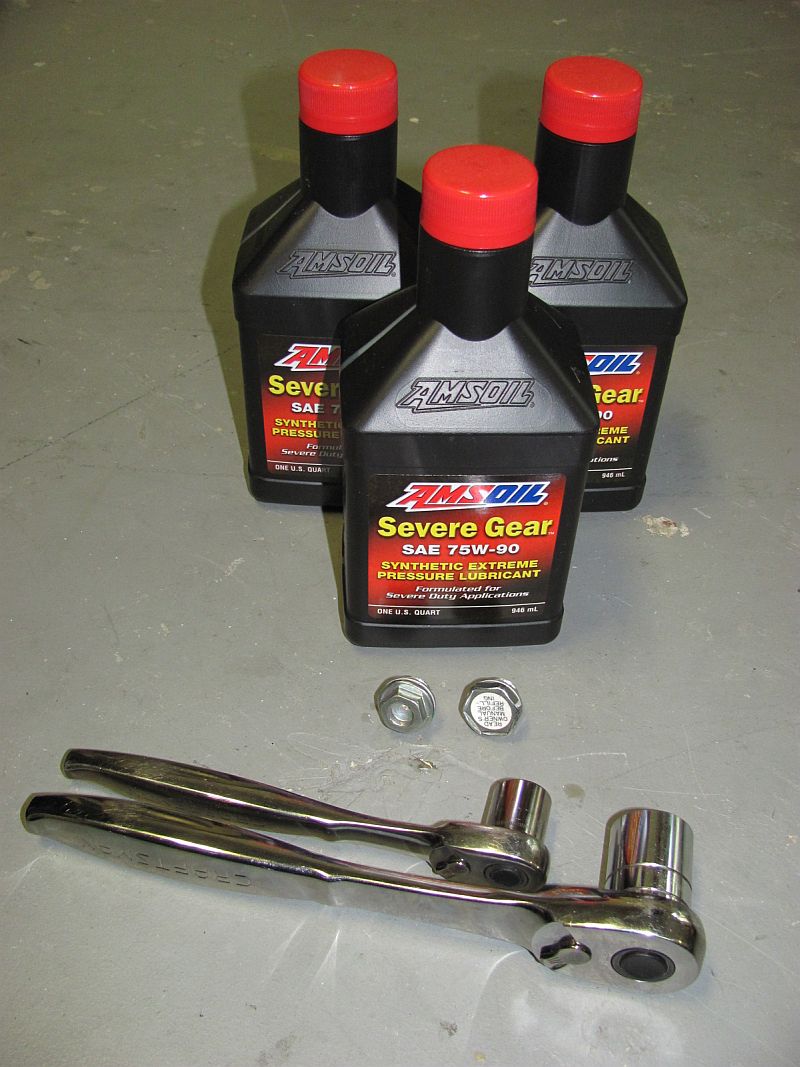
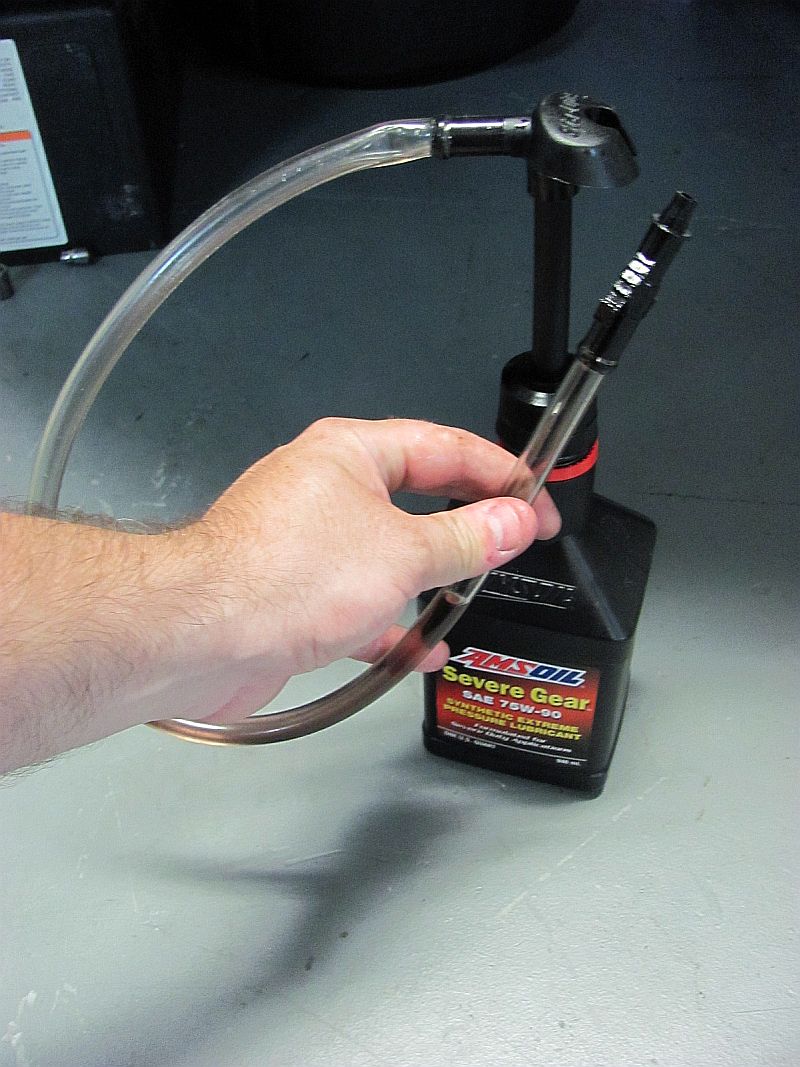
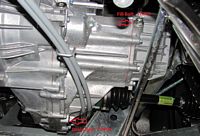
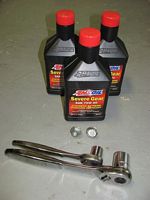
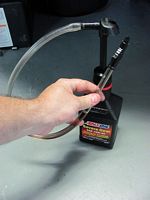
Transmission Oil was also changed at the 1k mile mark to get rid of any break-in metals. I used Amsoil Severe Gear 75w90 (Product Code: SVGQT-EA).
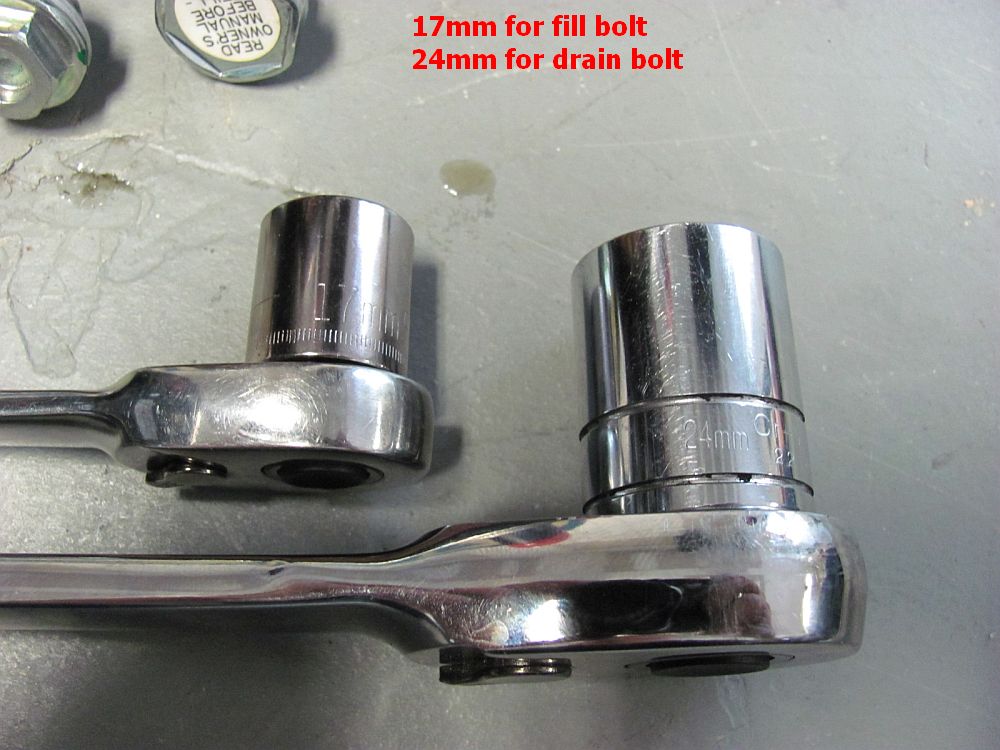
The first step in any fluid change is to make sure the fill bolt can be removed- you don't want to drain the old oil if you can't refill it


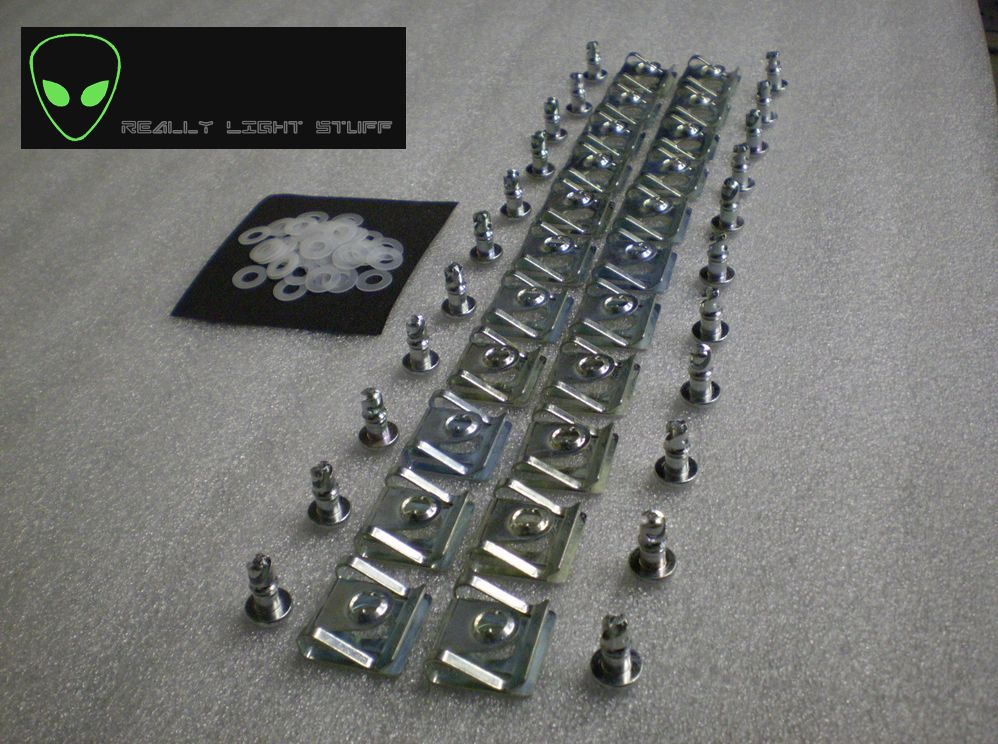
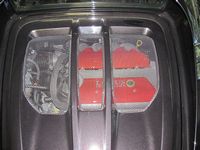
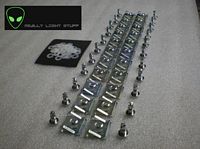
Quarter-Turn Quick Release Kit from Really Light Stuff installed. All parts arrived pre-set for locations and bagged/labeled for easy ID- couldn't get any easier, almost plug and play. Simply remove the bolts and clamp-nuts from your car and replace with the quick release clamp-nut and bolt/retention washer.
The Quarter Turn Kit installation thread is HERE and HERE.
Works GREAT and mine required no adjustments. I did discover that the 2011 has an extra bolt and Thomas was kind enough to send me an extra after I sent him an IM on LotusTalk, he responded within a few hours and this was after business hours in the evening- great customer service
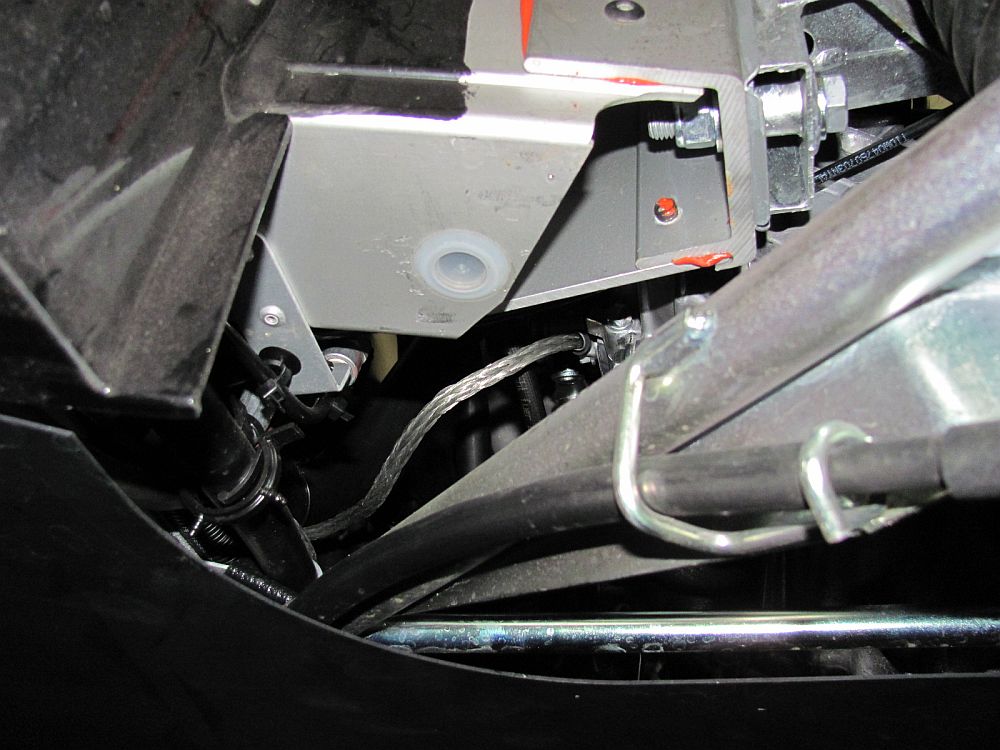
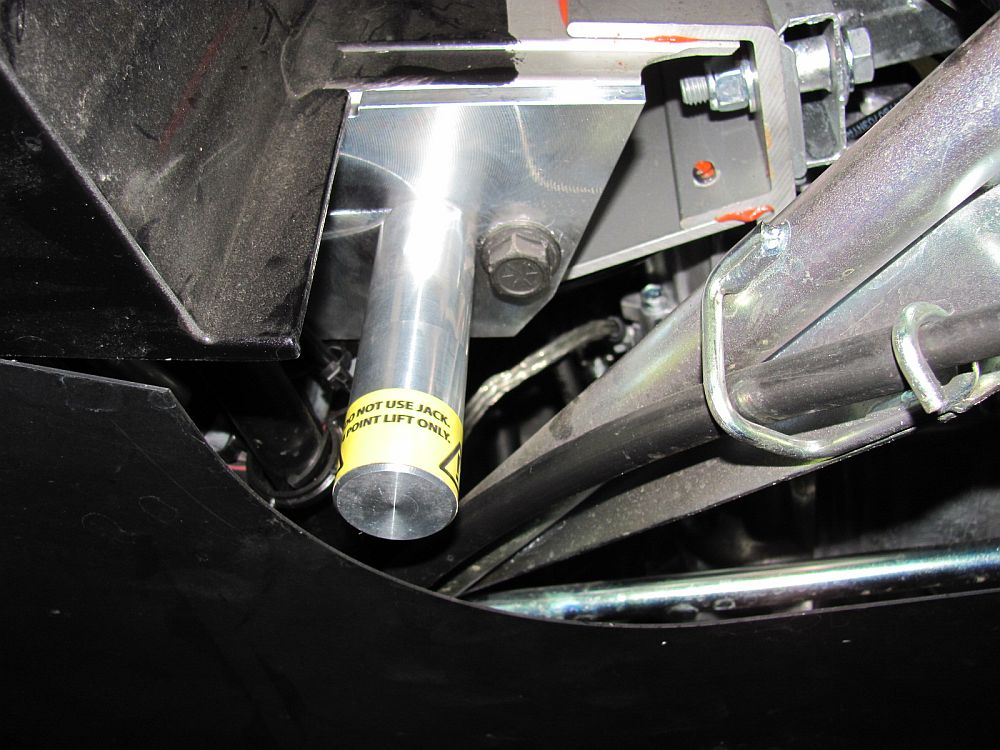
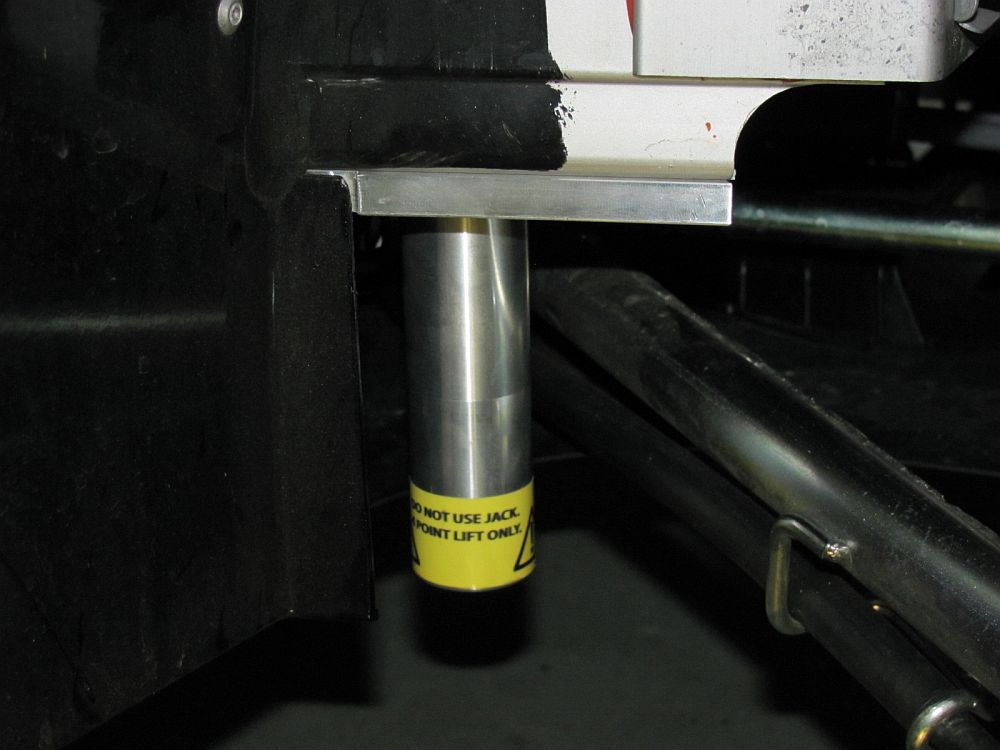
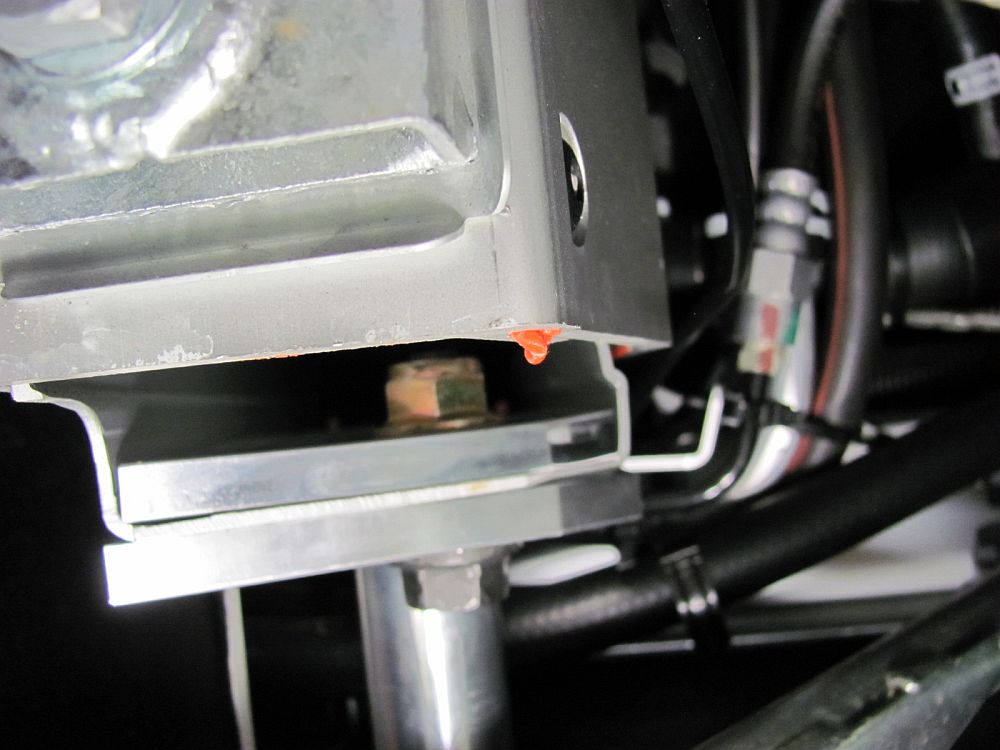
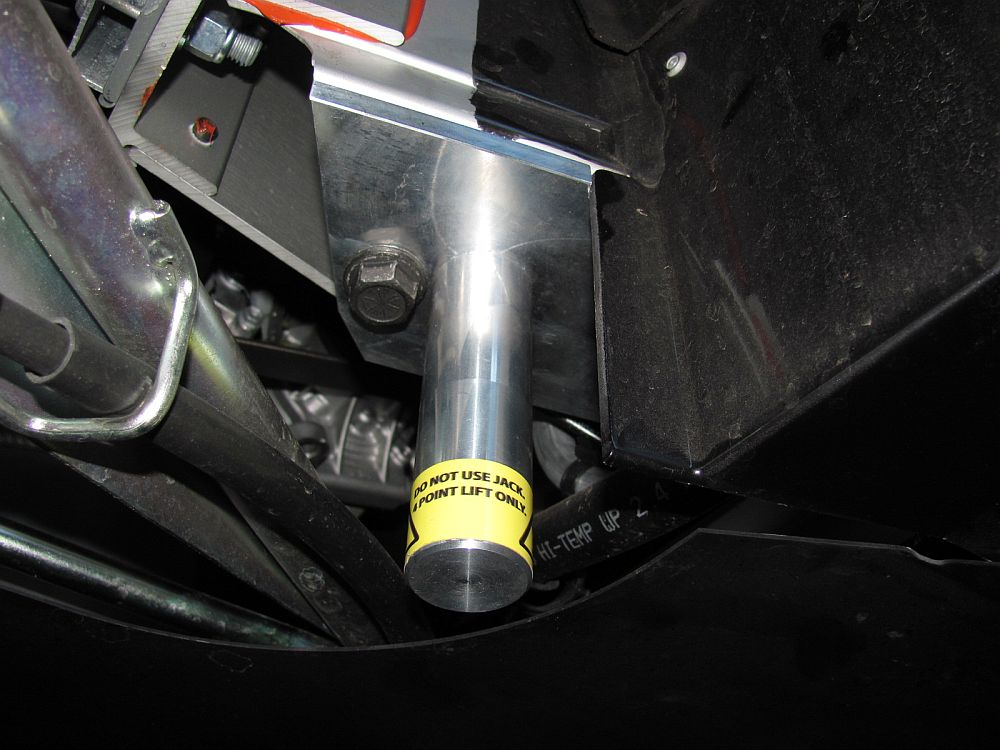
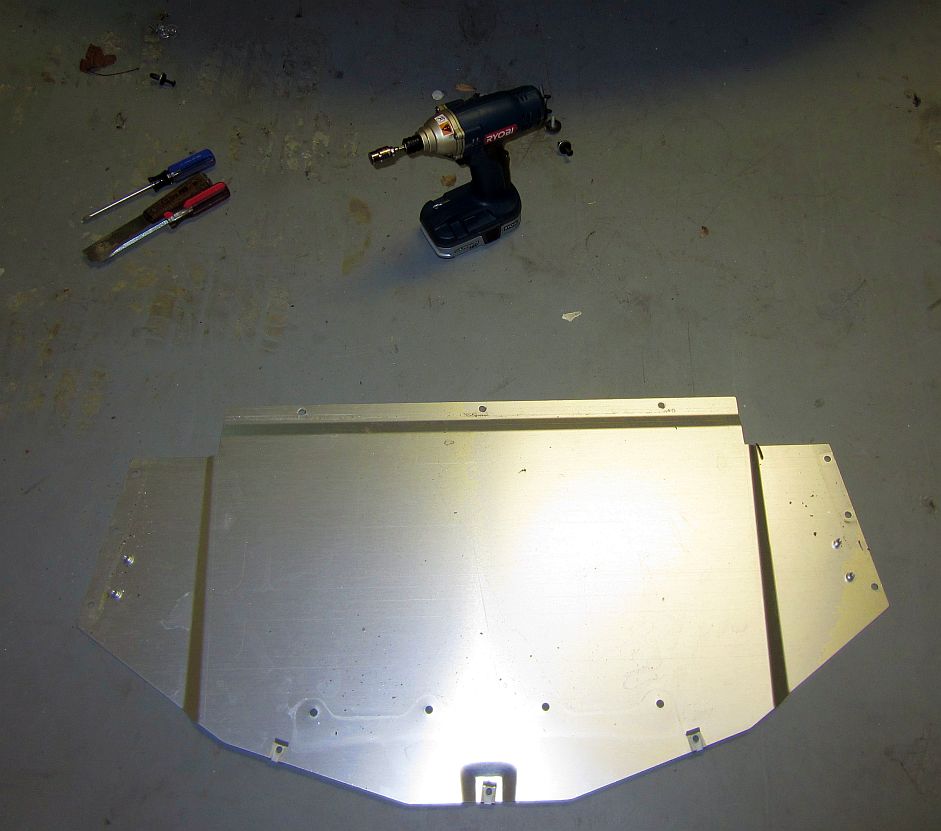
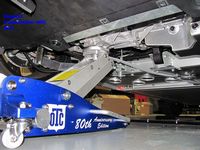
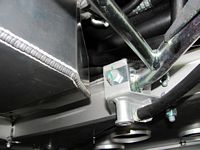
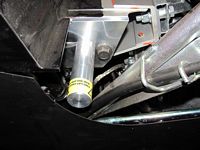
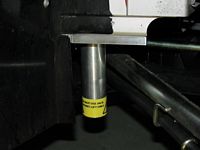
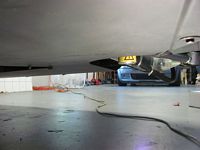
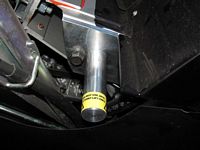
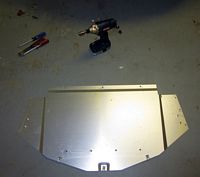
Installed the rear lift point kit from Monkey Wrench Racing that EliseTalk's tesprit came up with as a means to allow a lift to be used for the Elise without removing any underbody panels (but allowing the flexibility to do that if access was required while the lift was in use). Installation guide and design drawings from Dan are HERE, MWR includes their instructions with the kit but no pdf available. All pieces were labeled for easy identification. I had installed one of these kits on my 2005 Elise, as seen HERE, and it was one of the mods I decided was a must do this time as well.
Installation involves an 8mm hex wrench, a 19mm wrench, a 19mm socket/ratchet, and some blue LocTite if you don't plan on removing the posts. I didn't plan on removing mine and found it easier to assemble them to the bottom piece prior to mounting the plate on the car. The quality is top notch and installation was straight forward, the posts are not that much lower than the engine under-tray and I am comfortable leaving them mounted. This should make using lifts a lot easier


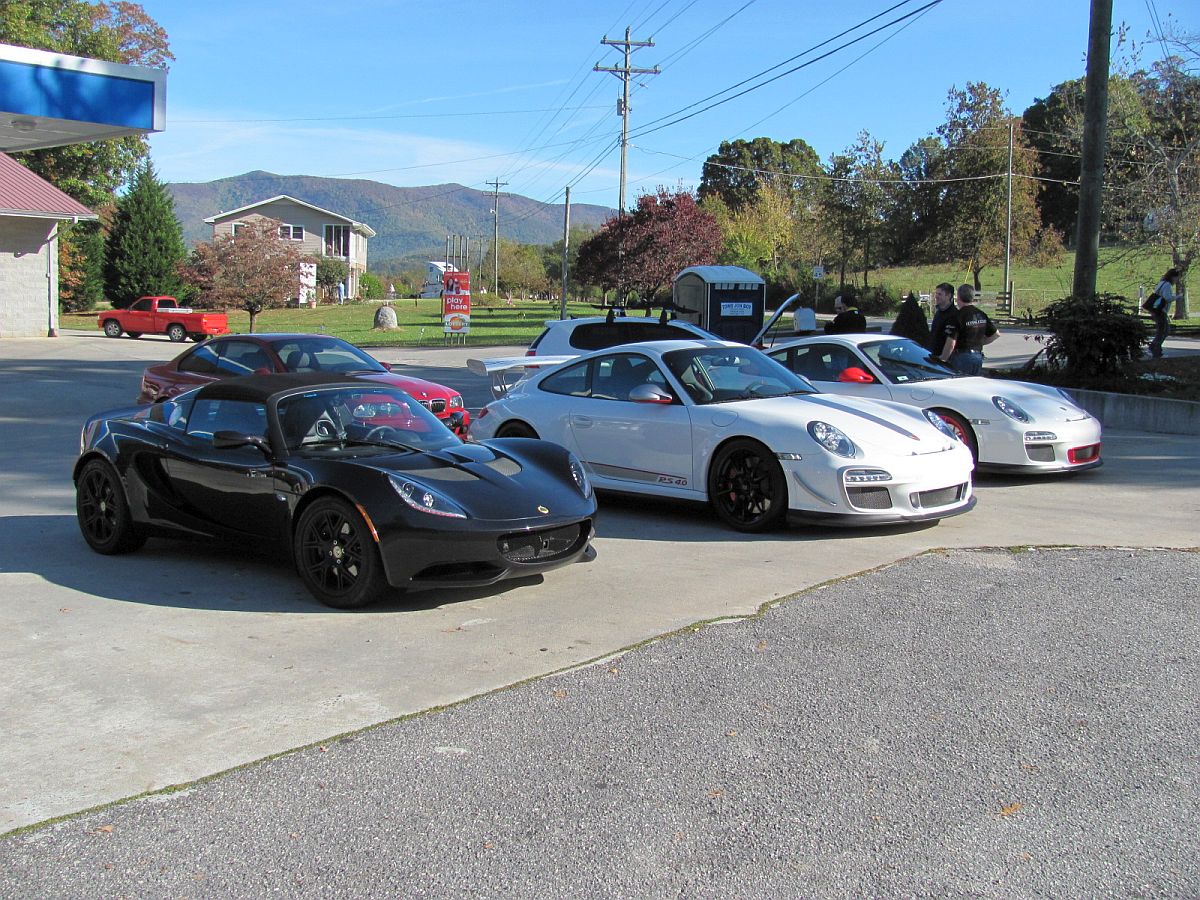
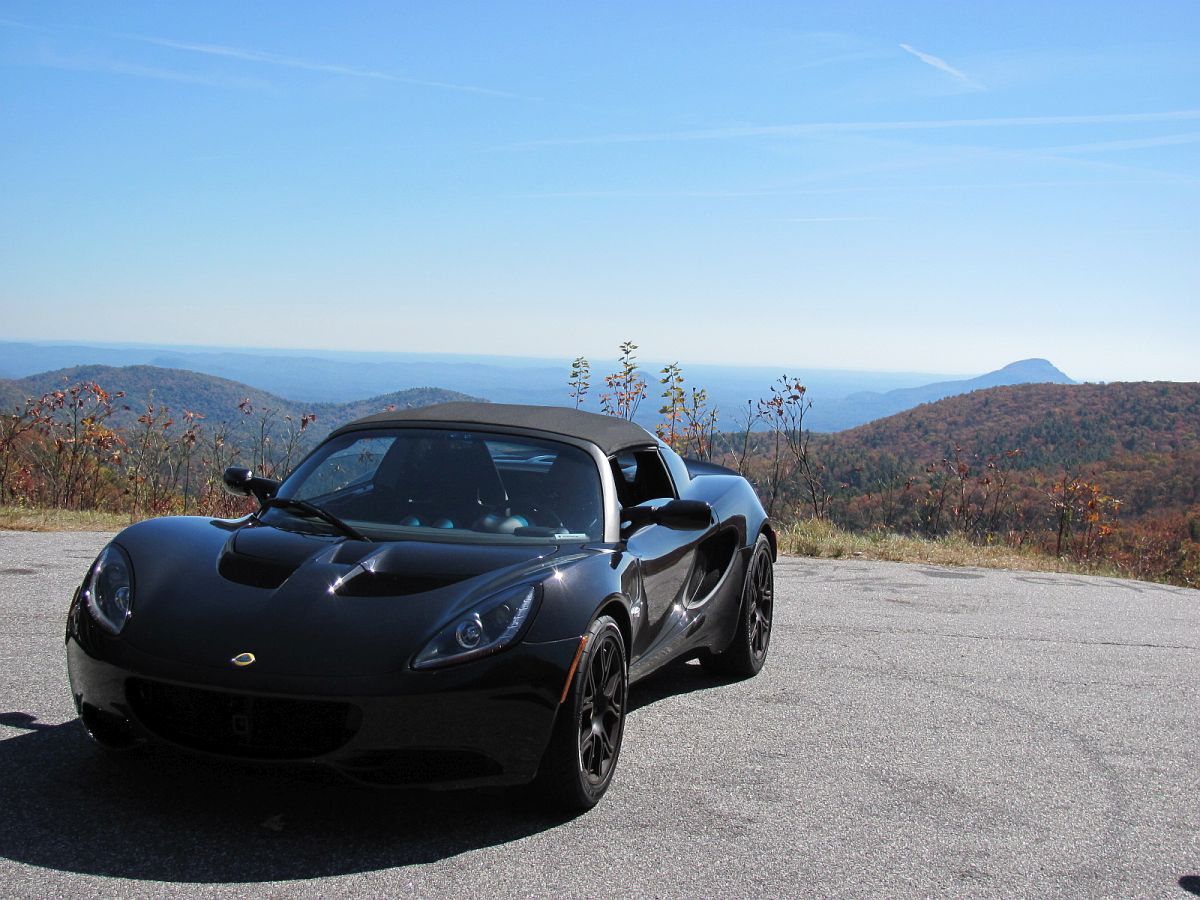
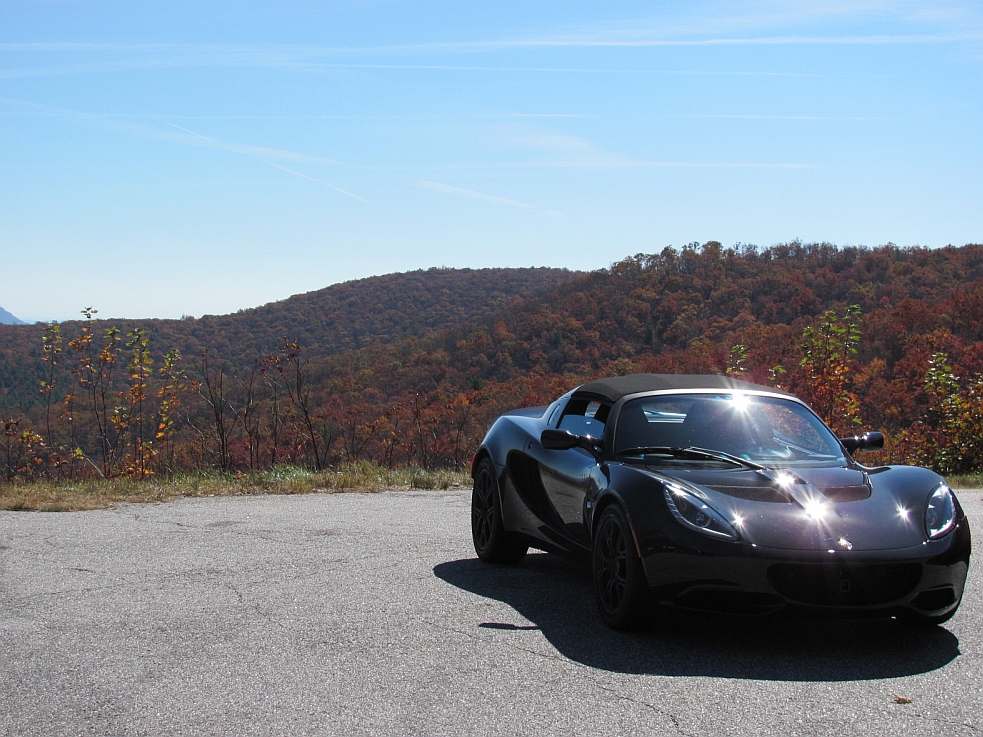
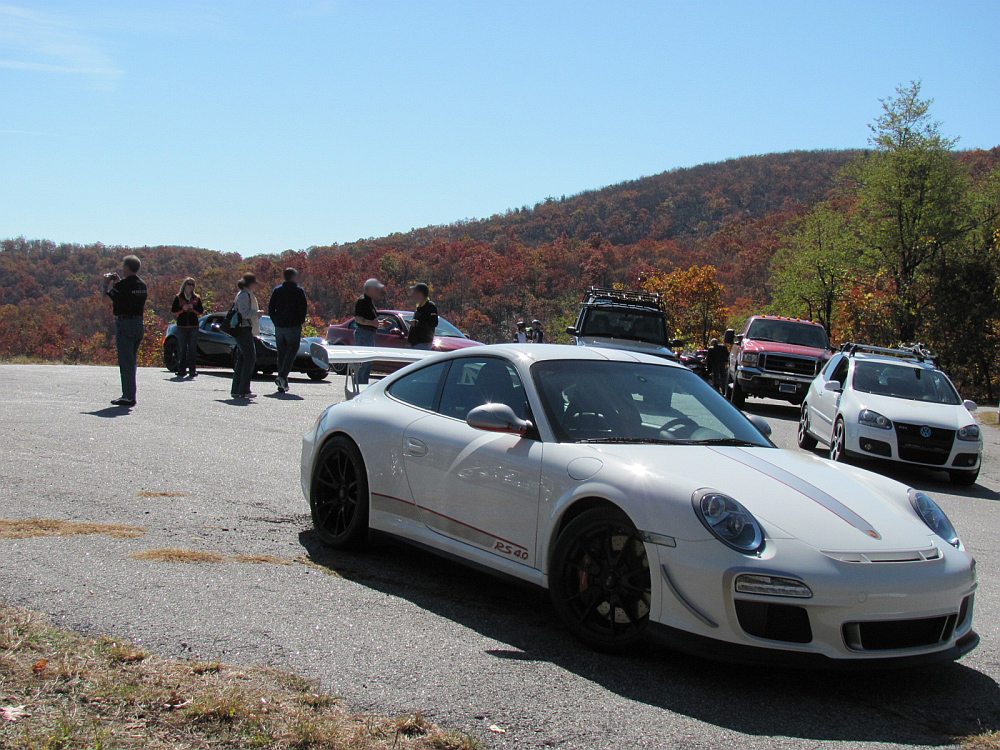
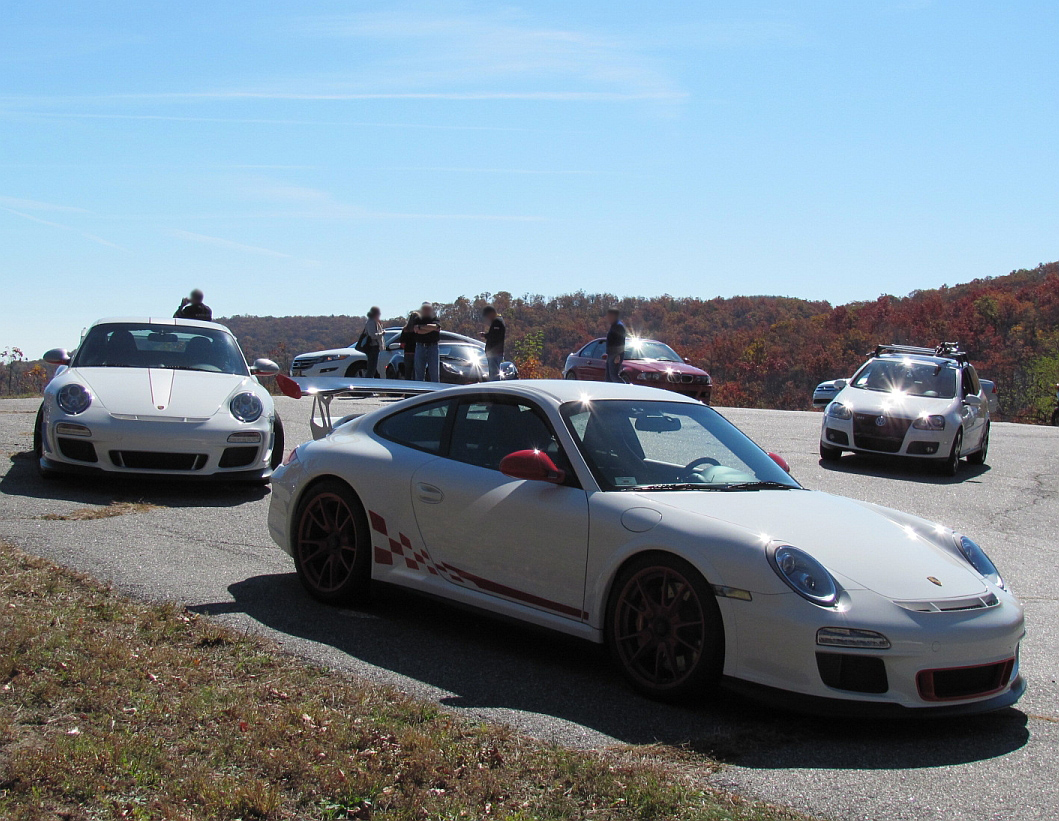
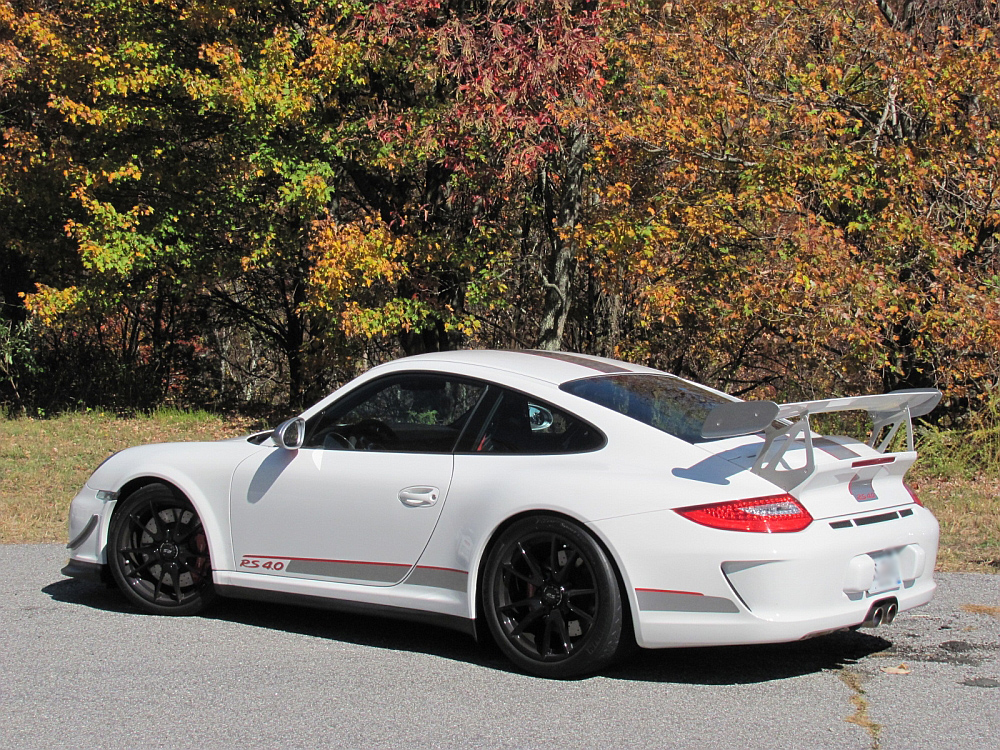
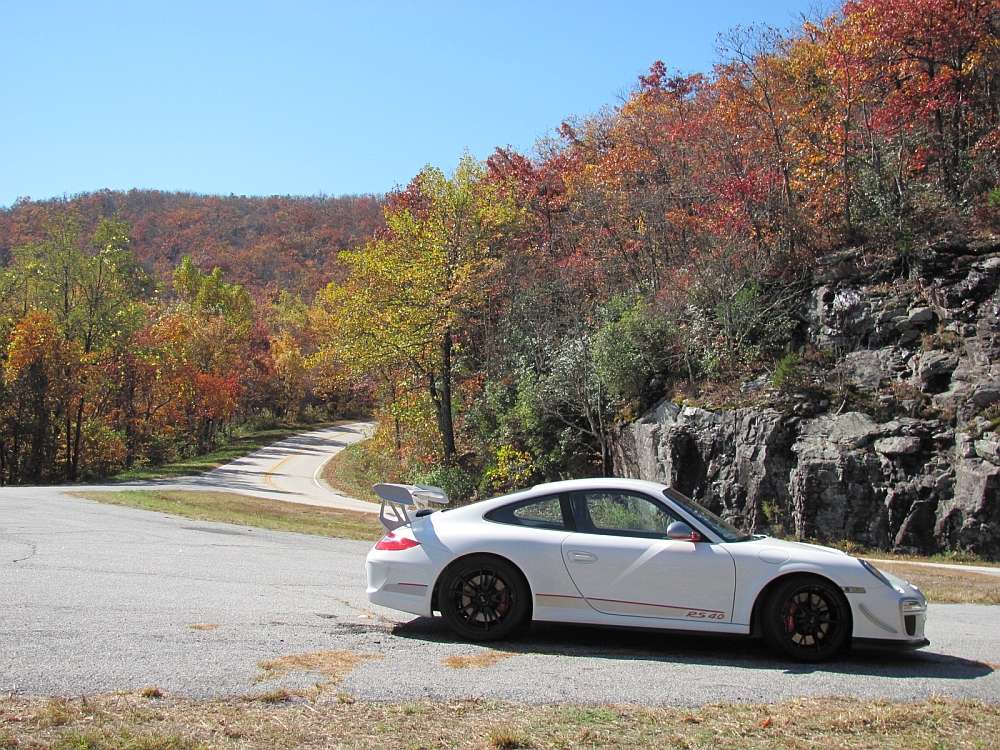
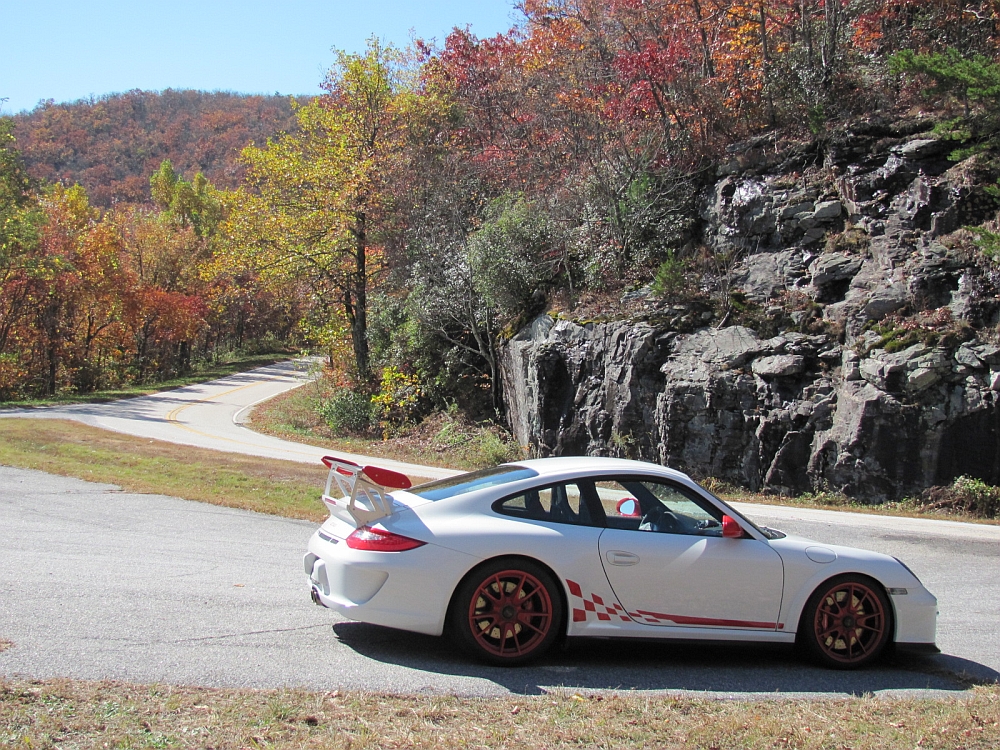
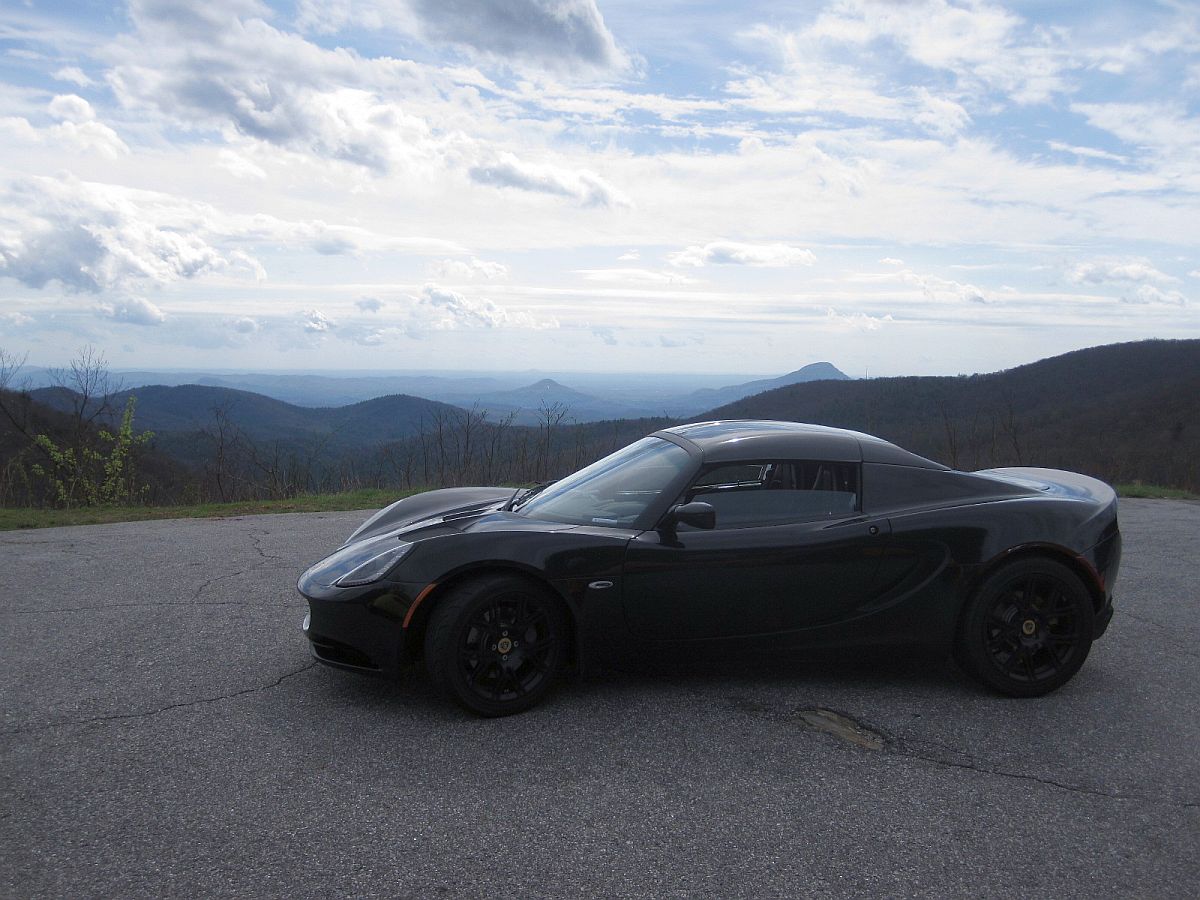
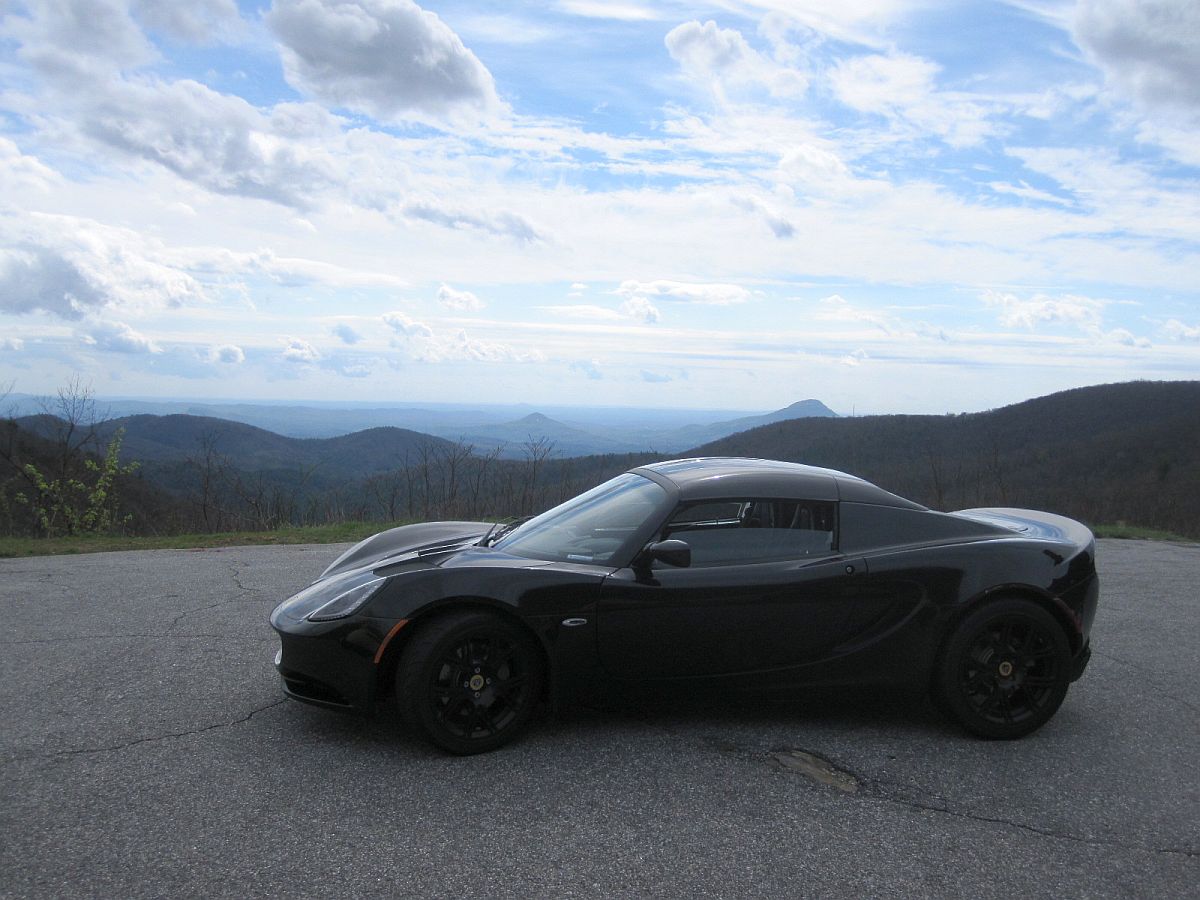
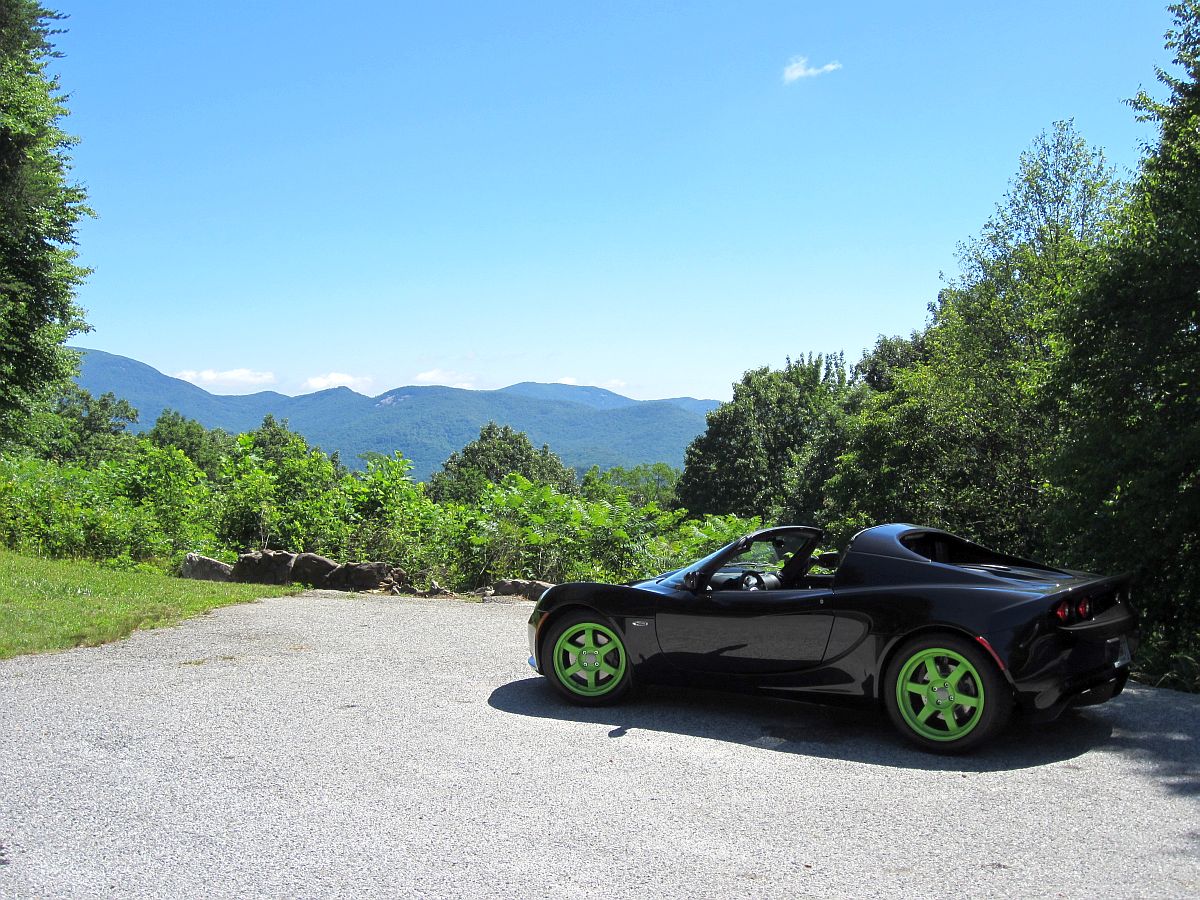
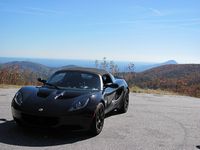
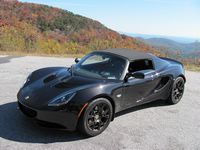
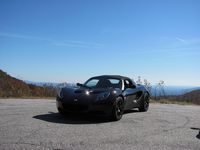
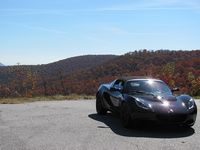
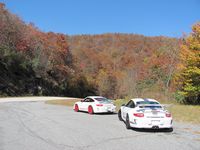
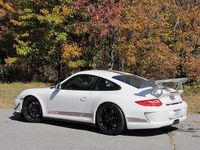
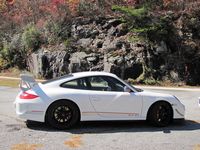
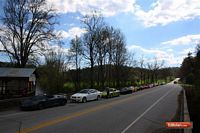
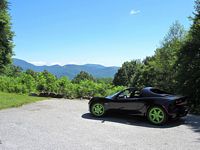
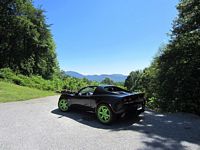
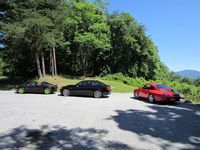
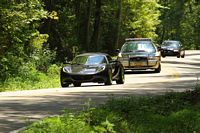
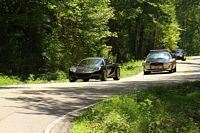
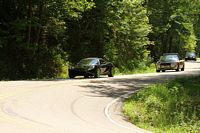
Decided to see how good/bad the new motor mounts were and went on a drive with some friends in the North GA mountains. Traffic was better than expected and the leaves were changing color but the bright sun did not allow for the best pictures with my Canon pocket camera. Got to see some GT3s in action that were on the drive


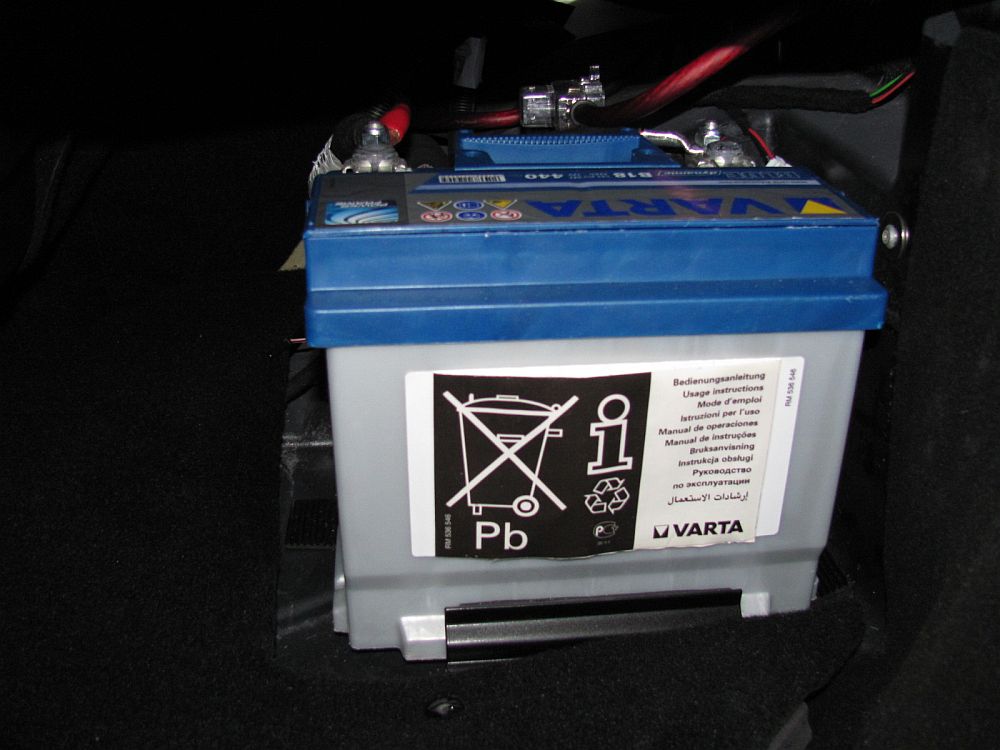
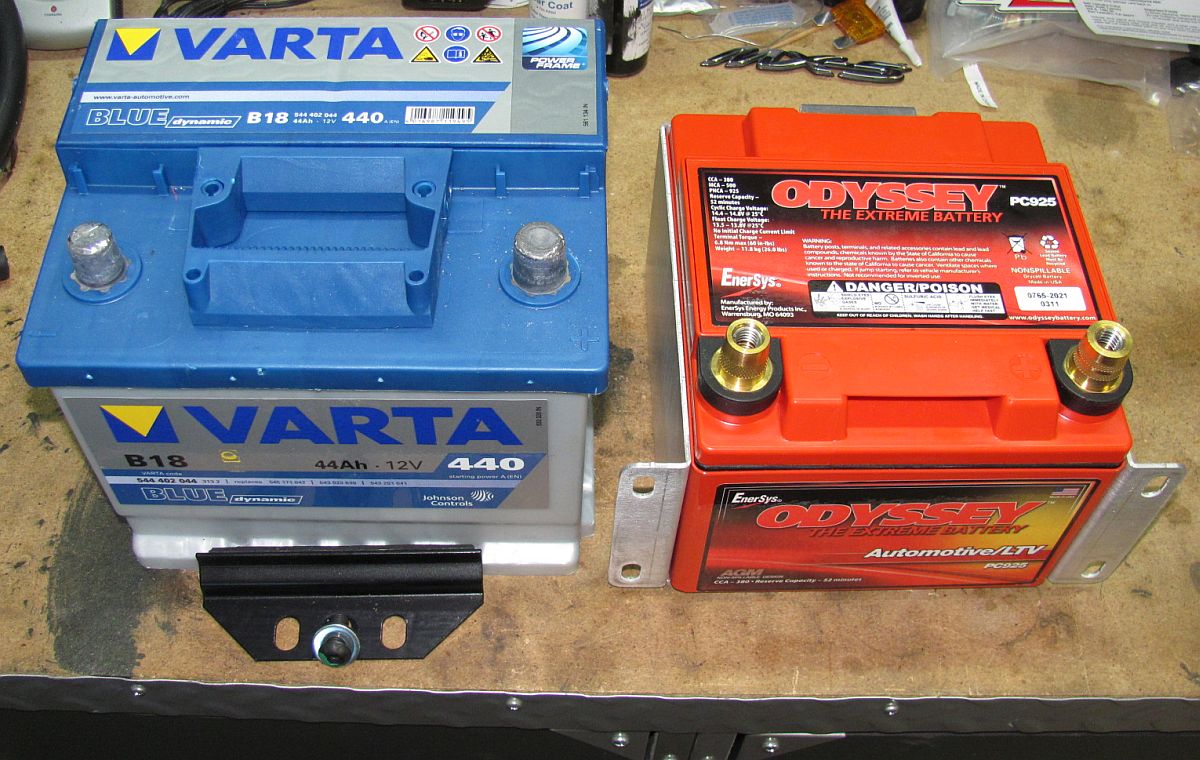
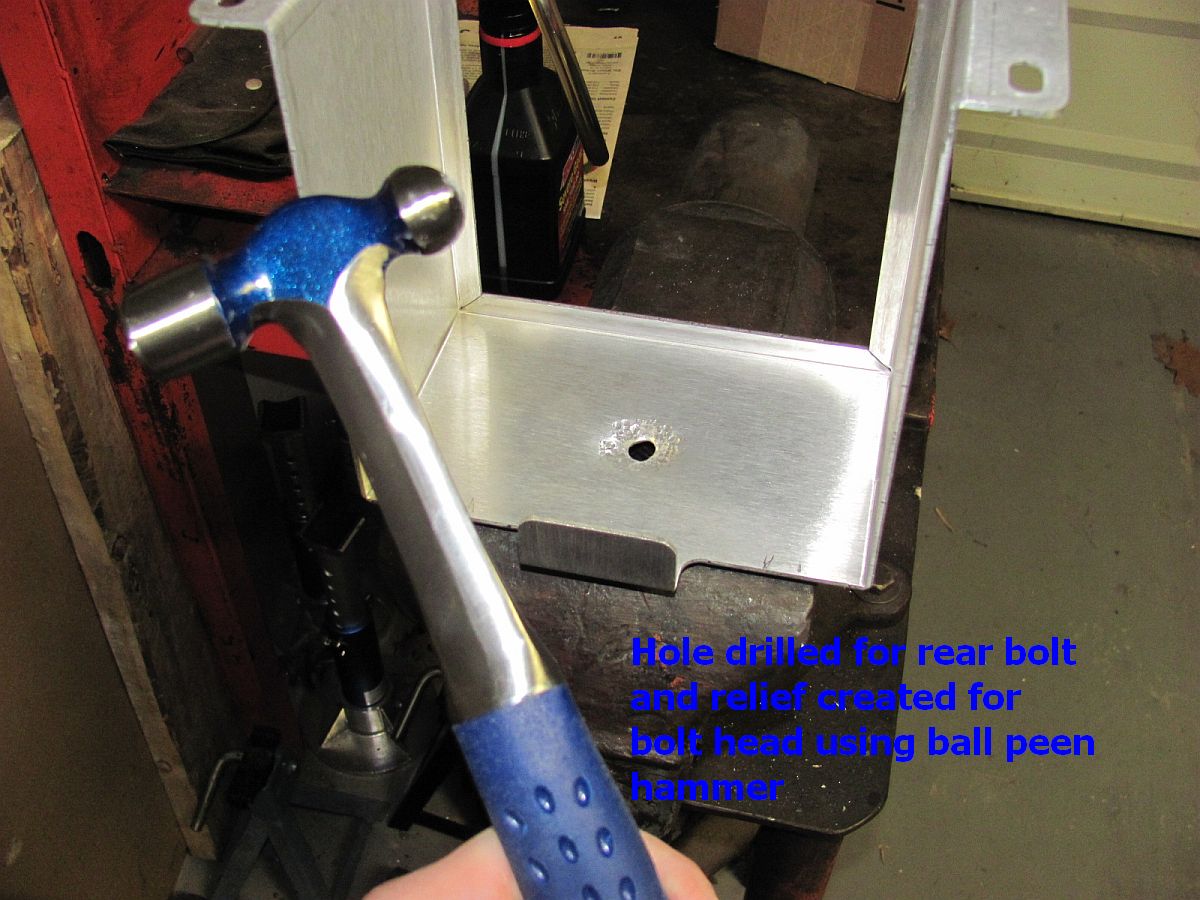
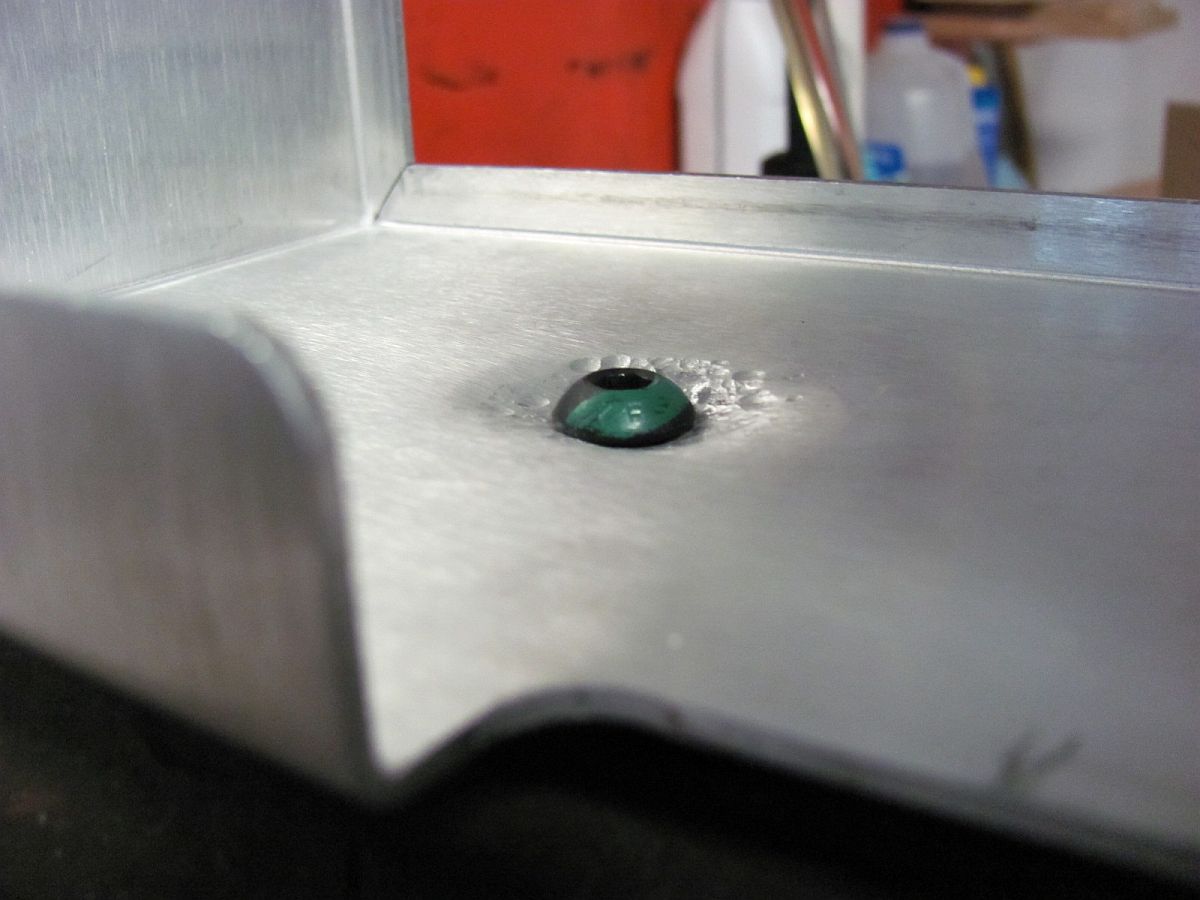
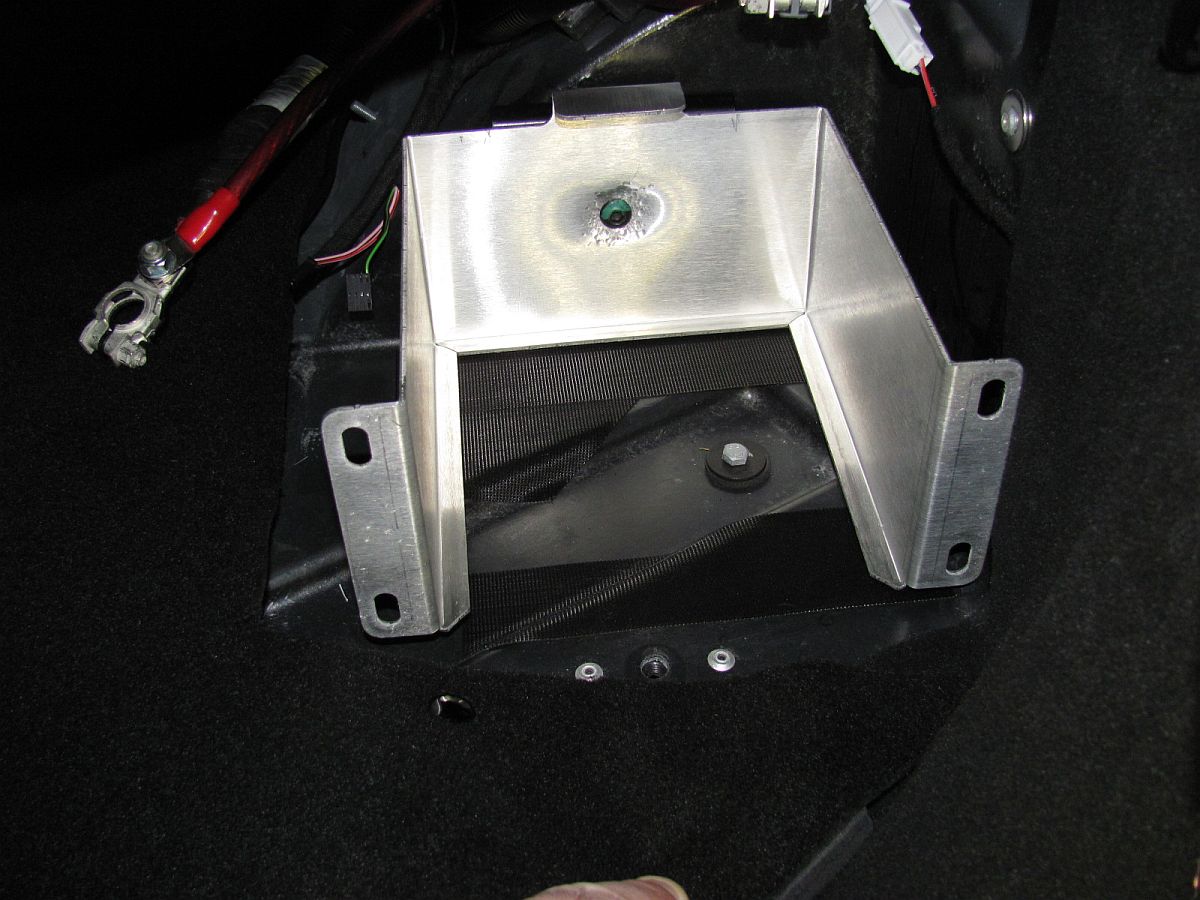
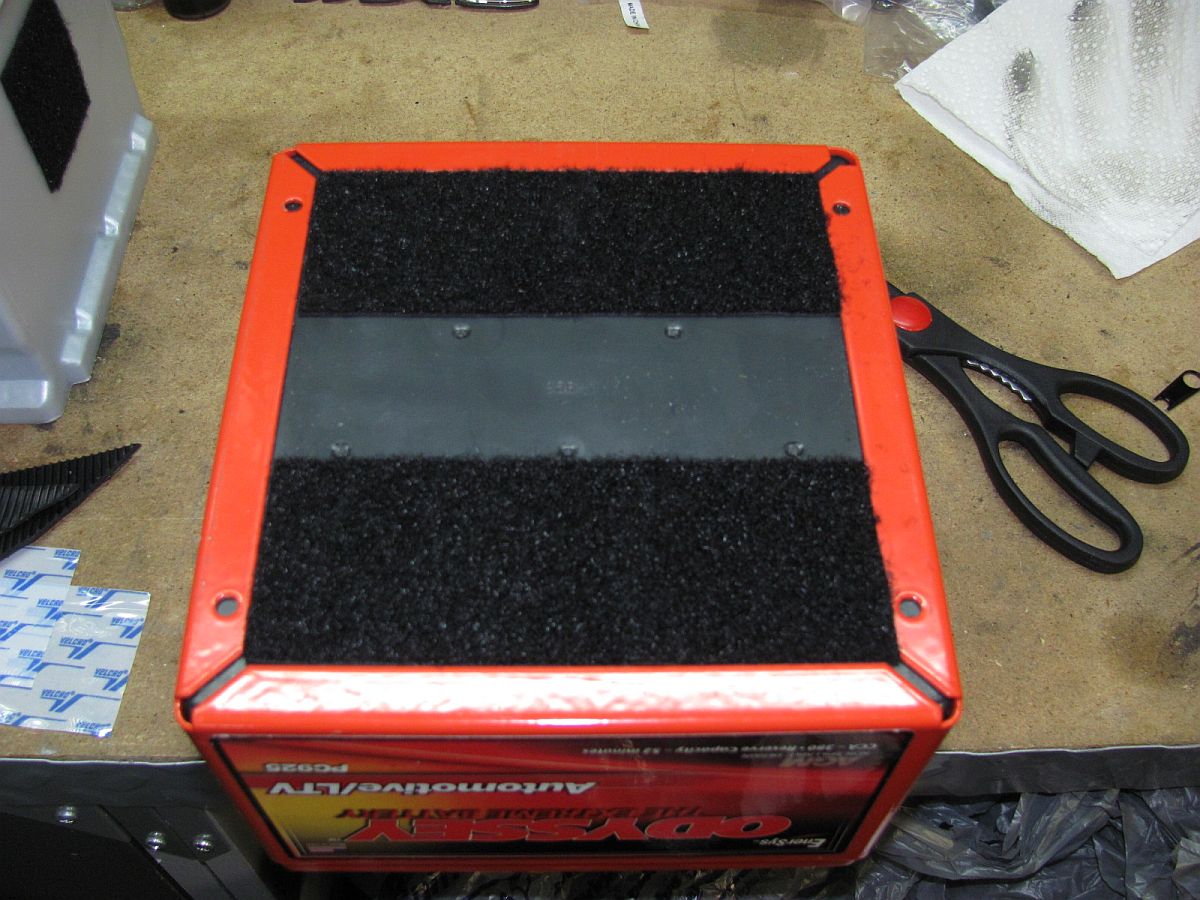
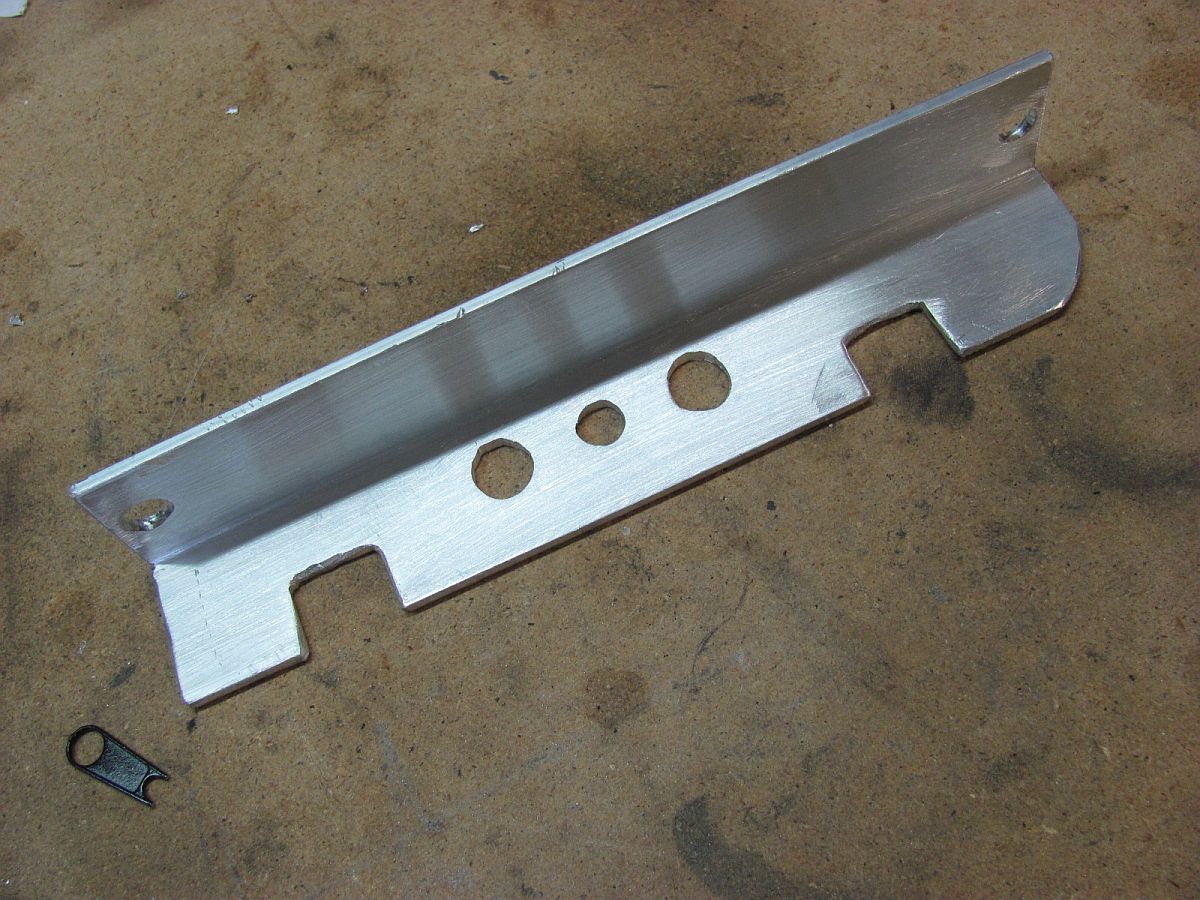
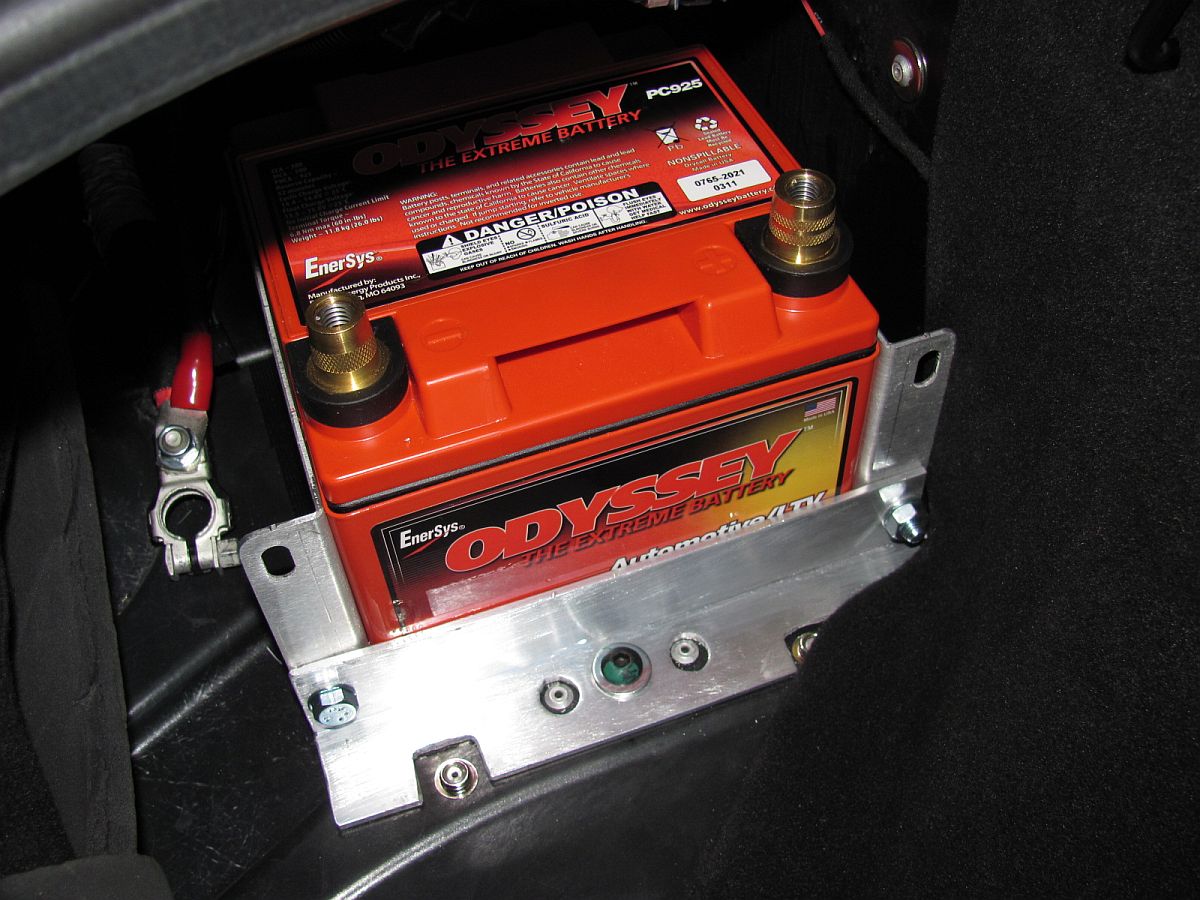
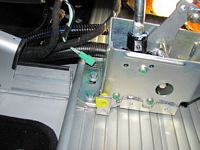
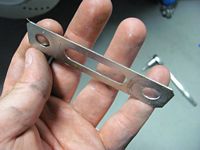
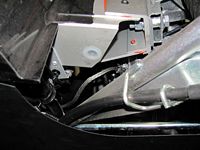
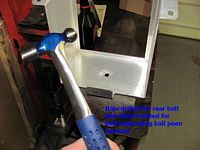
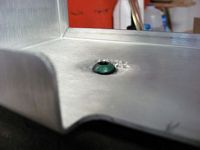
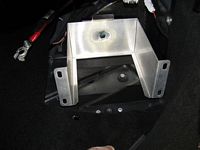
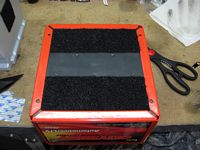
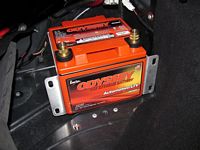
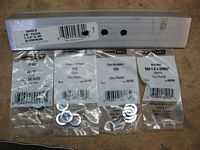
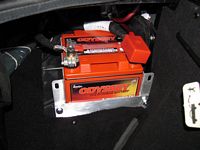
Finally got around to installing an Odyssey PC925MJT from West Coast Batteries using Odyssey HD925SM mount along with some custom pieces (read aluminum angle stock and some 8mm bolts/washers/nuts). This battery has been sitting in my garage for about 6 months, I bought it shortly after bringing home the Elise- it was still at 85% charge
when I hooked it up to the Ultimizer charger to top it off (this charger can also be used to maintain the battery). The factory Varta really was not up to sitting longer than a few days without action and the factory battery mounts leave some room for improvement. Since I did not want a dead battery and/or a battery bouncing around damaging the clam due to under-engineered mounts, I decided to go with the same PC925 I had used in my 2005 Elise. After reviewing an EliseTalk writeup by tmr, I decided to do something similar for a mounting solution. Instead of making a new rear bracket I turned the rear bracket upside down to accomplish the same thing- provide a vertical mounting surface for the new mount while clearing the rivets. The rubber anti-slip pieces under the battery were removed and replaced with industrial Velcro to provide a little more anti-slip after cleaning contact surfaces with brake cleaner. I then bought some angle aluminum stock and metric bolts/washers/nuts from the local hardware store. The aluminum was cut to 22mm in length and then marked for holes to be drilled to clear the rivets and snaps, and to bolt to the Odyssey mount while allowing the bottom bolt to be re-used. I found the zipper pictured under the OE battery, definitely a hand-built car
Odyssey manuals are here:
Odyssey Owner's Manual, Odyssey Technical Manual, Brochure, and Odyssey Ultimizer Charger Owner's Manual.


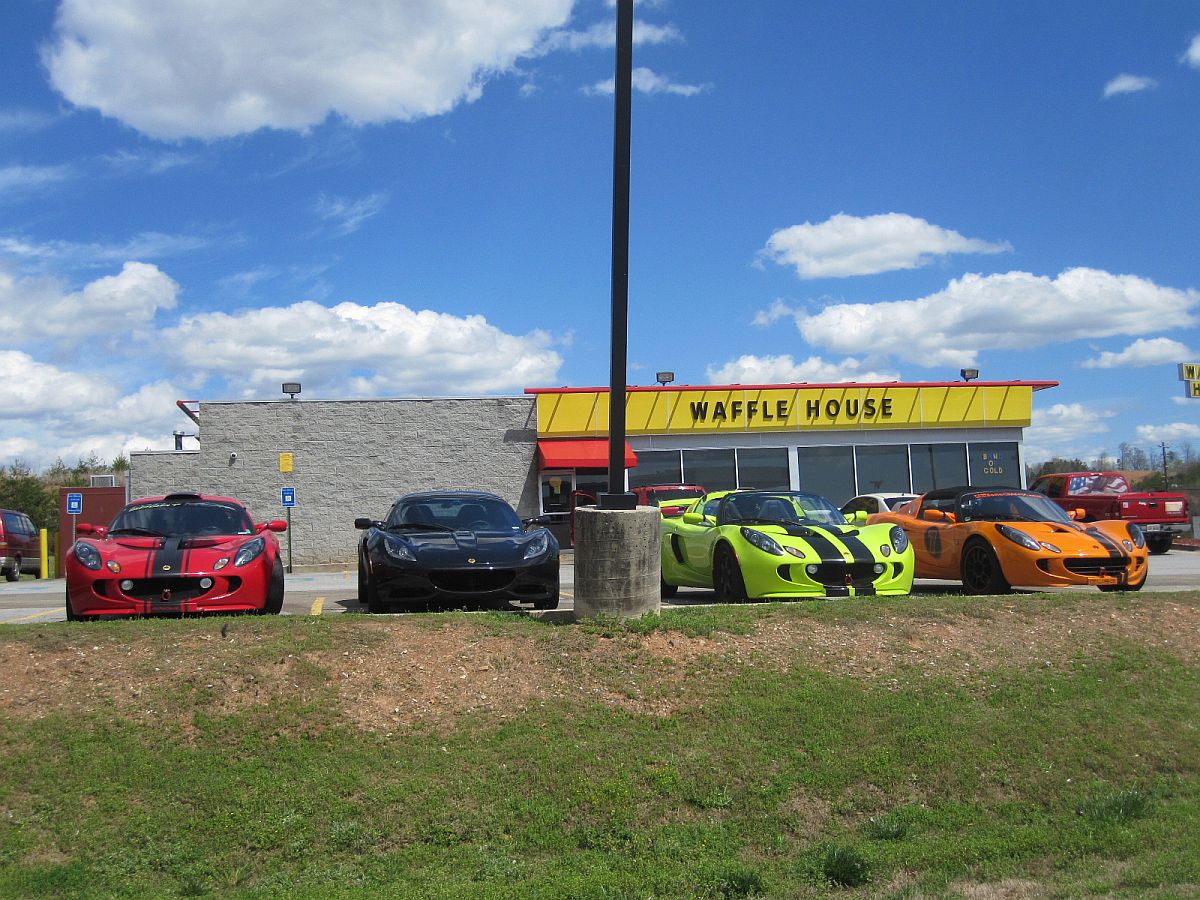
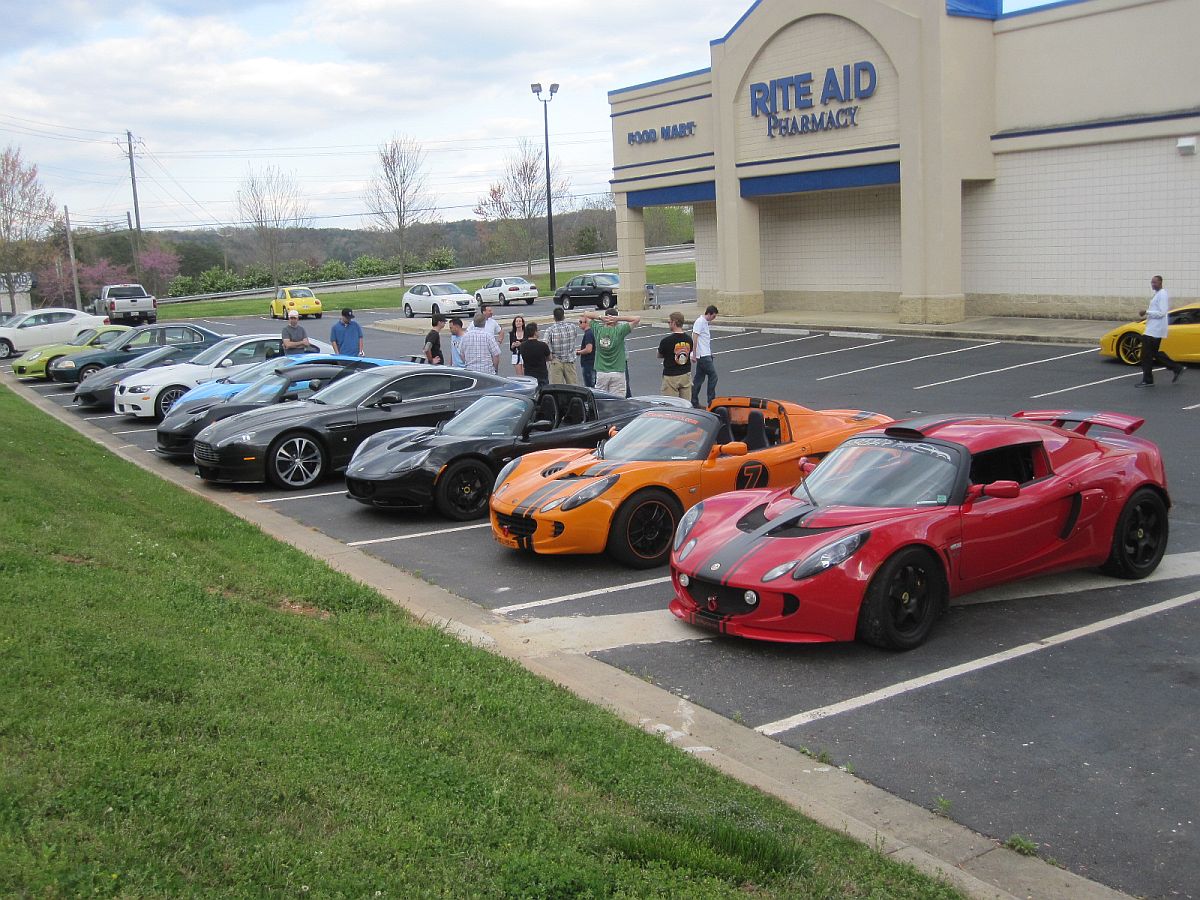
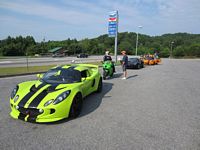
Feels like early spring today (3-24-2011) so we went on two different mountain drives this weekend in the North GA mountains- one with the Lotus Limited SE club and one with the Lotus of Atlanta dealer. Great people and fun roads


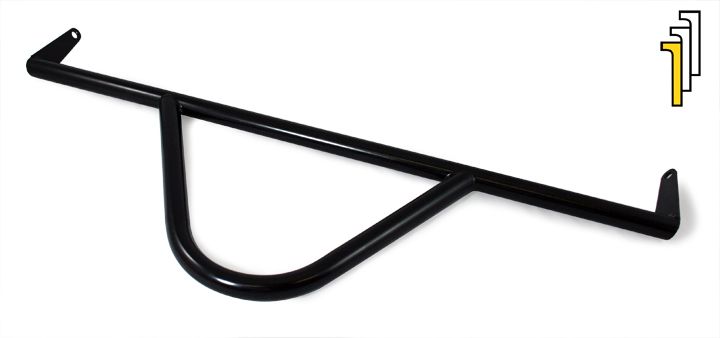
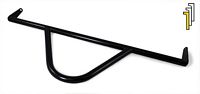
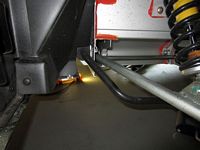
Sector111 V-Force Harness Bar found on LotusTalk classifieds and installed (installation guide HERE). WAY easier to install than the older Sector111 4Tress bar I had in the '05 Elise. One day I'll buy some harnesses to go with it.
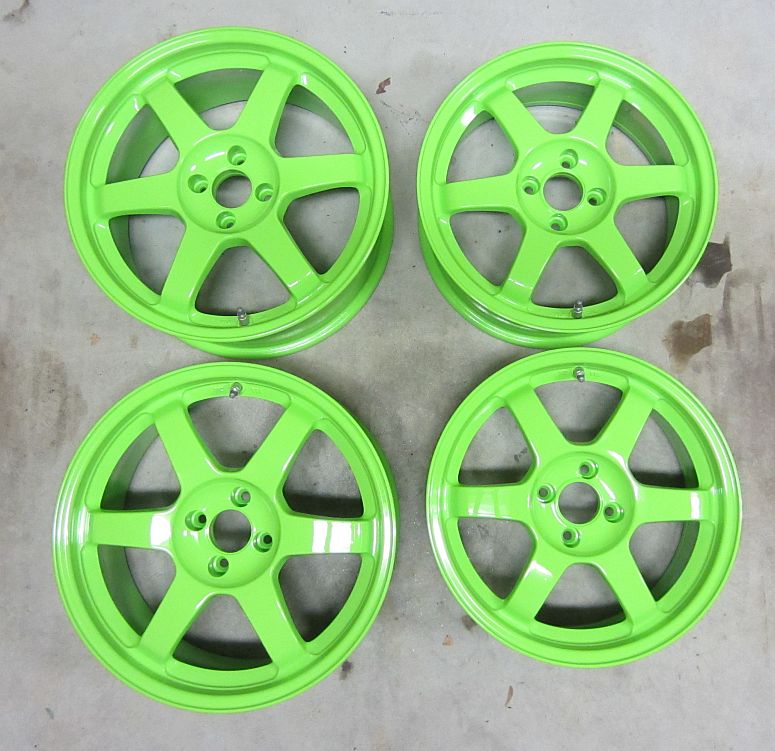
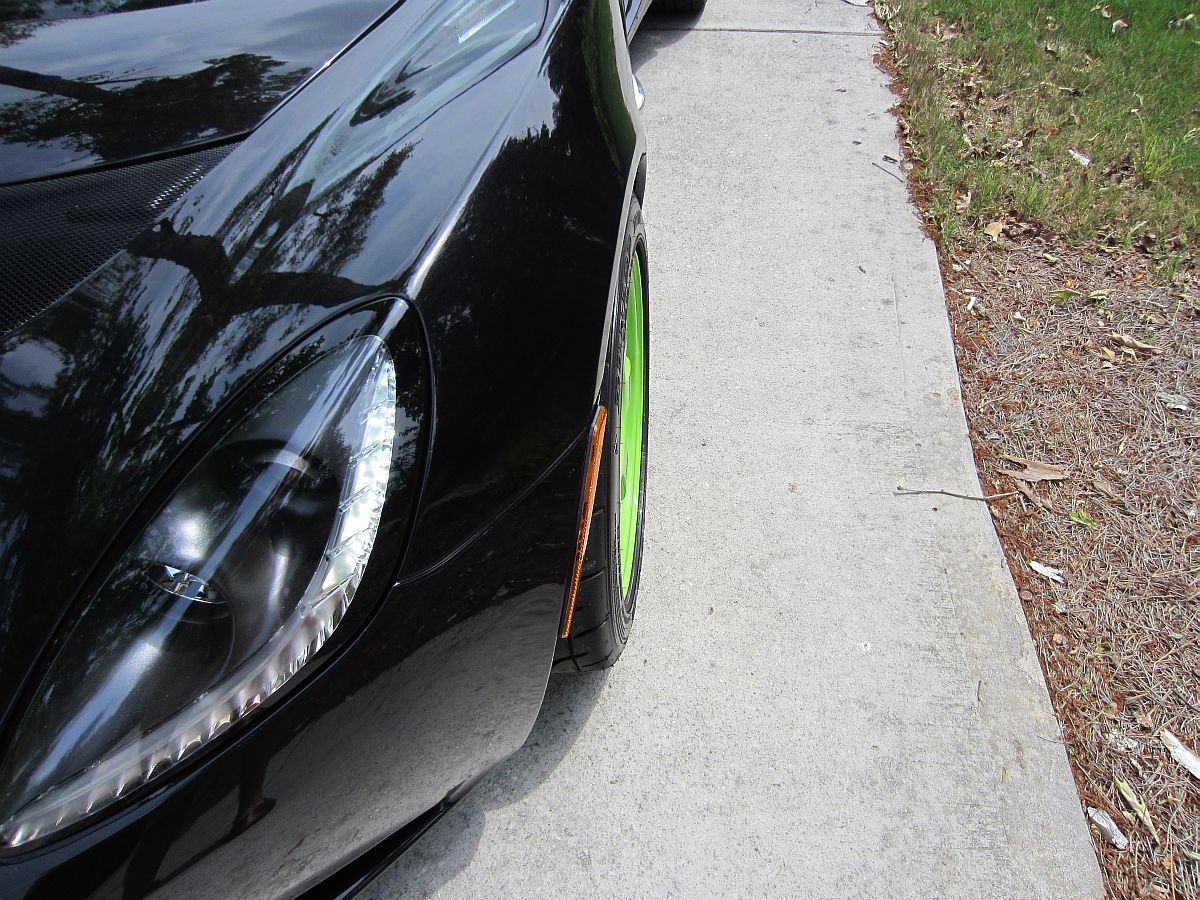
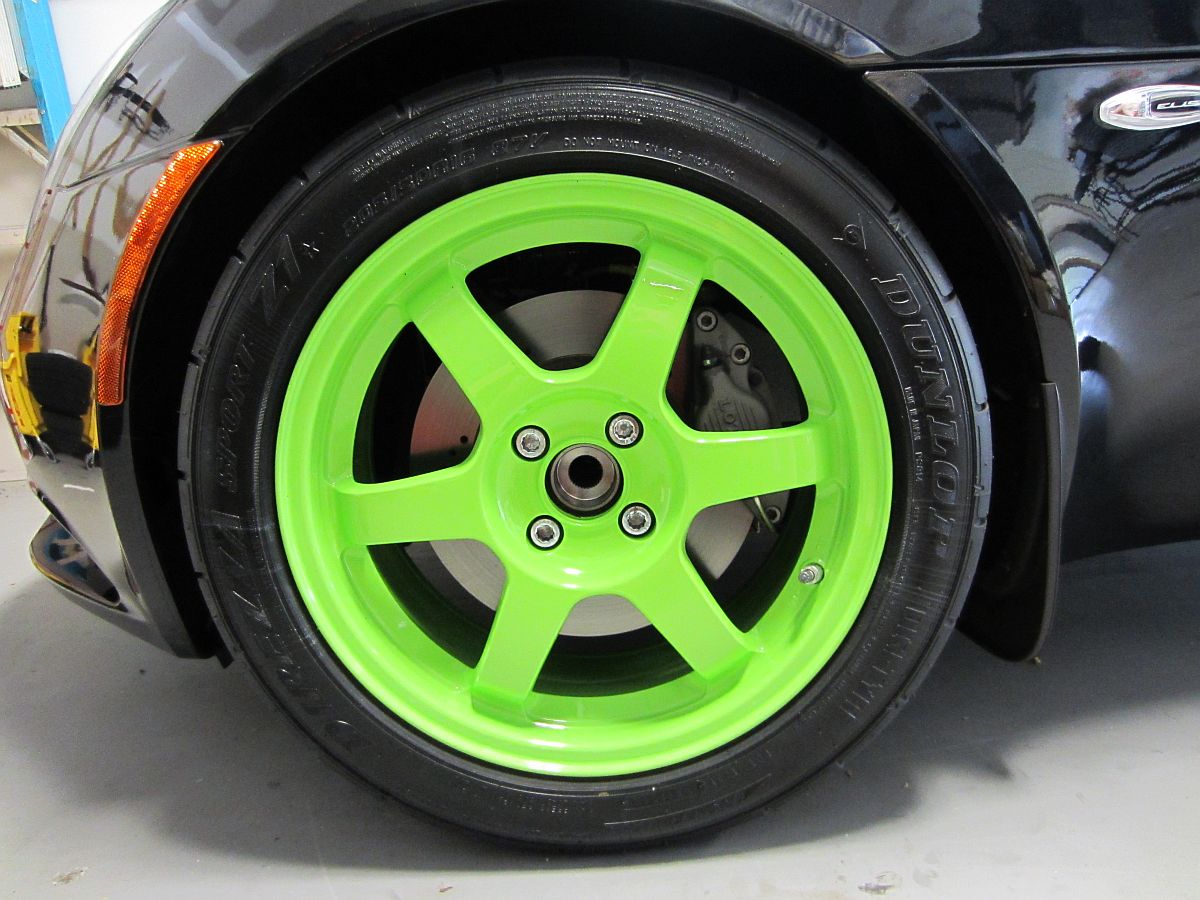
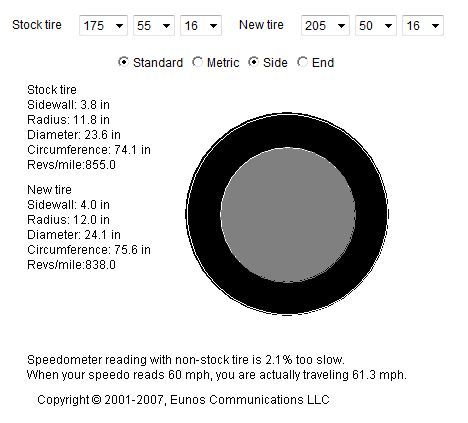
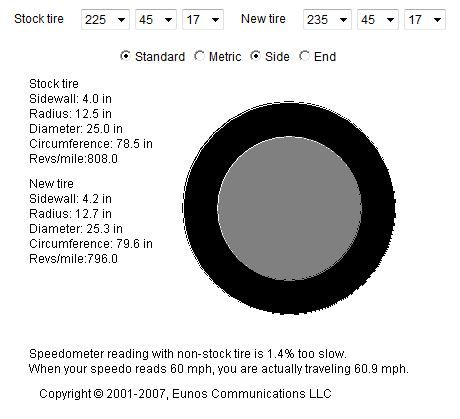
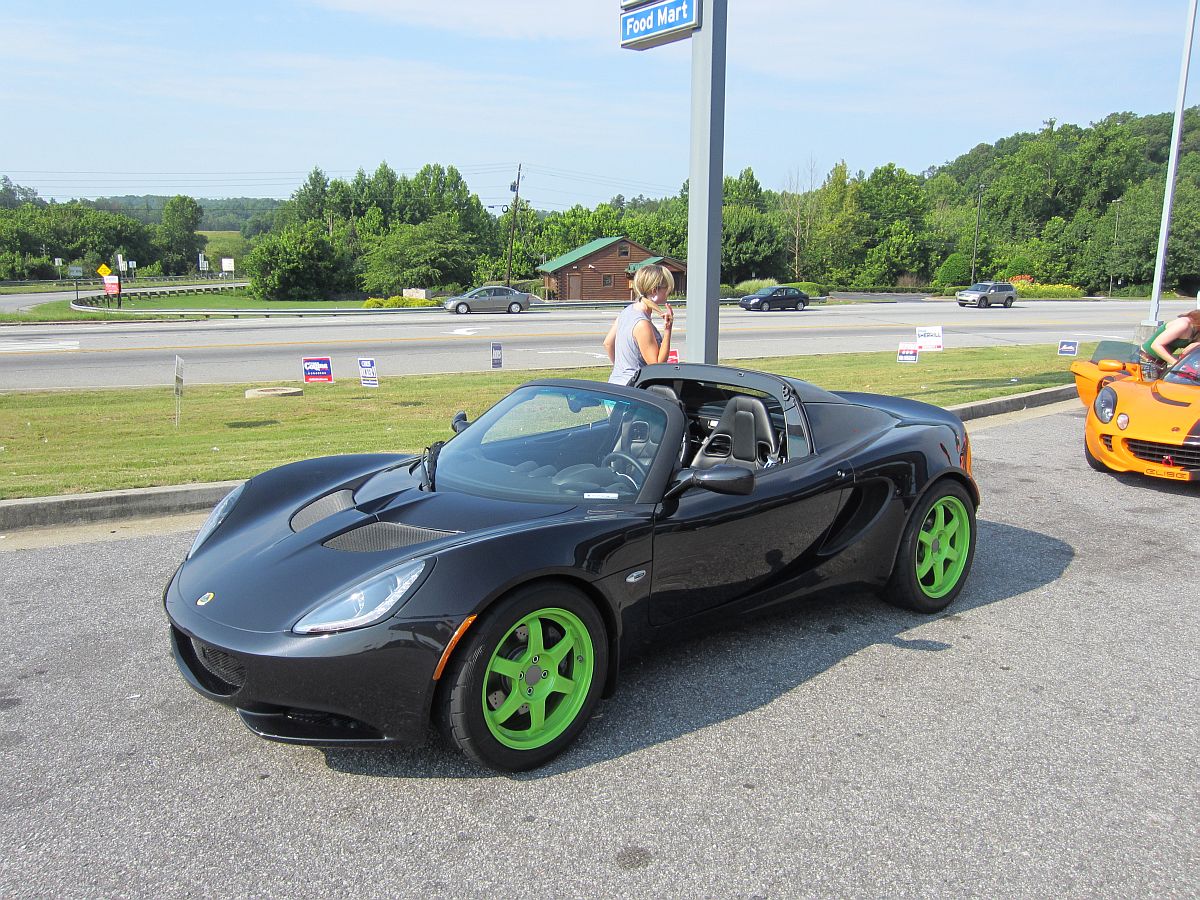
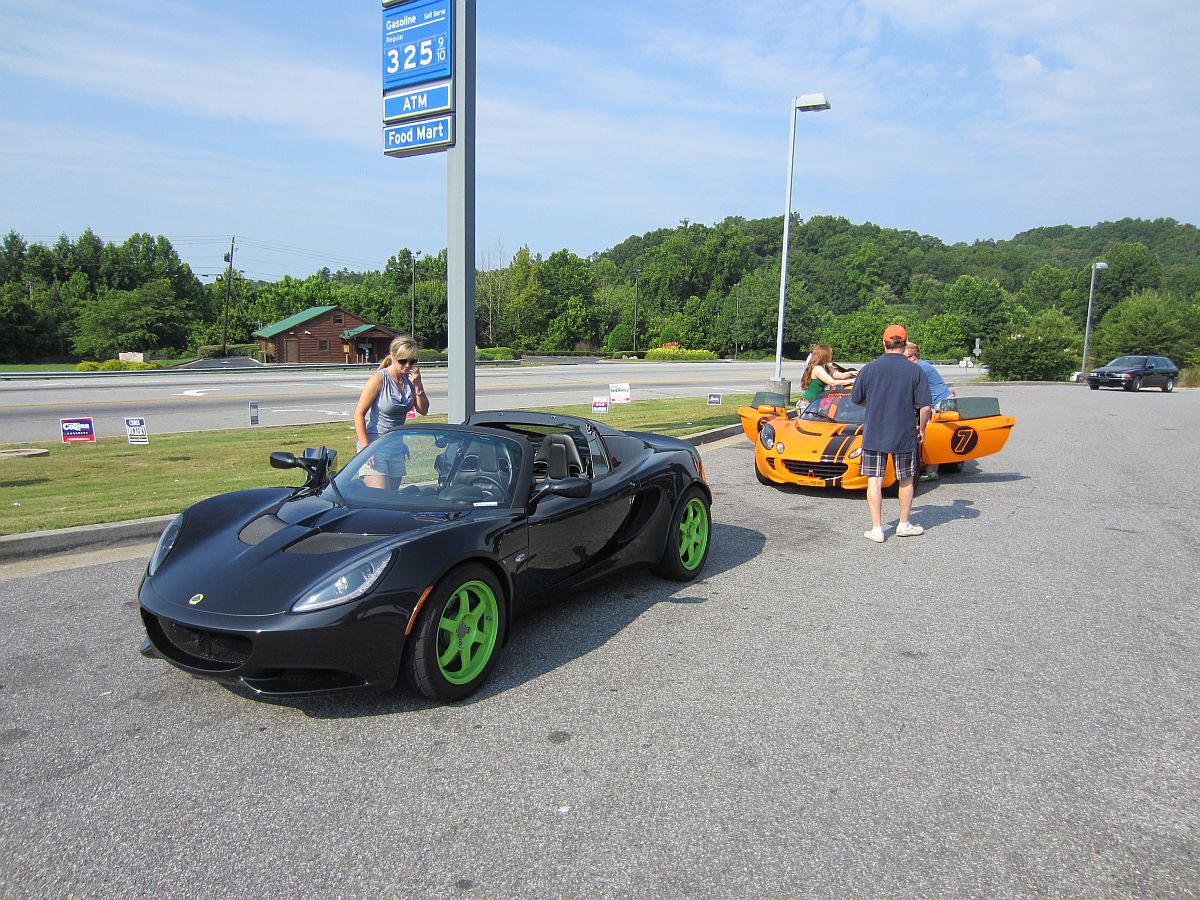
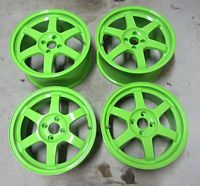
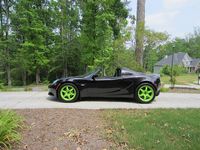
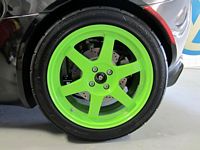
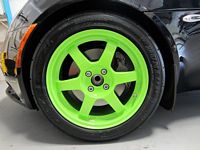
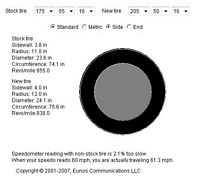
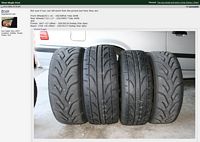
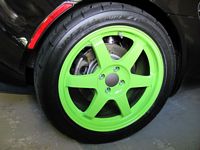
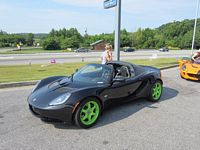
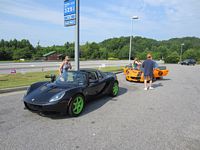
Rays Volk Racing TE37 wheels purchased from LotusTalk classifieds and mounted with Dunlop Direzza Z1 Star Spec tires. Wheels were painted Fiat green by previous owner and when I received them I had them repainted the same color with PPG paint. The wheels are 16x7 (+31, 11.2 lbs) and 17x8 (+41, 16.3 lbs), tires are 205/50/16 and 235/45/17 which is pretty close in diameter to OE size.
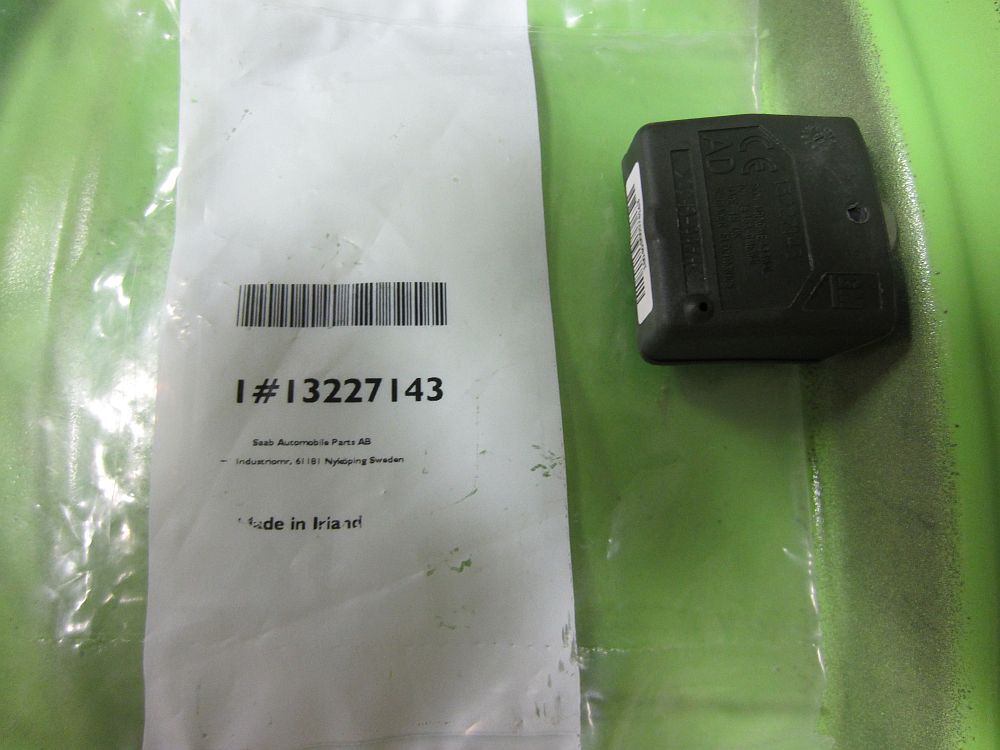
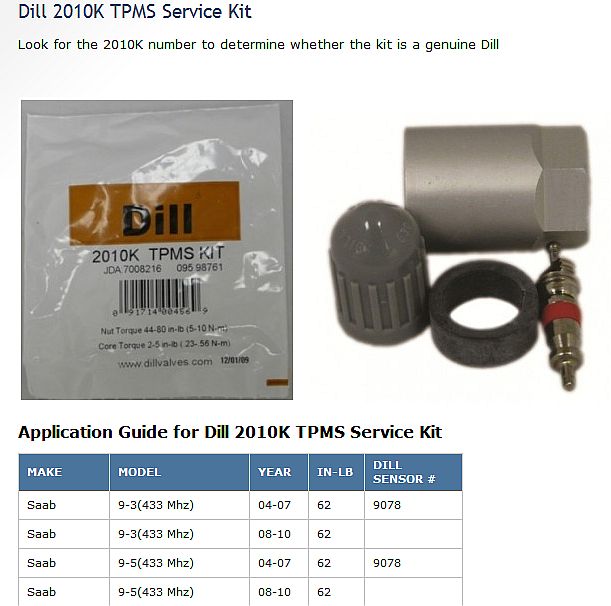
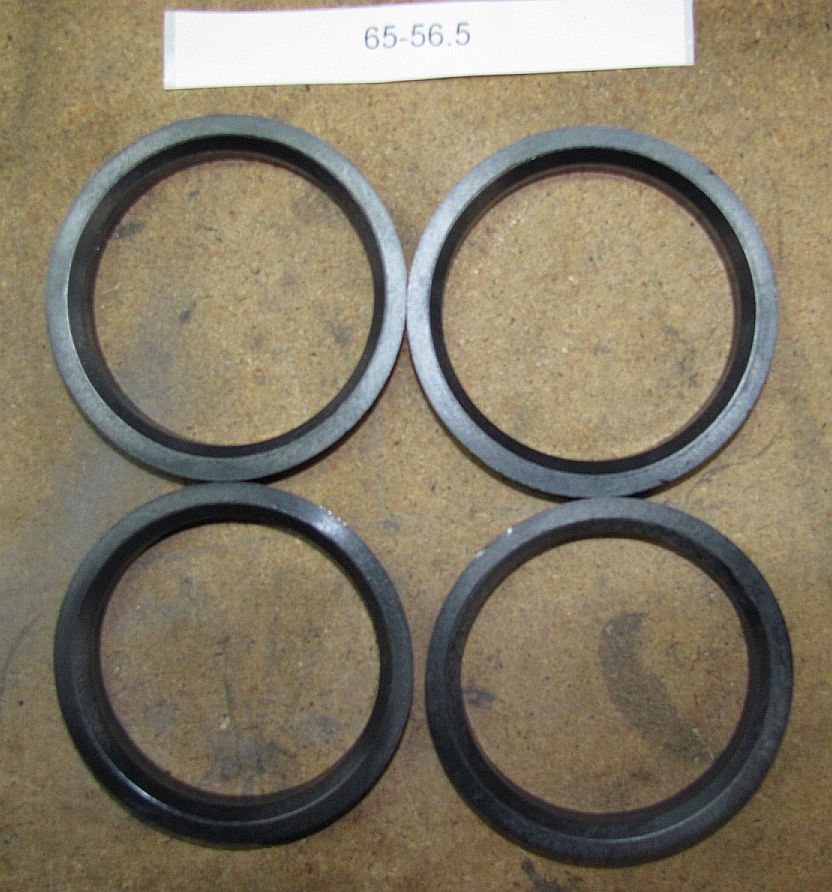
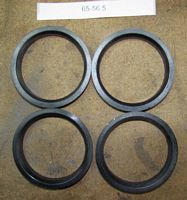
I needed to source some TPMS sensors and found on a LotusTalk thread that the Saab P/N 13227143 was on the 433 mHz frequency and would work as a substitute for Lotus P/N A12G000F at half the price. I sourced the sensors from Hendricks Saab in NC- but they don't come with the sleeve nut so I purchased Dill TPMS Tire Valve Kit P/N 2010K. I also ended up sourcing Volk hub centering rings (65mm OD x 56.6mm OD) from Eric Molinatti at GetYourWheels.com- they carry Volk wheels/Volk option parts and have a direct line to the Rays Volk US importer/distributor, he was the only person I contacted that responded the same day
Car and Driver tire tests HERE ranked the Dunlop Star Spec at the top. Wheel weights can be found HERE, Rays catalog is HERE.


Drove the Suches Loop in North Georgia with some friends in early June while temps still in low 80s. Other than moronic bicyclists who did not want to share but own the road, it was a great day of driving. The new Dunlop SS are GREAT, much better in these sizes than the OE Yokos- I'm sure the lighter weight TE37s helped too.

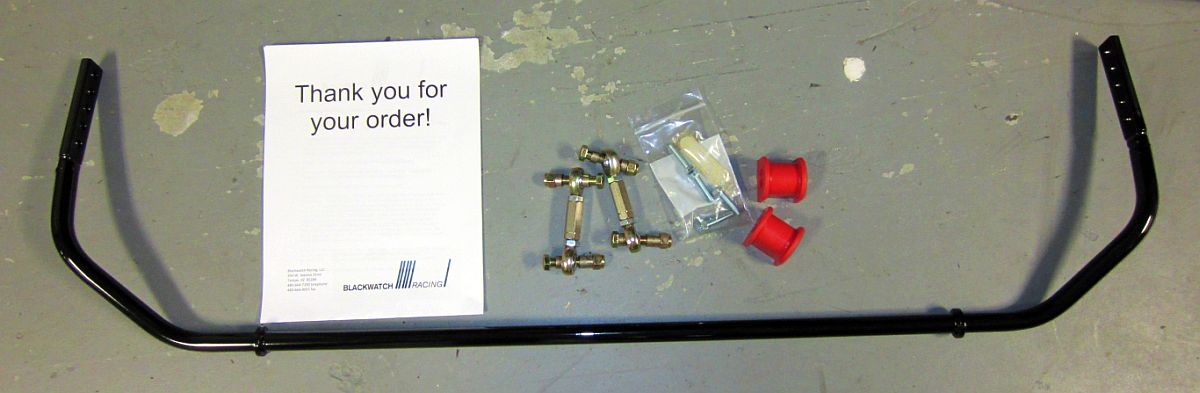
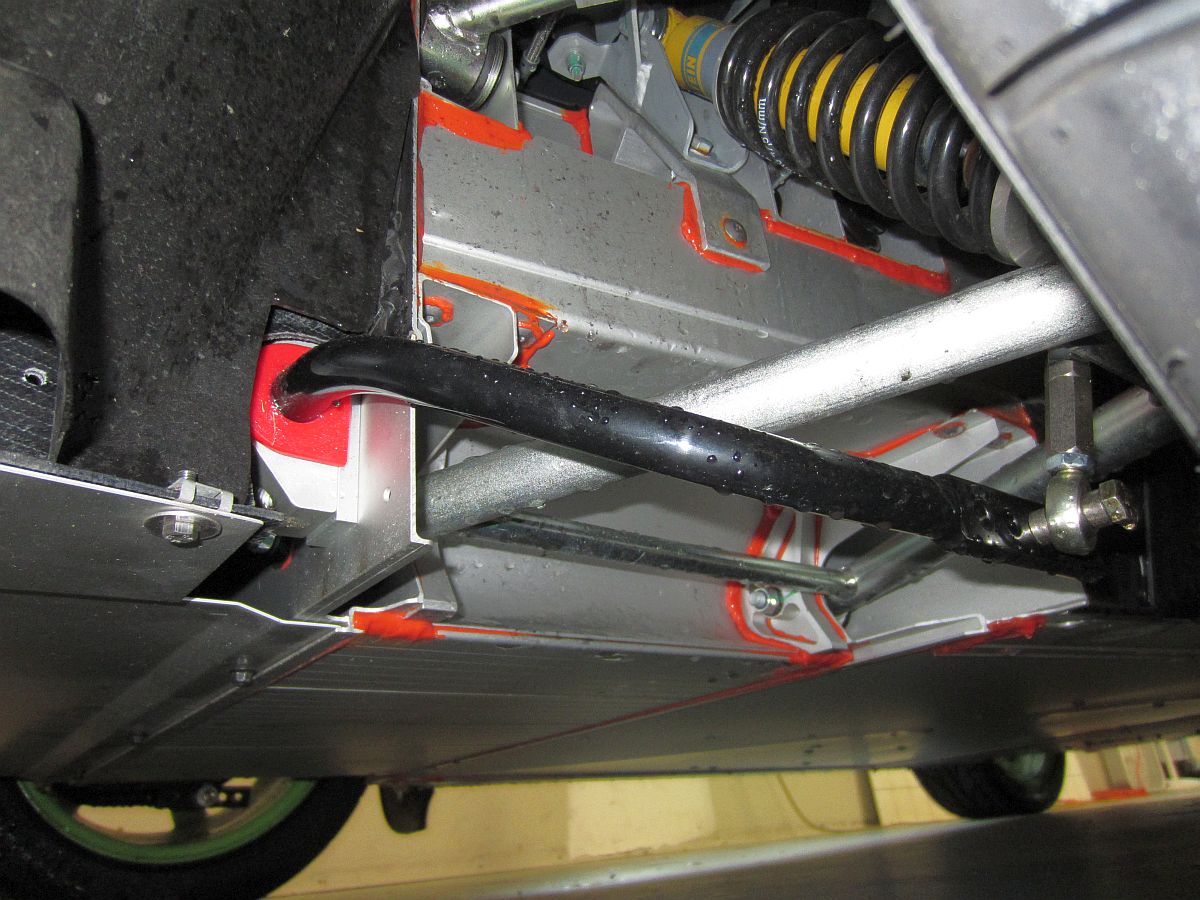
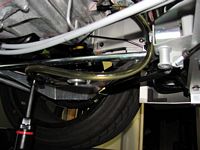
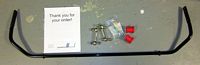
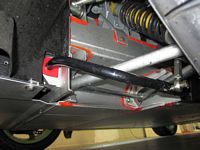
Installed adjustable front anti-sway bar (non-LSD version) from Blackwatch Racing. Lotus feels this is the way to address balance as opposed to a LSD and includes this type of adjustable bar on several Elise/Exige models from the factory. Blackwatch packages their bar with new poly bushings, bushing lube, new bolts (replaces OE Allen-head bolts) and adjustable end links- quality is top notch. Since I had upgraded to wider tires for street use I felt this would help me get a litle more out of the suspension. I added some pictures and comments to Robert's installation instructions and assembled a DIY guide HERE.
The installation is not hard but is time consuming, the 2011 went faster than the old 2005 since the plate with rivets was not applicable. I did come up with an idea/modified tool to save some time on the lower Allen-head bolt removal for the OEM anti-sway bar detailed in the DIY. Not a lot of new pics since this was covered by my 2005 write-up for the most part, the bar is now powdercoated black and looks more like OE.
Of course we had to go to the N. GA mountains to see how it worked, my wife said she felt a difference from the passenger seat and I thought the car was more predictable/stable in tight corners. I think this bar really helps get the most out of the factory spring/damper package without having to upgrade to higher rate coilovers.


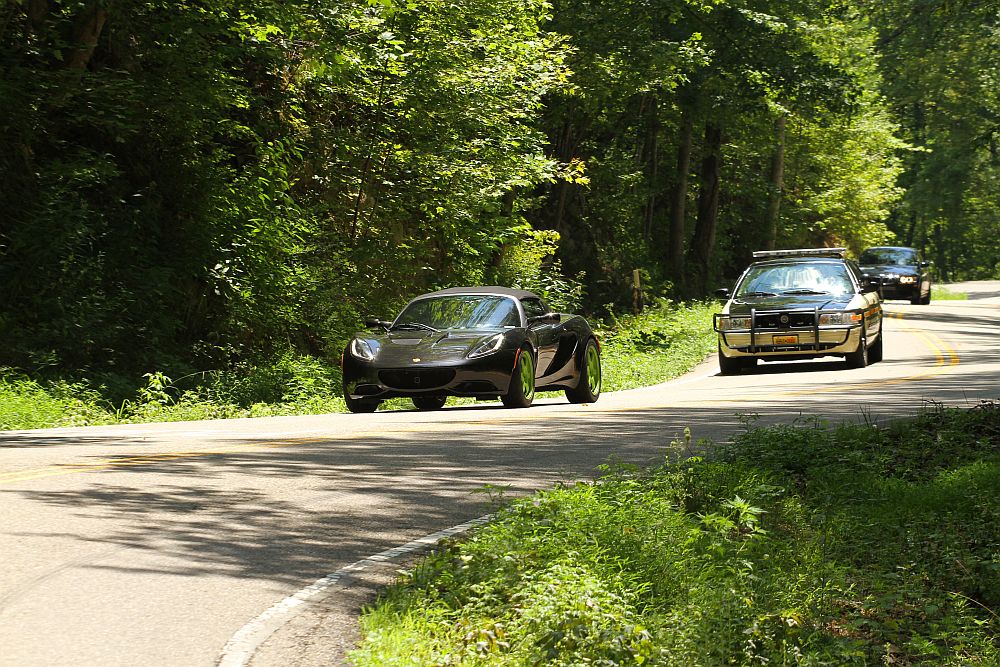
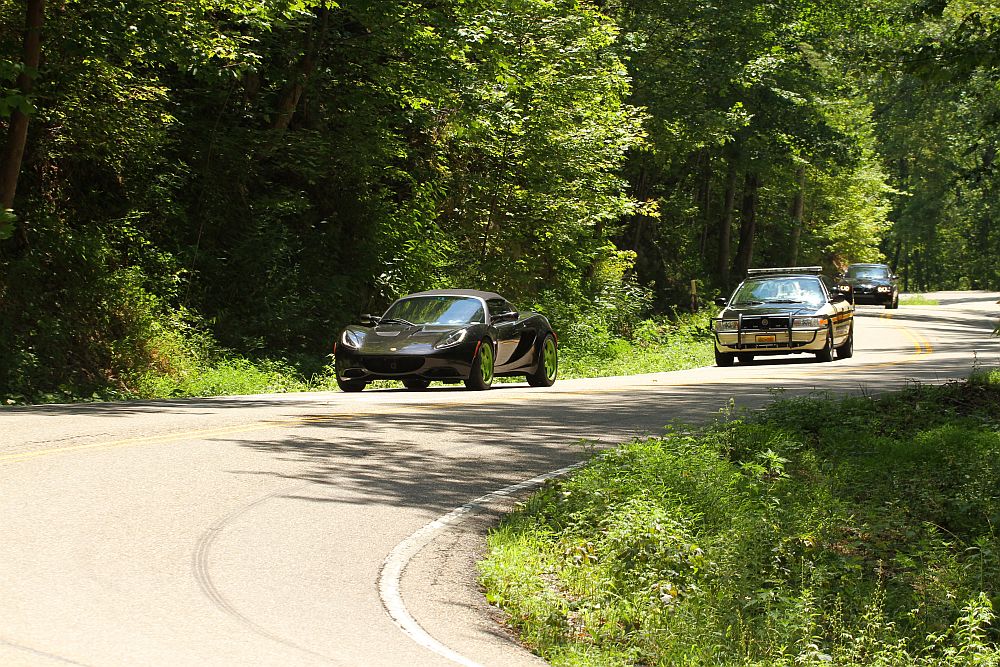
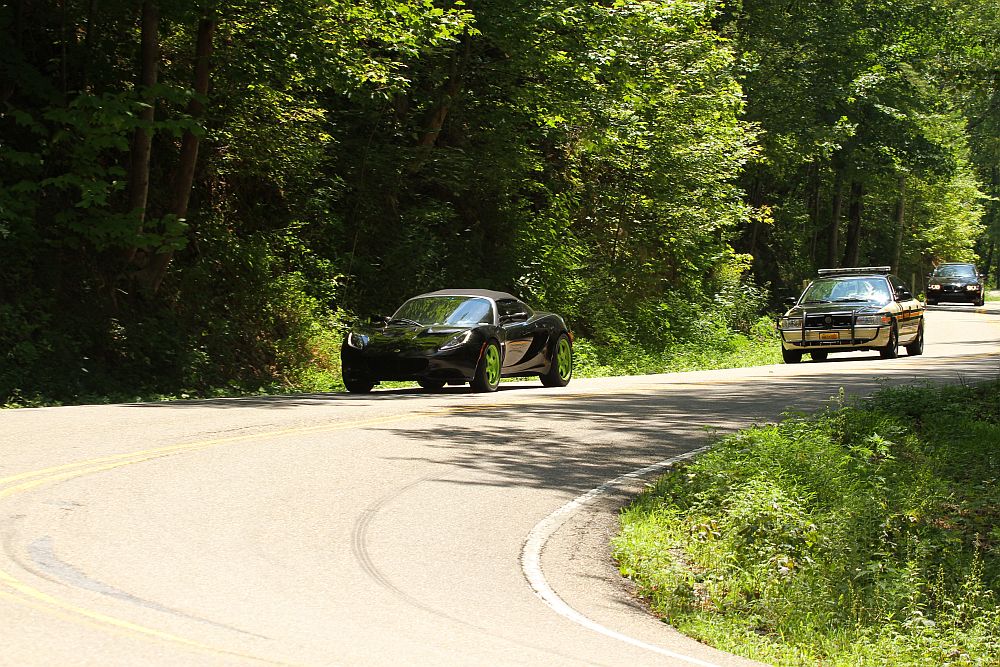
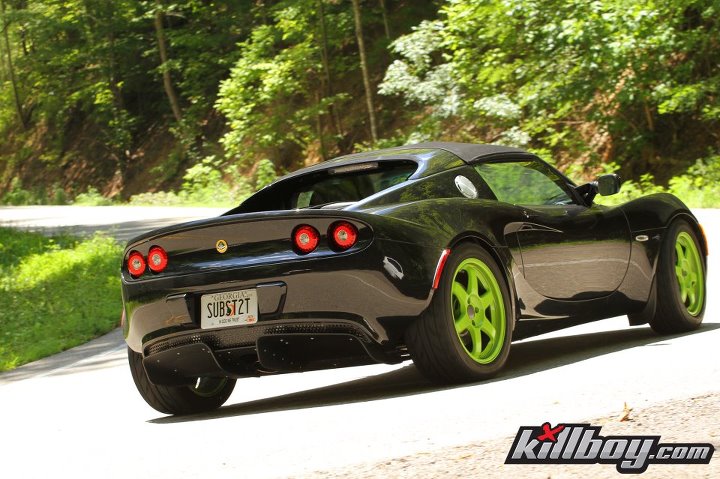
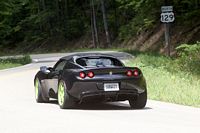
Nothing makes 318 curves in 11 miles go slower than having a TN State Patrol car follow you the entire way. Welcome to the new escort program offered at Tail of the Dragon by TSP.....but on a positive note I did make the KillBoy highlights again, and got out of a GSP ticket on the way home:

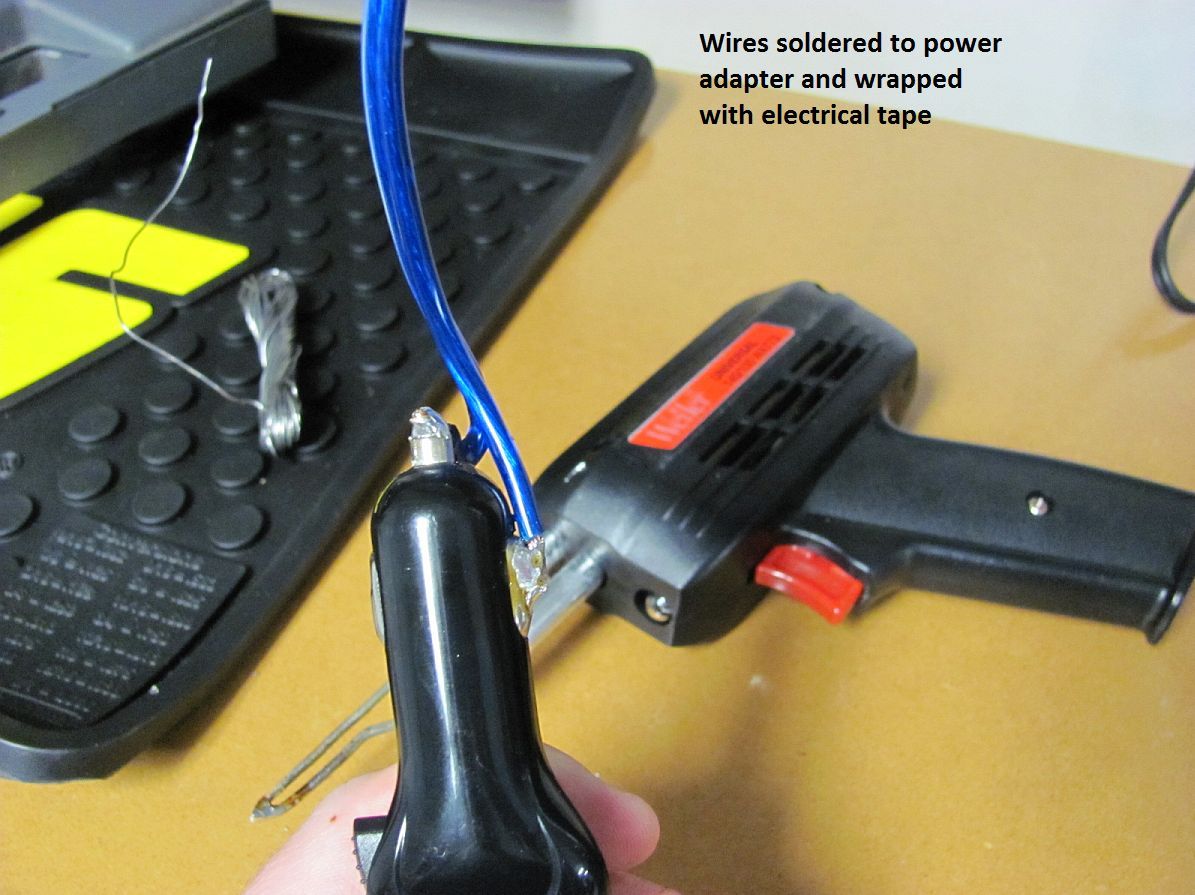
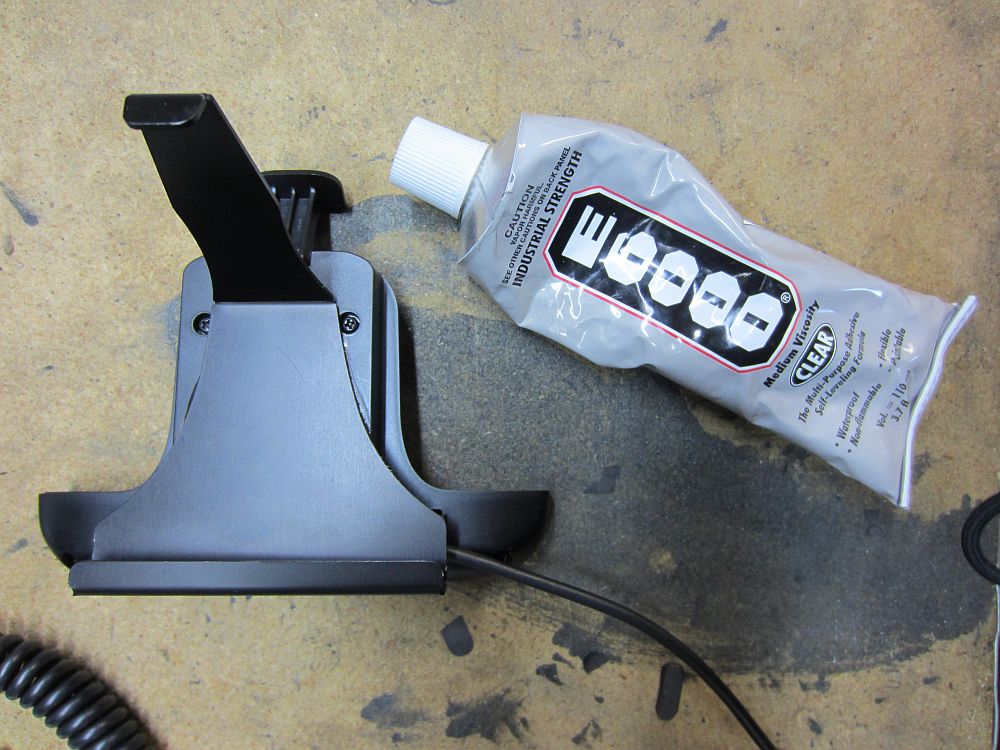
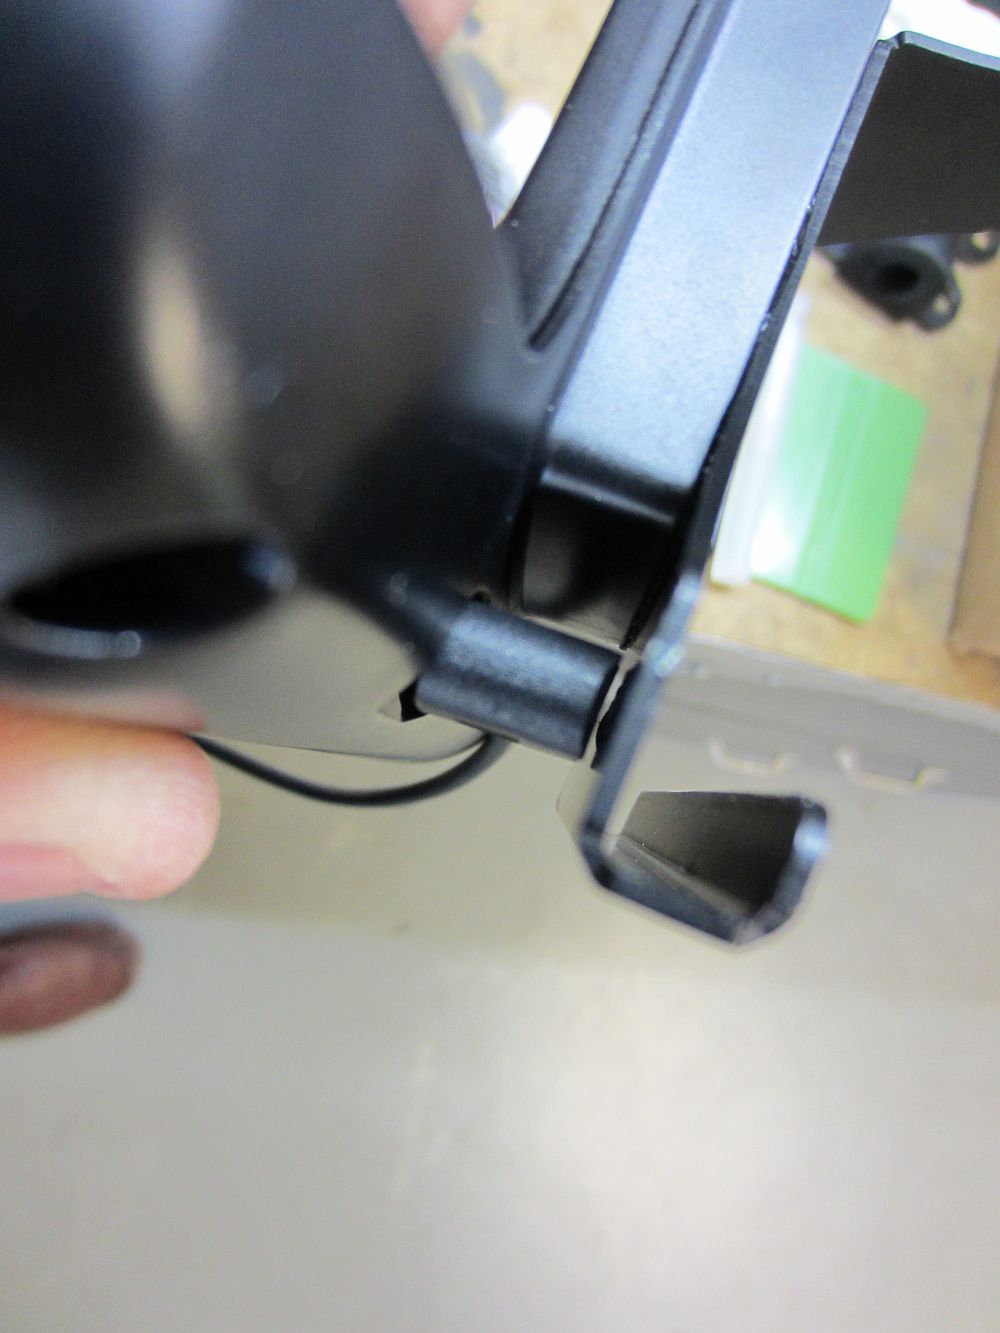
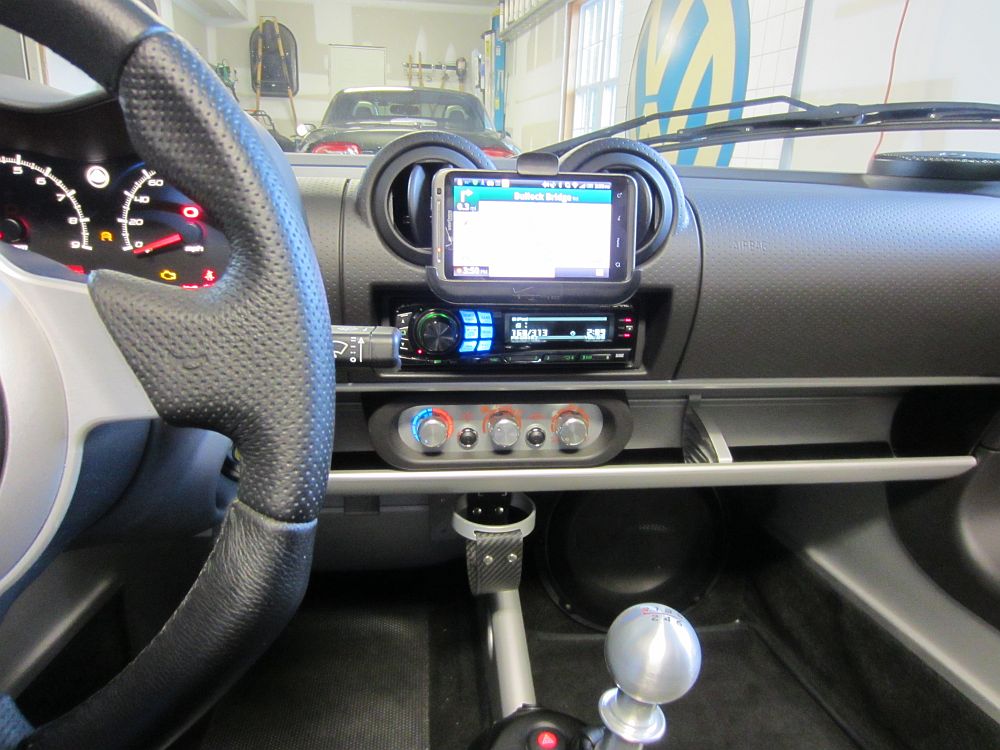
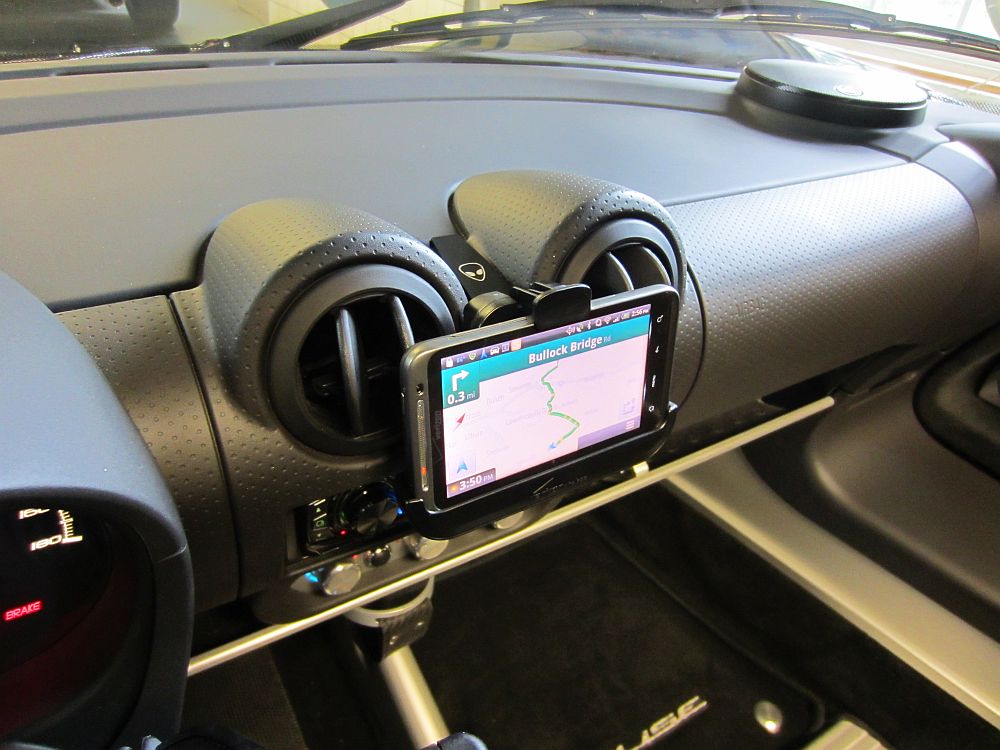
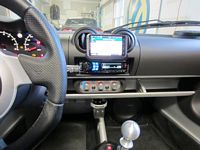
Really Light Stuff Phone Mount purchased along with some Verizon accessories from eBay: car charger with USB plug, Thunderbolt dock, and a right angle micro USB cord. I had to use the dremel tool to notch the plastic trim above the radio and the dash (small) above the radio mount. Wire was soldered to the lighter plug end of the power supply and wrapped with cloth electrical tape (it seems to work better than vinyl). After tapping into the radio wiring with some ScotchLoks, this was tucked behind the radio/instrument cluster and everything was reinstalled. The dock was attached to the RLS mount with E6000 adhesive after using a razor blade to remove some plastic on the right angle connector, best to use after allowing a 24 hour cure time. This will make keeping the phone charged and using Google Nav a bit easier.


UPDATE: The Lotus was traded, the only car I have ever purchased twice as it was that good.
Oil Analysis performed by Blackstone Laboratories
Engine Oil Analysis at 970 miles- Factory Havoline 5w40 Synthetic
Transmission Oil Analysis at 970 miles- Factory Transmission Oil
Elise Reviews:
Elise/Lotus Video: *High Speed Connection Recommended*
Lotus Elise: The Inside Story, Project M1-11
How to enter and exit your Elise
(2MB)
How to place your Elise soft top behind the seats (1.4MB)
TopGear Tests the Lotus Elise (Base model) featuring Lotus Engineer (58MB)
Lotus Heritage with Narration- from Lotus USA (37.1MB)
Lotus Heritage- from Lotus USA (58.4MB)
Lotus Factory- from Lotus USA (7.9MB)
Lotus Assembly- from Lotus USA (2.7MB)
UK Elise S Commercial-Quality Control (3.4MB)
Lotus Elise Commercial-Power to Weight (3.6MB)
UK Exige S Commercial-Lotus Position (4.7MB)
Lotus Elise Toe Link Failure (7.1MB)
World's Fastest Lotus? Frank's Exige (aka roninexige on YT)
Elise Articles/Documents/Files:
2005-Up USA Elise Owners Manual
2008-Up USA Elise Owners Manual Supplement
2011-Up USA Elise Owners Manual
2005 Elise Maintenance Schedule
USA Elise/Exige Owners Manual Supplement- Track Use and Precautions (46KB)
2005-Up USA Elise/Exige Technical Service Manual-Subscribe and Download for $25 from Lotus USA
Lotus TSB 2011-01R: Retrofitment of revised turn signal module
Toyota TSB: Inspection and Repair When Lift Bolts Break (442KB)
US Elise Introduction at Barber (527KB)
Elise Dimensional Drawing (JPG)
The Lotus Position: Standard vs Probax seats from www.telegraph.co.uk
Grassroots Motorsports December 2012: Supercar Bargain, Lotus Elise
autodaily: The last Lotus Elise delivered to its eponym Elisa Artioli
DIY Guides:
Lotus Elise Jacking Points (8KB)
Lotus Elise Suspension Torque Settings
ekological HID Installation by EliseTalks's darkSol (519KB)
Sector111 HID Installation by EliseTalks's odeon (2.18MB)
Shifter Reinforcement by EliseTalk's Stan (199KB)
Clutch Pedal Stop Mod by moremonkey's Stan (956KB)
Elise Coolant Flow (Diagram and Pics) by moremonkey's Stan (501KB)
Elise Water Pump R&R by moremonkey's Stan (221KB)
Elise Lift Bolts by moremonkey's Stan
2ZZ Lift Bolts Replacement from TeamCelica.com
Cleaning the 2ZZ VVT Oil Control Valve (OCV) Strainers from NewCelica.org
Elise Pedal Adjustment (from various EliseTalk threads) (545KB)
Lotus Stage 2 Exhaust Installation by EliseTalk's waydui
2Bular Exhaust Installation by PistonHeads' Janitor (2.79MB)
Heater Core Bypass by EliseTalk's Tonywa28 (1.5MB)
Making a Locking Gas Cap by EliseTalk's elisenc (237KB)
Rebuilding Seat with Kemmler Air2Gel Foam by EliseTalk's Brian 111 (344KB)
Oil Filters for Elise from Sands Mechanical Museum
How to Change the Oil from Sands Mechanical Museum
How to Change the Gear Oil from Sands Mechanical Museum
How to Adjust the Elise Headlights from Sands Mechanical Museum
Elise Brakes and Clutch Bleeding from Sands Mechanical Museum
Elise Brake Pad Replacement from Sands Mechanical Museum
Exige Soft Top Retrofit by EliseTalk's pilot
Elise Dash Removal by EliseTalk's buzzy
Harness Bar Installation from Sector 111 (289KB)
How to Remove the Elise Exhaust Manifold from EliseTalk's mlk_f1 (224KB)
How to Make a Cat Delete CEL Eliminator from EliseTalk's Hollywood (247KB)
Lotus Sport Competition Seat and 6-point Harness Installation (3.6MB)
BillsWebSpace: ForcedFed Header Installation
BillsWebSpace: Blackwatch Racing Front Sway Bar Installation
BillsWebSpace: Moroso Oil Pan Installation
BillsWebSpace: Elise Transmission Fluid Change
BillsWebSpace: Lotus Cup Airbox Installation
BillsWebSpace: Lotus Elise Innovative Mounts Installation Supplement
BillsWebSpace: Lotus Elise Odyssey PC925 Mounting Solution
Elise/Exige Lift Point Kit Design and Installation by EliseTalk's tesprit
Elise Window Adjustment (compiled from EliseTalk)
Forums and Clubs:


Other Web Sites: