
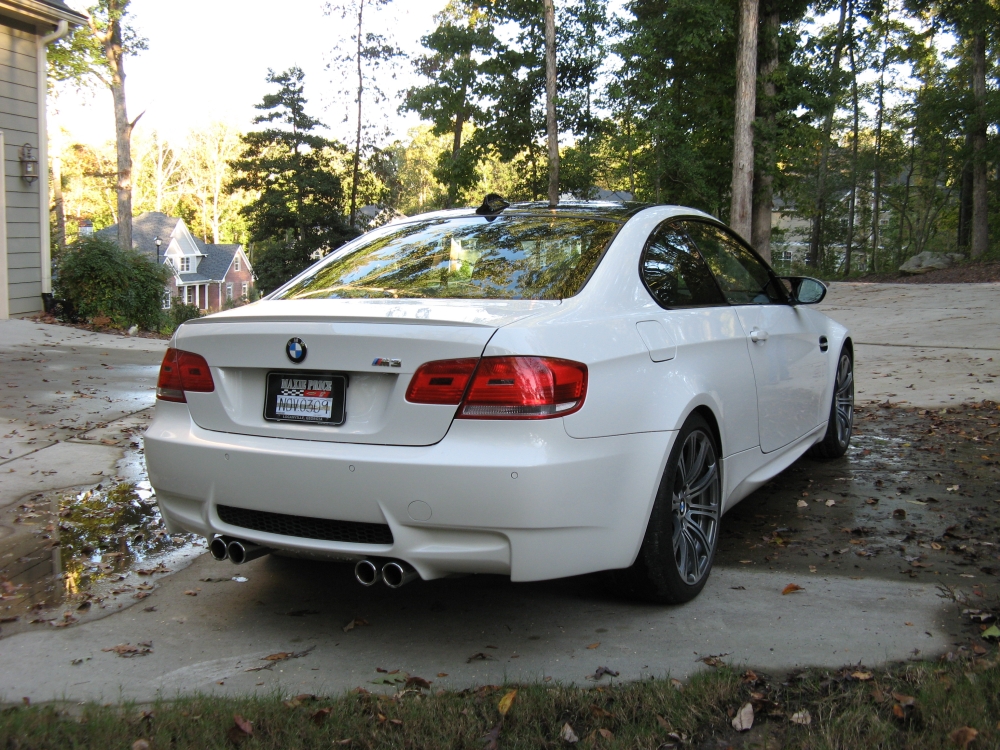
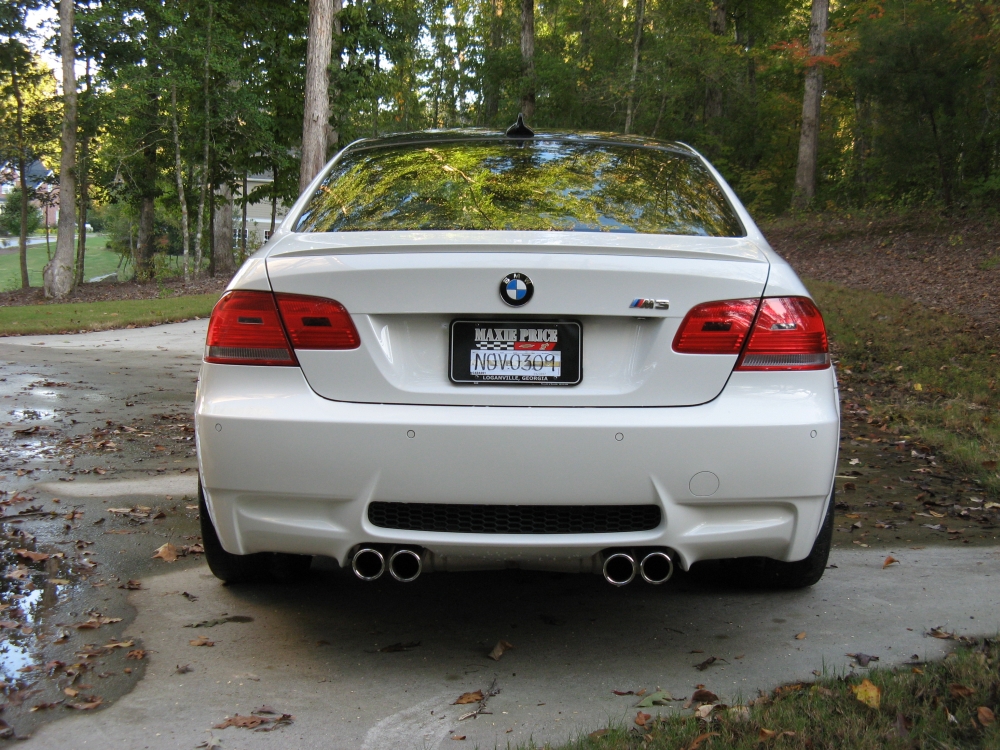
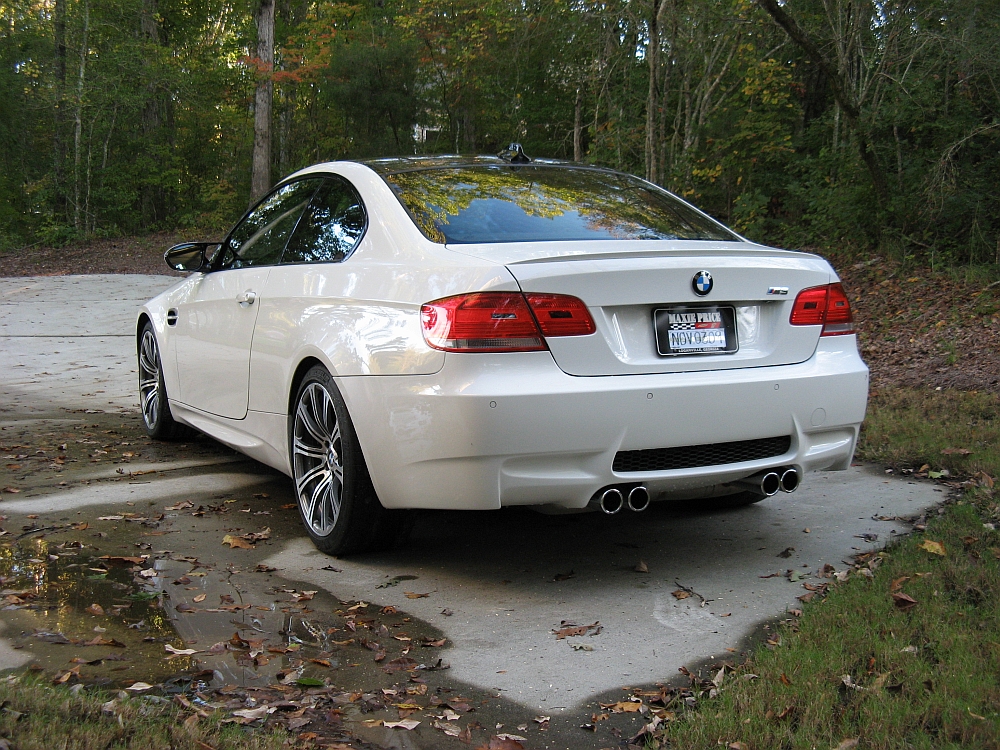
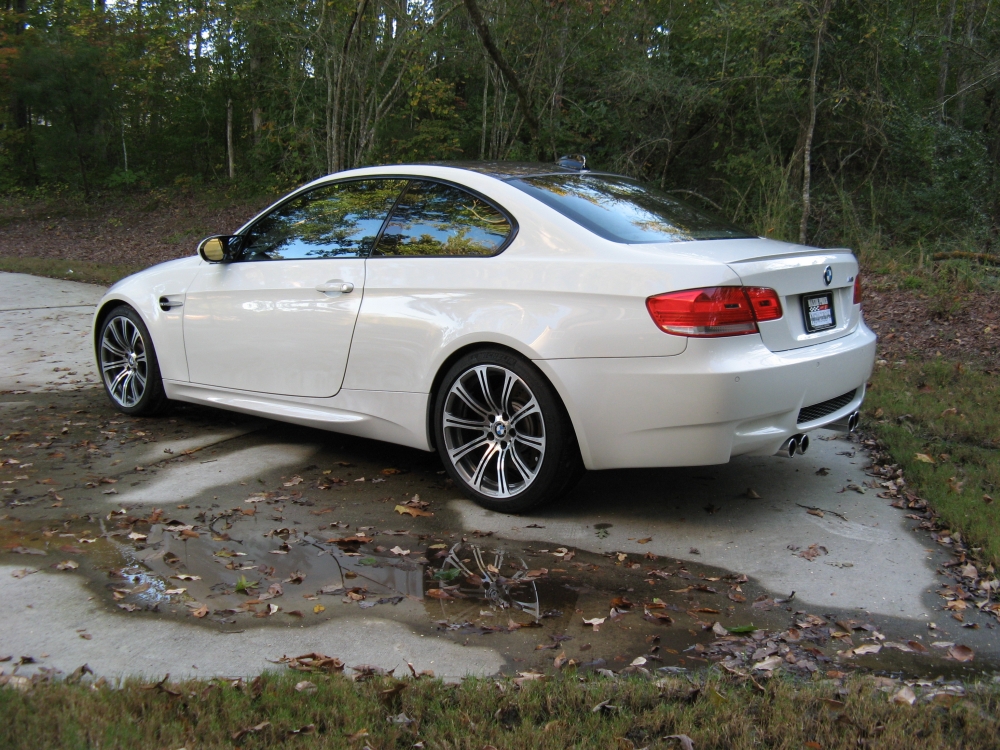
Click on thumbnails below for larger pics....
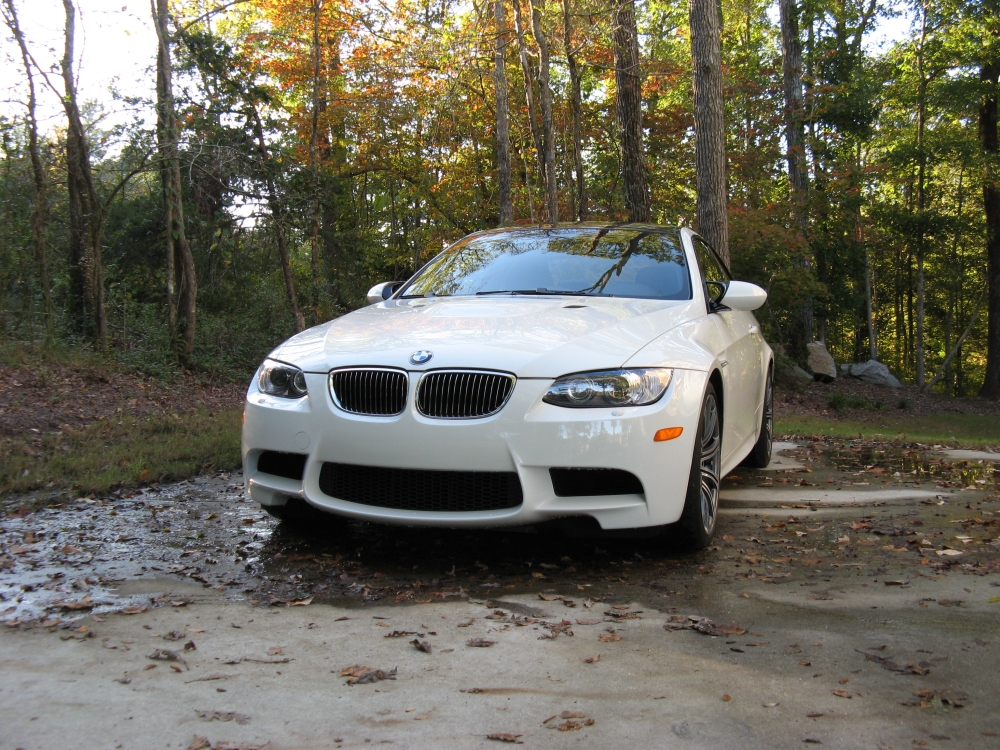
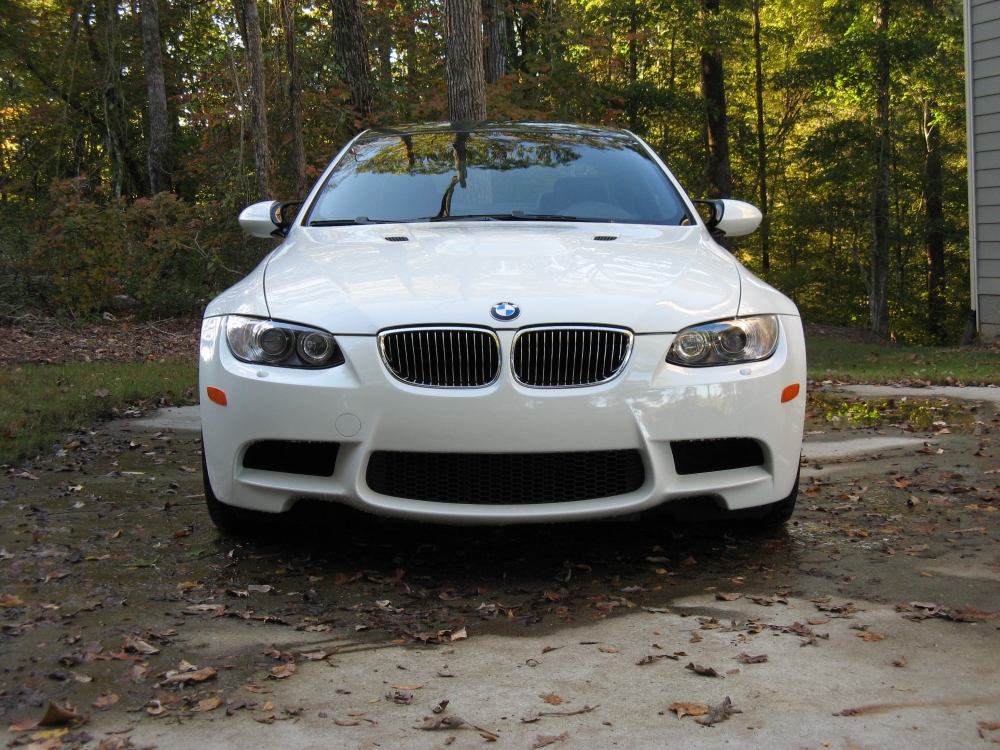
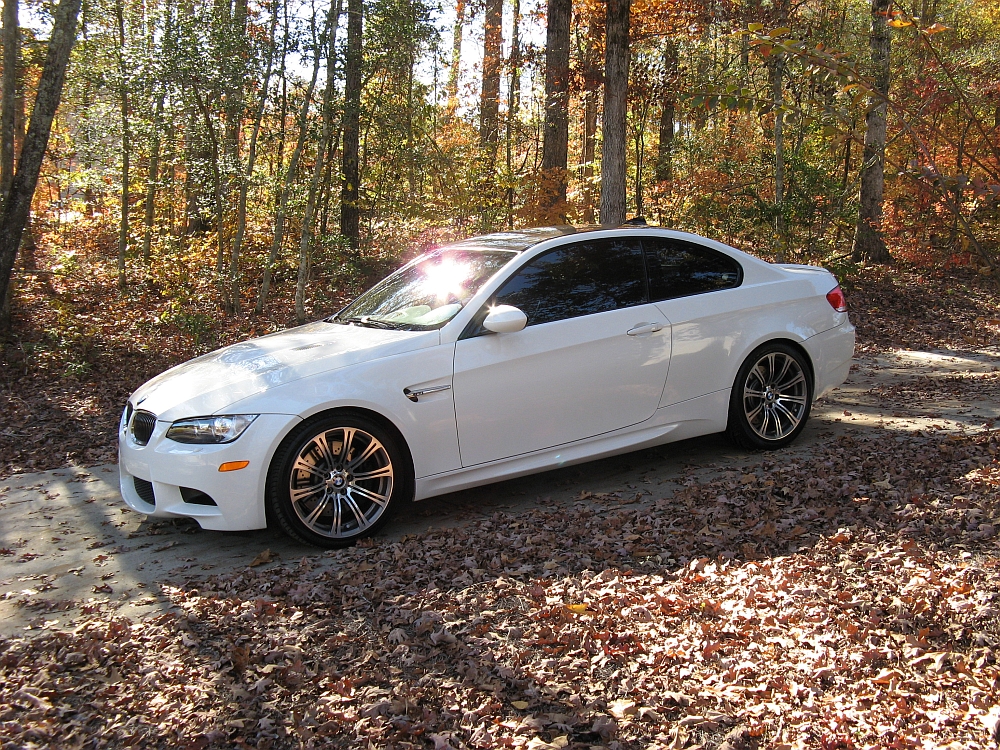
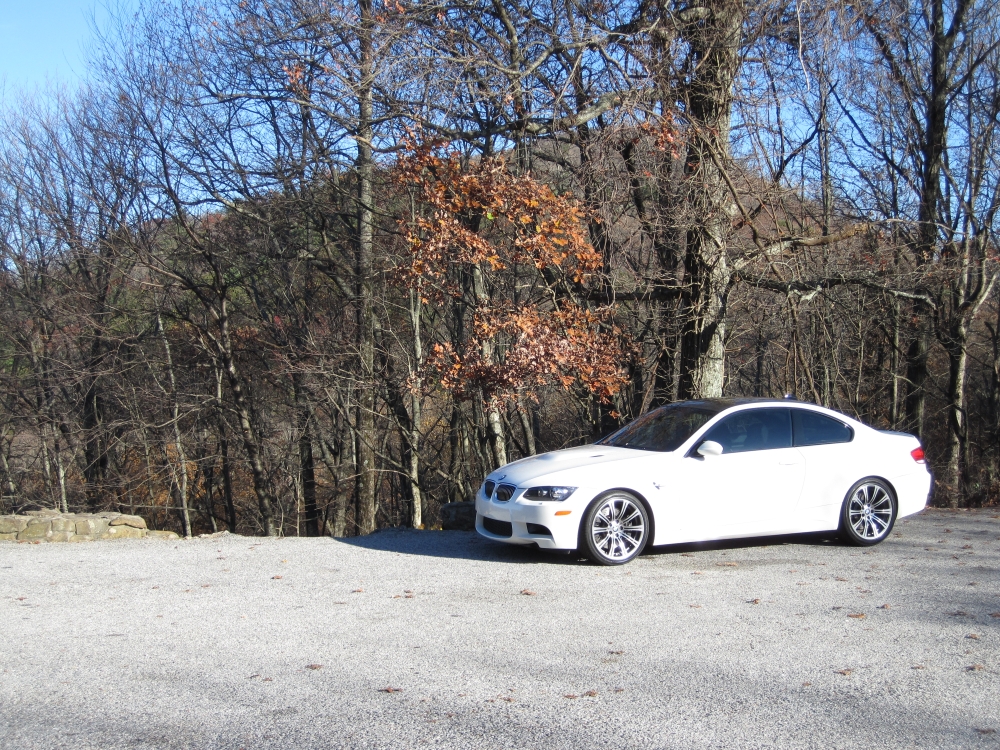
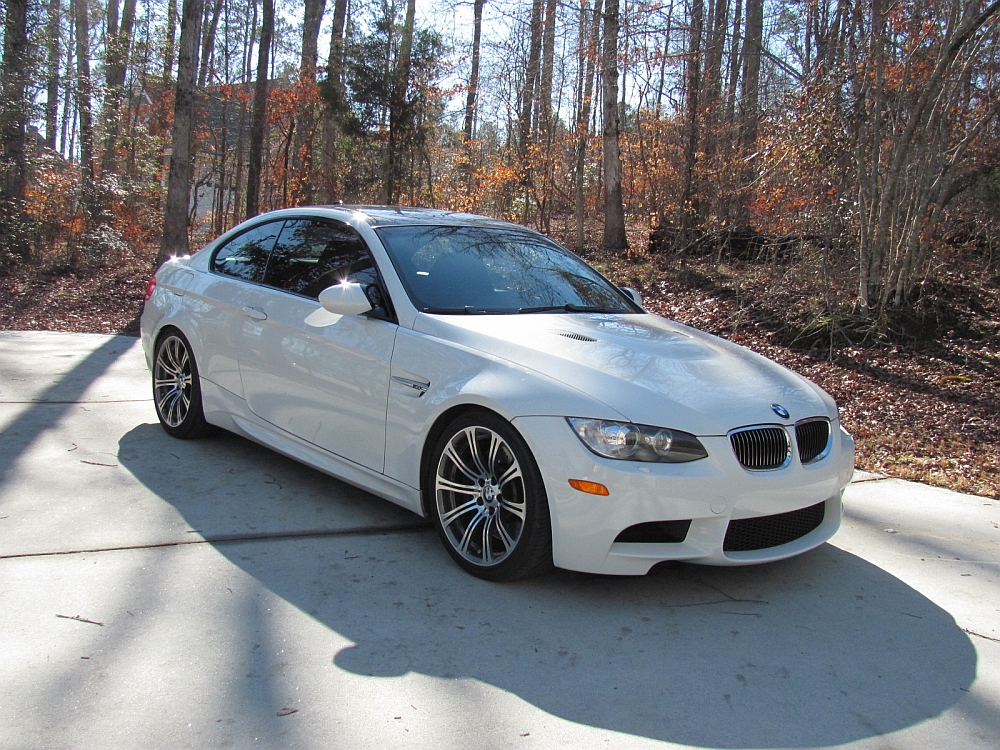
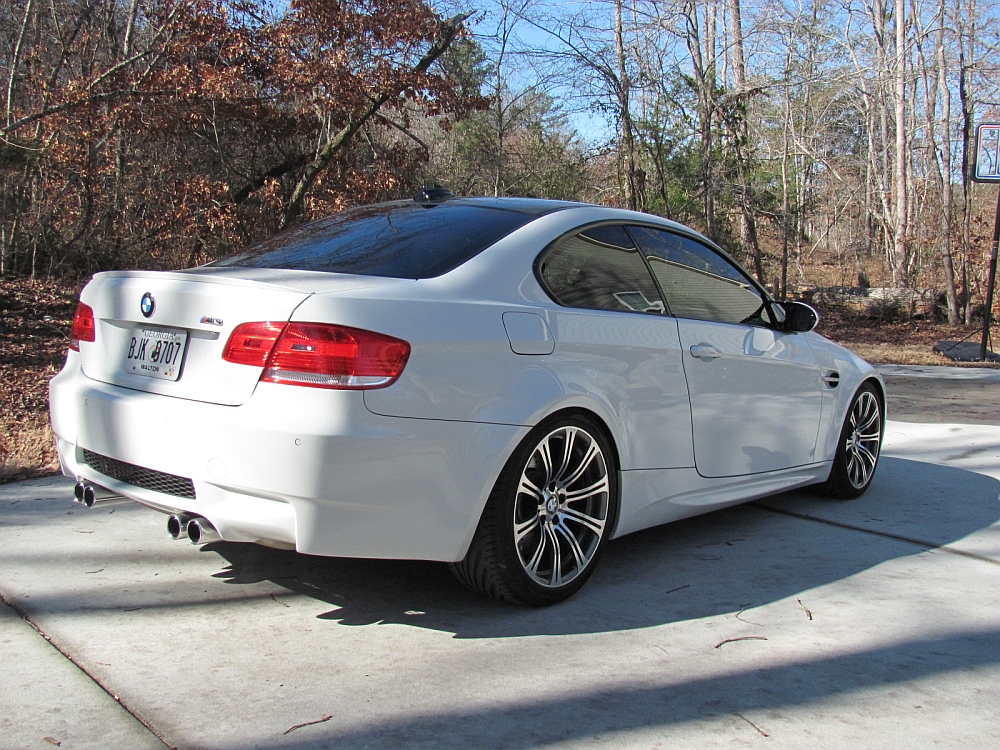
This M3 was a pre-owned BMW that was purchased from Maxie Price Chevrolet-
The original owner traded it in on a new Corvette ZR1. Our sales consultant, Lou Estevez, was great during the test drives and sale. We had taken new
M3s for test drives and were underwhelmed, on the new car test drives we kept the tach under 5k RPMs out of respect for the future owners and salesman,
these cars are typical M and really have most of the power near redline. Being able to drive this pre-owned M to it's full potential sealed the deal, my
wife and I both felt the car was better than our modded 335 which surprised both of us.
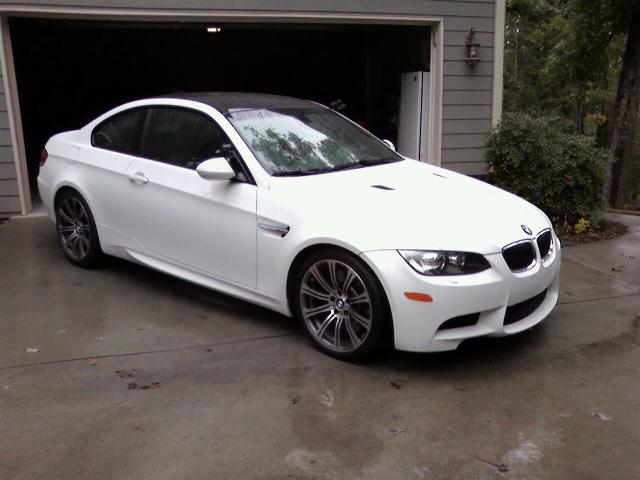
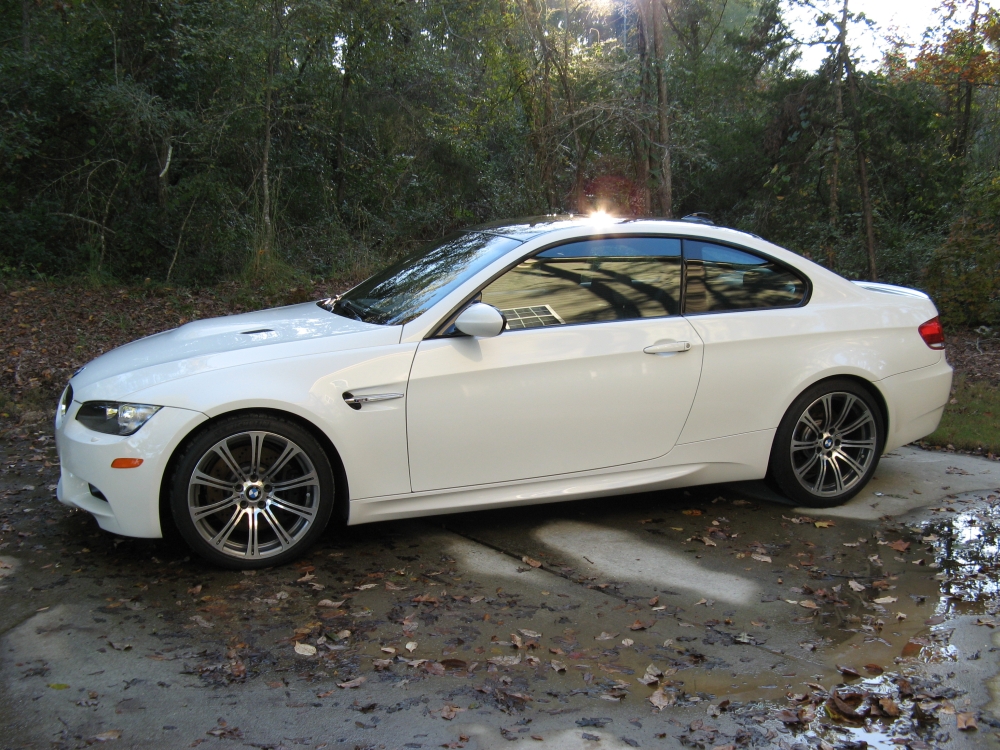
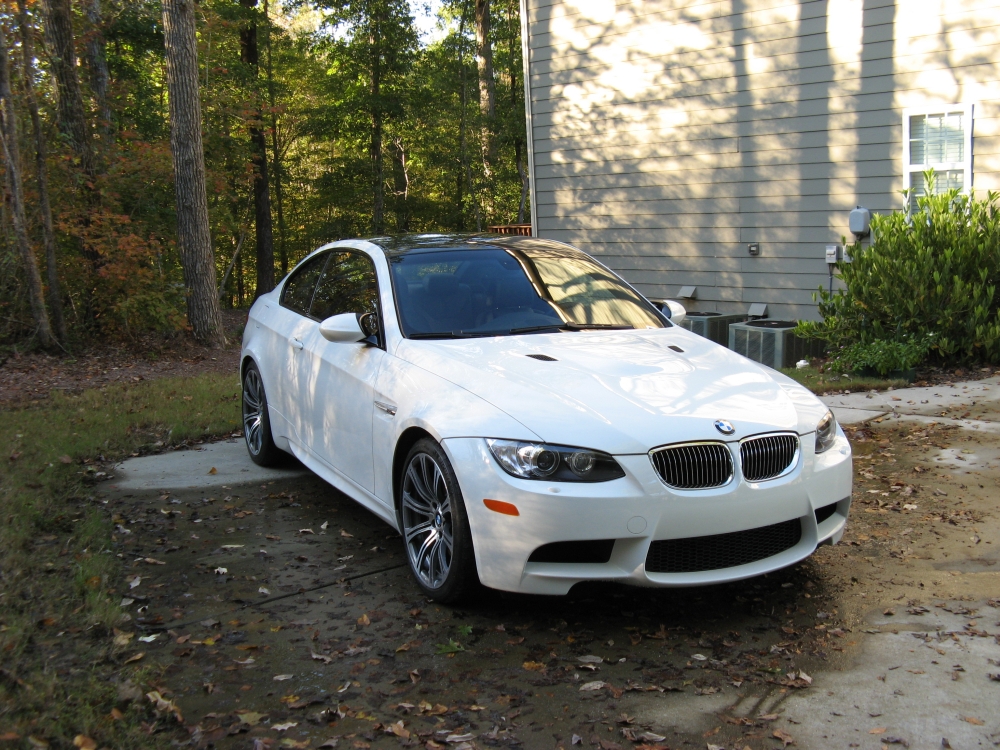
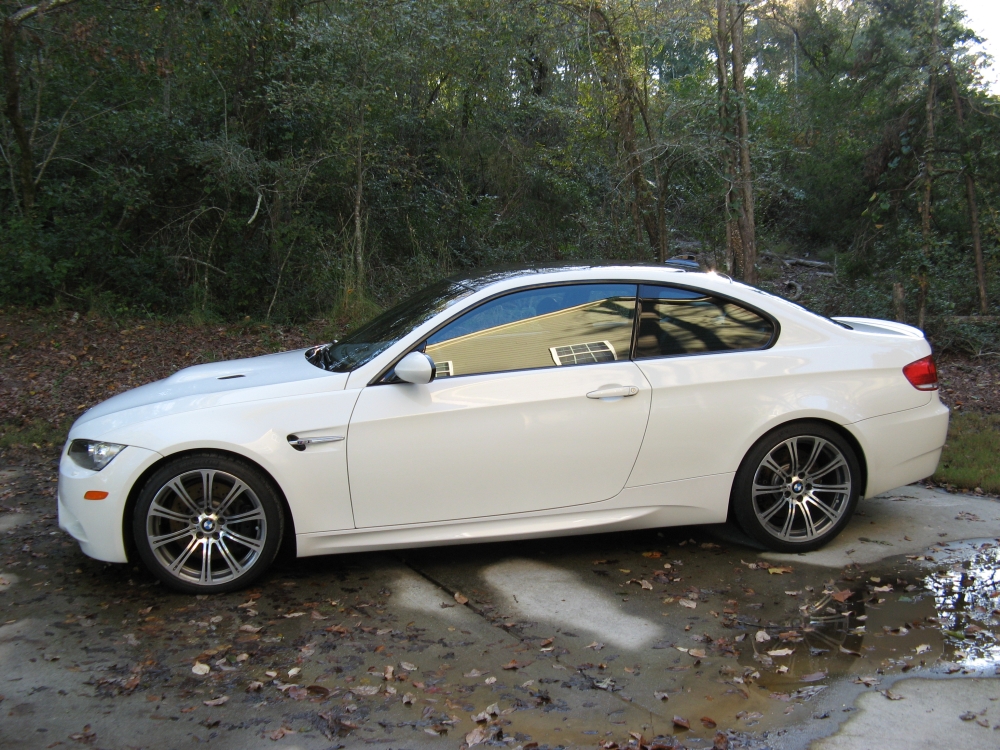
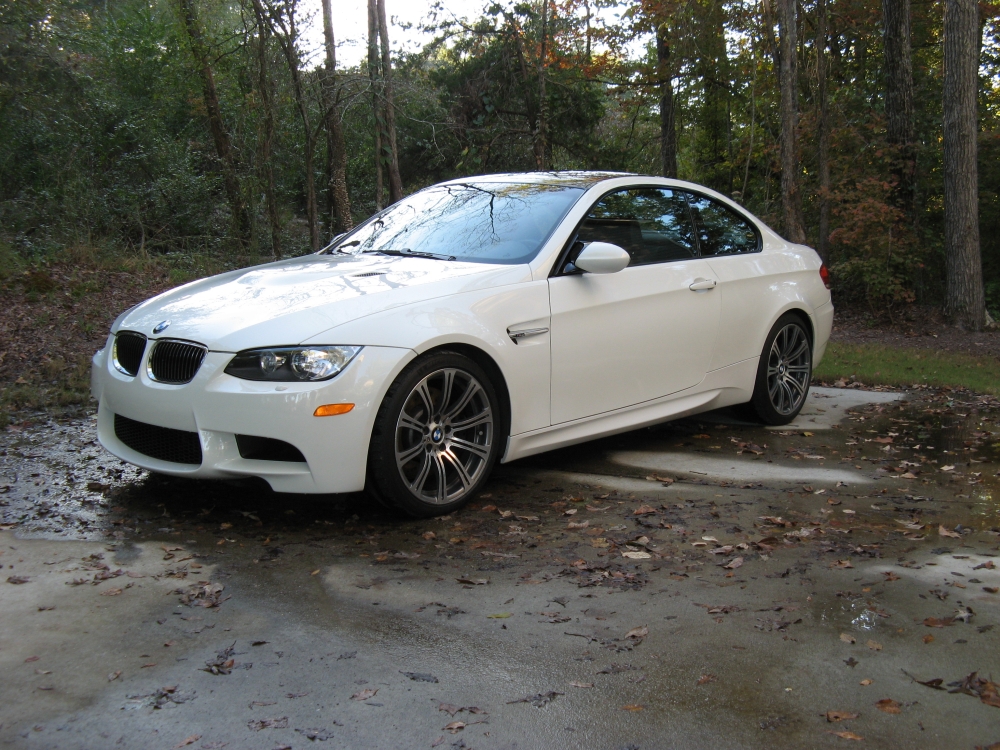
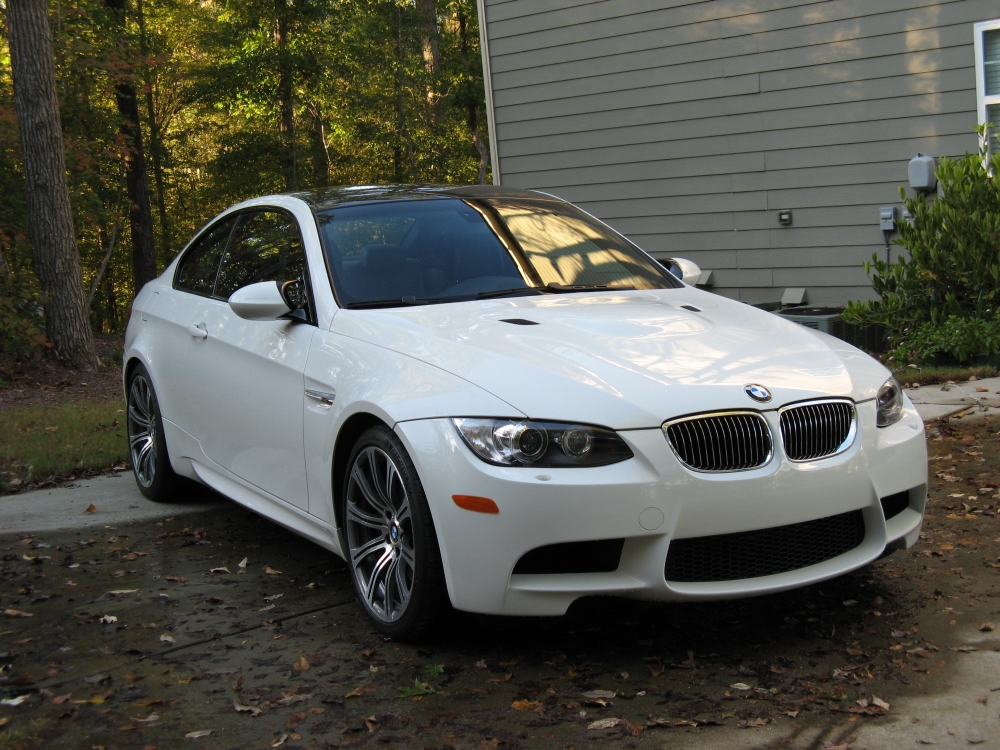
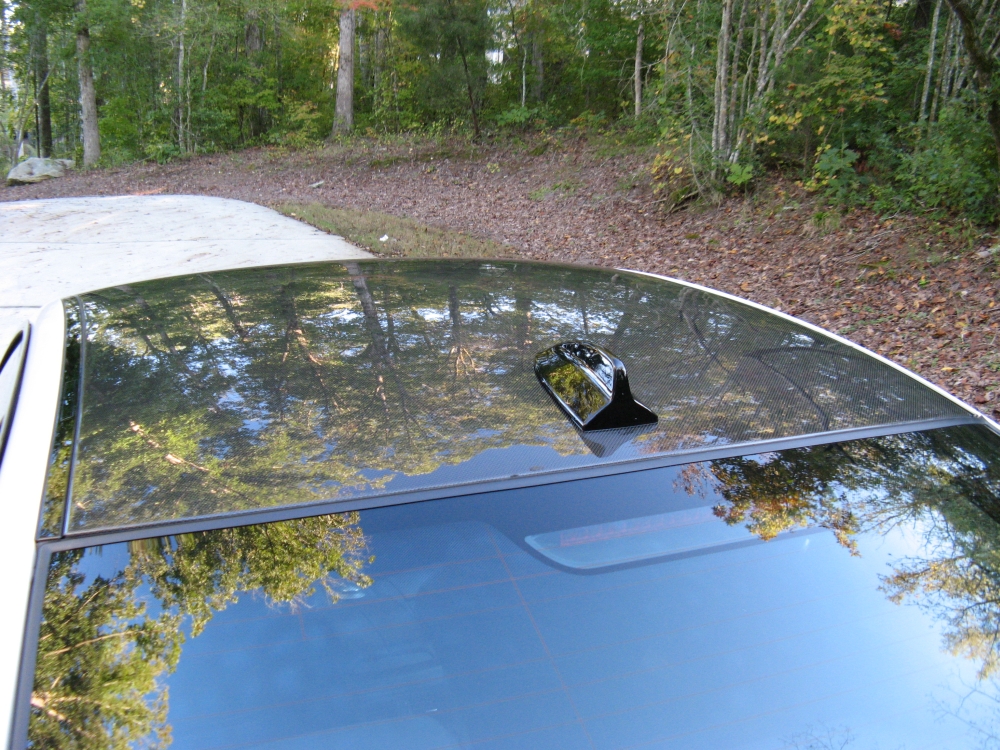
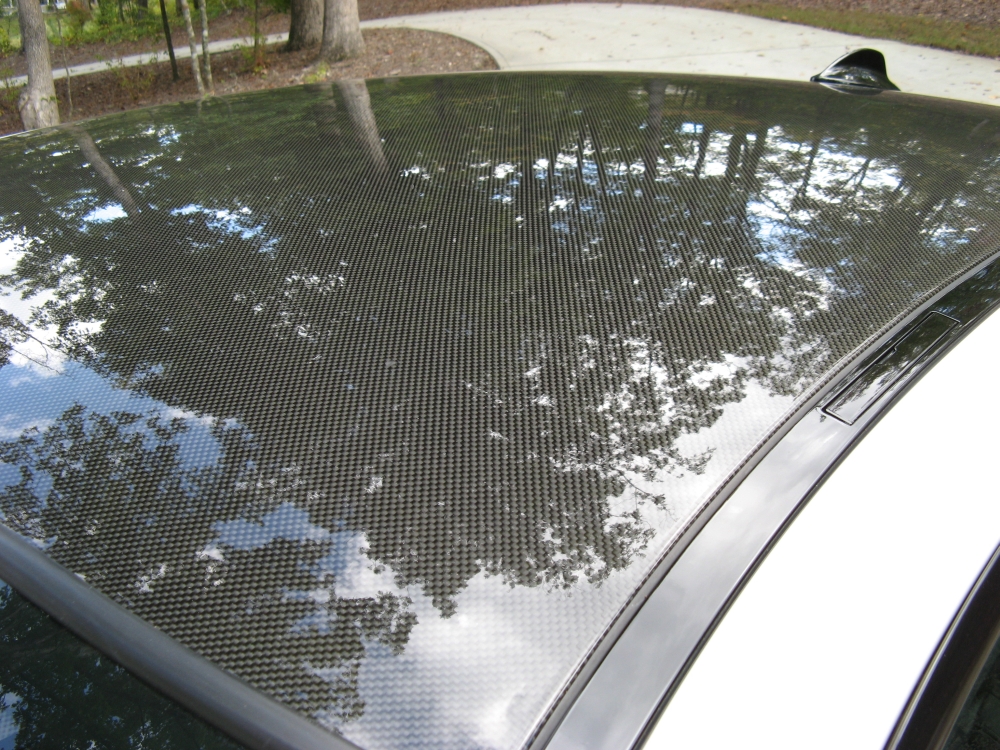
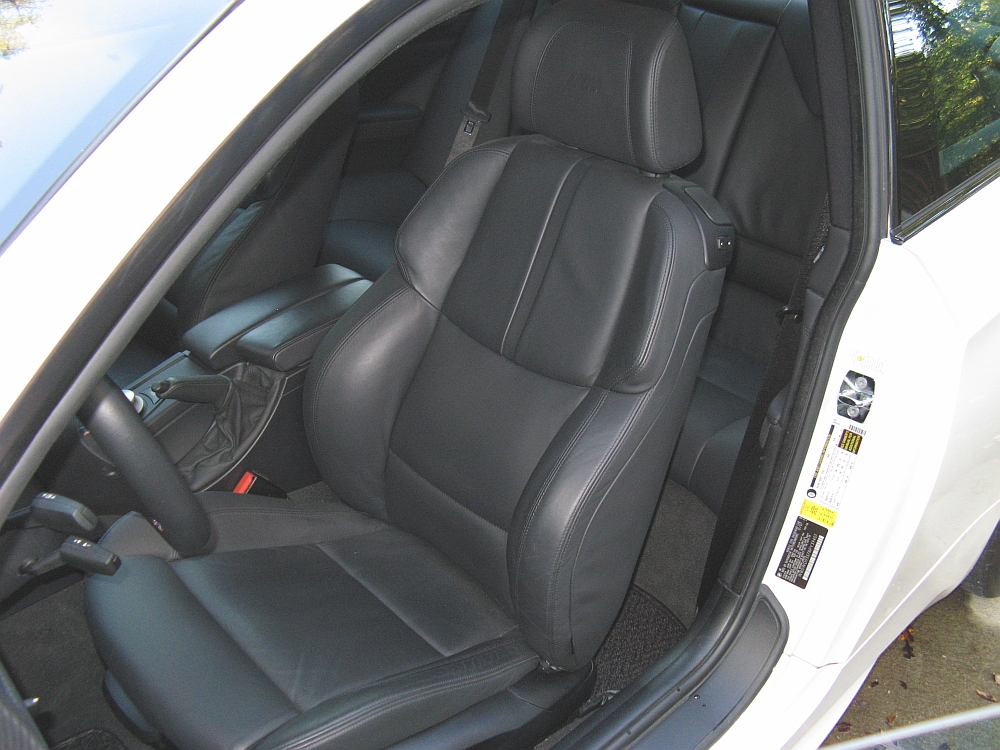
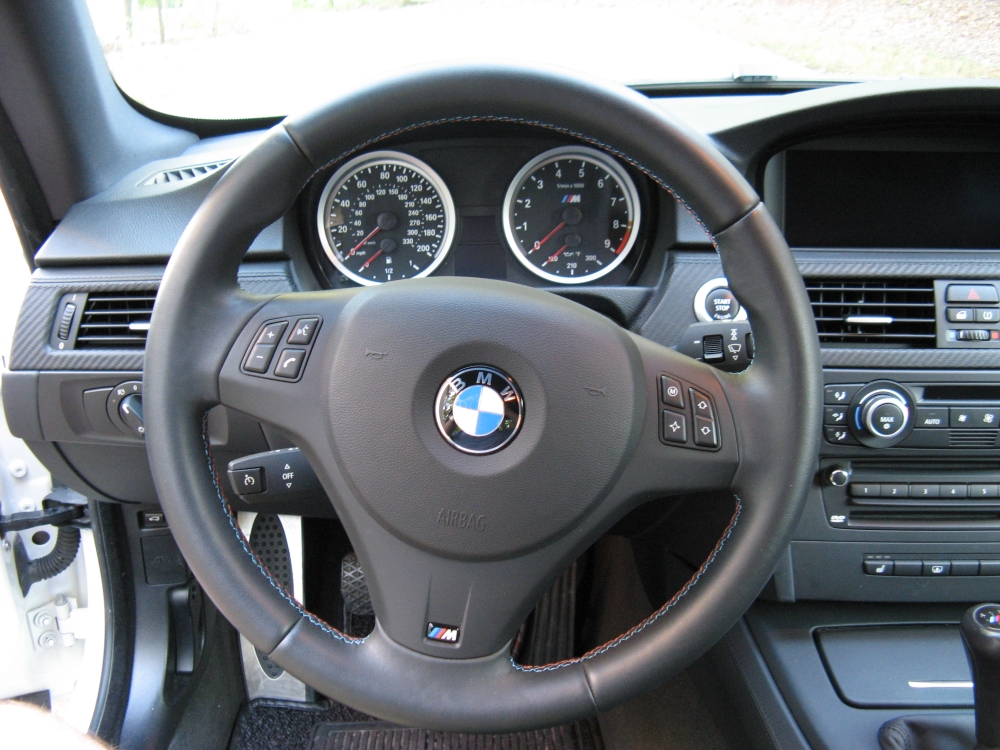
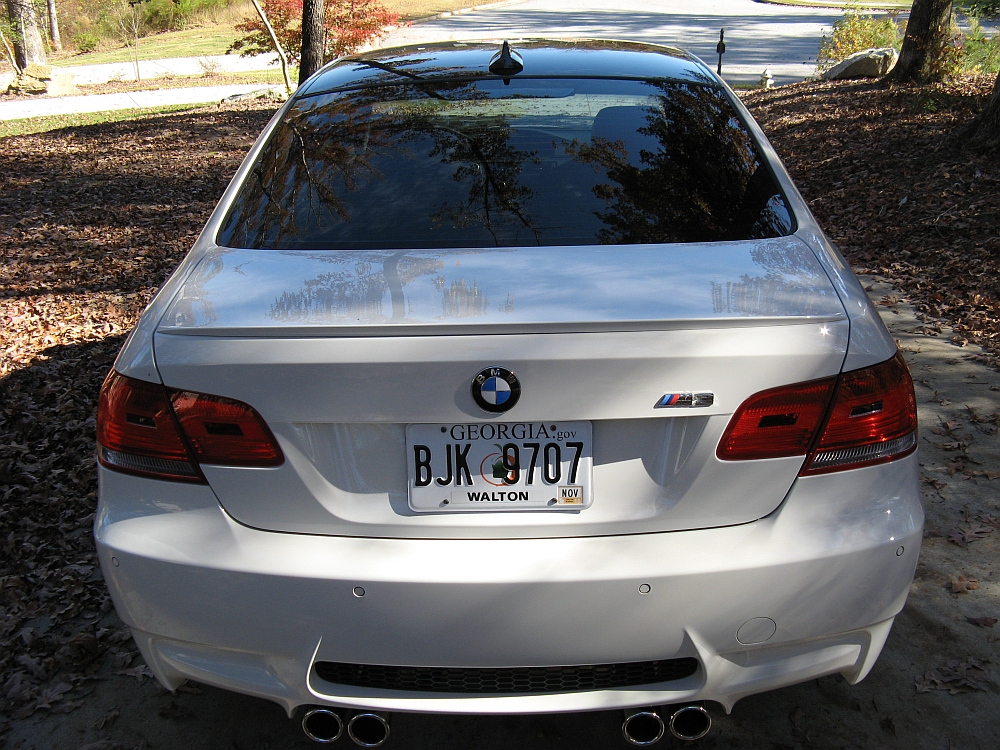
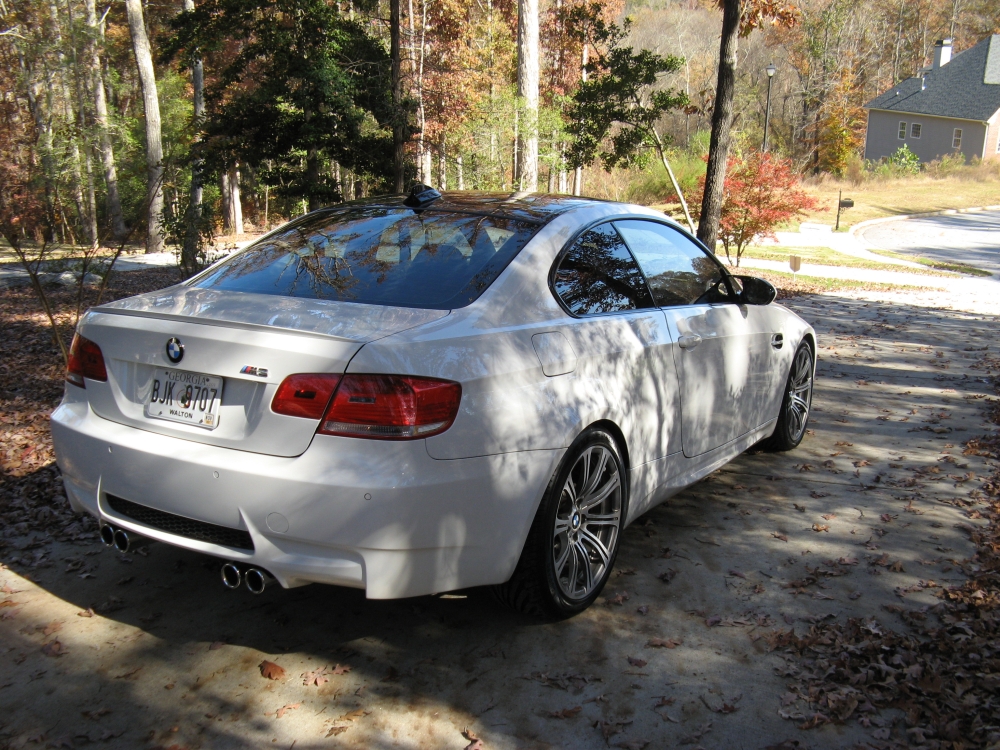
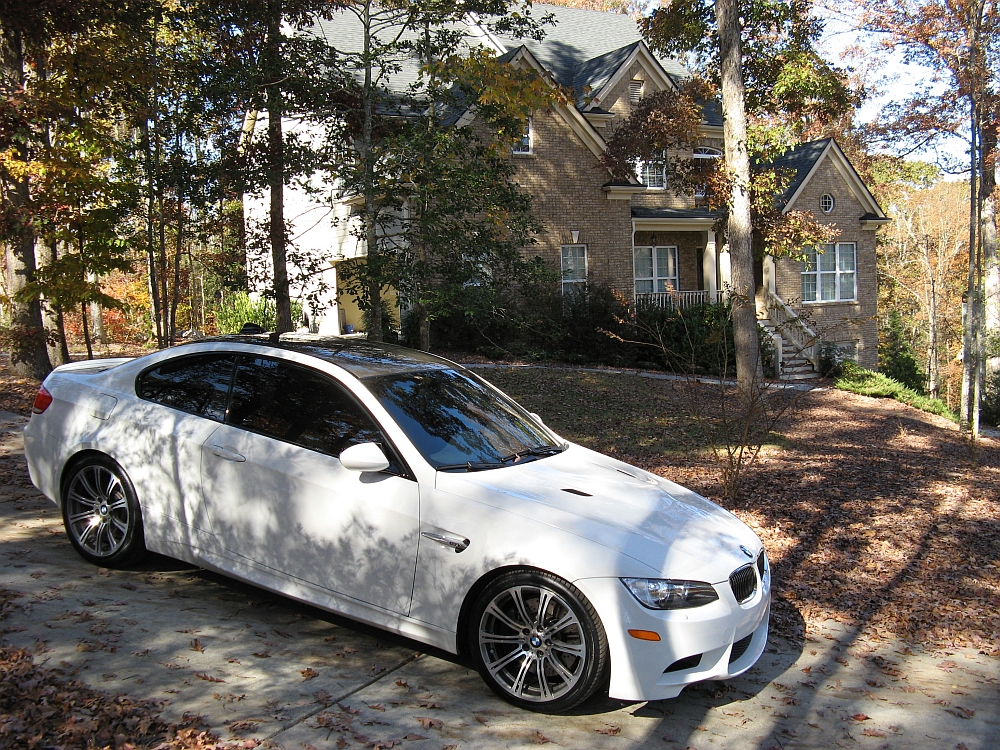
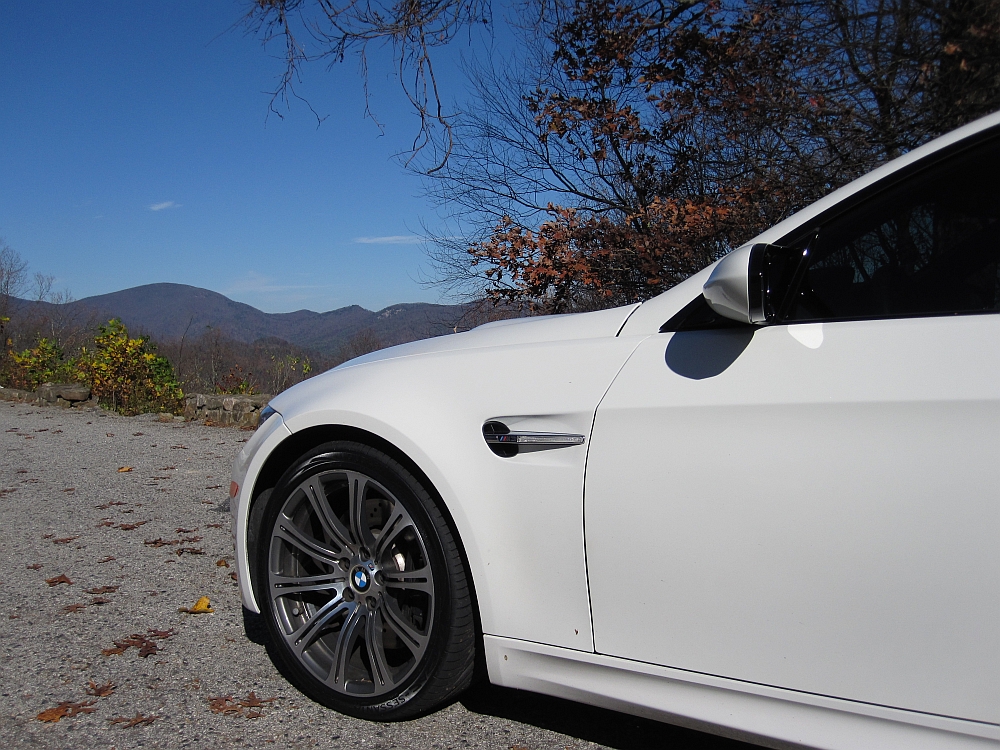
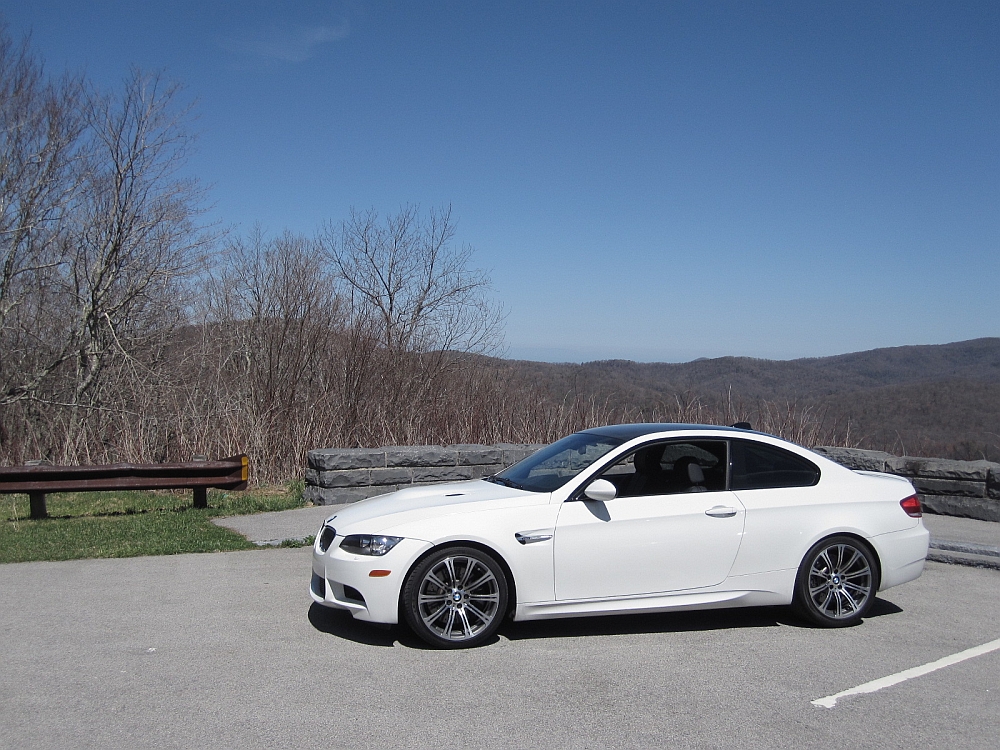
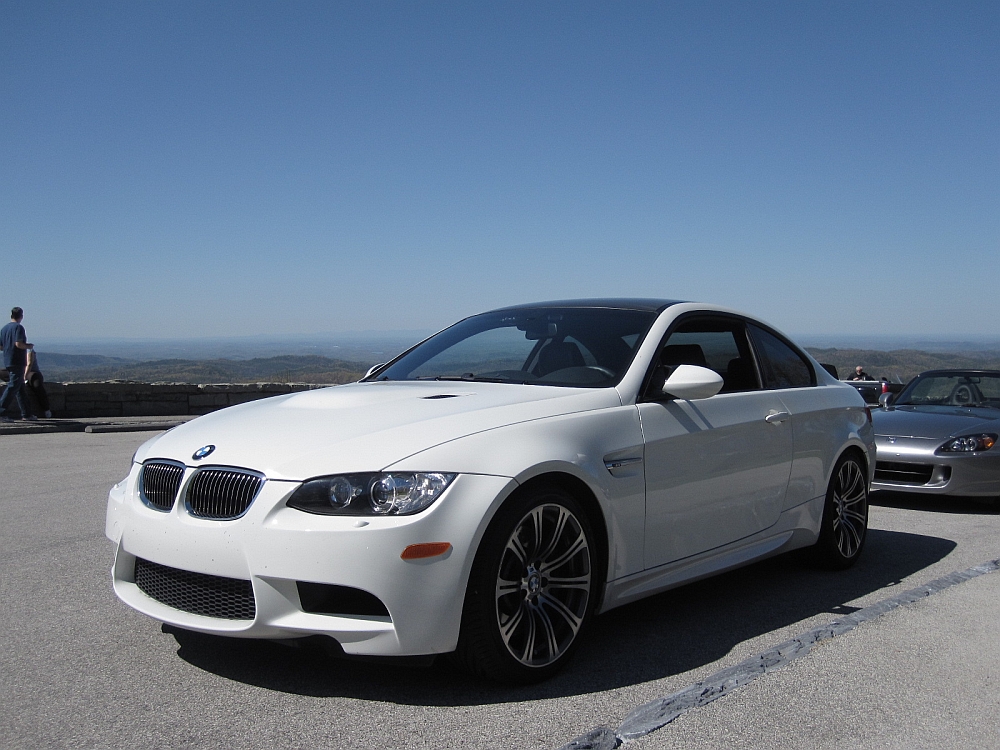
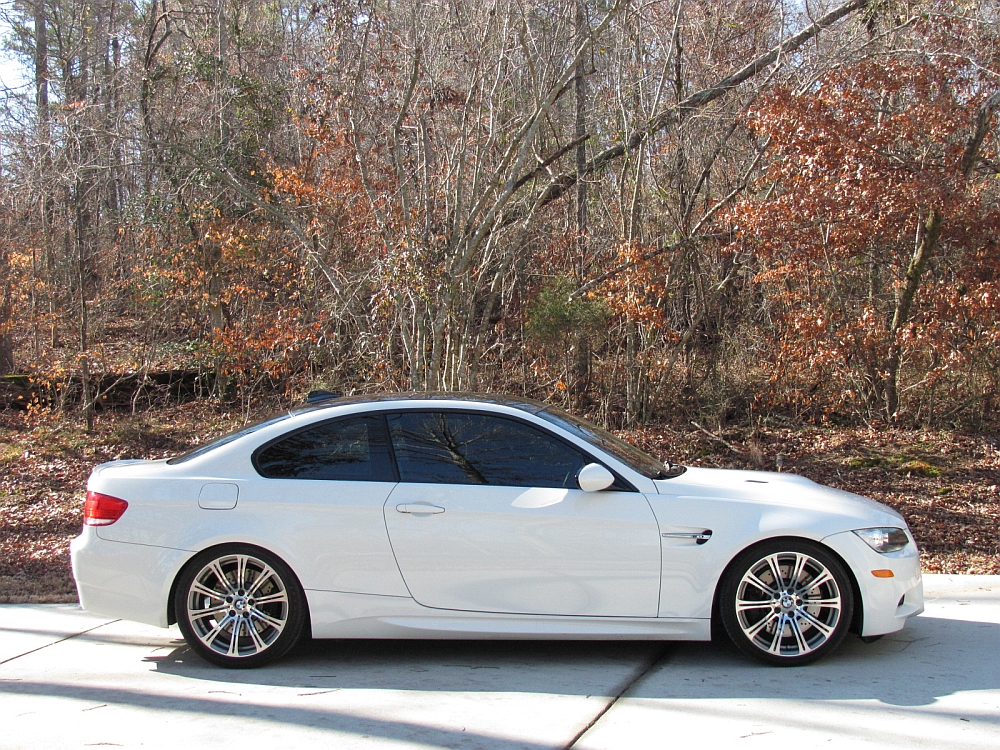
This 2008 BMW M3 was equipped with all available packages and options and was practically new (OK, just broken in),
and we decided to trade my wife's 335 in for this. The 335 had H&R sway bars and M suspension parts, but the M test drive proved that a car designed and
built by the factory is superior. The M seemed to ride and handle better and the exhaust note is......
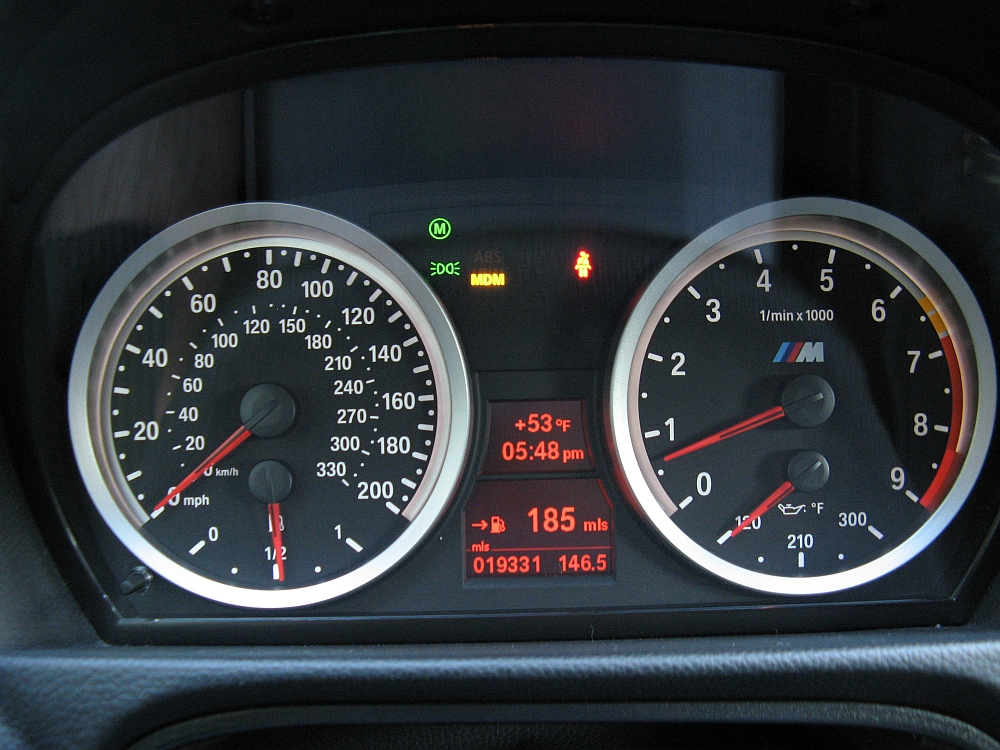
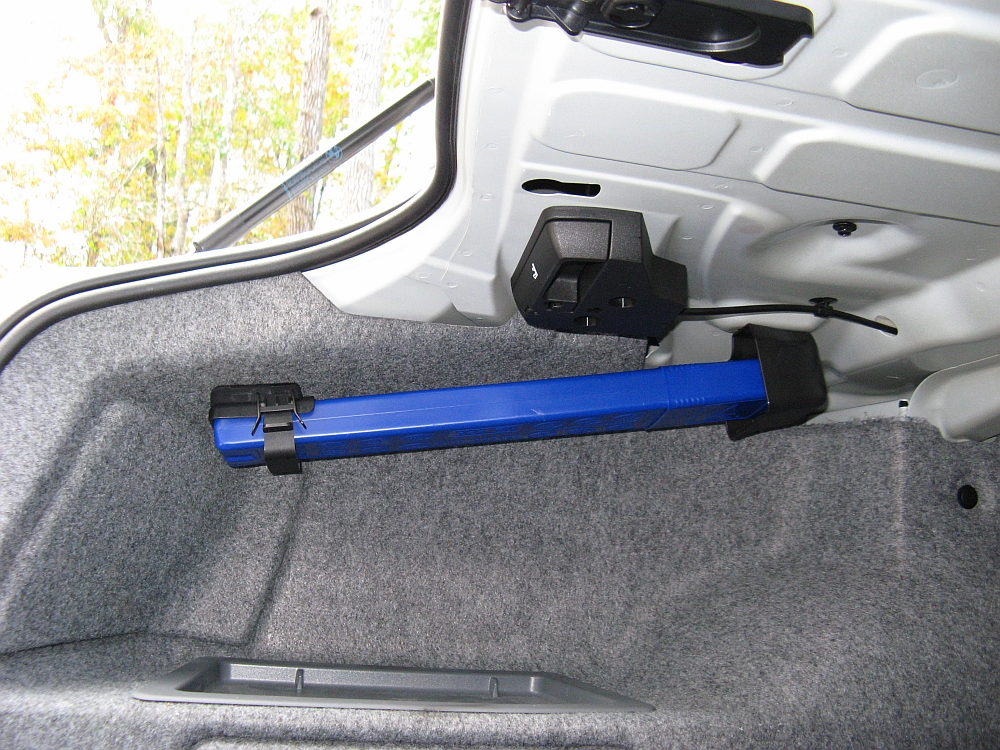
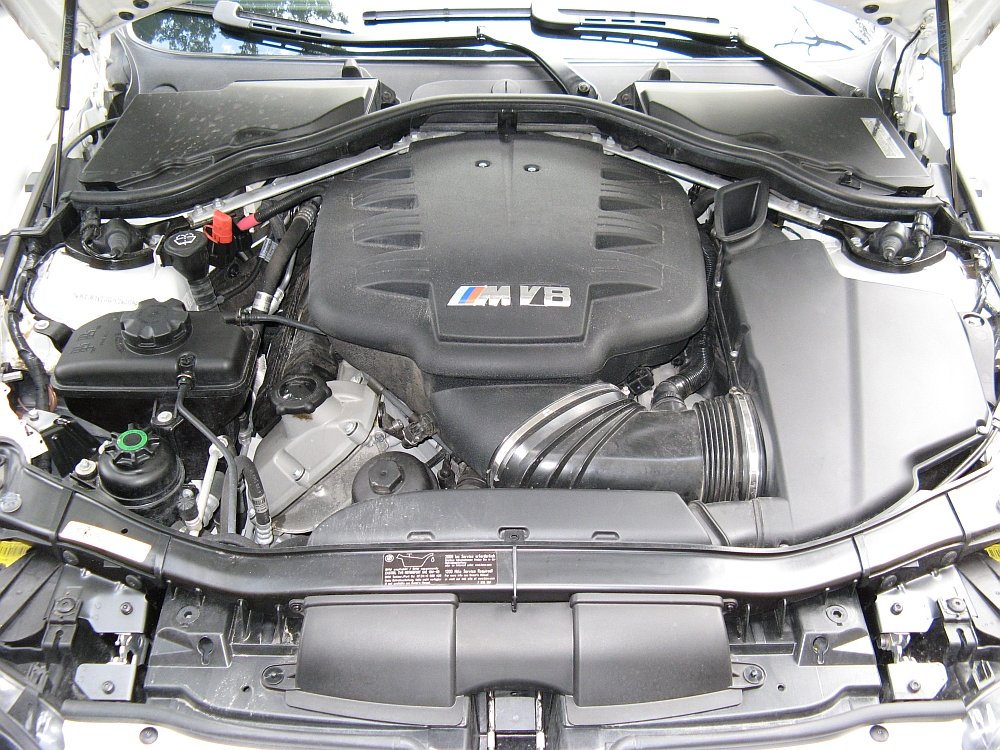
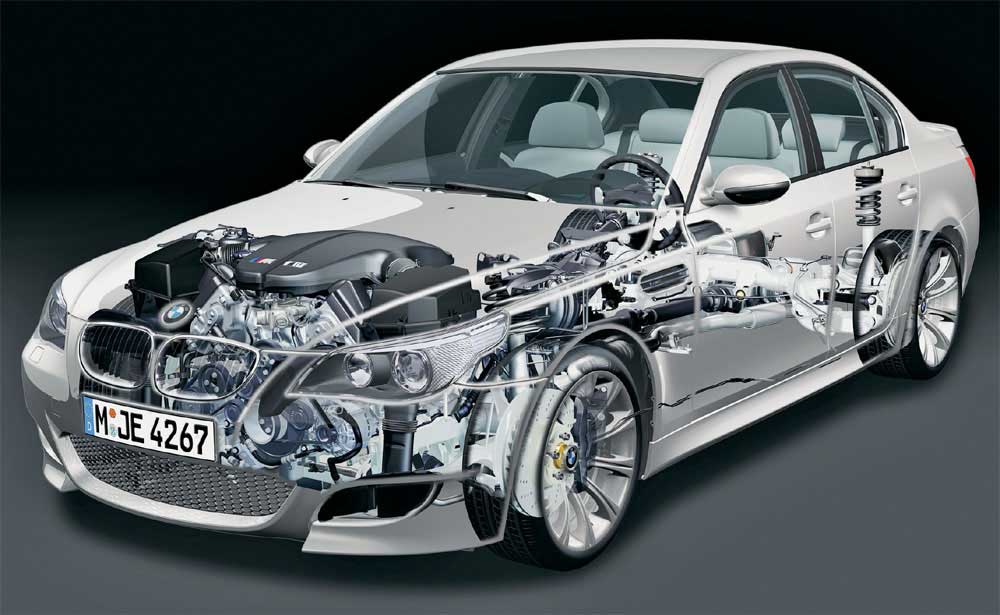
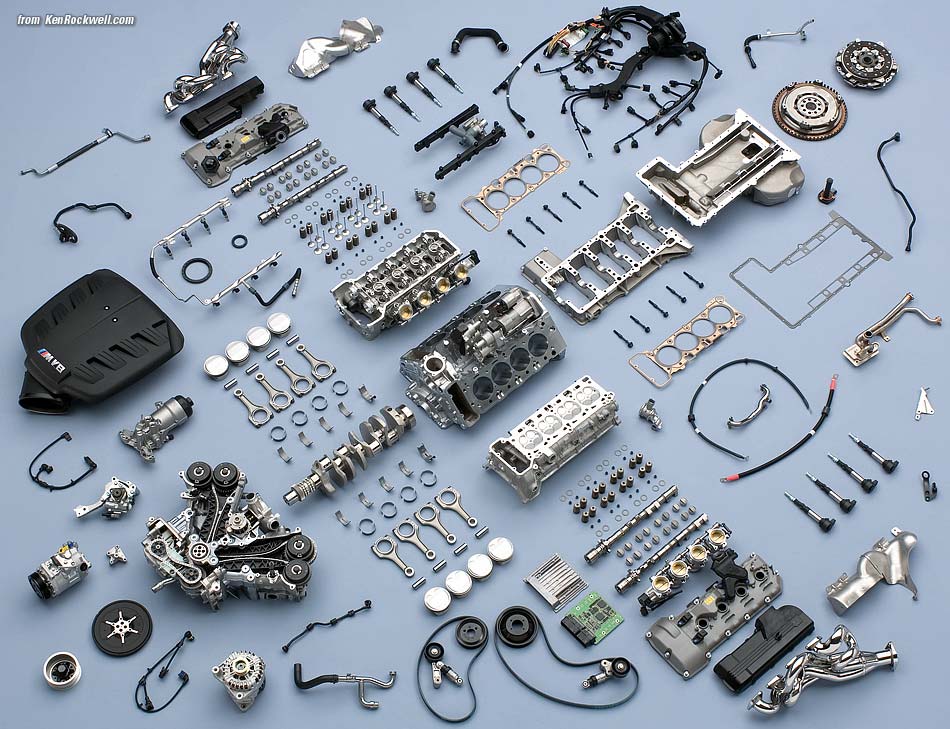
The S65 motor in this M is made in the same factory that produces BMW F1 engines and is a first for the M 3-series cars, a V8. All of the things we bought to personalize the
335 were transferred to the M3, including the euro delivery road hazard triangle and first aid kit:
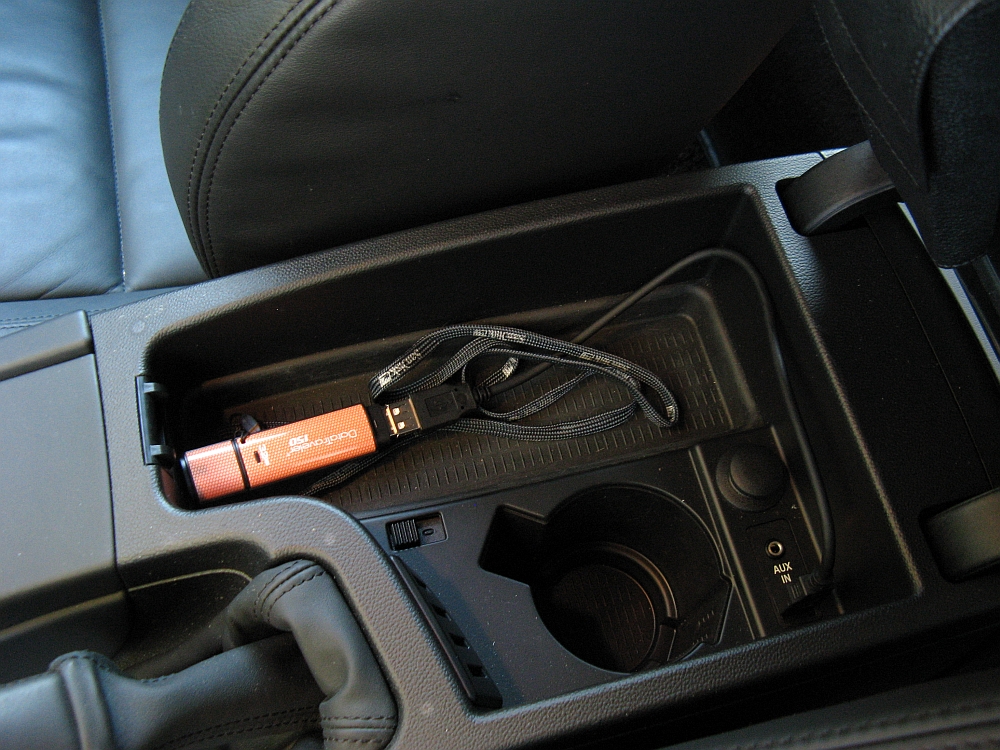
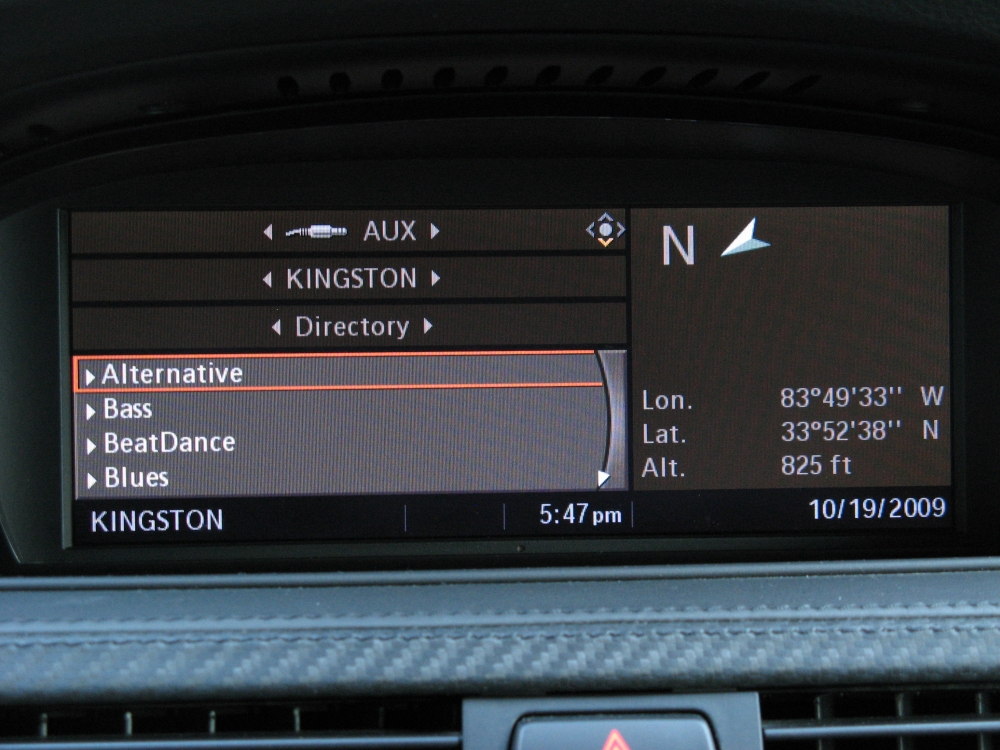
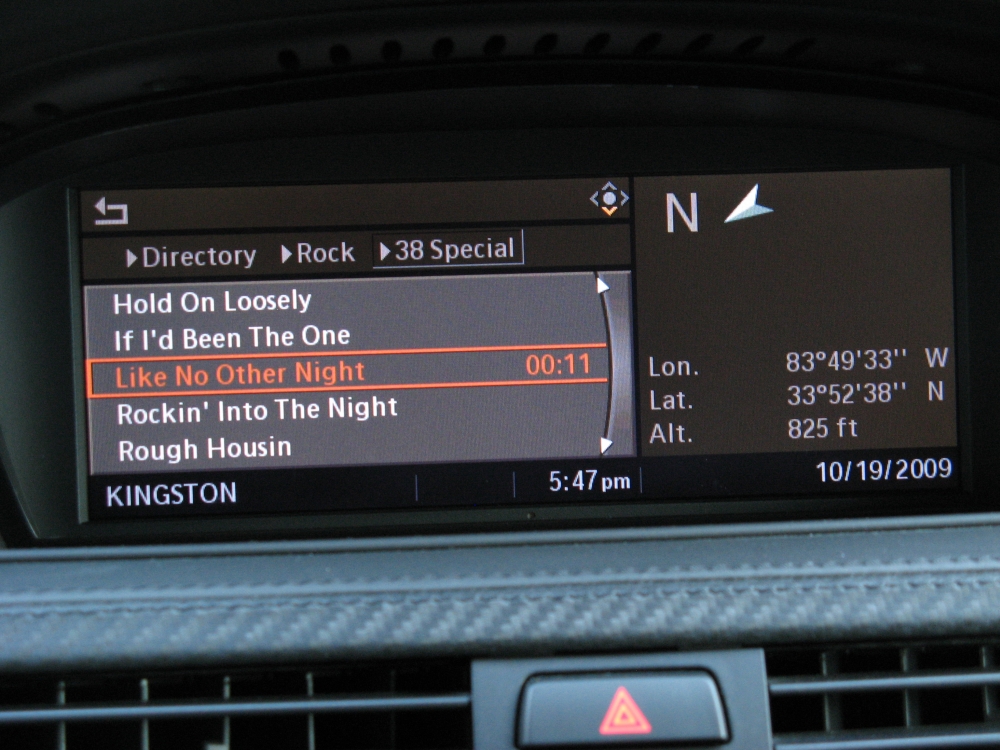
This car came
with the USB iPod or flash drive port, we elected to use a Kingston 32GB Flash Drive. Works great, just copy MP3 folder to flash drive and
iDrive allows you to scroll through folders and songs within folders- very functional and sounds great:
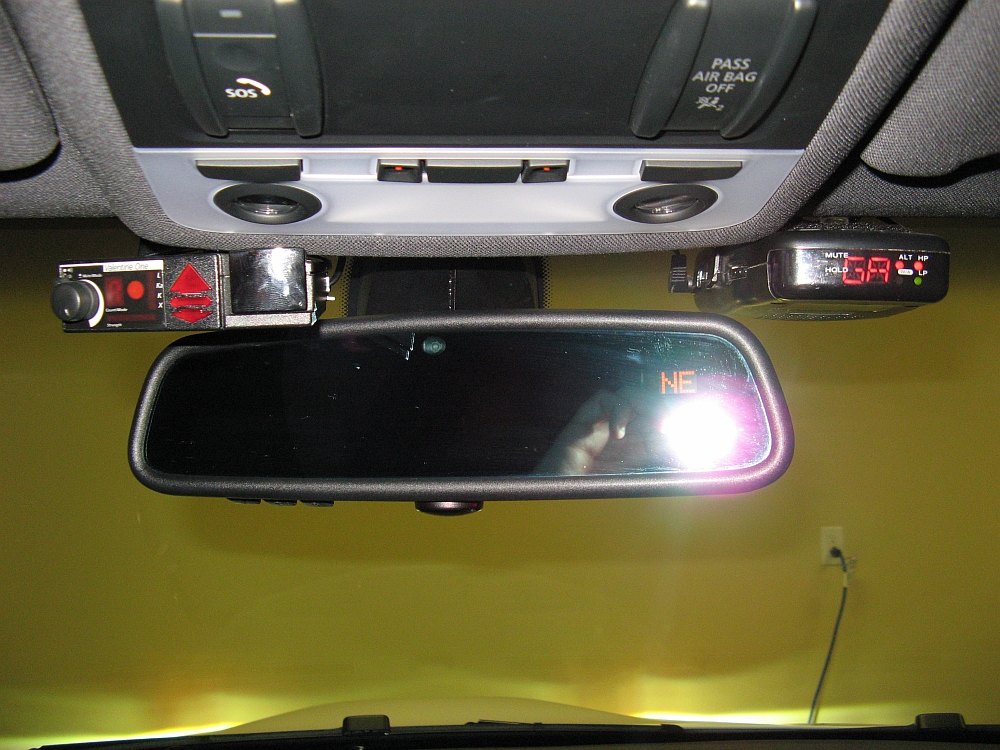
Valentine 1
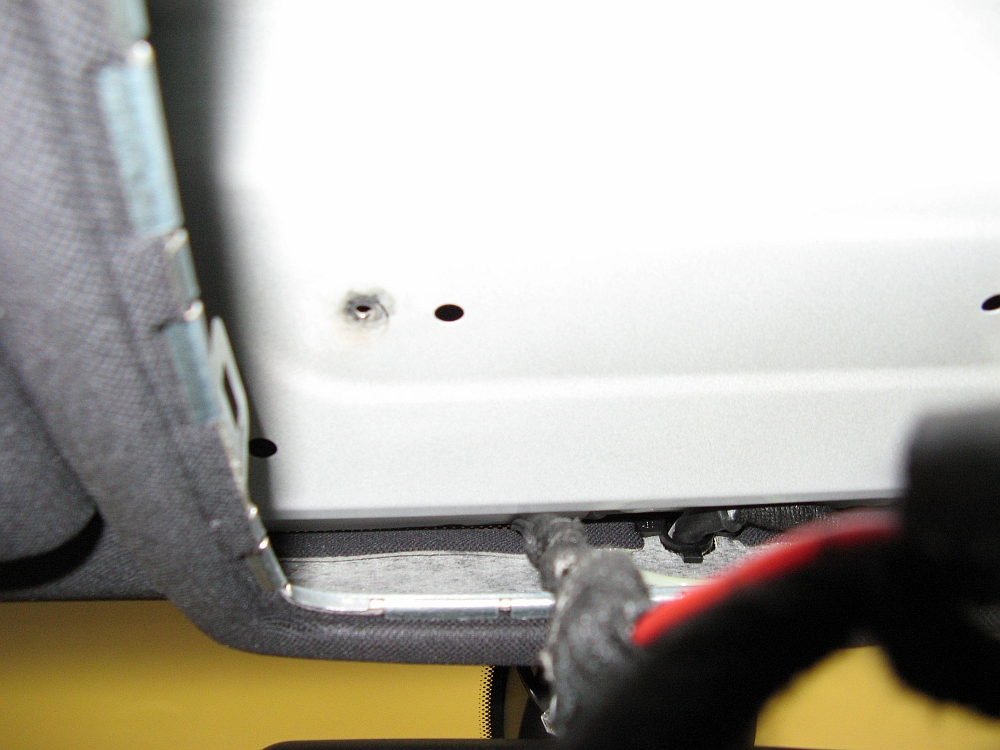
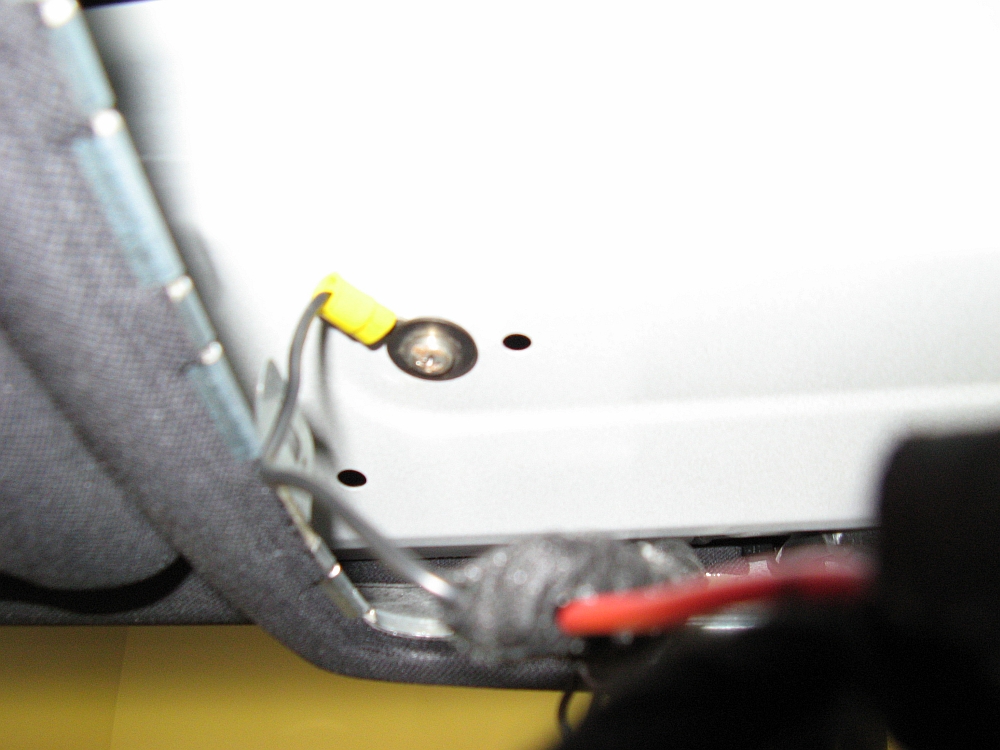
hard wired, not easily noticed looking in from outside- (manual here). There are two approaches to hard wiring the detectors: one is to use the
Homelink power wire in the upper front console as detailed HERE or to run a wire to
the fuse box and use a tap as detailed HERE. I decided to use the Homelink
power wire to avoid running wire under the a-pillar airbag. Since our M3 had the carbon fiber roof, I also had to drill a small hole in the metal support
to allow for a small ground screw- be careful NOT to drill through your roof and lightly sand around the drilled hole for a good ground...also use a short screw that does not touch the CF roof
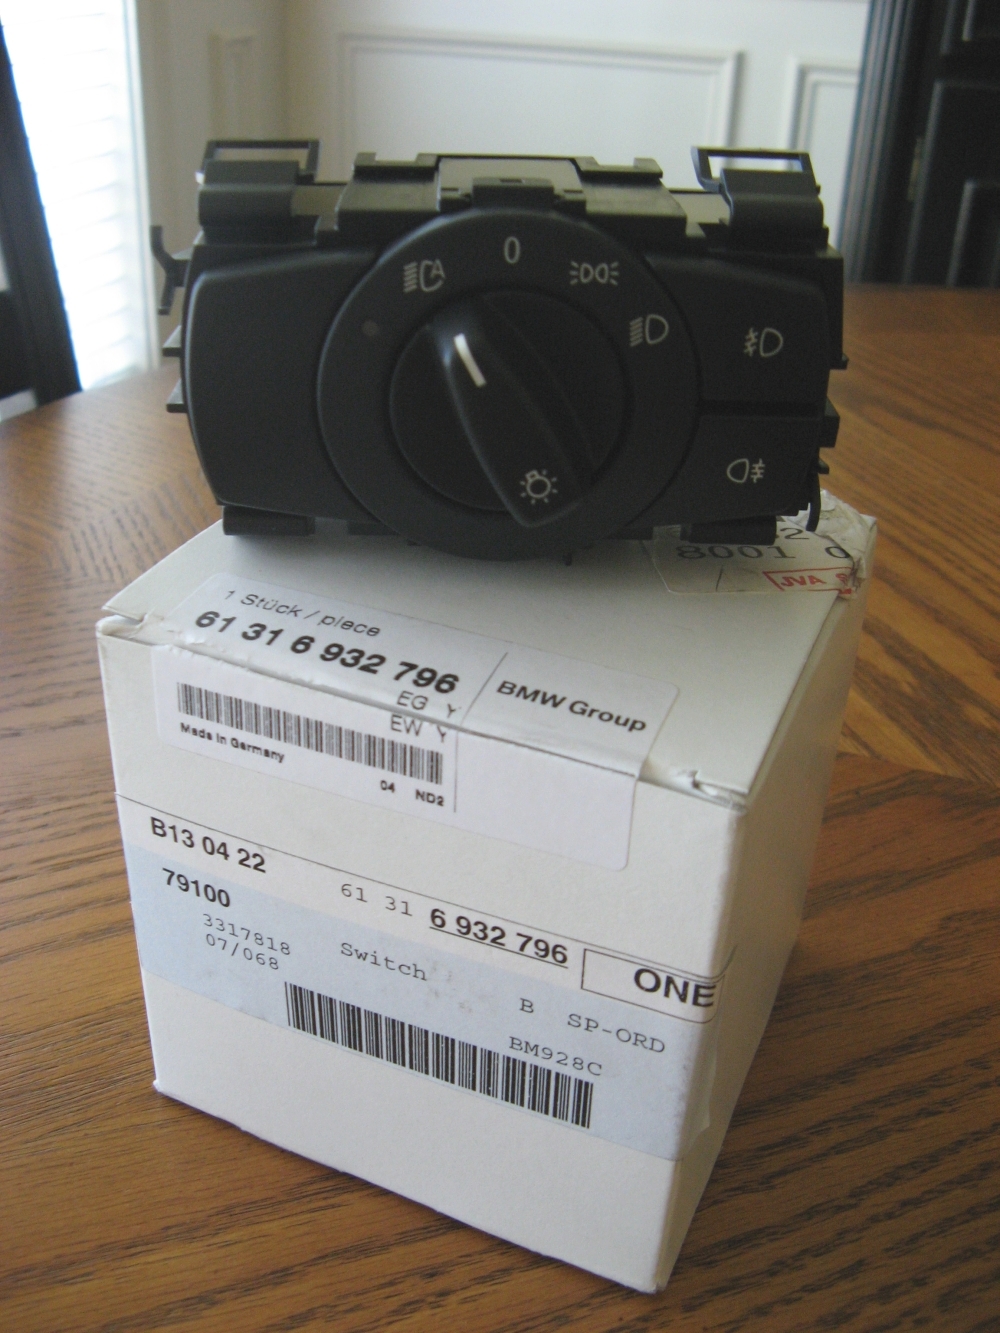
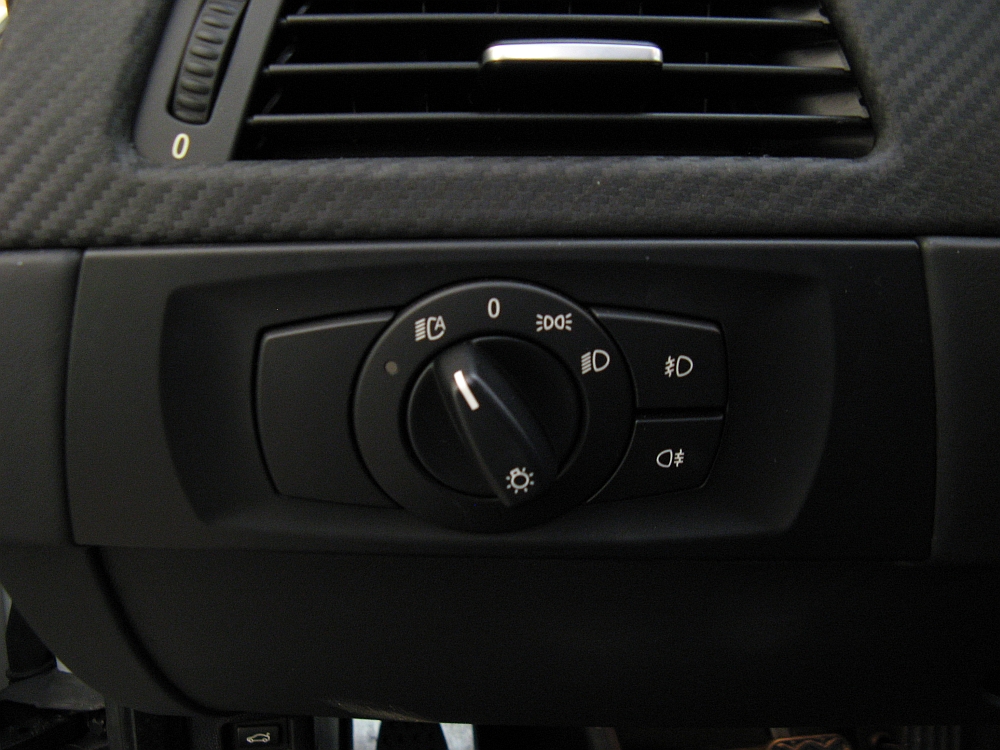
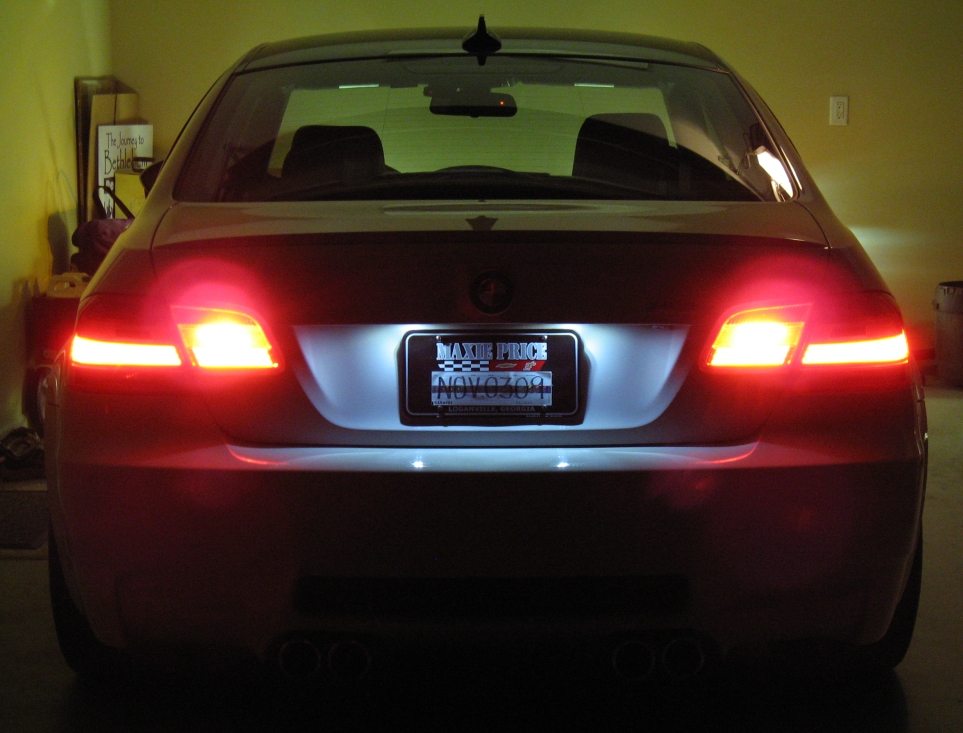
European light switch (P/N 61316932796) from Tischer BMW Parts installed.
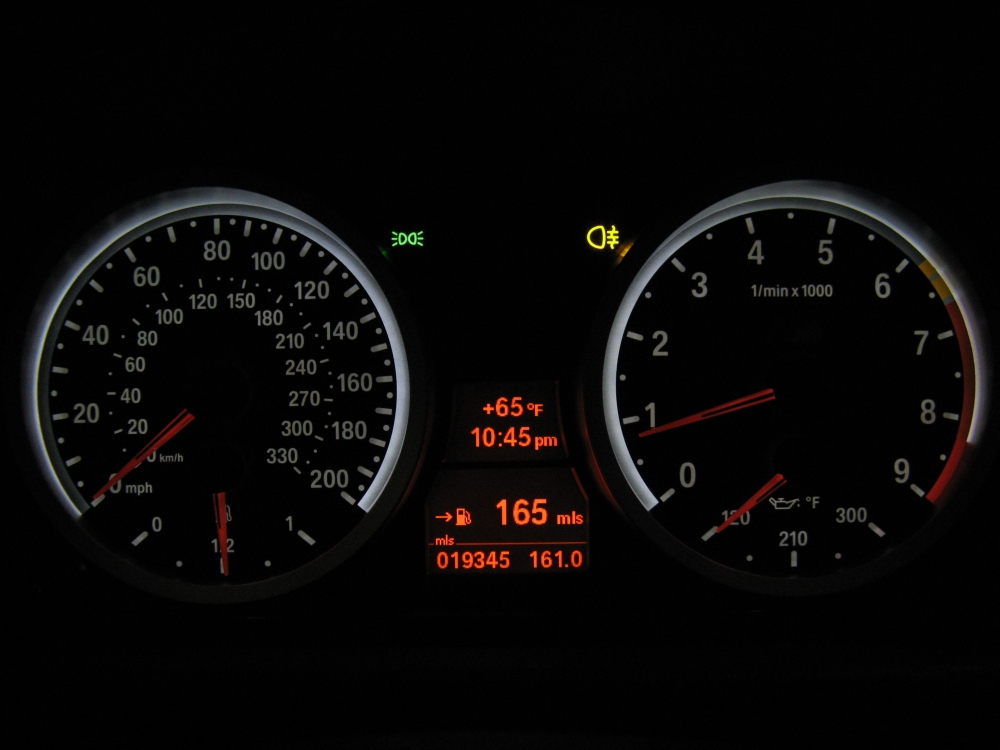
This switch is all that was required to activate rear fog lights. These lights are BRIGHT and should only be used in reduced visibility conditions. I assembled a DIY guide
HERE:
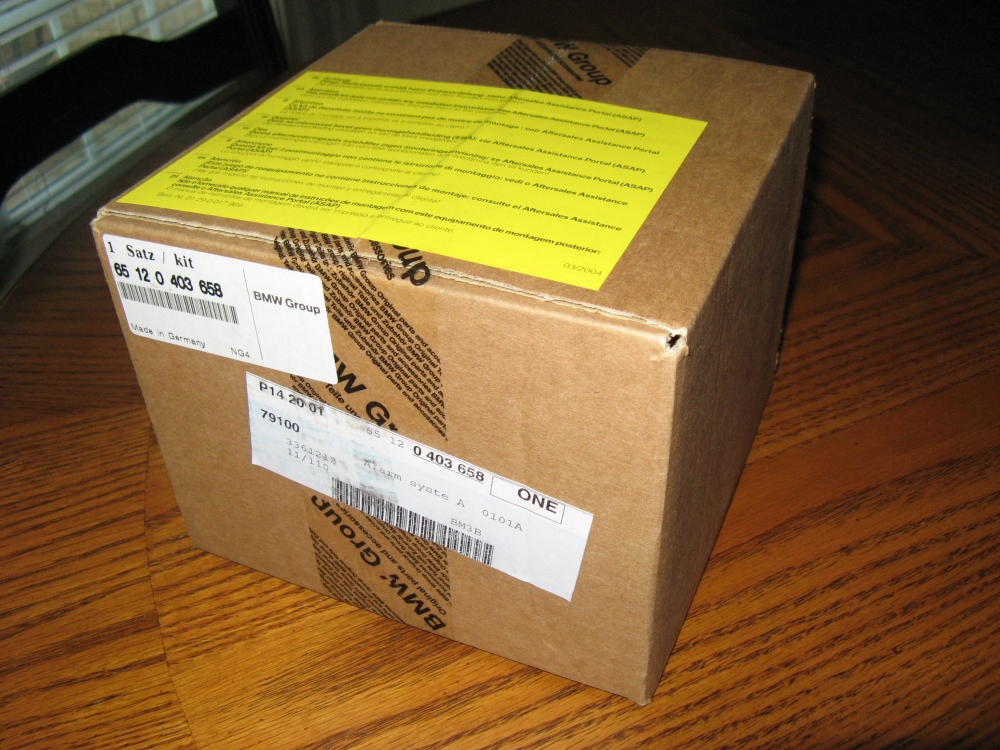
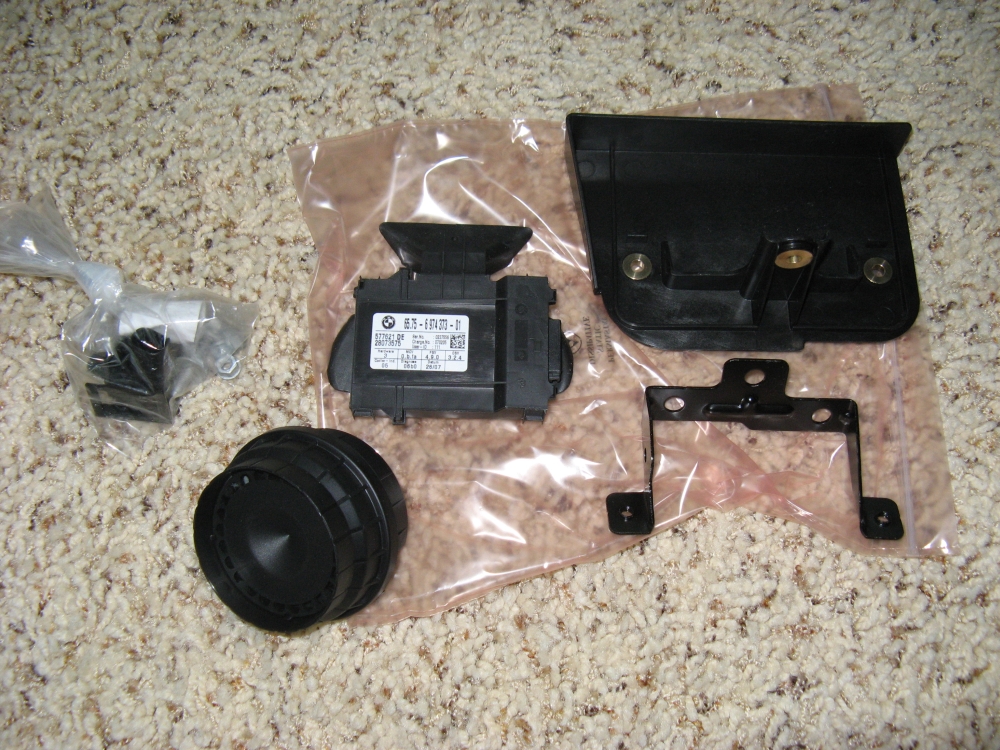
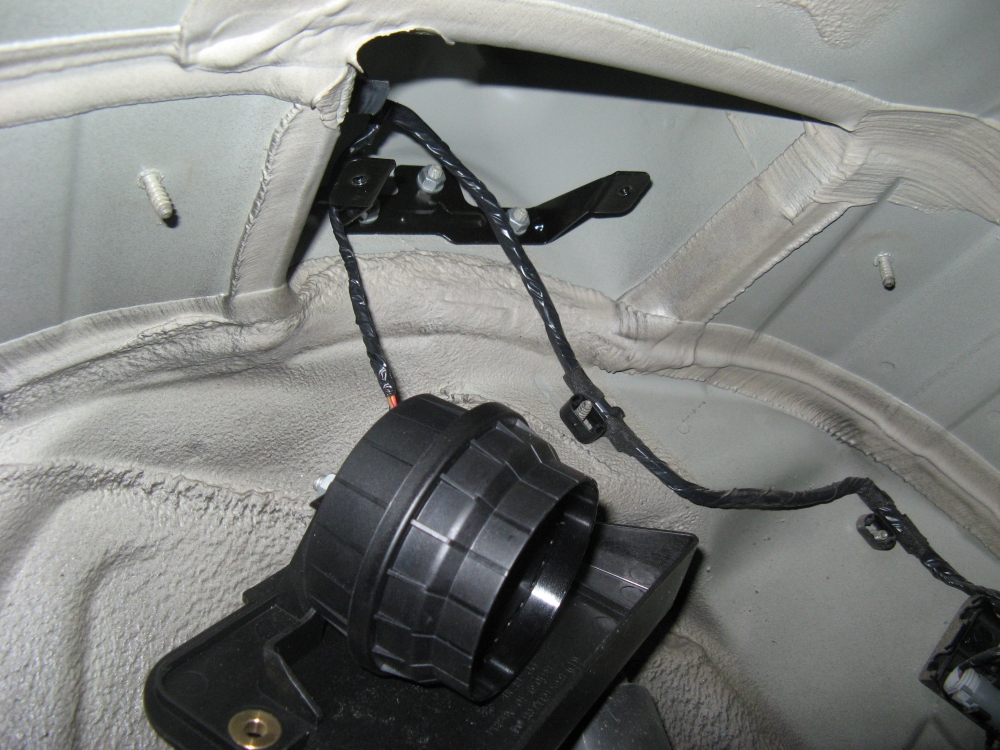
OEM BMW Alarm System (P/N 65120403658) from Tischer BMW Parts installed.
The E90/92 comes pre-wired from the factory for the alarm which consists of a hood switch (already installed on the M3), an interior ultrasonic intrusion sensor, and a LOUD siren (I installed in that order as well). I used the DIY guide
HERE to install this and the BMW instructions HERE. The alarm
may require activation by your BMW dealer to fully function. Mikey335i filmed this video of how the alarm sounds HERE :
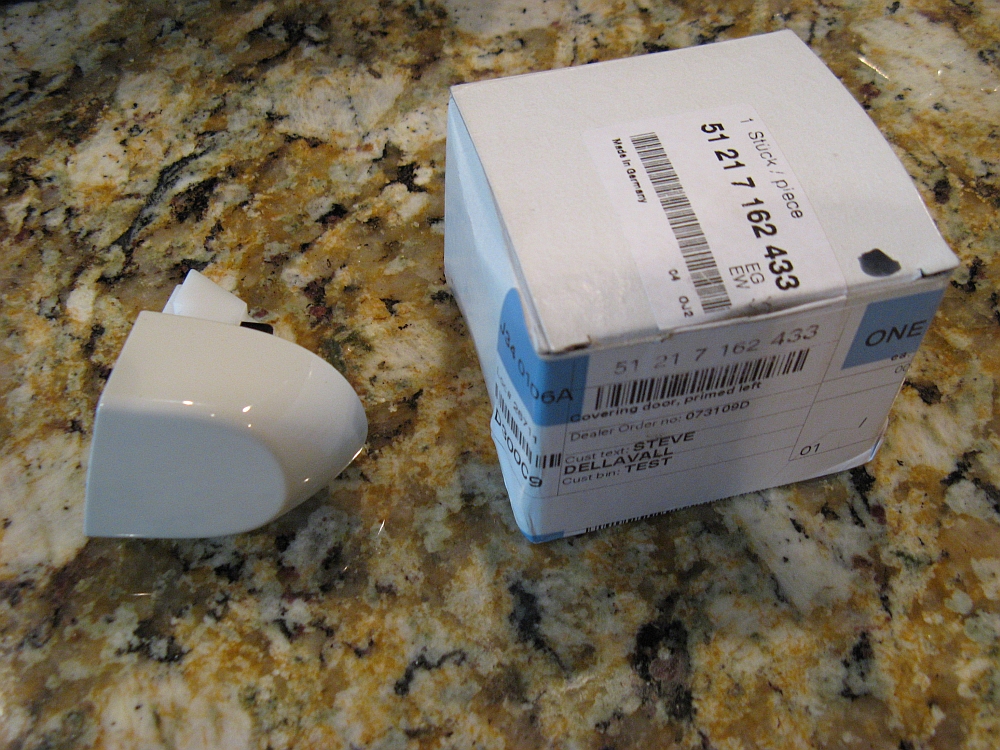
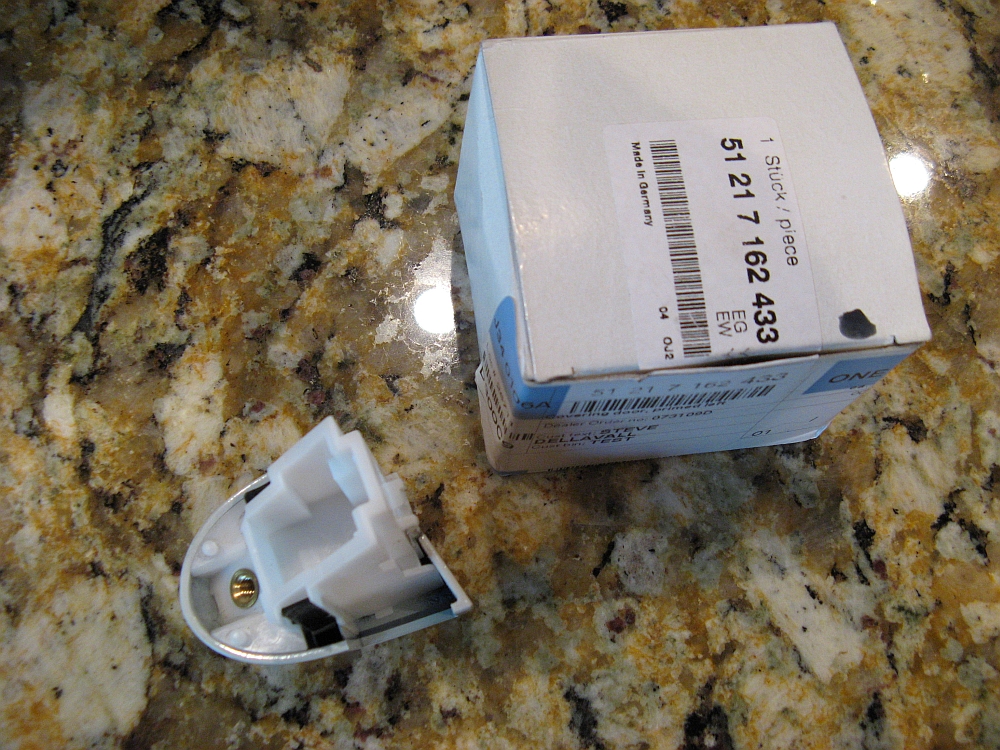
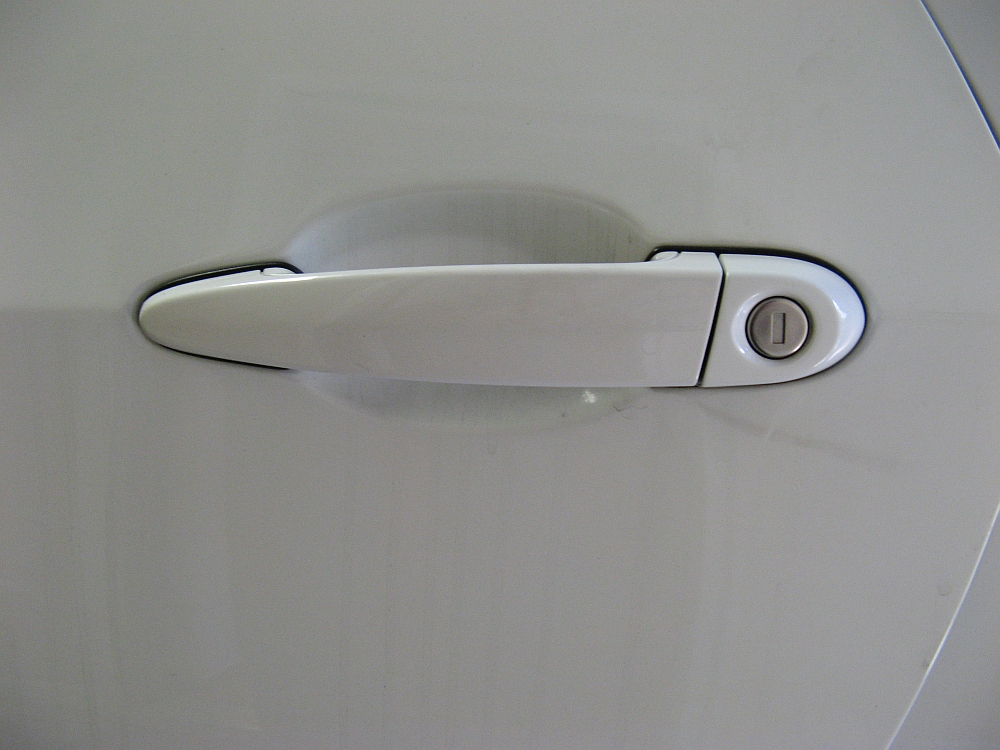
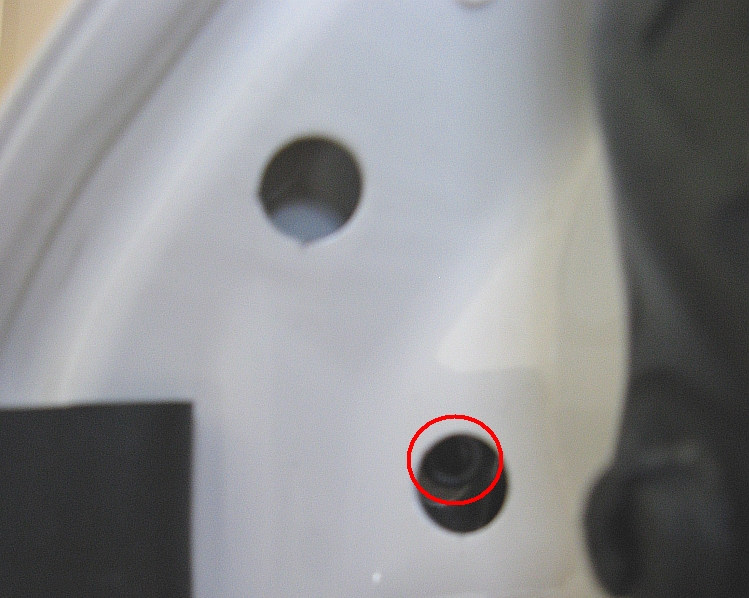
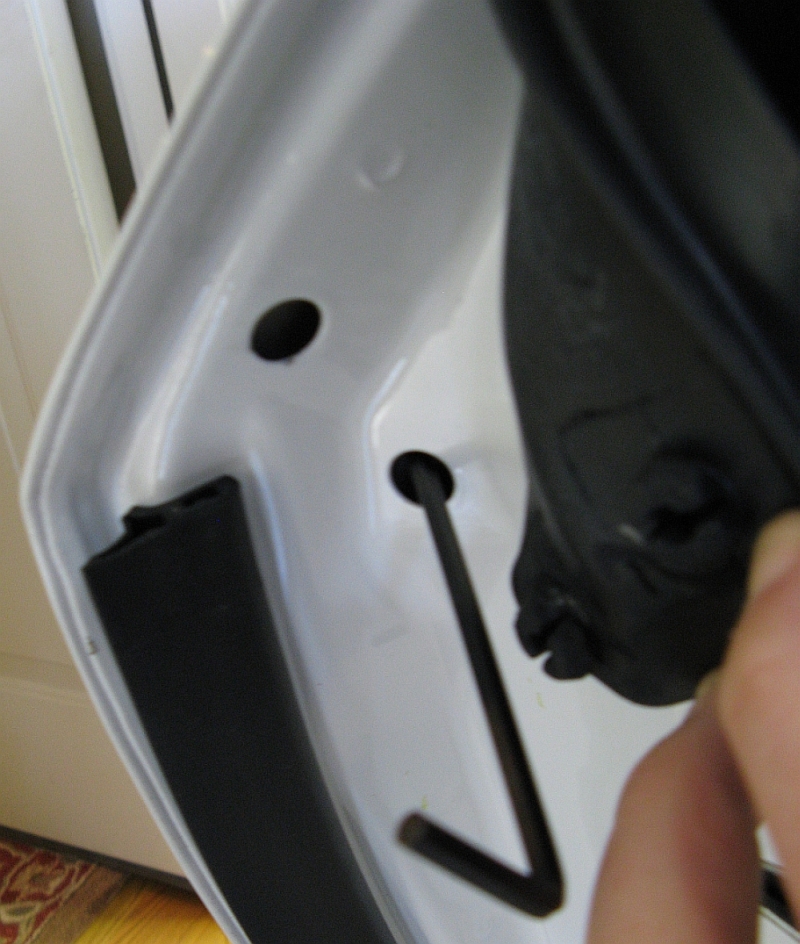
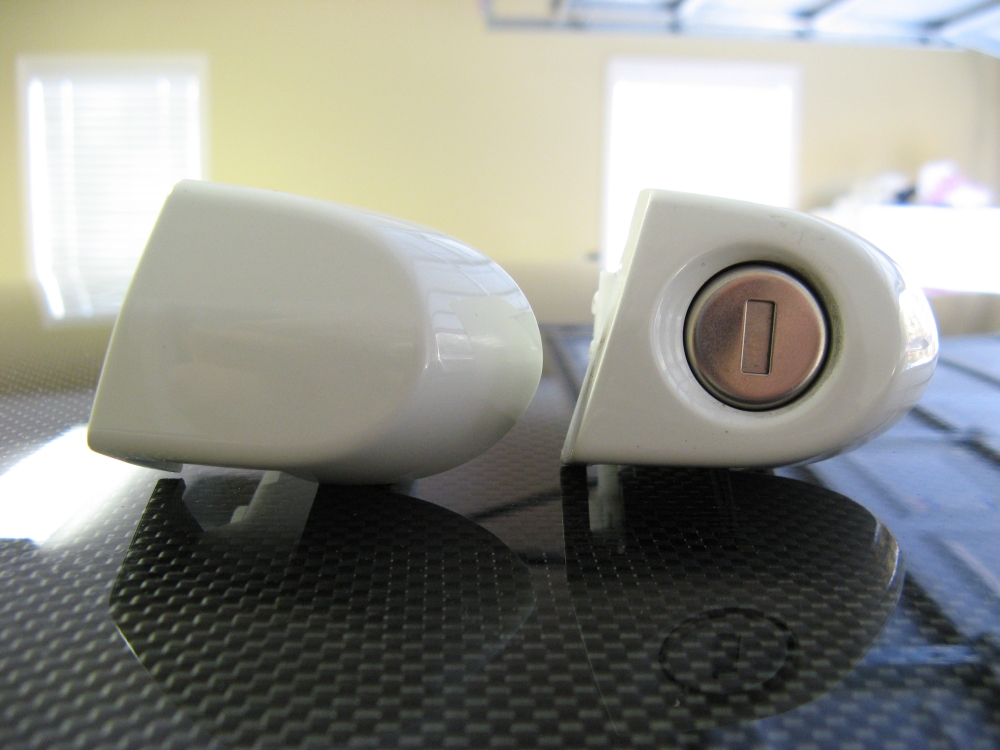
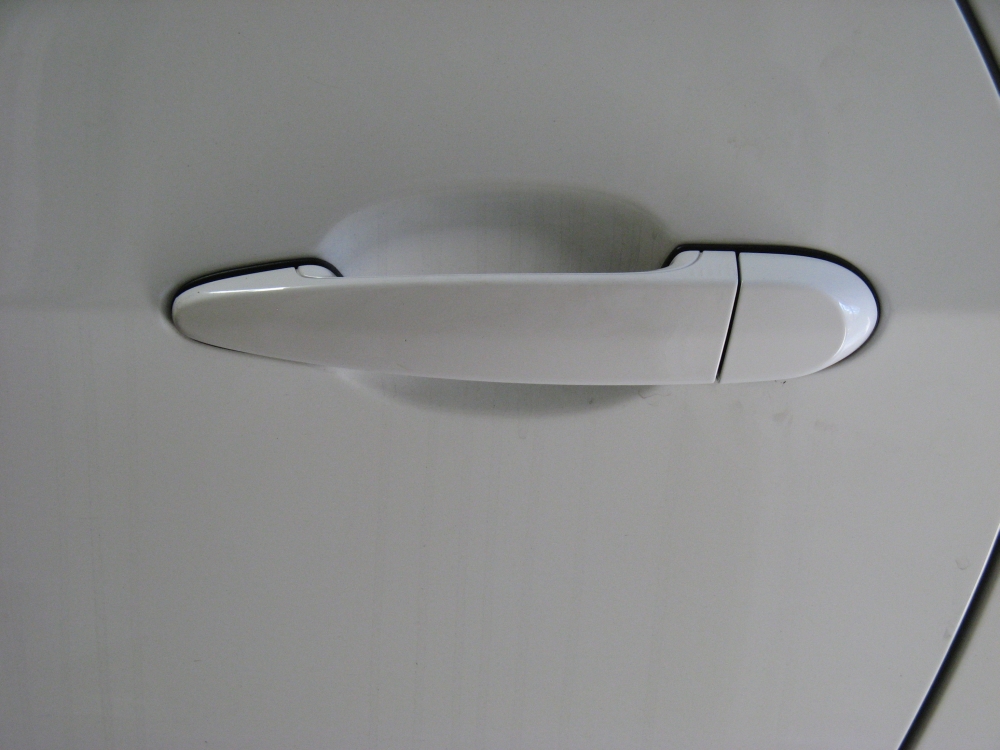
Keyhole cover purchased from M3POST member- added security and enhanced aesthetics.
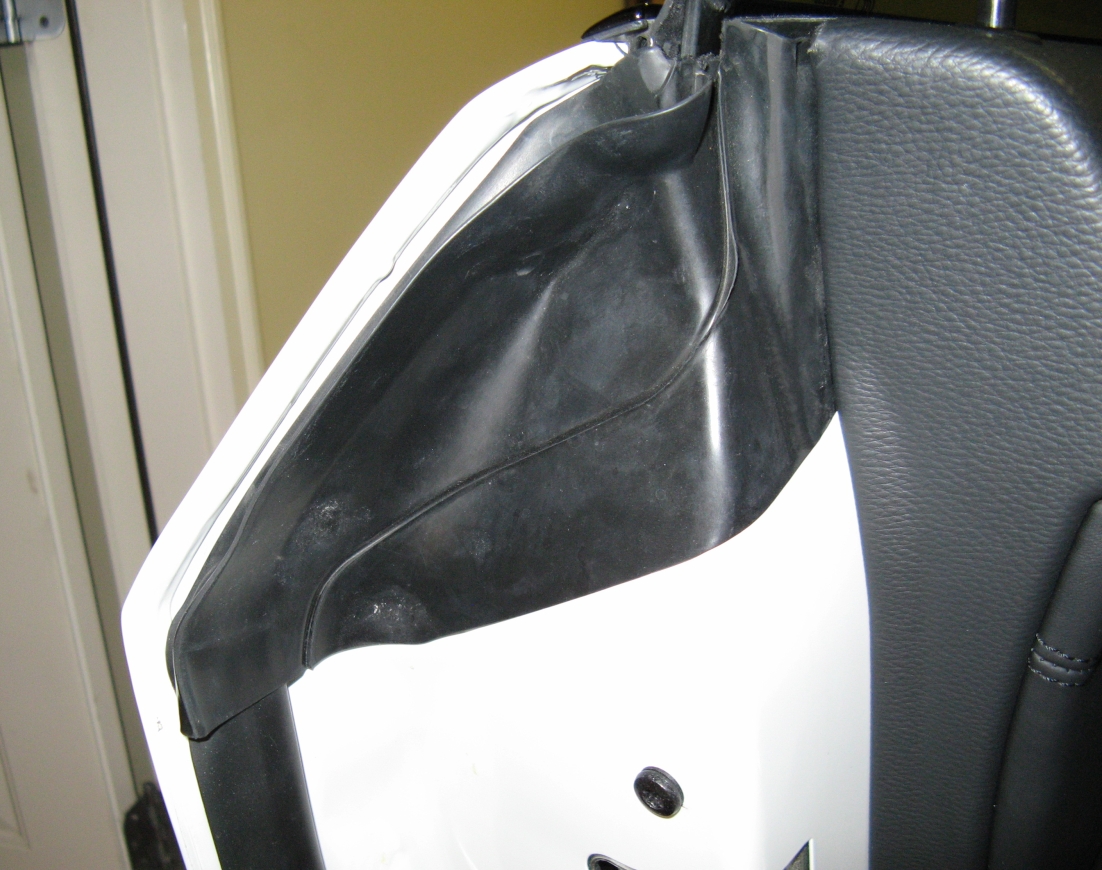
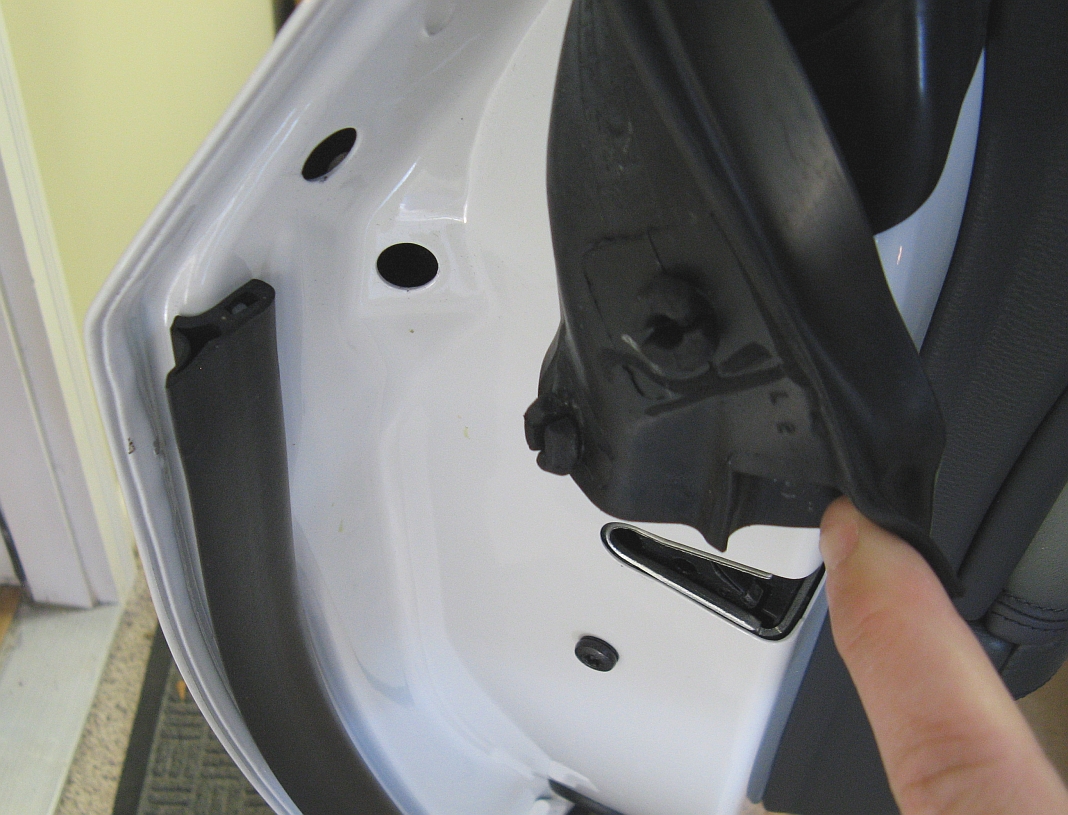
The keyhole cover comes painted to match your paint code. To remove the lock cylinder, the rubber seal at the corner of the door has two rubber nubs that are press fit,
can be removed by carefully pulling out until the bolt hole for the lock cylinder is accessible. A 4mm HEX wrench is used to loosen/remove the HEX bolt and
the lock cylinder can be pulled out. Installation is reverse of removal.
Generic Bimmian installation instructions HERE in pdf format.
Windows Tinted 35% by Mr. Tint (aka Barry Wood, H:(770)963-7924 C:(404)392-8007) :
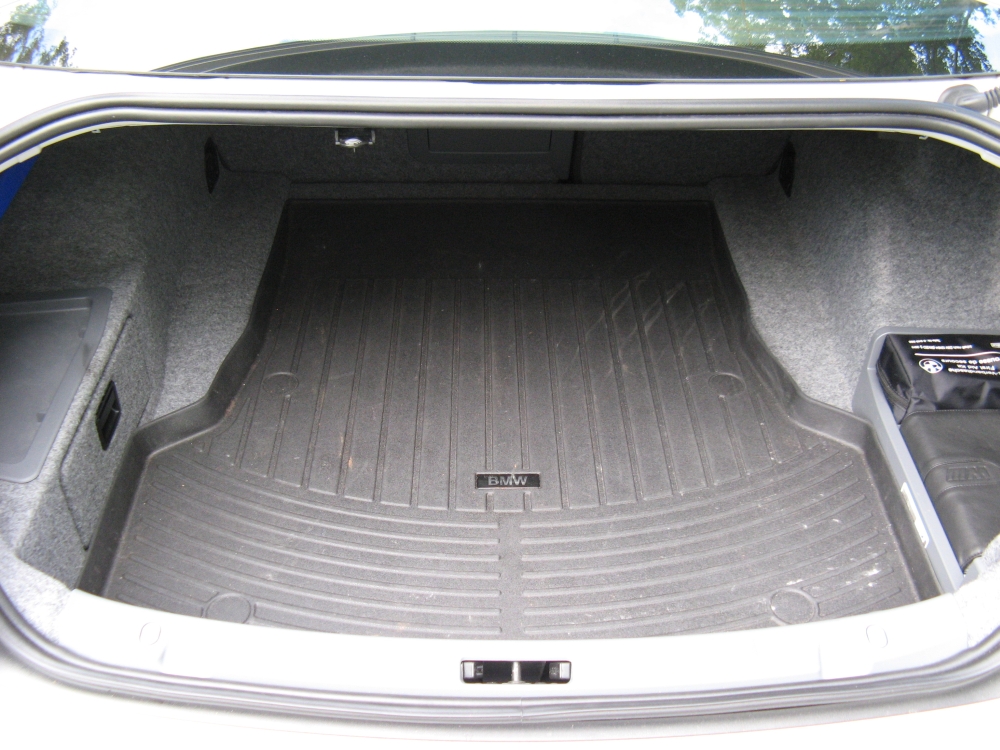
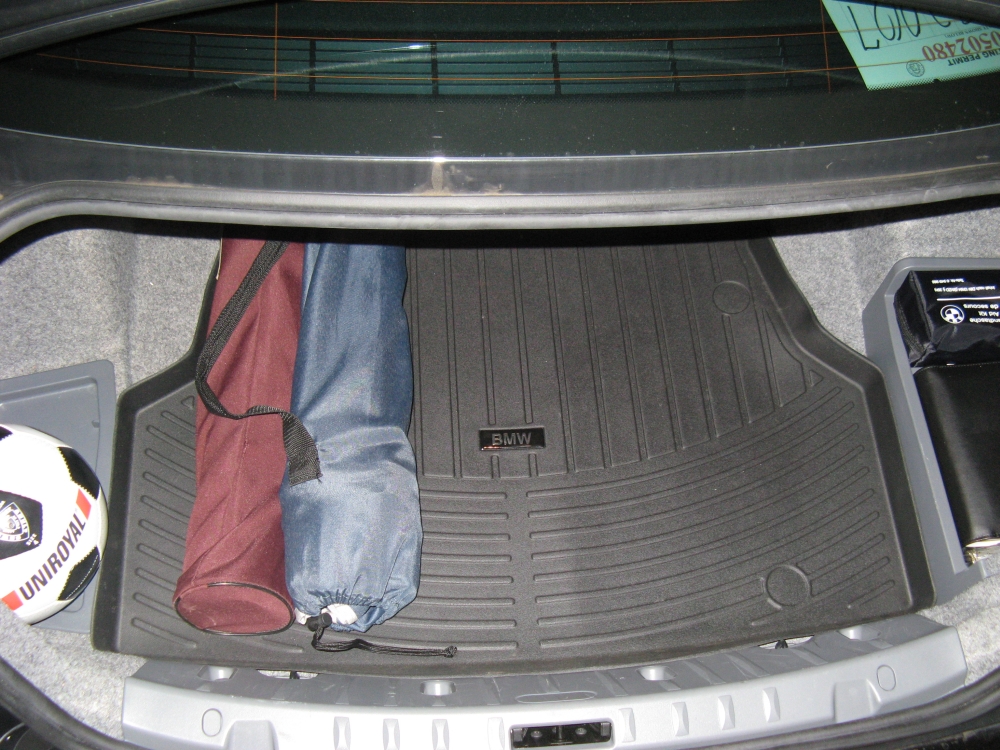
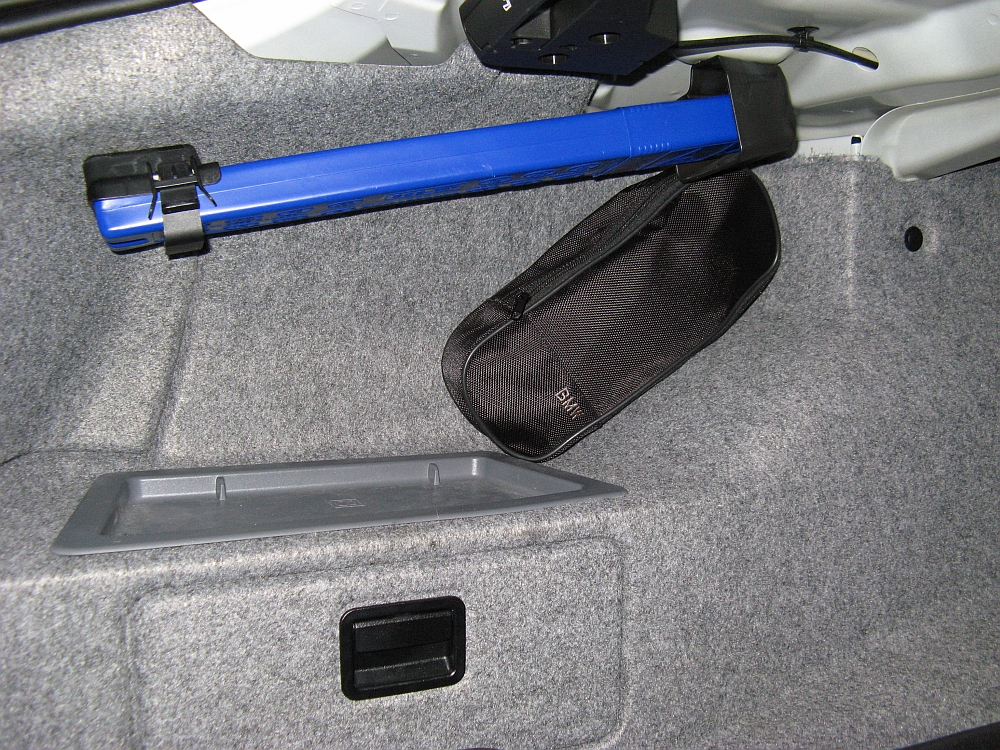
BMW All Weather Cargo Liner (P/N 82110399159)- purchased from e90post.com classifieds, protects trunk carpet and
acts as non-slip mat:
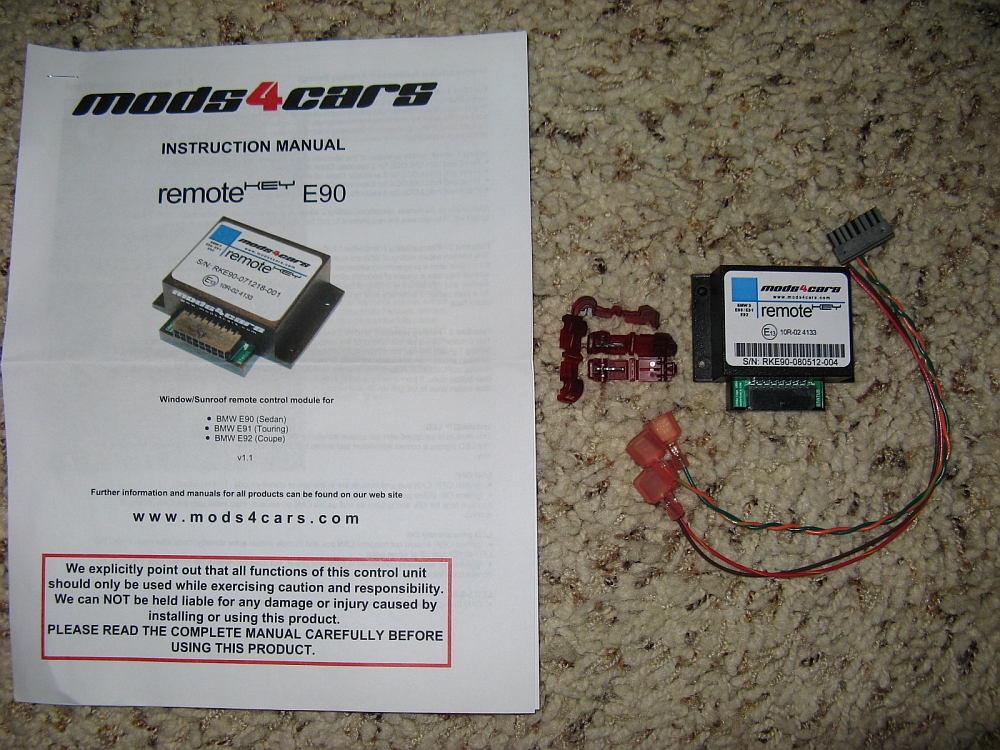
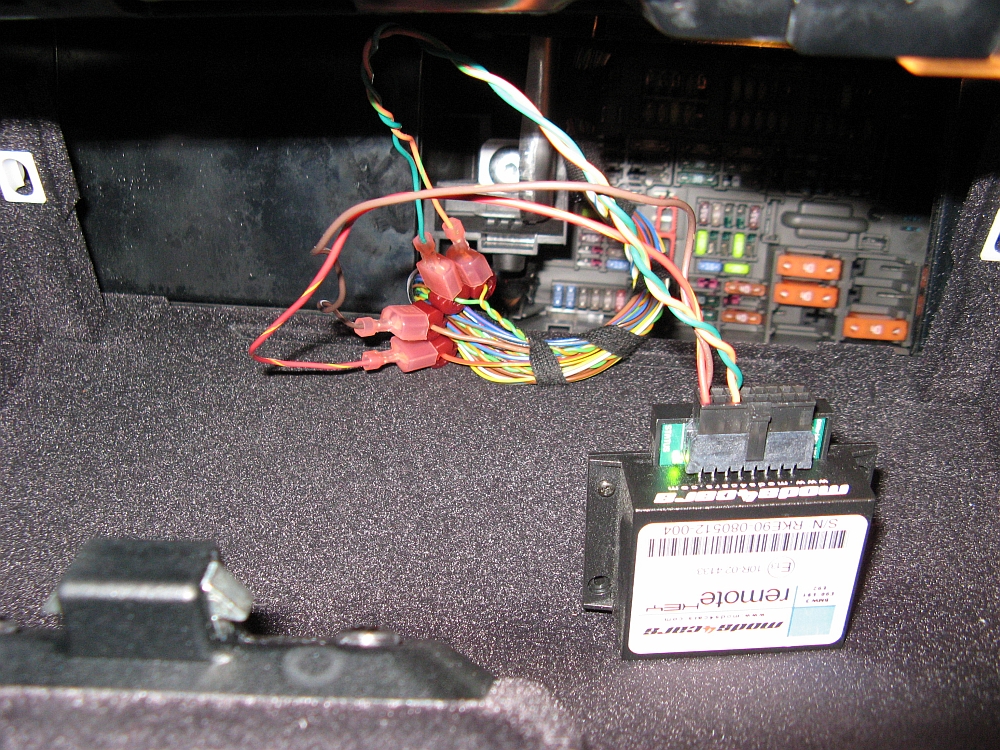
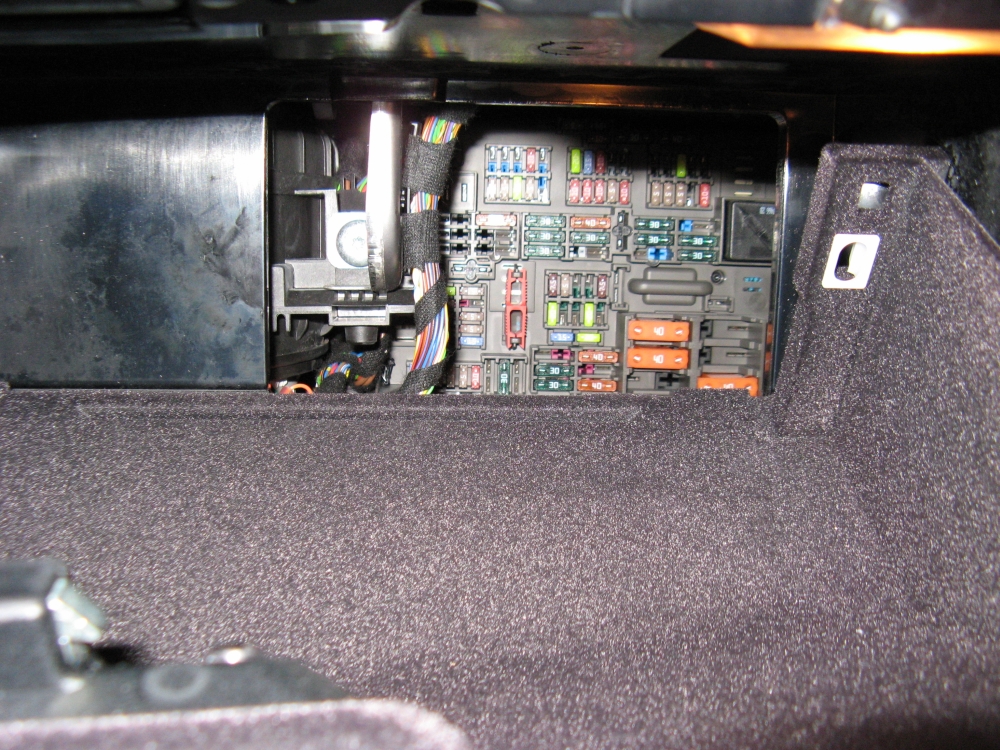
Mods4Cars
Remote Key from EAS (European Auto Source) installed- allows
remote operation of power windows/sunroof/folding mirrors using existing key fob.
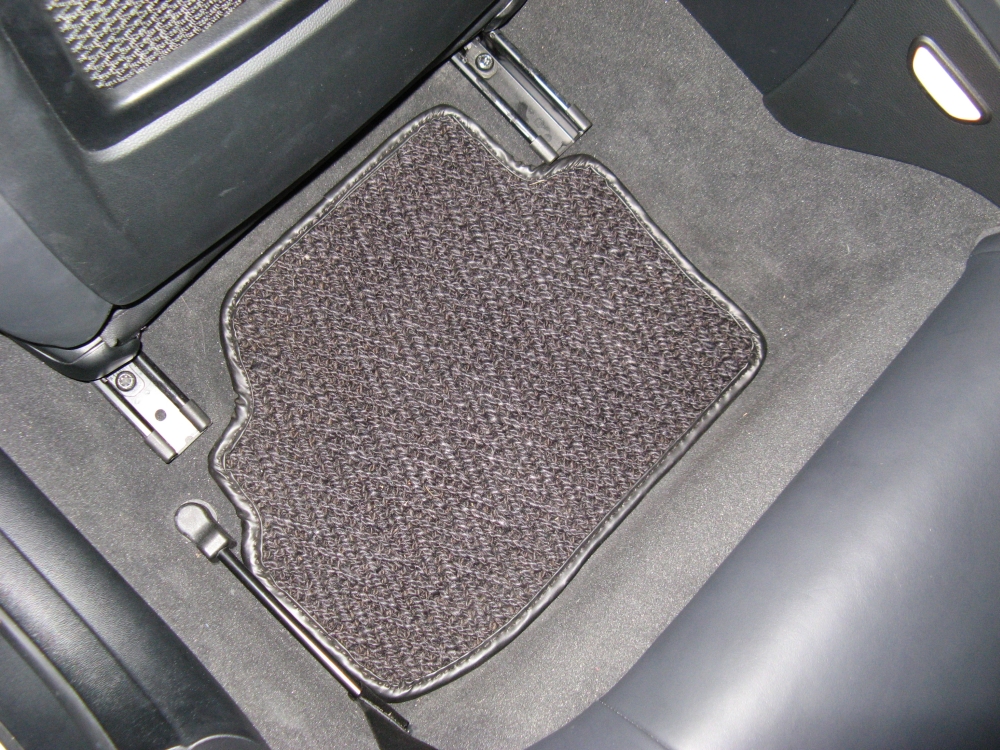
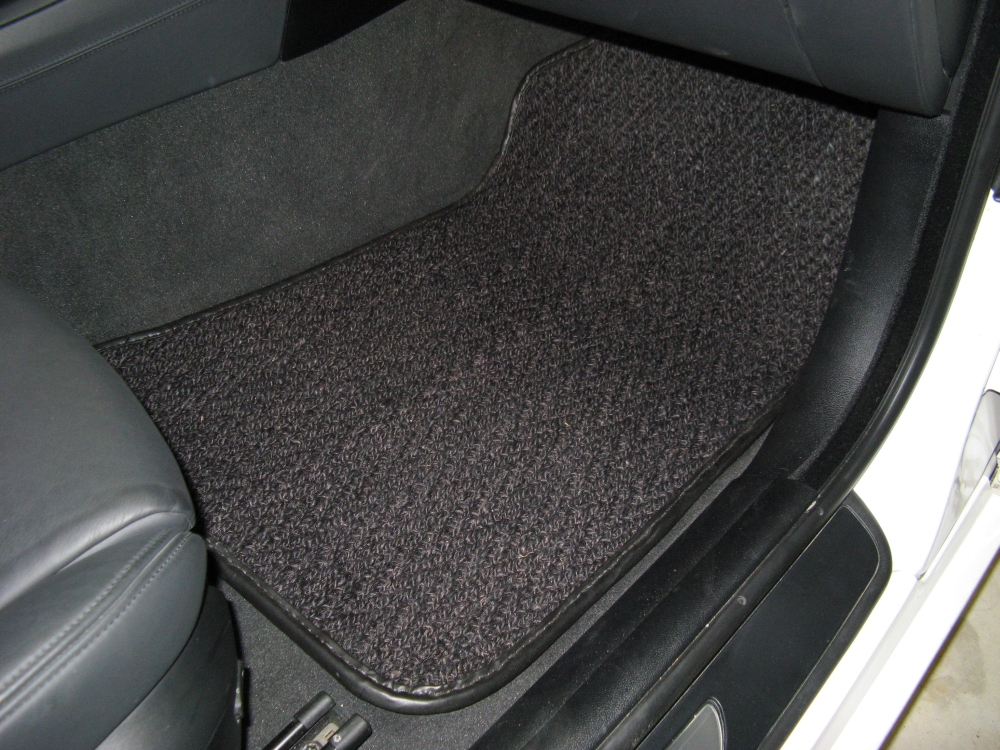
Coco Mats
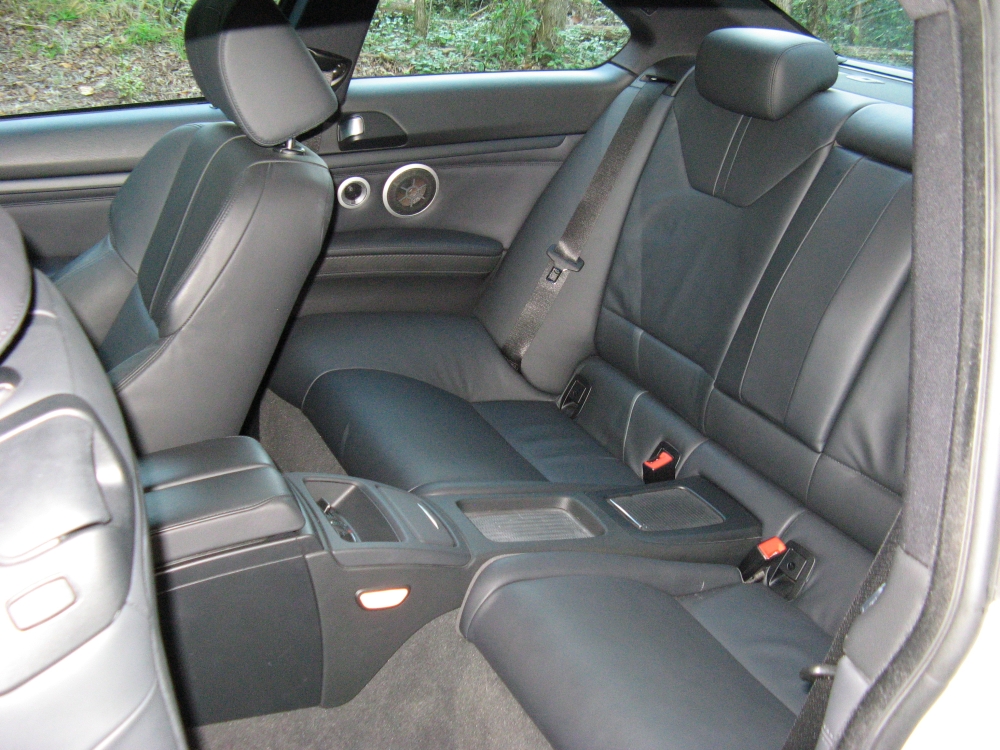
installed to replace OE mats. These mats are superior in every way: thick and stable with more coverage, I'm sure they will last a long time as well.
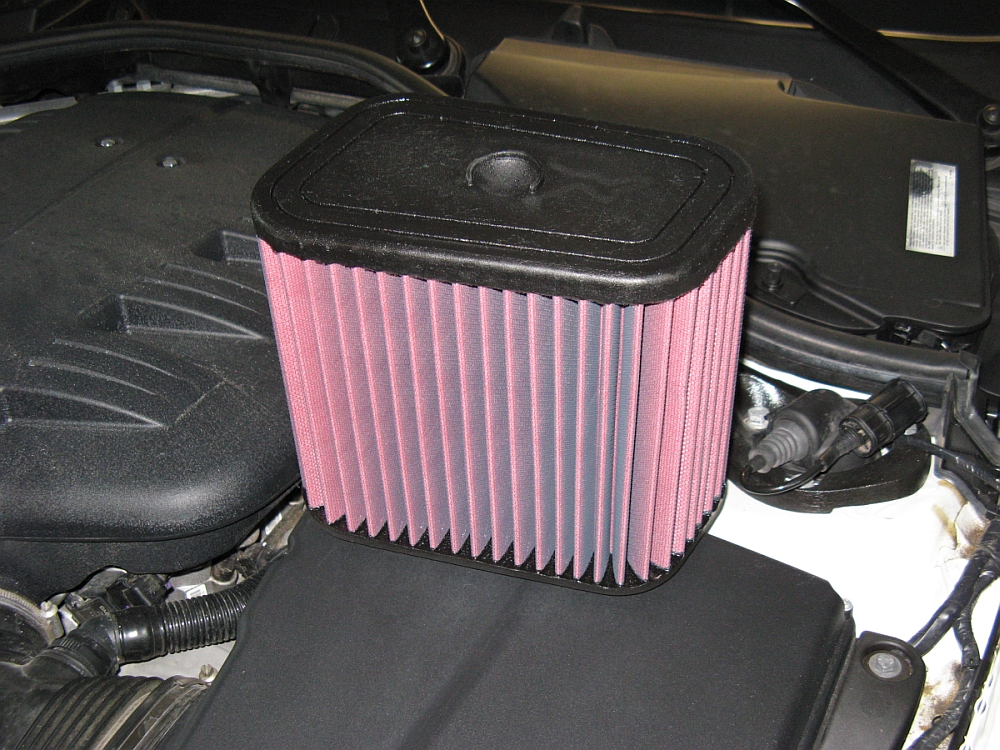
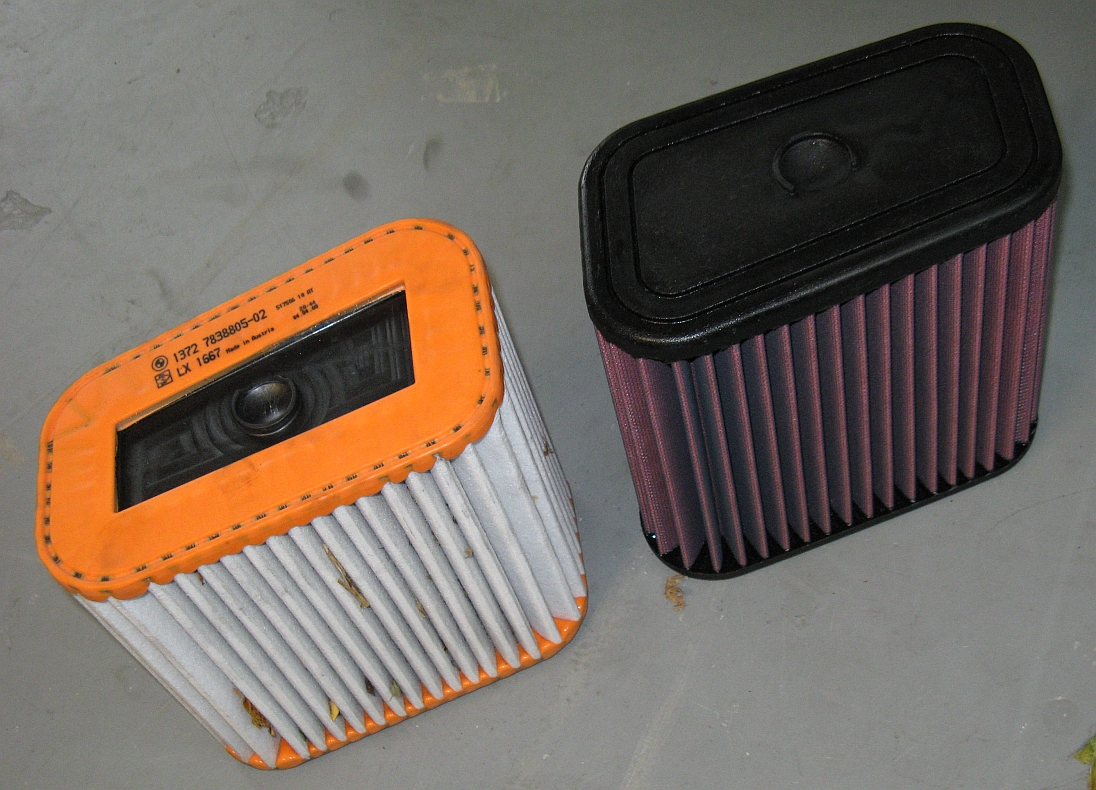
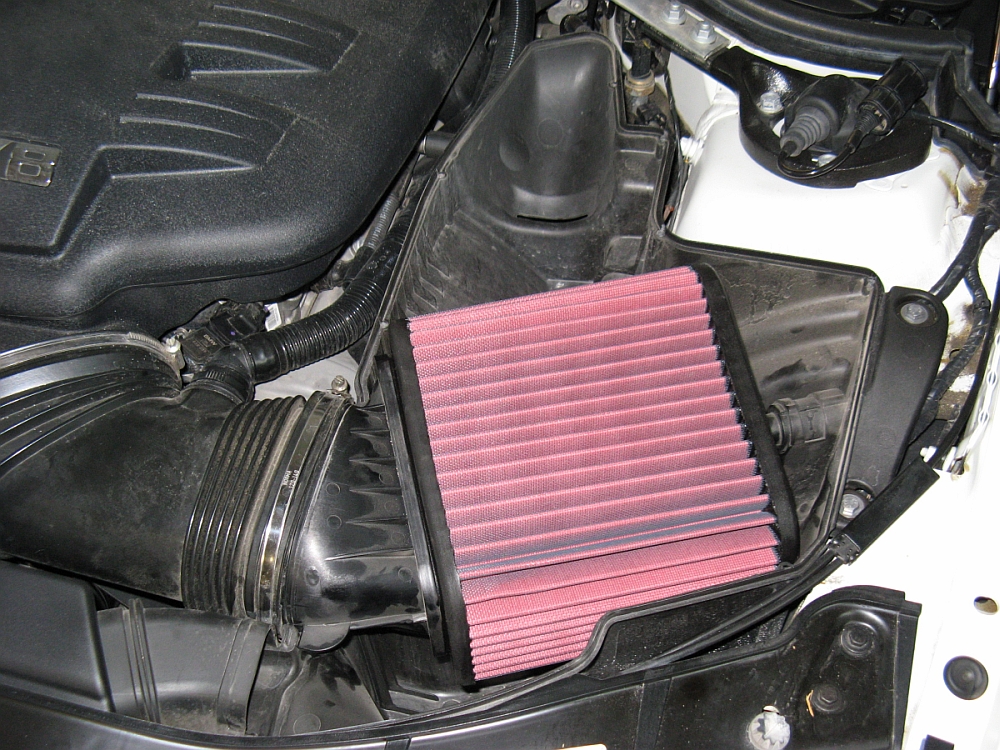
S&B Air Filter
from APE Performance installed. Intake noise/acceleration seems to be a little more agressive and
gas mileage went up 1-2 MPG.....compared to OE the pleats seem deeper and the filter should last for a long time. DIYs I found to install this are
HERE and HERE. Takes about 15 minutes using a T25 Torx
driver for the lid screws and socket driver or standard screwdriver for the clamp:
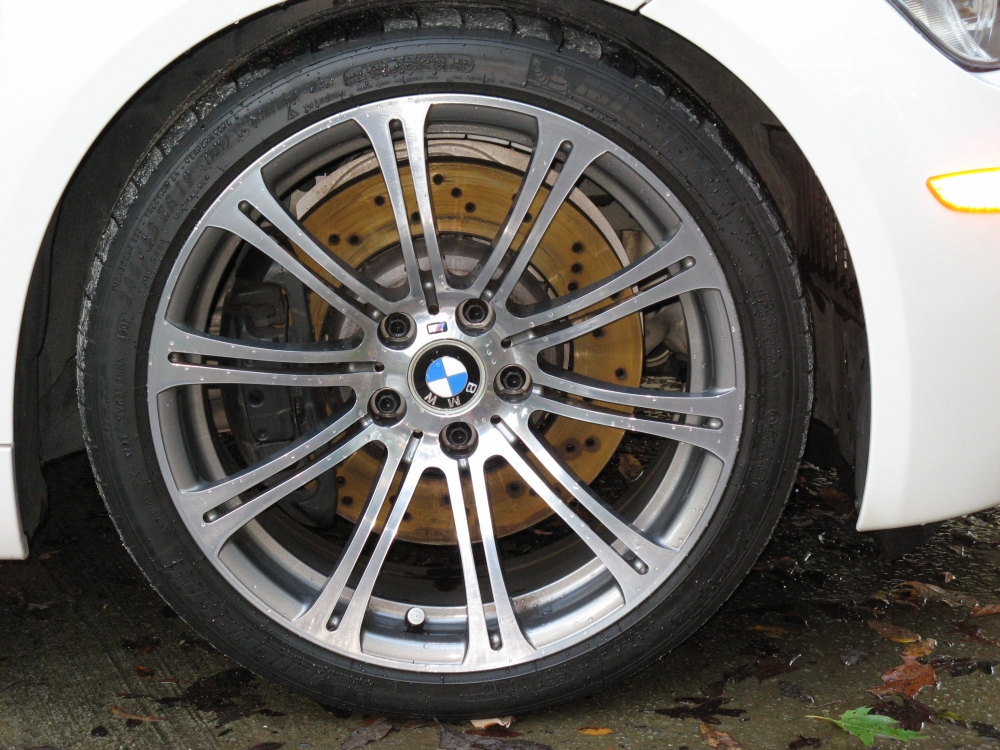
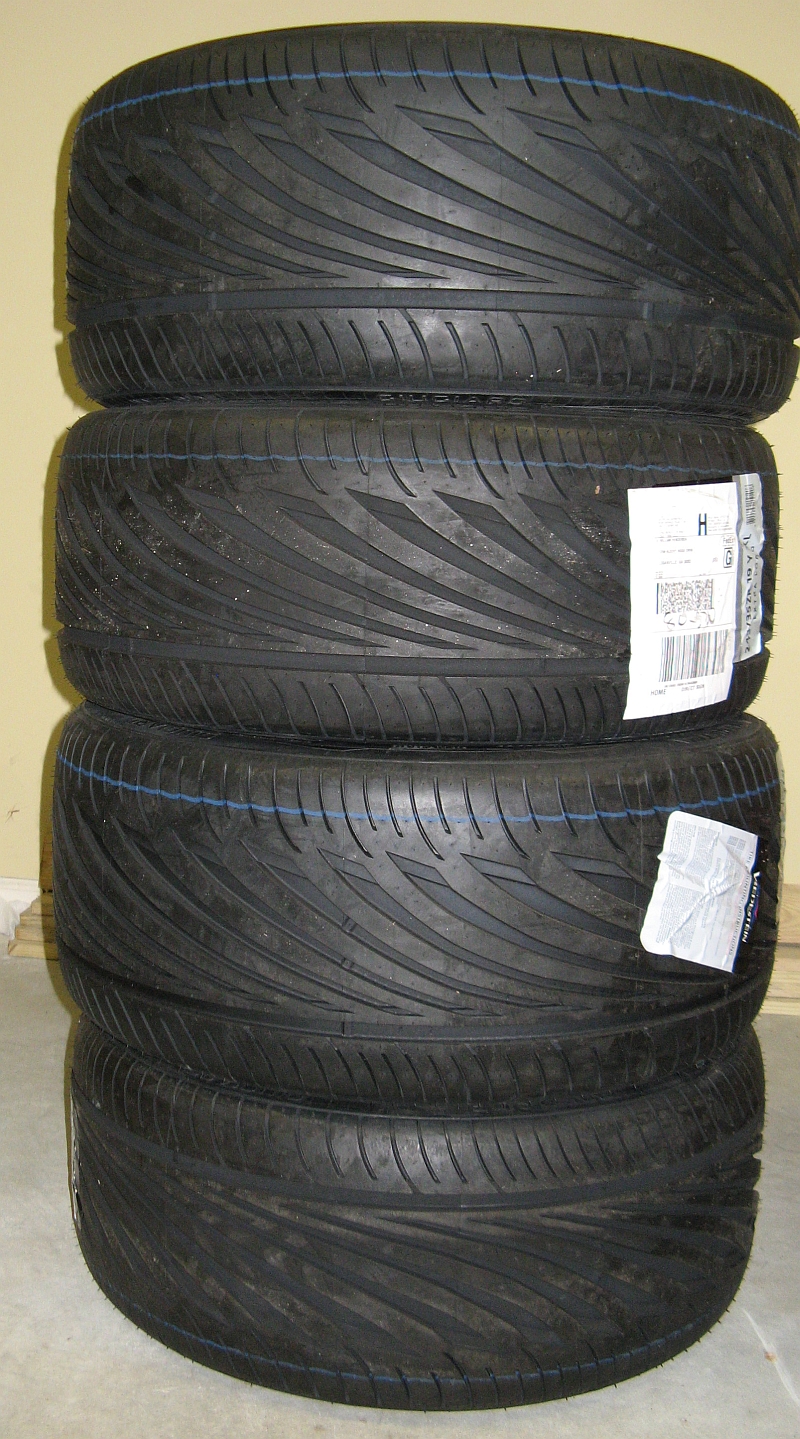
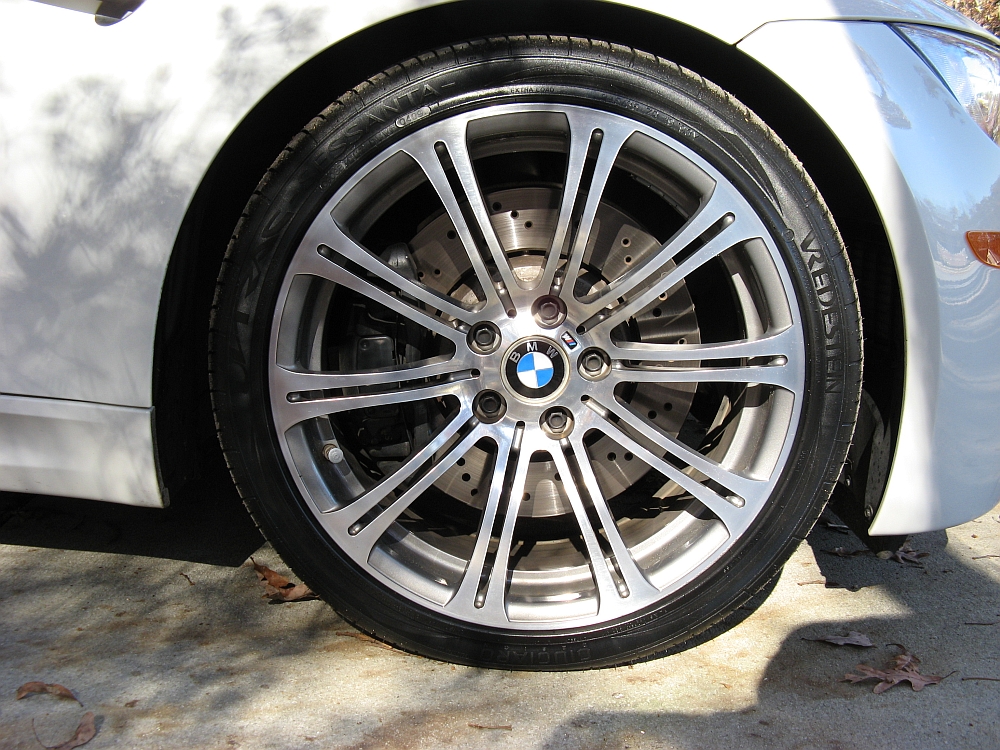
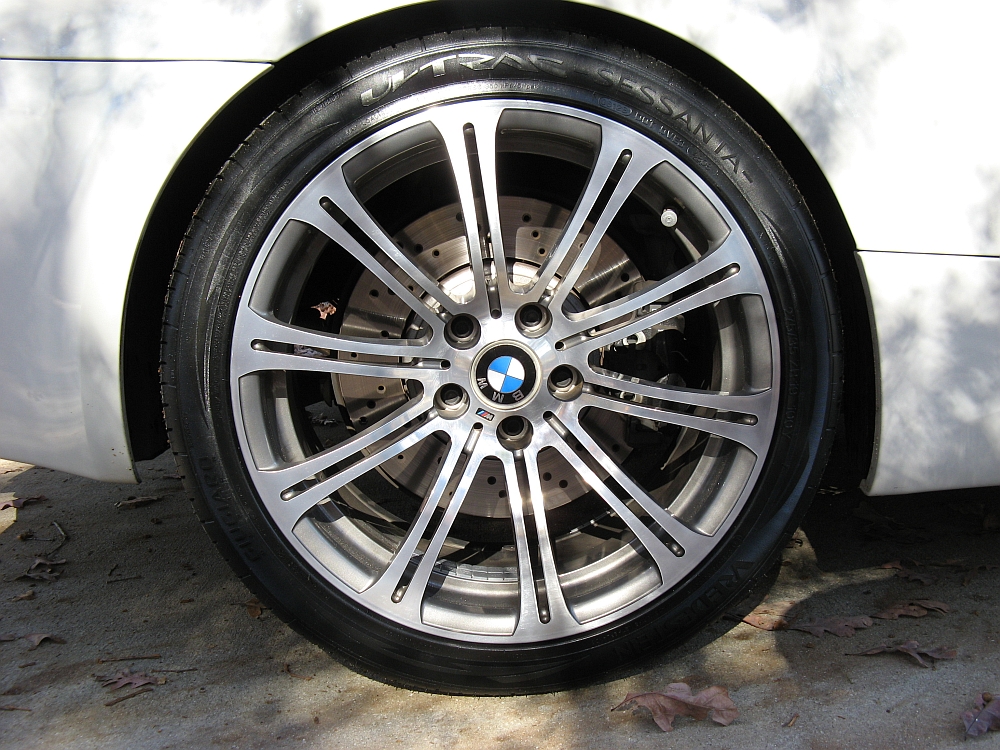
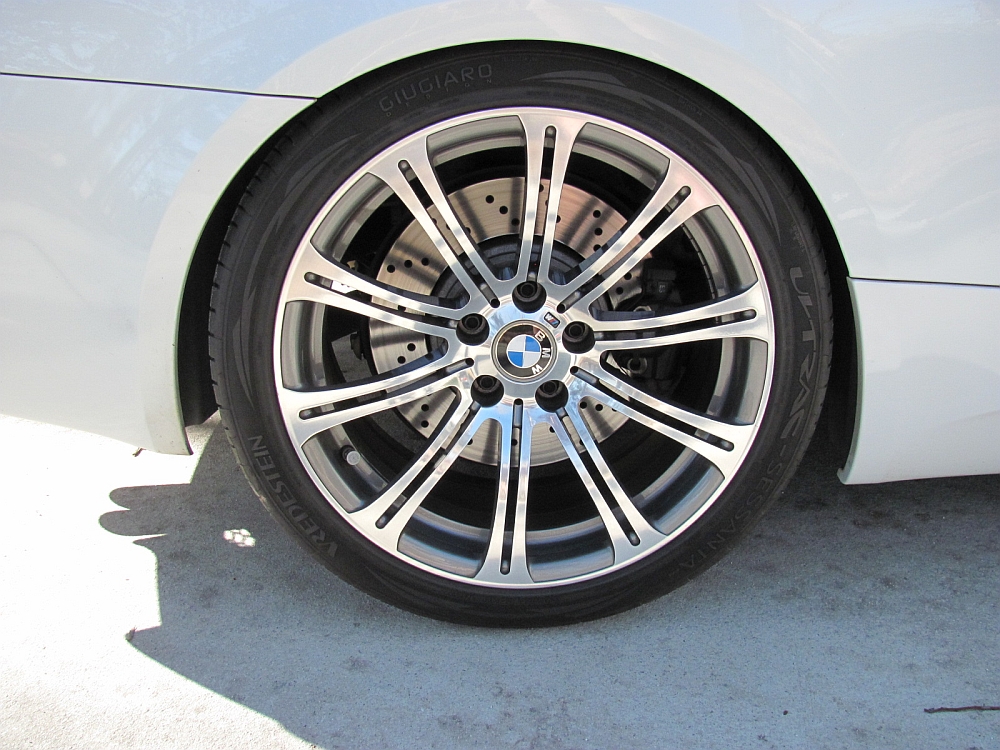
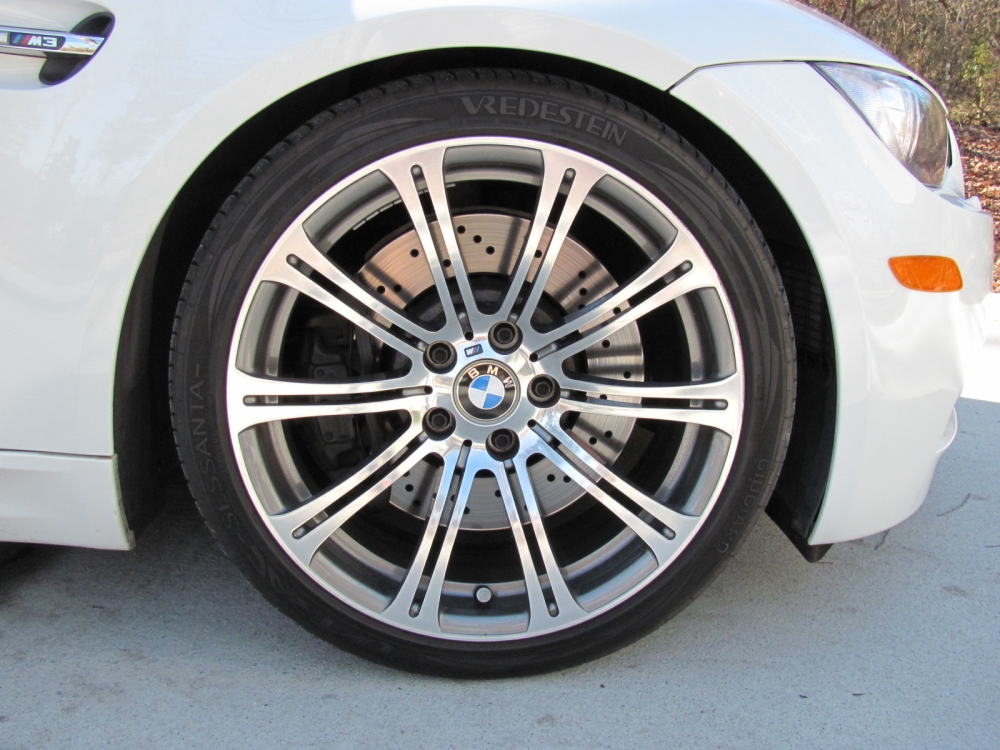
Looking for replacements for the Michelin PS2s that were at the tread wear
indicators, I came upon these threads on one of the M3 forums: M3 Post- VREDESTEIN Ultrac Sessanta?
and M3 Post- Economical 19" Tires.
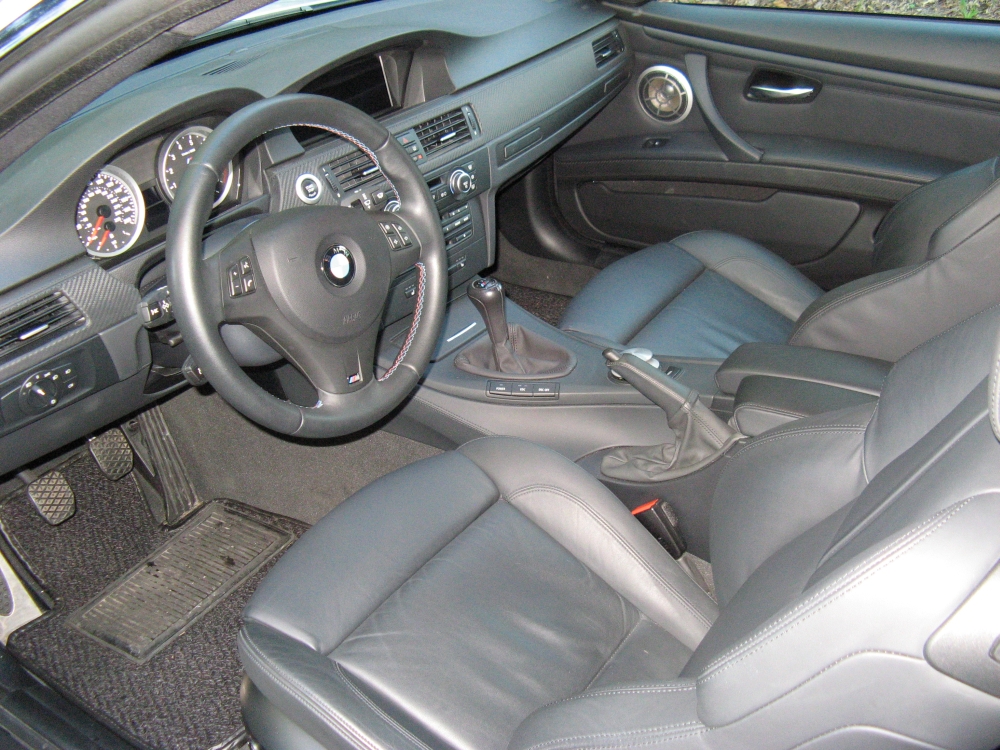
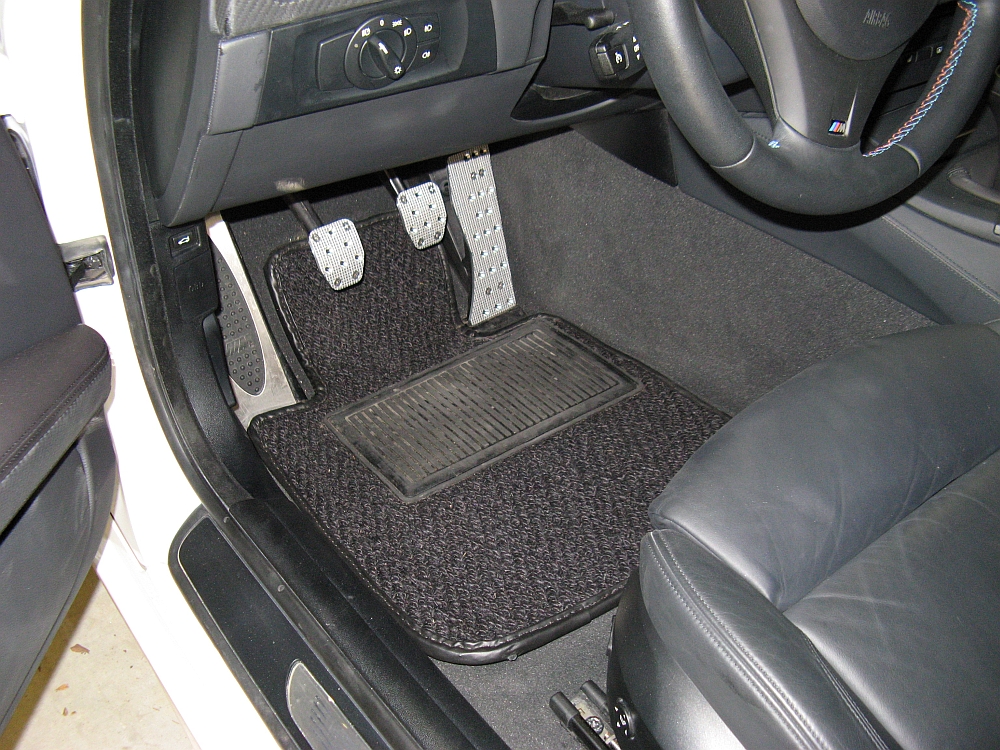
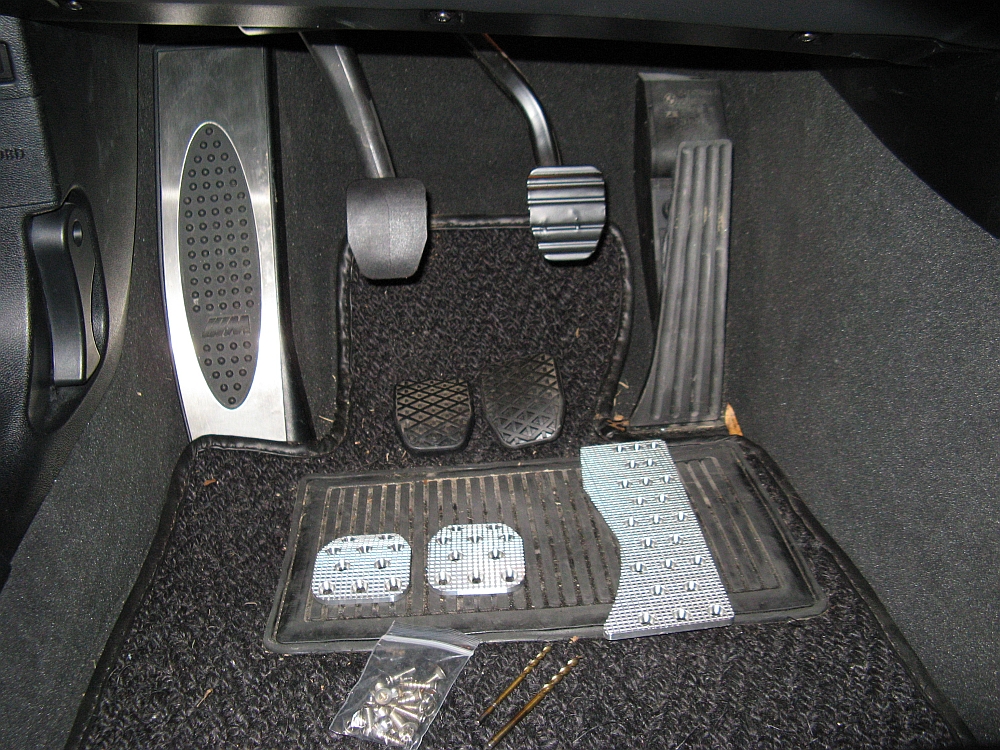
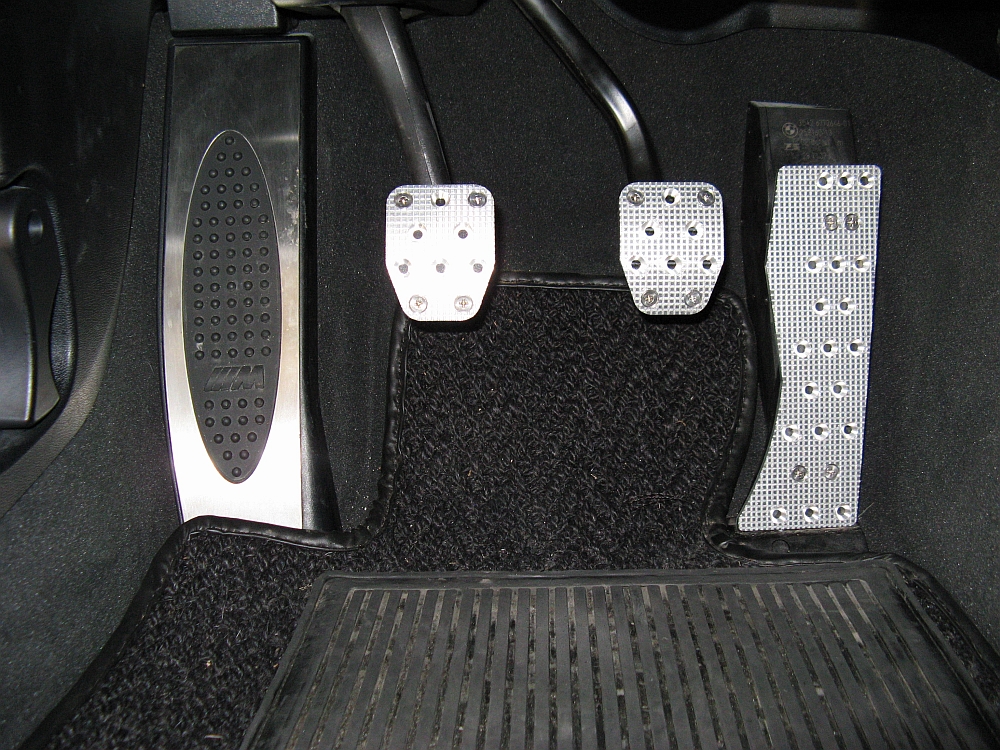
Ultimate Pedals
gas/clutch/brake/dead pedals installed, shiny anti-slip finish - shop their eBay store HERE.
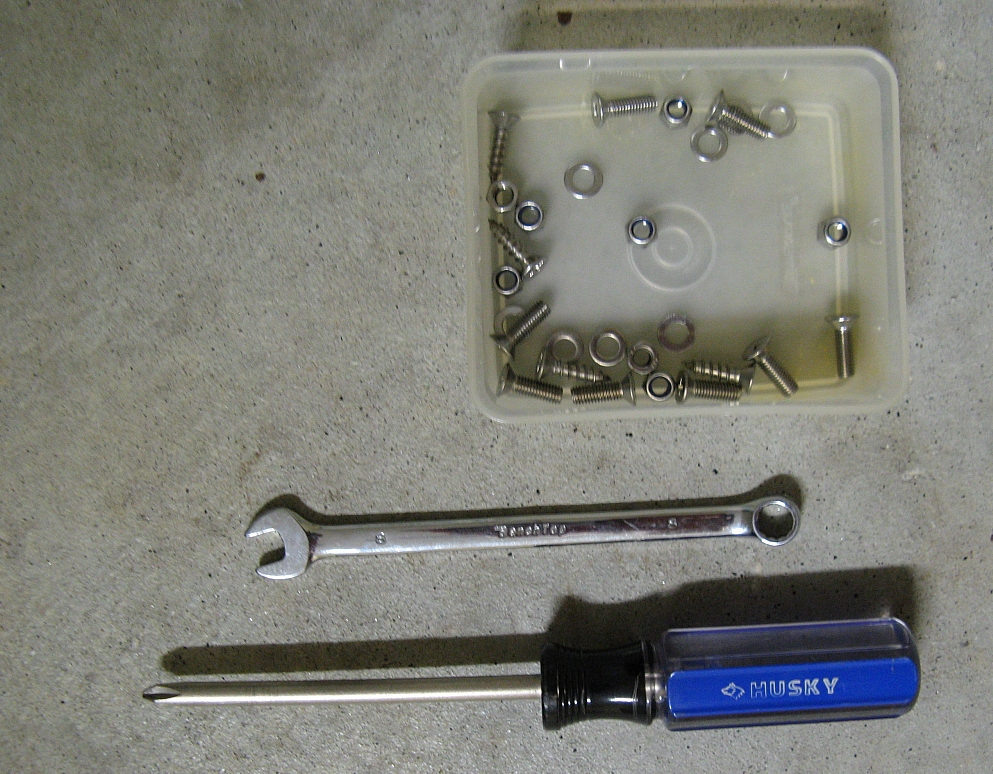
These pedals are made to order and the fit and finish is great. Installation hardware includes self-tapping
screws for the gas pedal and nylon locking nuts/bolts/washers for the clutch and brake pedals. I opted for the upper left gas pedal heel/toe extension.
These pedals not only offer better aesthetics but also provide more function and feel than the OE heavily insulating (and slippery when wet) rubber pedal
pads.
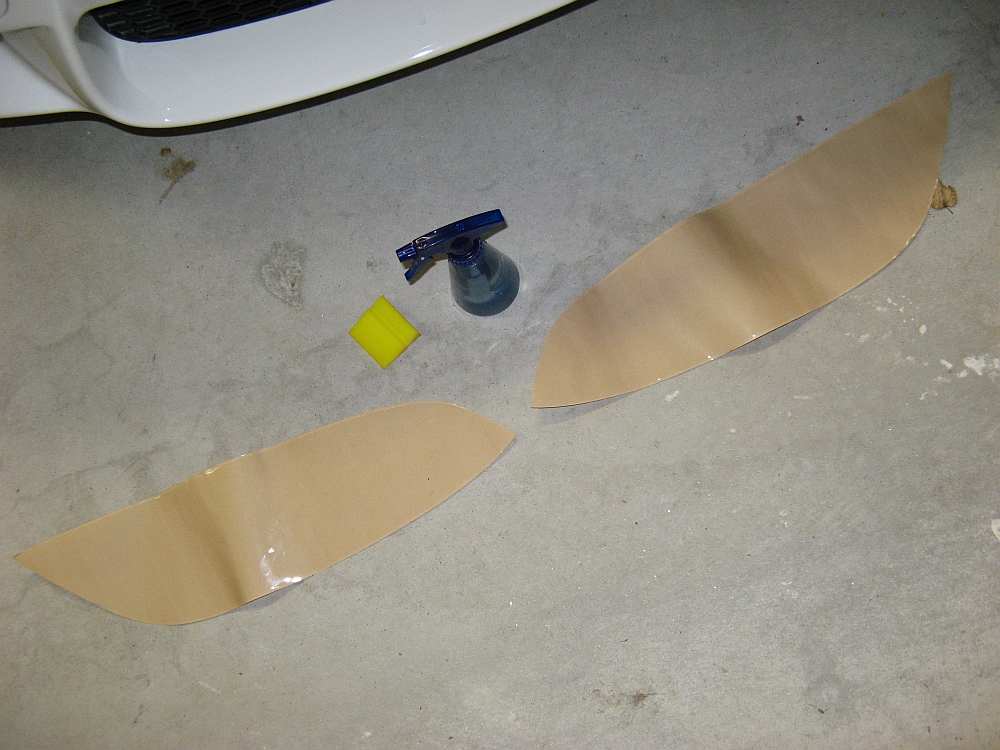
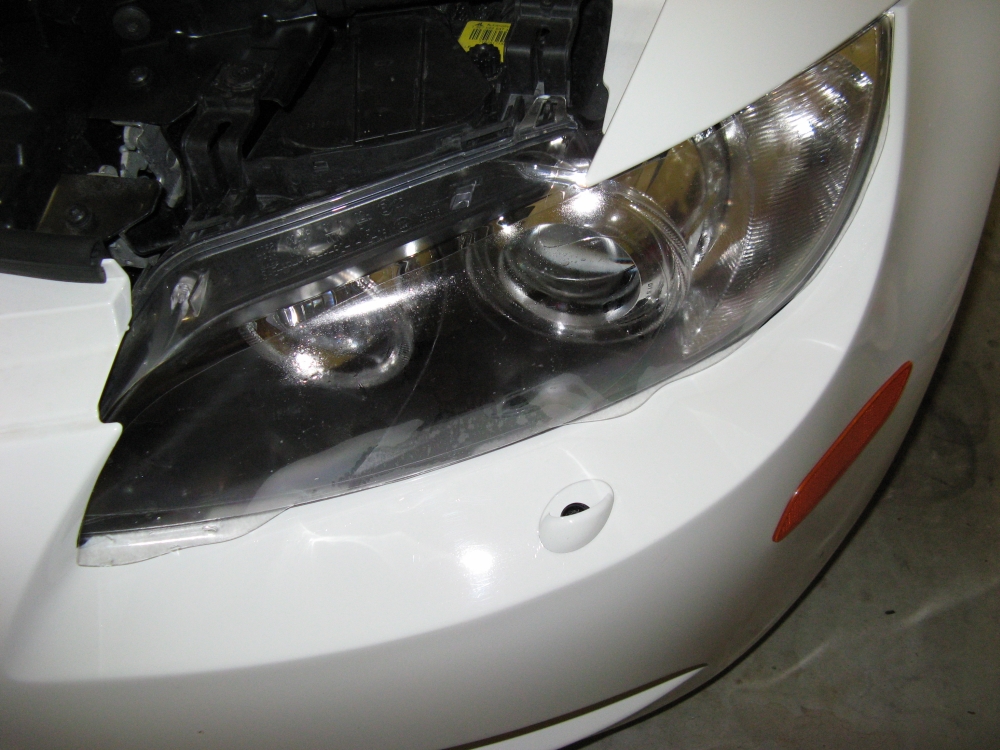
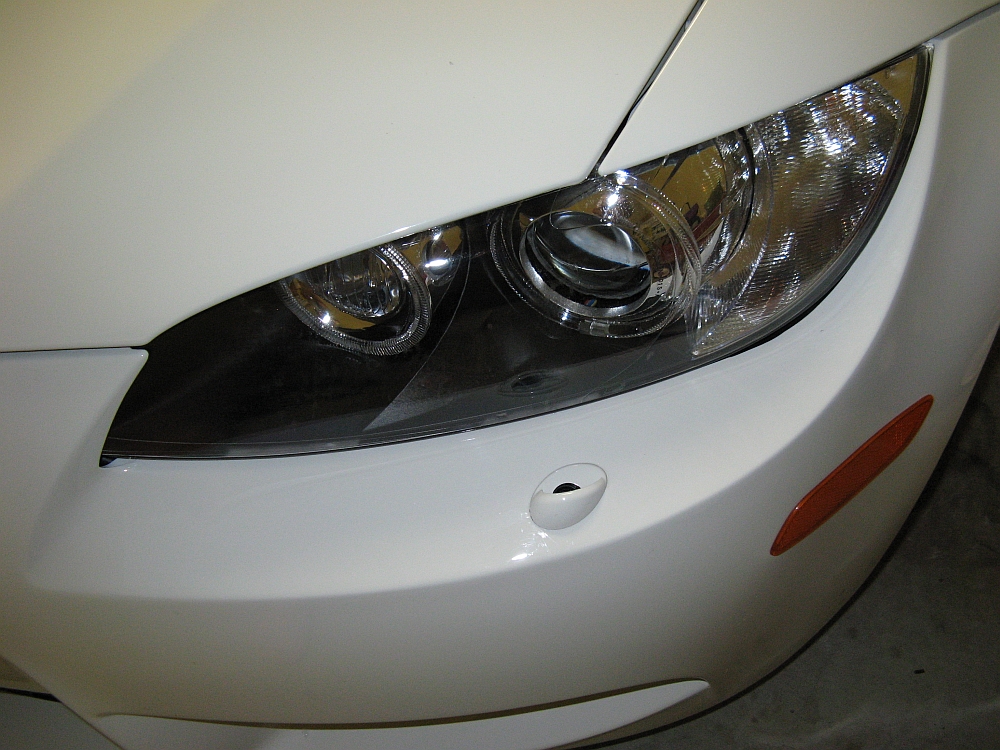
20 mil Headlight film for headlights from
Lamin-X Protective Films installed.
The installation instructions provided (HERE) worked great, video installation guide
HERE.
The 20 mil film is thicker than the lesser brands but don't let the curves scare you, a heat gun on low can be used to work wonders in
molding the film to the headlight contours, exercise caution so you don't burn your headlight or film. To be honest, I didn't have to use the
heat gun at all for this installation. After positioning the left and right corner and running the squeegee down the middle between these two points, I
just had to go back and sqeegee what was left as per the instructions. Any water haze under the film will cure and disappear after a few days in the sun
if past experience holds true:
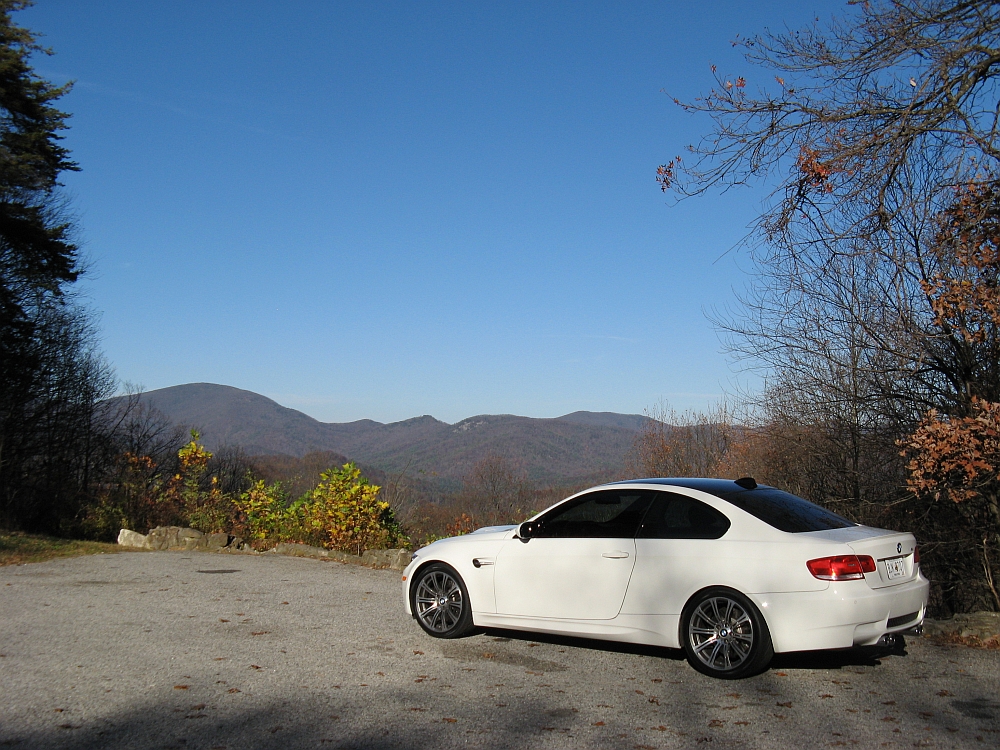
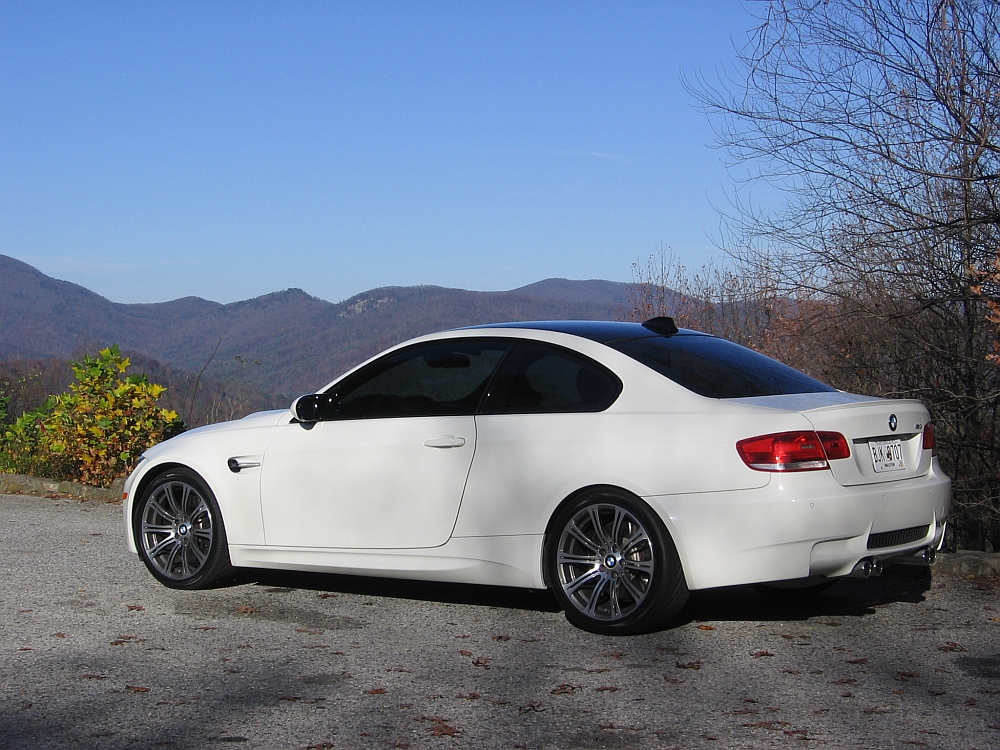
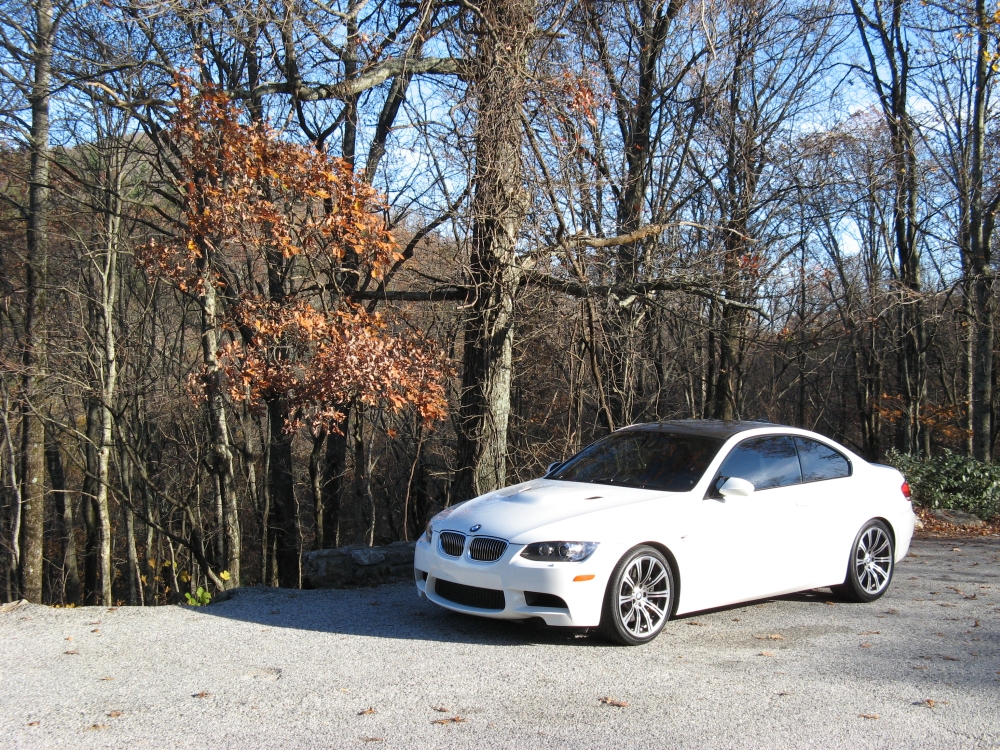
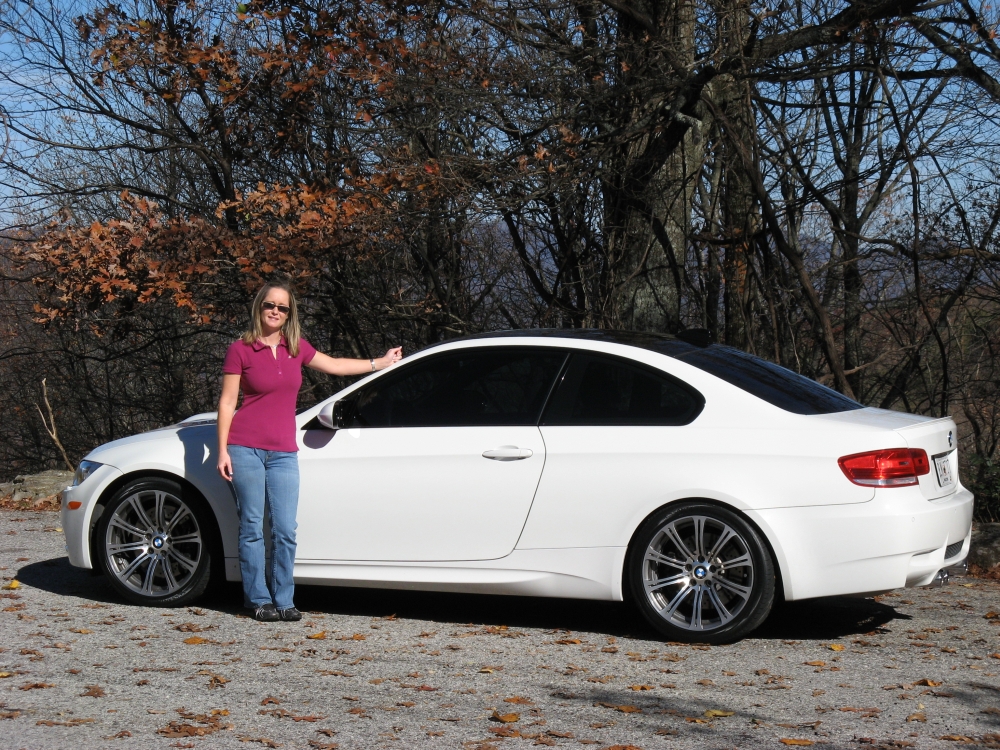
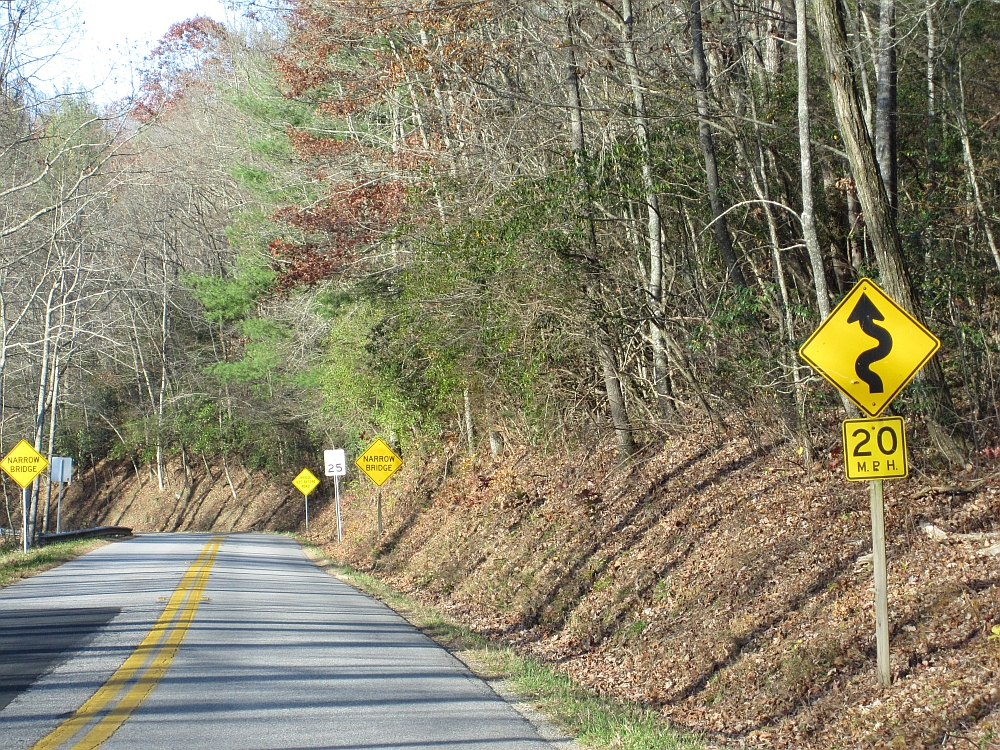
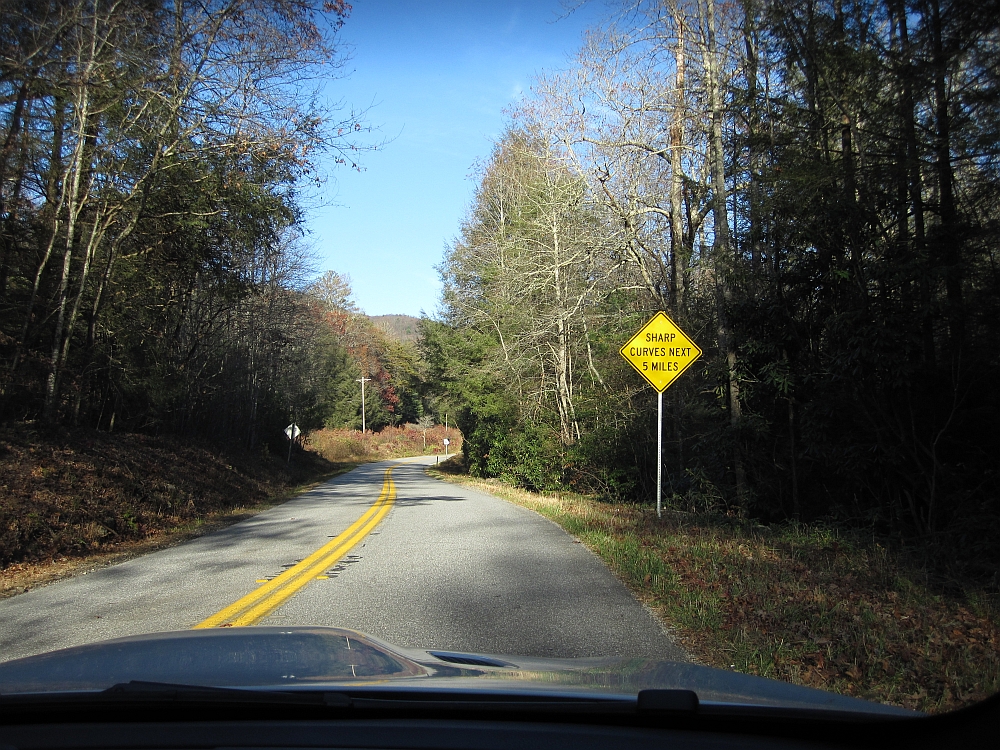
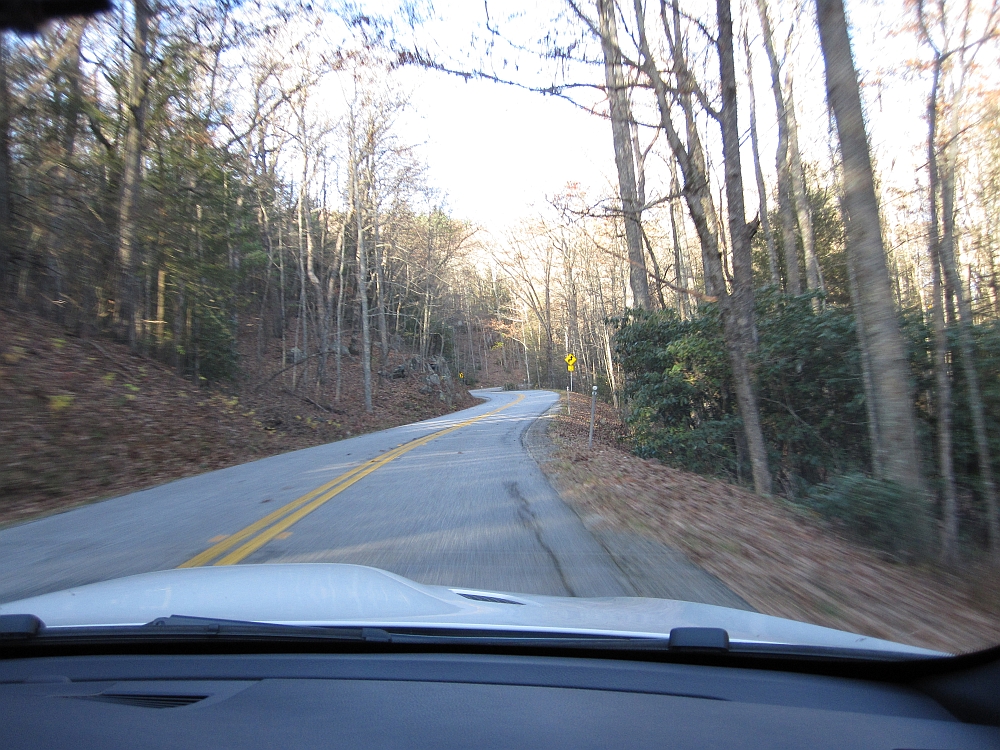
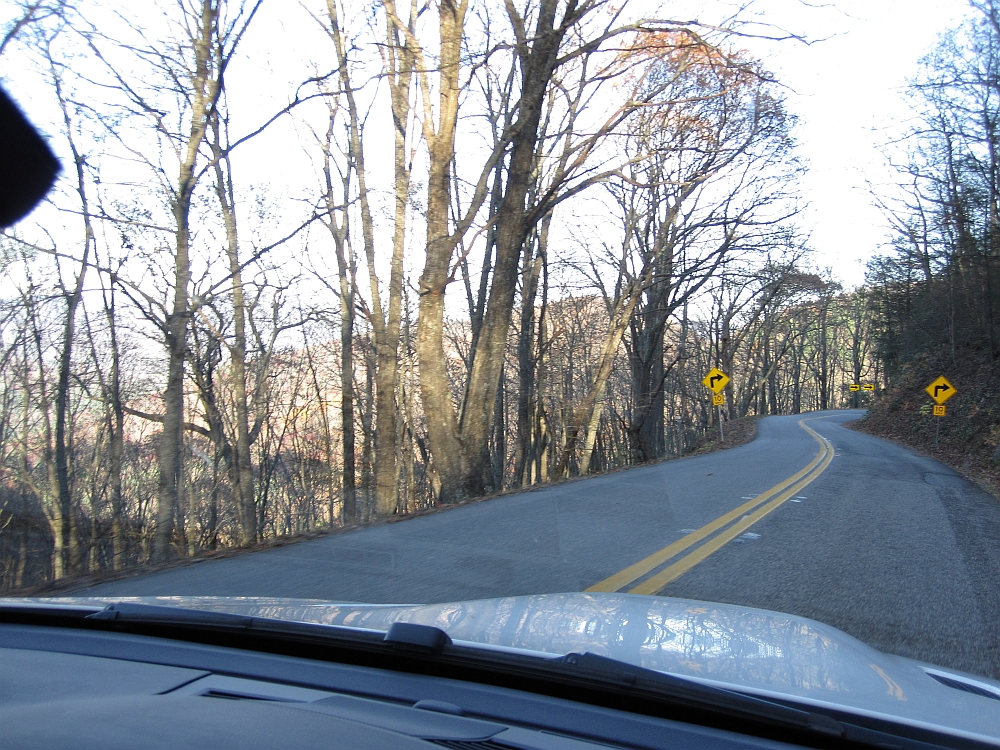
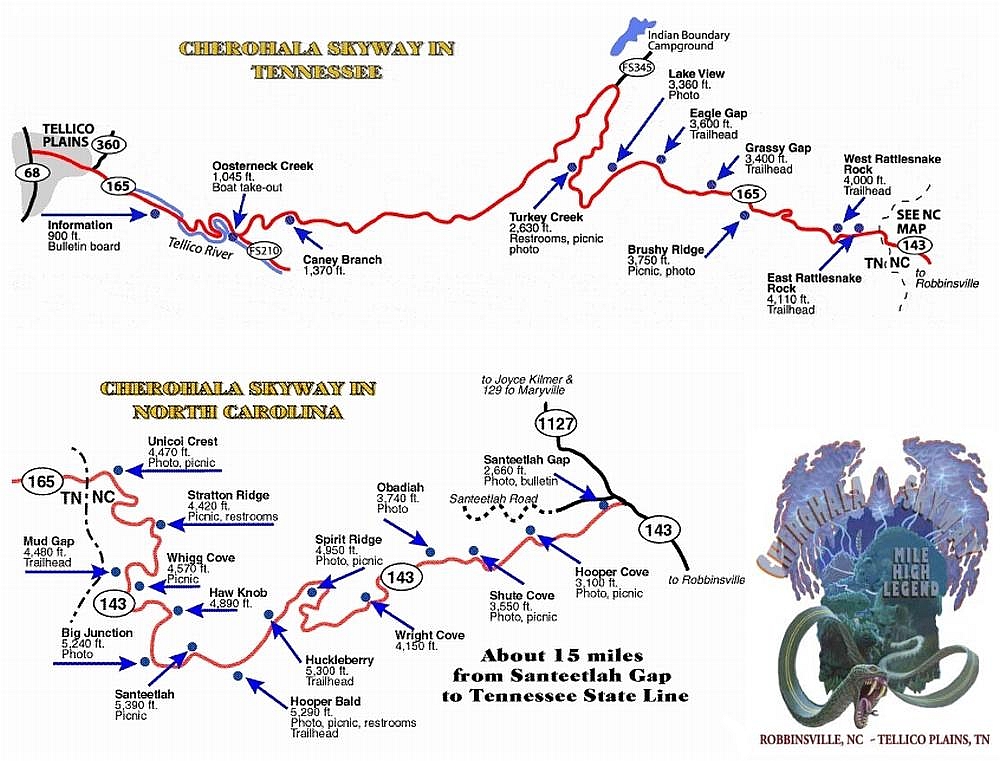
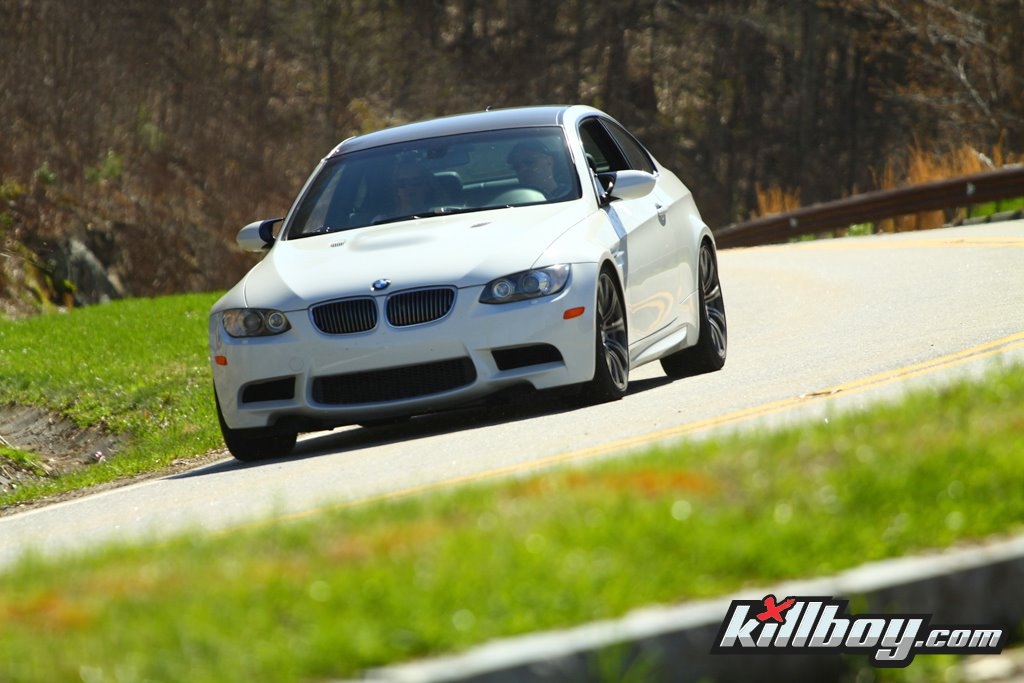
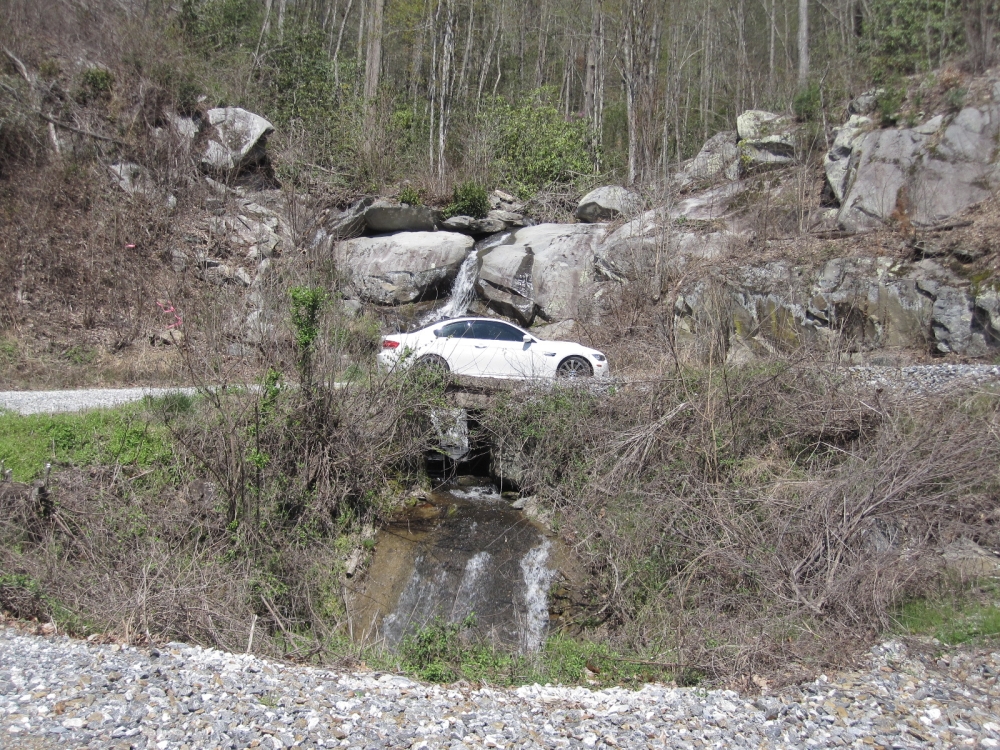
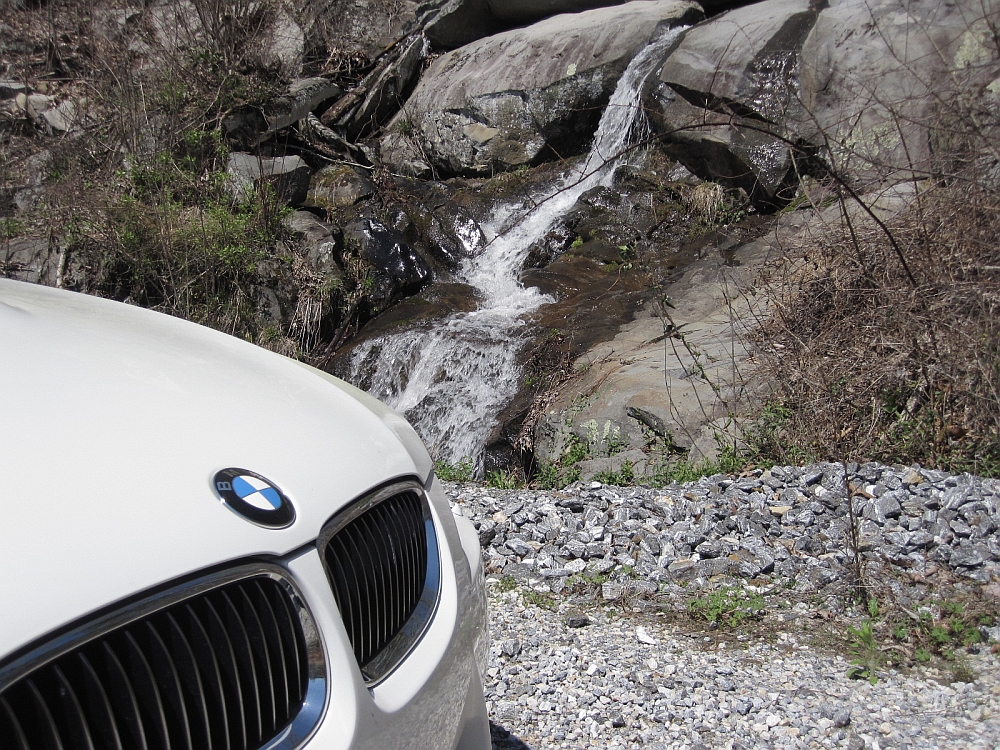
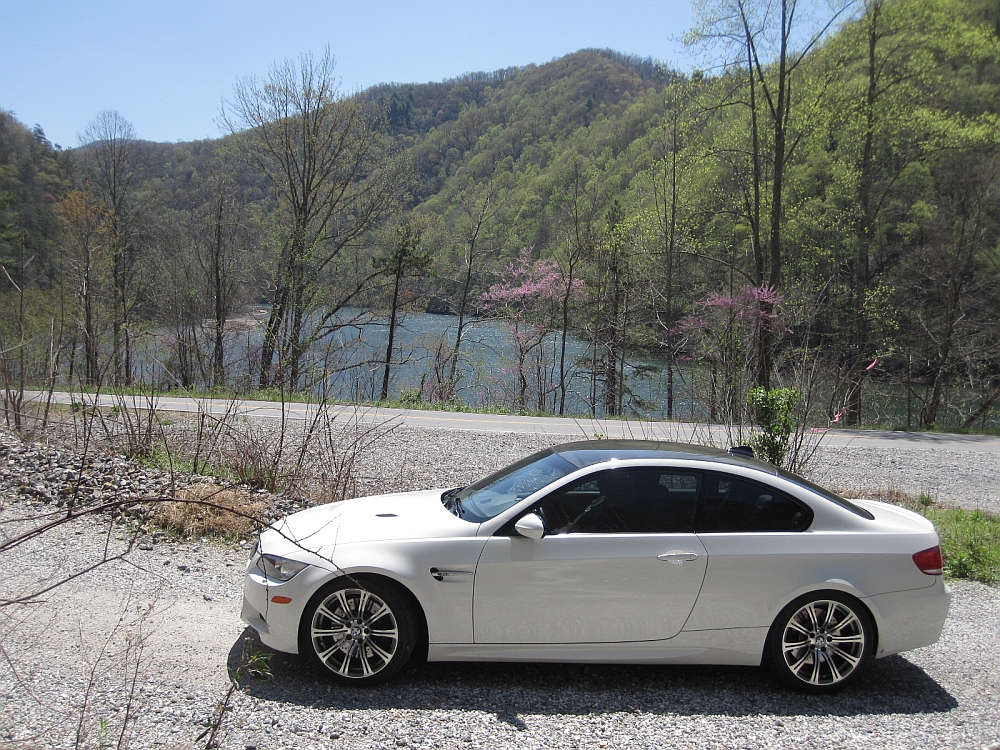
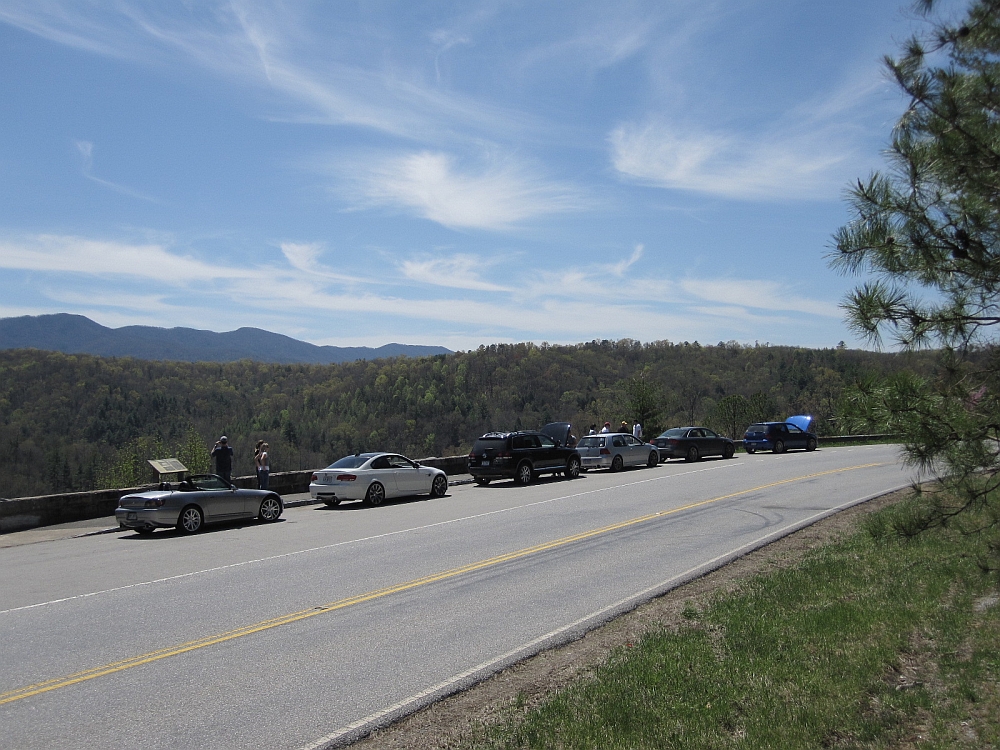
After scrubbing in the tires for 500 miles, it was time to head to the
North GA mountains to see how both they and the car would perform- in a word flawless. The route we typically do is the 60>180>129 loop as detailed in a map
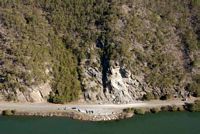
HERE that Frank in the Lotus club drew and tagged for us. Pics taken at Chestatee
Overlook (on 60) and on 180 (aka Wolf Pen Gap):
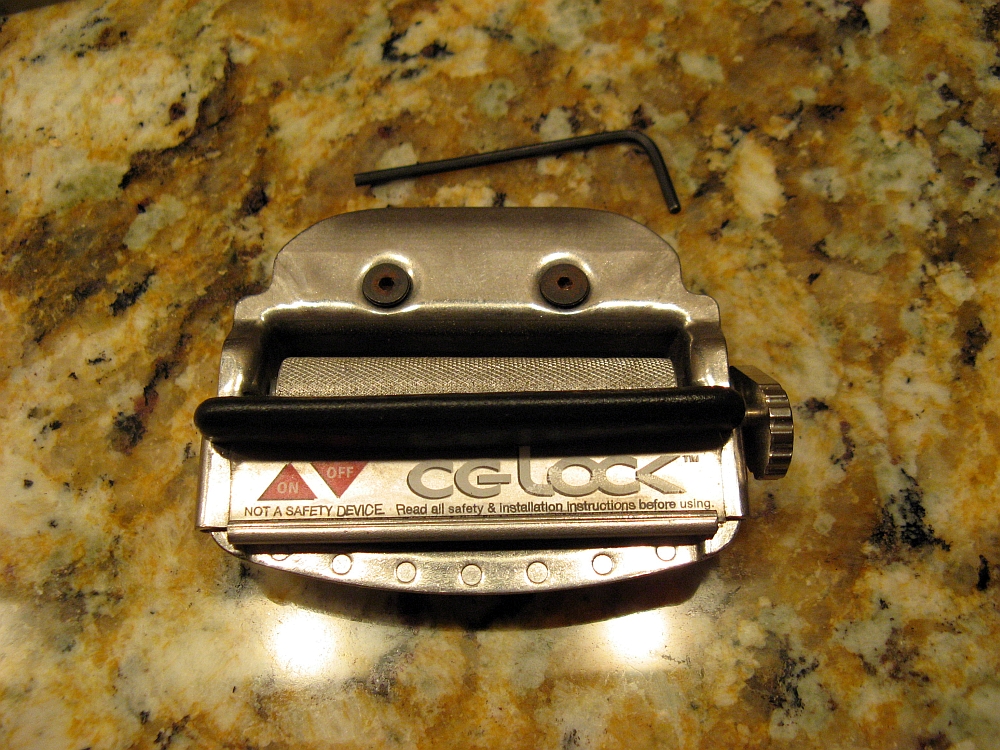
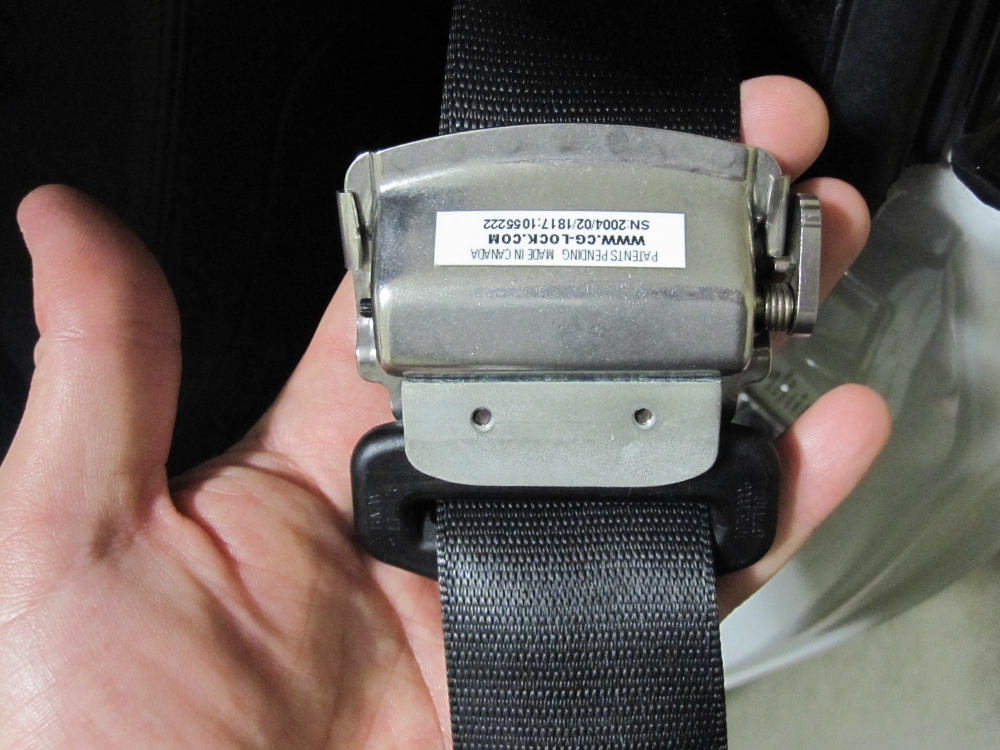
CG-Lock from a past car installed. Provides stability so there is less sliding and repositioning in seat, as seen in
the promotional video HERE.
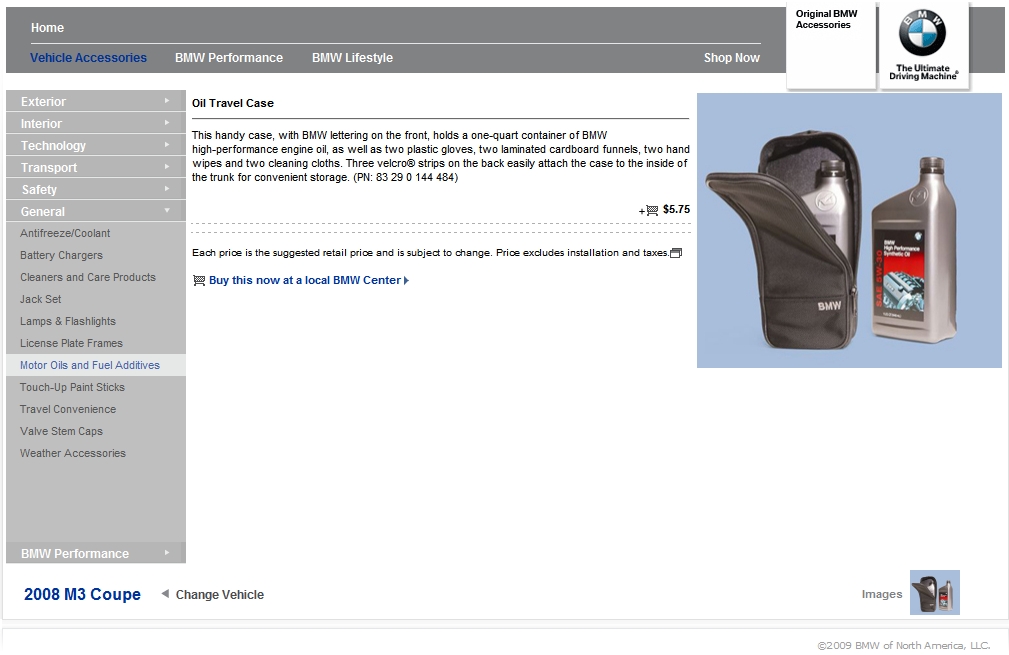
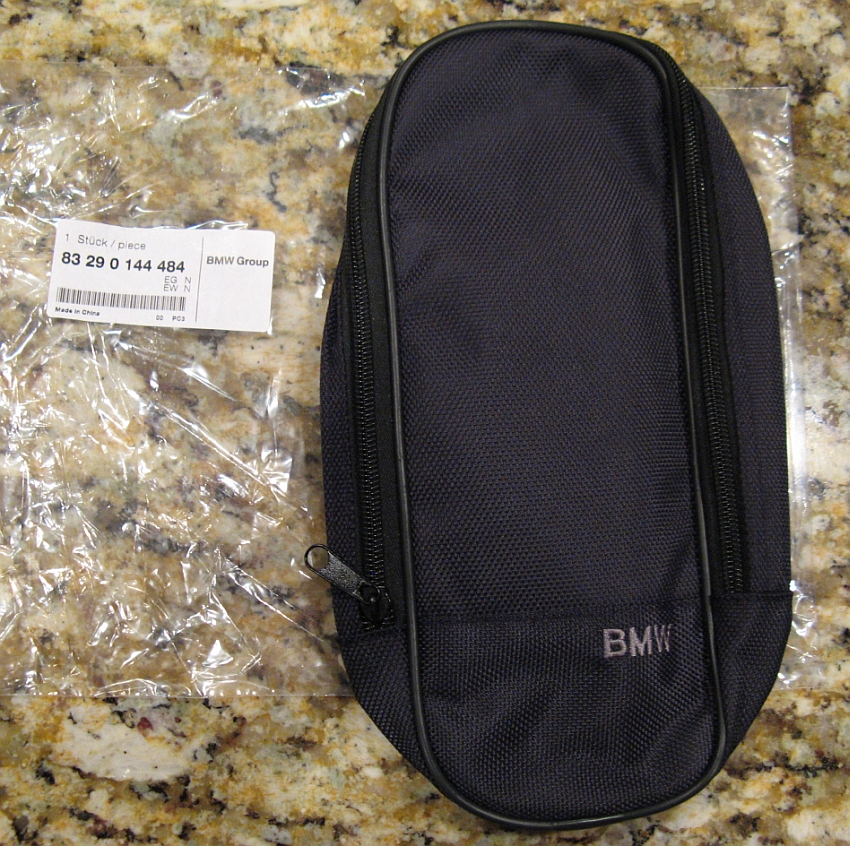
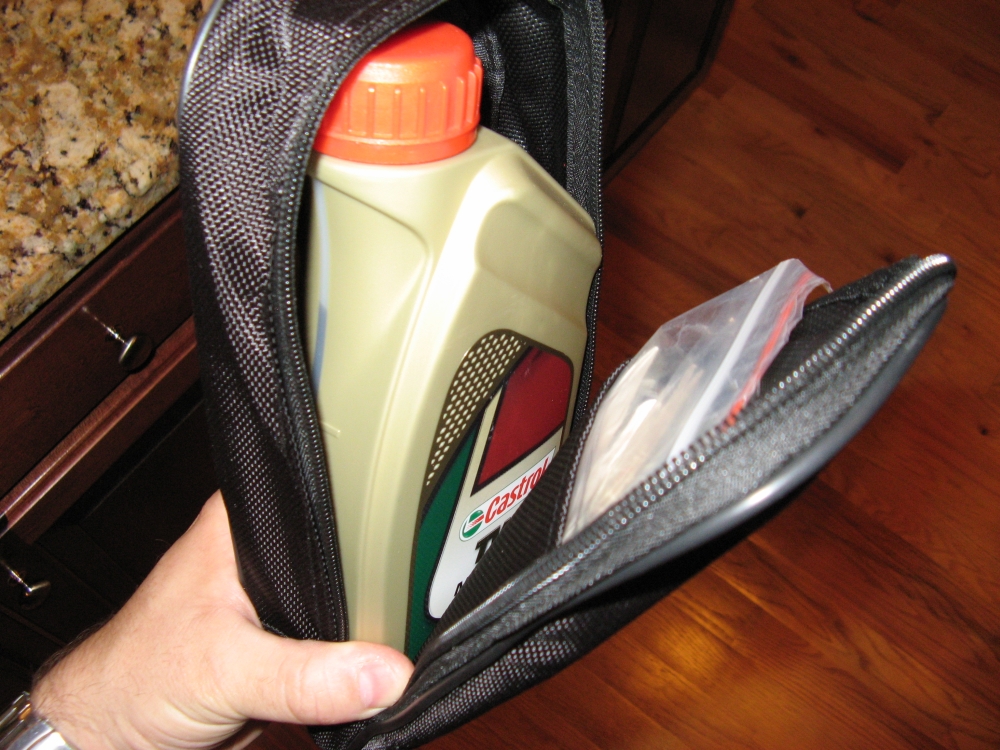
BMW Oil Travel Bag (P/N 83290144484) purchased to hold extra liter of oil in the trunk.
The bag has Velcro on the back so that it can "stick" to the carpeted trunk surface anywhere you wish to place it- I found a place out of the way of cargo.
Has room for one liter of oil and contains two each of: cardboard funnel, plastic gloves, hand wipes, and cleaning cloths.
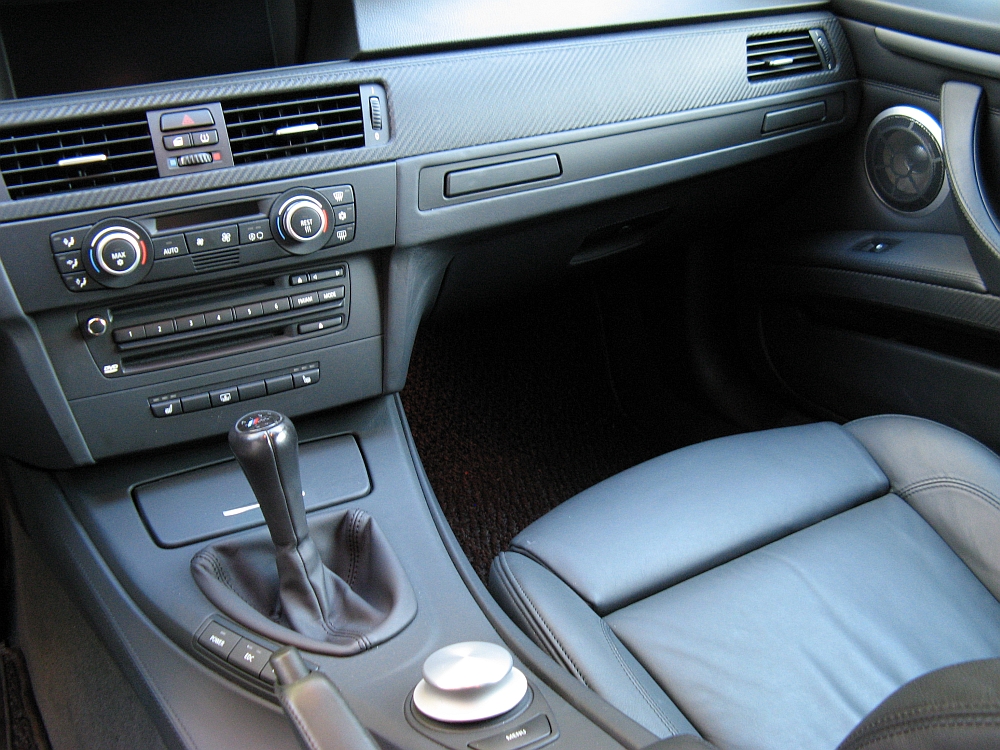
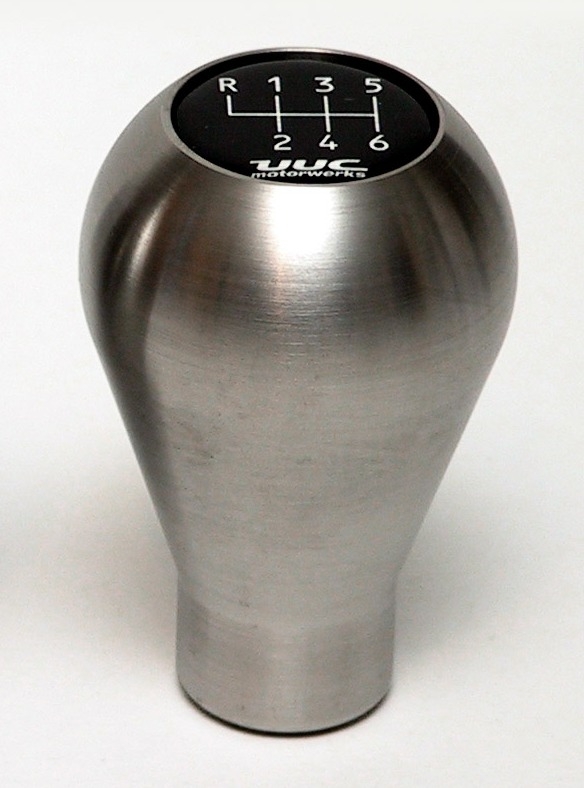
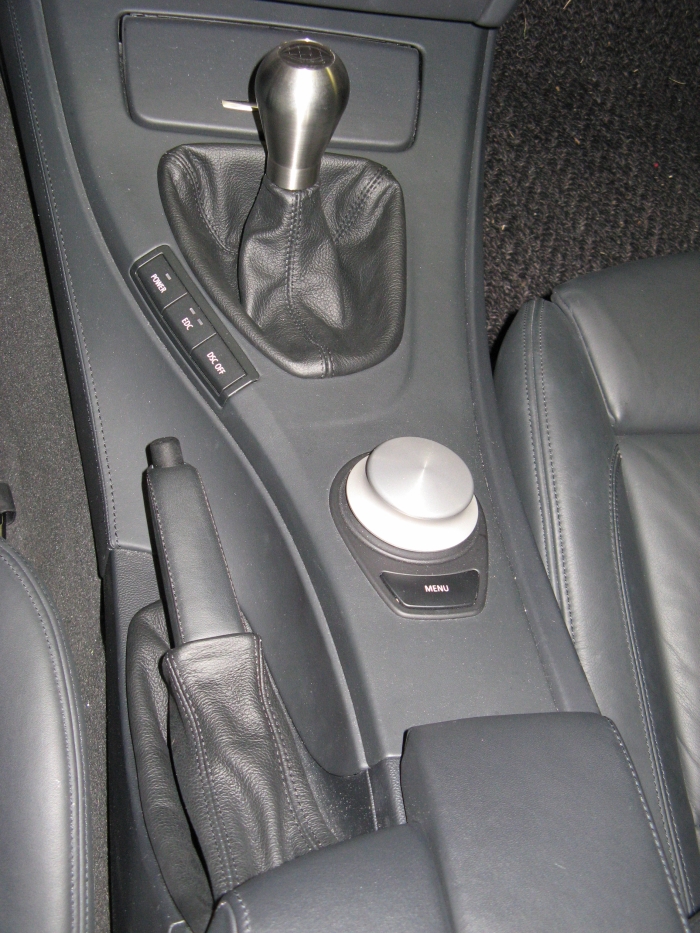
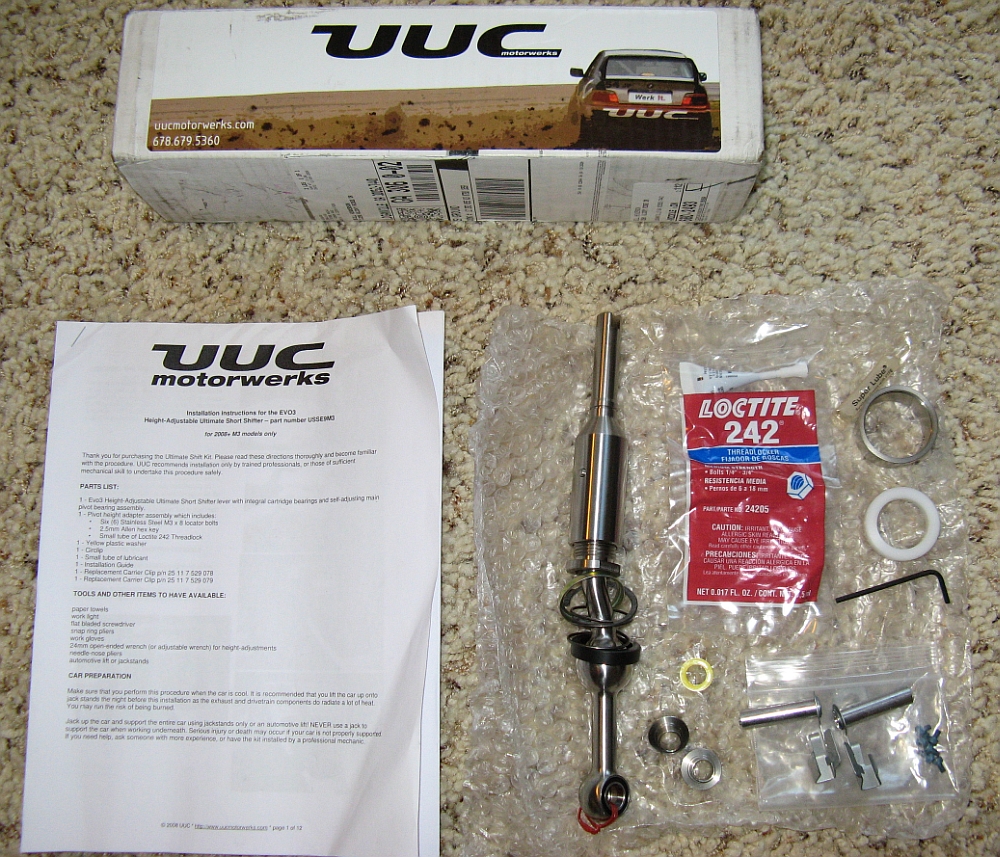
UUC Motorwerks
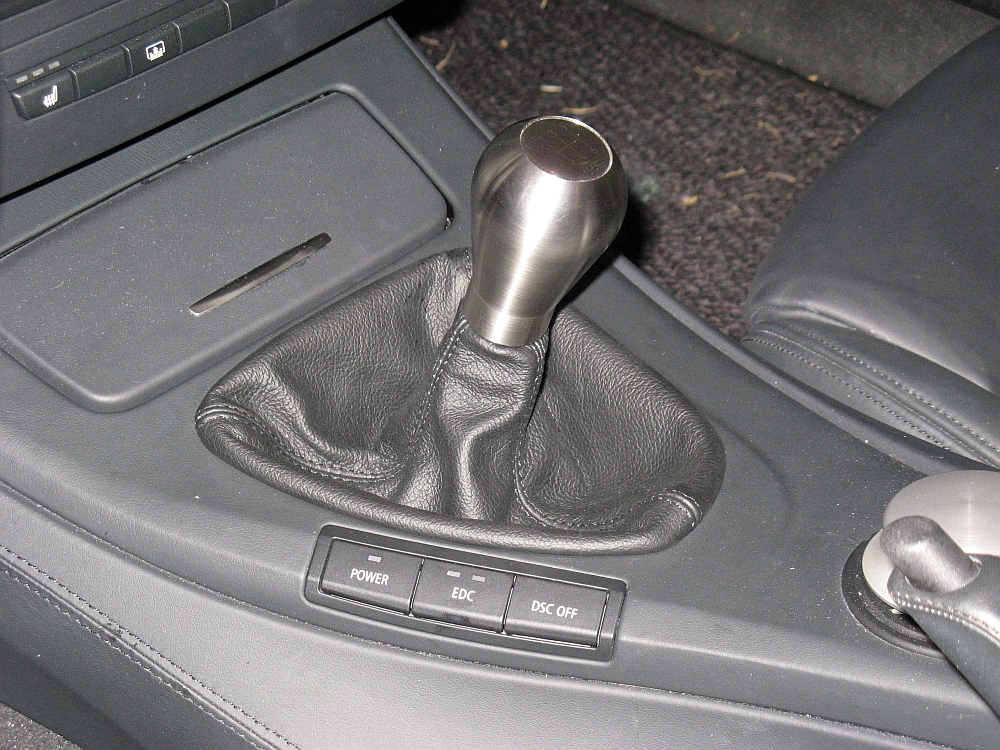
stainless steel RobKnob (RK) 2 installed. At 20.4 ounces it is a bit heftier than the OE knob and the additional weight makes shifting less notchy/easier.
UUC Motorwerks
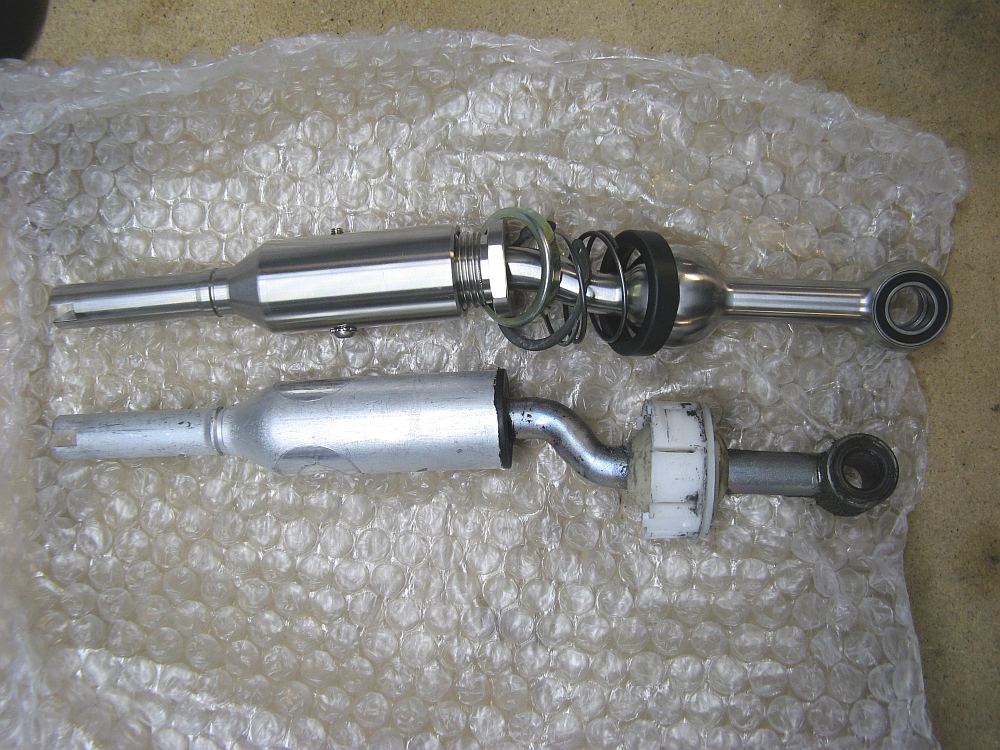
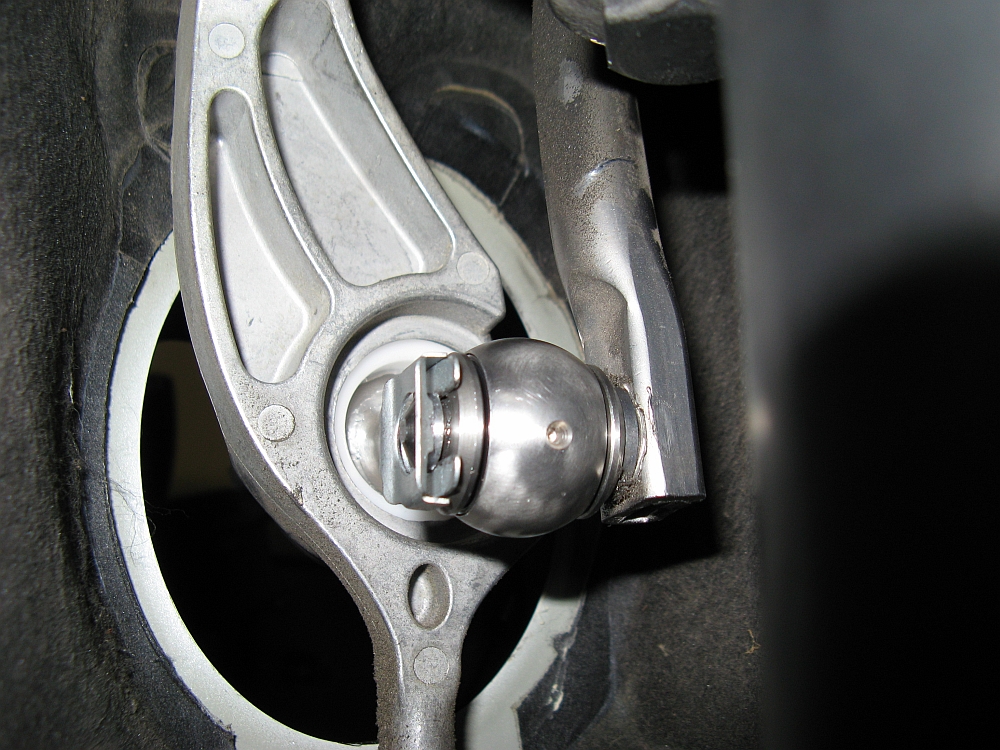
Evo3 short shifter (P/N USSE9M3) installed. This shifter has shorter throws than OE, but maintains the OE shifter physical height, and is SO much more precise, definitely a worthwhile mod.
I have noticed no additional NVH (Noise/Vibration/Harshness) over OE since installing, and this has been my experience with UUC SSKs in two other cars I owned/own.
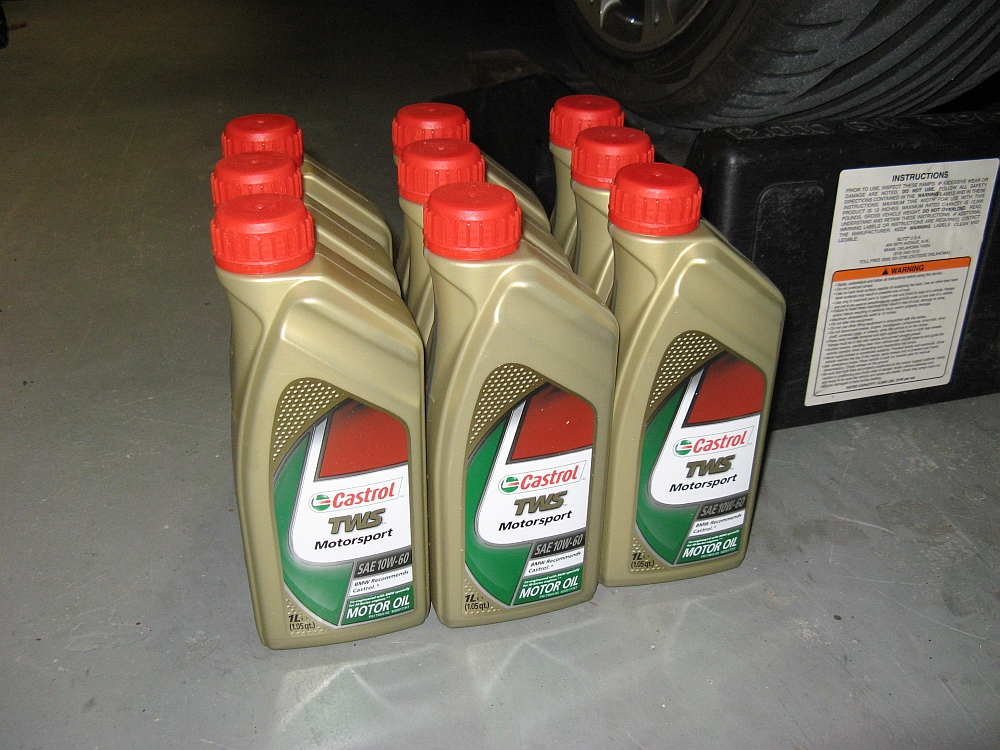
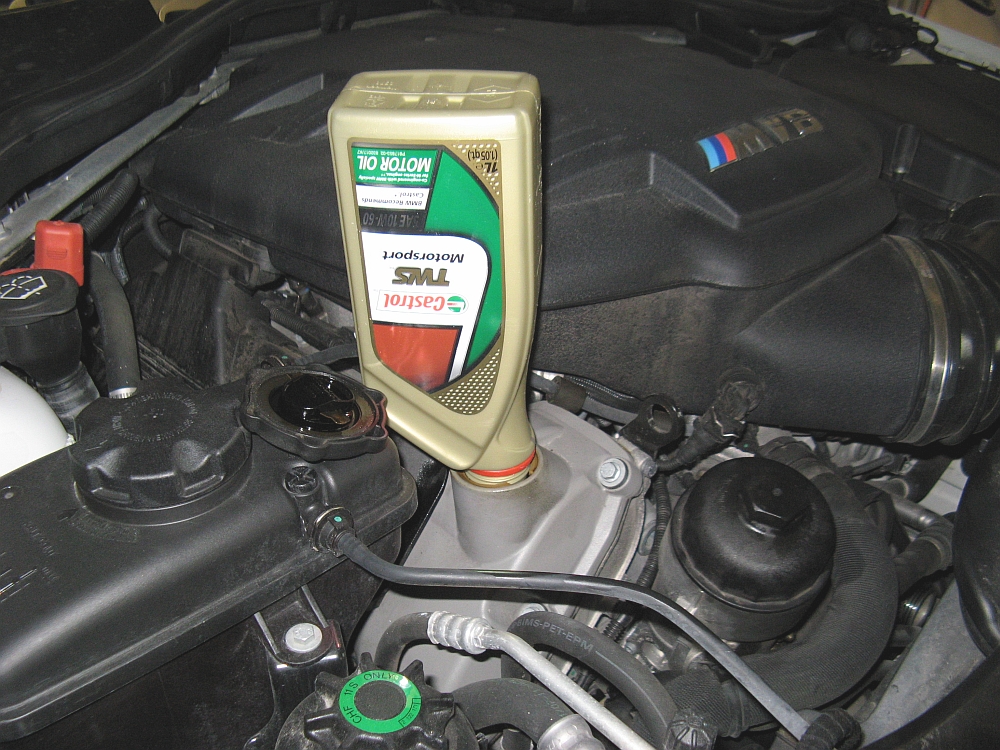
I change the oil in between the the "scheduled" service intervals so that it gets
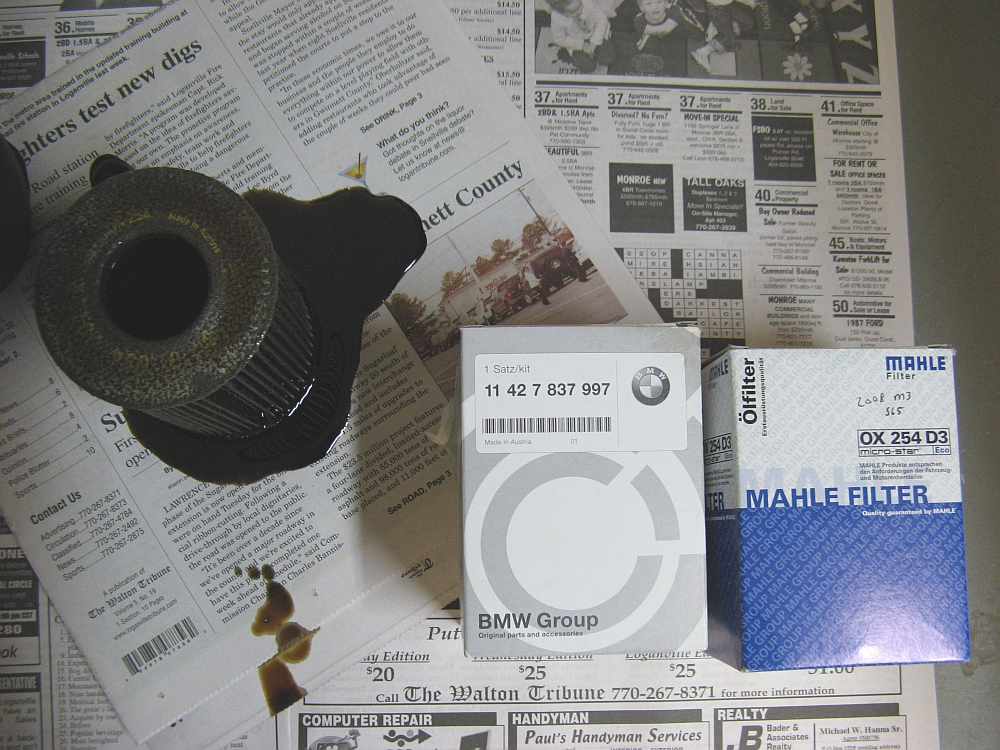
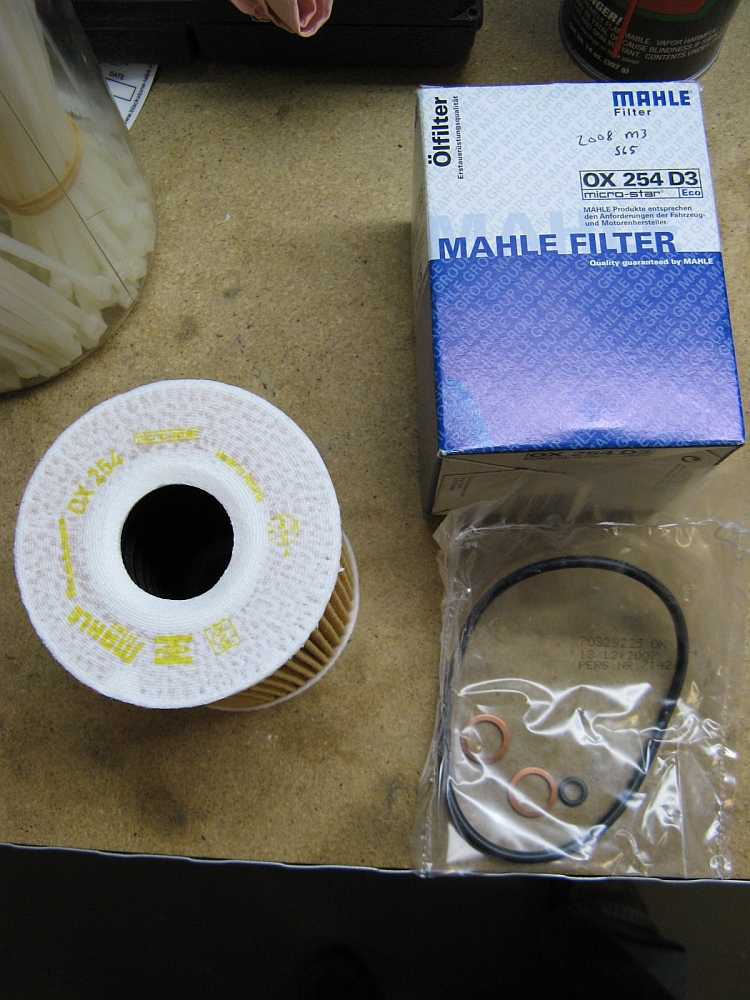
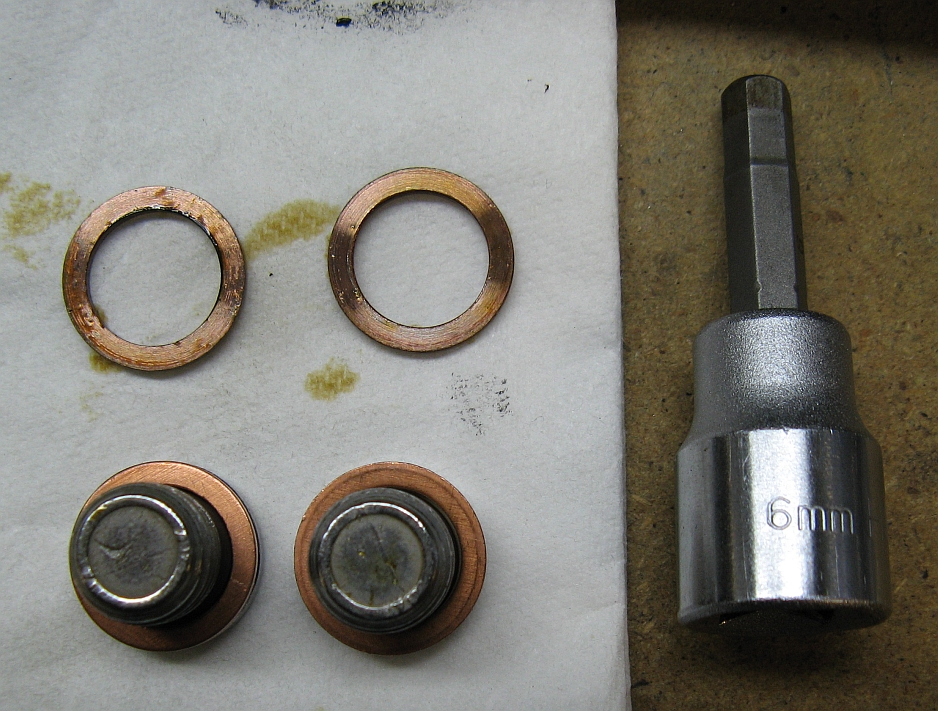
changed every 7500 miles. The M3 will hold 9.3 quarts of Castrol TWS 10w60 oil (P/N 07510009420), when changing you also need the BMW oil filter with O-Ring seals and crush washers
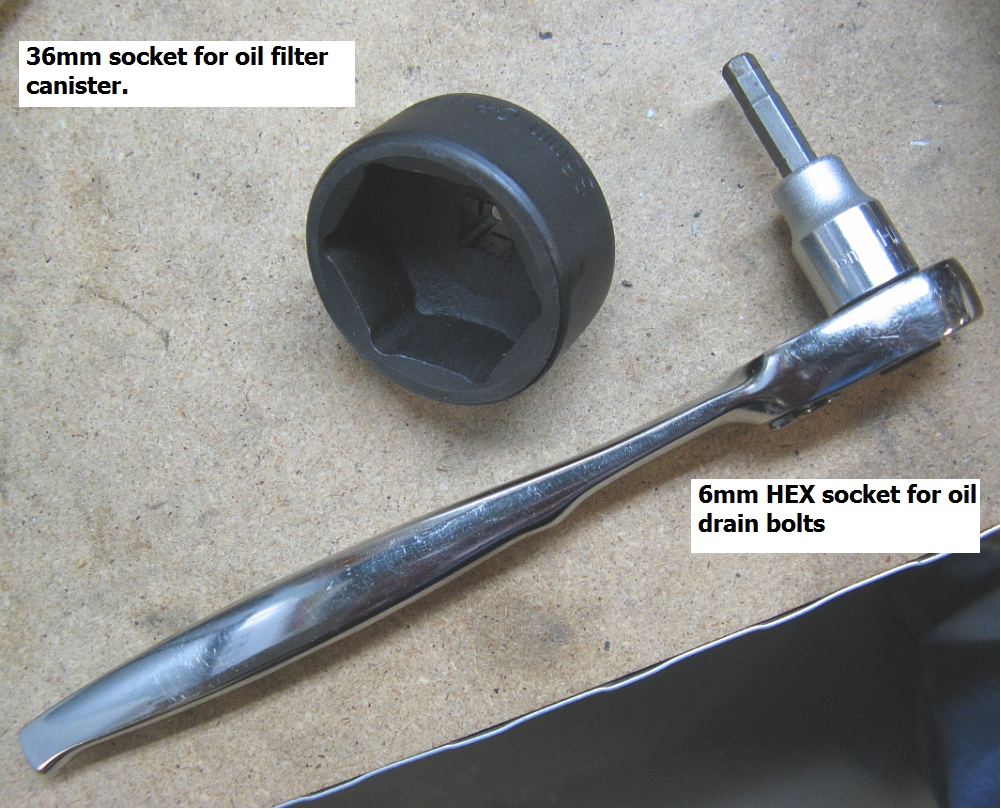
(P/N 11427837997)- I used a Mahle filter this time, one of the OEM . Note that the TWS oil comes in liters so 9.3 quarts = 8.8 liters, you will need 9 bottles minimum for an oil change. Tools you will need are a 6mm HEX
wrench or socket for the oil drain plugs and a 36mm socket for the oil filter canister.
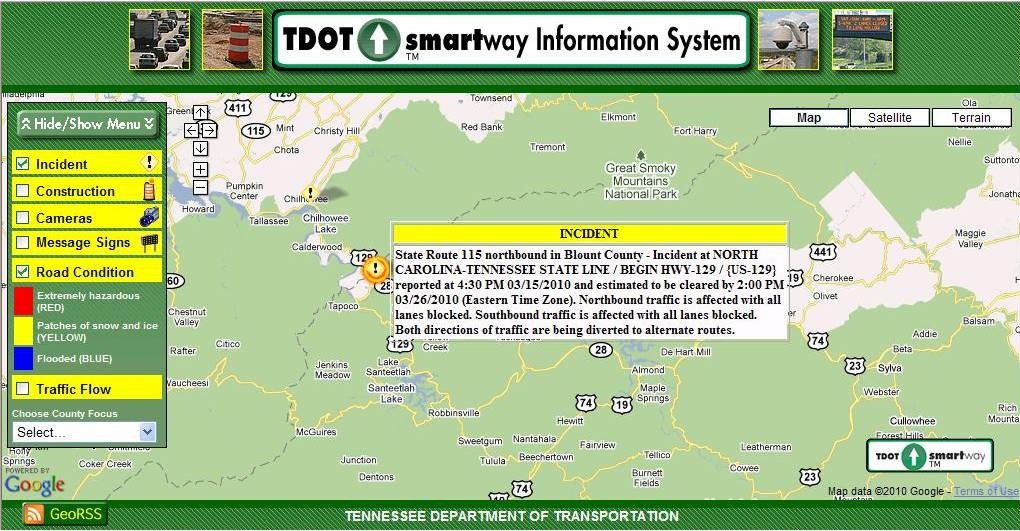
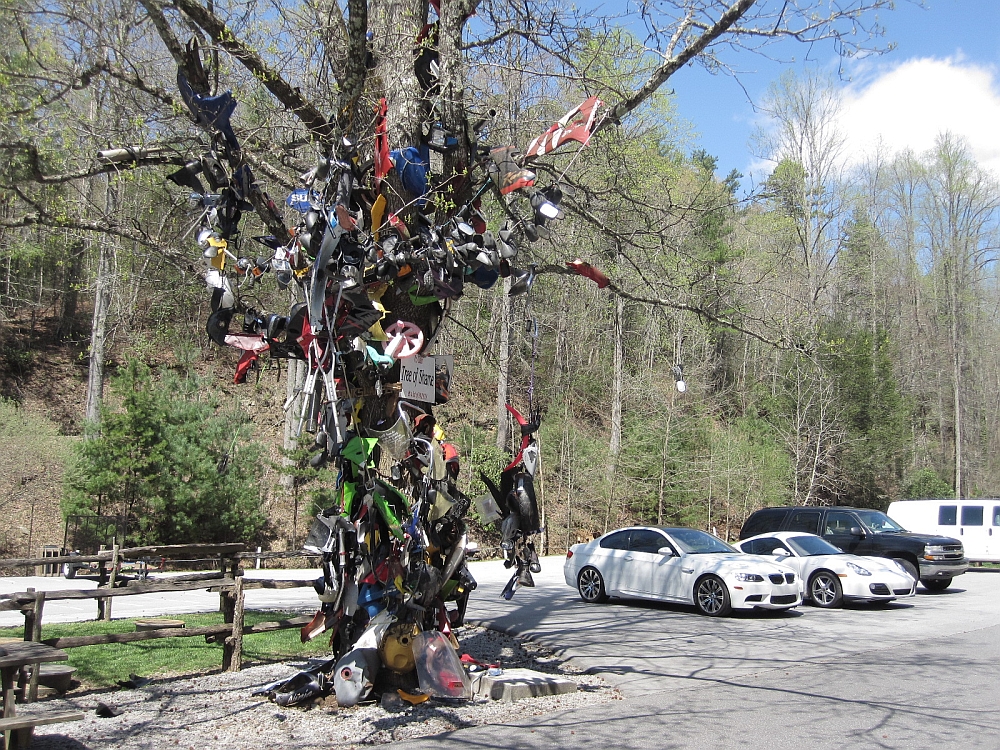
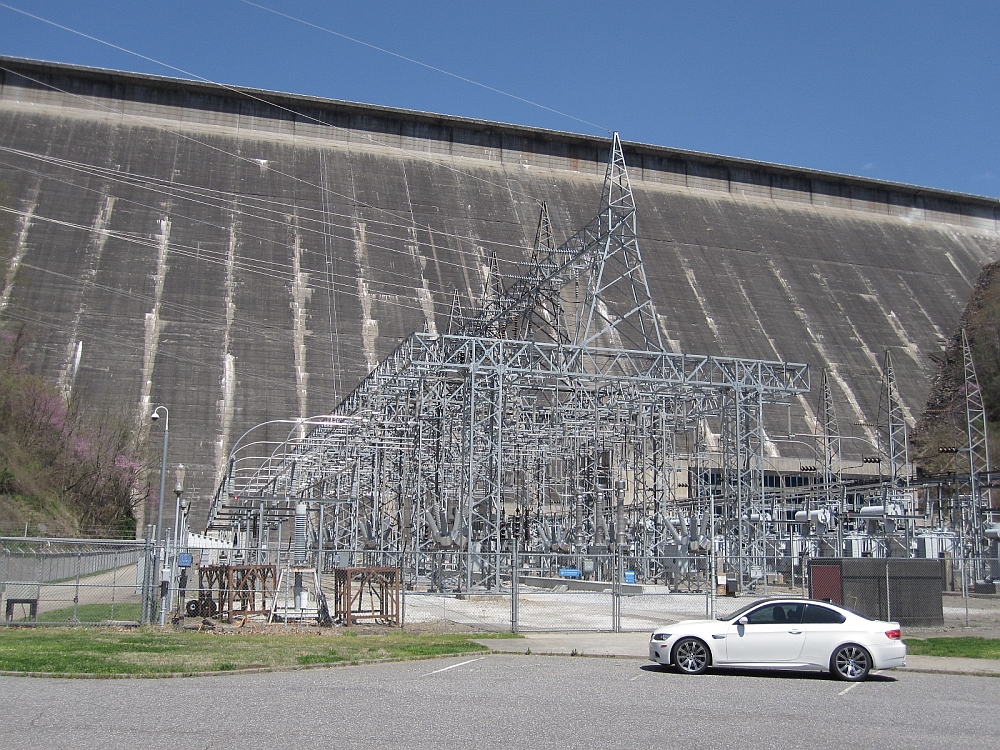
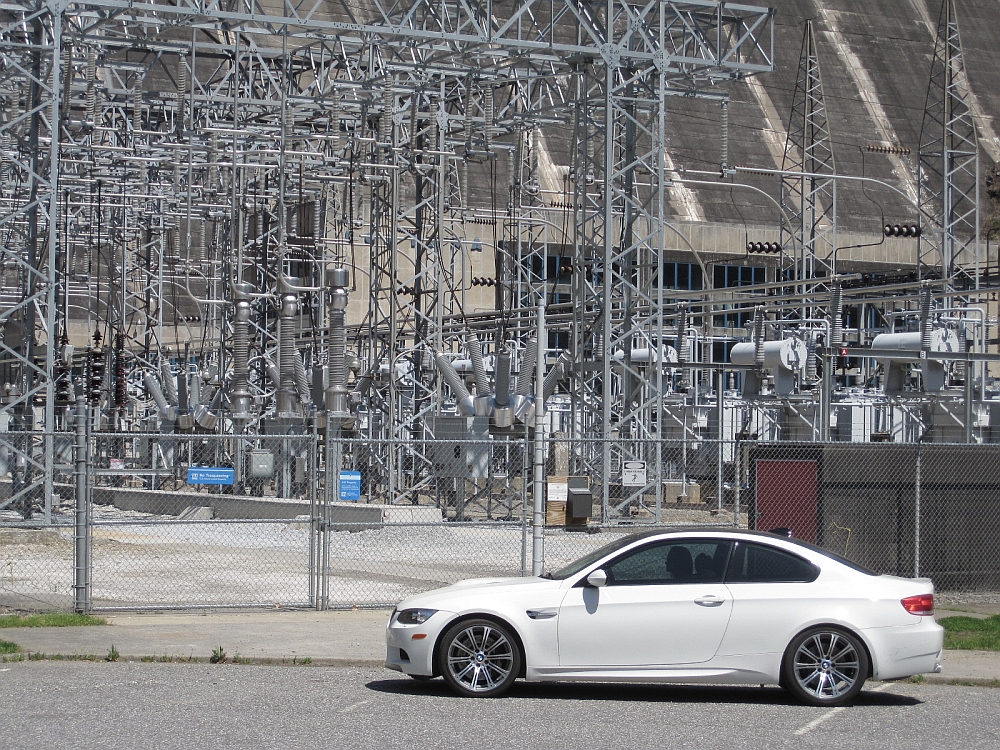
I spent some time with my VW R32 friends up at Tail of the Dragon (HWY 129) at the
East Coast R TOD GTG 2010. Unfortunately a rock slide had closed TOD, so
Hellbender/Fontana Dam (HWY 28) and the Cherohala Skyway had to suffice for driving excitement. Still had lots of fun,
saw some old friends and made some new ones. Some video from the rear bumper on the Cherohala HERE.
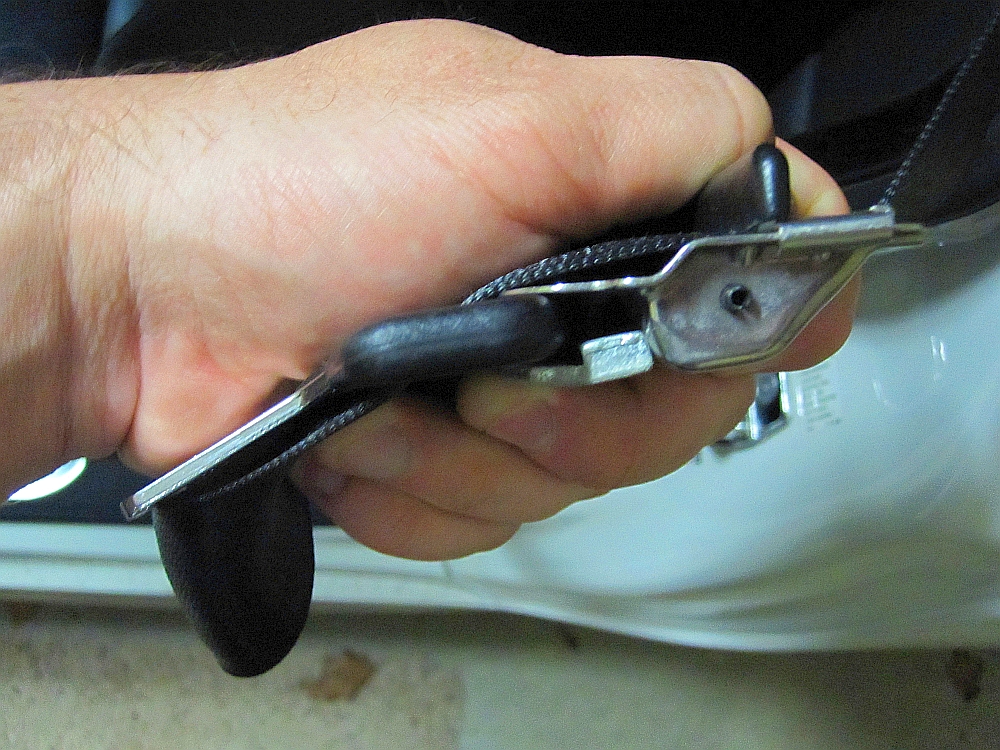
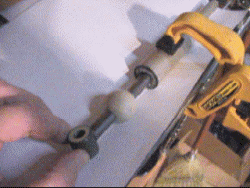
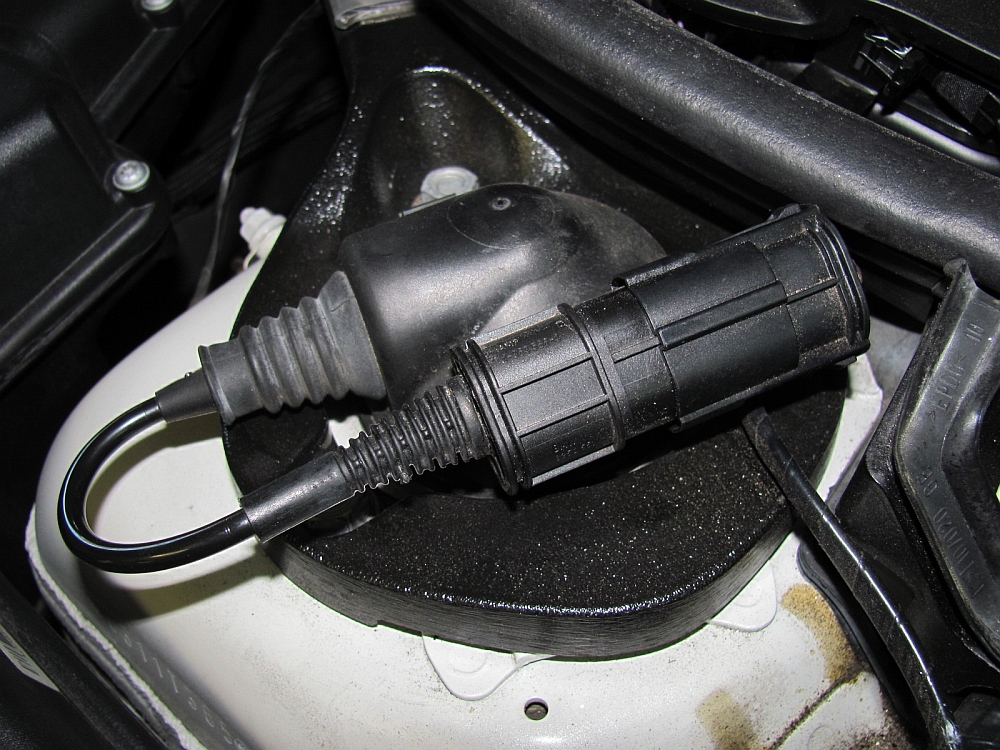
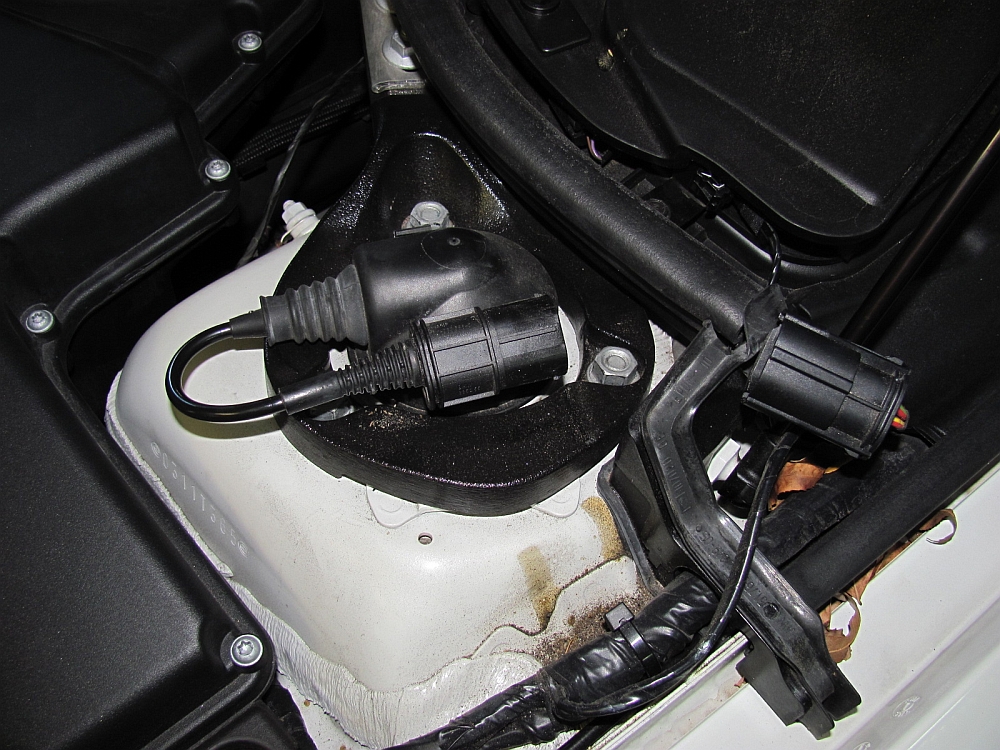
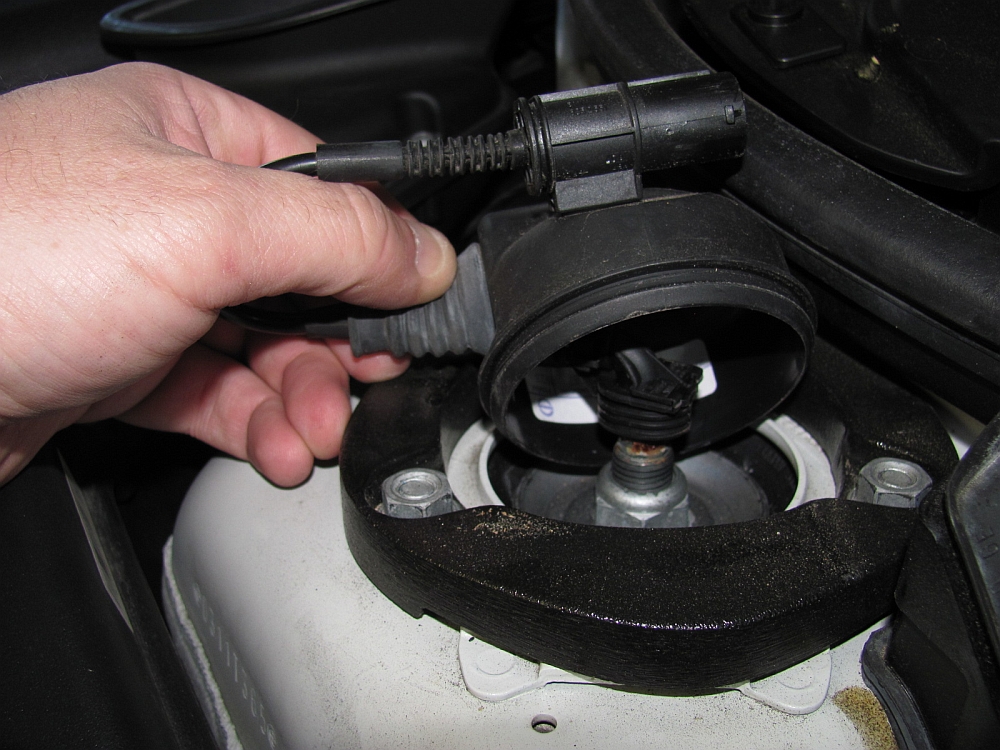
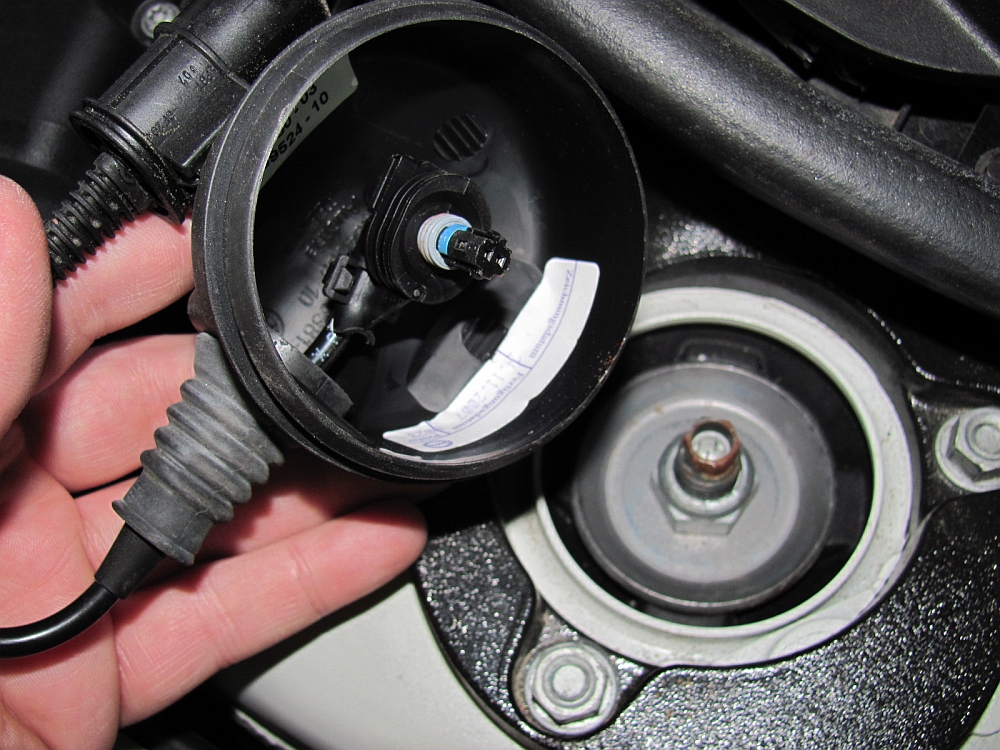
Before installing springs, I decided to pull the strut alignment pins,
Doing this will allow some additional negative camber.
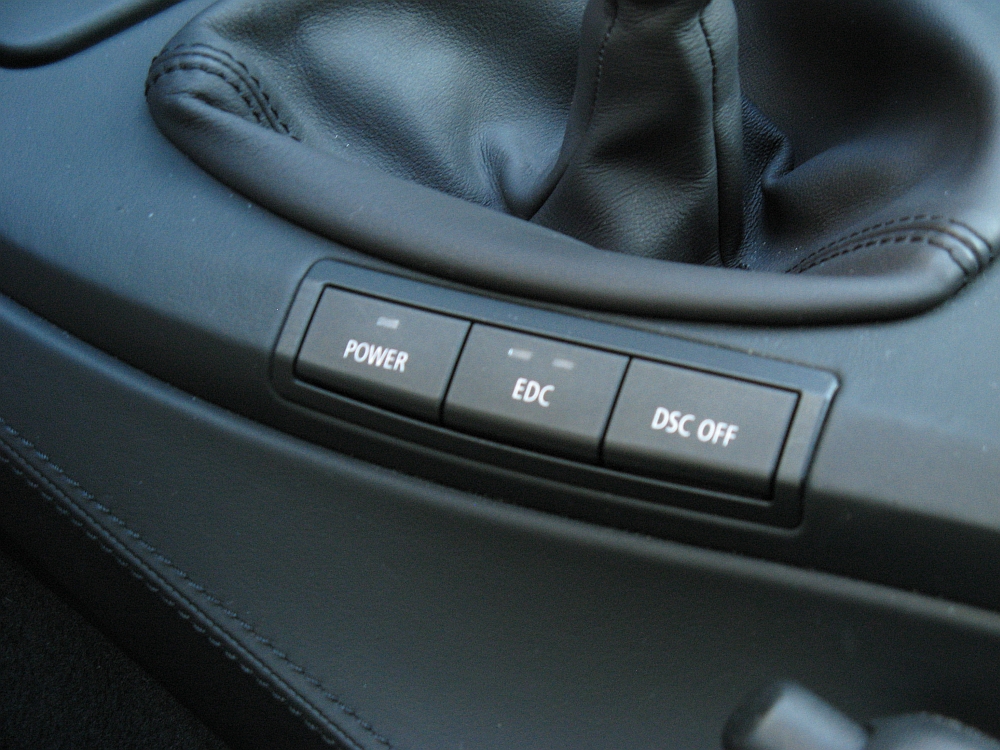
This is easily done while the car is on the ground. If you have an EDC car, the cap on the strut mount can be carefully lifted up and off,
but not too far as the plug for the damper has a short wire. This plug can be carefully lifted straight up to unplug. If you wish to remove the EDC
cap entirely this can be done by unplugging from the car's connector, but it can be left in the car and placed to the side. I removed mine since
I was disassembling the suspension to install the springs.
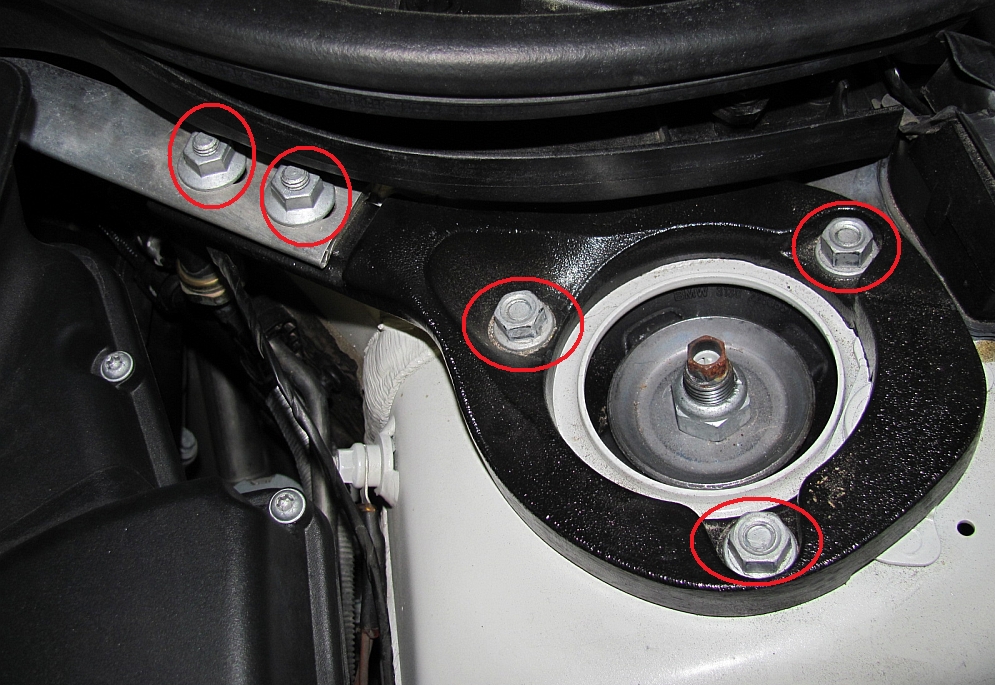
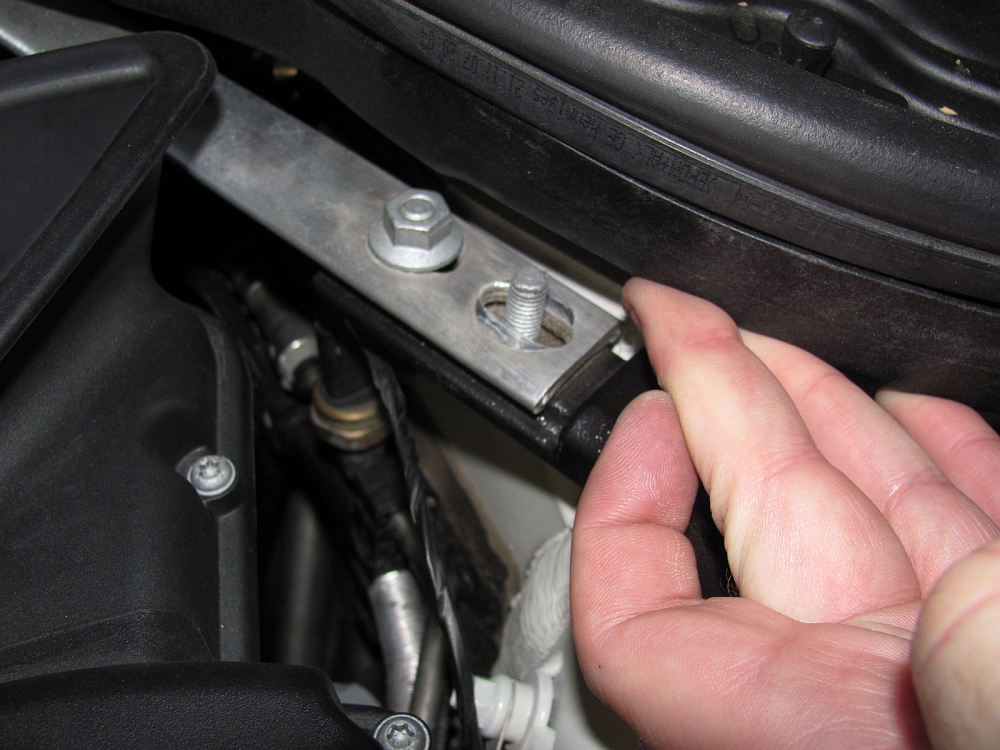
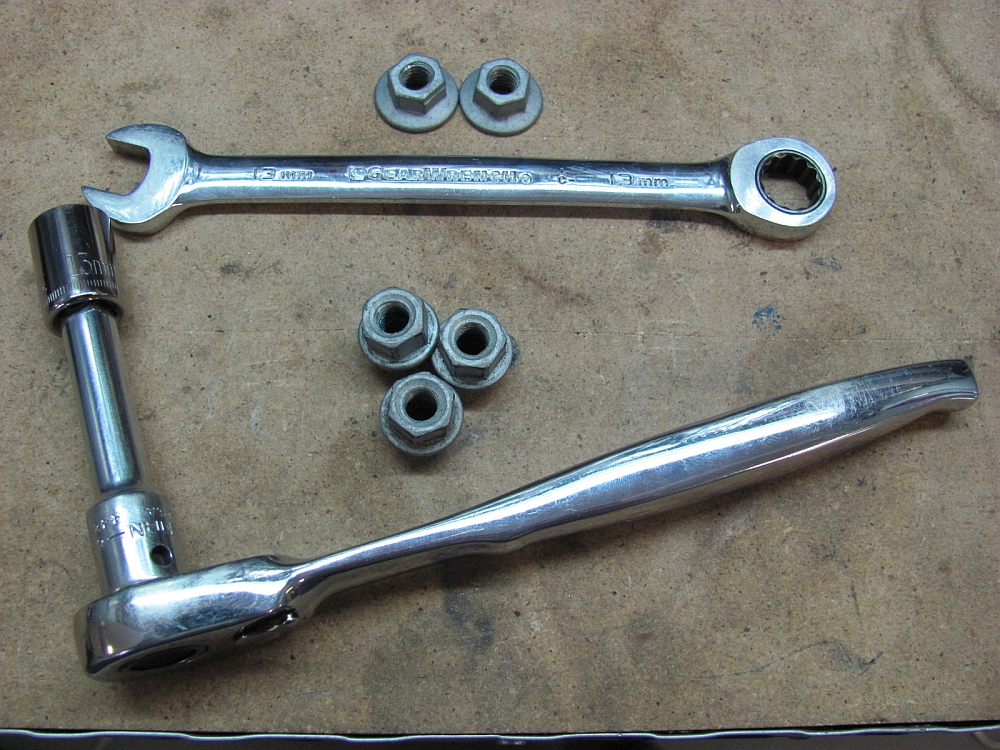
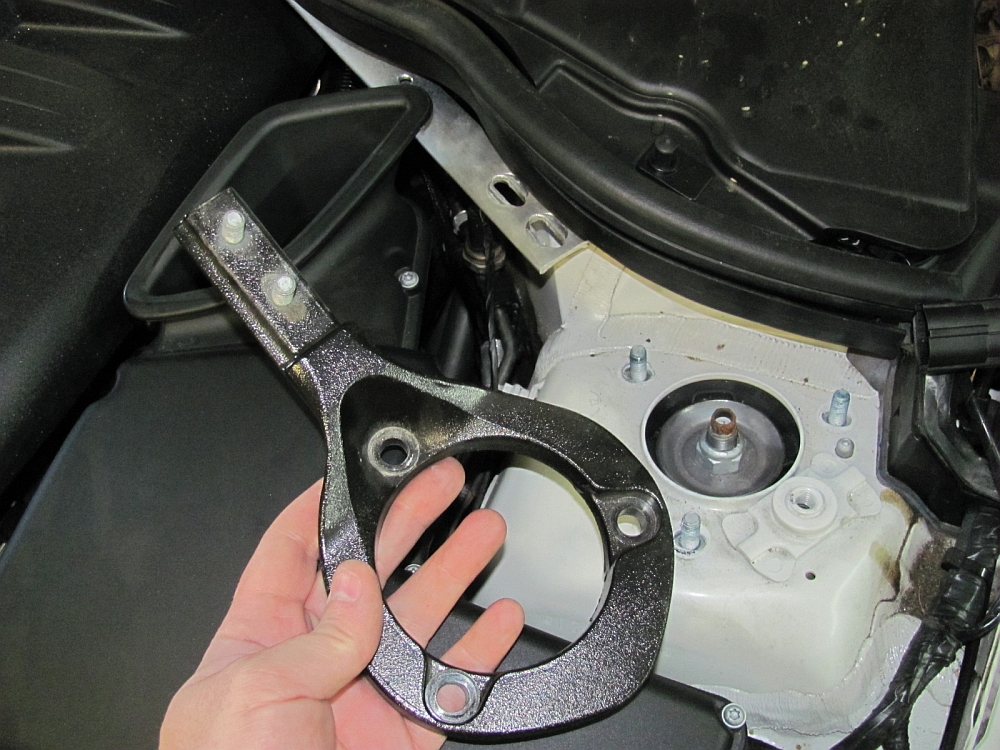
The two strut brace nuts need to be removed, this can be done by flexing the plastic cowl cover
to access the nuts with a combo wrench, 13mm. Next the strut mount nuts are removed, I used a socket wrench with a 13mm socket. Once all 5 nuts have been
removed, the strut brace mount ring can be carefully removed, kind of like a puzzle flexing the right way for things to come apart at the same time
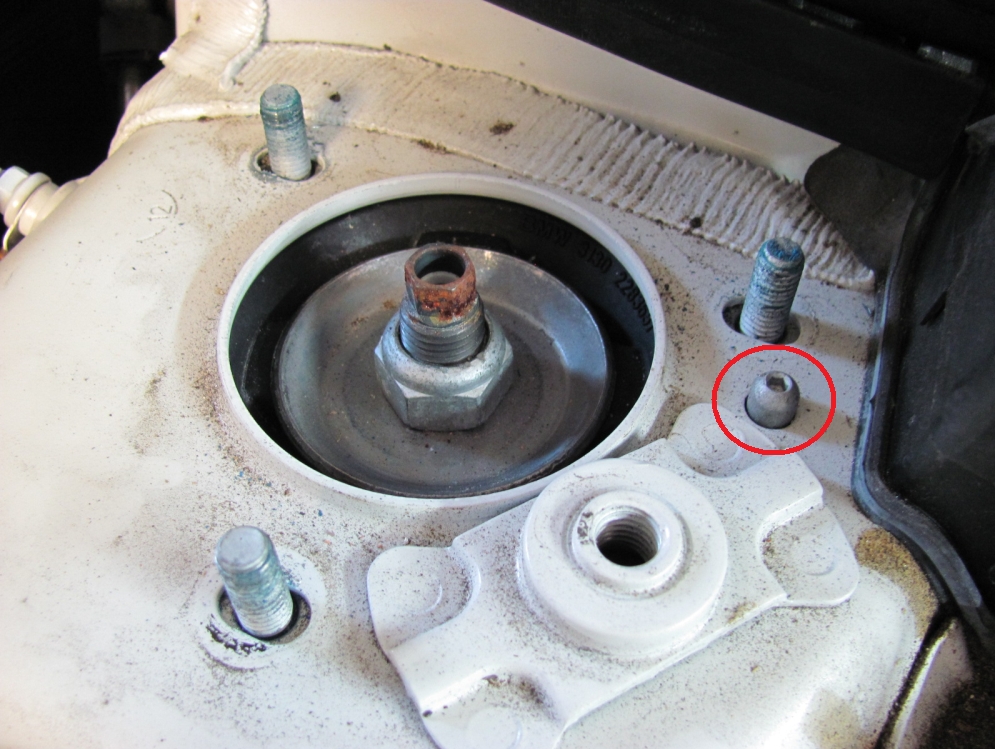
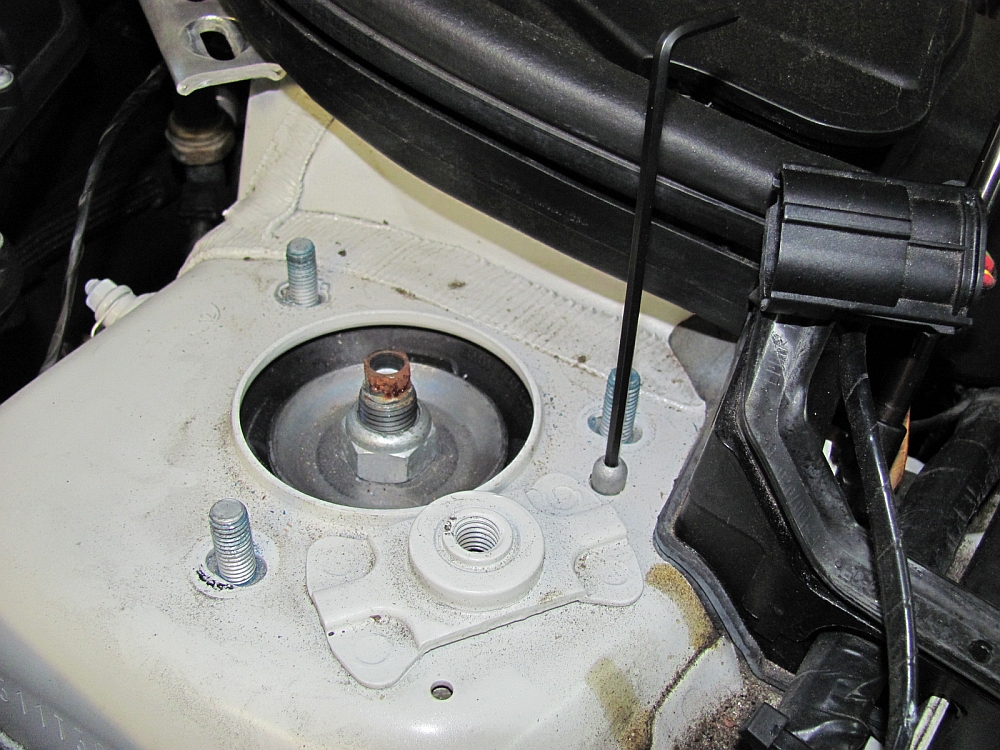
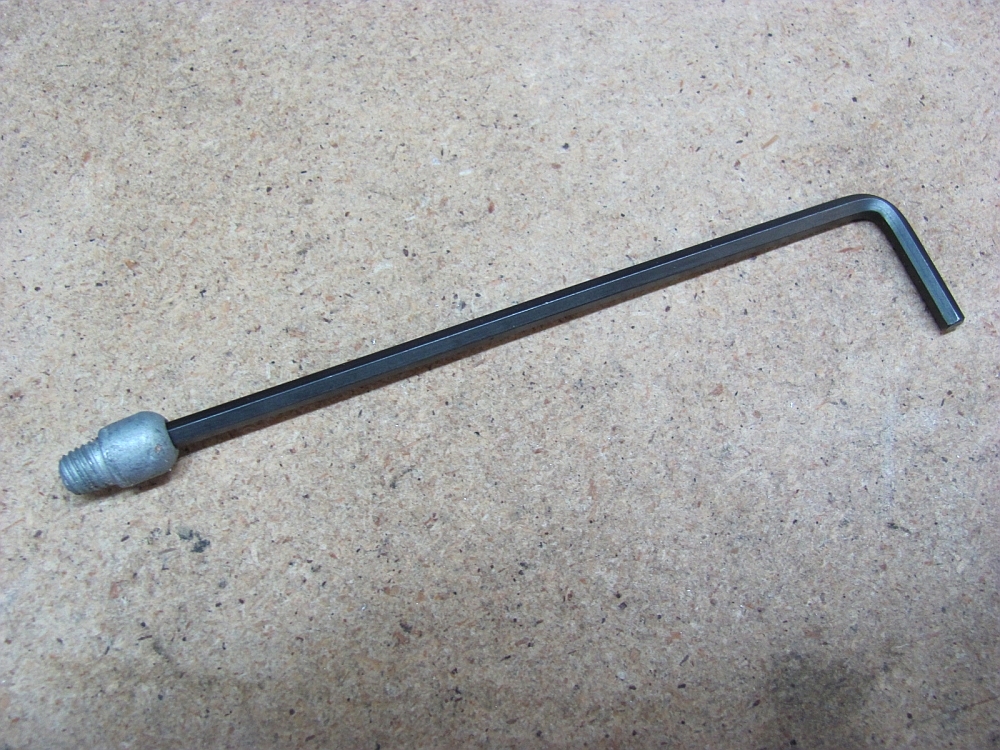
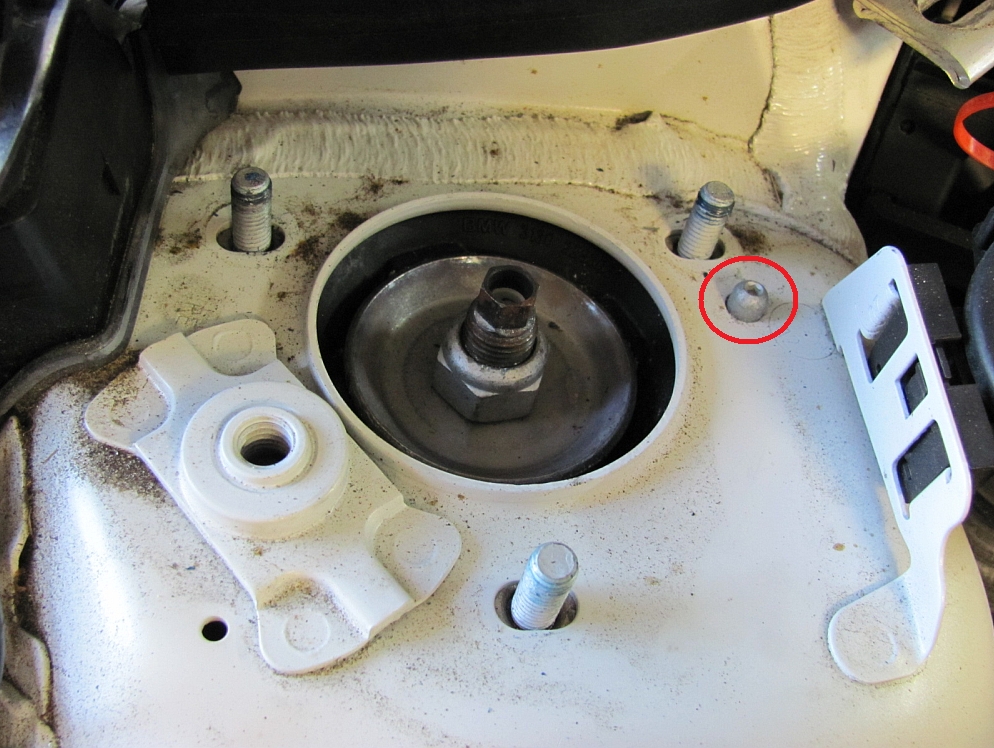
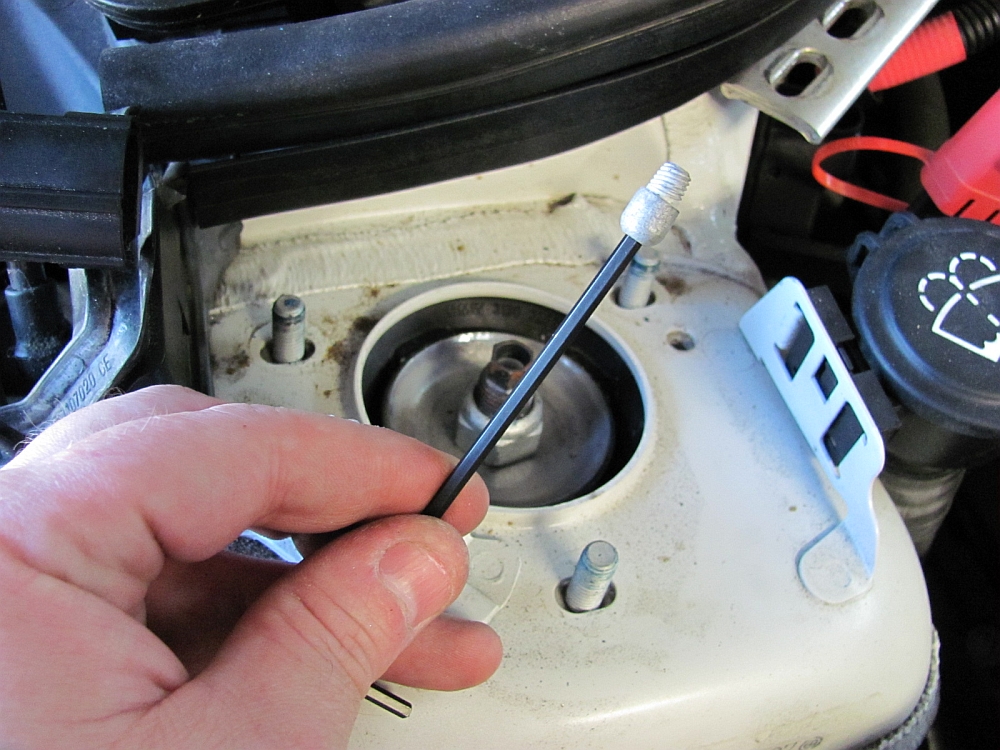
but possible, I did this for both sides. Once removed you will see a small nub with a hex head- this is the assembly locating pin, a 3mm HEX wrench can
be used to unscrew and remove. Putting the ring back into place is almost as much of a puzzle as removing it, assembly is reverse of removal.
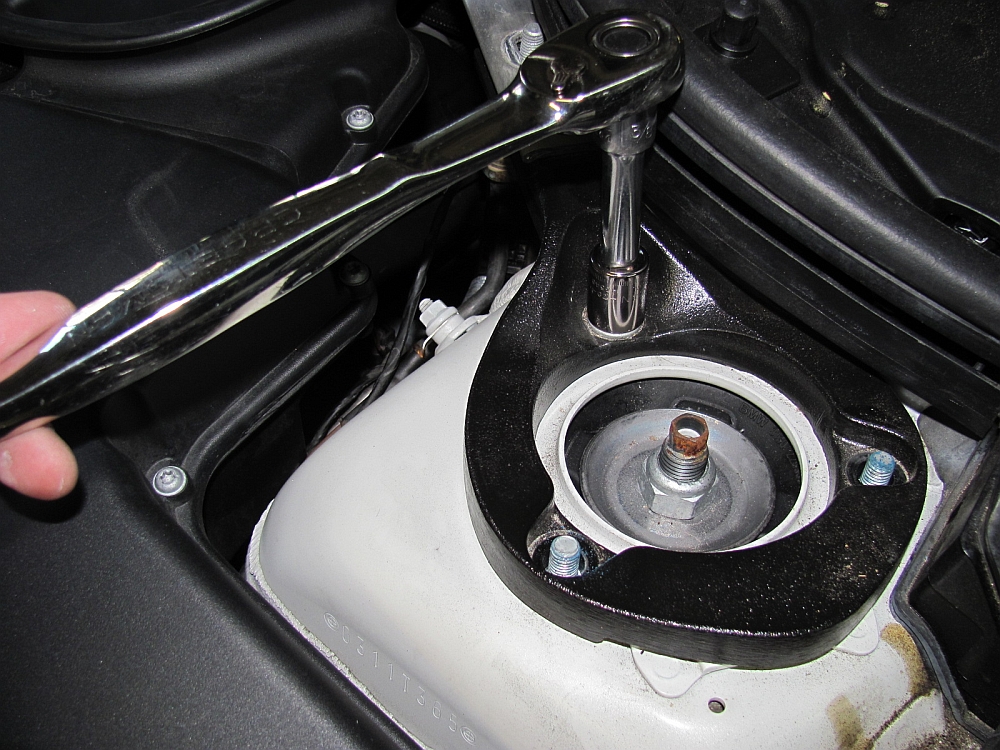
Before tightening any of the nuts, jack the car up and push the strut top in as far as it will go and snug down one of the strut mount nuts to hold it in place while
you tighten the remaining nuts. TIS torque specs can be found at the bottom of this write-up
HERE.
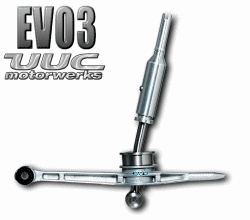
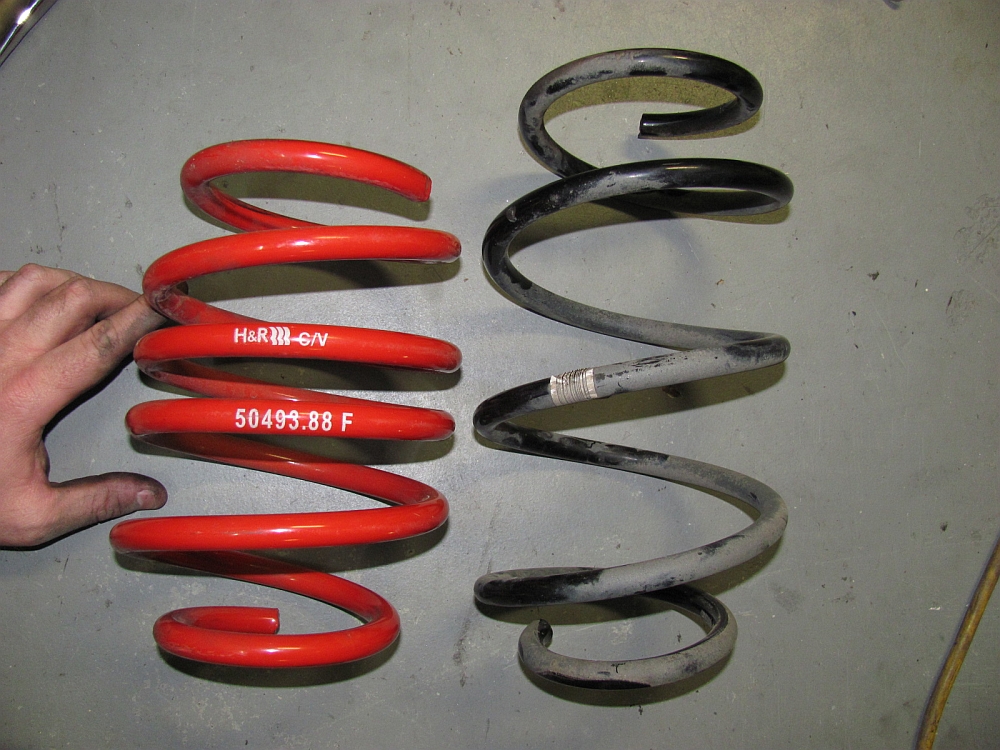
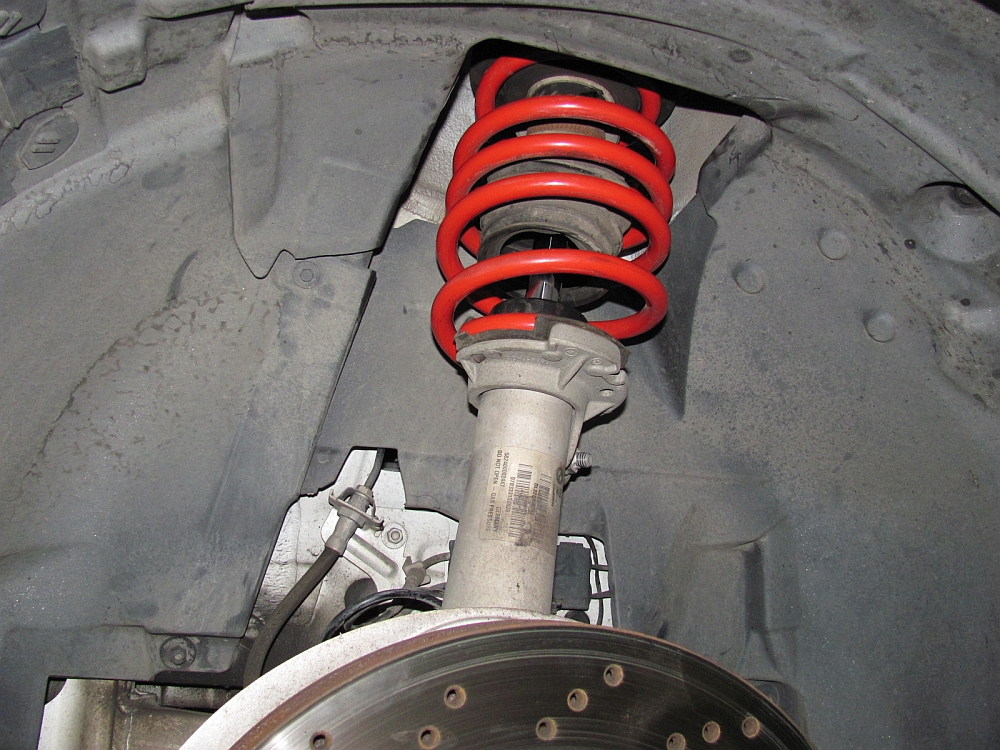
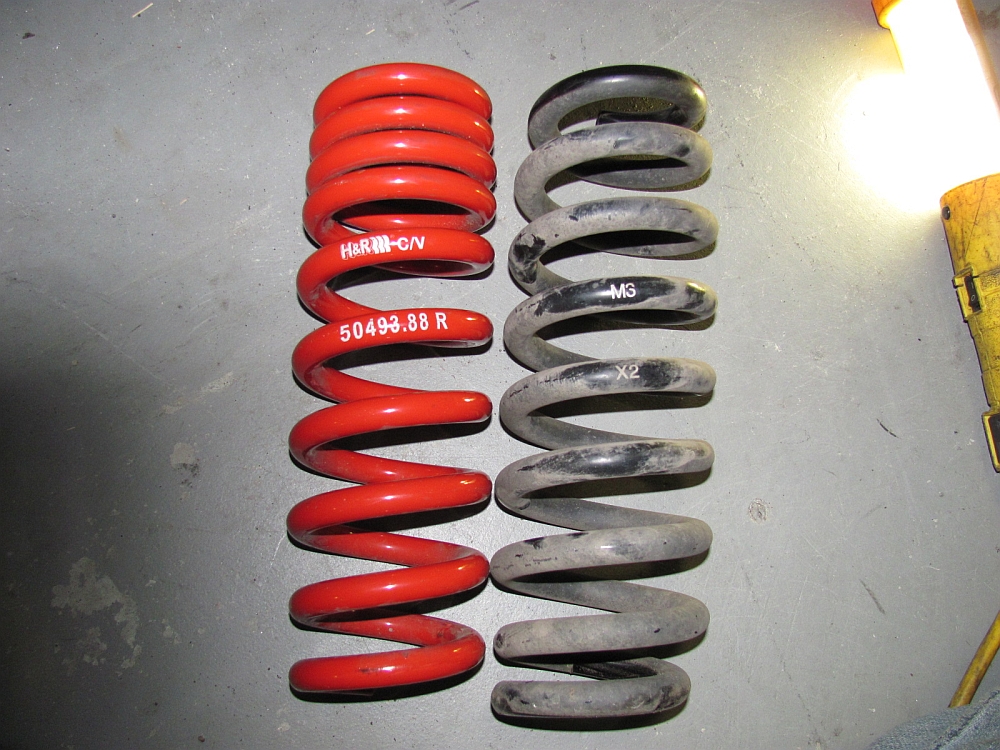
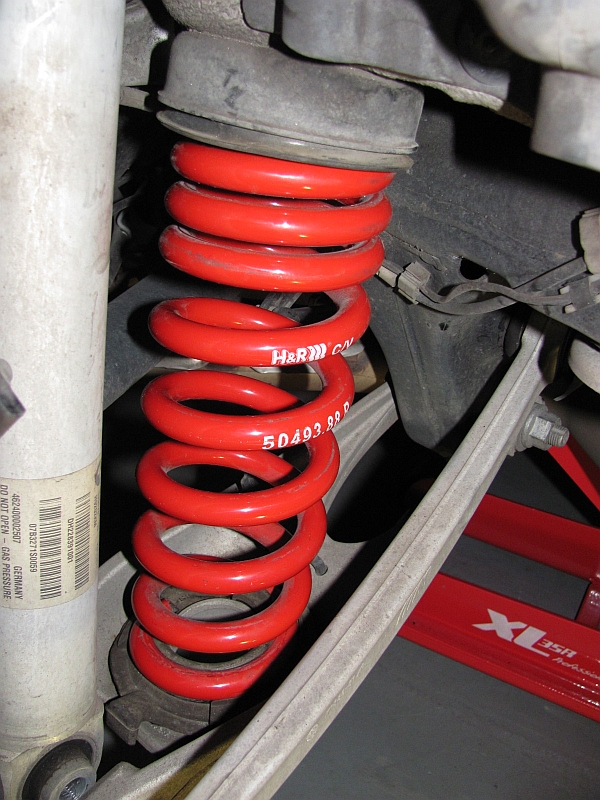
H&R Sport Plus (Race) Springs (P/N 50493.88) installed.
Turner Motorsport
originally released these as Sport Plus (H&R lists them as Race now), they requested H&R deliver something a little stiffer than Sport but with the same ride height
(-1.0" front, -0.6" rear lower than stock). I purchased these from the M3 forum classifieds with a few thousand miles on them for a good deal.
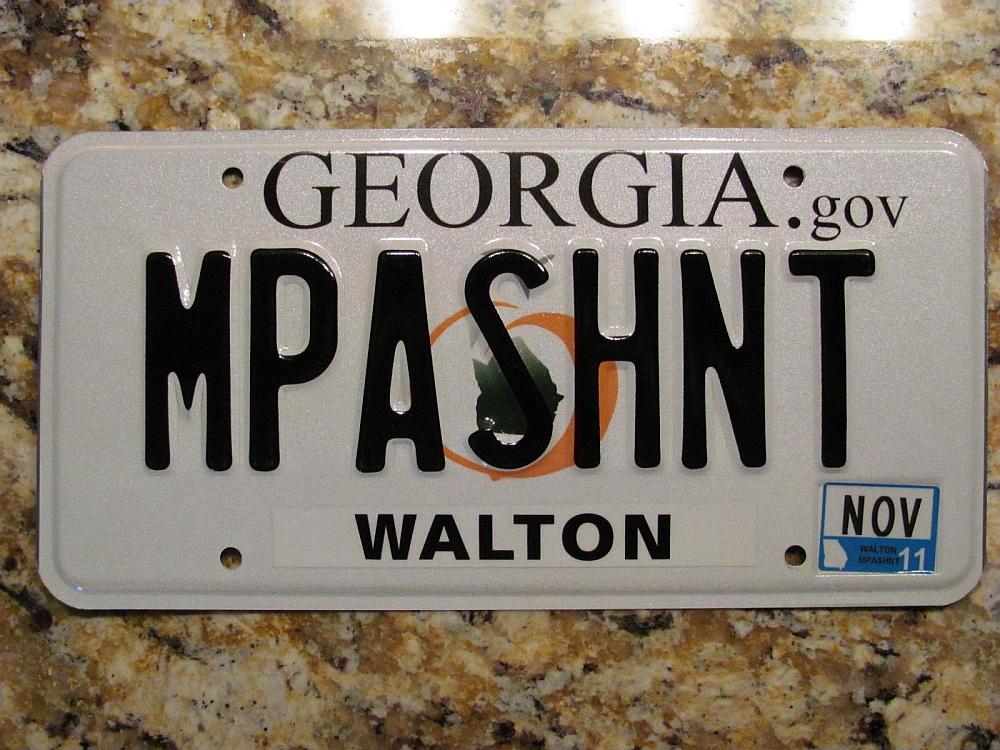
New Tag: "IMPATIENT"
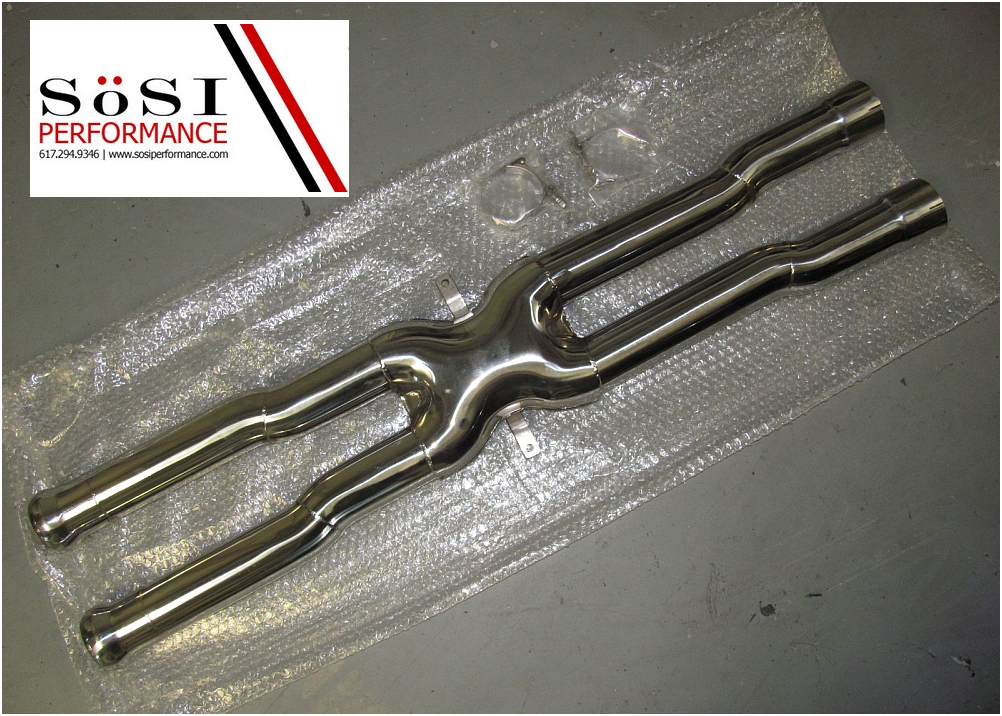
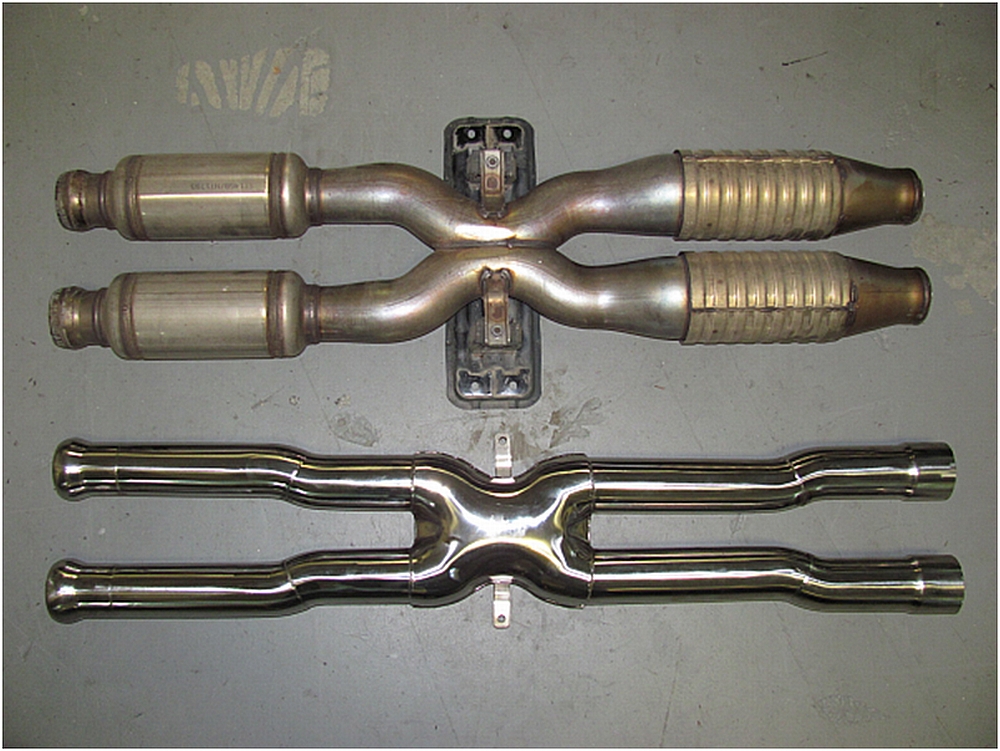
Sosi Performance X-Pipe installed. Reduced weight with a bit more aggressive sound and a bit more power, what's not to like. Easy to install and can be reversed by welding or clamping the OE X-Pipe back in place.
Oil Analysis performed by
Blackstone Laboratories
Oil Changed at x miles- OEM BMW Castrol 10w60
BMW 2008 M3 Coupe Brochure
BMW M3 Reviews:
evo: BMW M Car Ultimate Test 2009
Grassroots Motorsports- 2008 M3 Sedan
Edmunds Inside Line- 2008 M3 First Drive
Edmunds Inside Line- 2008 M3 Full Test
Edmunds Inside Line- 2008 M3 Suspension Walk-Around
Truth About Cars- 2008 M3 Review
Car and Driver- 2008 M3 Coupe News
Car and Driver- 2008 M3 First Drive and Review
Car and Driver- 2008 M3 Long Term Road Test
Car and Driver- 2009 M3 Lightning Lap Results and 2006-2009 Lightning Lap Results Summary (XLS)
Car and Driver- 2011 Audi RS5 vs. 2010 BMW M3, 2011 Cadillac CTS-V
Car and Driver- 2011 Audi RS5 vs. 2010 BMW M3, 2011 Cadillac CTS-V Data Panel
The Car Connection- 2008 M3 Introduction
MotorTrend- 2008 M3 First Drive
MotorTrend- 2009 M3 Long Term Test Arrival
MotorTrend- 2009 M3 Long Term Update #1
MotorTrend- 2009 M3 Long Term Update #2
MotorTrend- 2009 M3 Long Term Update #3
Automobile- 2008 M3 Coupe Test Review
Left Lane News- 2008 M3 Coupe Review
Popular Mechanics- 2008 M3 Coupe
New Car Test Drive- 2008 M3 Review
Canadian Driver- 2008 M3 Sedan and Coupe First Drive
BMW Video:
*High Speed Connection Recommended*
Commercial- M3 S65 Internal Combustion
Commercial- The E92 M3 is Here
Commercial- The Spirit of M. Unleashed by Technology.
BMW M3 GTS Teaser Video from BMW TV
BMW M3 GTS Video 1 from BMW TV
BMW M3 GTS Video 2 from BMW TV
BMW M3 Competition vs MB C63 AMG
Top Gear:BMW M3 vs Mercedes C63 AMG vs Audi RS4 in Spain
Best Motoring International:BMW M3 vs Lexus IS-F - Touge Test & Track Battle
WebRides TV Shootout:BMW "Sibling Rivalry"- Dinan 335i vs. Stock M3
BMW M3 vs Toyota Prius: Which is more environmentally friendly?
Roadfly: 2011 BMW M3 Test & Review
Doug DeMuro: Here's Why the BMW M3 E92 Was the Craziest BMW M3
Doug DeMuro: Here’s Why The E92 BMW M3 Is a Really Special BMW M3
BMW DIY Guides/Installation Instructions:
BMW OEM Alarm Installation Instructions
BMW 335i Sunroof Switch Panel Removal and Radar Detector Hardwire by e90post.com's sfbmw
BMW E90 Radar Detector Fuse Box Hardwire Installation by e90post.com's bilbarstow
BMW E92 Door Panel Removal by e90post.com's installmd
BMW E90/92 Euro Light Switch (with Rear Fog Light Provision) Installation
BMW 3 Series (E92) Shift and Parking Brake Boot DIY Guide
Wheel Paint and Light Scratch Repair by AudiWorld.com's NASAracer
UUC BMW 335i (E90/92) Evo3 Short Shifter Installation
UUC BMW M3 (E90/92) Evo3 Short Shifter Installation
BMW M3 (E90/92) H&R Sport Spring Installation
BMW M3 (E92) Manual Transmission Fluid Change DIY Guide
M3POST e92robert's BMW M3 (E90/92) Thermostat Replacement (archived HERE in pdf format)
M3POST Rennwerks's BMW M3 (S65) WPC Rod Bearing & ARP Rod Bolts DIY & Advice (archived HERE in pdf format)
FCP Euro- BMW S65 Engine Diagnostic & Maintenance Guide (2008-2013 BMW V8 E93, E90, E92 M3 Engine)
BMW M3 Documents/Files/Links:
Real OEM: OEM Part Numbers and Diagrams Online
BMW Fans: OEM Part Numbers and Diagrams Online
BMW Product Knowledge on Demand
BMW 2008 E92 M3 (with iDrive) Owners Manual
BMW E92 M3 Aftersales Training-Product Information
BMW 2008 E92 M3 Ordering Guide
BMW Navigation: Adding Points of Interest (POI)
Information Release-The NEW M3
BMW S54 vs. S65 - Overview, History, Comparison, and Power potential
BMW M3 SIBs:
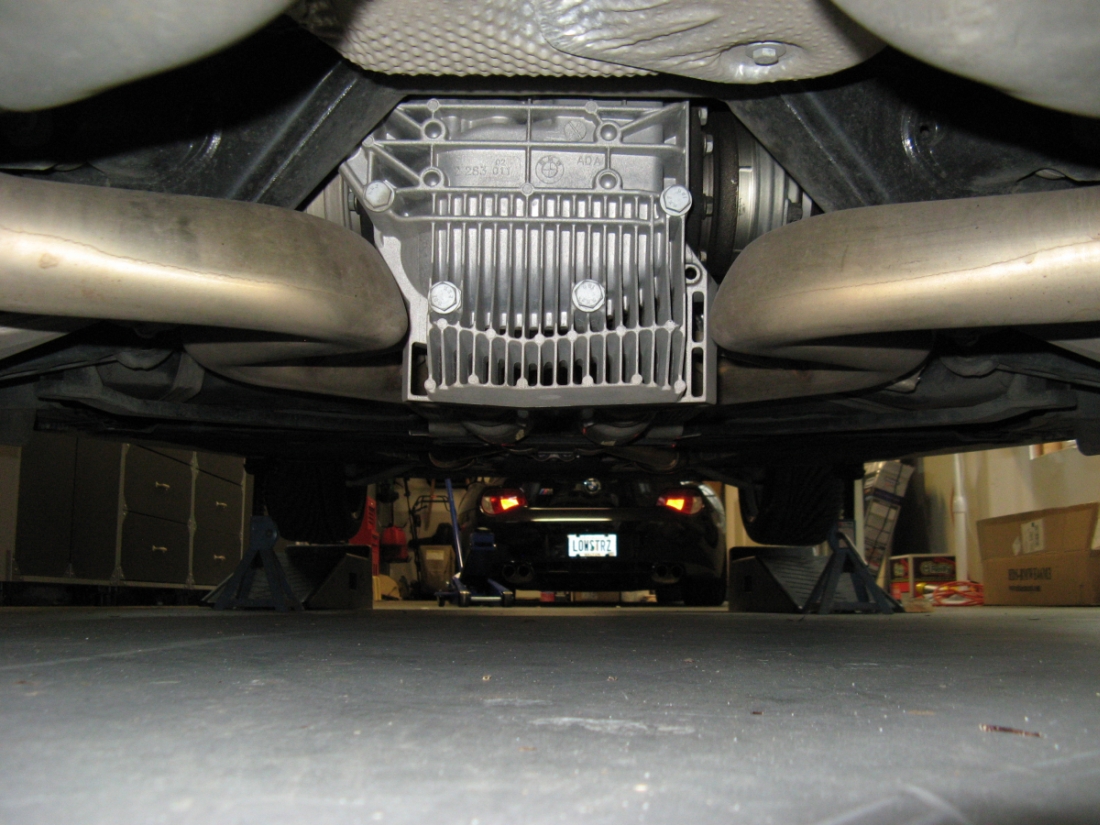
BMW Operating Fluids: Manual Transmission
BMW Operating Fluids: Final Drive (Differential)
SI B01 04 10 -BMW Maintenance Program Annual Low-mileage Engine Oil Changes
SI B13 05 08 -Rough Idle, Rough Running, Misfiring and Loss of Power
SI B33 01 02 -Grinding Noise from the Differential during Slow Cornering
BMW/M3 Forums/Links:
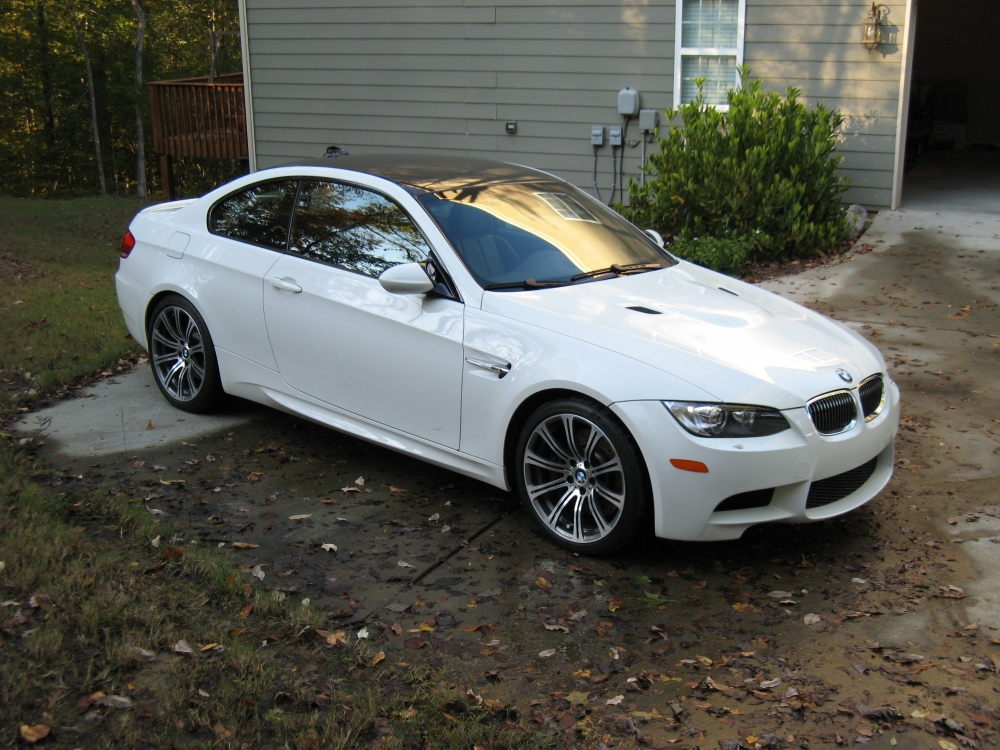
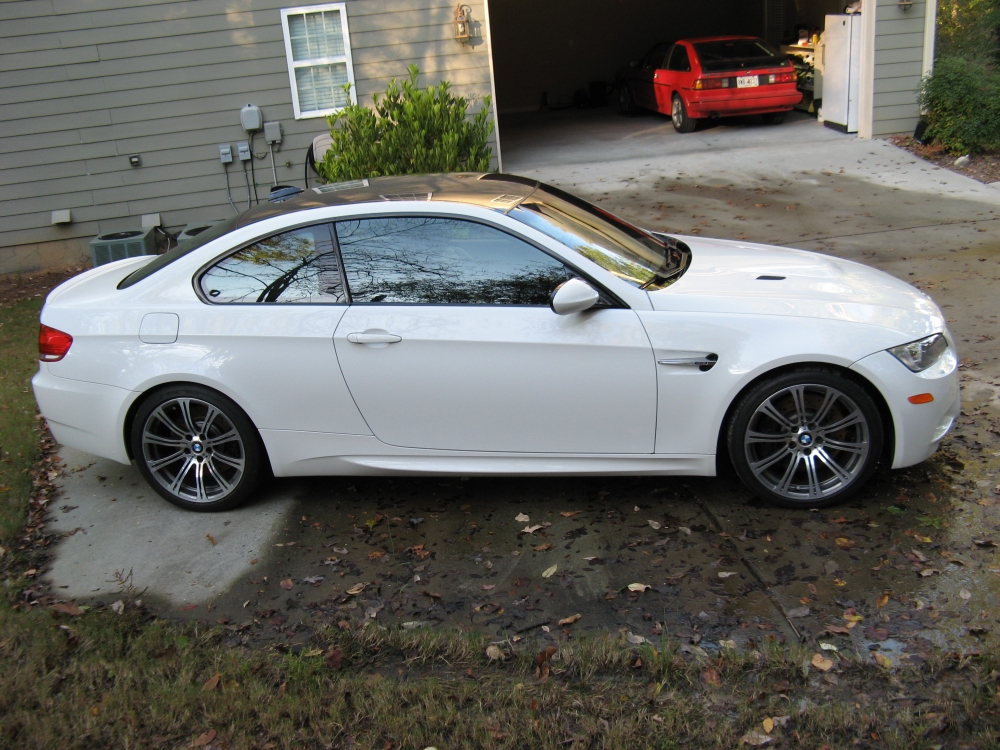
 2008 BMW M3 Coupe


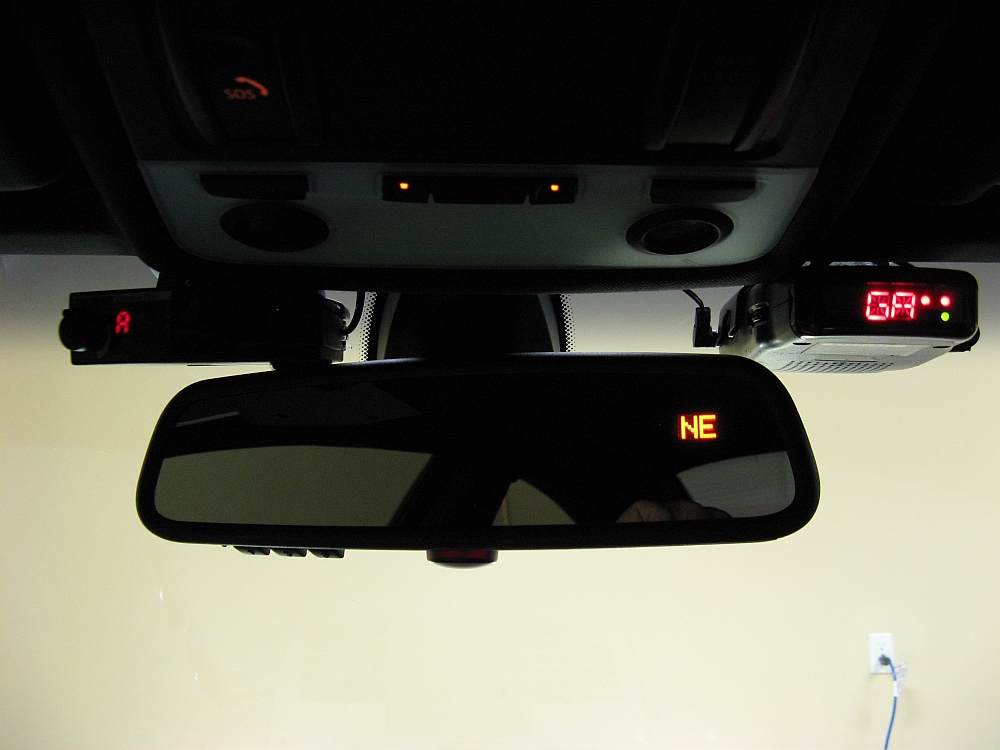
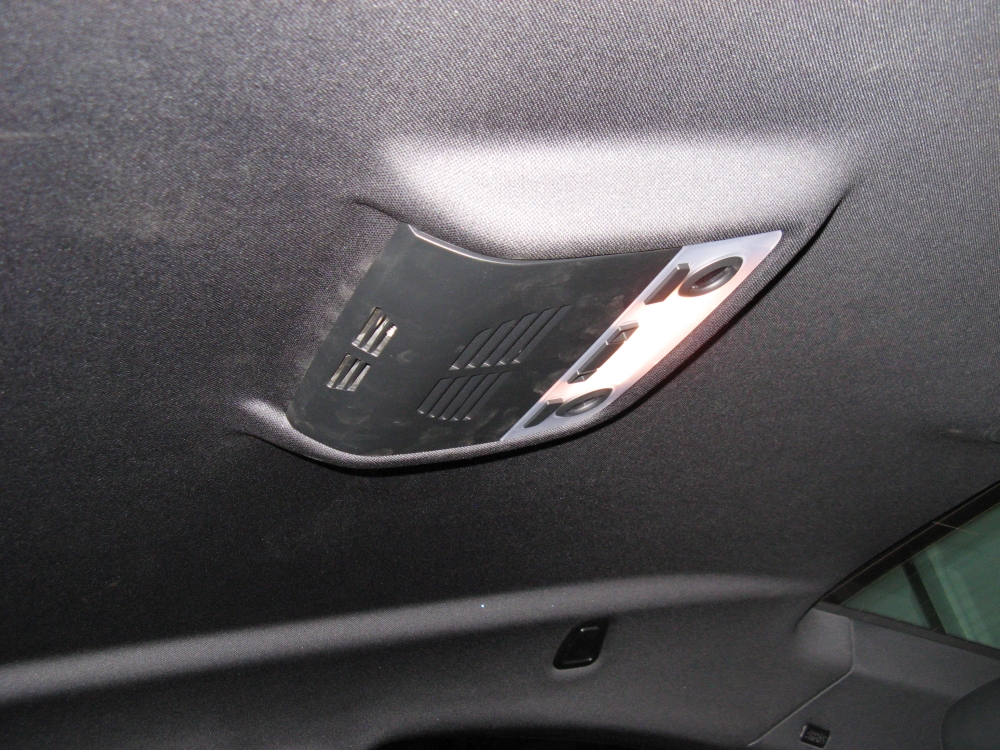
Uniden Beartracker BCT-12 scanner (manual here) also hard wired,
allows you to listen to police bands and alerts for transponder signals within 3-mile radius- acts as a pre-radar detector and programmable by state. I mounted the detector above the rearview mirror, using soft Velcro on the bottom to prevent rattles from contact.
When the windows are tinted I may go ahead and get a strip across the top of the windshield to better conceal these....
I mounted the detector above the rearview mirror, using soft Velcro on the bottom to prevent rattles from contact.
When the windows are tinted I may go ahead and get a strip across the top of the windshield to better conceal these....
A good radar detector/speed detection counter measure forum: www.radardetector.net
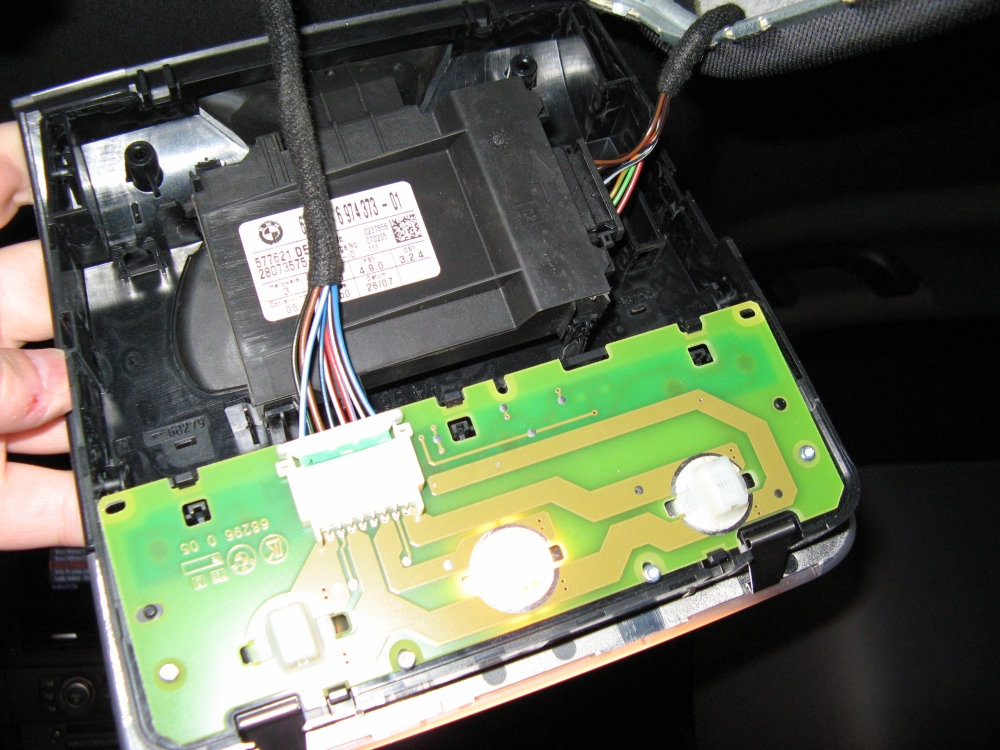


The installation and operation instructions are HERE. Note that there are multiple twisted pairs of green/green-orange and
multiple brown wires in the harness- I just picked correct colors where multiples existed at random. I did not undo any tape or have to pull the wire loom off
the metal bracket- pulling the wiring loom up I installed the taps as close to the bottom of the wire loom as possible.
Once wiring is complete/connected and unit/wiring tucked away, unit is not noticeable.
Folding mirror demo video HERE,
Power window demo video HERE.
Mercedes Benz Magazine wrote an article about the company HERE.

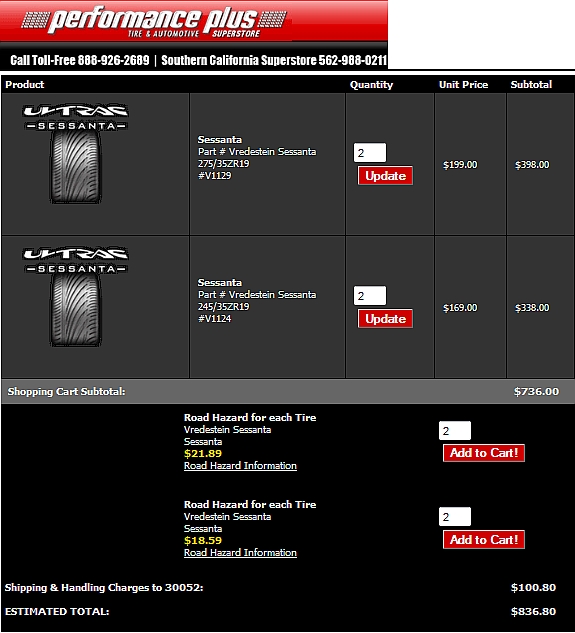
I did some research and found that for several European tests the Vredestein Ultrac Sessantas were in the top.
Equally impressive was the price for 245/35/19 & 275/35/19 set of four tires from Performance
Plus Tire of ~$850 shipped. Tires installed at Kauffman Tire in Suwanee (770-614-5650)
More information about these tires in a video HERE,
tires designed by Vredestein and another name you might be familiar with- Giugiaro.
After about 500 break-in miles, I headed to the North GA mountains and the tires were GREAT, I find them to be as good or better than the old PS2s in the dry,
and maybe a bit better in the rain. The wheel protector is also nice to have and a little beefier than the Toyo T1Rs (although not quite as good as
the wheel protection on the GY F1s). You may also notice these tires are non-directional so they can be rotated side to side without breaking them down off the wheel
if desired:
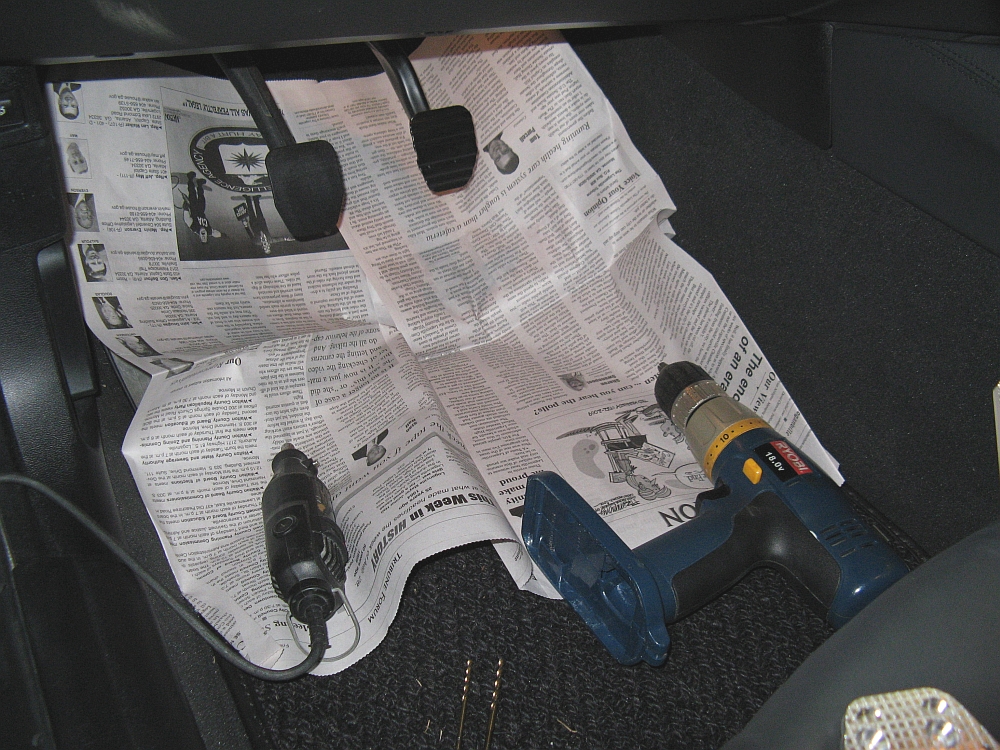
Installation guide is HERE. I opted to use a Dremel with a small 1/8" bit in place of the center punch to
dimple the metal and/or start the hole in the plastic pedals- it is kind of tight and this was easier to both line up and use. The plastic clutch and gas pedals
are quick and easy, the metal brake pedal takes a little more time. Once the Dremel is used to make the initial dimple with the 1/8" bit, use the same 1/8" bit
in the drill to drill a pilot hole and then the larger screw sized bit. Paper placed under the pedals allows for quick cleanup of the plastic and metal drill
shavings.


Install instructions HERE, install video HERE.

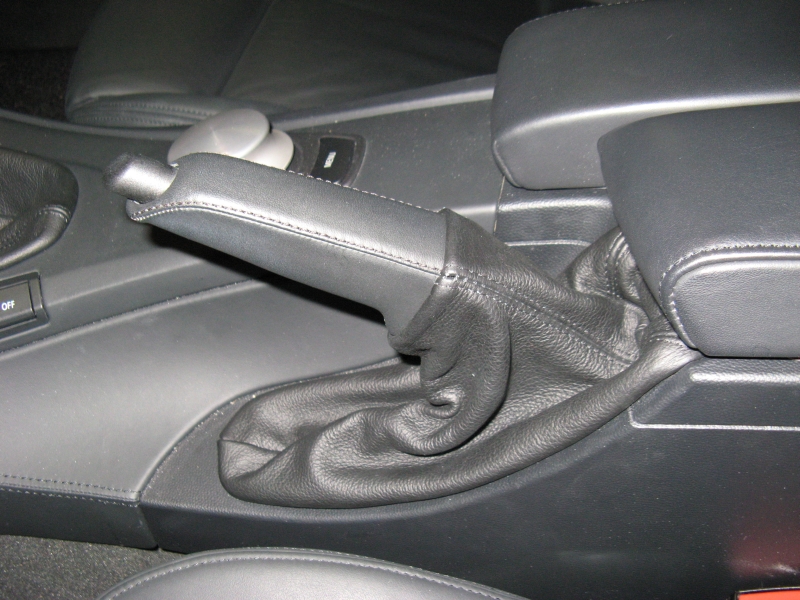
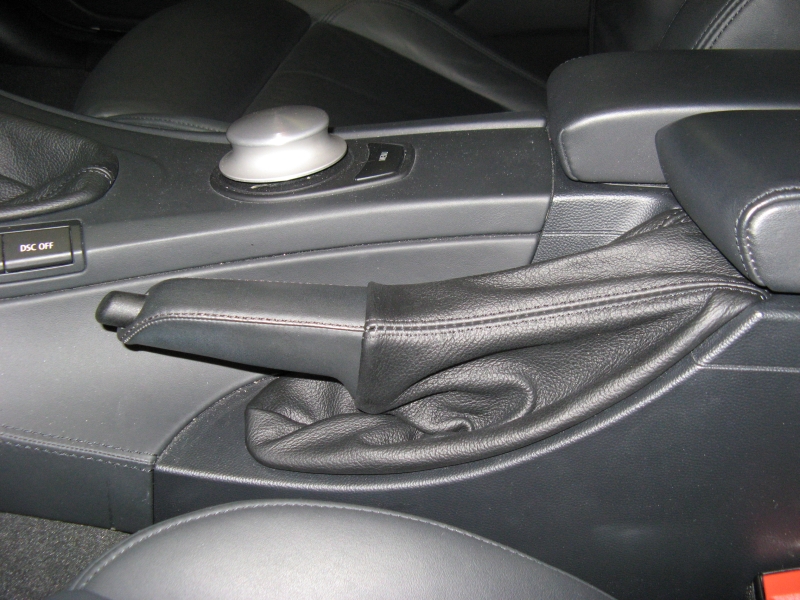
I also decided to not cut up the OE shift boot/knob and ordered new boots for the shifter and parking brake
from Redline Goods.
The leather is higher quality, both thicker and softer. The OE boots have to be
removed from the plastic bases and the bases glued to the new boots.
The shift and parking brake boot DIY I assembled is HERE.


I assembled a DIY guide for the UUC shifter installation on the M3 HERE. I did not drop the exhaust or heat shields but worked around them
for access:

I usually go for a 15 minute drive to warm up the car, not only does warm oil drain better but the particulate it contains is suspended and not settled on the bottom of the pan.
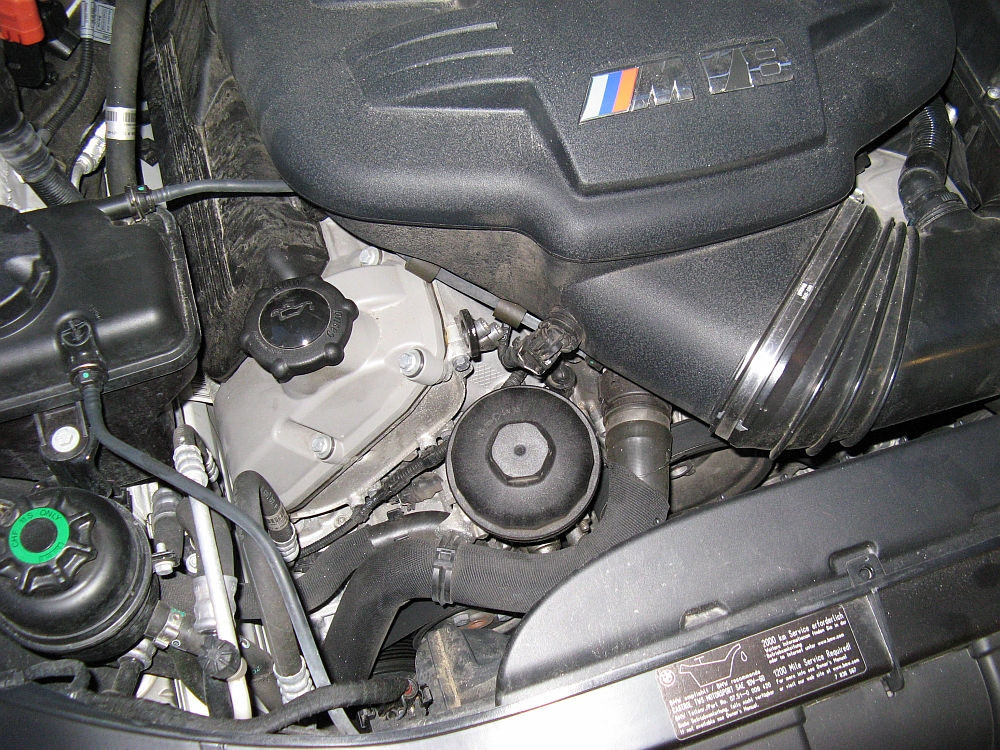
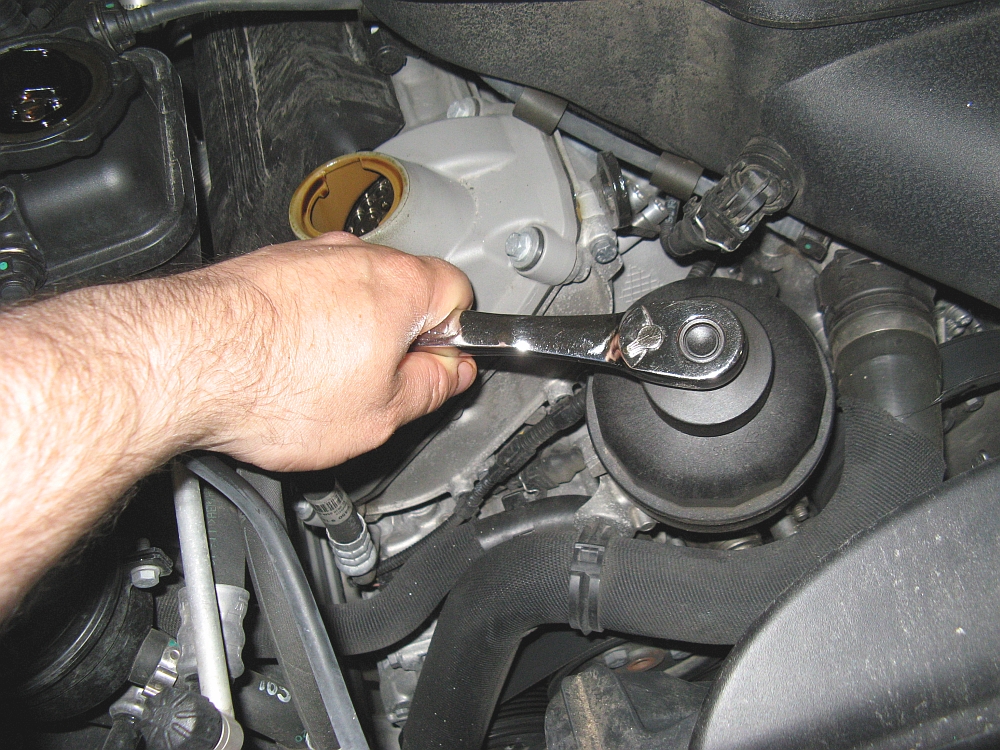
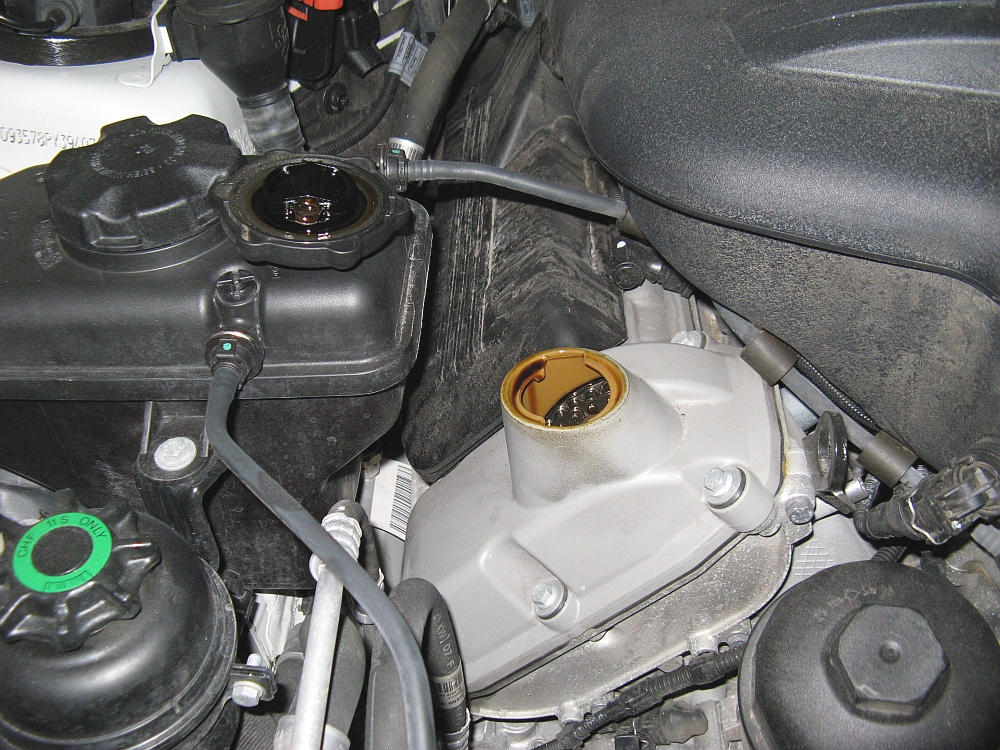
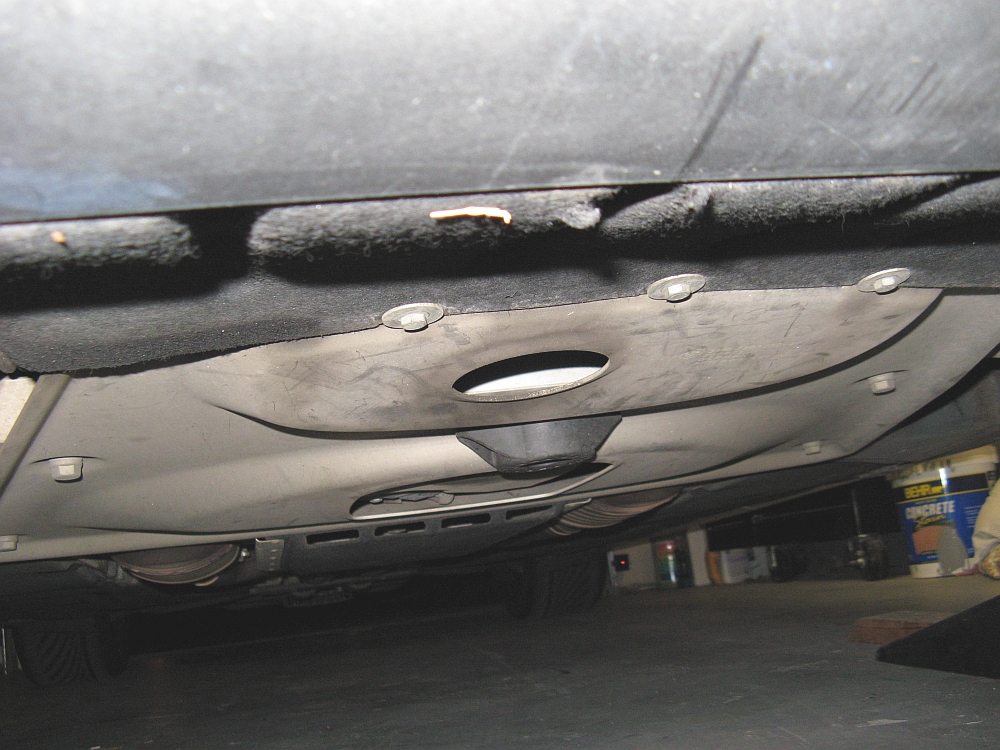
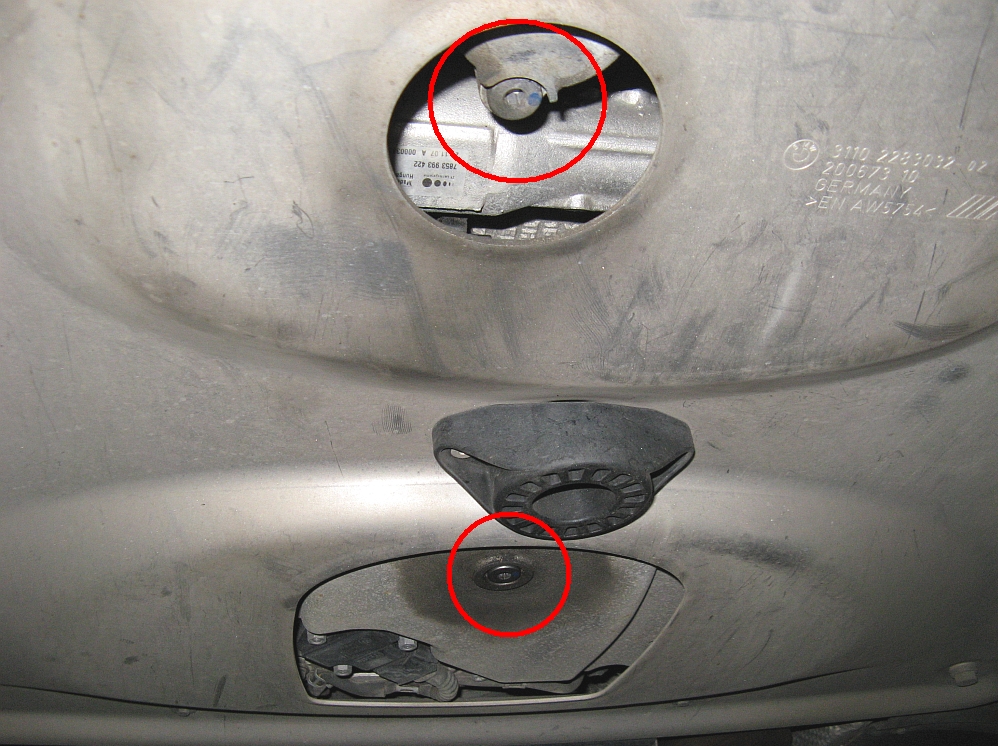
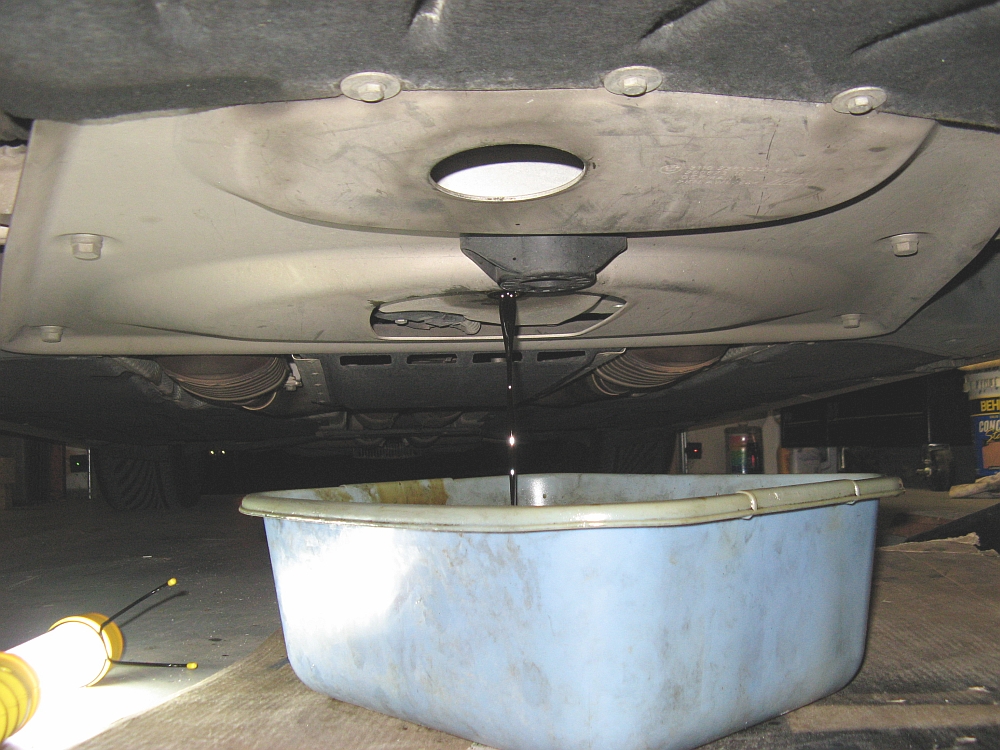
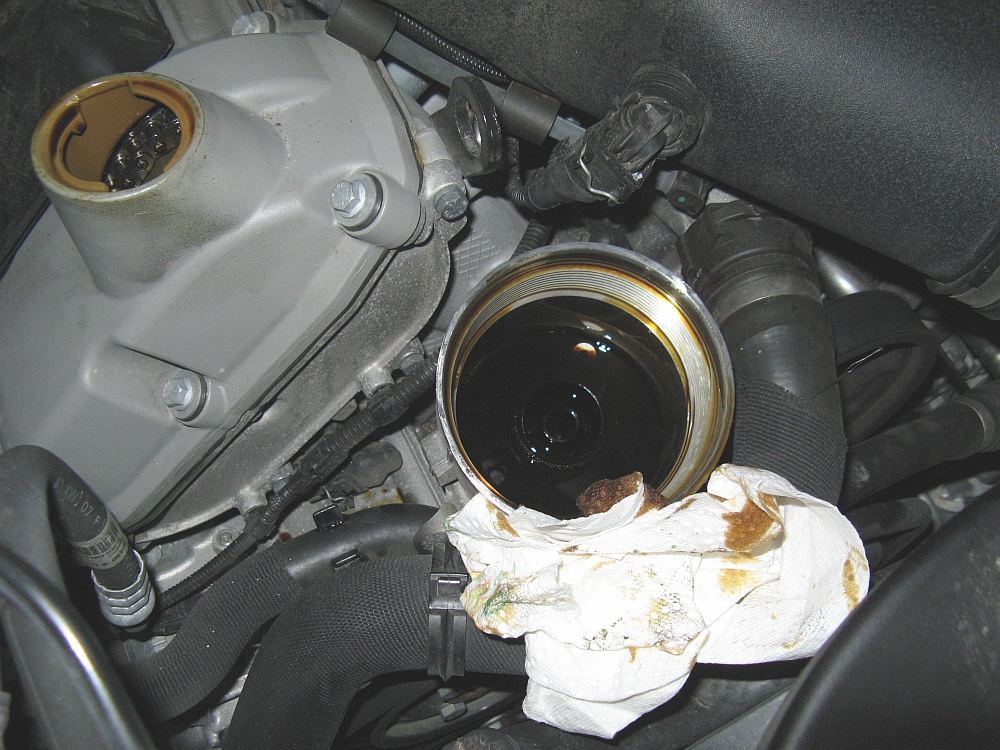
Drive the car up on ramps. Loosen the canister lid with the 36mm socket but don't remove it. Remove the oil filler cap. Remove the oil drain bolts one at a time and let drain
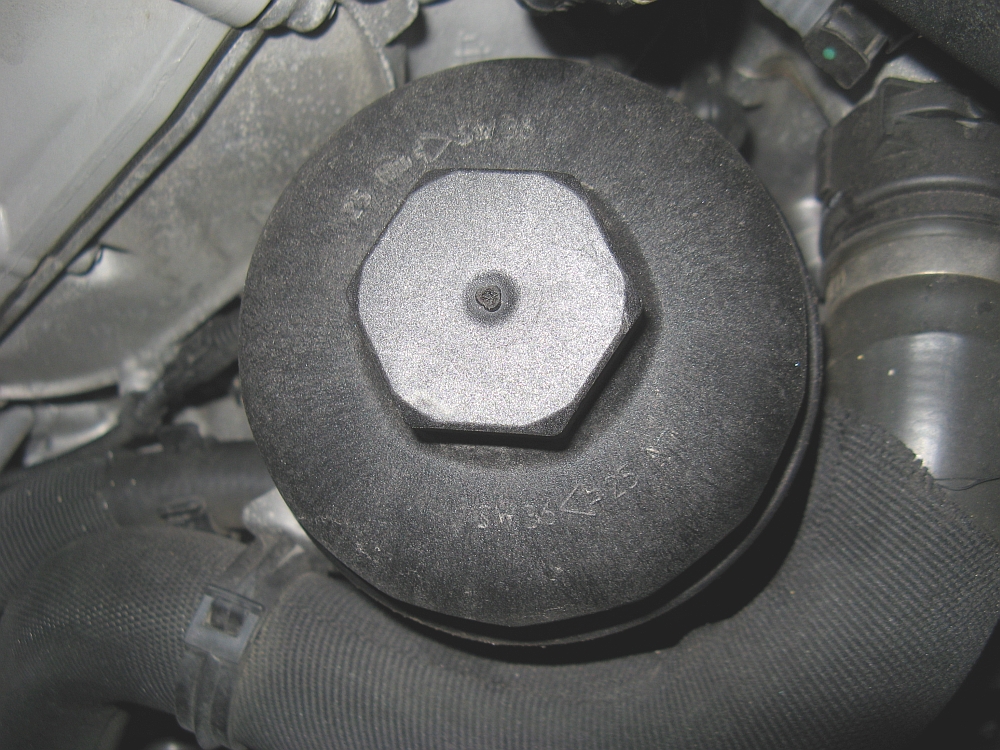
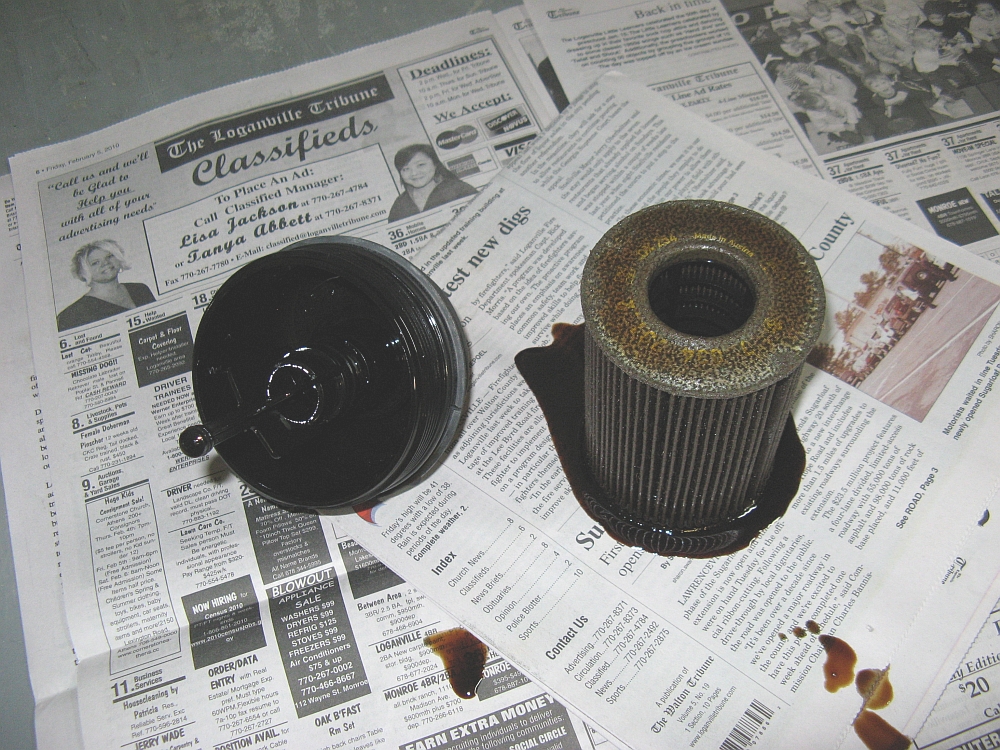
into a pan using the 6mm HEX socket. Remove the oil filter with the canister lid, I use paper towels around the canister for easier cleanup. You may choose to clean out the canister
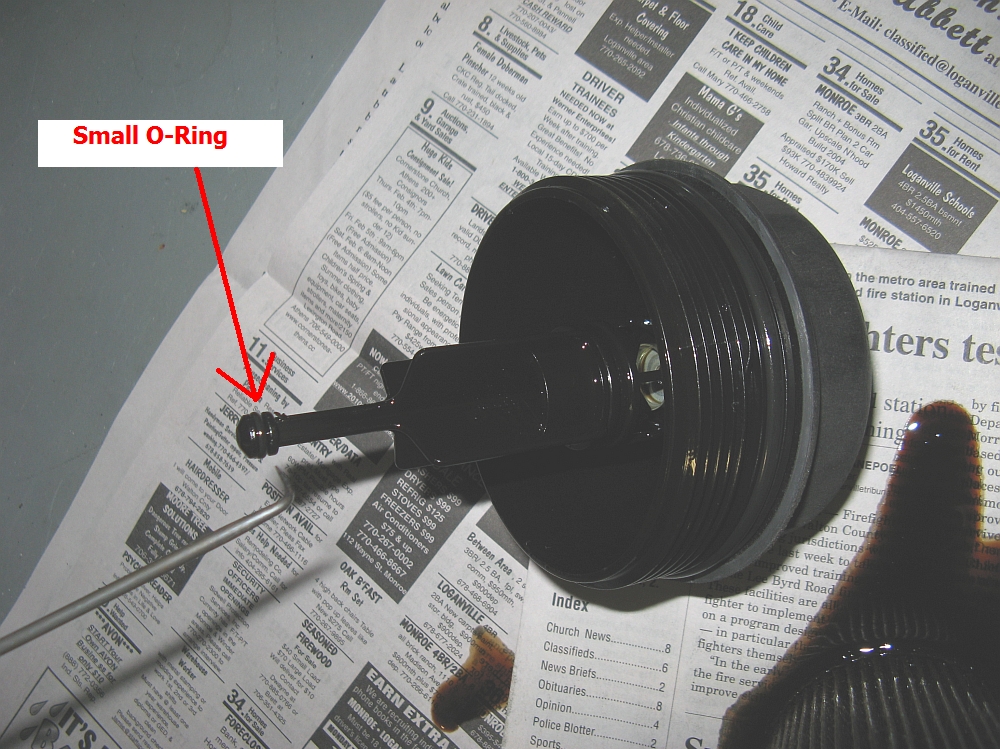
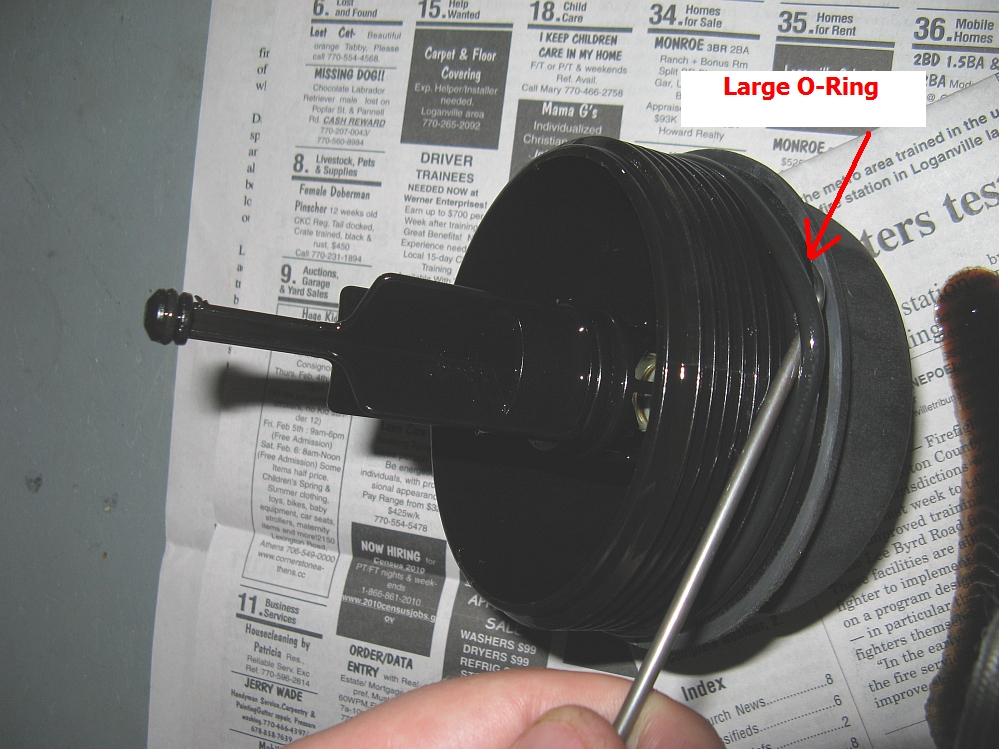
with a lint free towel if your are feeling particularly AR. The canister lid gets two new O-ring seals (should be in the oil filter box), a small one on the
stem and a larger one where it seals the canister on top. Be careful not to score the plastic with the tool used to remove/install the O-ring seals, I use
a trusty pick. When the O-ring seals are installed the new oil filter can be carefully pushed onto the canister lid stem and seated. The oil filter and canister lid
assembly can be reinstalled hand tight (don't crank on it but make sure it is on the canister snug, it states 25Nm on top, ~18.4 ft/lbs). You should also find two new crush washers in the oil filter box for the
drain bolts. Reinstall both oil drain bolts and torque to spec, should be 25Nm (~18.4 ft/lbs). Finally, add oil- I add 8 bottles and then start the car to back off the ramps and run it for a few minutes,
check for leaks, and then use iDrive to check the oil level (this should be done on a level surface- in your garage?). Add about 3/4 of the last bottle and the oil should read full.
Don't forget to tighten the oil filler lid before starting the car


With these pins removed and the new springs I was able to get ~1.5 degrees of negative camber up front.
After driving, I think Sport would be too soft; the Sport Plus springs feel perfect and do not really ride significantly rougher than OE if at all. They
seem to work well with the EDC dampers- the car has a lot less body roll, turn-in is much sharper, and I can still feel a difference between EDC modes.
My installation DIY write-up is HERE.


My DIY write-up can be found HERE.