![]()
BMW E92
Door Panel Removal BY
e90post.com’s installmd
http://www.e90post.com/forums/showpost.php?p=1287119&postcount=8
Alright, saw
someone the other day asking if anyone had a pictorial of how to take the doors
apart, so I figured I would take pictures as I did this car. These door panels
actually come off rather straight forward for a BMW.
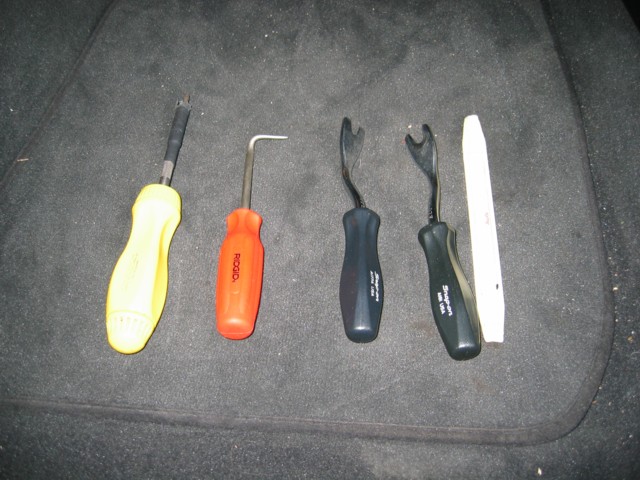
Pic 1 - just some helpful tools, only one that is actually a must is the T20
Torx Bit Screw driver
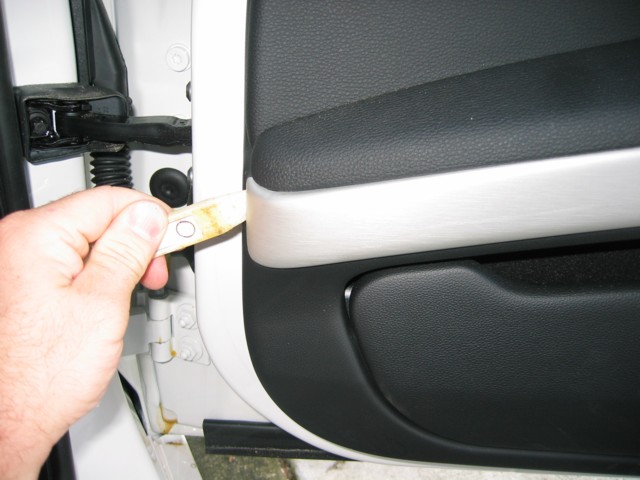
Pic 2 - start out with either a plastic pry tool (preferred to not mar panel)
or a flat blade screw driver, your finger tips will even work, and insert tip
of tool under hinge end of door trim. pry gently
forward, far enough as to be able to get your fingers behind the trim piece.
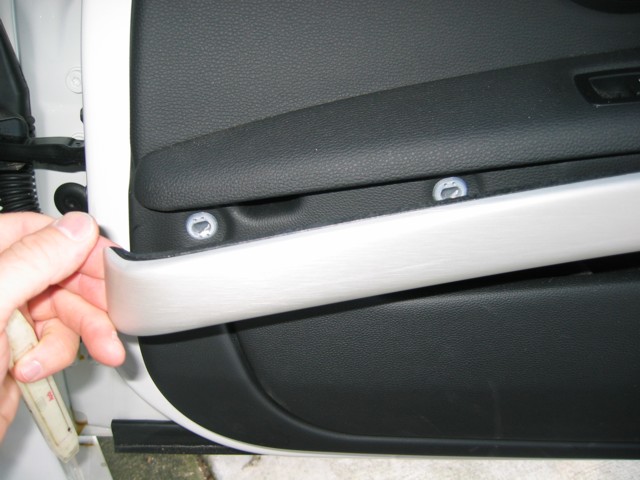
Pic 3 - gently work your way down the trim piece prying the piece straight away
from the panel.
Pic 4 - once your door trim is removed, the first 4 of the 5 screws that hold the
panel on the door are accessible. Use your Torx 20 Screw Driver to remove these
4 screws. They like to get stuck and not come out of the hole once completely
loosened, don't worry, you can get them out once panel is off.

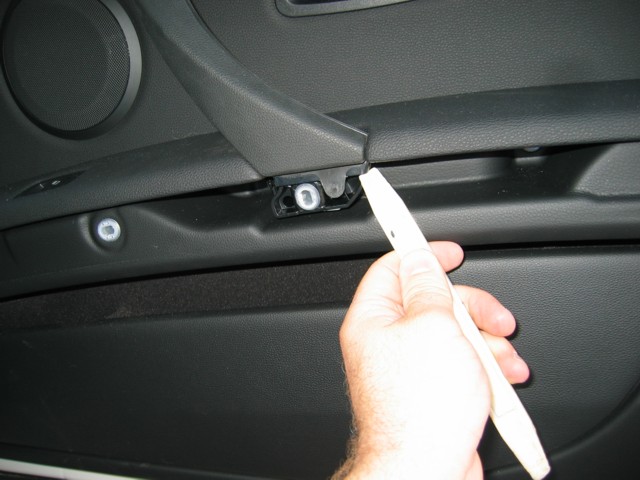
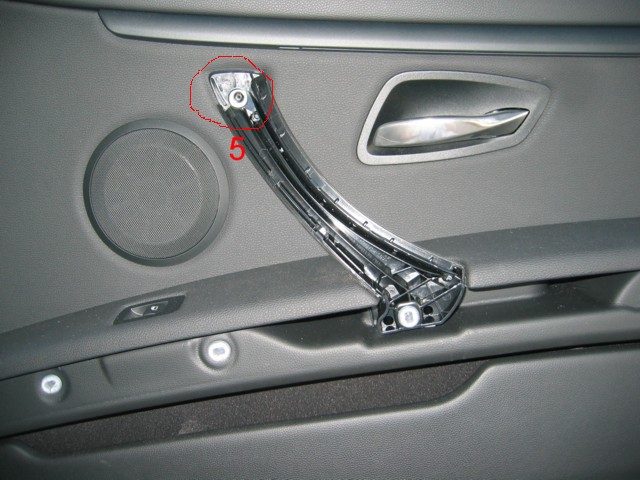
Pic5 - now to remove the trim piece that covers the screw behind the door pull
(drivers door does not have this, so skip to step 7). Use the pry tool again
and gently pry it under the corner as shown in the picture, again prying only
far enough to get a grip on the piece with your fingers. Pull on this piece
again straight away from the panel. As the clips release along it's two long sides, it sounds like the plastic is snapping,
but gently continue. If it hangs up and the need for strong force is required,
try a different grip as the angle you are using to pull might be off a little.
Pic6 - Once the trim is off, the fifth and final T20 screw is now visible.
Remove this final screw. That's it for mechanical fasteners, the rest is all
clips.
Pic7 - the safest way to get the clips to pop with out marring the paint on the
door is to use your fingers. Start in the lower front corner as it is the
easiest to get your fingers behind. Once you have your fingers behind, work
your fingers in both directions giving slight pulls as you go to get the clips
to pop along the panel edge. Work up from the corner to the top of the panel,
and then work along the bottom of the panel all the way around to the top of
the latch end of the panel. Those are the easy clips, now the ones along the
top of the panel are a little more difficult to get to pop. They seem to be
easier if you start from the front of the panel, closer to the hinge. These
clips pull straight away from the door, parallel to the ground, not in an
upwards direction like the window travel. Again, start at one end and work to
the other.
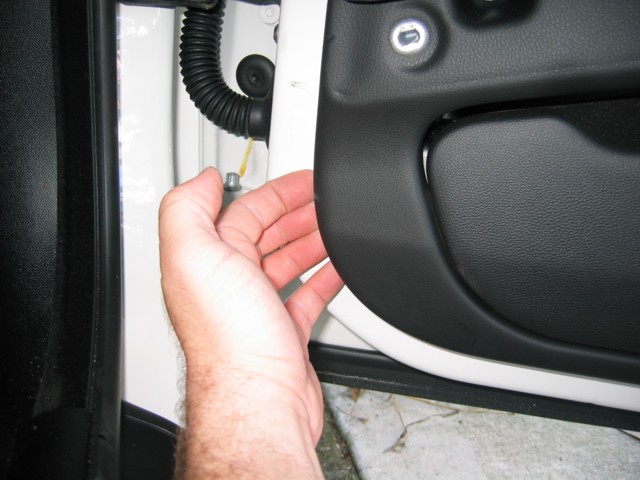
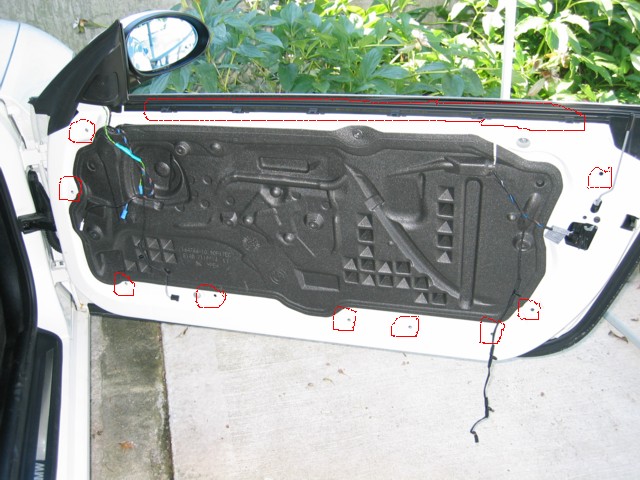
Pic8 - the red circles show where the plastic perimeter clips are located, and
the long oval shows the 6 metal clips along the top of the panel. Once all the
clips are off you can remove the two plugs from the speaker (one input, one
output to tweeter), the plug to the window switch, to the door light at the
bottom, as well as the plug for LED strip near the upper front corner. The last
thing to disconnect is the latch cable. If you pull it straight down from the
point it mounts on the door, the plastic will come out and the cable can be
slid out of its groove and lifted up and off of its hook.
And that's it. For first timers, this should take approximately 10-20 minutes
per door.