

Click on thumbnails below for larger pics....
This CPO 2011 Mazda Miata MX-5 Special Edition was purchased from Aaron Gillison at Roswell Mazda. Aaron was great answering questions before the sale, and continued to be great during and after the sale. If you want a Mazda, Aaron is there to help you
Click HERE for the listing and pics as it was posted when I bought it. This model is an NC2, NC is third generation (starting with 2006 model year) and 2 signifies the facelift for the NC lineup in 2009.
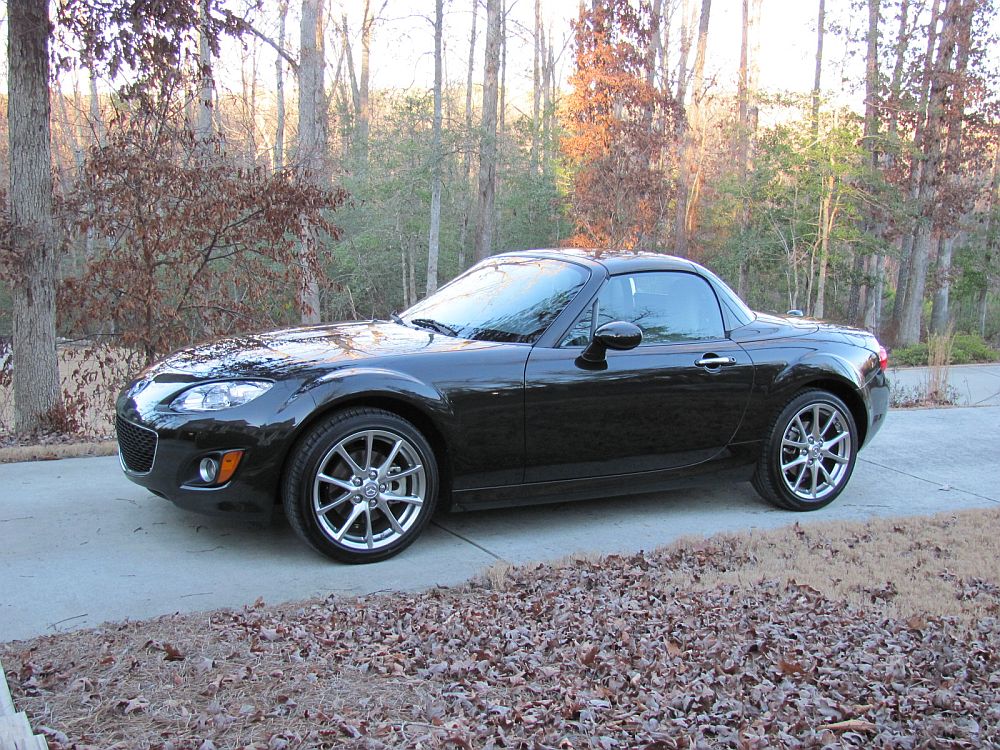
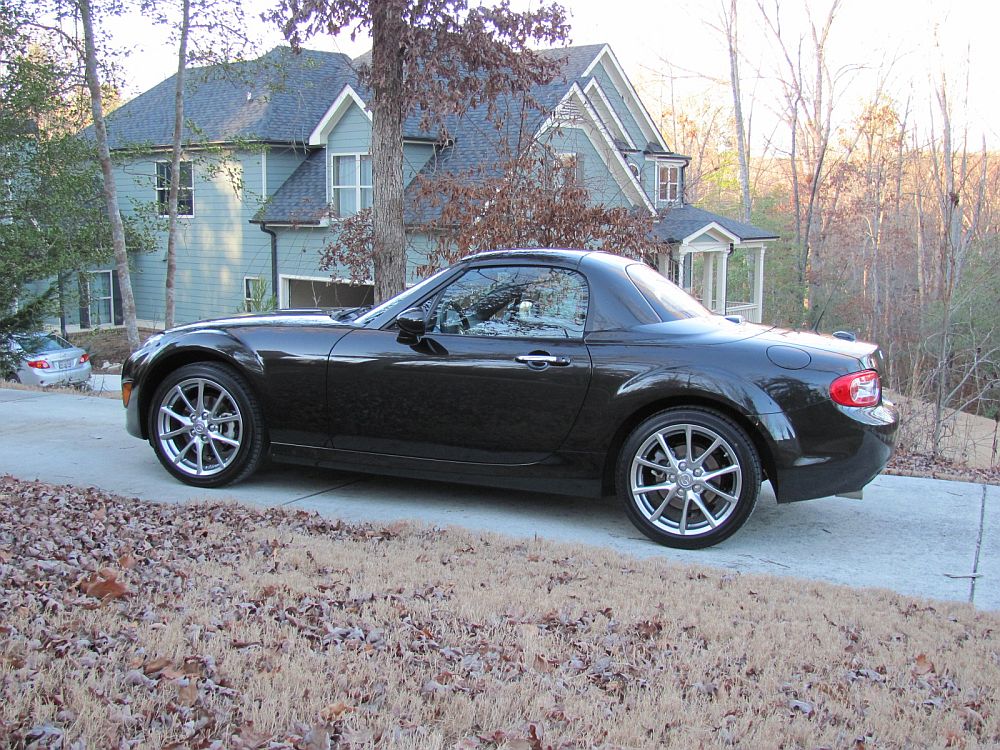
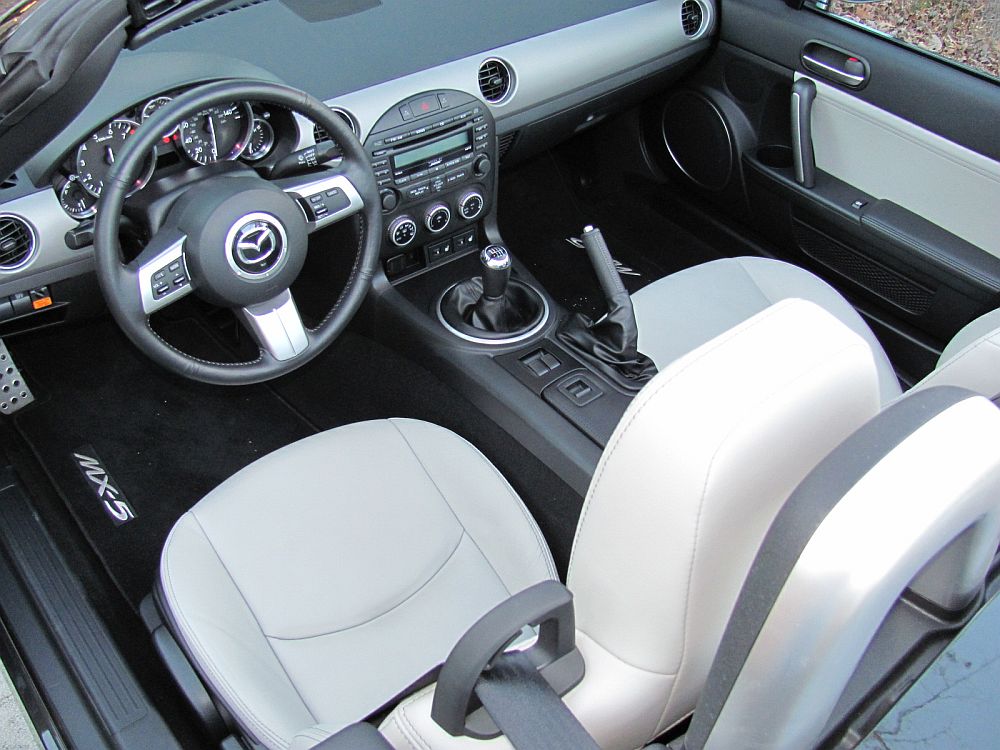
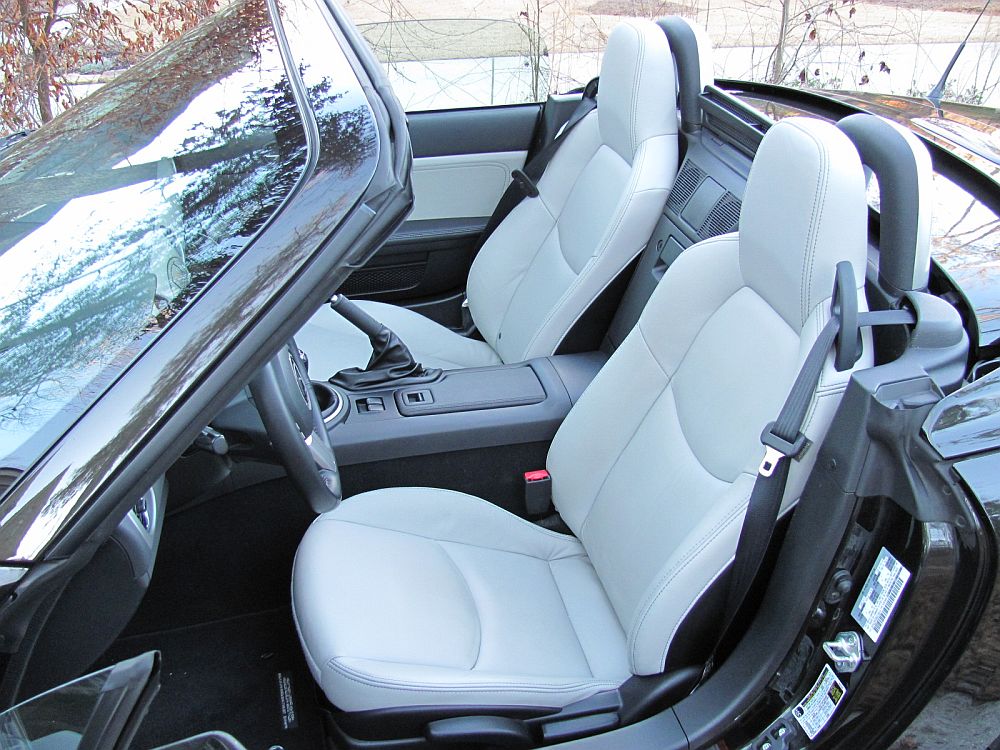
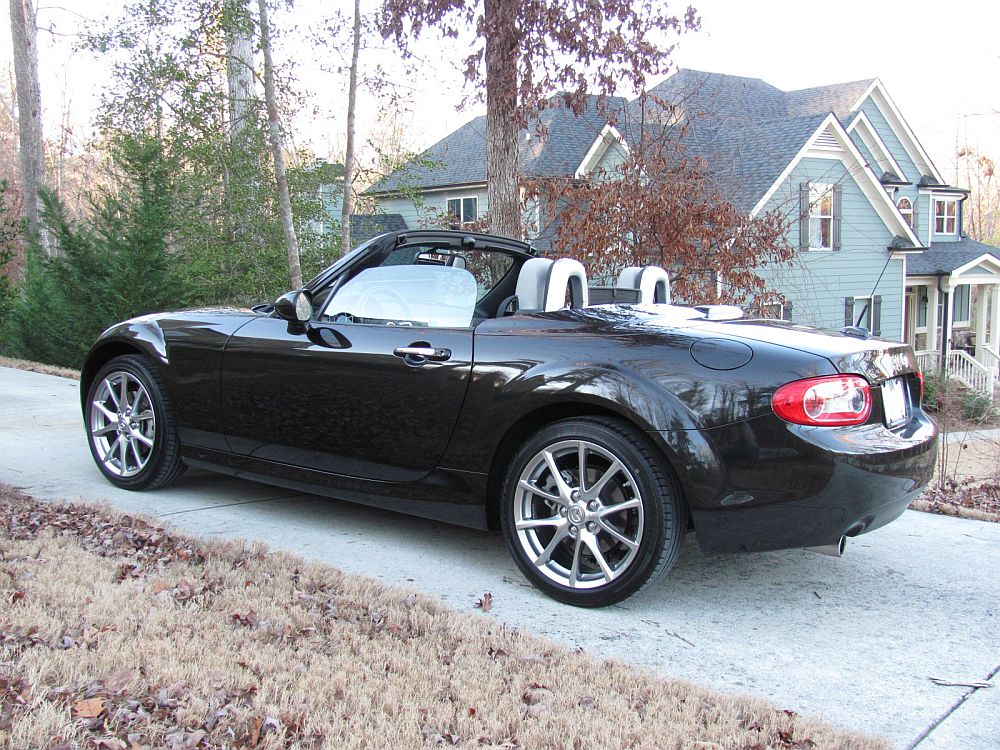
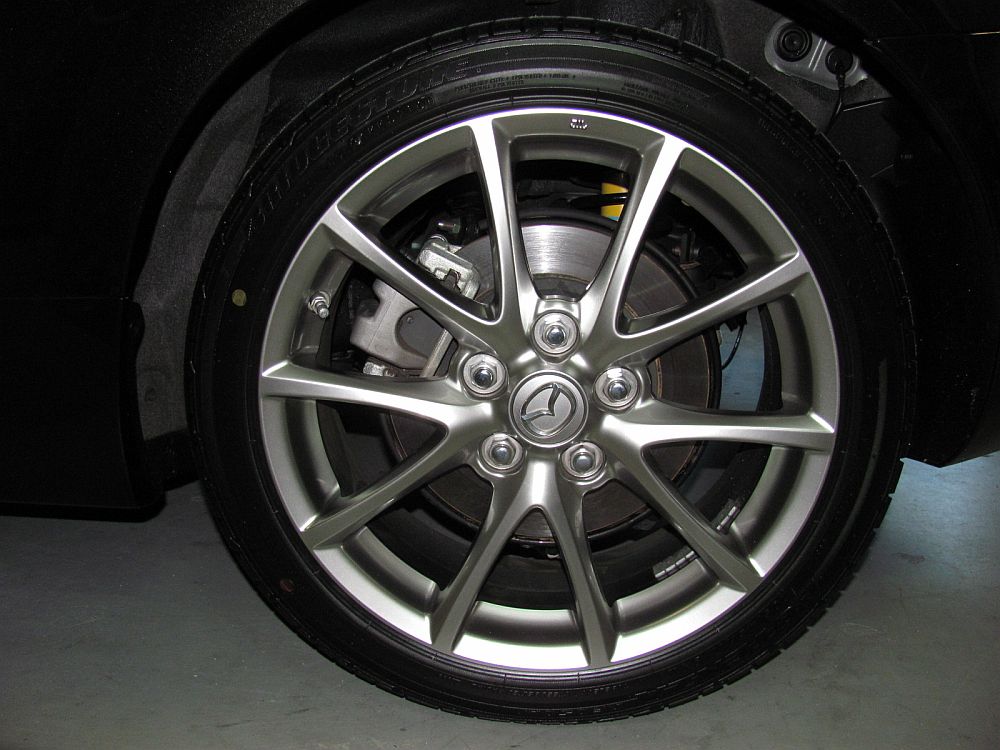
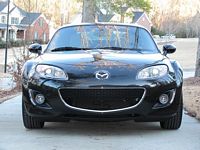
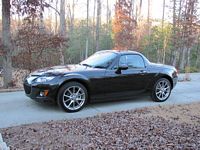
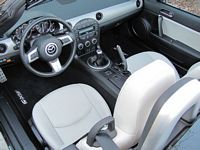
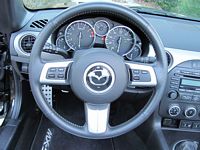
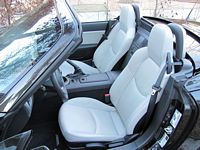
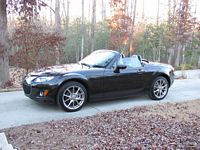
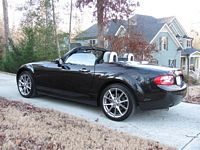
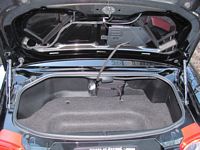
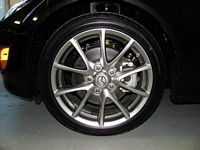
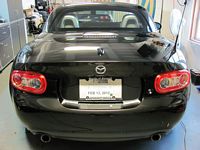
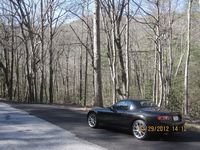
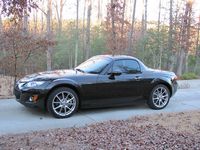
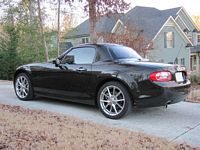
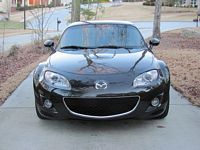
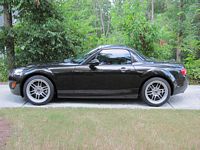
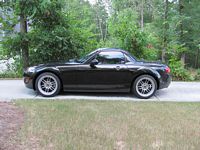
This 2011 Special Edition Miata was one of 750 produced to celebrate worldwide sales of over 900,000 Miatas since inception. Basically a Grand Touring model loaded with premium/convenience/suspension packages, the SE is distinguished by one of two custom paint colors, bright finish wheels, gray stitched black leather covers for steering wheel/shift knob/brake handle, chrome gauge/vent surrounds, aluminum pedals, and contrasting gray seats. The Power Retractable Hard Top (PRHT) adds a little more security for my road trips and hotel parking lots. The first owner only had it for 5 months but that was a win for me- with CPO that means I get warranty coverage up to 7 years/100k miles so 6.5 years and 84k miles left to go
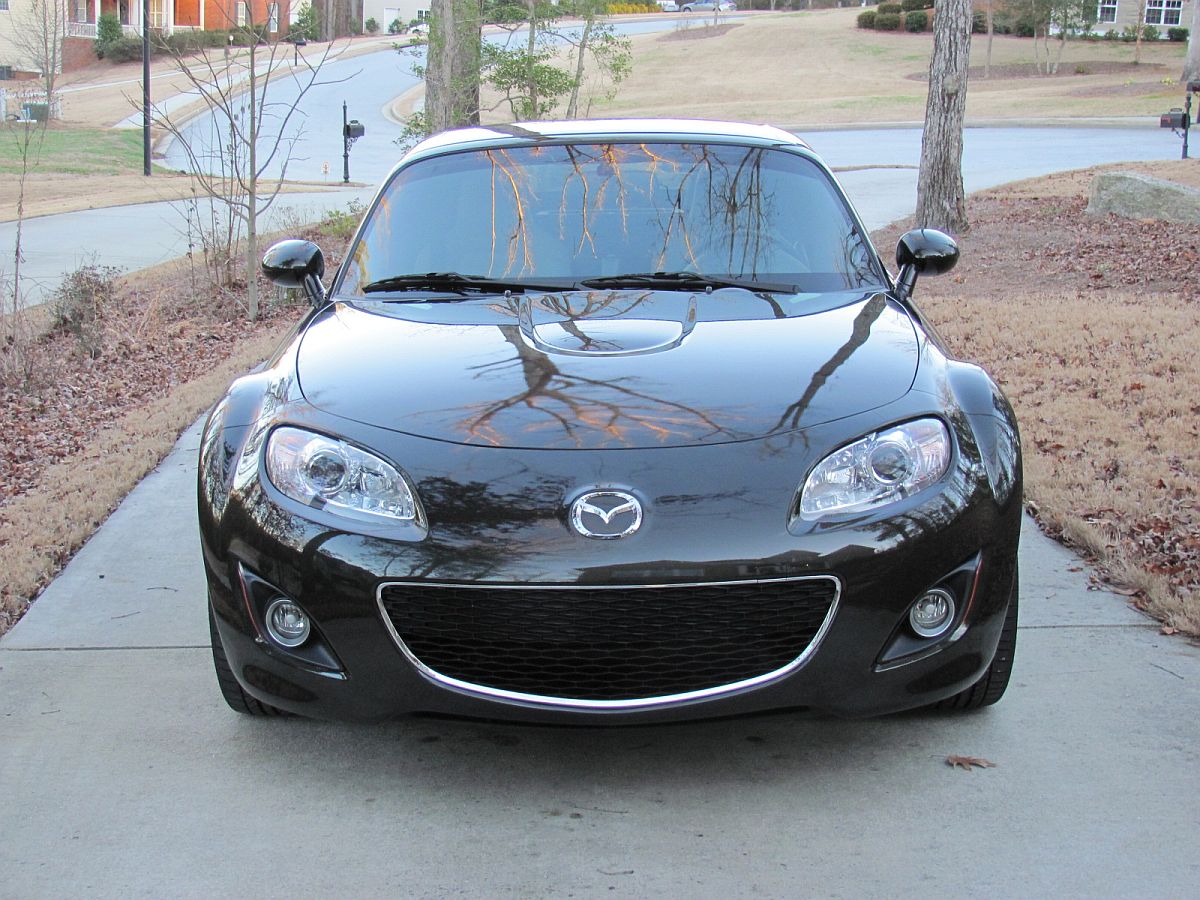
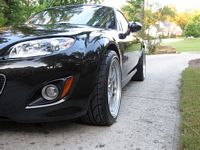
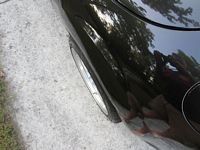
Below are some pics the day after I brought it home:


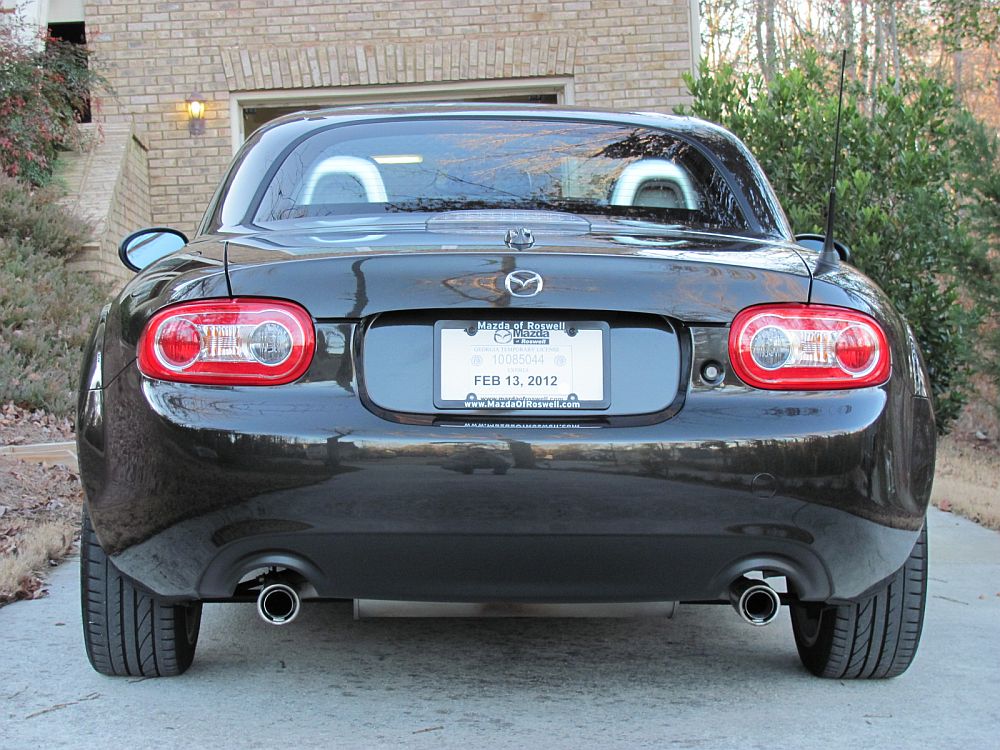
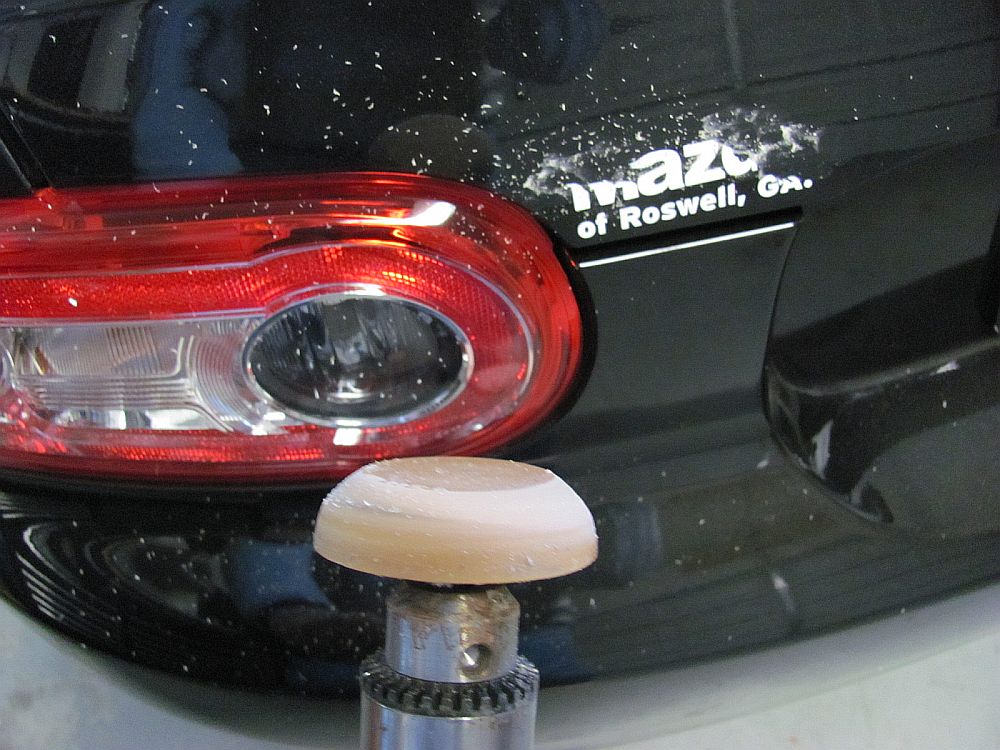
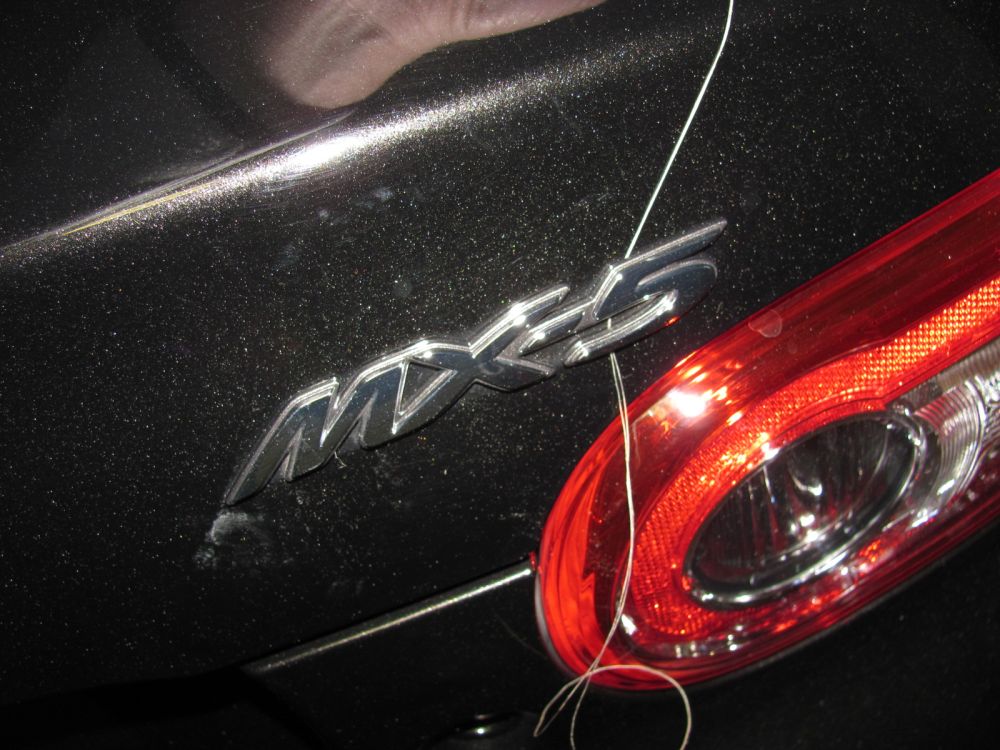
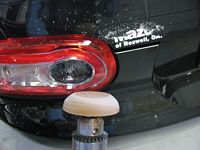
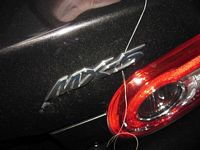
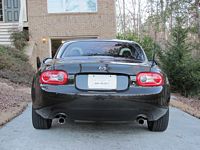
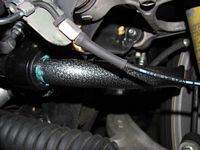
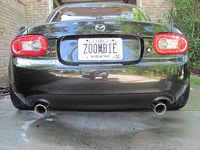
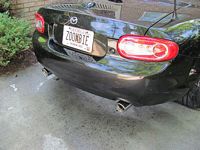
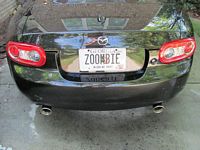
Dealership and "MX-5" letters/stickers removed: Doubled up fishing line was worked under emblem and used to cut through double sided tape. This will leave residue but I already had the pinstripe removal wheel (uses drill) to remove the dealership logo sticker and it did well in removing the double side tape residue as well. WD-40 was used on a soft cotton towel to completely cleanup any remaining adhesive followed by soap/water and finally wax. Looks MUCH better (to me), thinking about removing the Mazda emblem as well but for now it stays:
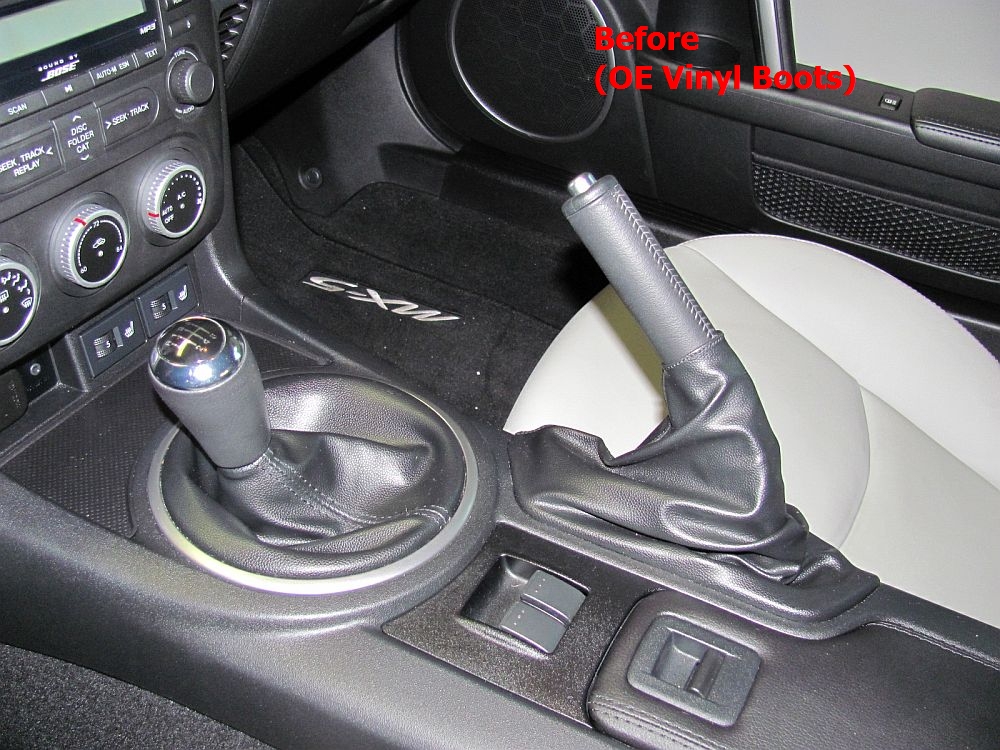
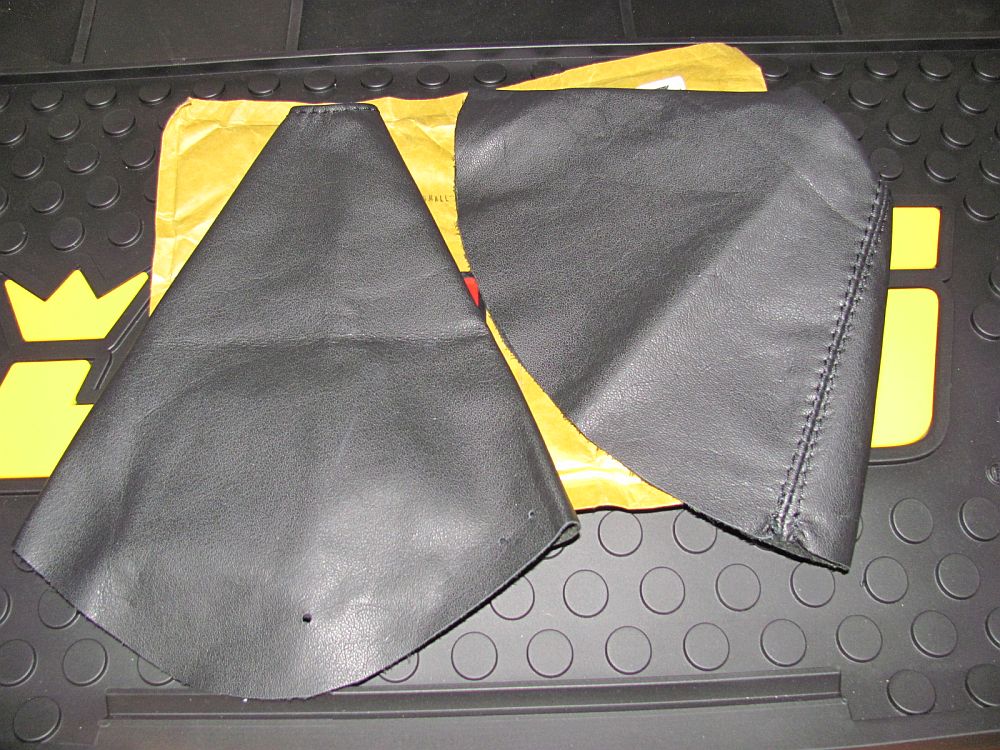
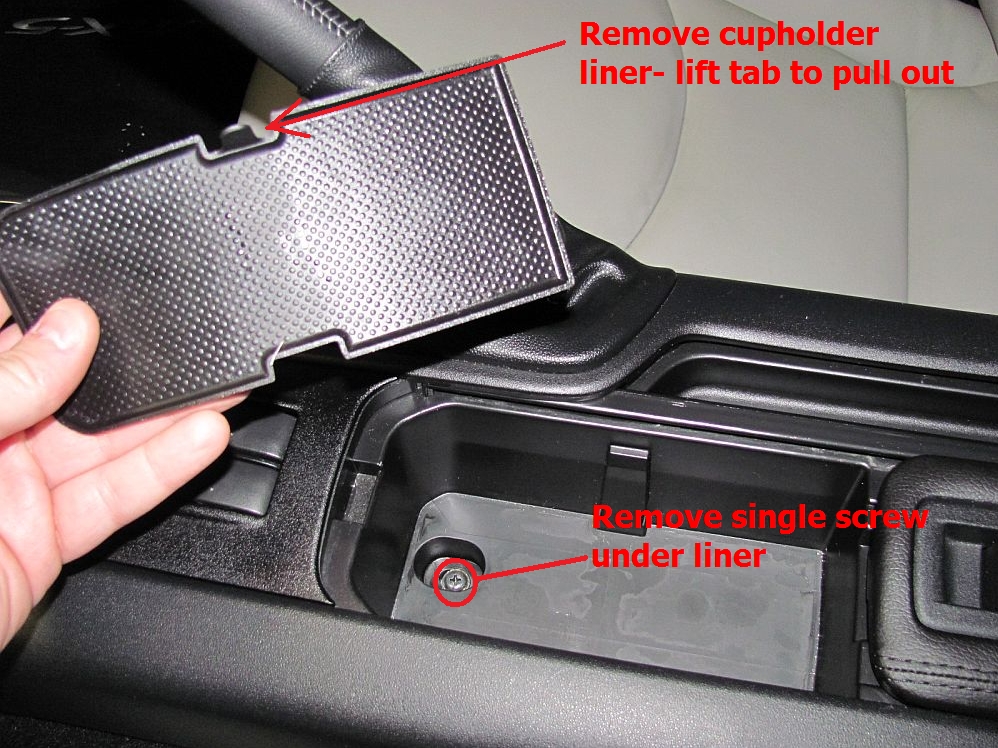
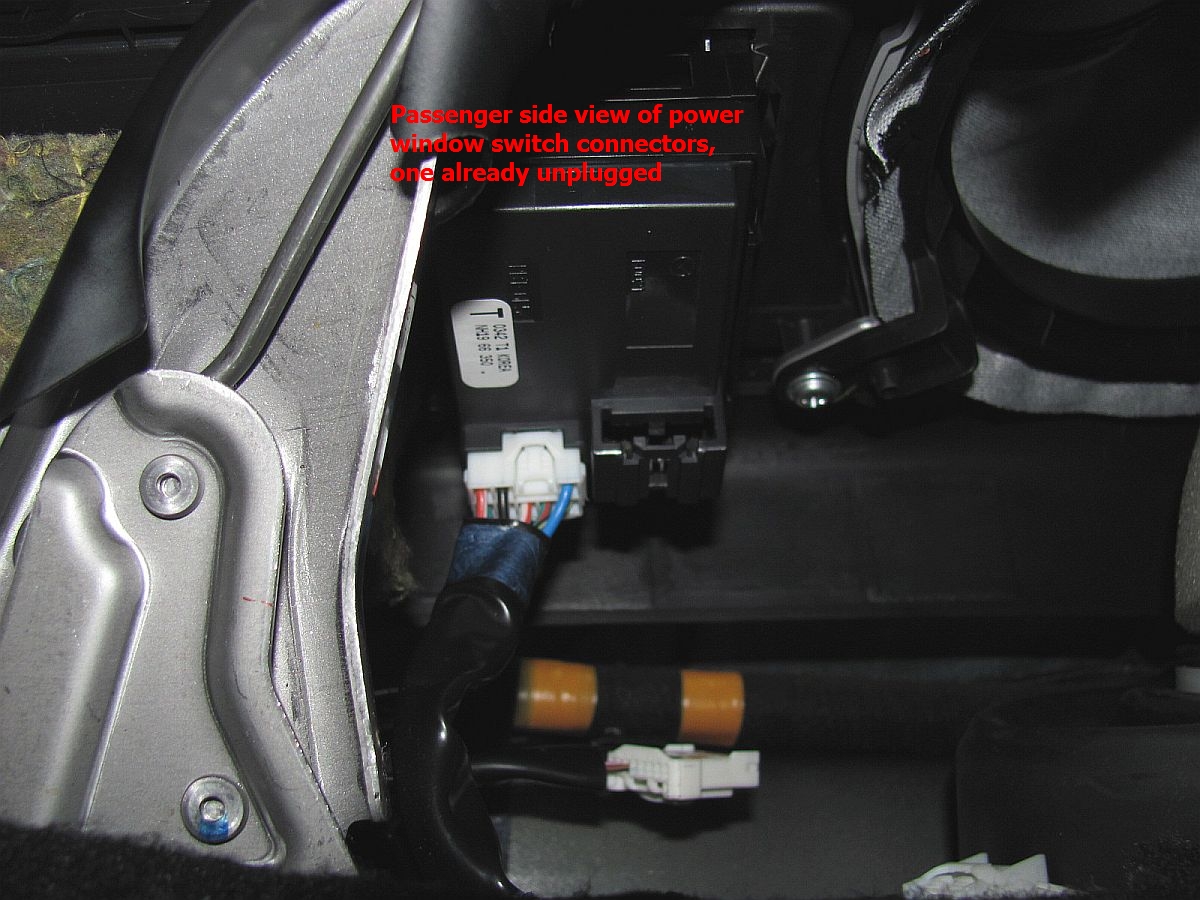
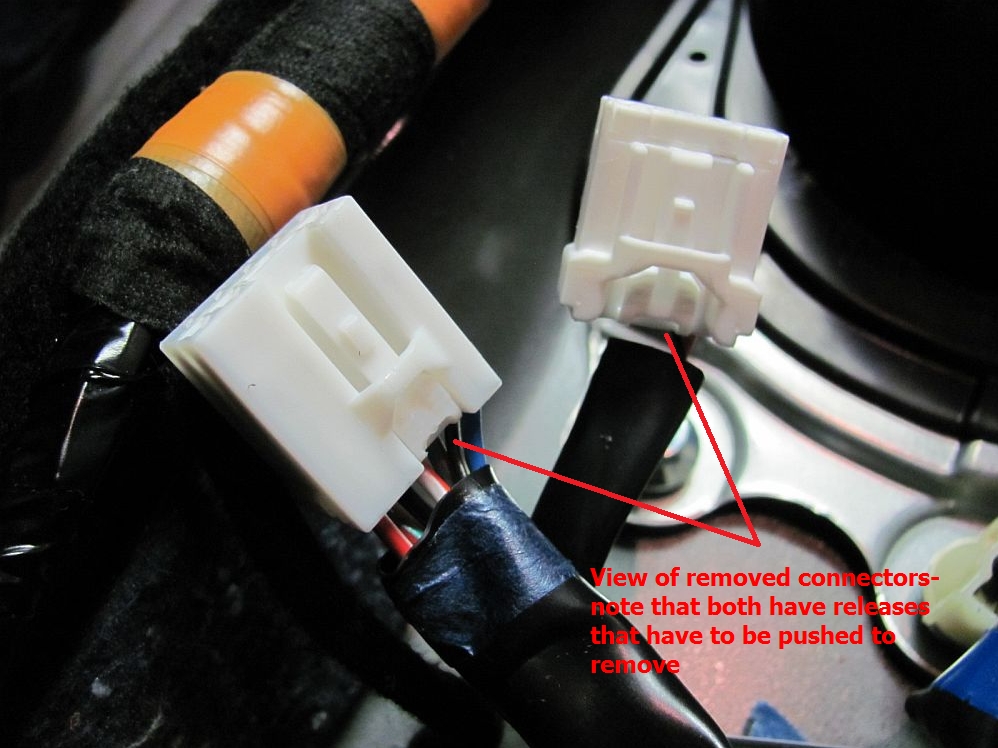
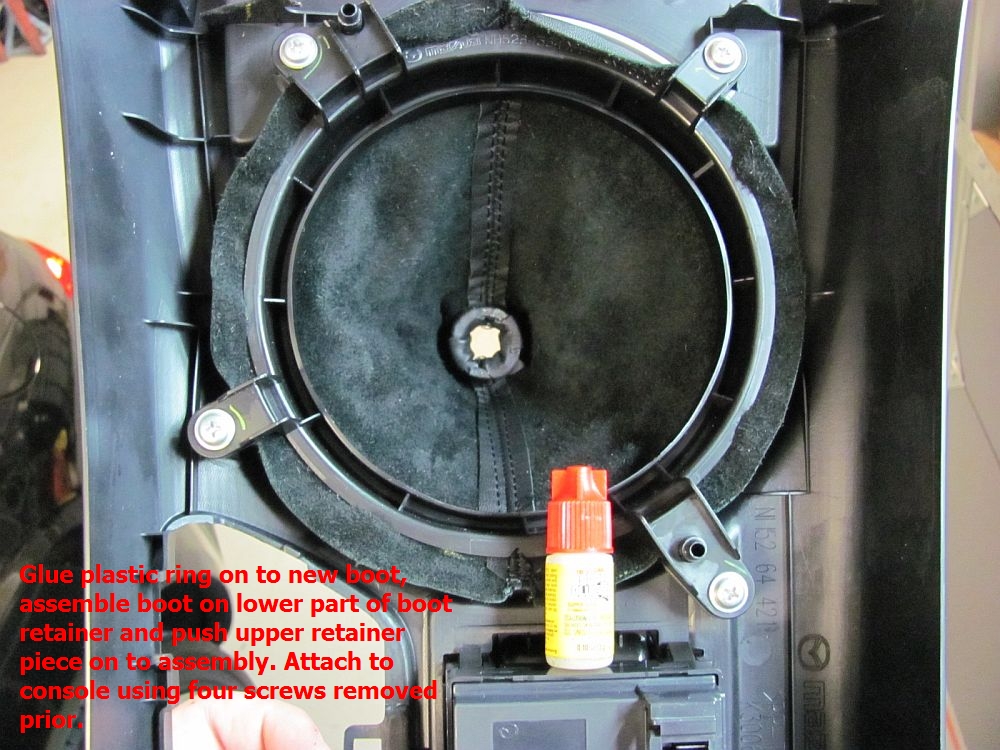
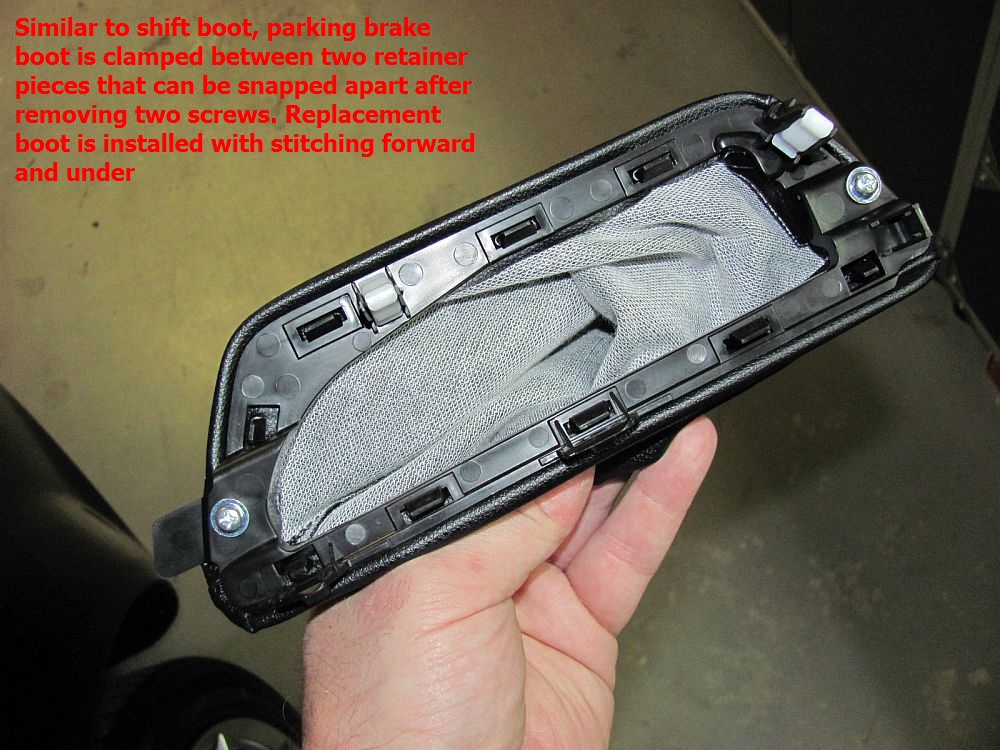
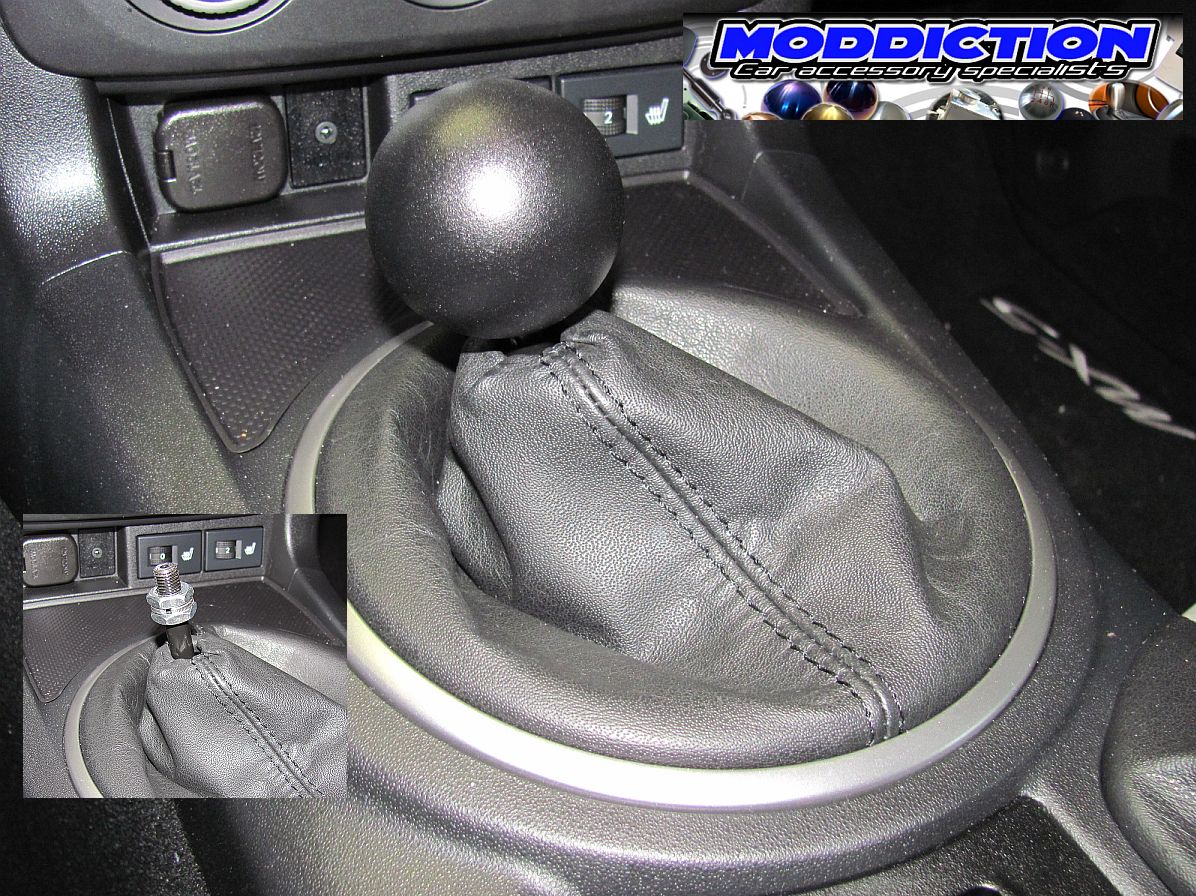
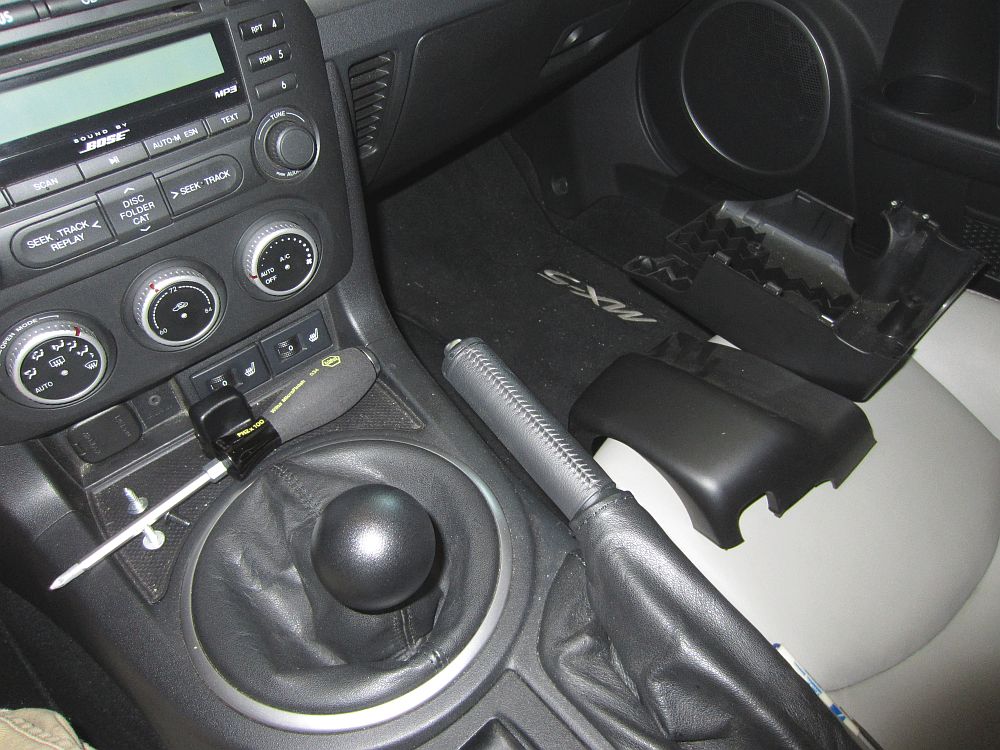
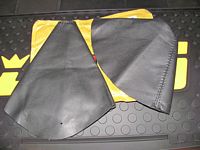
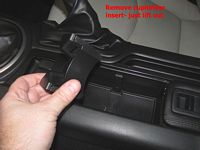
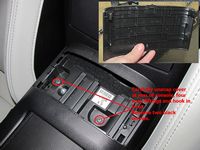
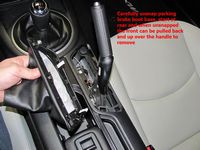
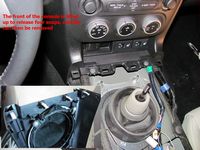
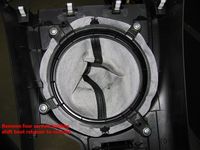
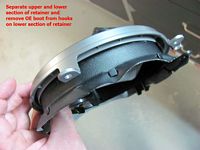
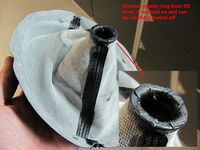
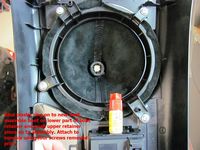
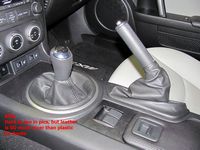
Mazda skimped on shift/parking brake boots, unacceptable to me for a 30k plus car new to have plastic/vinyl boots (even my VWs in a similar price range came with leather) so I decided to replace with leather boots. I sourced them from Top Gaiters eBay store, I had used them once before in my daughter's car and they are a good value with an OE-like fit and look. For the later NC2 cars, console removal only requires three screws to be removed (hiding under various trim), power window switch connectors unplugged, parking brake boot removed, and finally console can be lifted up in the front to release press-fit snaps. The power window switch plugs can be tough to get unplugged, there is a tiny release that needs to be pressed on the bottom of the small plug and on the right (US passenger) side of the larger plug.
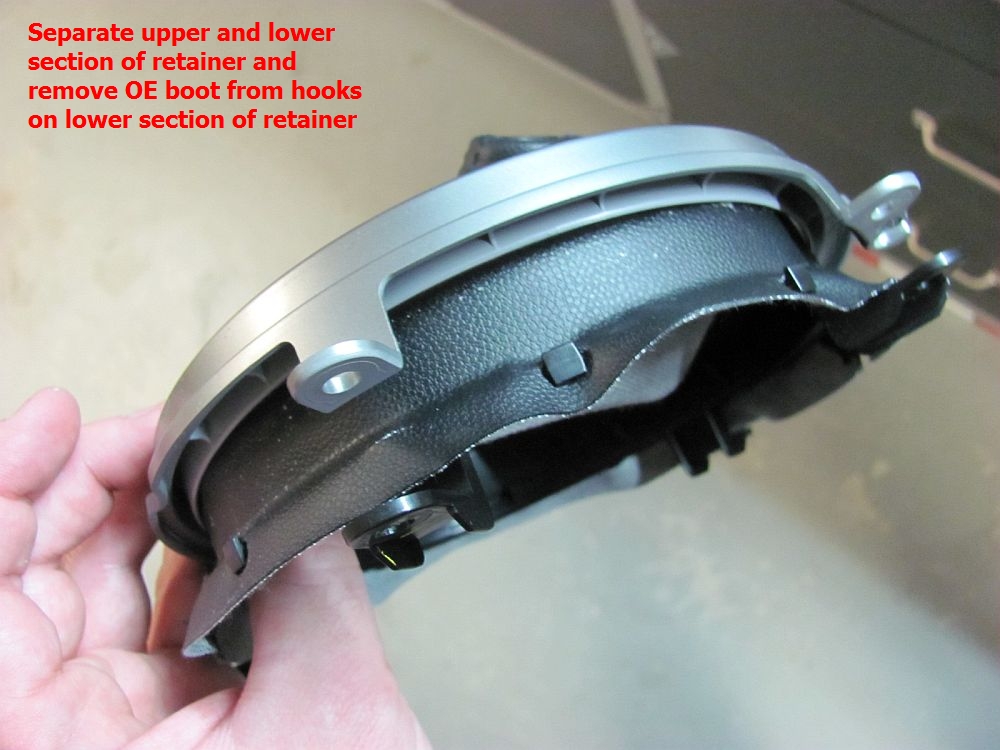
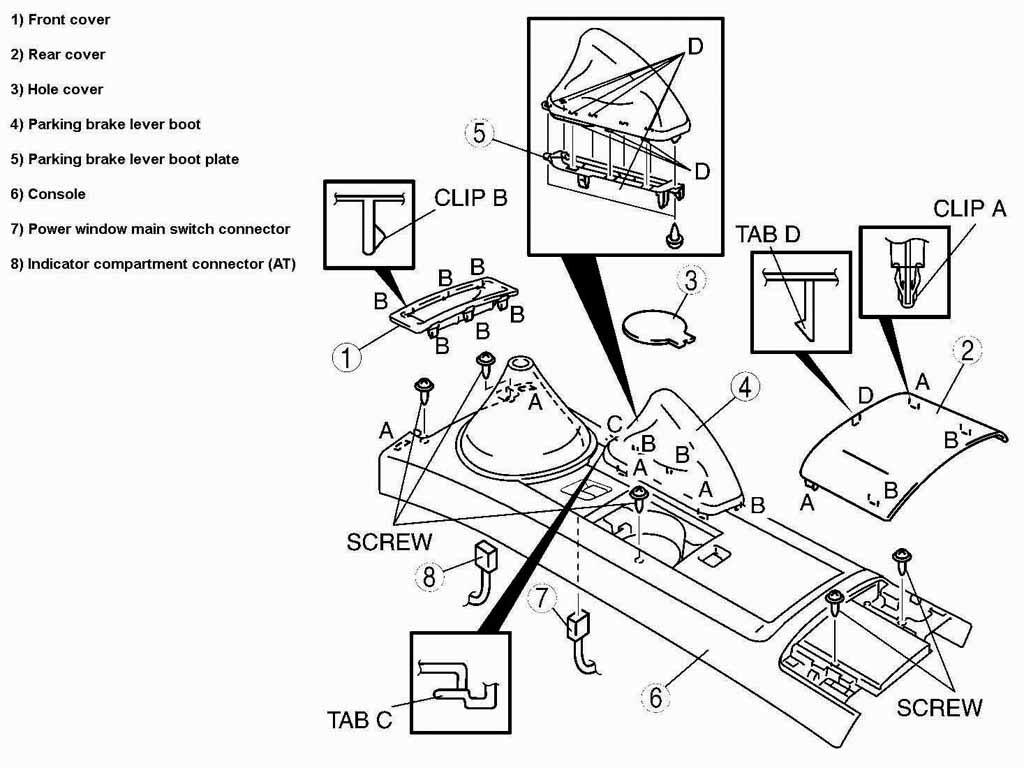
Boots are a simple R&R and come with the same alignment holes that the OE boots have for assembly, process noted in pics below. The console diagram below illustrates how the pieces go together for NC1 Miatas, the difference for NC2 Miatas is the lack of screws in front where clips are used instead.


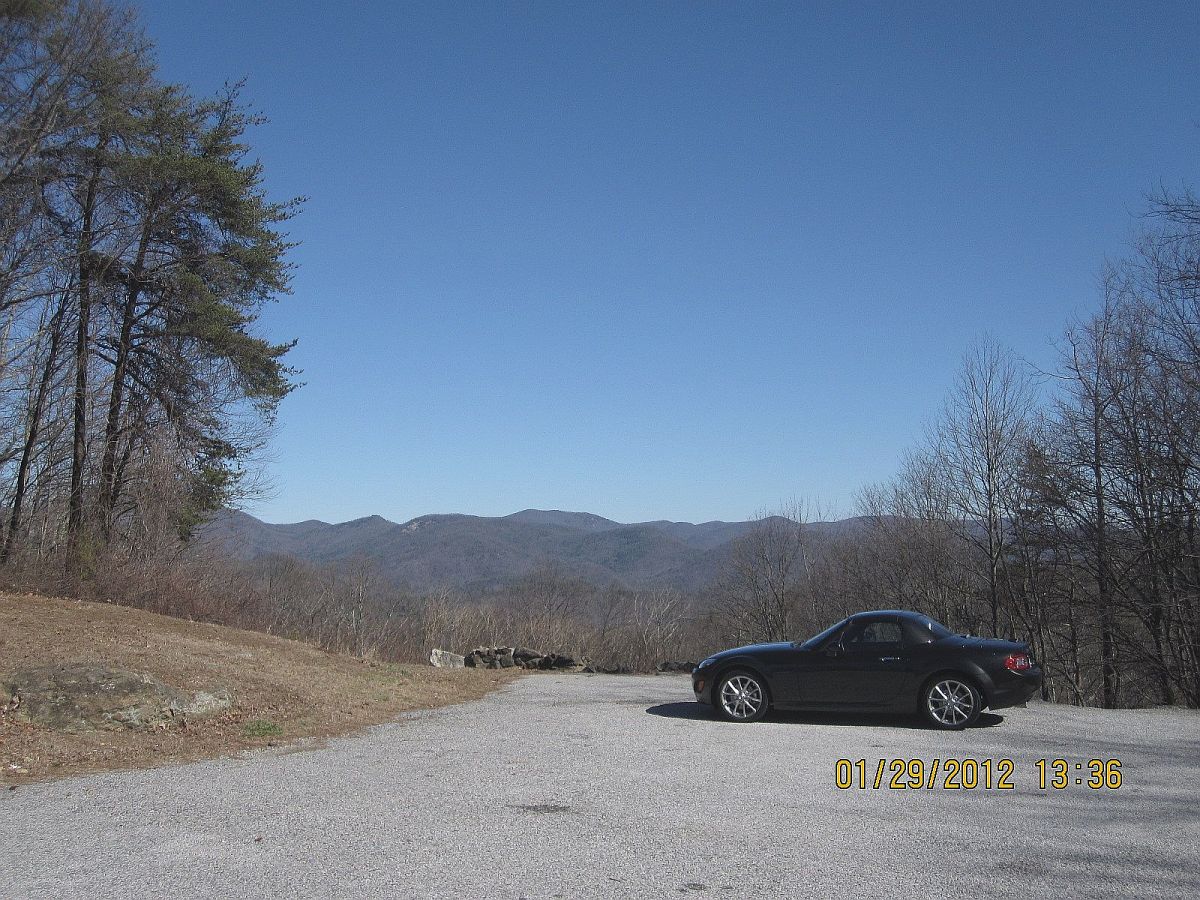
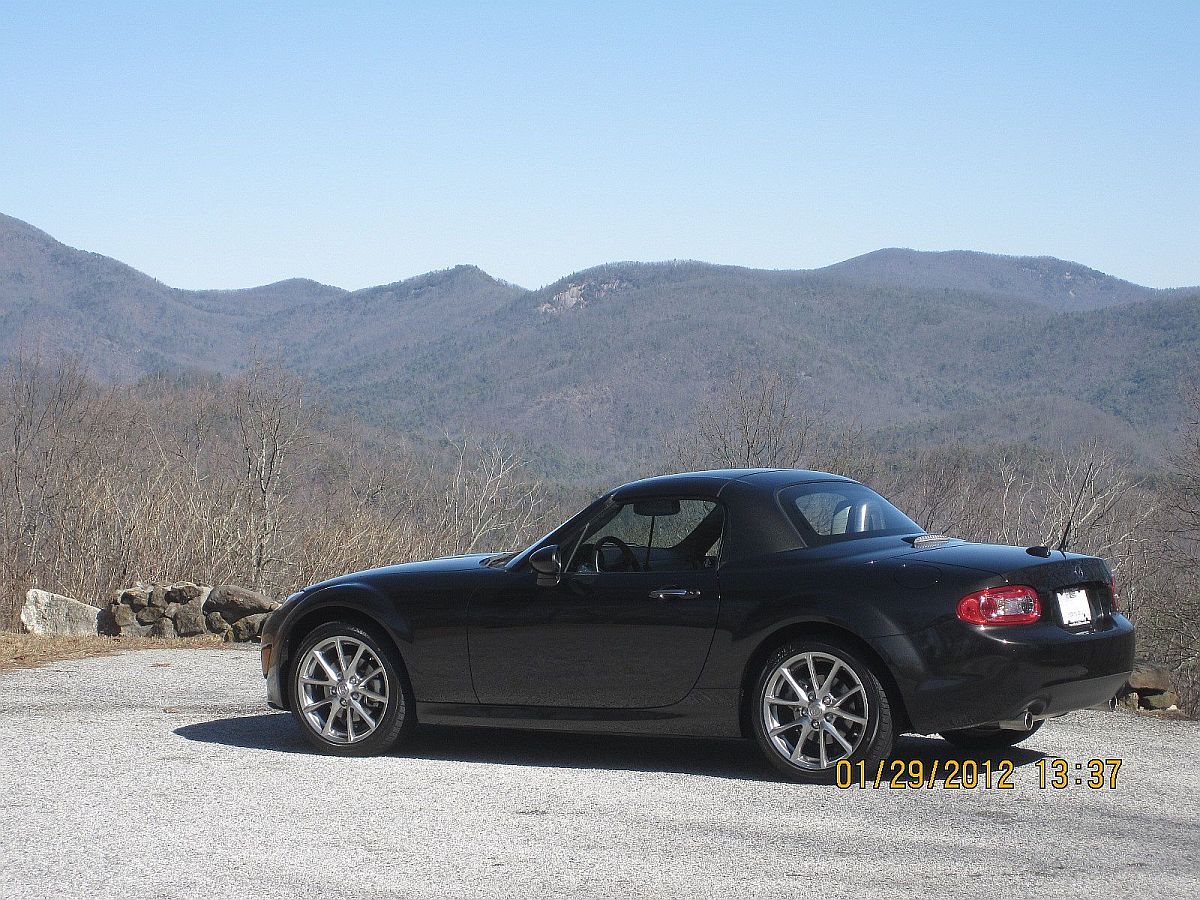
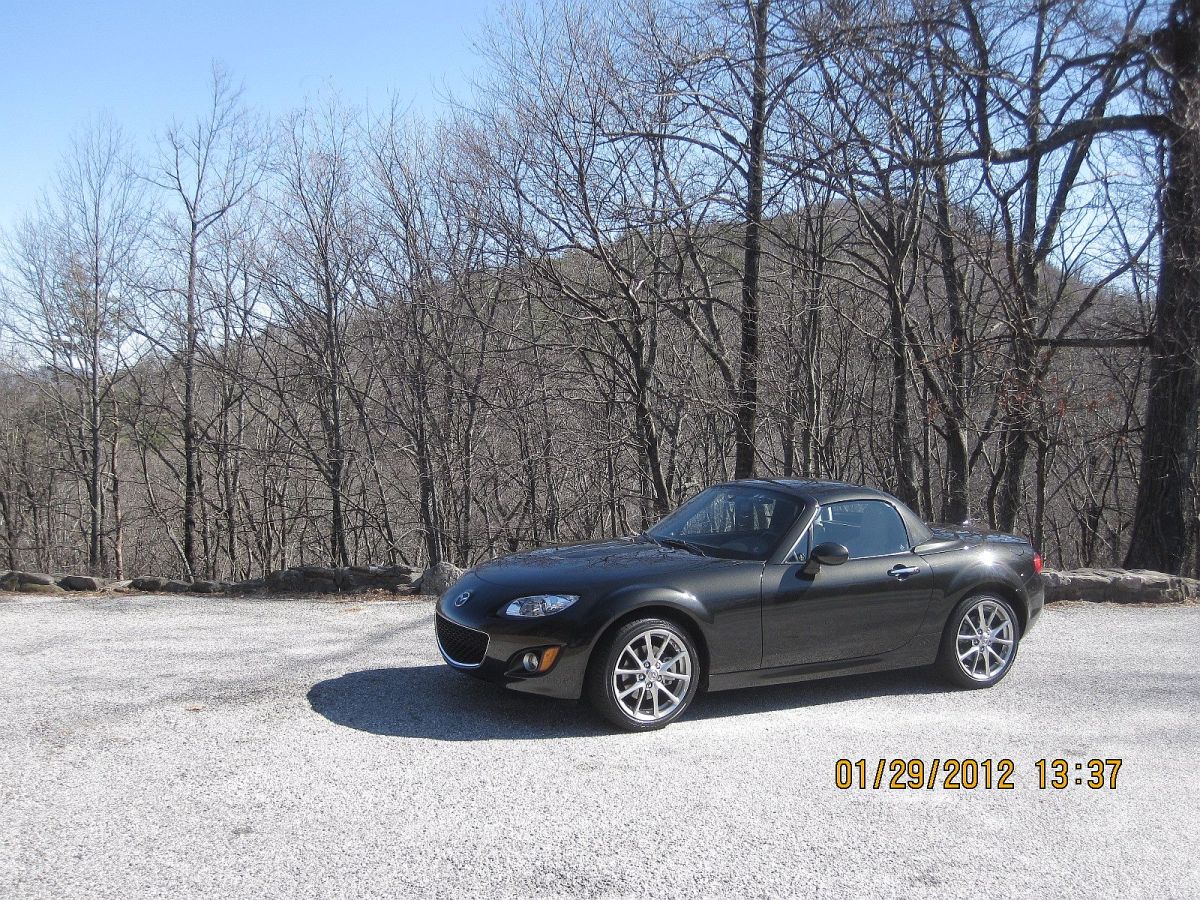
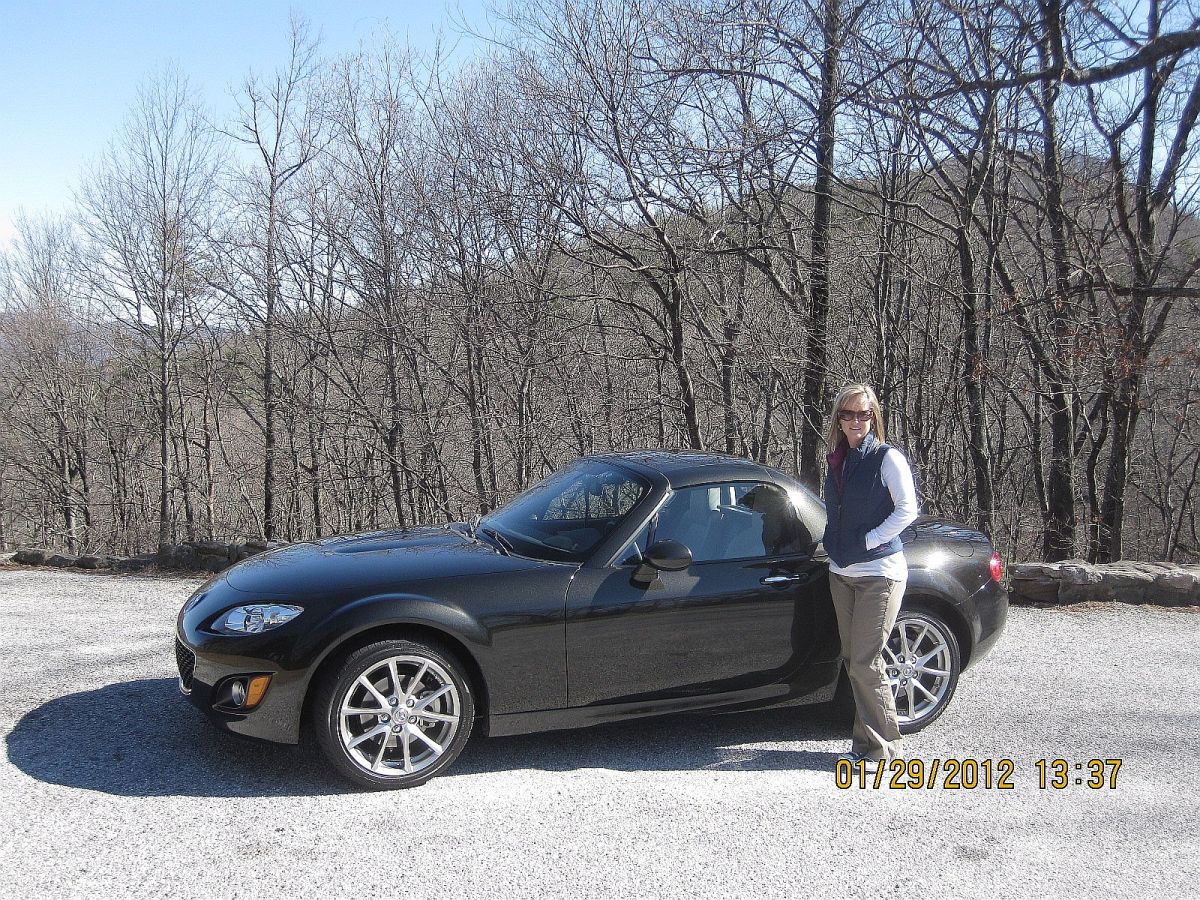
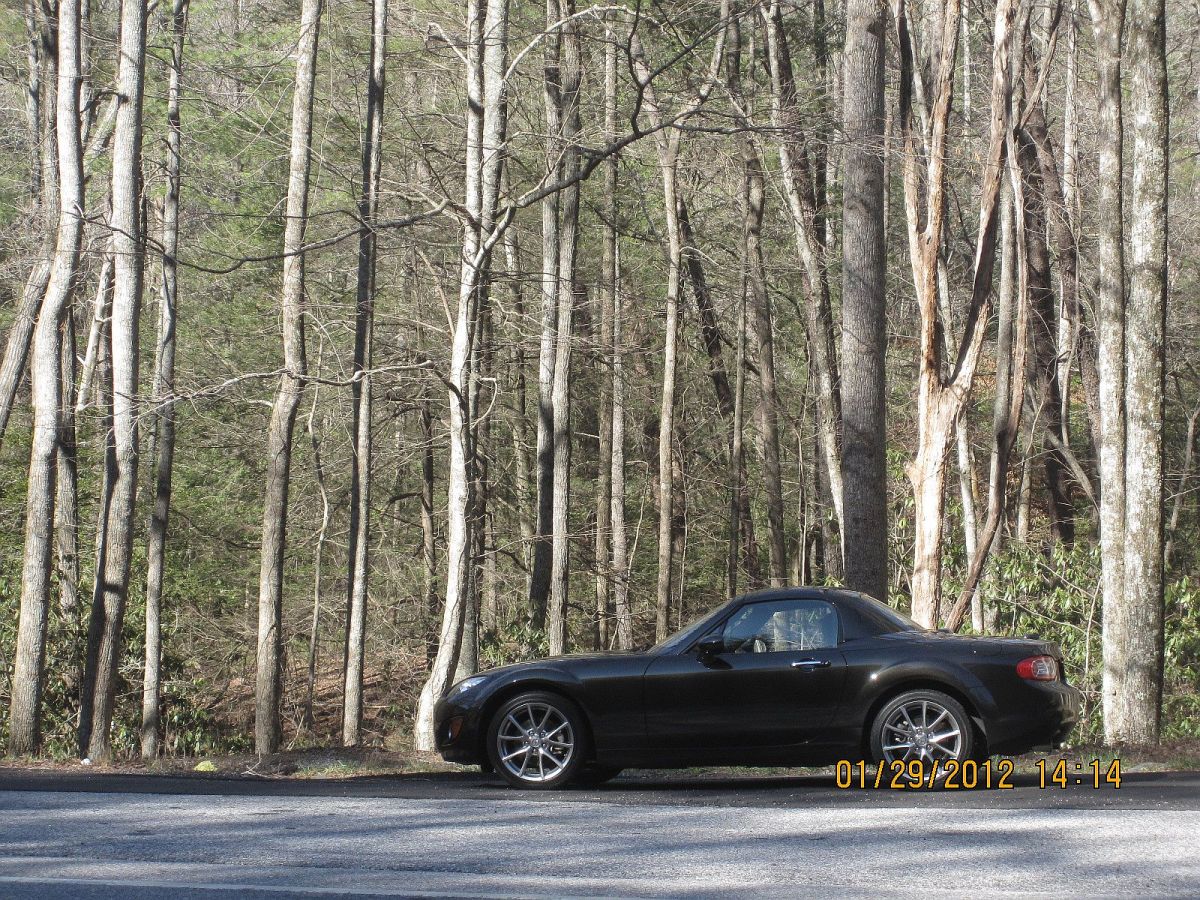
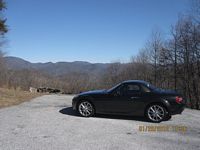
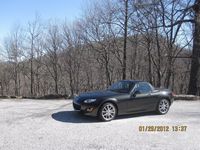
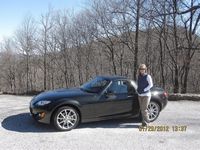
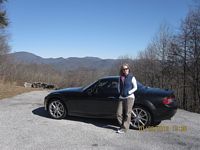
My wife and I decided to try out the stock Miata in the North GA mountains before making any mod decisions. Our usual route is to take HWY 60 to HWY 180 (Wolf Pen Gap) to HWY 129 loop as detailed in a map HERE that Frank in the Lotus club drew and tagged for us. The car did surprisingly well, but I have to agree with forum members that the suspension will be the first thing replaced along with some better brake pads
I forgot my camera and the one I borrowed had the date/time stamp turned on- just pretend they are not there.


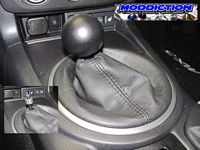
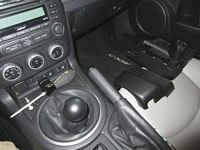
Moddiction Anvil Textured Shift Knob installed. This is a heavier weight knob that smoothes out shifts a bit and I prefer the round shape over the OE shift knob (which is also weighted, but not as much). The height of the knob can be adjusted with the included nuts/lock washer.
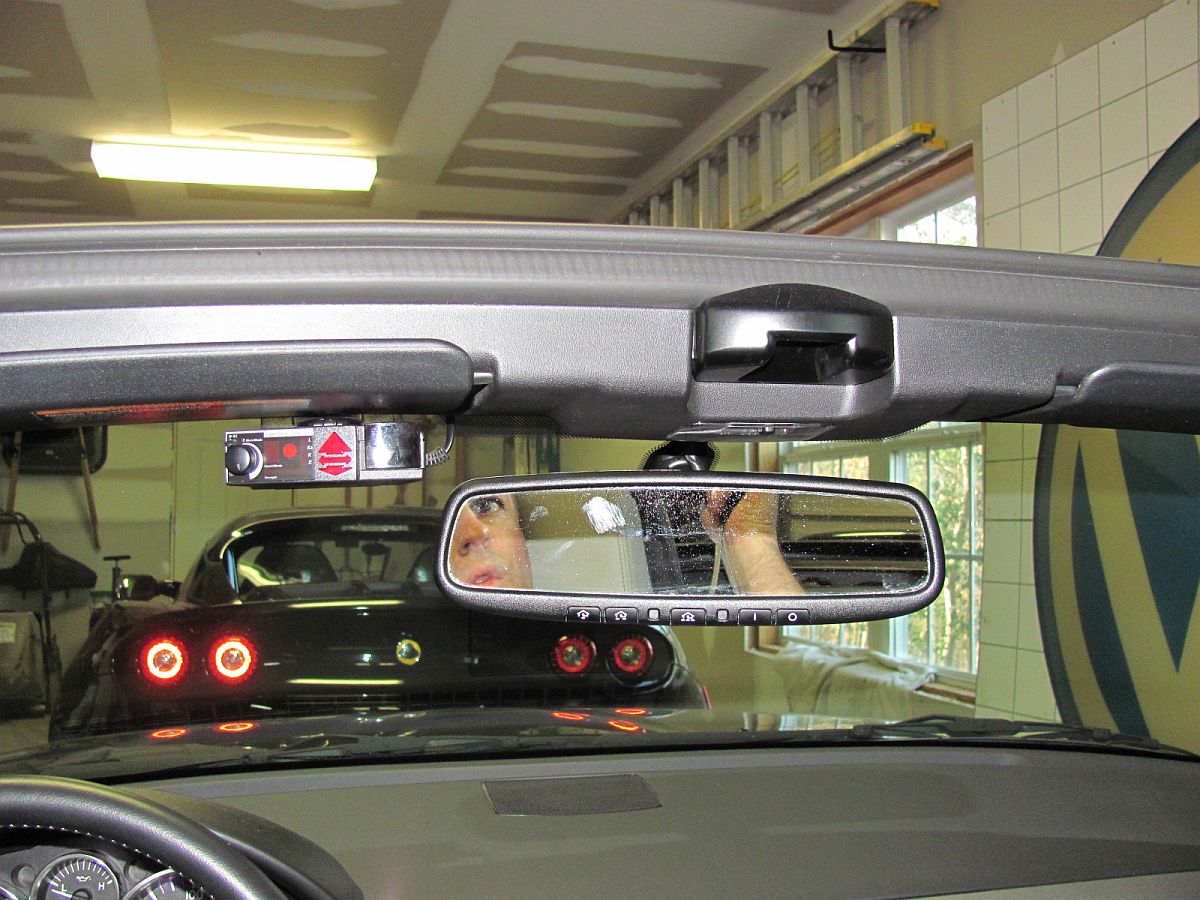
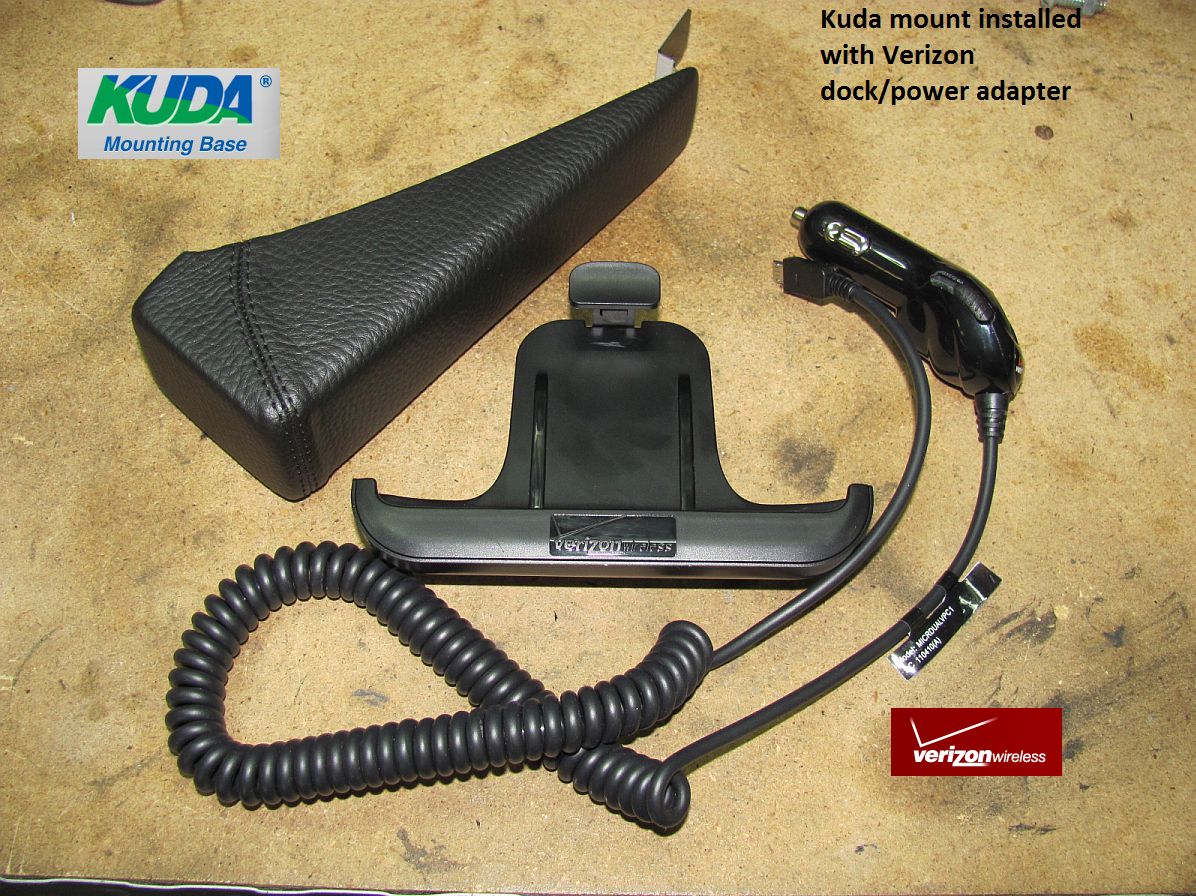
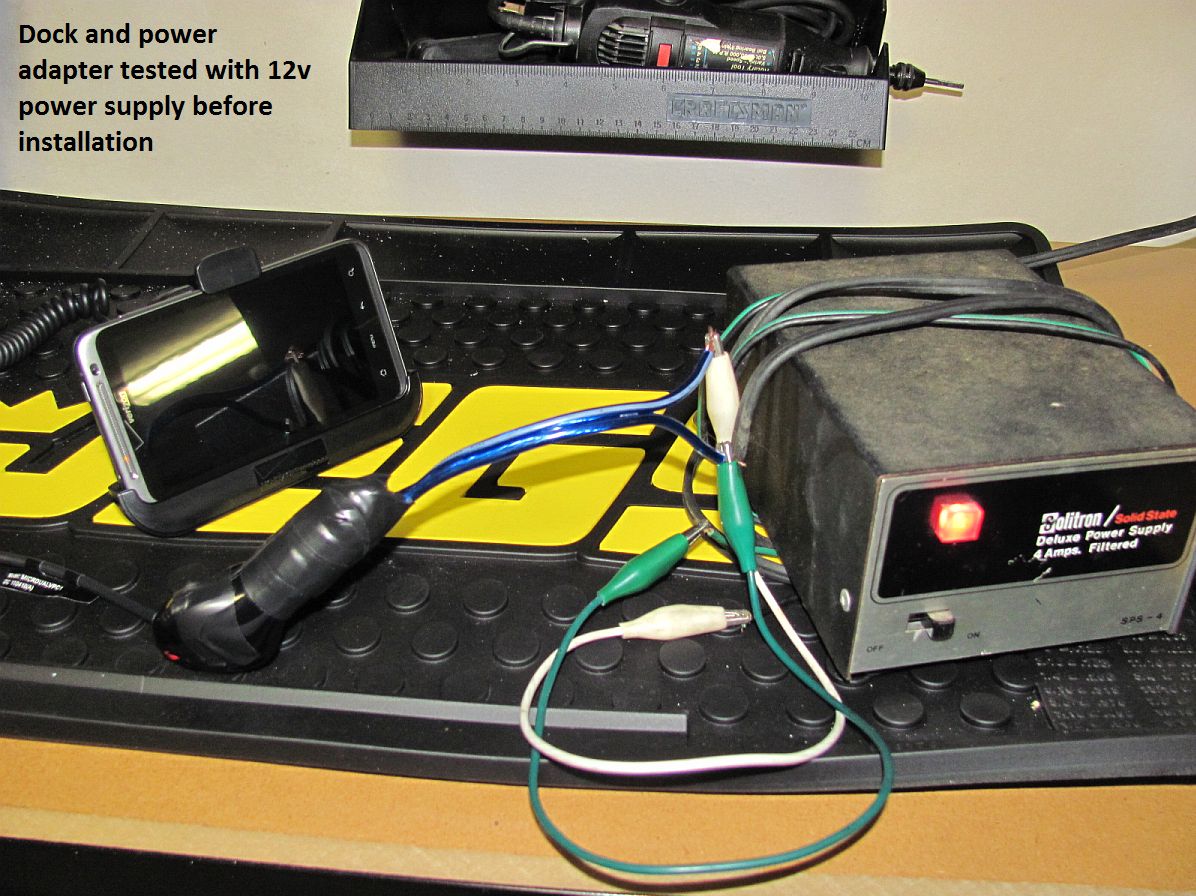
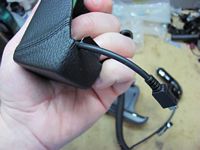
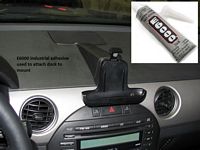
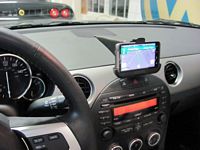
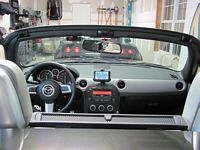
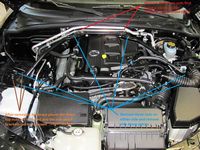
I decided to tap into the auxiliary power to hardwire my Valentine 1 (V1) radar detector and phone dock for my HTC Thunderbolt Android phone. To install the Thunderbolt phone dock I sourced a Kuda mount, I had used and been happy with this solution in the Mini.
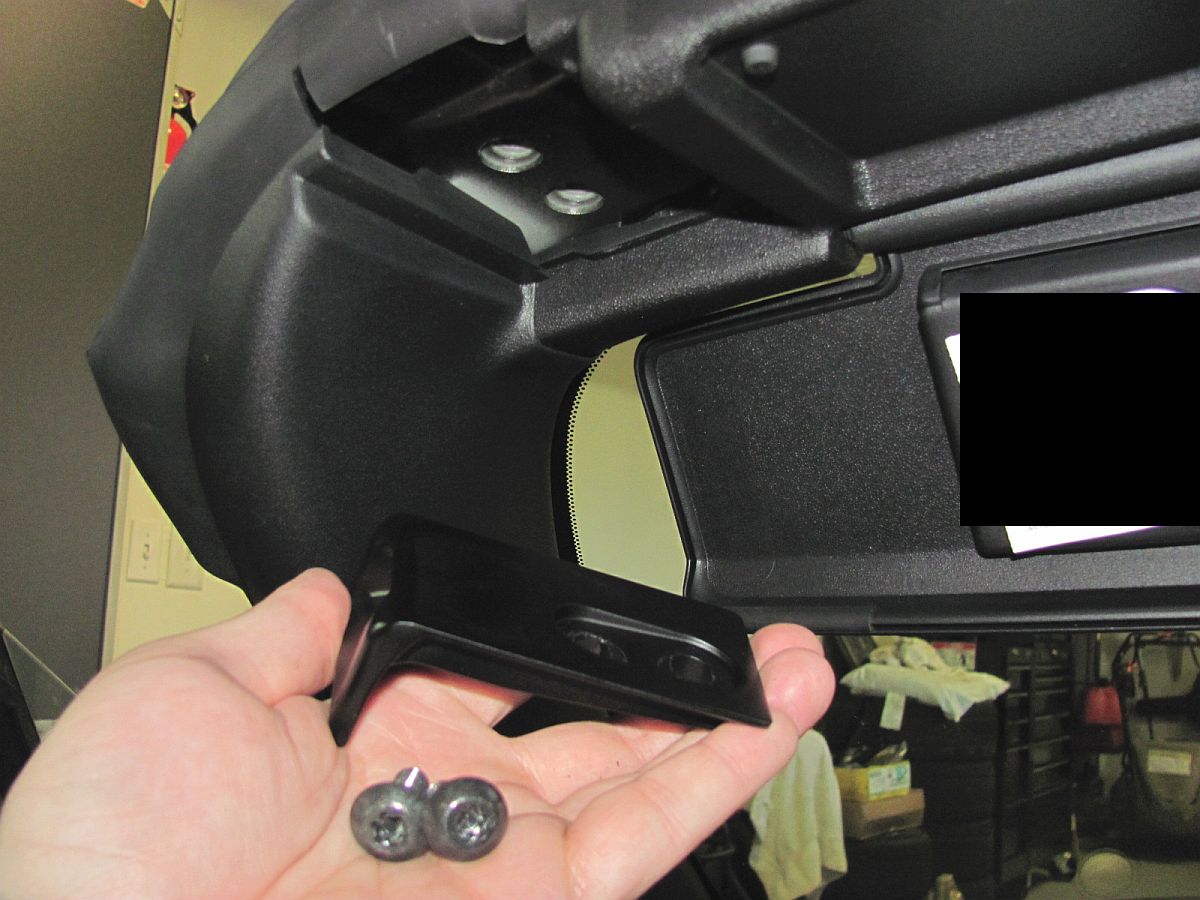
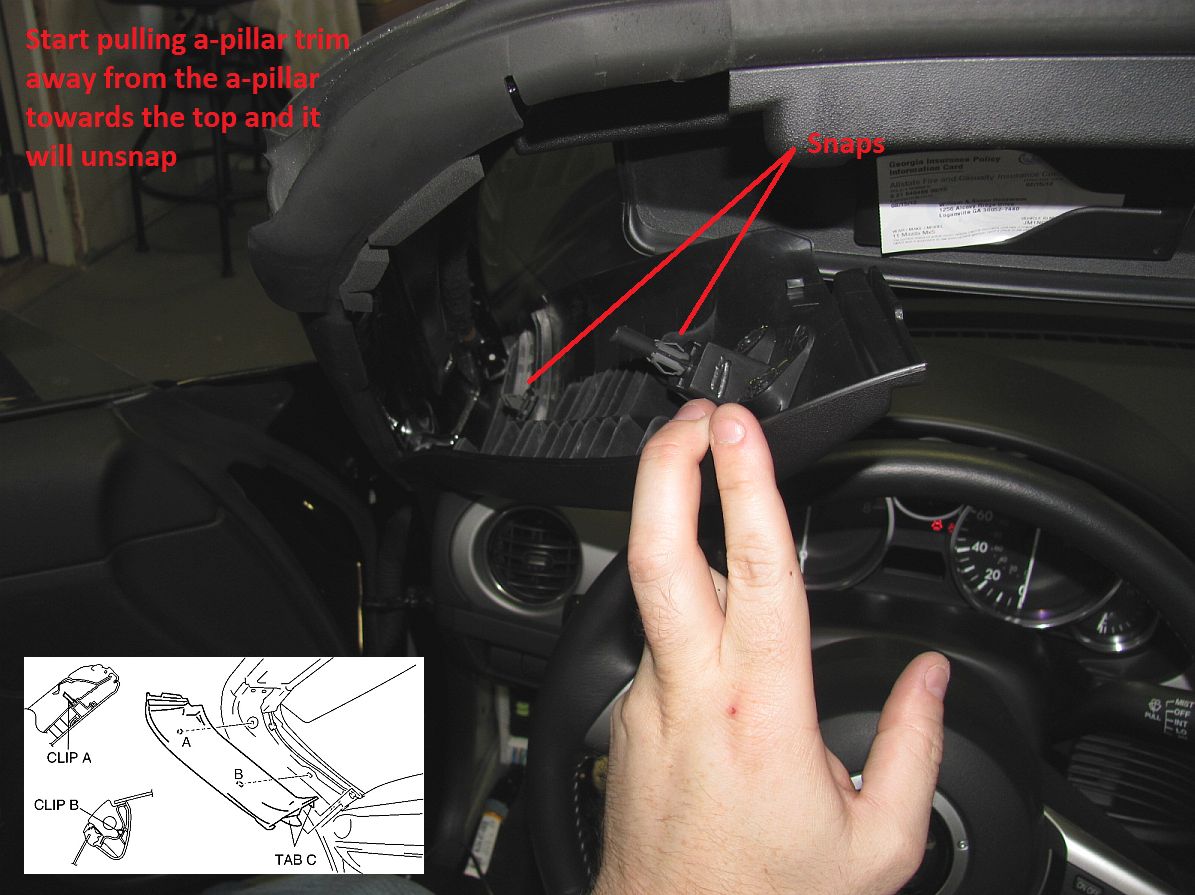
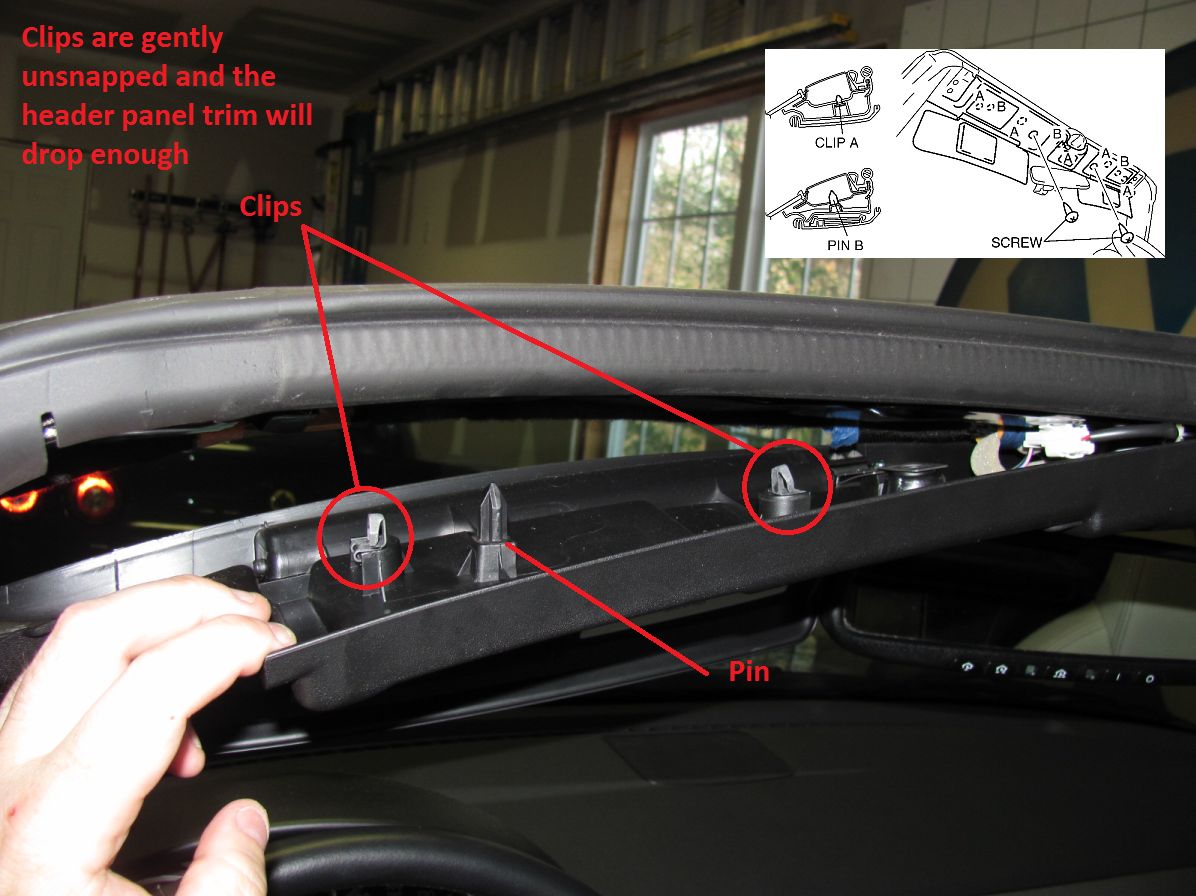
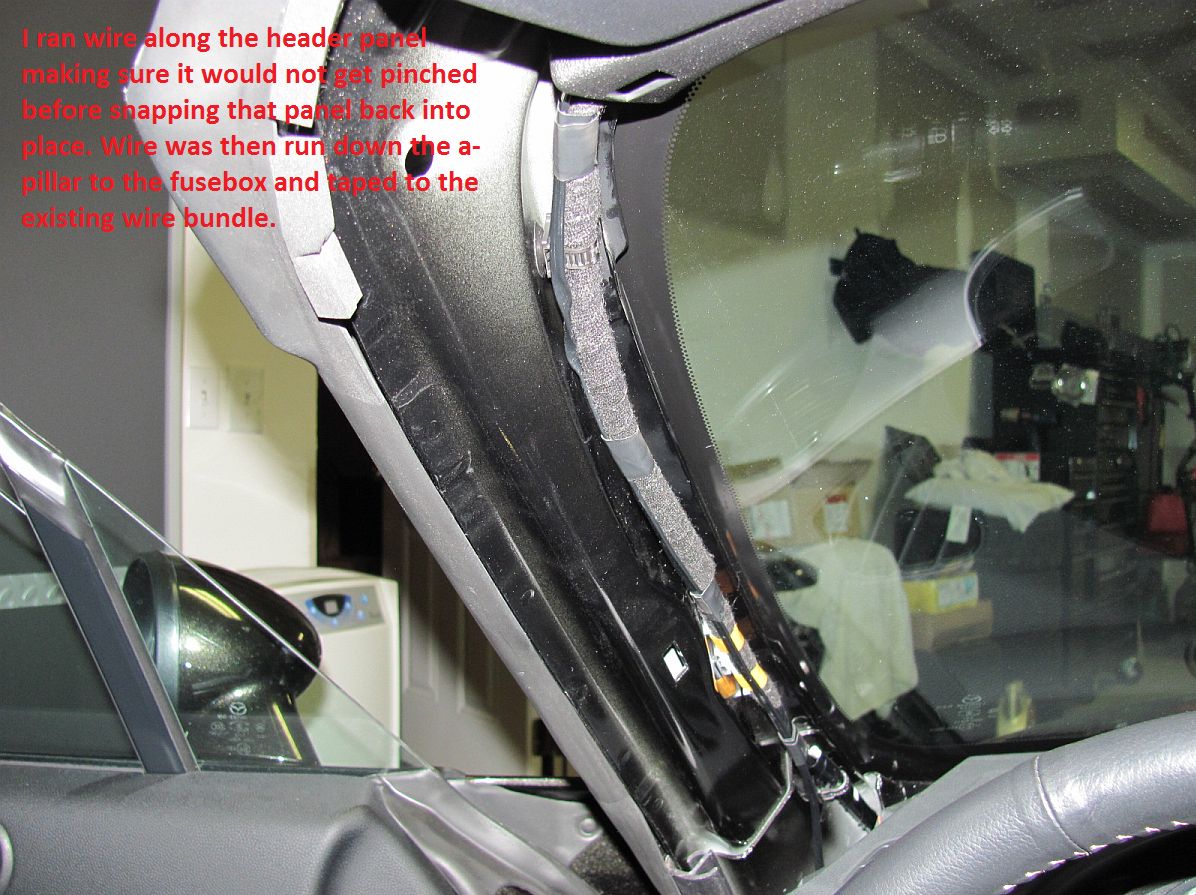
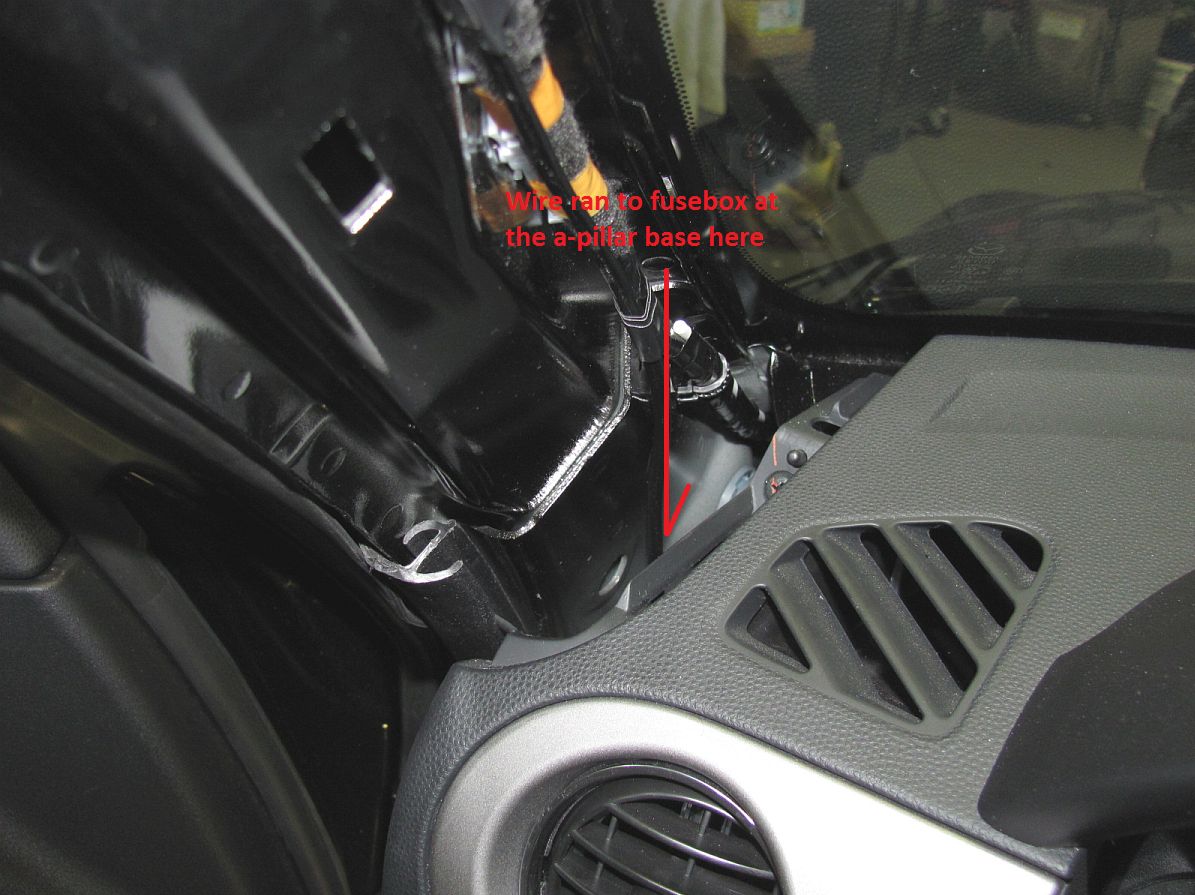
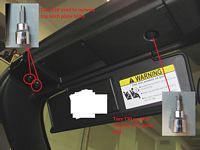
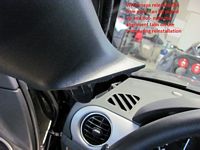
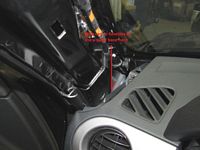
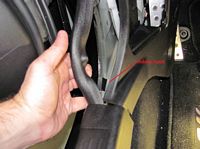
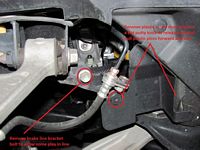
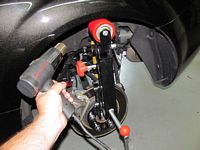
The header piece has to be loose and the a-pillar trim piece removed to run wiring down to the fusebox. Two bolts on the top latch plate are removed using a T40 socket, the single bolt holding the header trim is removed using a T30 socket. The a-pillar is then unsnapped and lifted up and out, the header panel is unsnapped on the driver side. Wiring can be run across the header panel trim and down the a-pillar- I used tape to hold the wire in place. Trim panels reinstalled after mounting radar detector and checking wire length/position again.
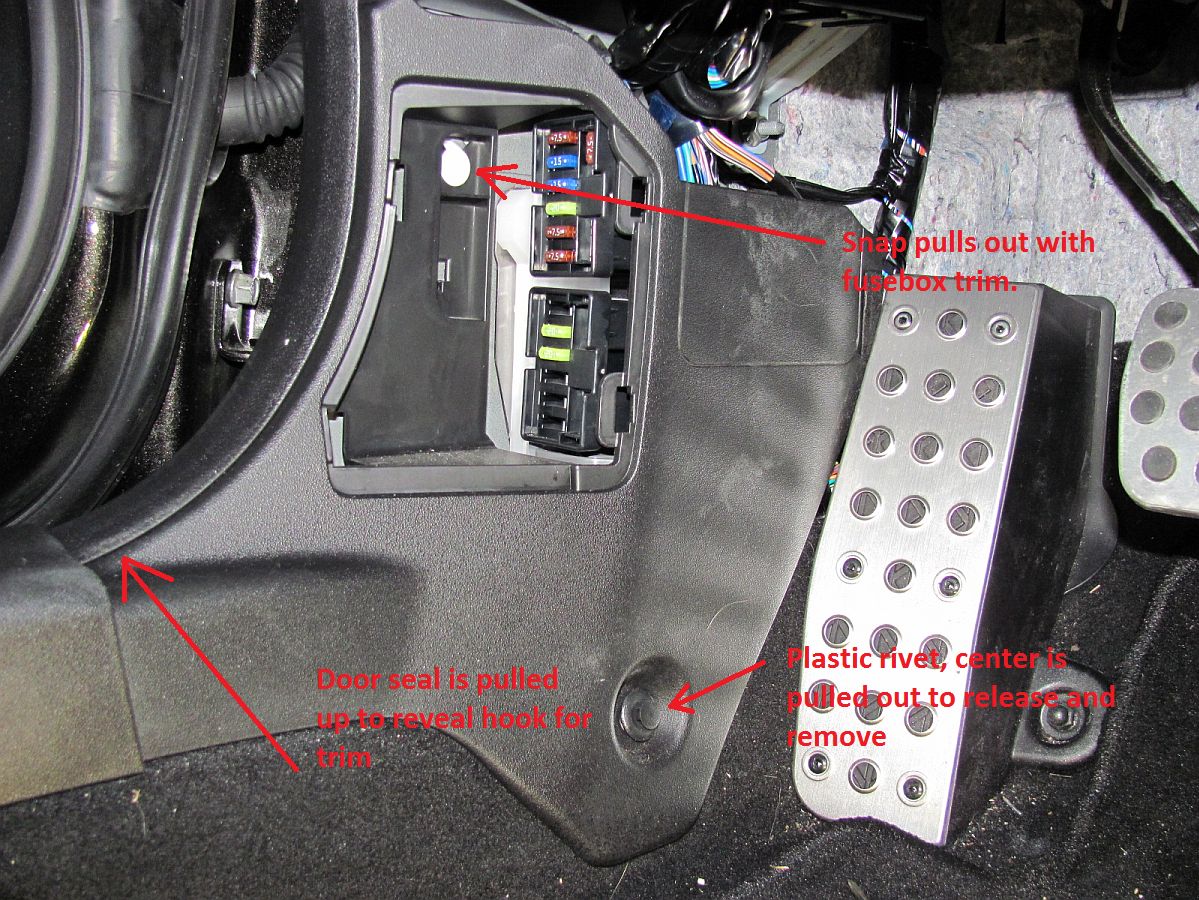
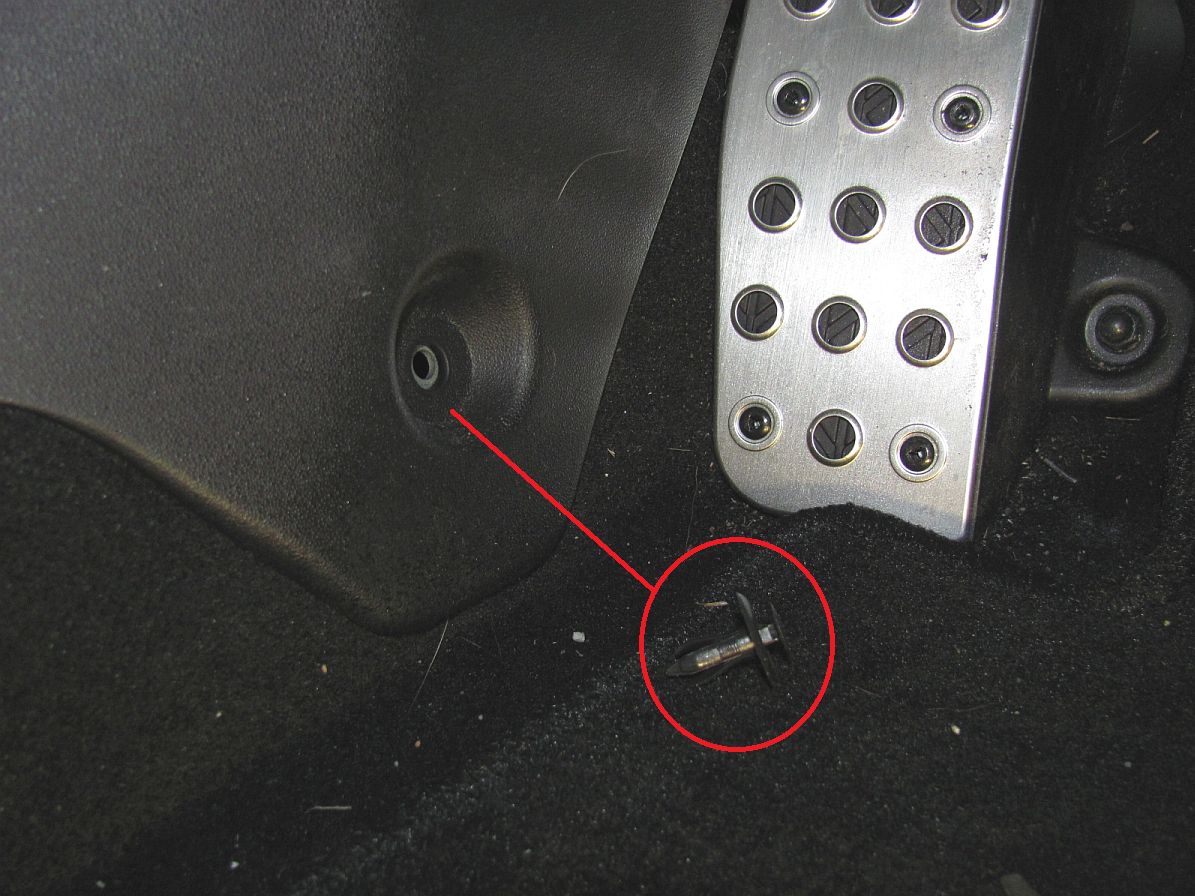
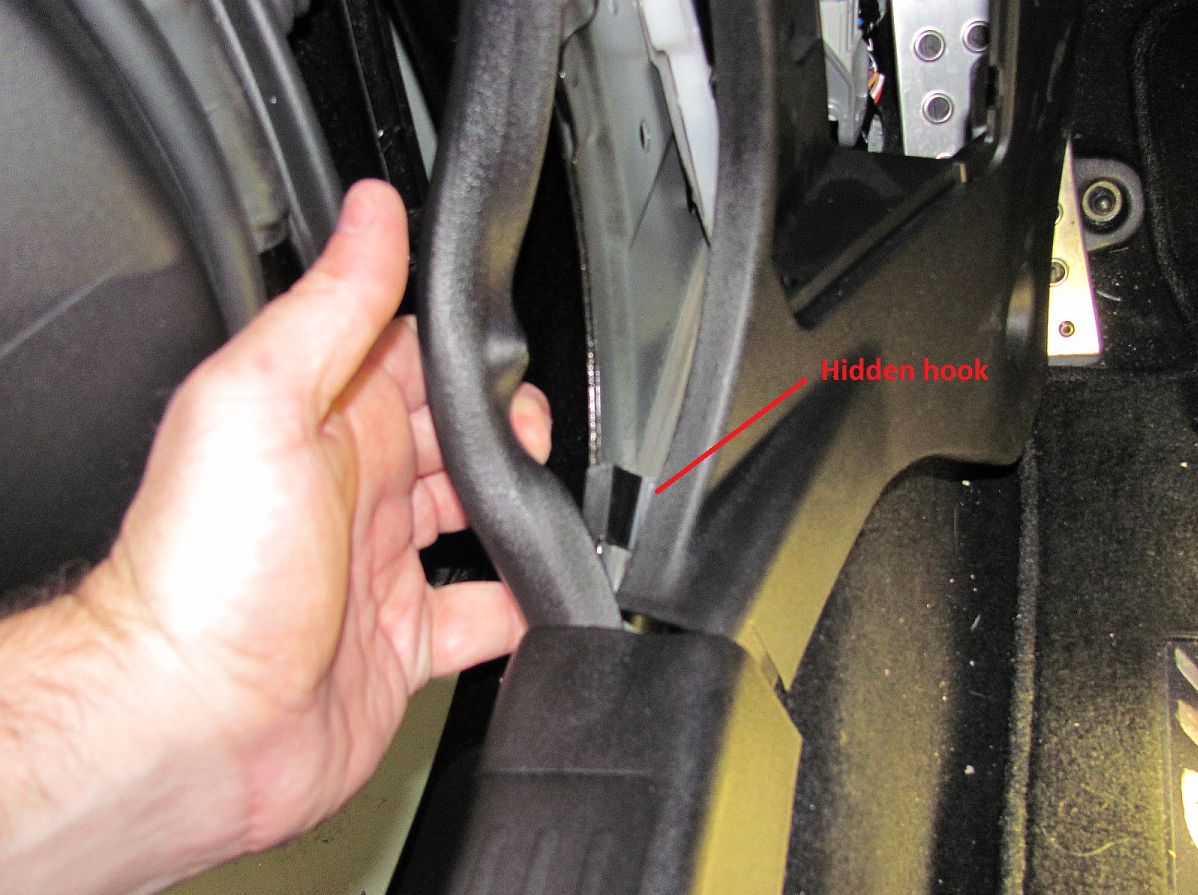
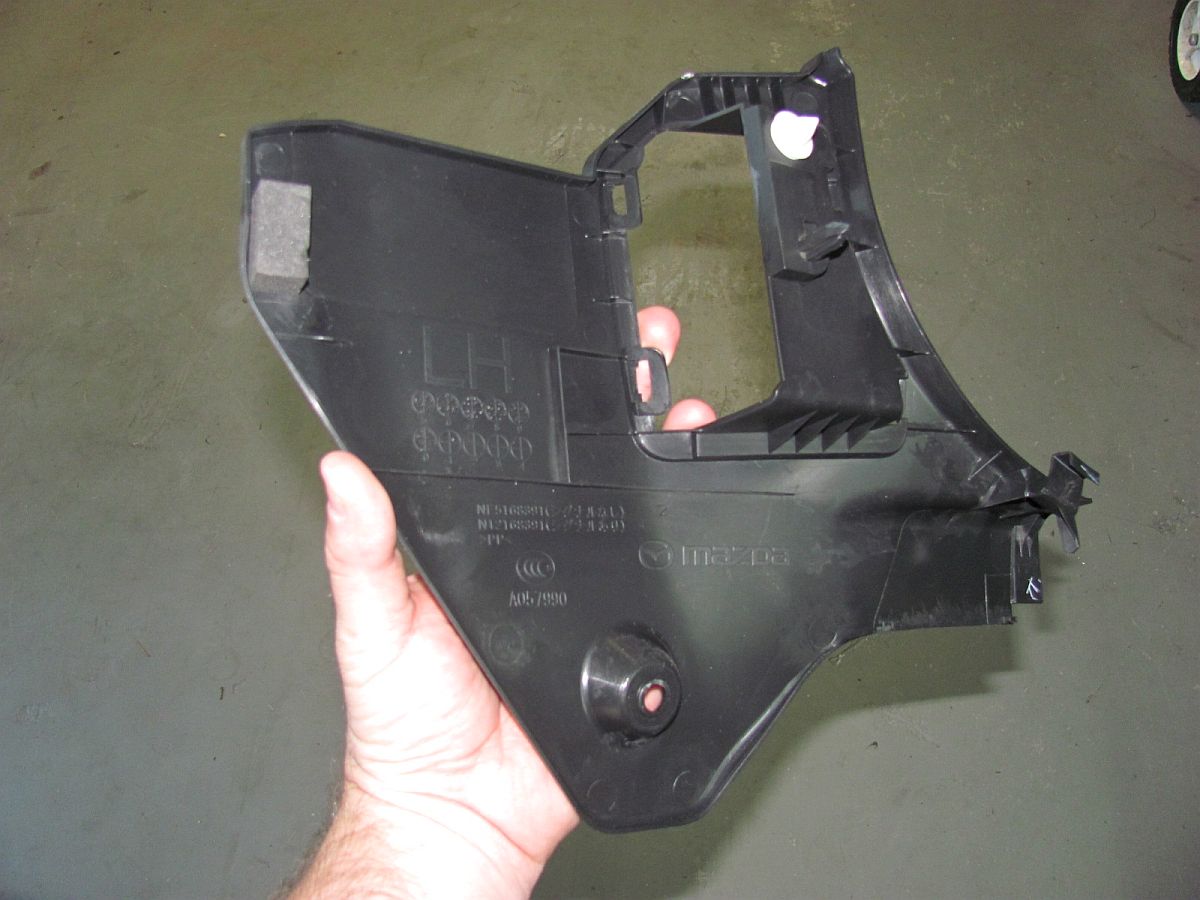
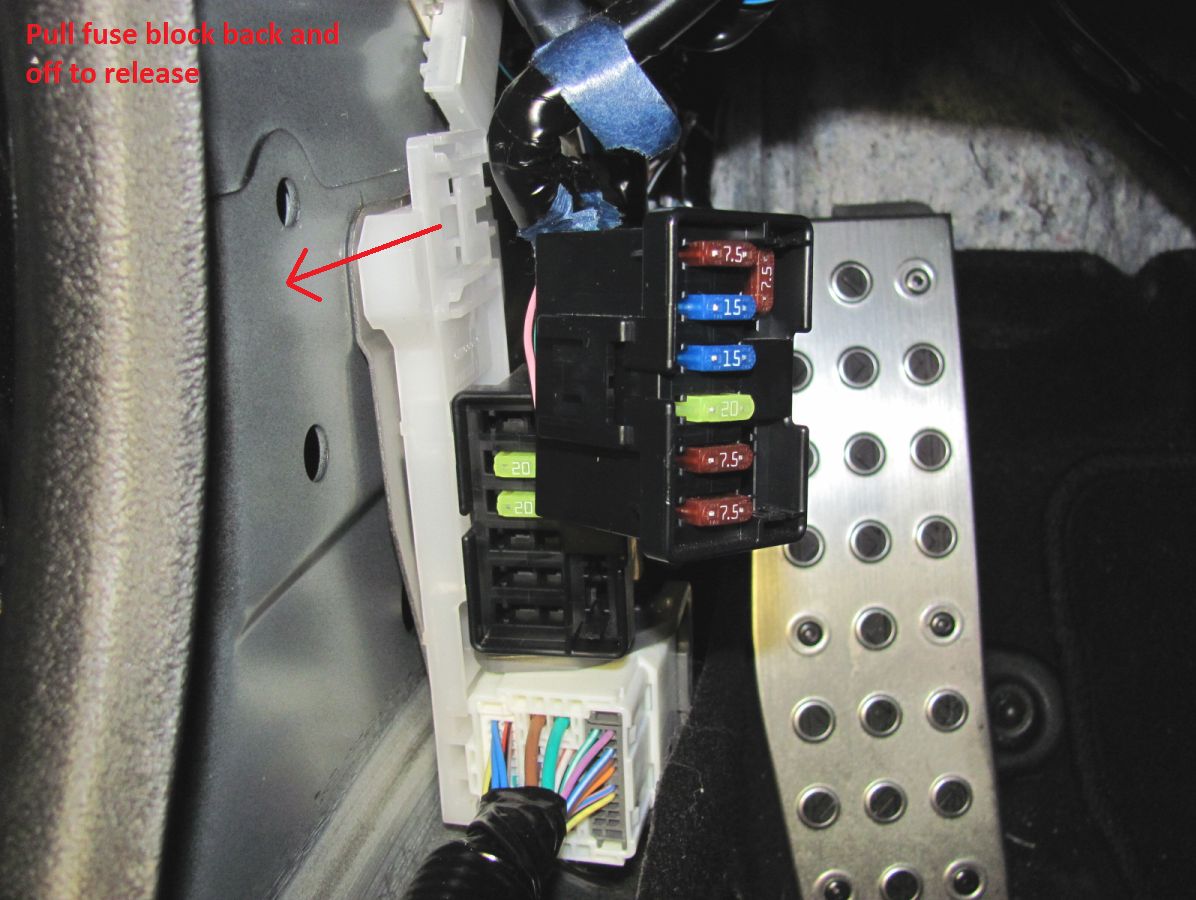
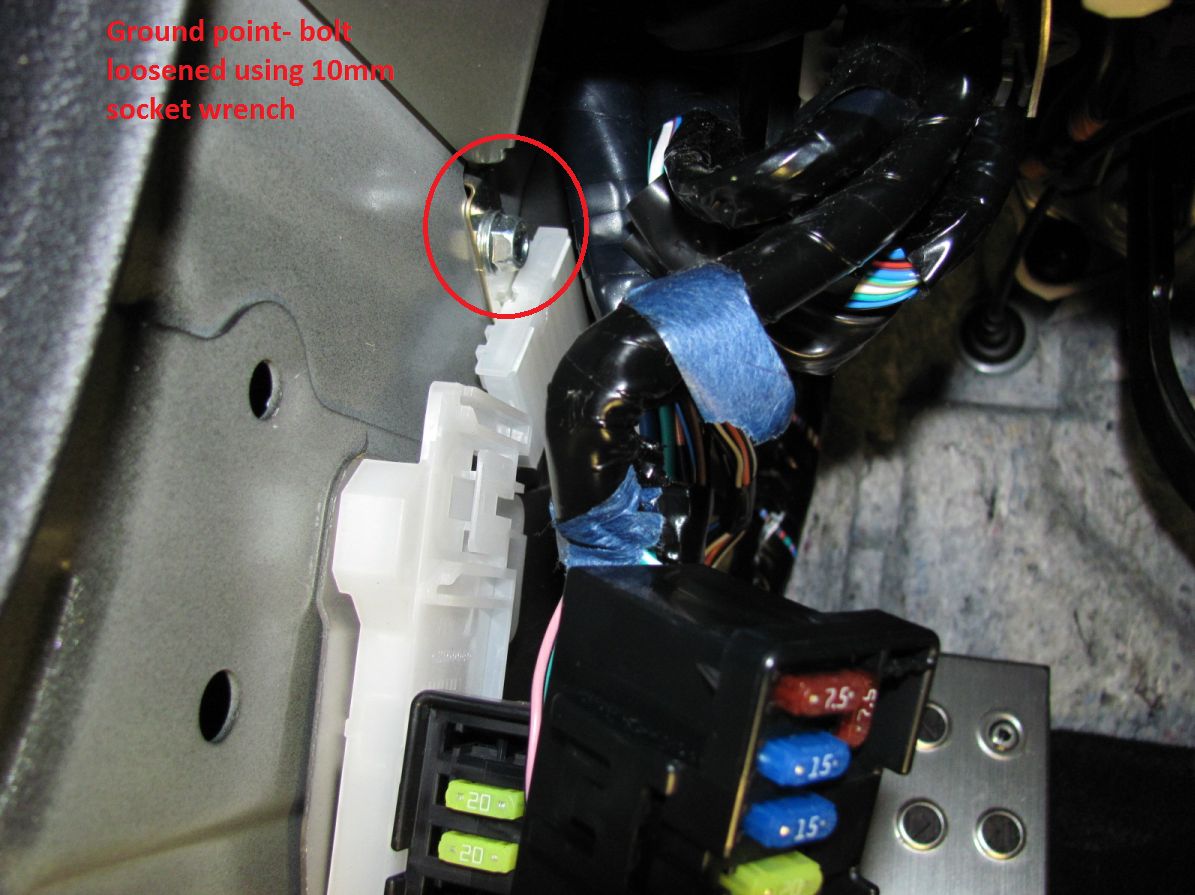
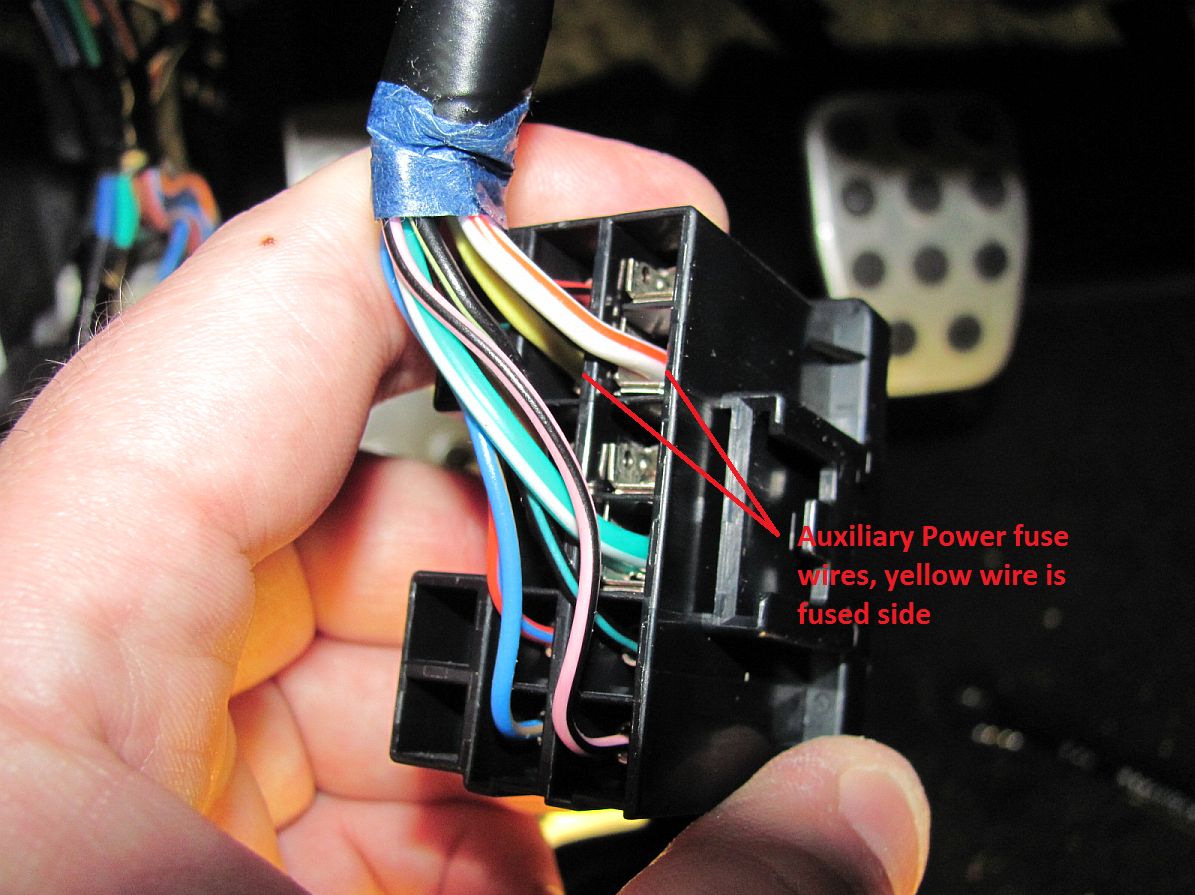
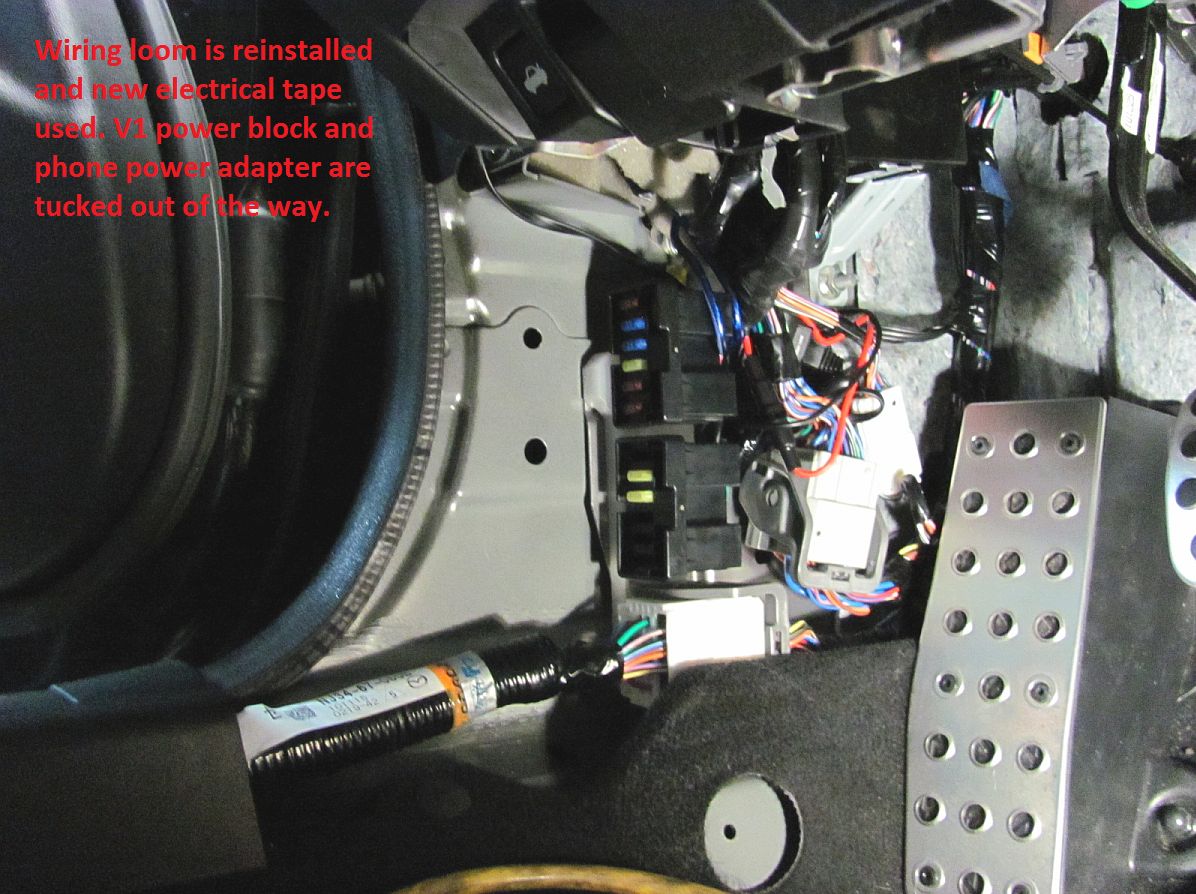
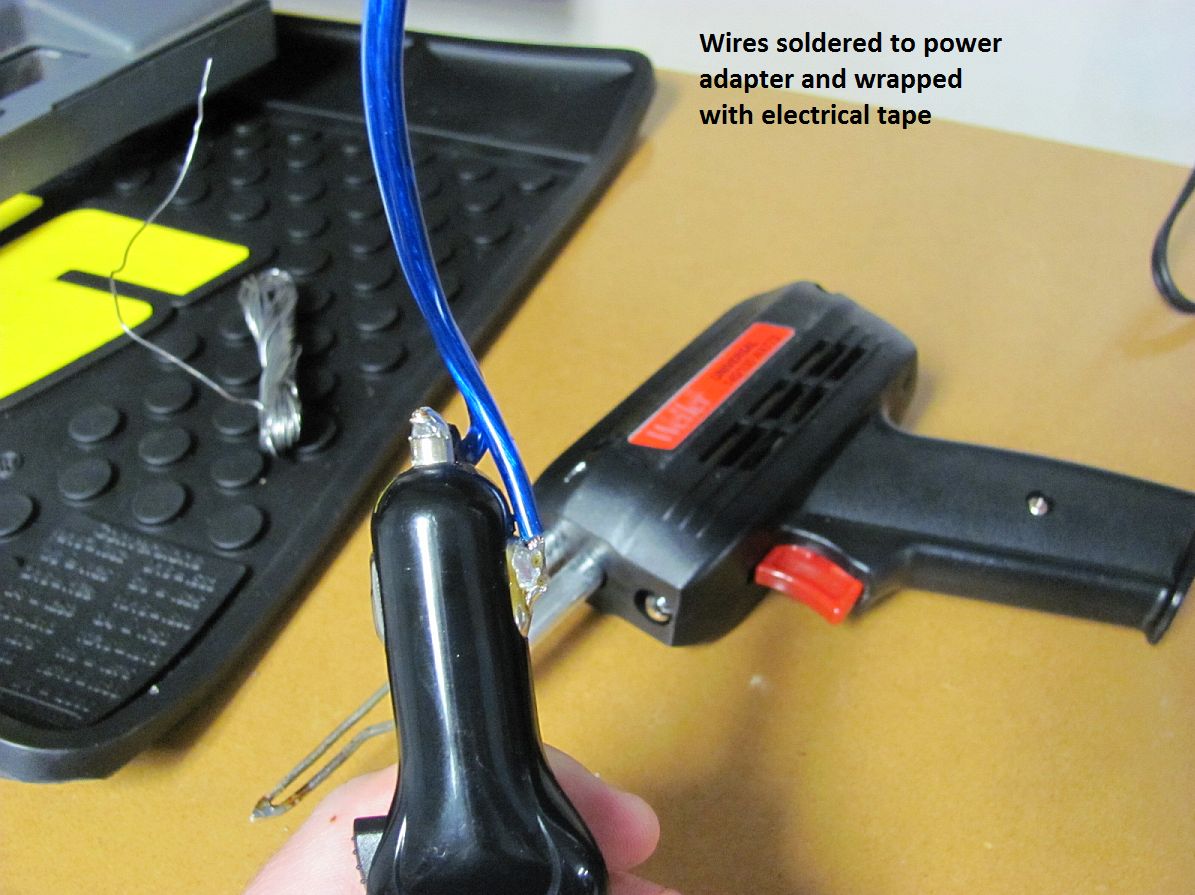
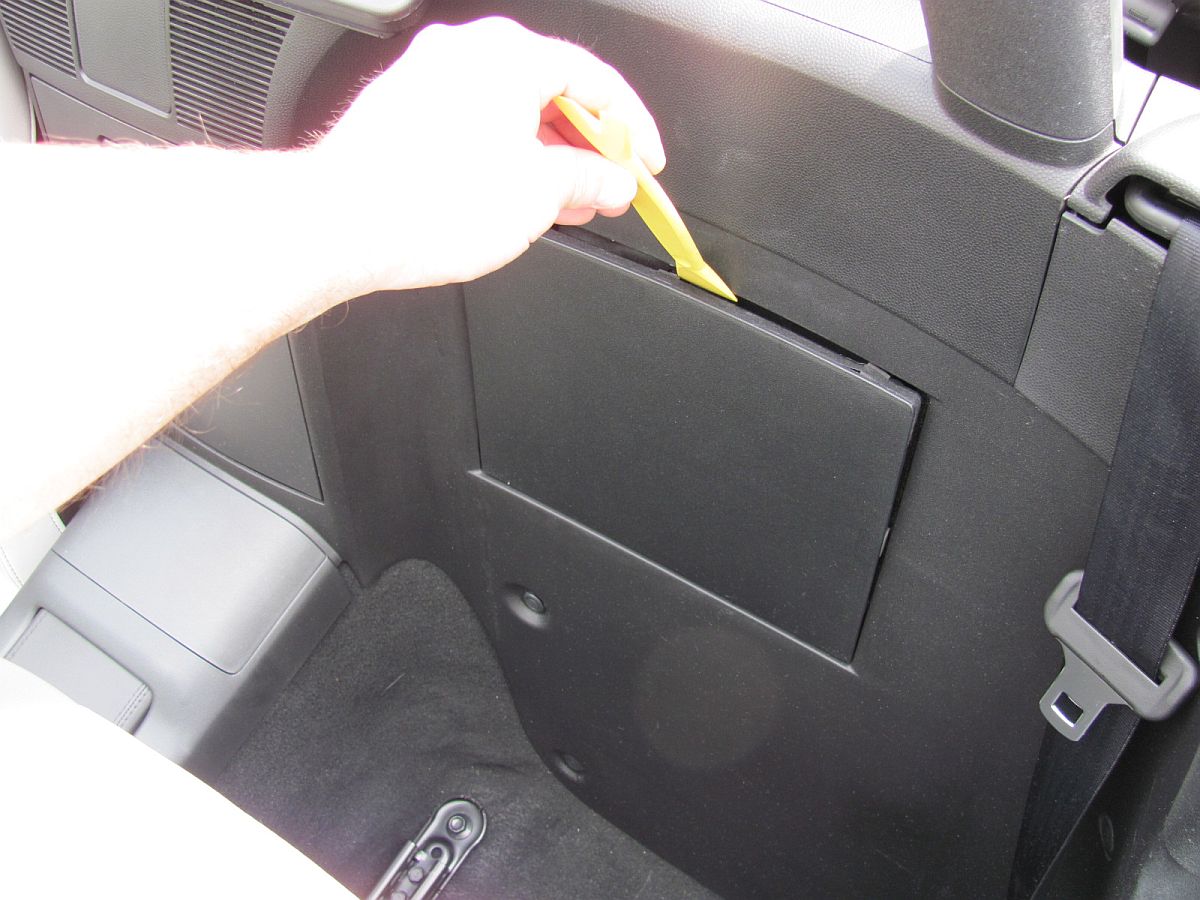
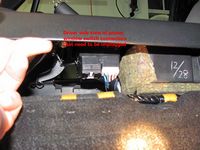
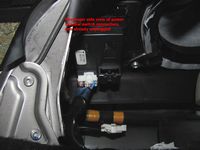
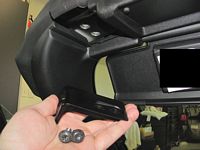
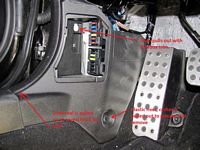
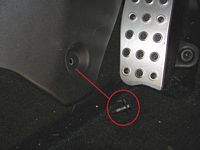
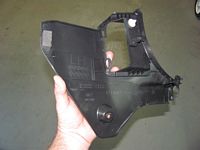
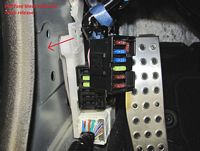
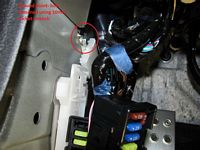
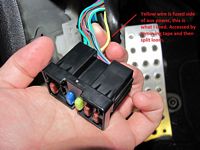
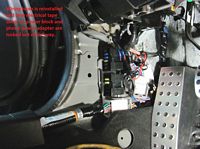
Next step to installing both of the above is to locate the power source, I chose the fusebox auxiliary power connection to tap into. There are various ways to tap into power and I will let you decide the way that works best for you: solder, crimps, taps (aka Scotch Locks), Littelfuse Add-A-Circuit, or Access-A-Fuse. The fusebox trim is removed by removing a plastic rivet and a hook under the door seal, it can then be unsnapped at top. Once the trim piece is removed the fuse blocks can be accessed, easy to do as they slide back and off the mounting post for access. I elected to use the fused side of the circuit which is the yellow wire. There is a grounding block conveniently located next to the fuse block, I used this bolt for my ground as well (10mm socket to loosen). Both the phone power adapter and V1 power adapter block were neatly tucked out of the way before reinstalling the fuse block trim.
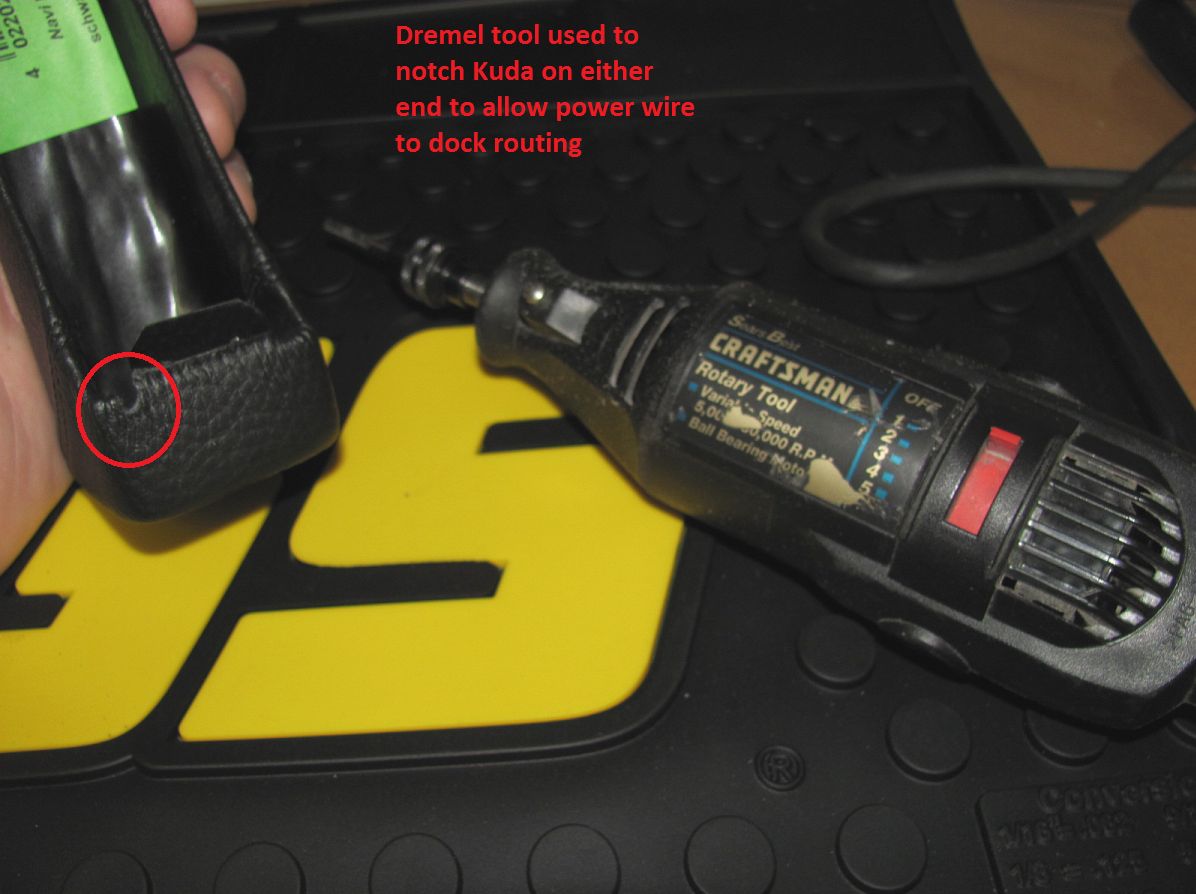
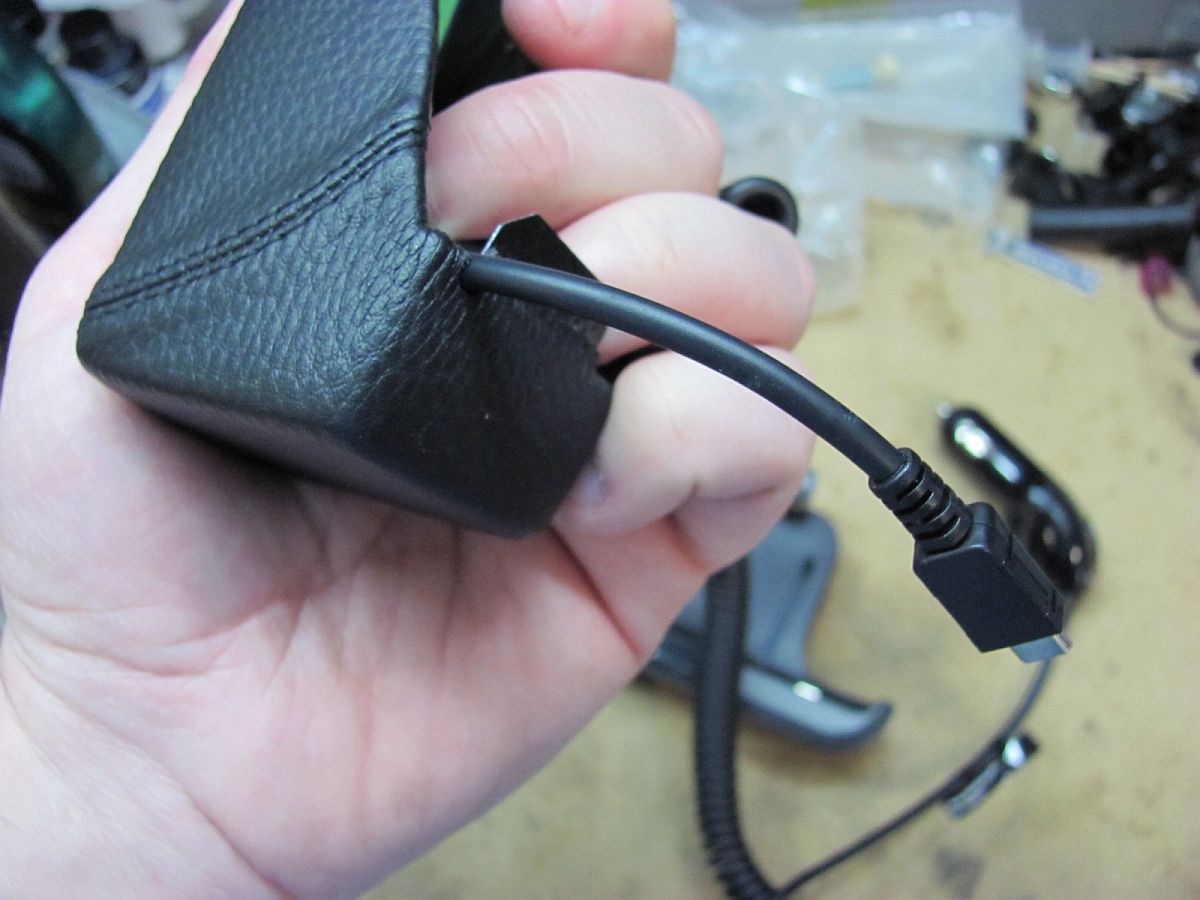
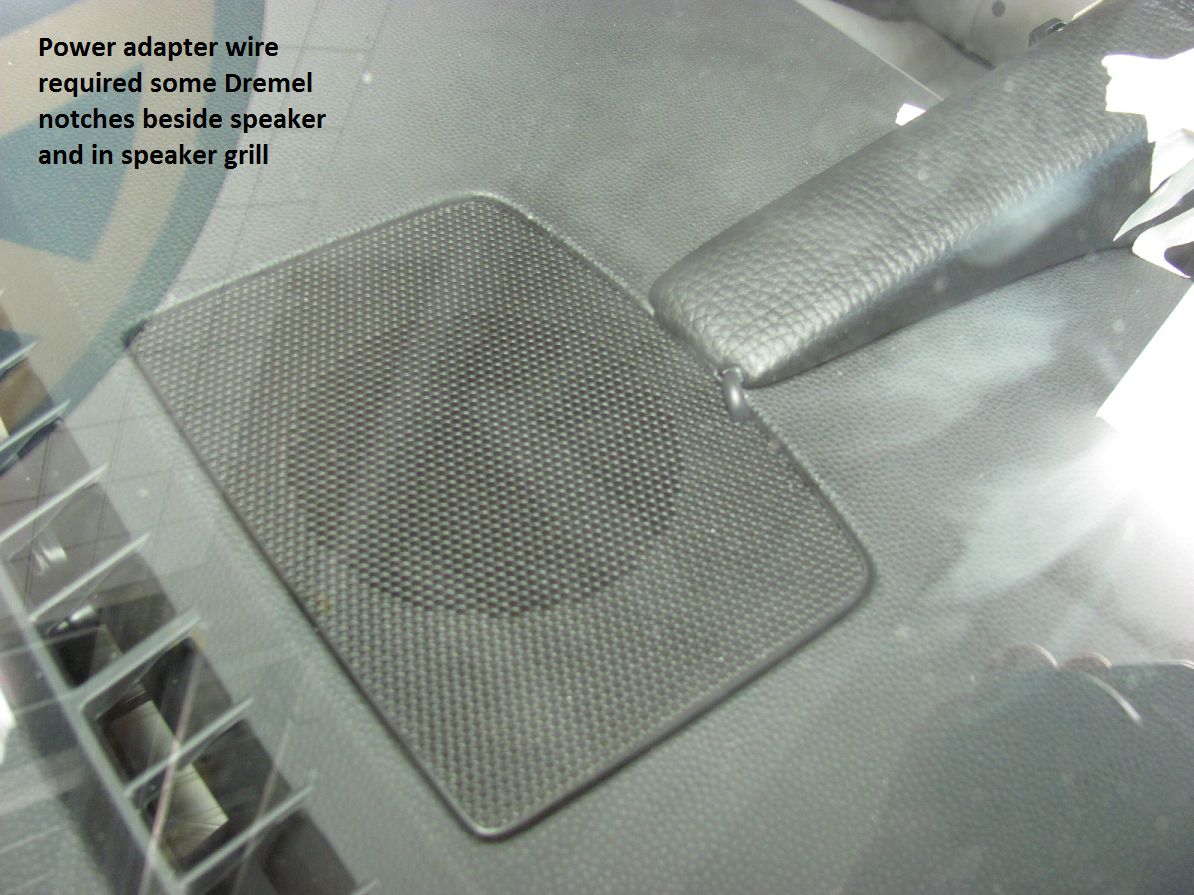
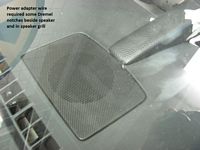
The Kuda installation instructions were used to install the Kuda mount, power adapter wire was run to the dock from the fusebox location and zip tied along the way to ensure no contact with moving parts. The Kuda base required a few notches with the Dremel tool as did the speaker mount and grill to accomodate the power adapter wiring. E6000 Industrial Adhesive was used to attach the dock to the Kuda mount, it is strong enough to provide a lasting bond but if another dock is desired at some point in the future a credit card can be used to separate the two pieces and remove the adhesive. The dock was lined up and taped into place until dry, cure time is overnight and optimally 48 hours. Now I have ready access to the phone and Google navigation


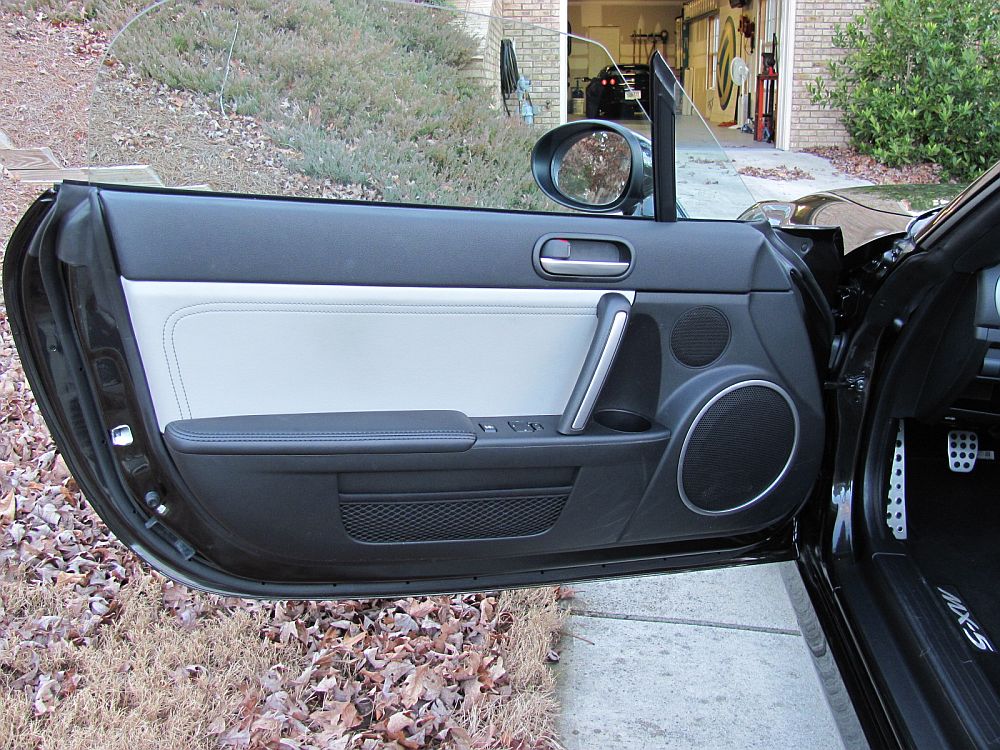
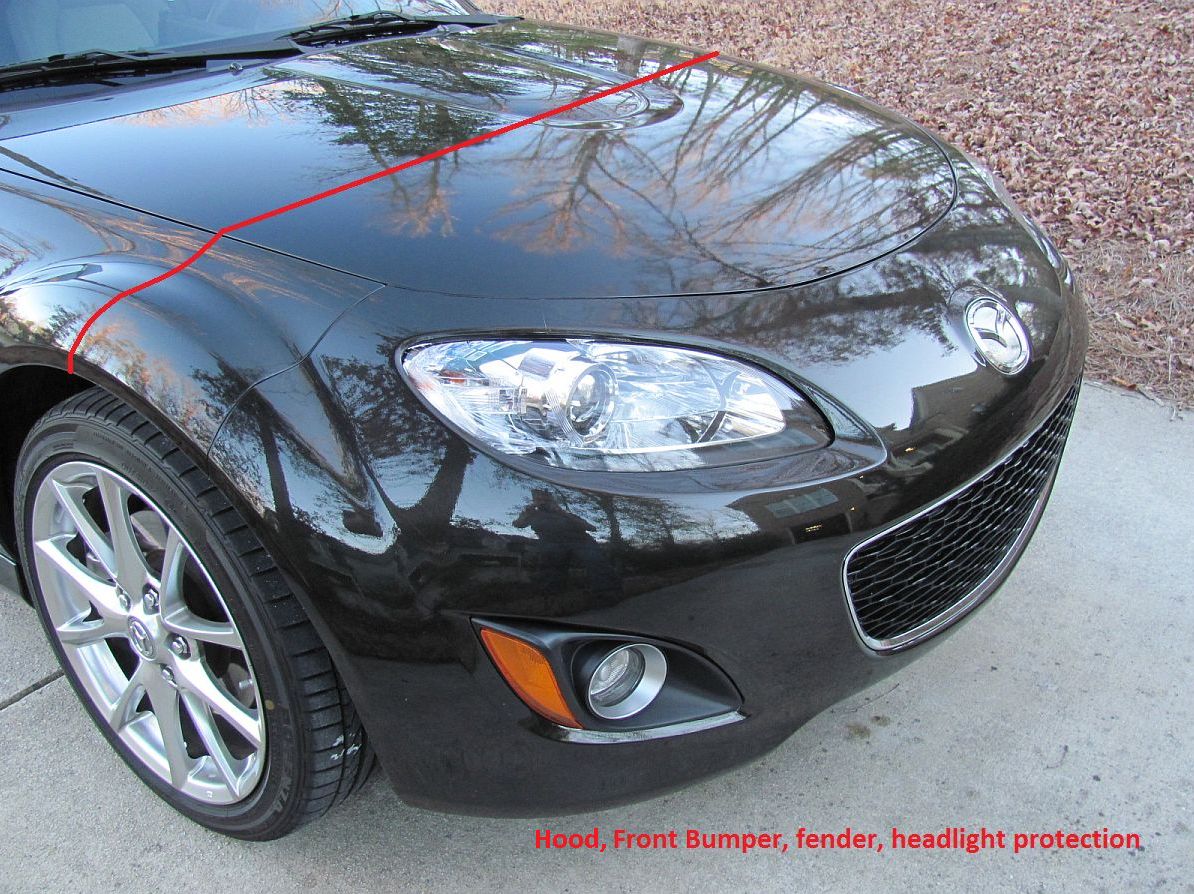
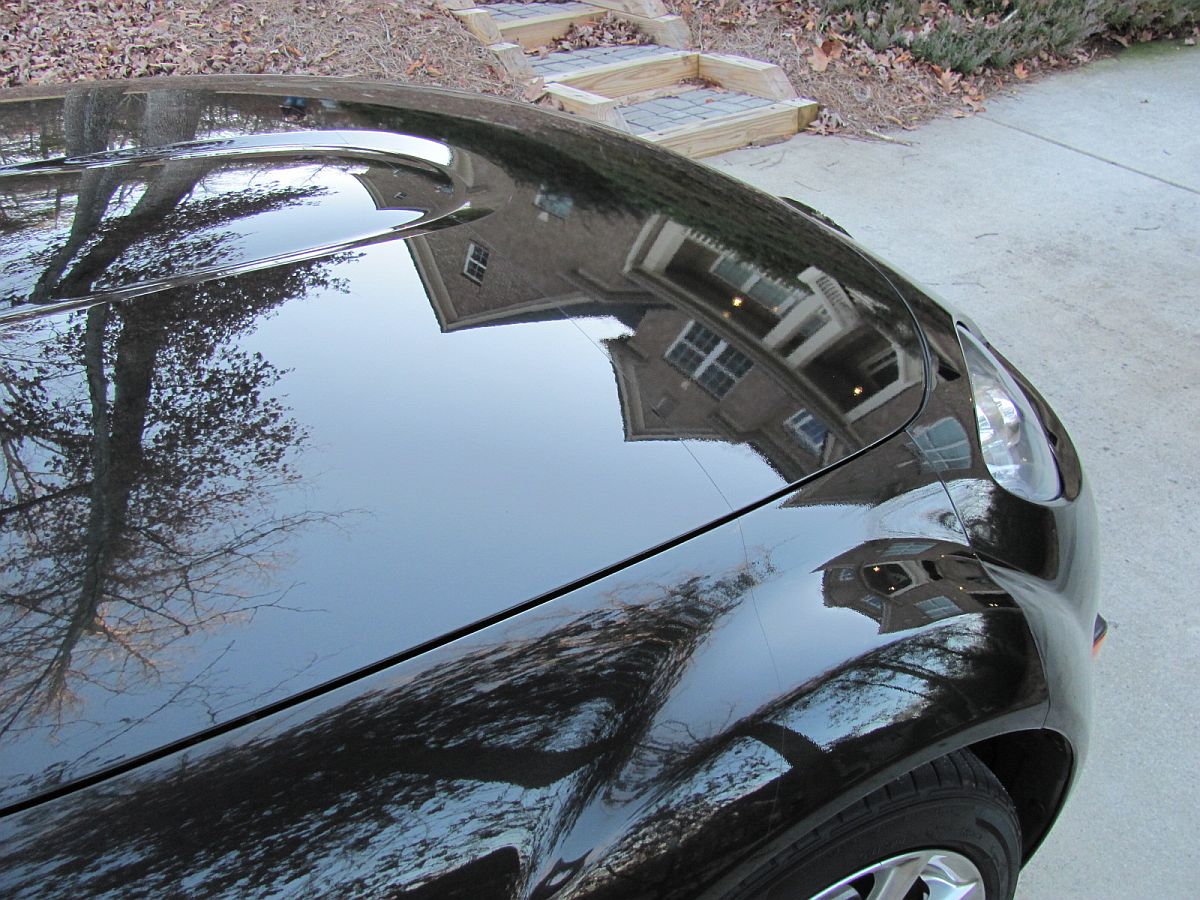
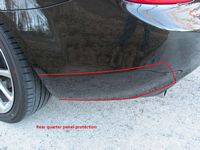
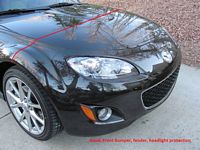
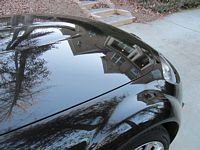
3M Crystalline 40 Window Tint (reviews HERE) and 3M Paint Protection Film installed by Sun and Shield Automotive Films. A one stop shop for all of the things I needed for the Miata, Mike was great explaining the options available and the service and value were outstanding
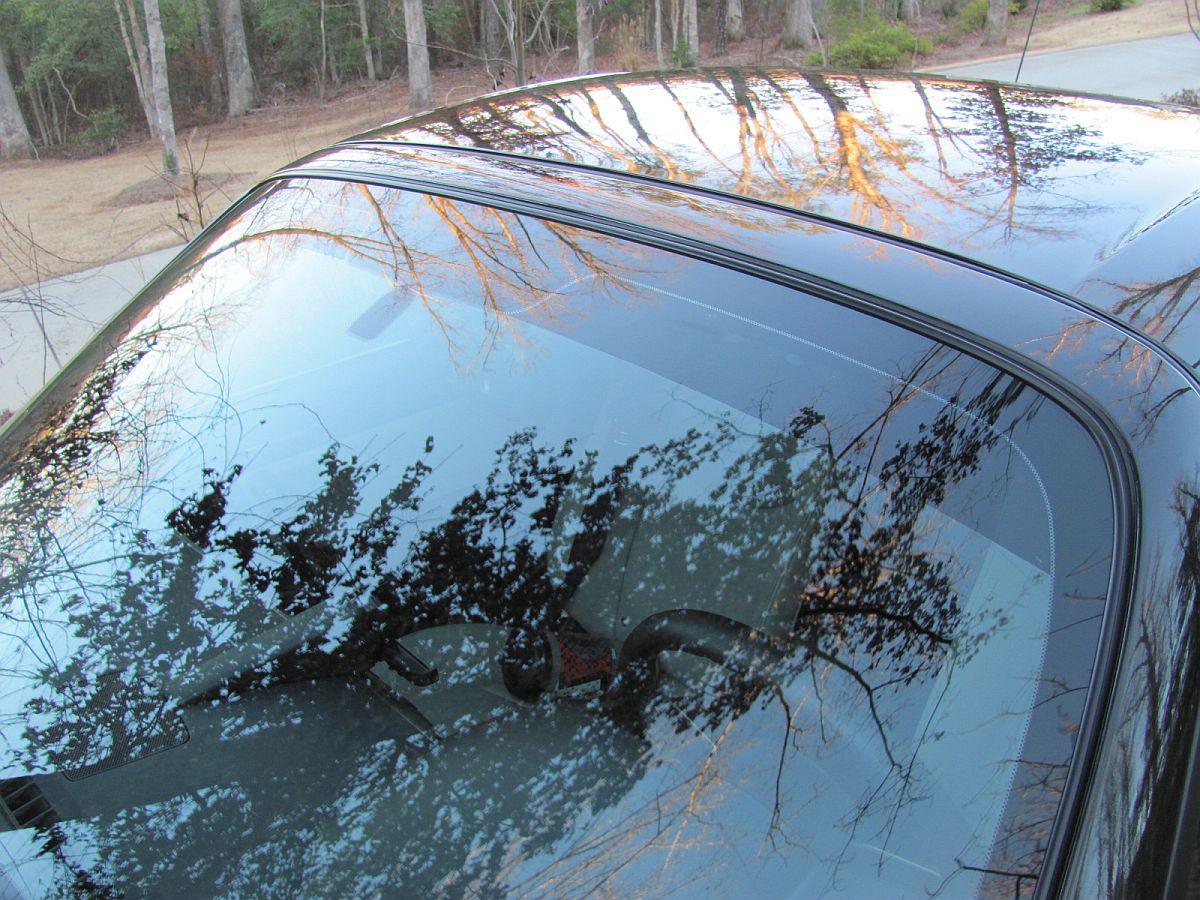
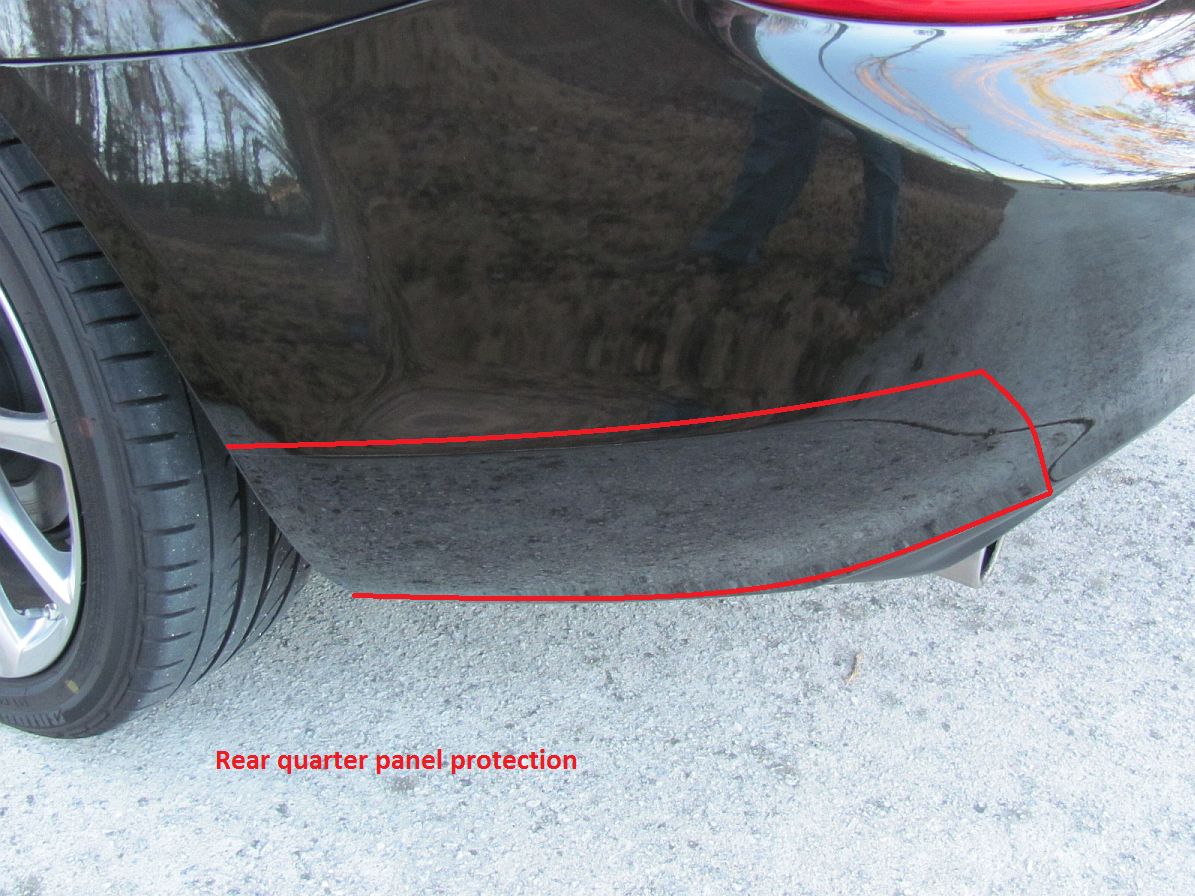
I got the bumper, headlights, half hood, half fender, mirrors, door handles, and rocker panels paint protected and then had the windows tinted including a small strip across the front window to conceal the radar detector suction cups. Looks great and should keep the paint in great shape and the car cool.


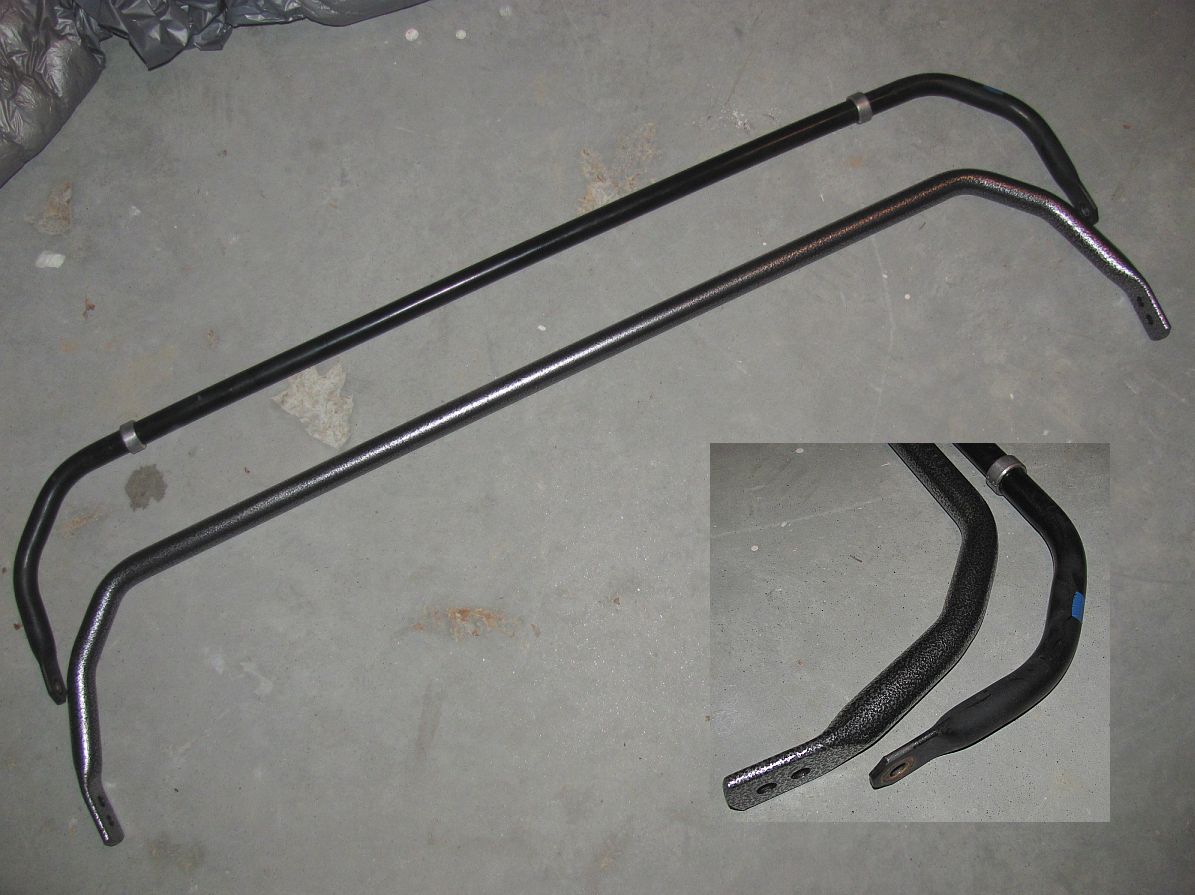
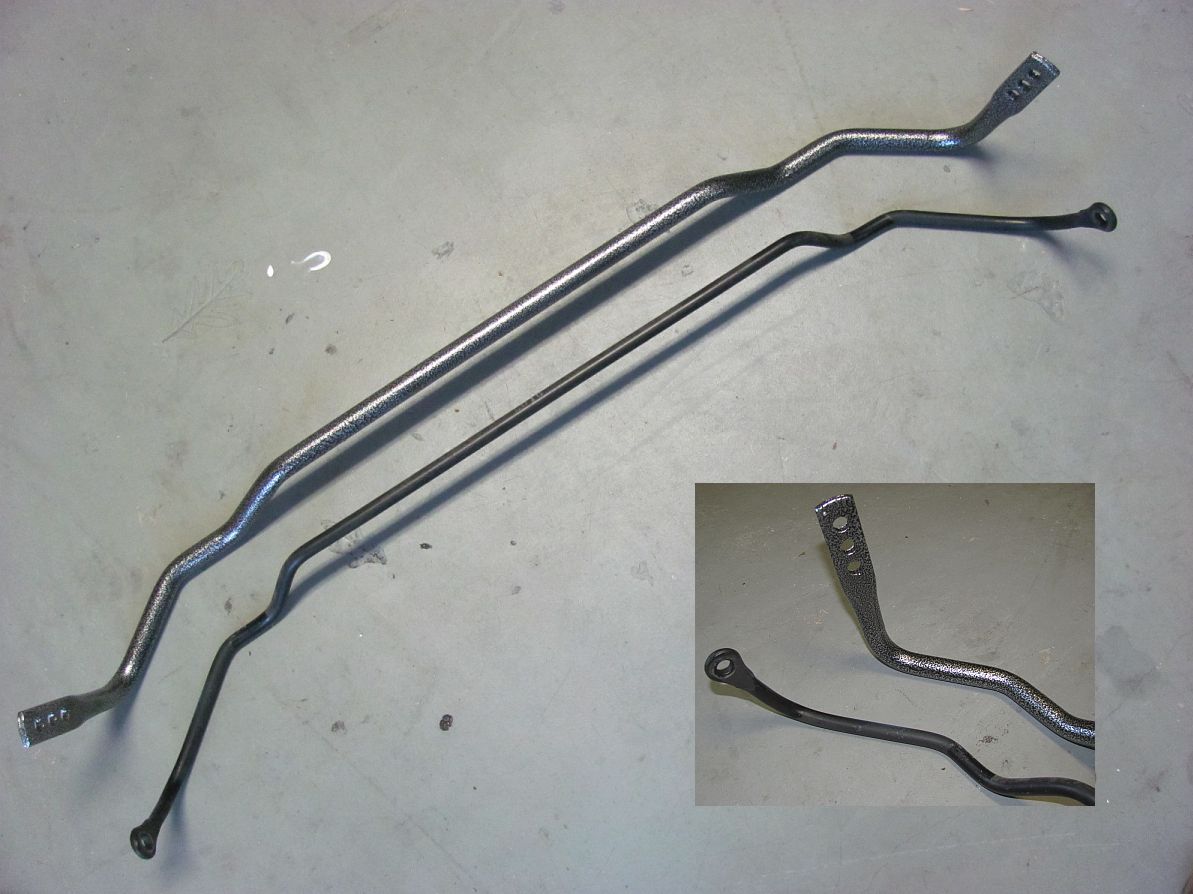
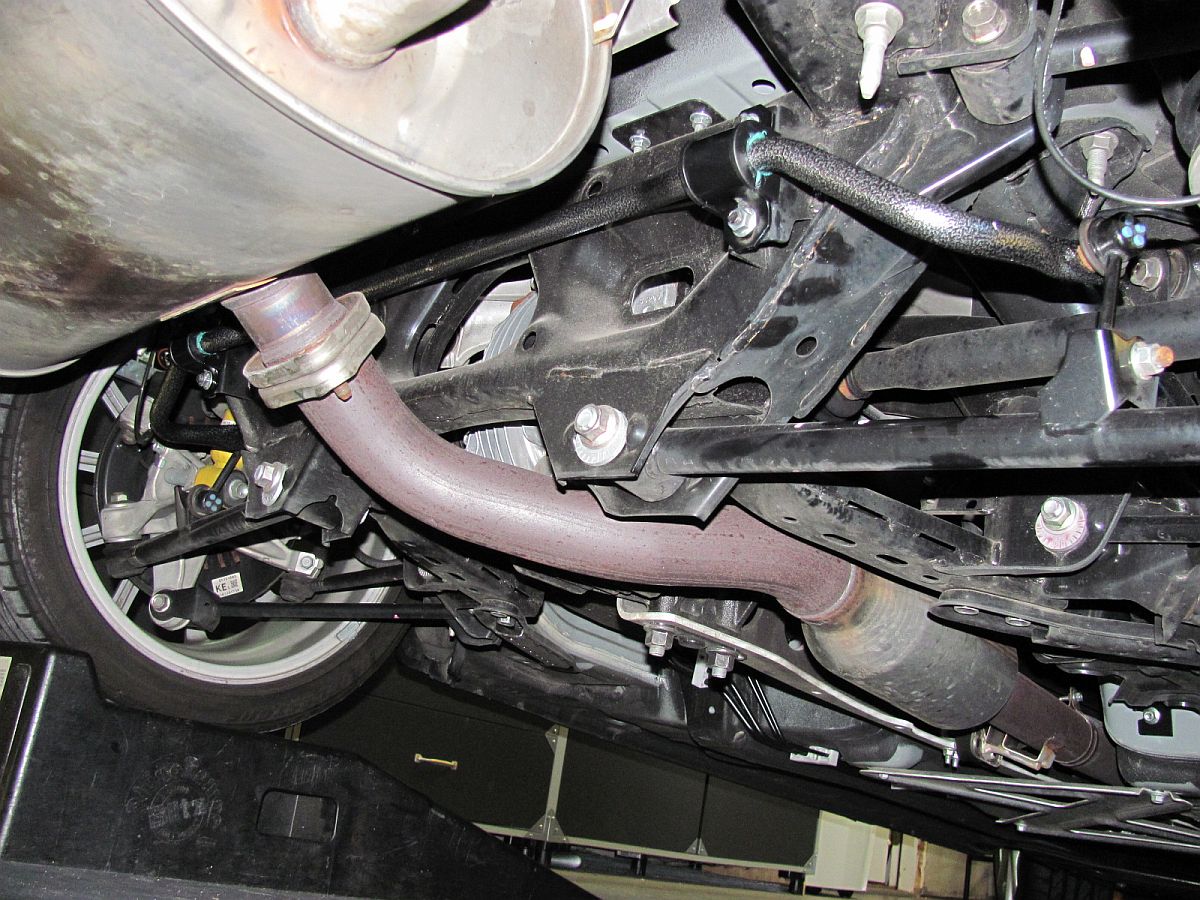
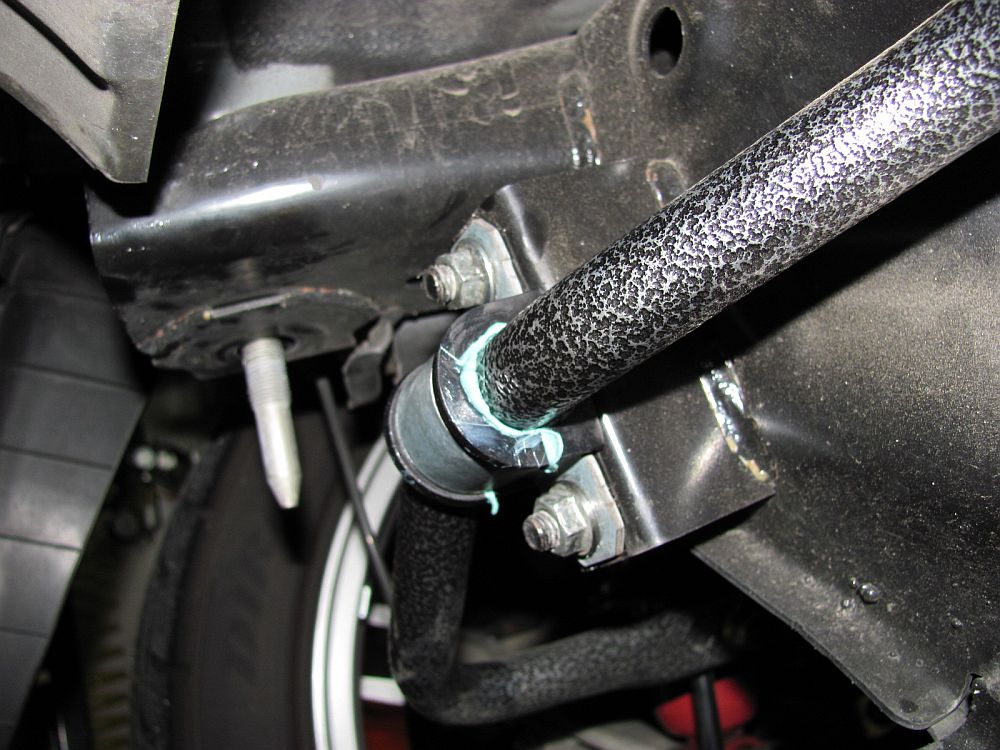
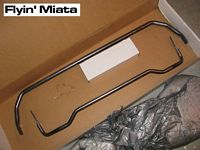
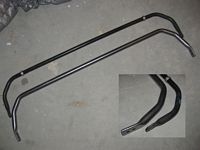
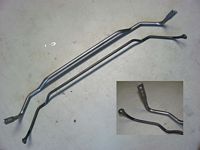
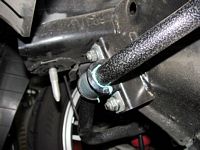
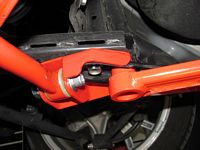
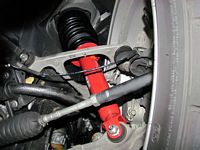
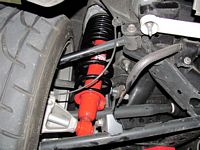
Sway bars from Flyin' Miata installed. These bars are larger and adjustable. I used the Flyin' Miata installation instructions in part, the Cobalt installation instructions for their idea of not removing anything other than the wheels/sensor brackets to R&R the front bar, and the MazdaSpeed installation instructions for torque specs. The front bar R&R was quick (maybe 30 minutes), I did find popping the hood and reaching in from the top to help guide the sway bar around the radiator fan during installation made it quicker- and a helper makes this job way easier.
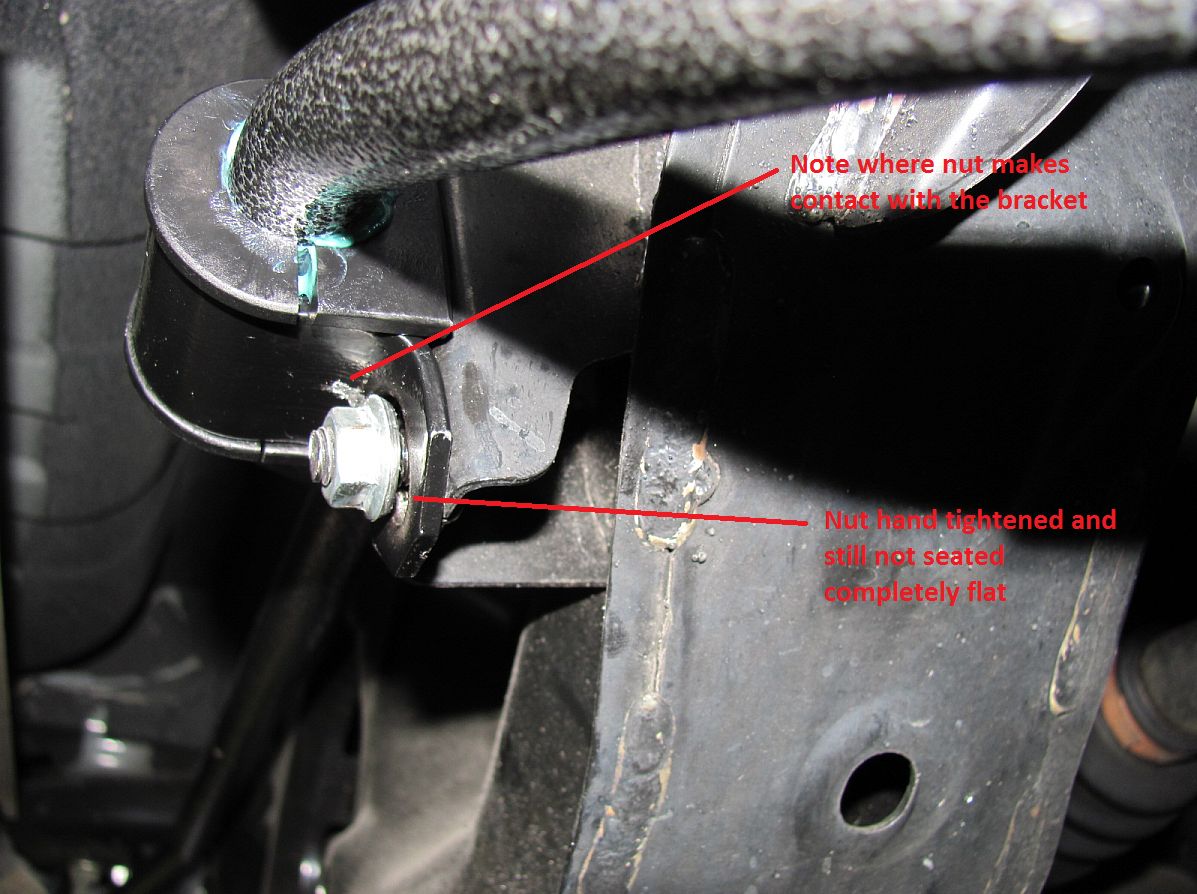
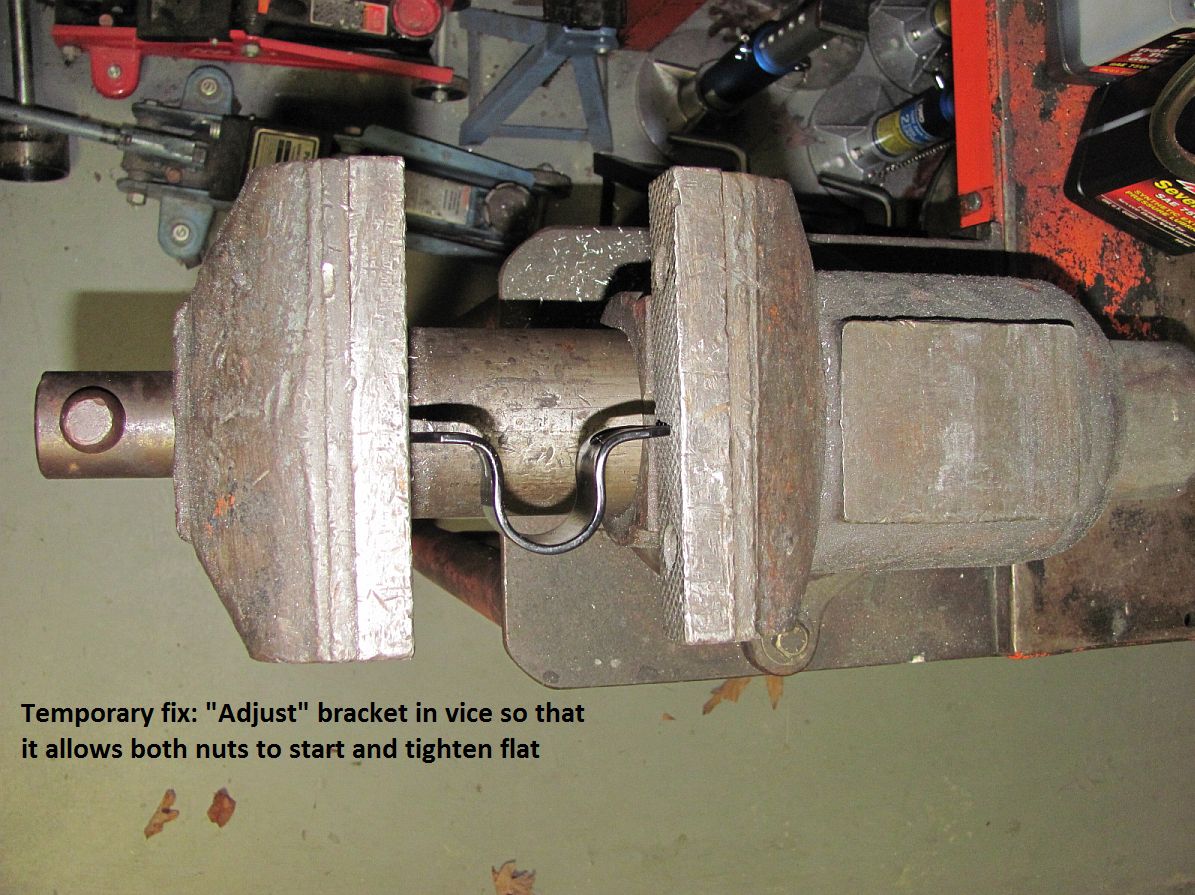
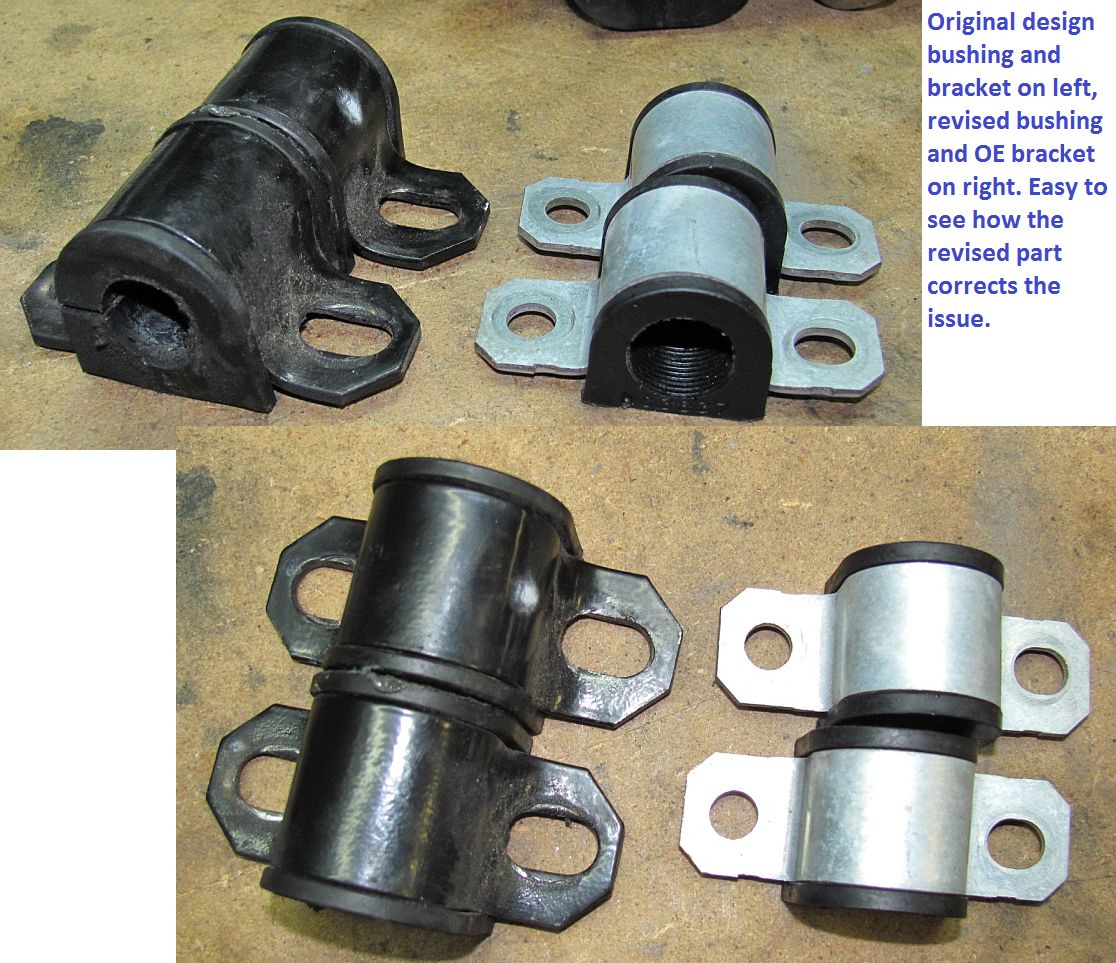
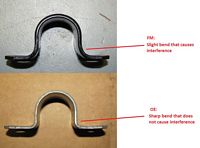
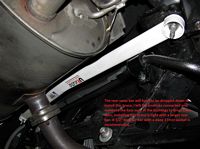
The rear bar would have been even faster but the brackets for the sway bar bushings did not work well with the factory nuts, I ended up using a vice to slightly "adjust" the brackets so that I could tighten the nuts without a lot of interference with the brackets. You can see in the pics where the nut makes contact with the bracket and does not allow it to seat flat when tightened in addition to preventing it from tightening all the way. I forwarded these pics to FM so they can review and see if they may have a QC issue.
Sway bars are a must-do first mod, the car is more planted and a lot flatter in corners. Eventually I will get the springs and dampers from FM to complete the Stage 2 suspension but sway bars are a great start if you don't want to make the larger investment in the complete package at first. A first for me out of all of the companies I have purchased aftermarket from, FM called and left a message before my installation began to see if I needed any assistance or had any questions as an uninitiated post sale follow-up.
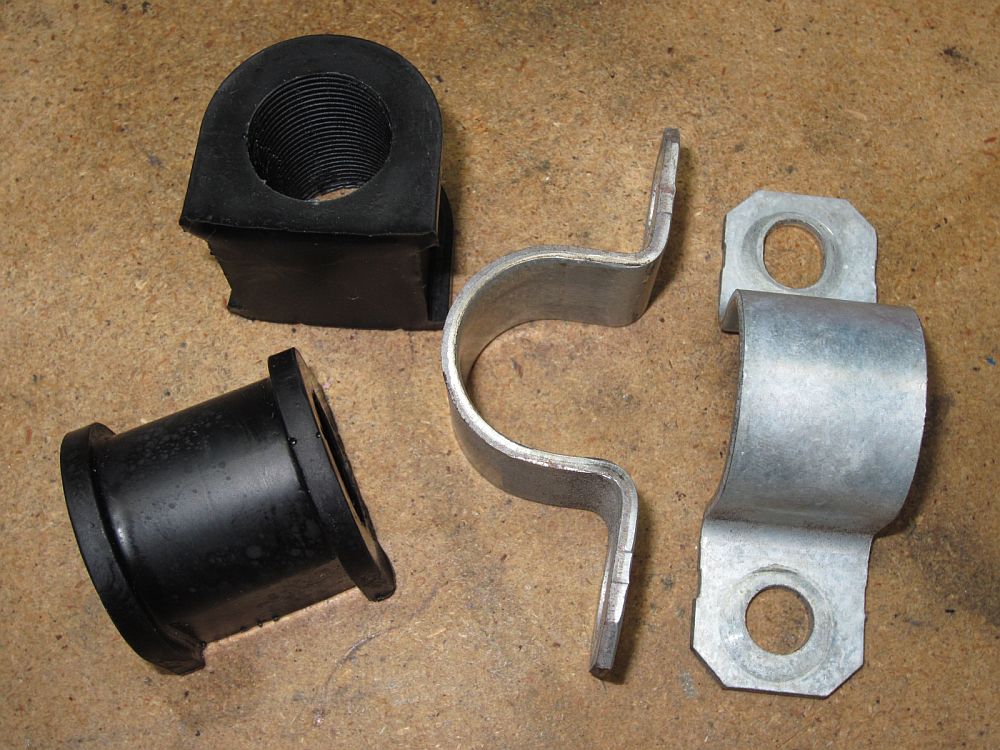
[UPDATE] The fix is in for the rear bushing issue- new bushings that work with the OE brackets.
Issue-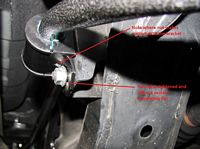
Resolved-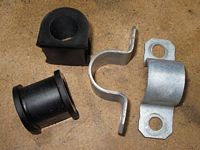


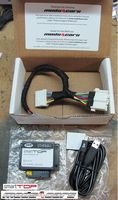
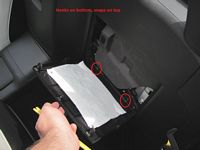
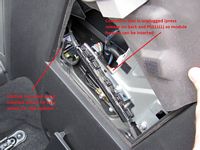
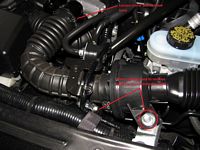
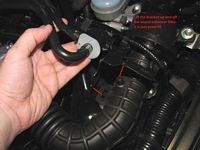
Mods4Cars smartTOP module (P/N STHFMA1) from MotiveMods) installed. This allows for several options over the factory PRHT switch only usable when stopped and in neutral- mainly one touch operation of open/close as well as being able to open/close while moving (at reasonable speeds and on smooth pavement of course) as seen HERE.
Mods4Cars provides USB updates using M4 Connect and the module is easy to install- plug and play installation that is easily reversed with no cut wires. Installation manual is HERE and Operation and Programming manual is HERE.
Manuals archived as pdfs: Installation or Operation and Programming.
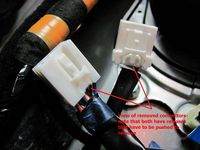
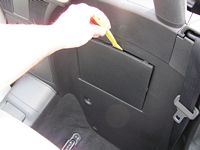
Some good insight on installation at Miata.net HERE, archived HERE. Mazda electrical plugs are the hardest to release of any car I have ever owned, you have to press HARD and PULL. Looking at the wiring harness that will be inserted for the module, you will see the same plug you are trying to remove and can get an idea how the release works since you really cannot see when installing from the front. Installation was done in less than 15 minutes and works perfectly.
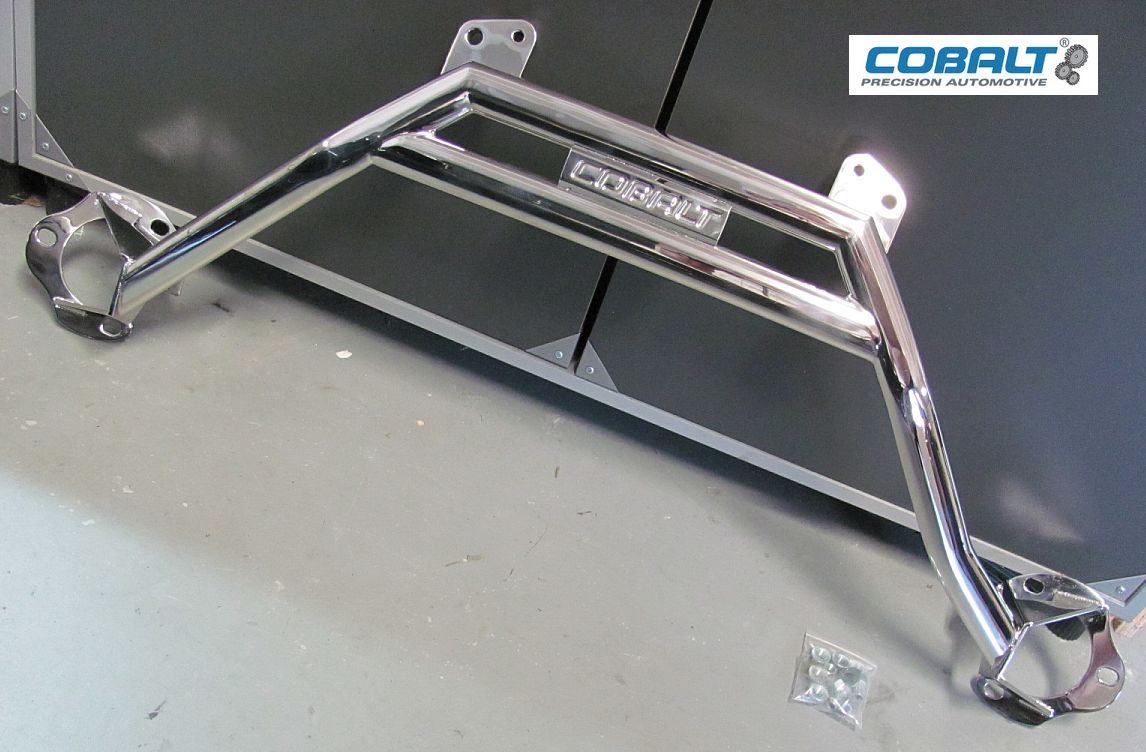
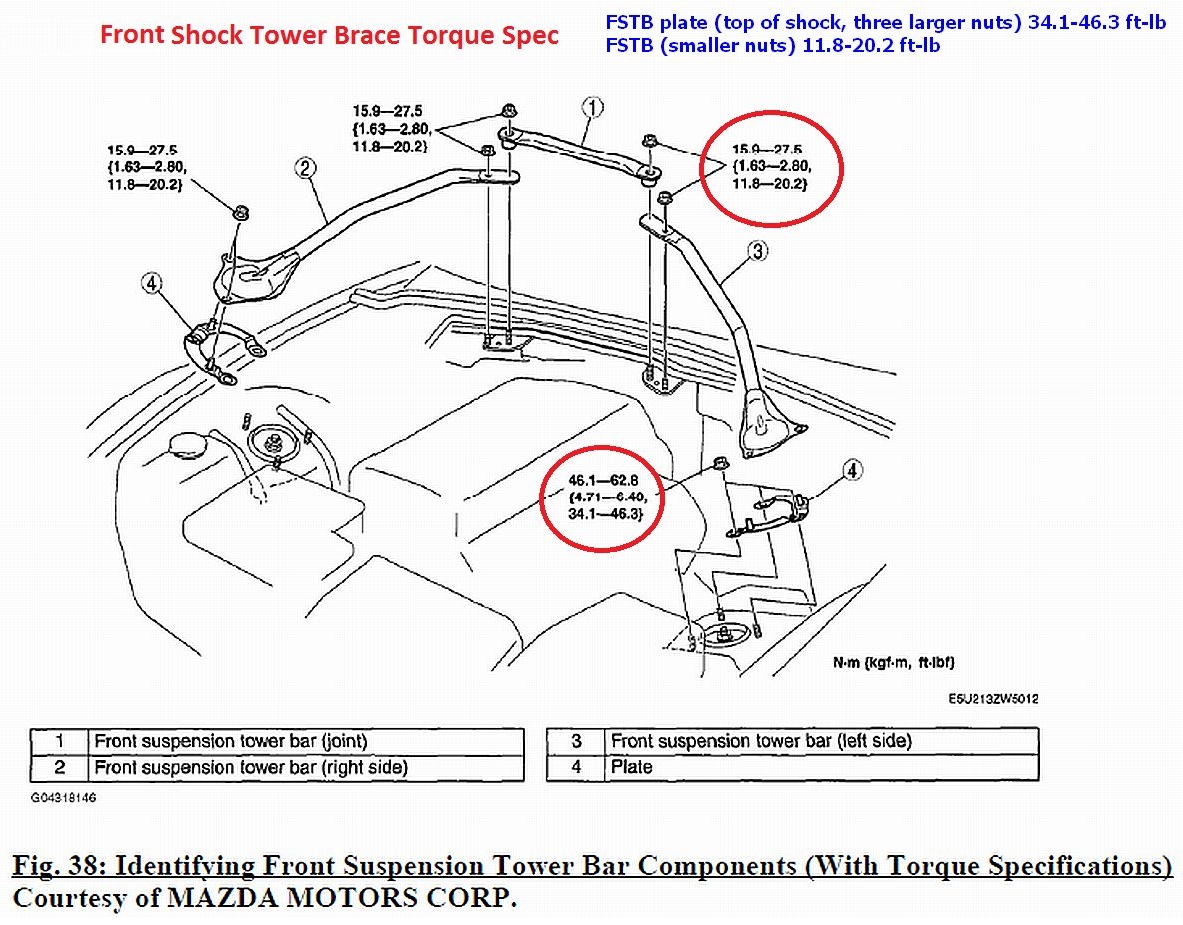
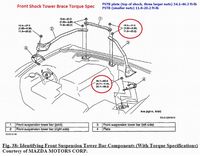
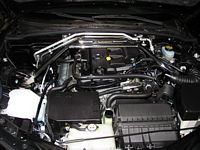
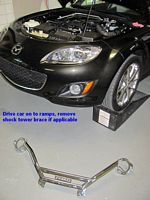
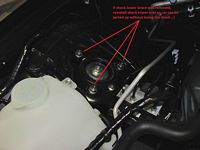
Cobalt Front Shock Tower Brace (P/N 904-675) from Goodwin Racing installed. Based on the solid design, this should be better than the OE brace. Installation instructions HERE. Some discussion on the front shock tower brace can be found HERE.
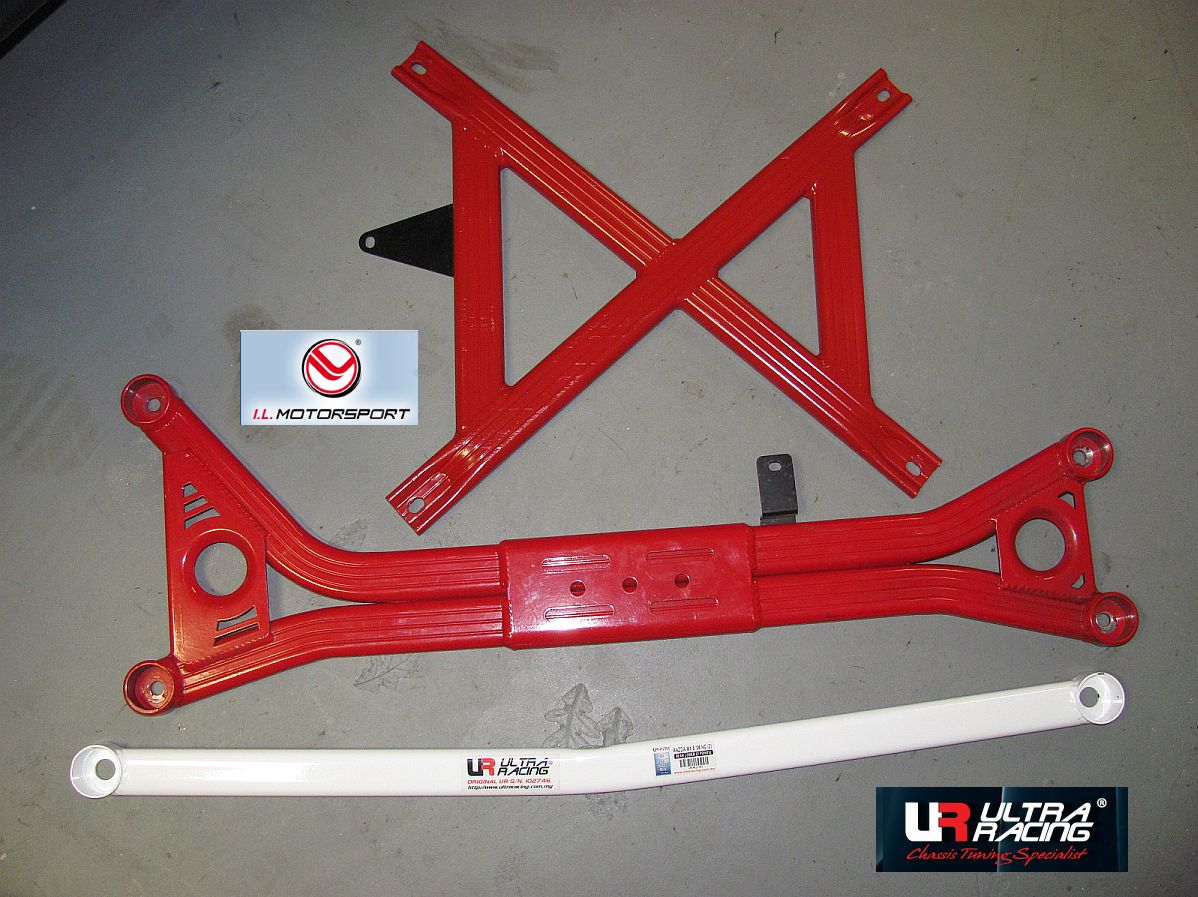
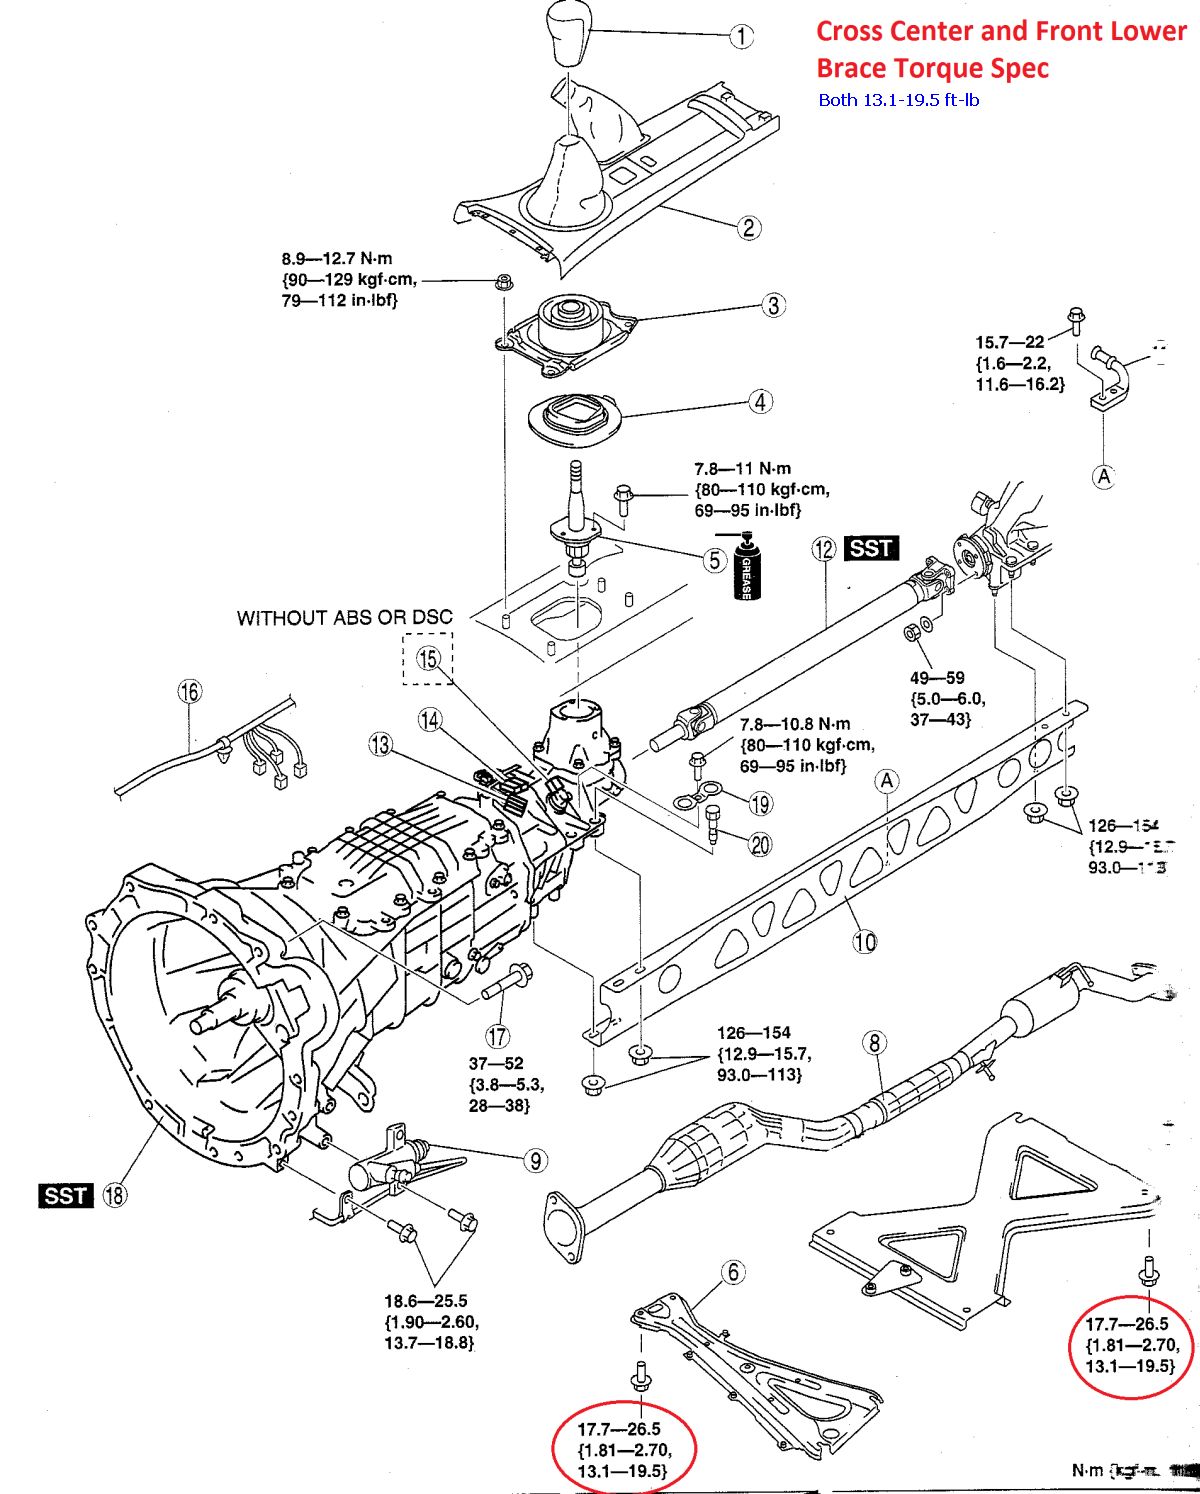
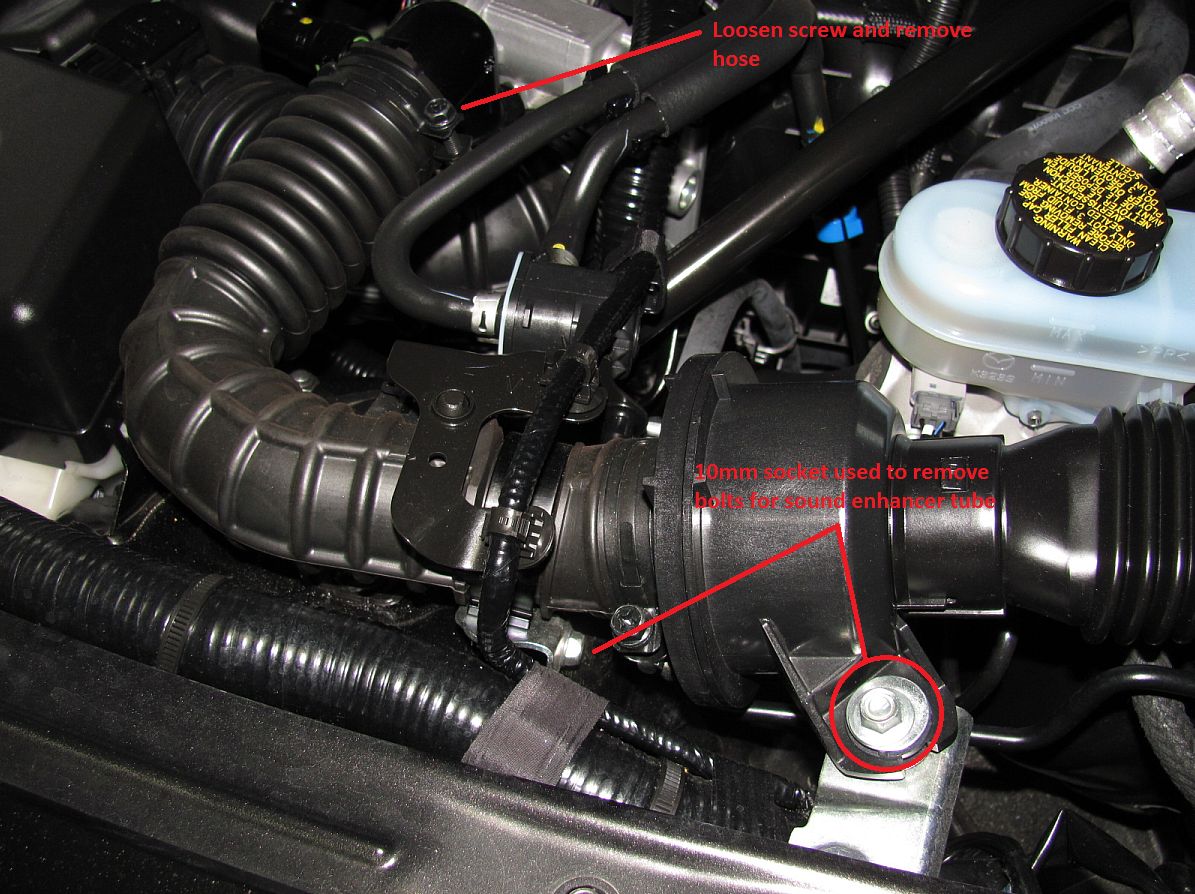
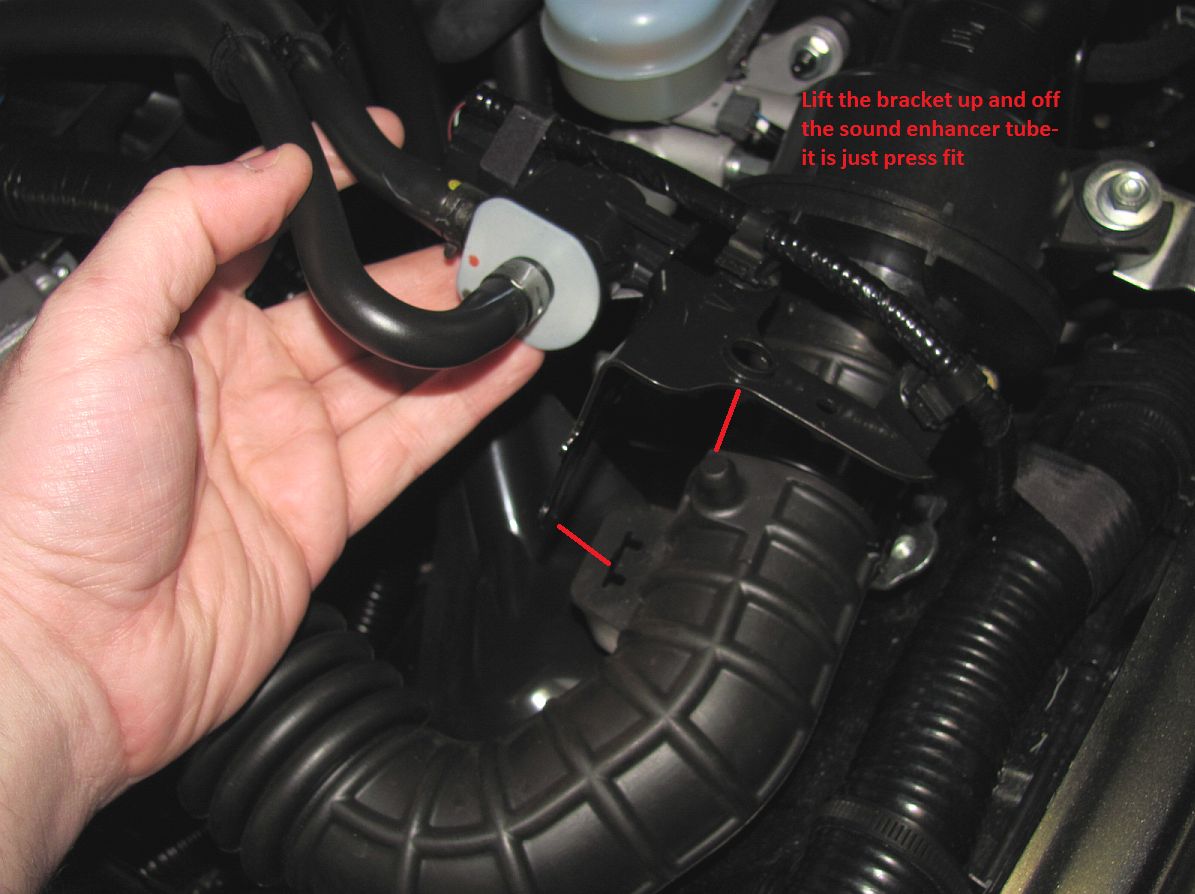
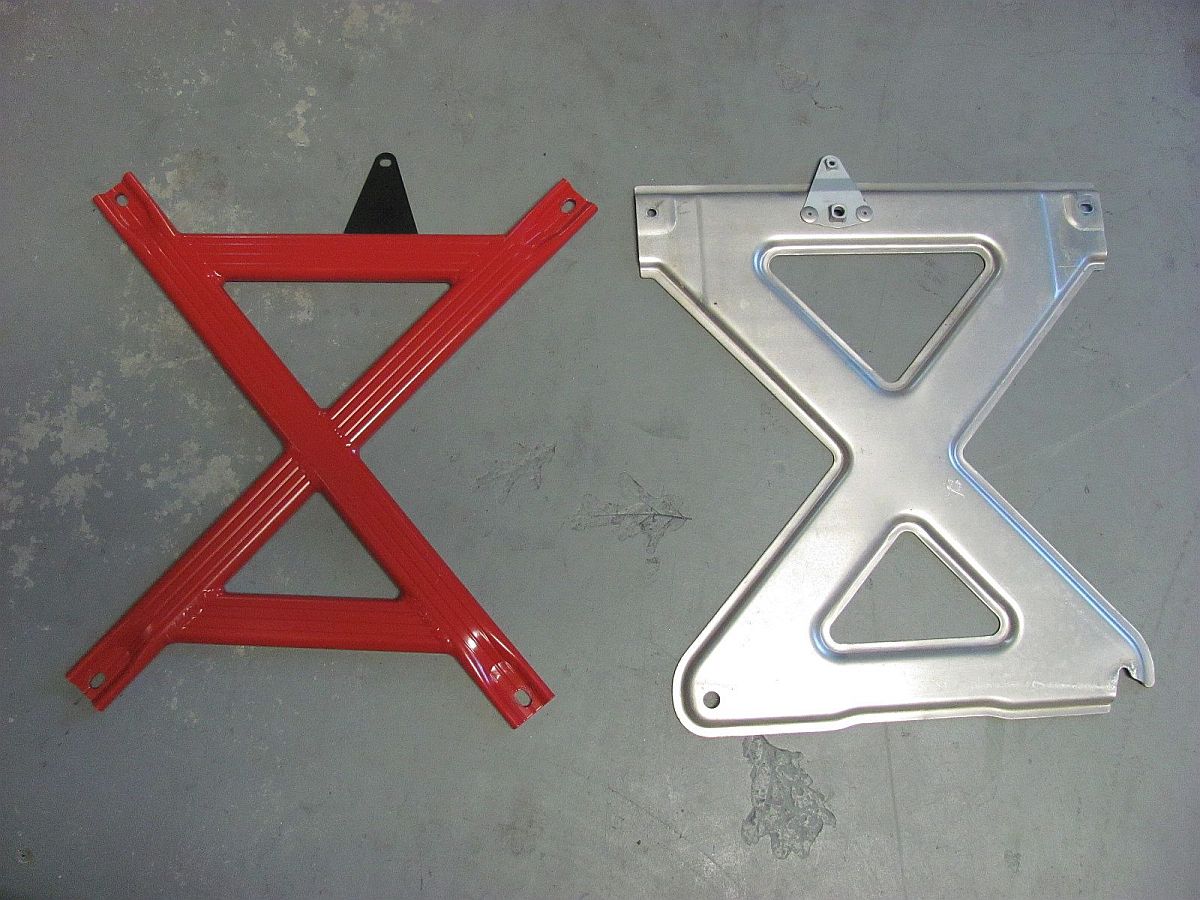
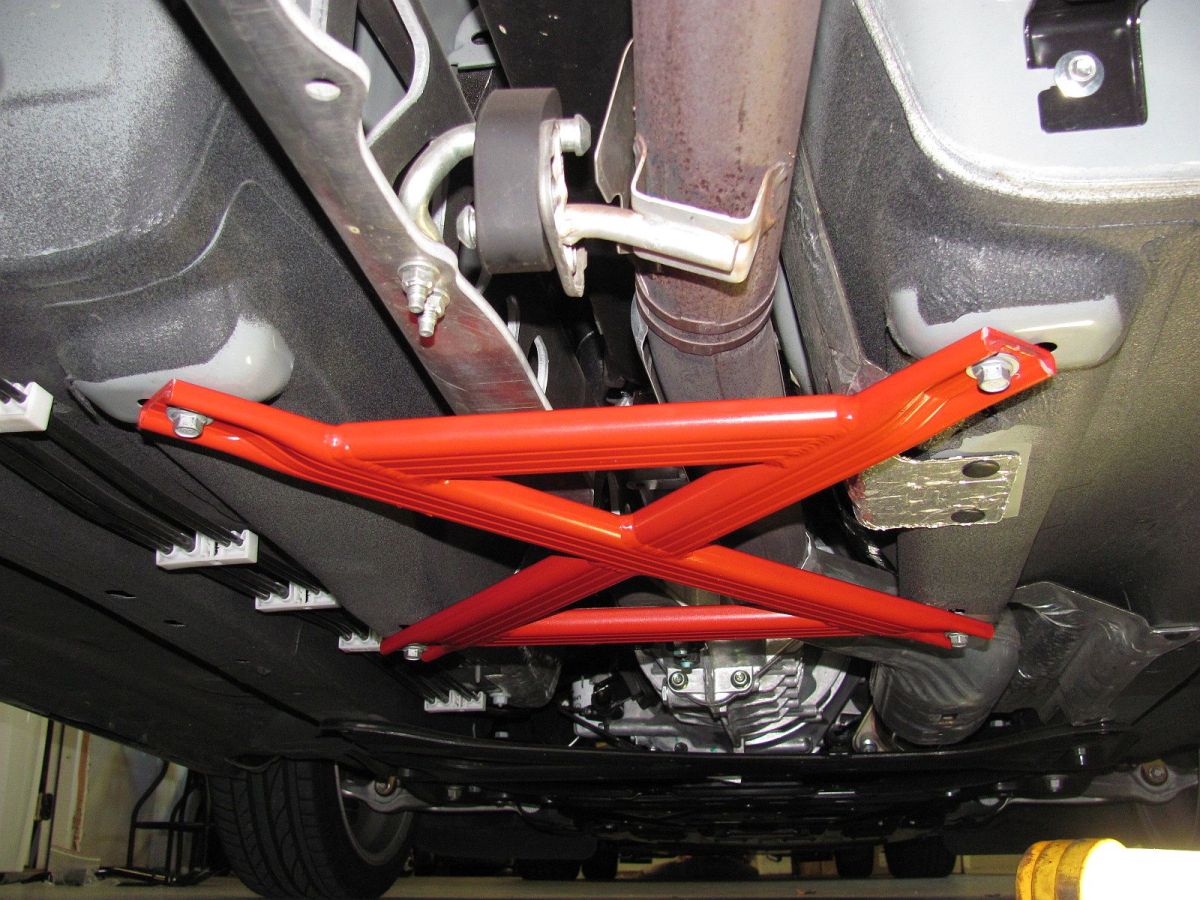
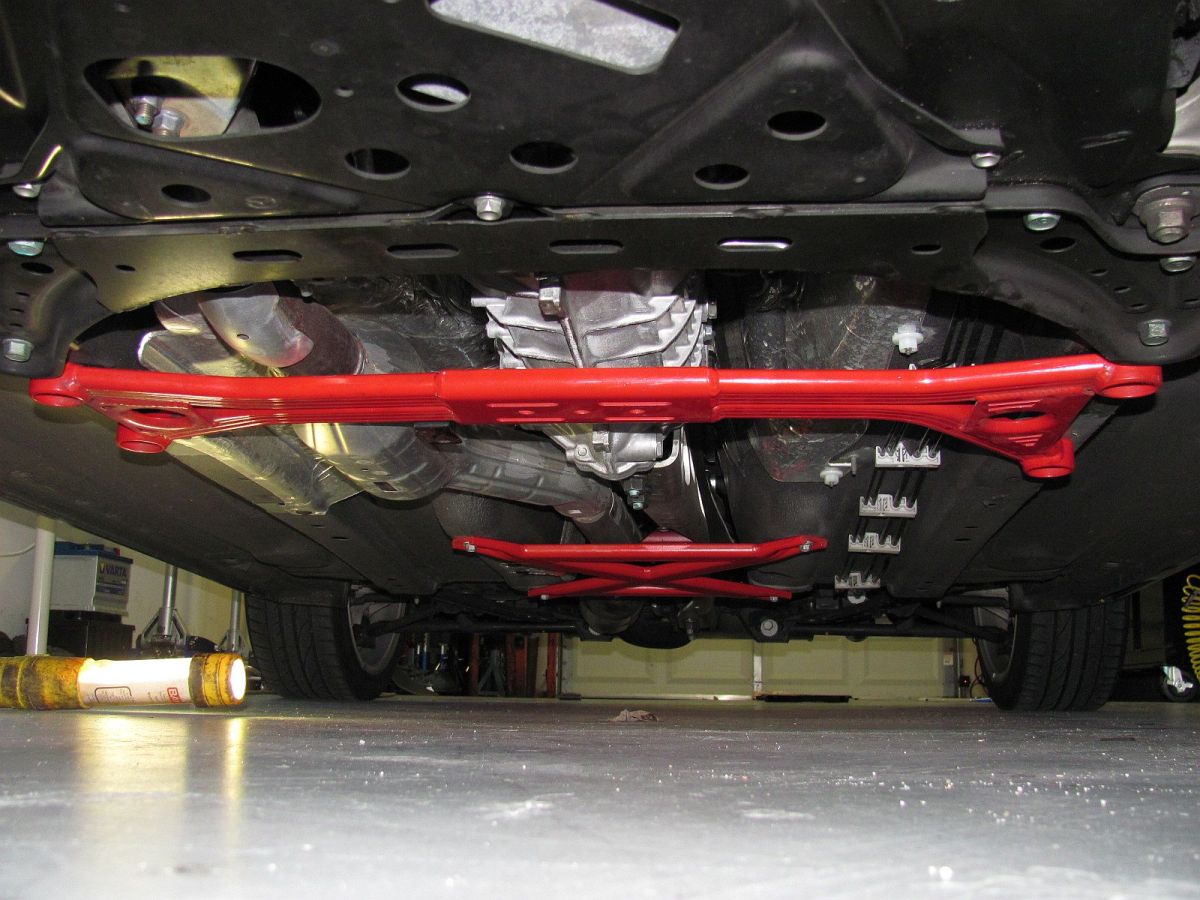
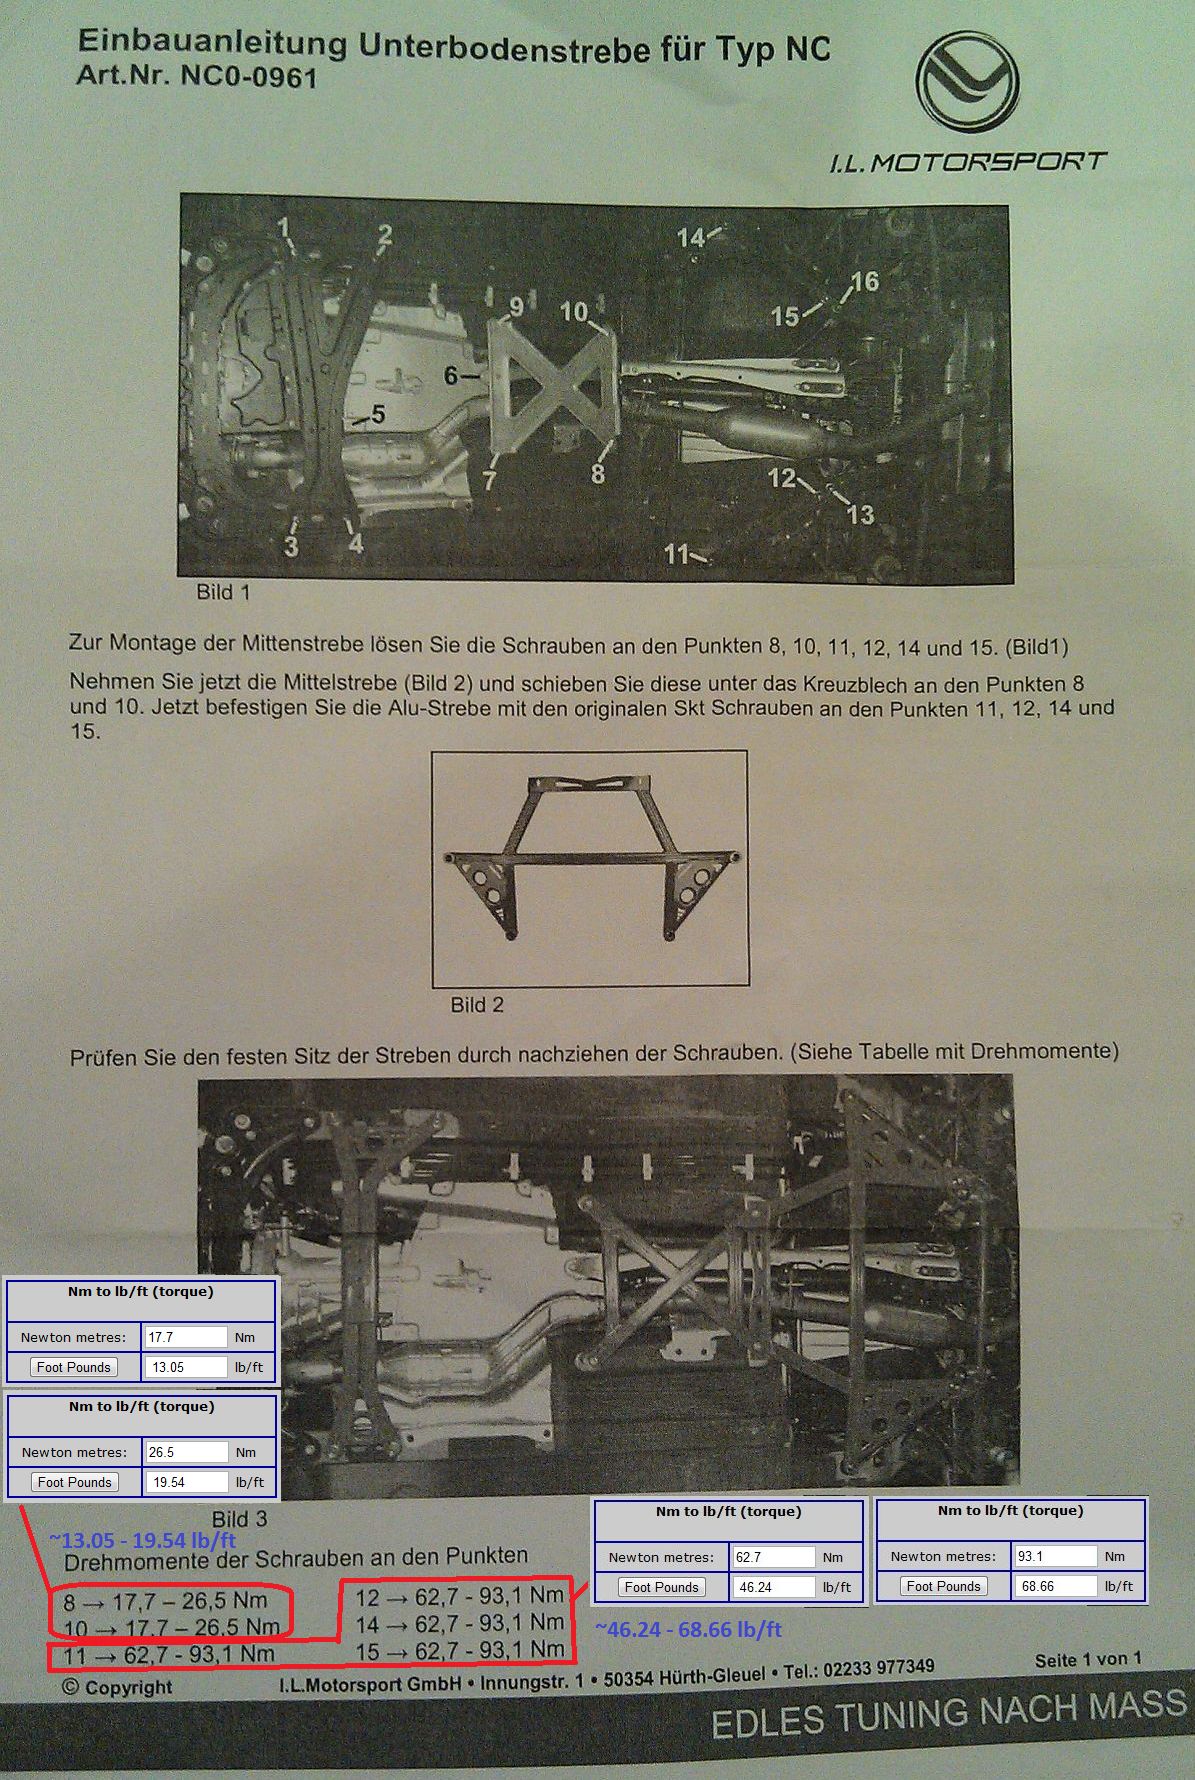
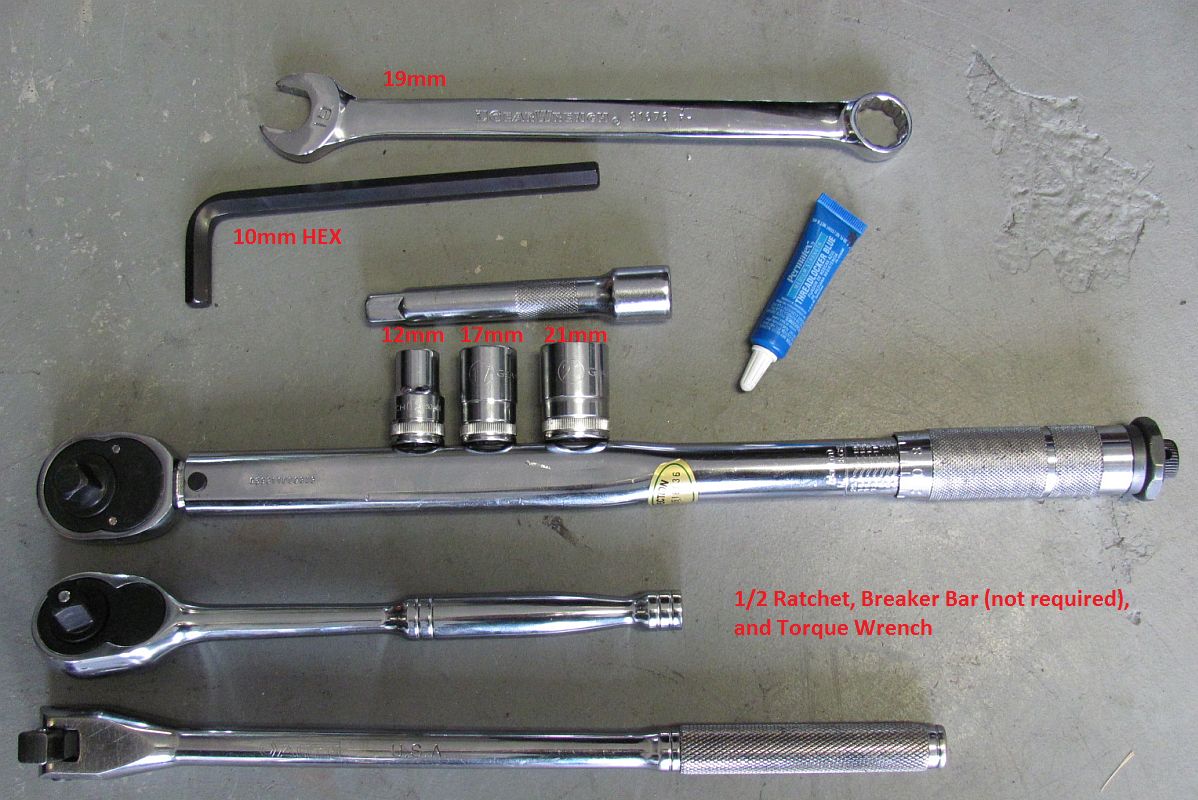
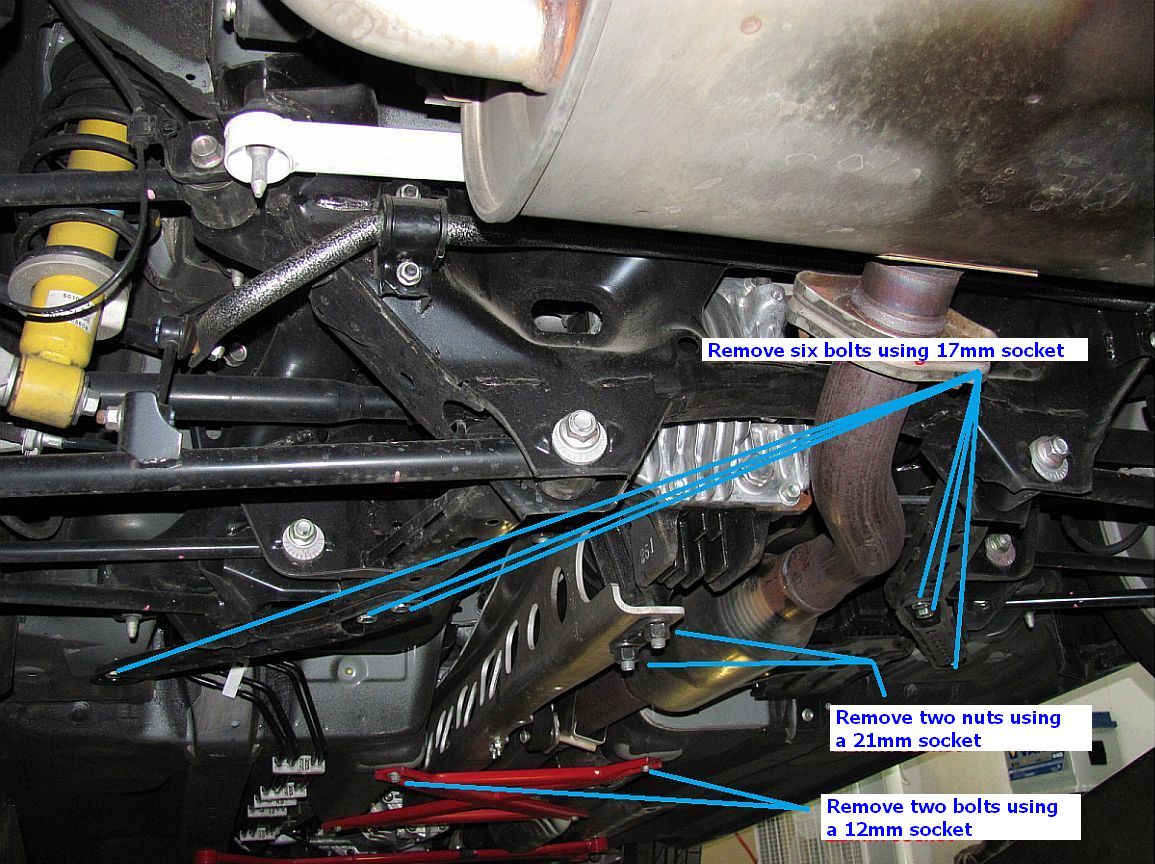
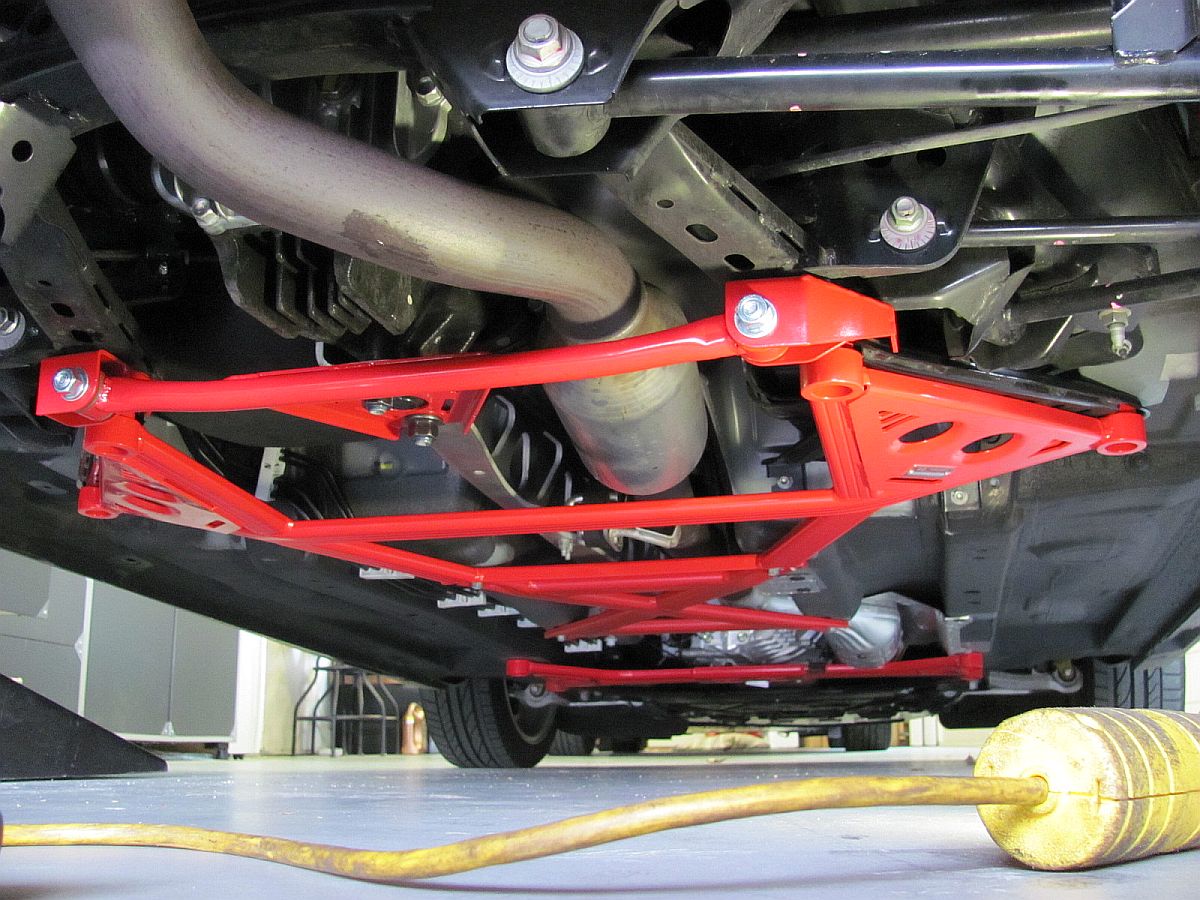
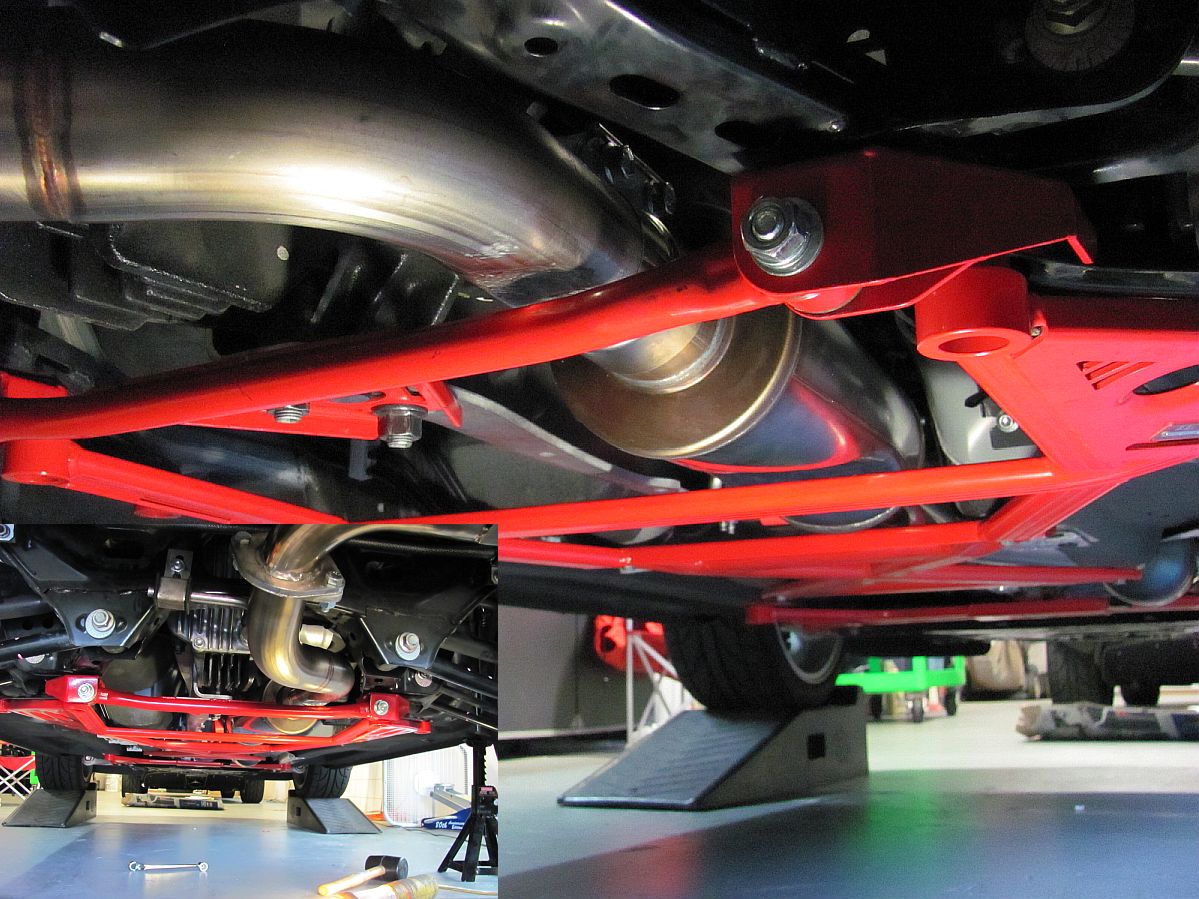
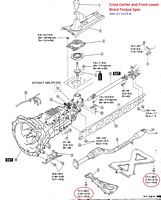
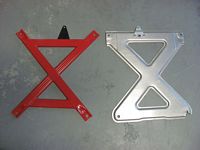
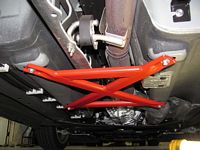
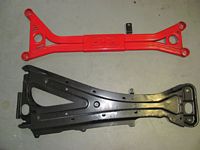
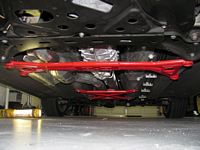
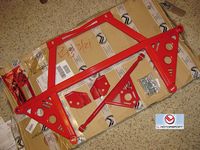
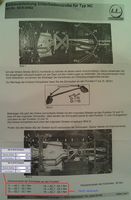
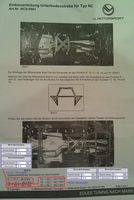
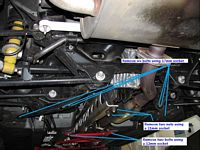
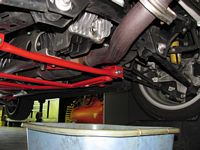
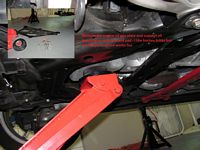
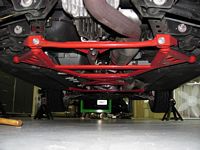
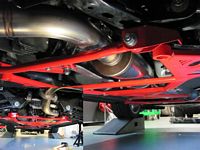
Purchased some used I.L. Motorsport chassis braces, the cross center and front lower braces. After some red paint they looked good as new (or at least good enough to bolt under the car). They replaced the existing OE braces for these locations, and should be a bit lighter and stronger than their OE stamped steel and aluminum counterparts. I also ordered the rear lower butterfly and PPF braces directly from I.L.M. but am still waiting after almost a month- DHL has a horrible network. As soon as those arrive I will add those pics and torque specs.
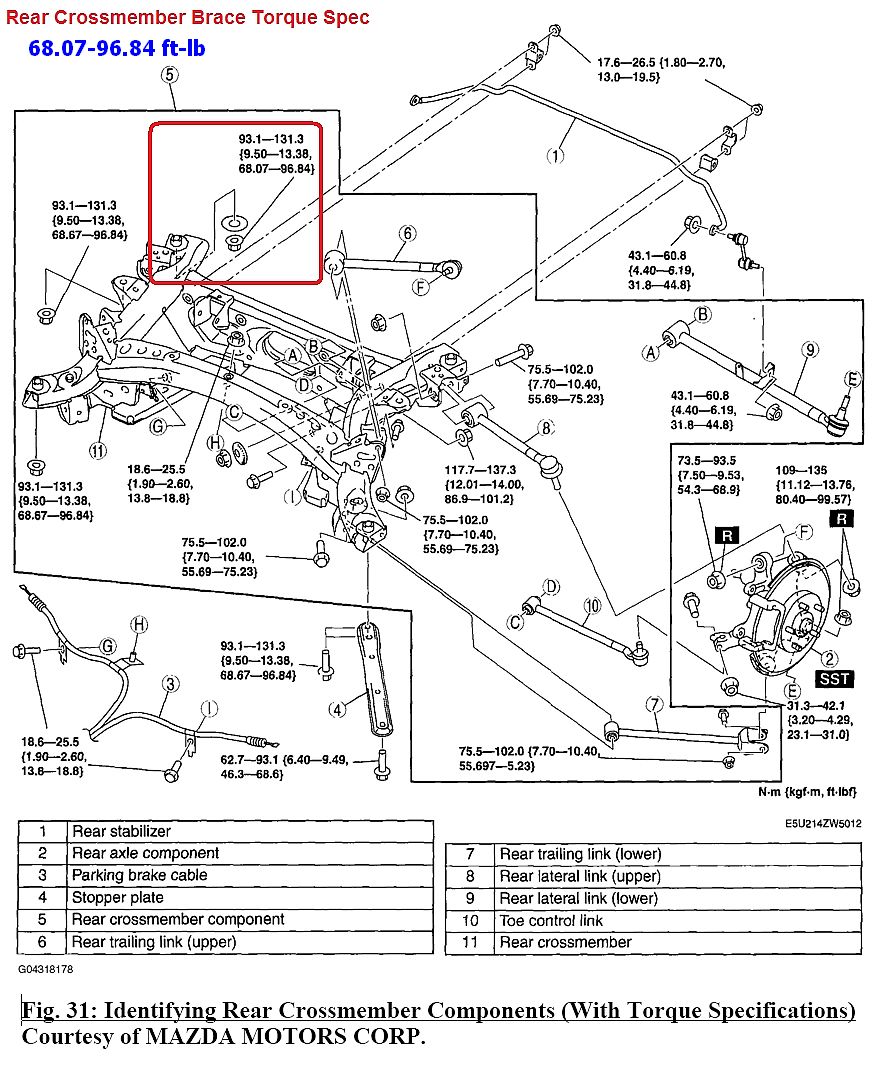
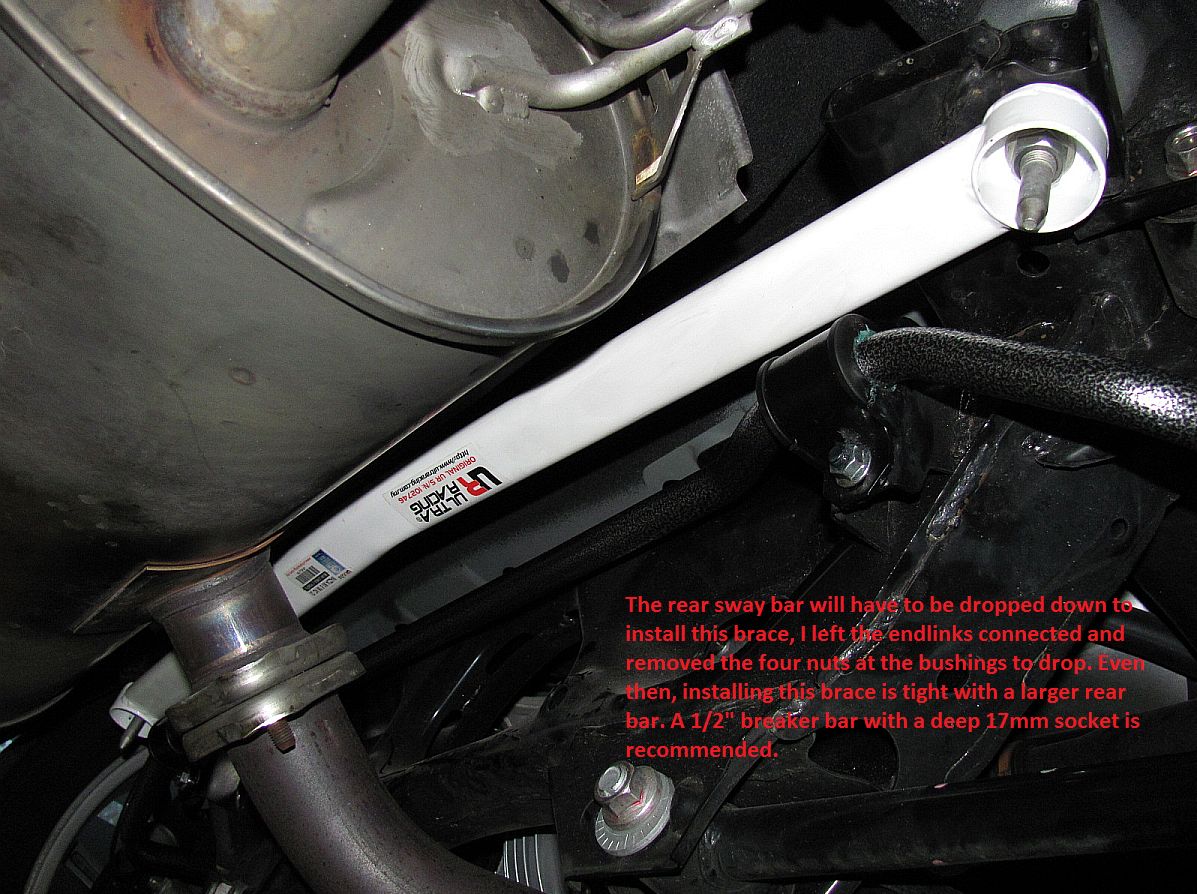
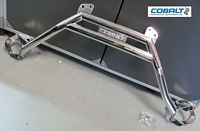
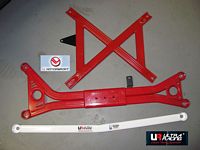
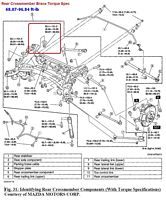
In looking for a rear lower cross member bar/brace, it seems they are NLA except for the Mazdaspeed brace which is kind of pricey. But I did find an Ultra Racing rear lower cross member brace, does not look to be as nice as the Mazdaspeed brace but for ~$120 shipped I figured it was worth a shot.
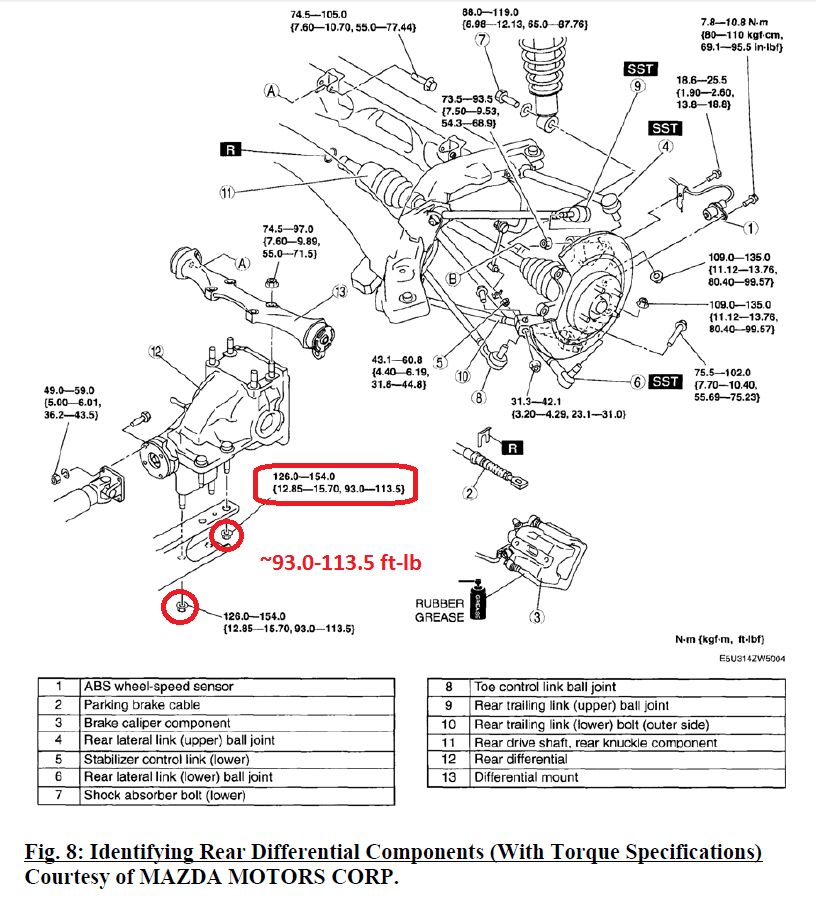
Torque specifications from service manual in pics below.
Driving Impressions: The car feels a LOT more solid when encountering road irregularities and turn in is sharper/more direct, I attribute most of this to the new front shock tower brace. IMO, This ranks right up there with the sway bar upgrade.

Chassis braces direct from I.L. Motorsport finally received after 45 days in transit from ILM in Germany (DHL is HORRIBLE: lost box, mangled box, late delivery
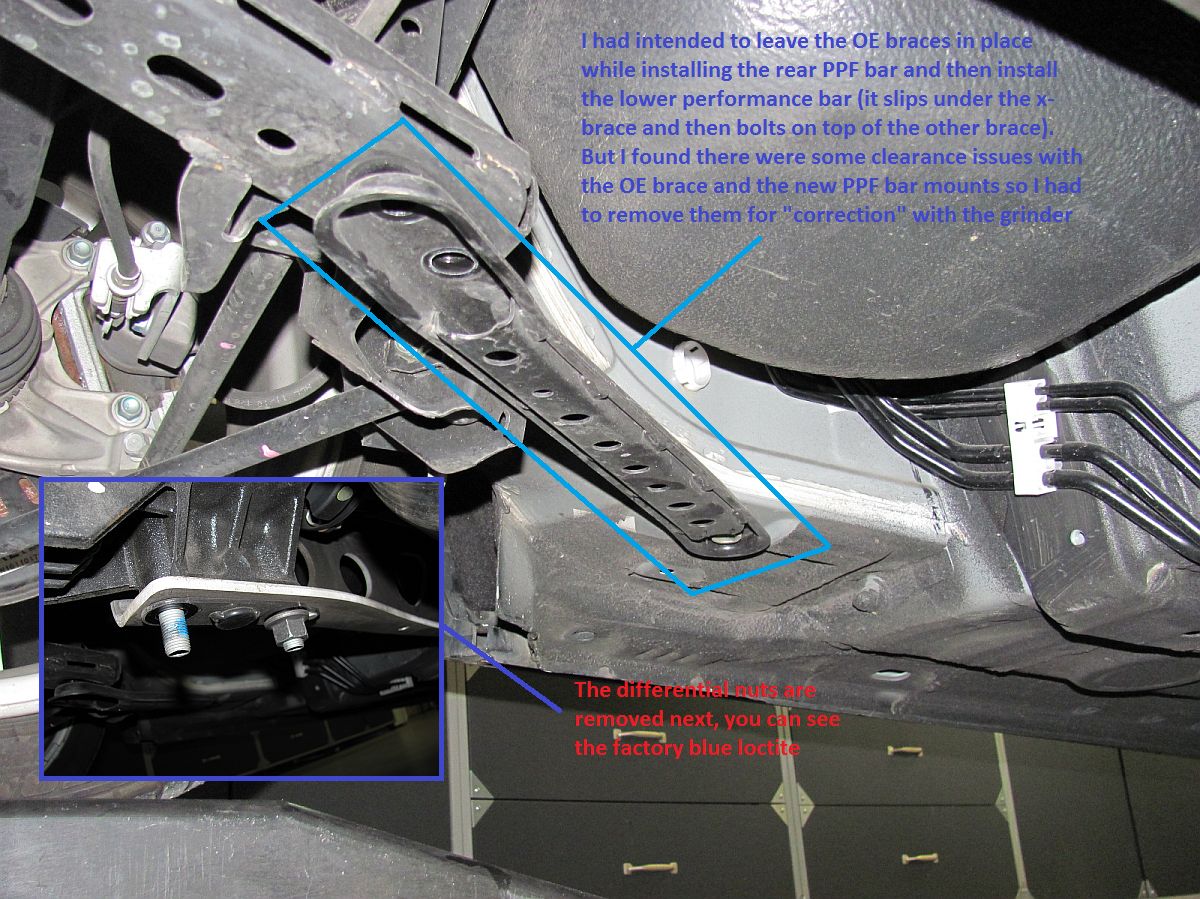
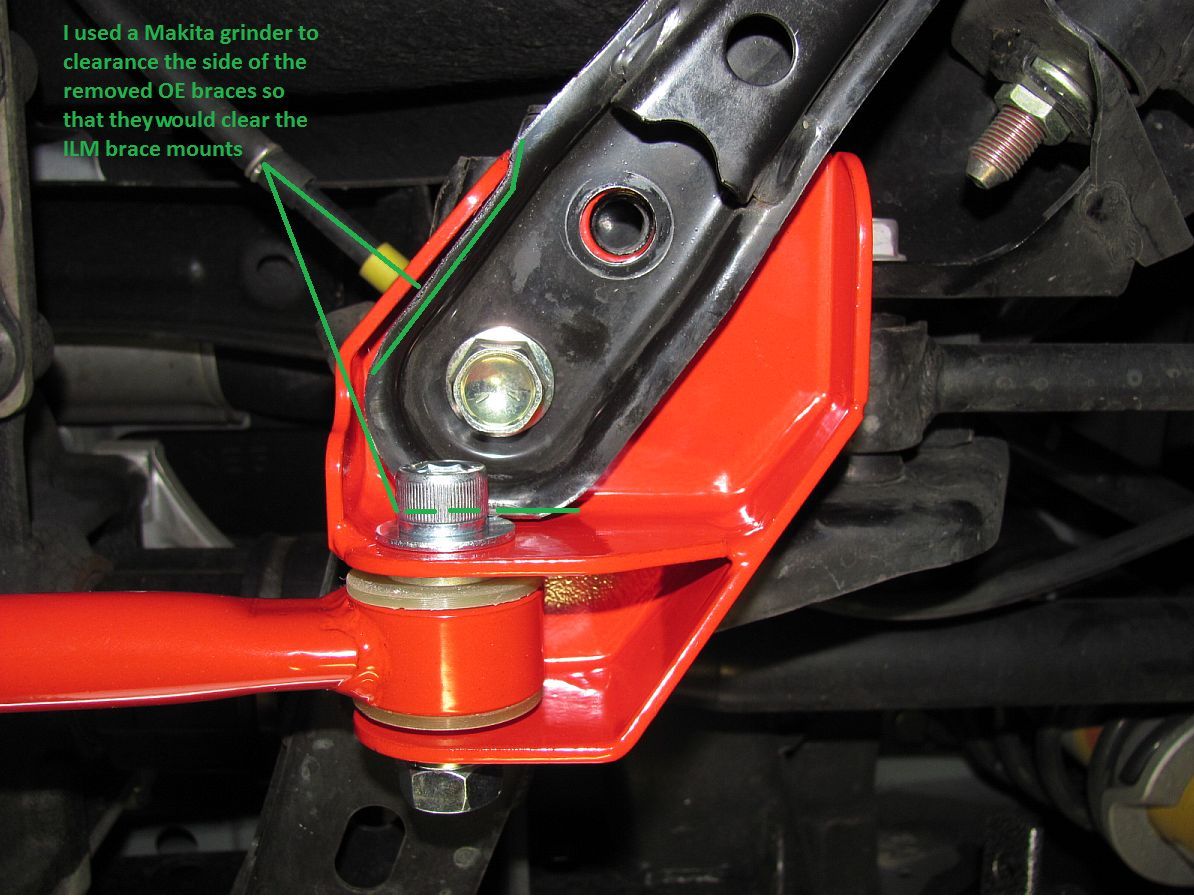
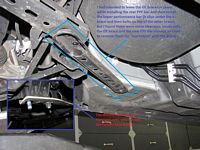
I was not initially planning to remove the OE side braces but was going to leave them held in place with the front bolt loose so that I could install the PPF brace and then remove that bolt to install the performance brace....but I had to grind the sides of them to clear the ILM PPF brace mounts, no big deal. The diff/PPF nuts were removed and reinstalled with blue loctite since that is what they came with from the factory. All of the ILM brace bolt holes lined up fine, I would not tighten any until you have started all of them though for both braces. The x-brace rear bolts were removed so that the performance brace could slip in under, and then the remaining bolts were started. Be sure to reinstall the OE braces on top of the PPF brace and under the performance brace. Some have removed the OE side braces but the ILM pieces are designed to work in conjunction with them installed, not replace them. I was expecting there to be horrible noise and lots of vibration based on some of the forum reviews and some owners even cutting off the brace diff/PPF mount. But, there is just a bit more gear noise and a little bit more vibration and it feels a LOT more solid- I think it works great. These braces are worth the cost/effort and at a significant discount when compared to the Beatrush braces.
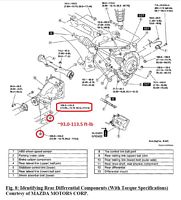


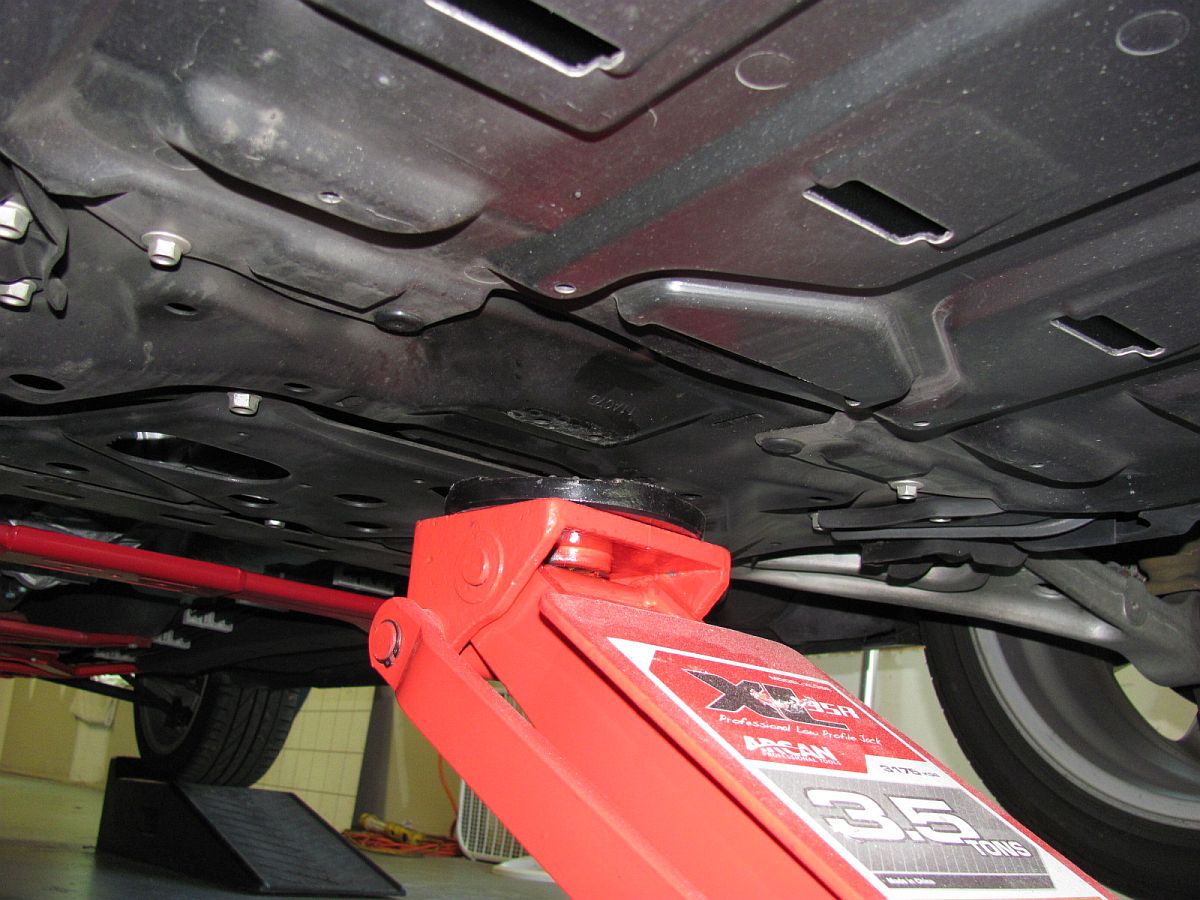
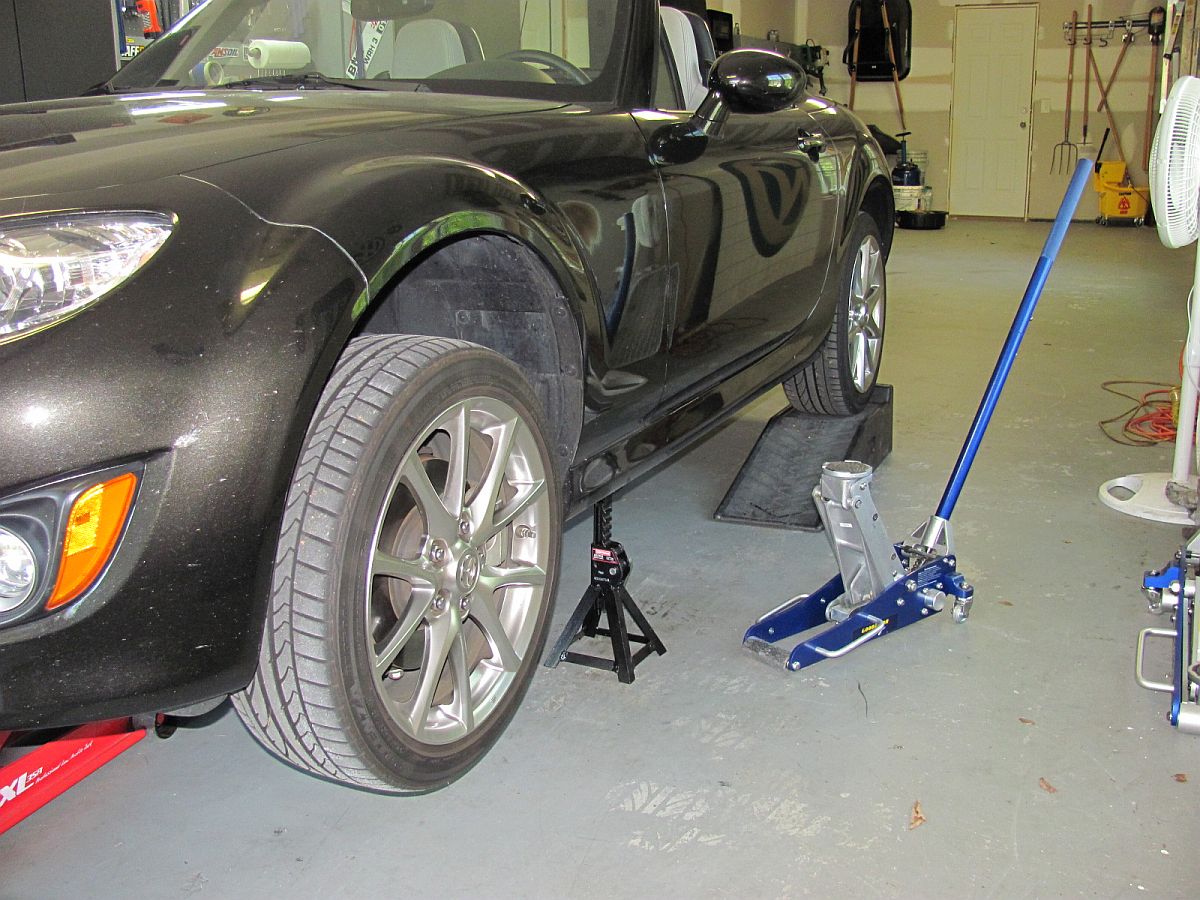
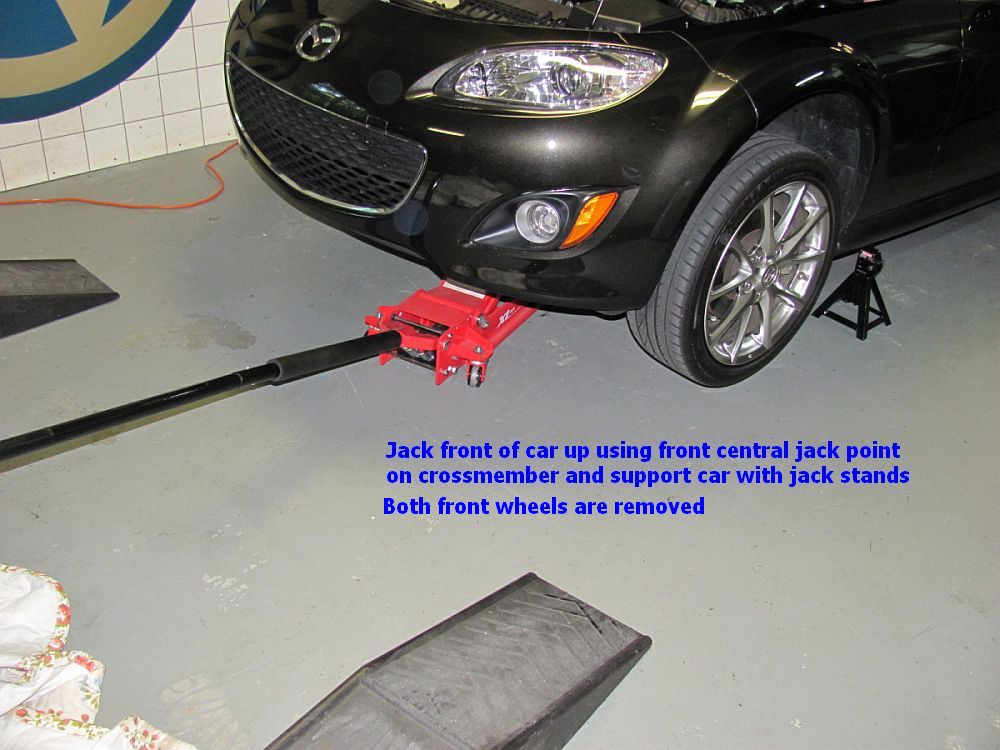
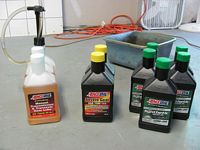
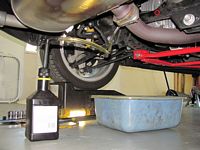
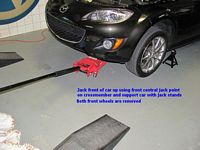
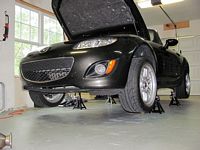
Now at 22,500 miles- time for engine oil, transmission oil, and differential oil changes. I backed the car on to ramps and then used two small jacks at the front jack points to raise the car far enough to access the front central jack point on the cross member (small hump is the jack point there). Once the jack on the central jack point was supporting the car, the jacks were removed and replaced with jack stands. I used a level under the pinch rail to make sure the car was level front to back. The car has to be level front to back and side to side for the fill process/quantity to be accurate for the transmission and differential.
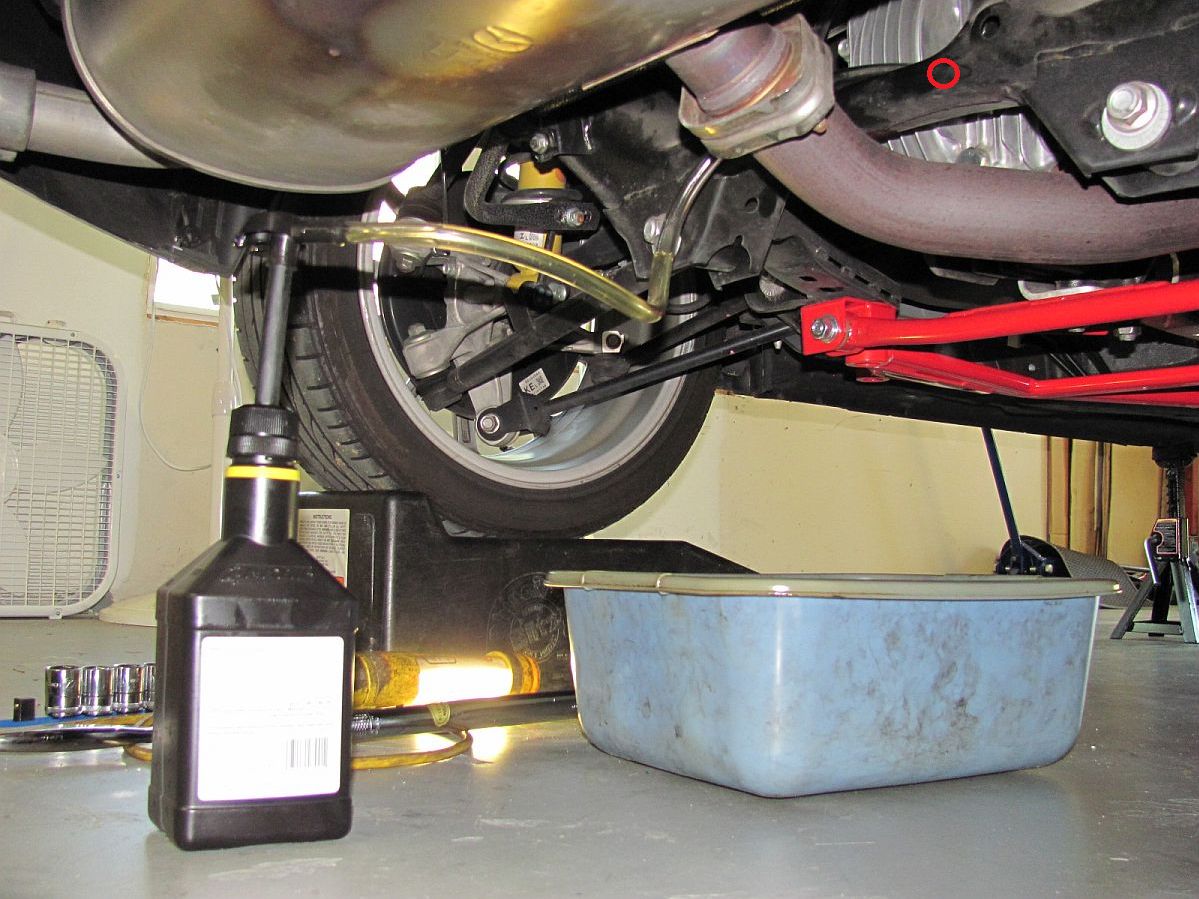
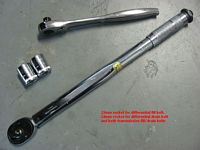
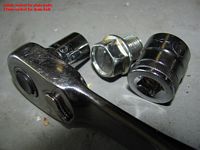
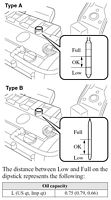
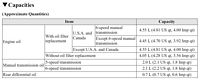
Starting with the rear differential, I used a 23mm socket to remove the fill bolt and then a 24mm socket to remove the drain bolt. After cleaning up the drain plugs and allowing the fluid time to drain, the drain plug was reinstalled and per the Mazda manual specification torqued to 39.2-53.9 Nm, 29-39.7 ft-lb. Using a hand pump, the differential was filled until fluid started to come out the fill hole- capacity for the differential is 1.3 pints. The fill bolt was then reinstalled and per the Mazda manual specification torqued to 39.2-53.9 Nm, 29-39.7 ft-lb. I used Amsoil Severe Gear 75w110 (GL5) for the differential. There is a thread HERE (archived HERE) that discusses why 75w110 is the correct fluid for our differential
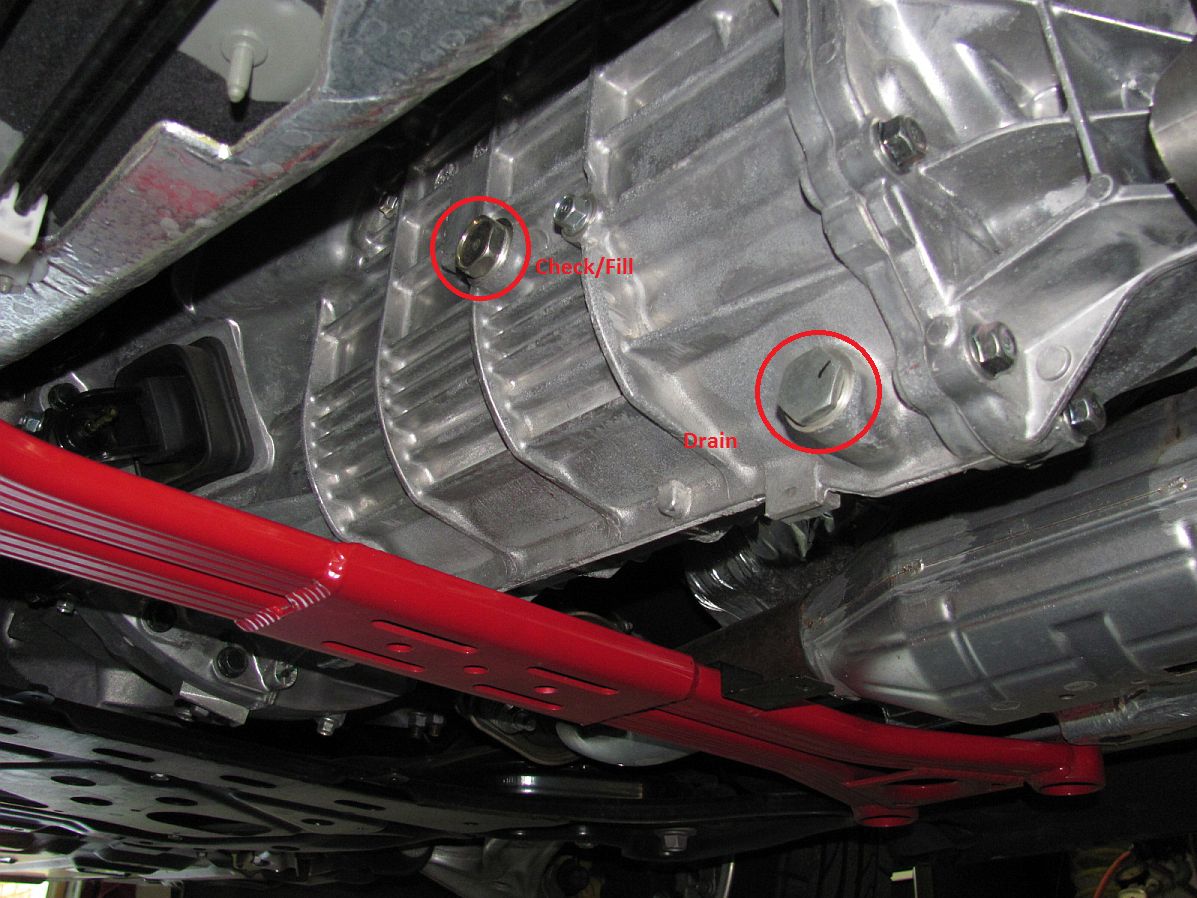
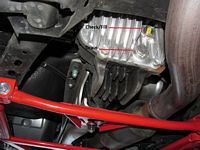
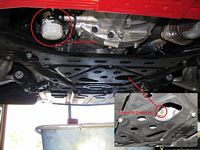
Moving on to the transmission, I used a 24mm socket to remove the fill bolt and then the drain bolt. After cleaning up the drain plugs and allowing the fluid time to drain, the drain plug was reinstalled and per the Mazda manual specification torqued to 39-59 Nm, 29-42 ft-lb. Using a hand pump, the transmission was filled until fluid started to come out the fill hole- capacity for the 6 speed transmission is 4.5 pints. The fill bolt was then reinstalled and per the Mazda manual specification torqued to 25-39 Nm, 19-28 ft-lb. I used Amsoil Manual Transmission Fluid 75w90 (GL4) for the transmission.
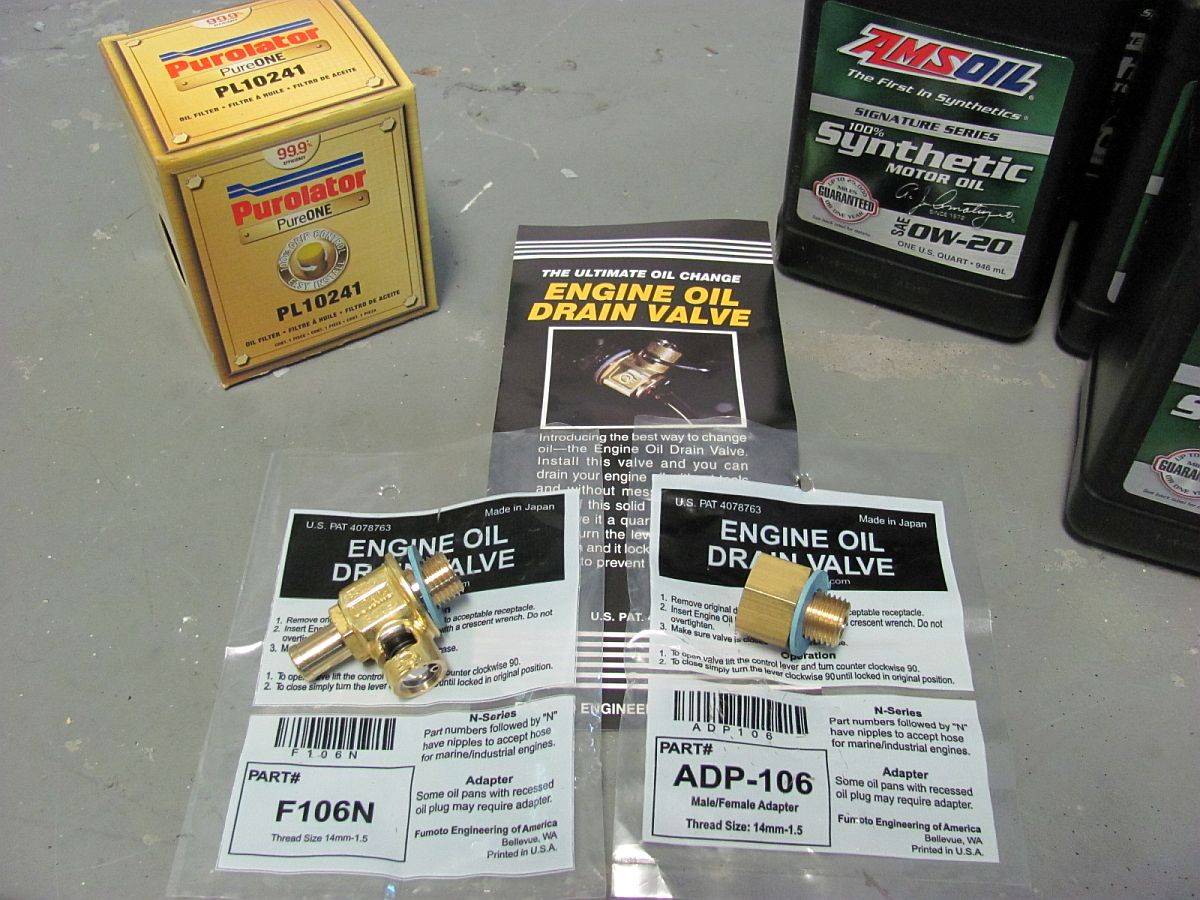
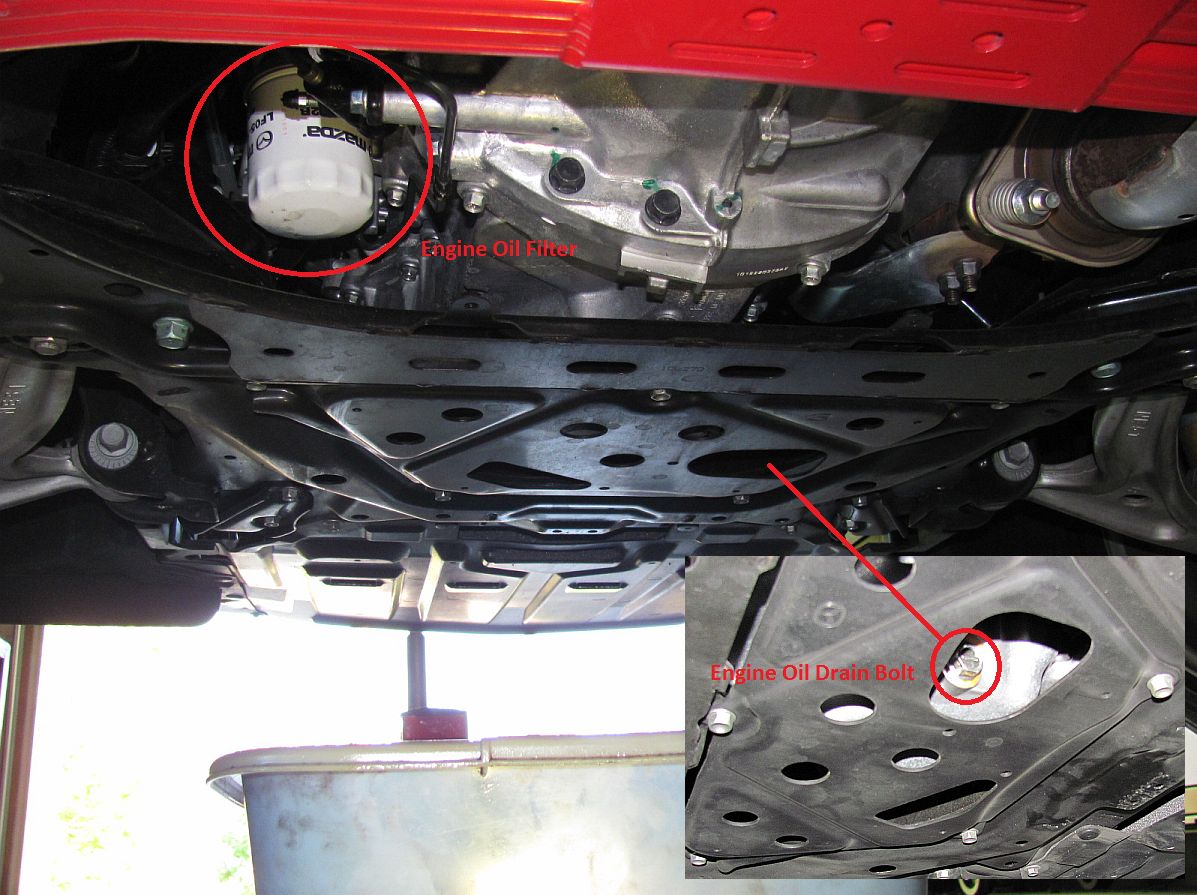
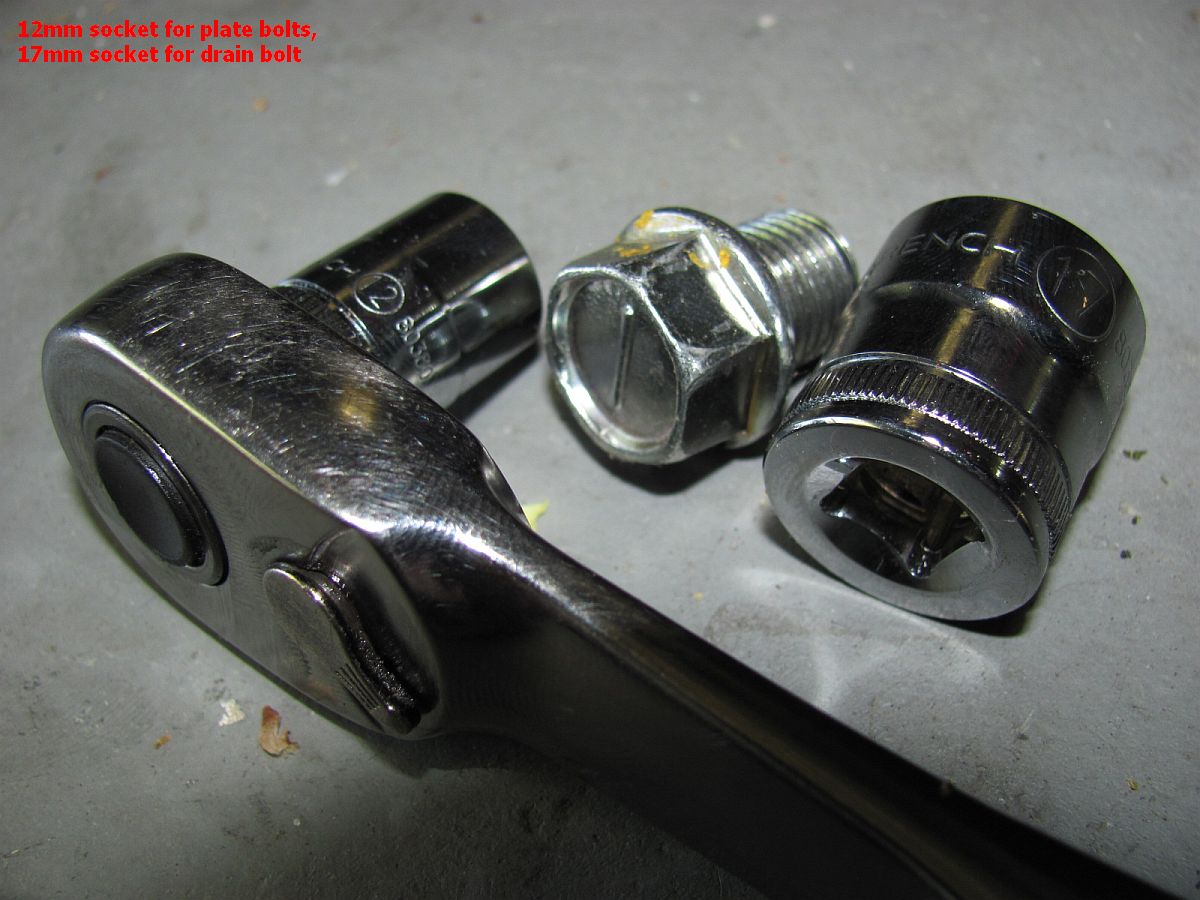
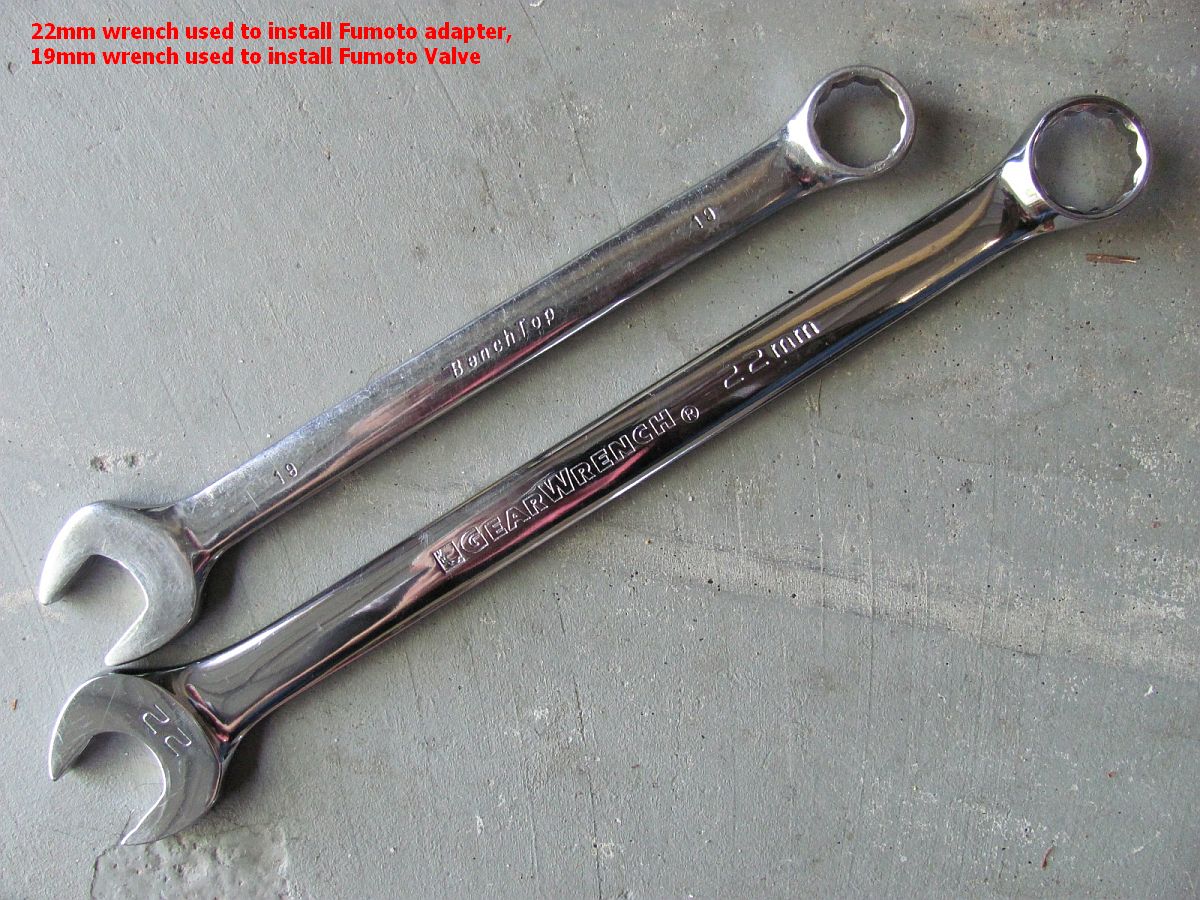
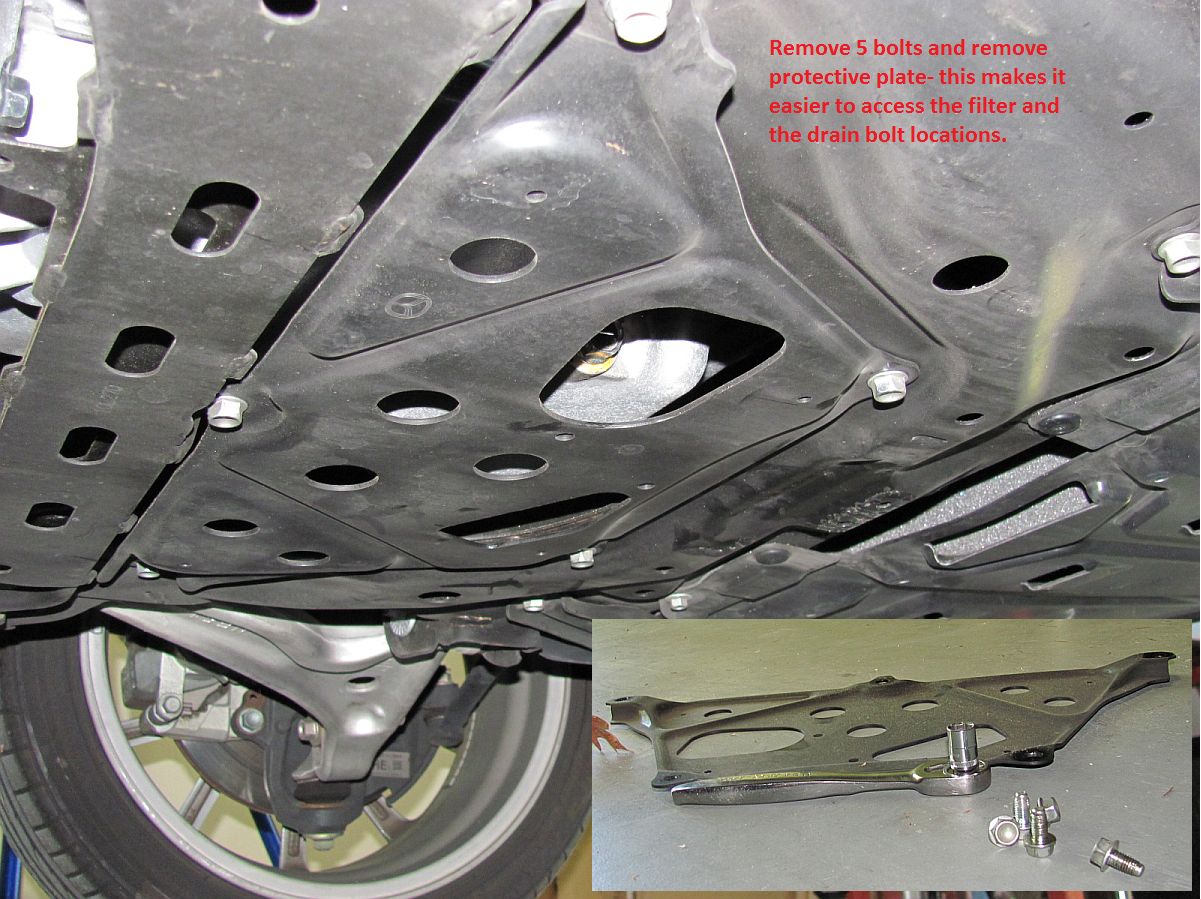
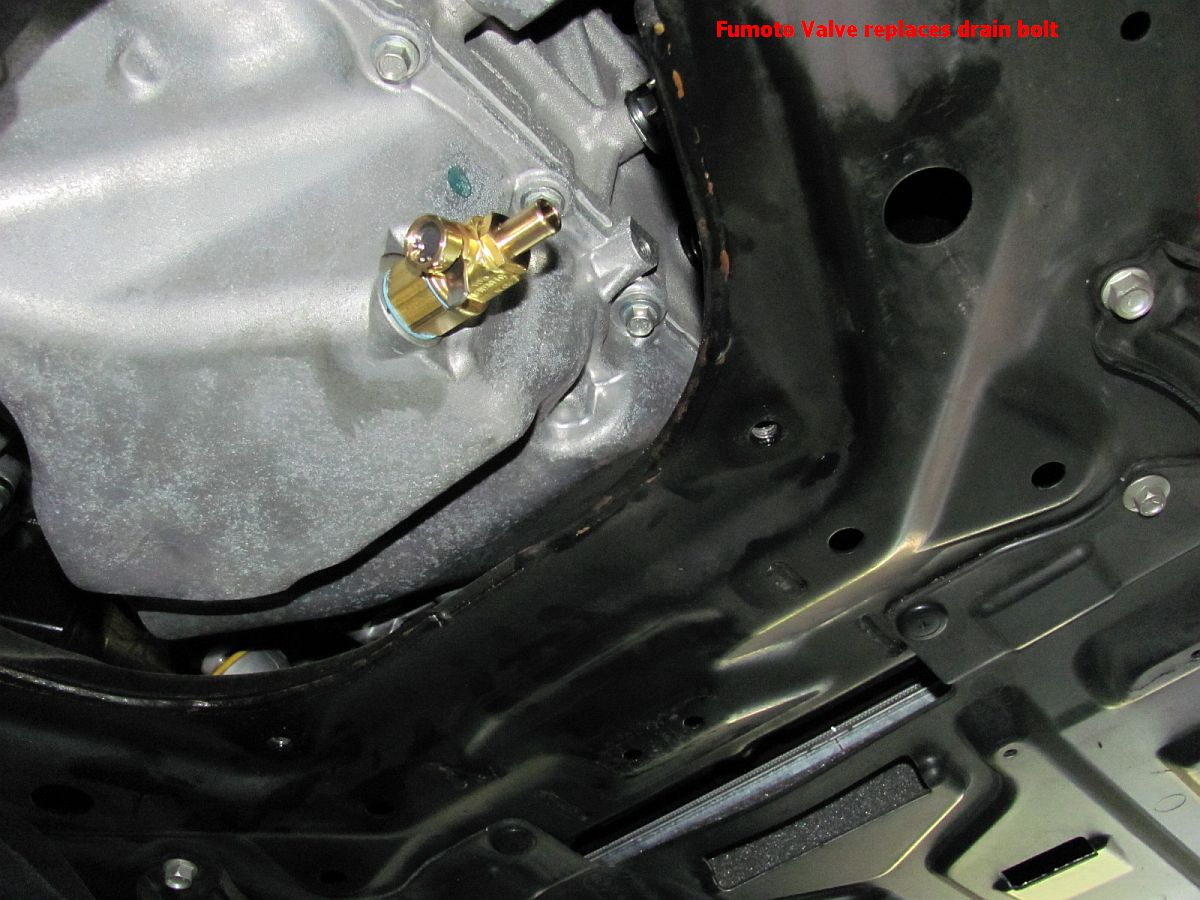
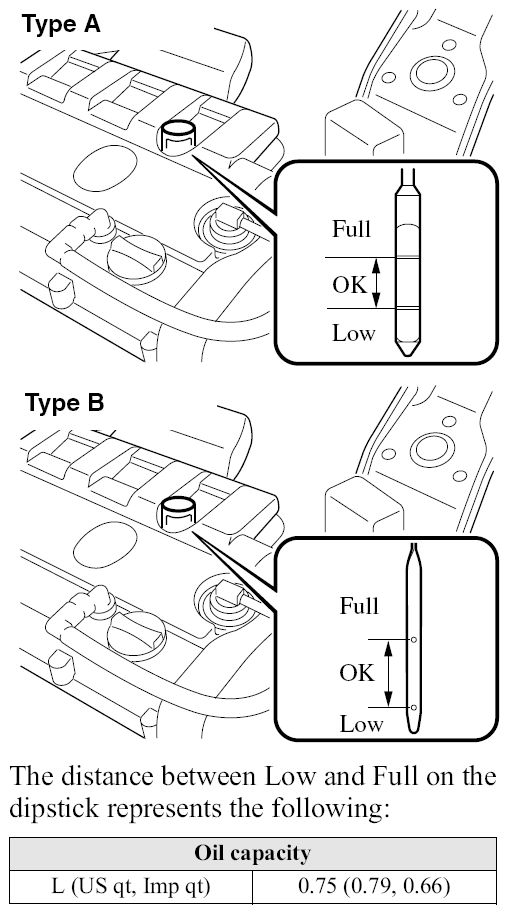
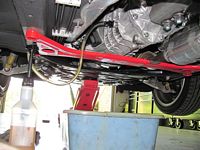
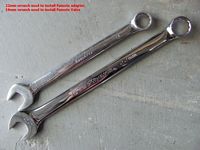
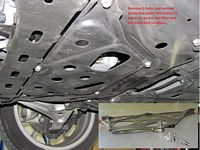
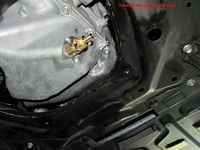
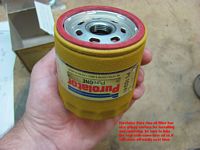
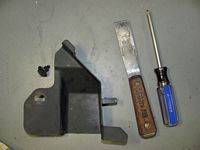
Finally, the engine oil. A small plate covers the bottom of the oil pan and as others had mentioned, removing this plate makes for easier access to the oil filter and the drain bolt location. Five bolts are removed using a 12mm socket and the plate is removed. A 17mm socket is used to remove the oil drain bolt. After allowing the oil to drain, the bolt is reinstalled per the Mazda manual torque specification 30-41 Nm, 23-30 ft-lb OR you can elect to install a Fumoto Oil Drain Valve, P/N ADP-106 for the adapter and P/N F106N for the Fumoto Valve. If installing these, you will need a 22mm wrench to install the adapter and a 19mm wrench to install the valve- follow the installation directions and don't over torque. The oil filter should be able to be removed by hand but a filter wrench can be used if needed. I replaced the OE Mazda filter with a Purolator Pure One filter (P/N PL10241), hand tightened and installed after lubing seal with new oil. The filter removal makes a mess so wipe down all of the parts it dripped on and reinstall the protective plate. I filled up the engine using Amsoil Signature Series 0w20 Synthetic Motor Oil, dry engine oil capacity is 4.9 quarts with oil cooler. I add 4 quarts, start motor and turn off after a few minutes, check for leaks, and then continue to add oil gradually until reading full on dipstick with car off jack stands and on level surface- usually a little over ~4.5 quarts total.


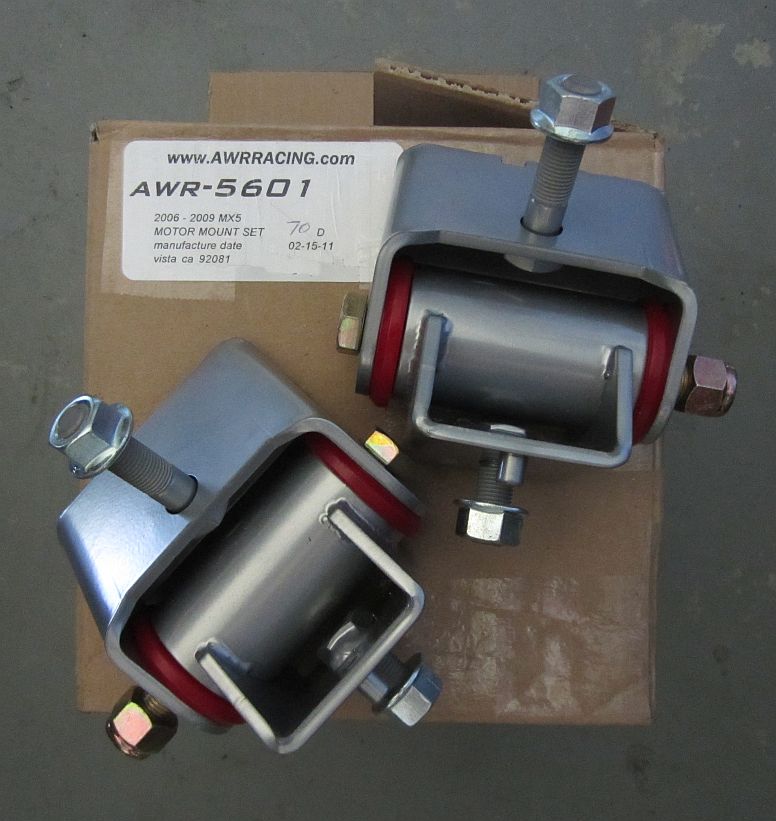
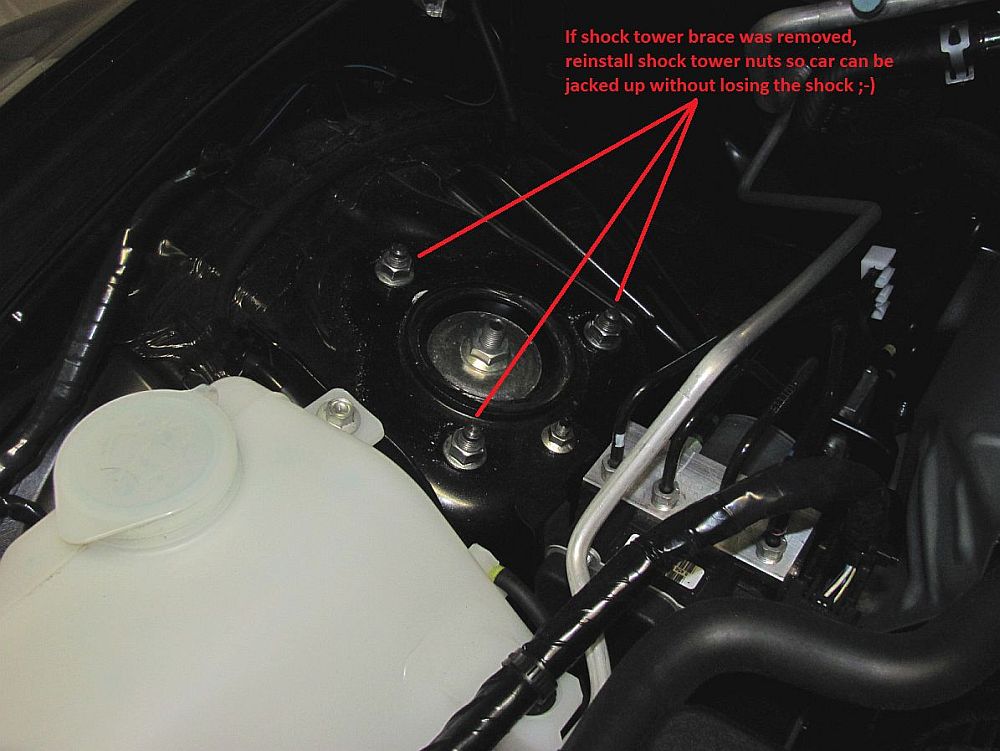
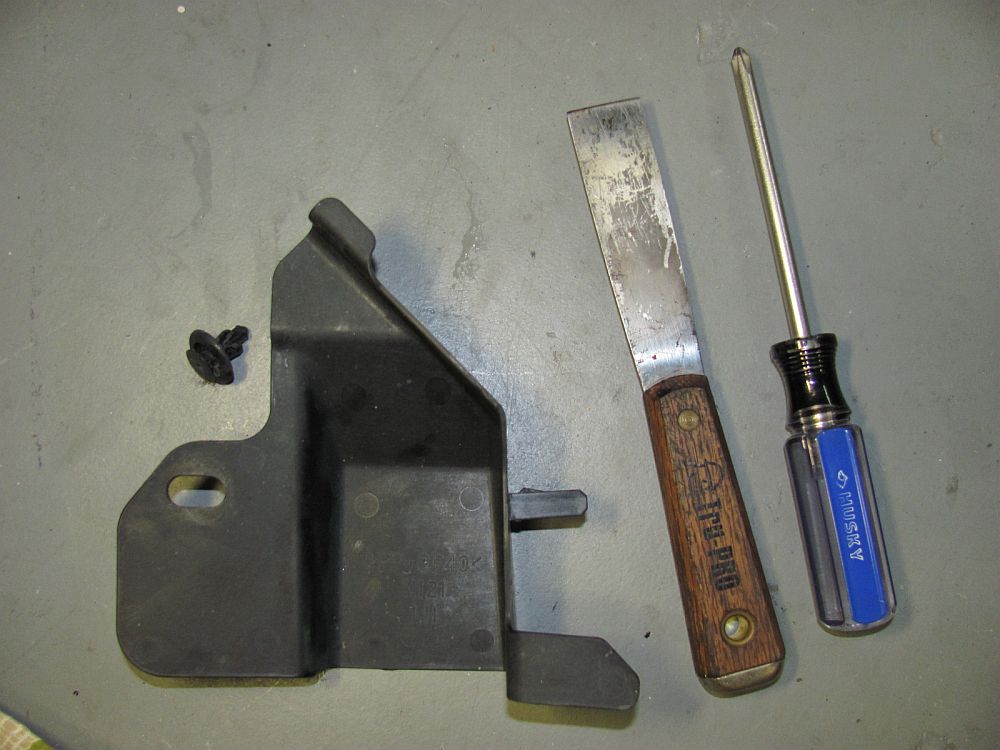
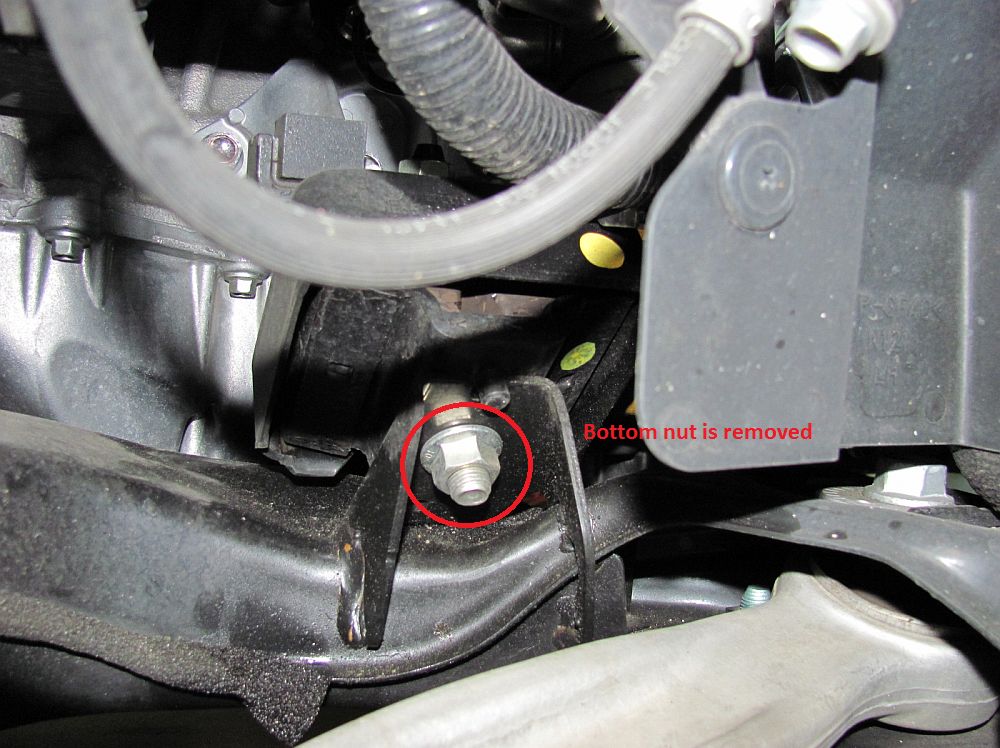
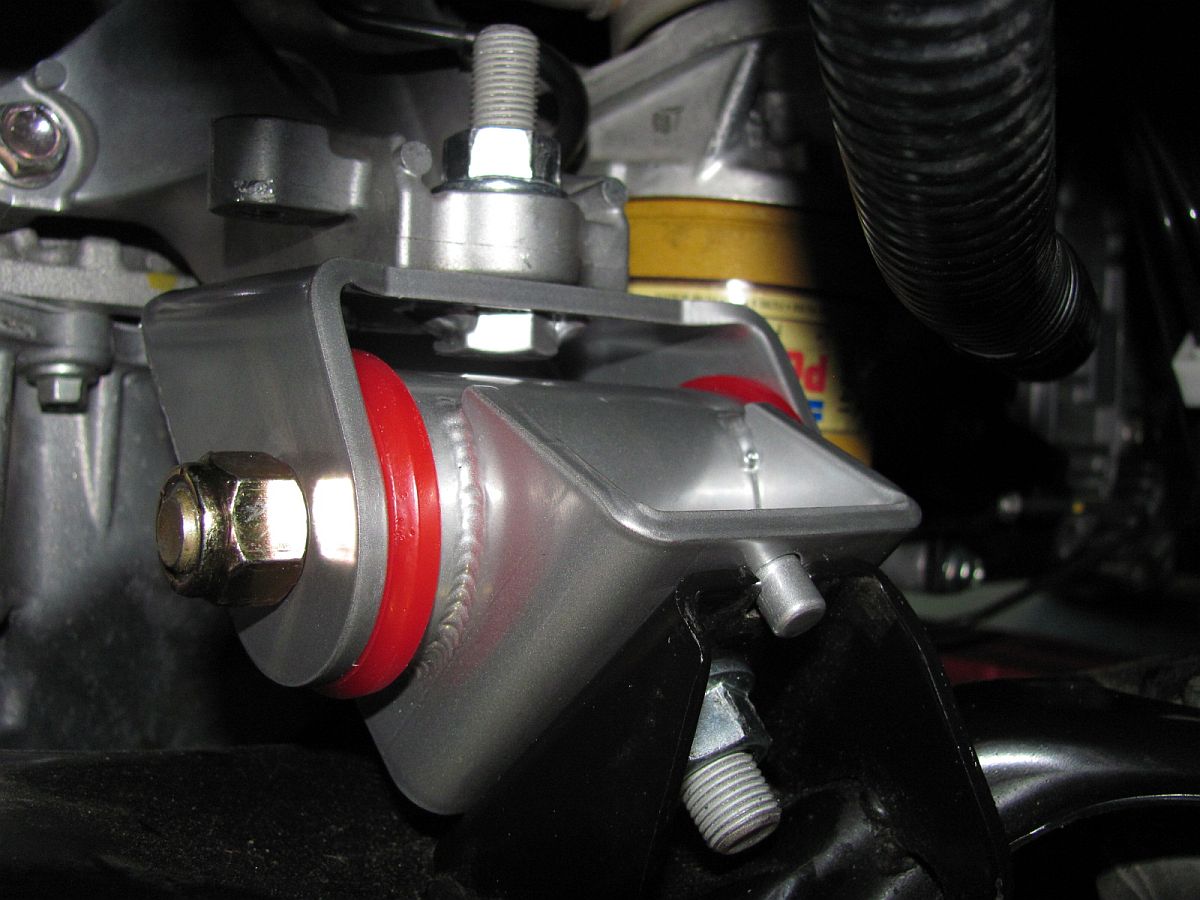
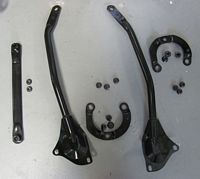
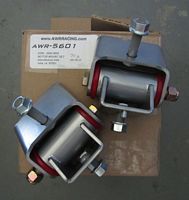
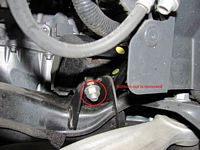
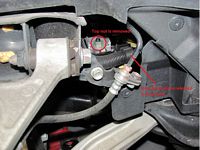
AWR Racing 70 Durometer Engine Mounts from Goodwin Racing installed. Cyberbug's writeups are HERE and HERE, torque spec is upper and lower nuts to 35 ft lbs and the through bolt to 45 ft lbs (AWR referenced in these threads).
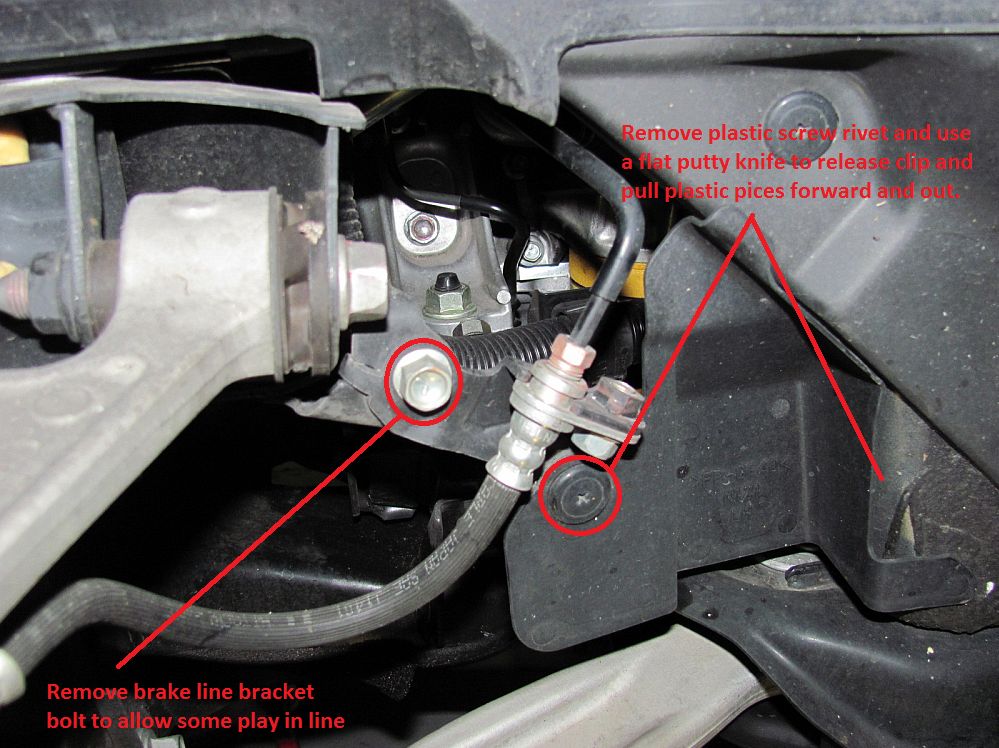
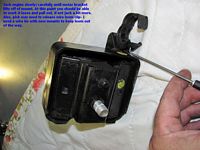
You will need a 17mm socket to remove the OE motor mount top/bottom nuts, and an 18mm socket for the poly motor mount top/bottom nut- the center through bolt/nut require a 19mm socket/wrench. Start to finish if you have a plan should be around 1 hour for the R&R process. The driver side requires a little more time than the passenger side since you have to deal with the wire loom and some weight that needs to be removed from the motor mount bracket (some piece that functions with the OE mount?). Details in pics below:
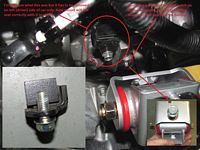

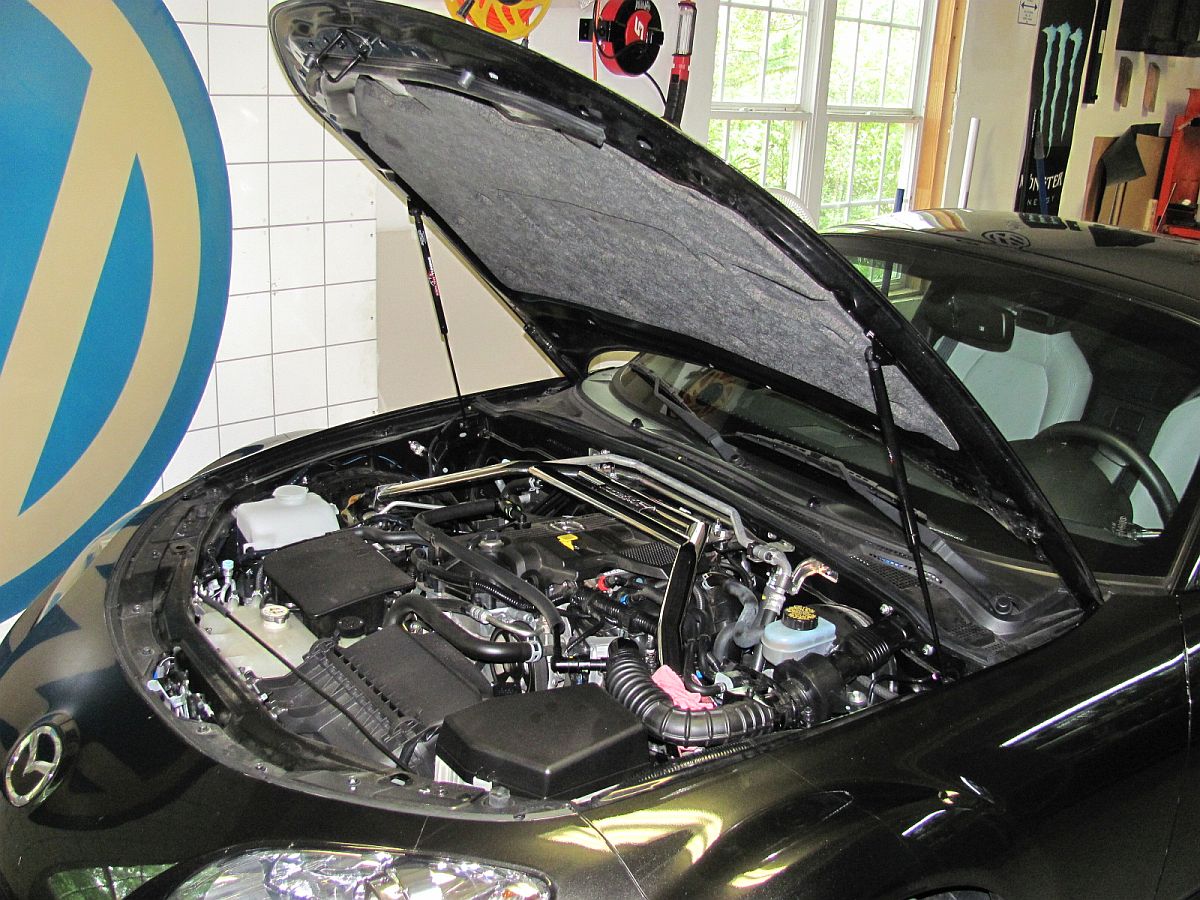
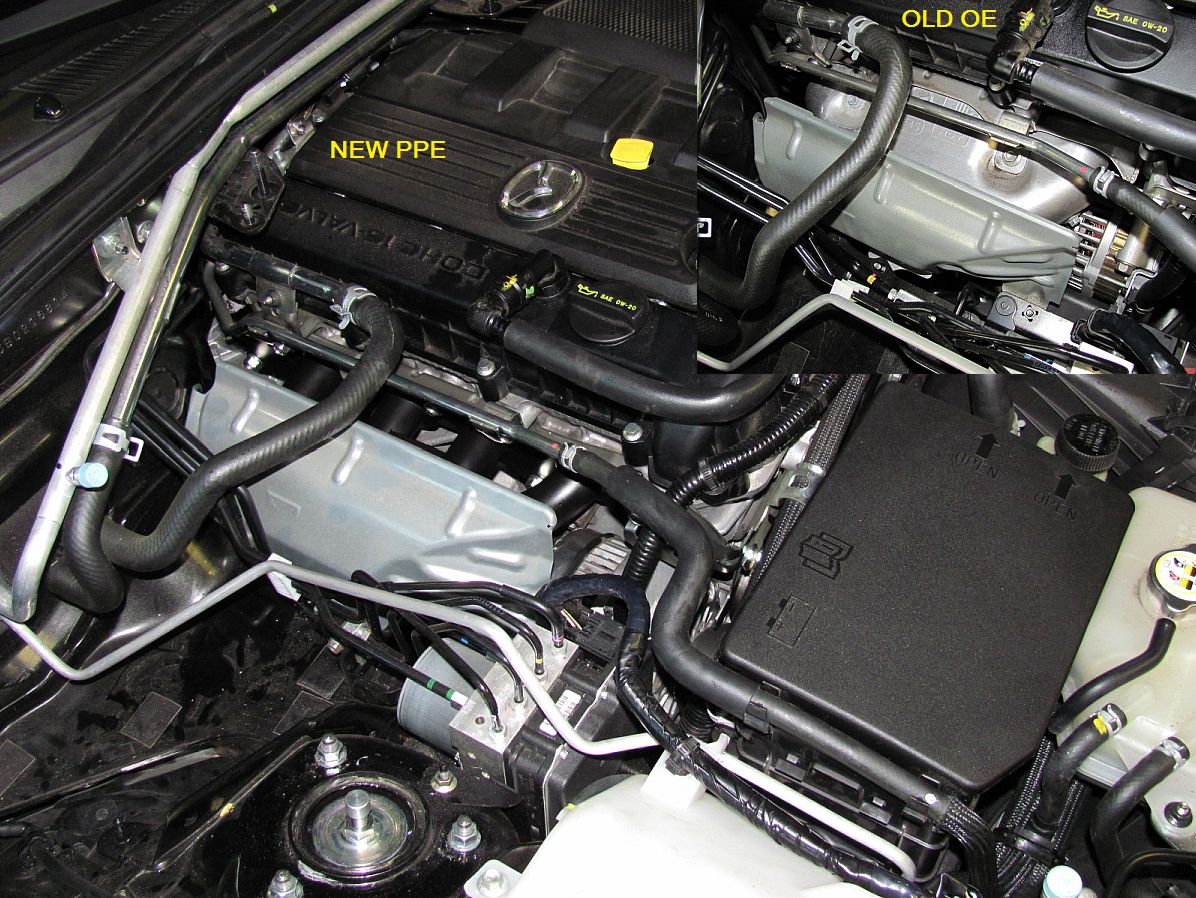
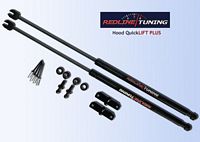
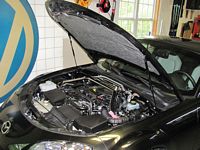
Redline Tuning Hood QuickLIFT installed. Replaces the prop rod with dual hood struts and allows for better access to the engine IMO. Installation instructions HERE.
[BE SURE TO USE THE MOST RECENT INSTRUCTIONS- the instructions included with mine from 2009 had a critical error about using a 5/8 bit to pre-drill for a 7/16 bit that would have botched the installation, it should have most likely read 3/8. This step was eliminated in the recent instruction update. It's ALWAYS a good idea to double check drill bit sizes against the hardware before drilling and read through the instructions carefully before measuring/marking drill points.]
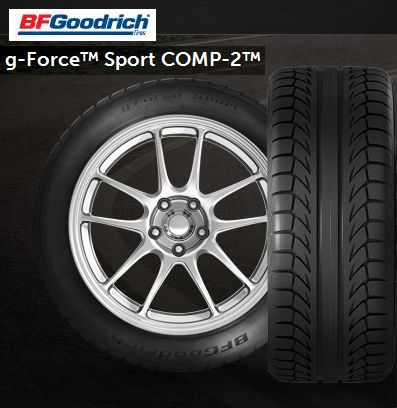
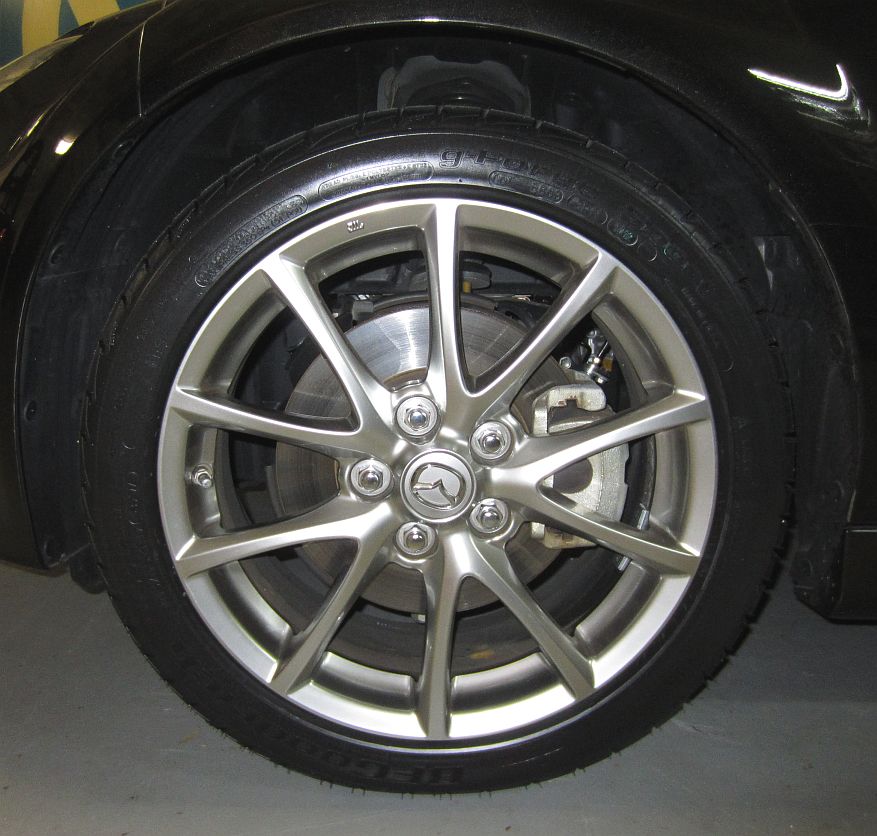
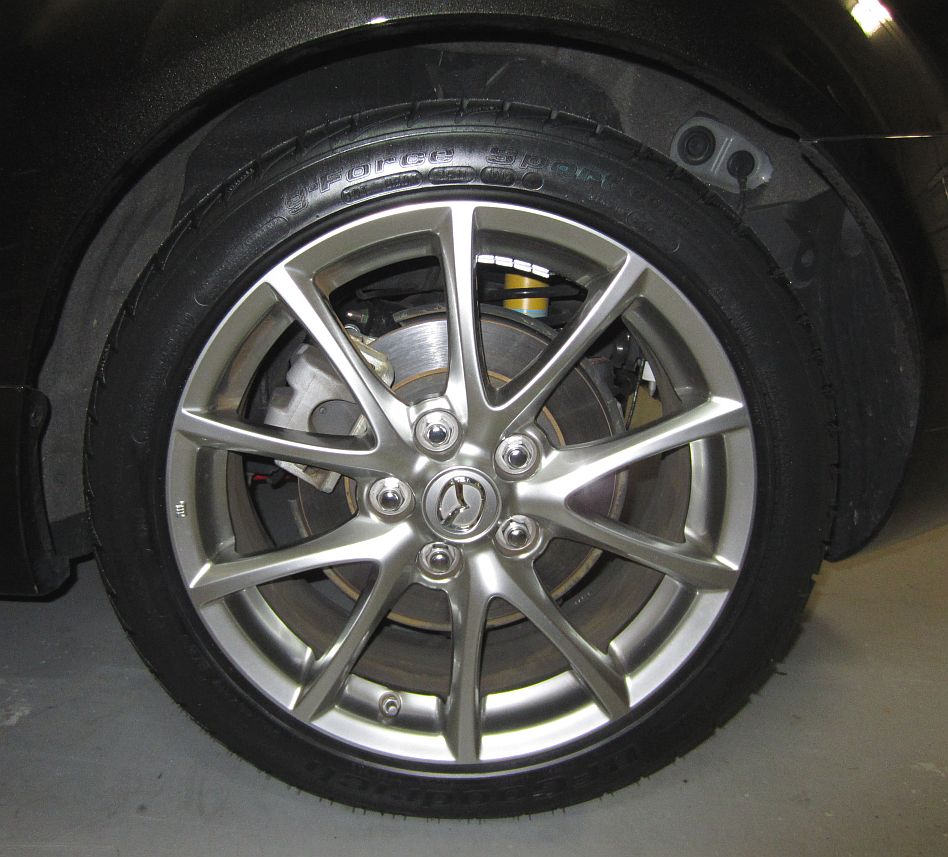
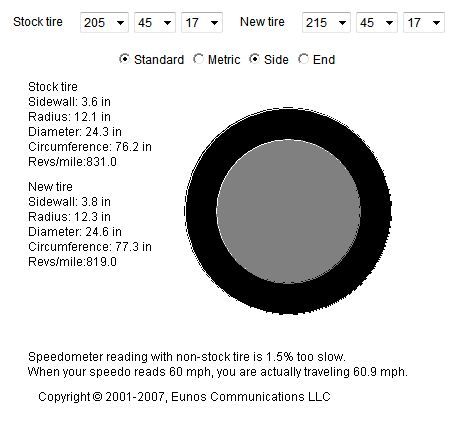
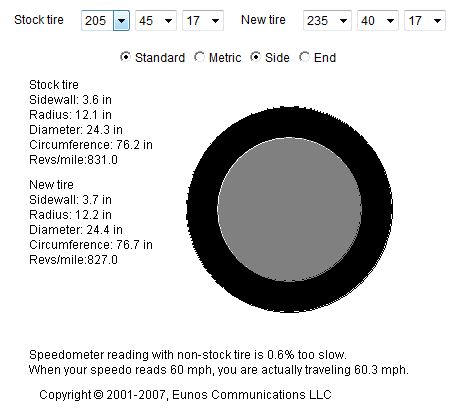
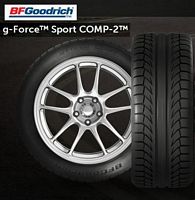
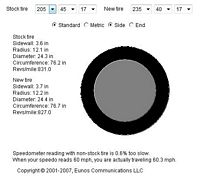
Two of the RE050 are down to the tread wear bars and a set of tires is almost as cheap as two of these. I decided to go a little wider and move up from the OE size 205/45/17 to 215/45/17 in the new BF Goodrich g-Force Sport Comp-2 tires- press kit HERE (ZIP file). Matt Farah has a review on THE SMOKING TIRE.COM, as does MotorTrend.
Initial impresssions- I like these better than the RE050s, I'll be driving through the mountains on my weekly TN trip and will update with some longer term feedback soon.
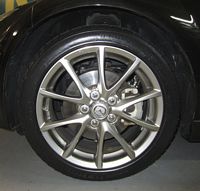
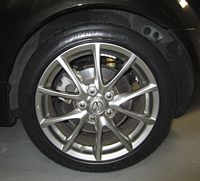

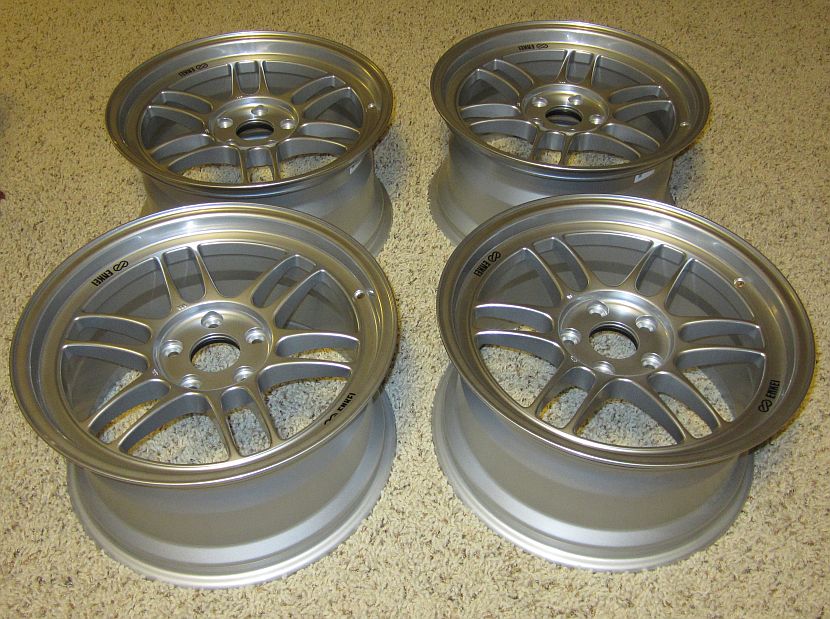
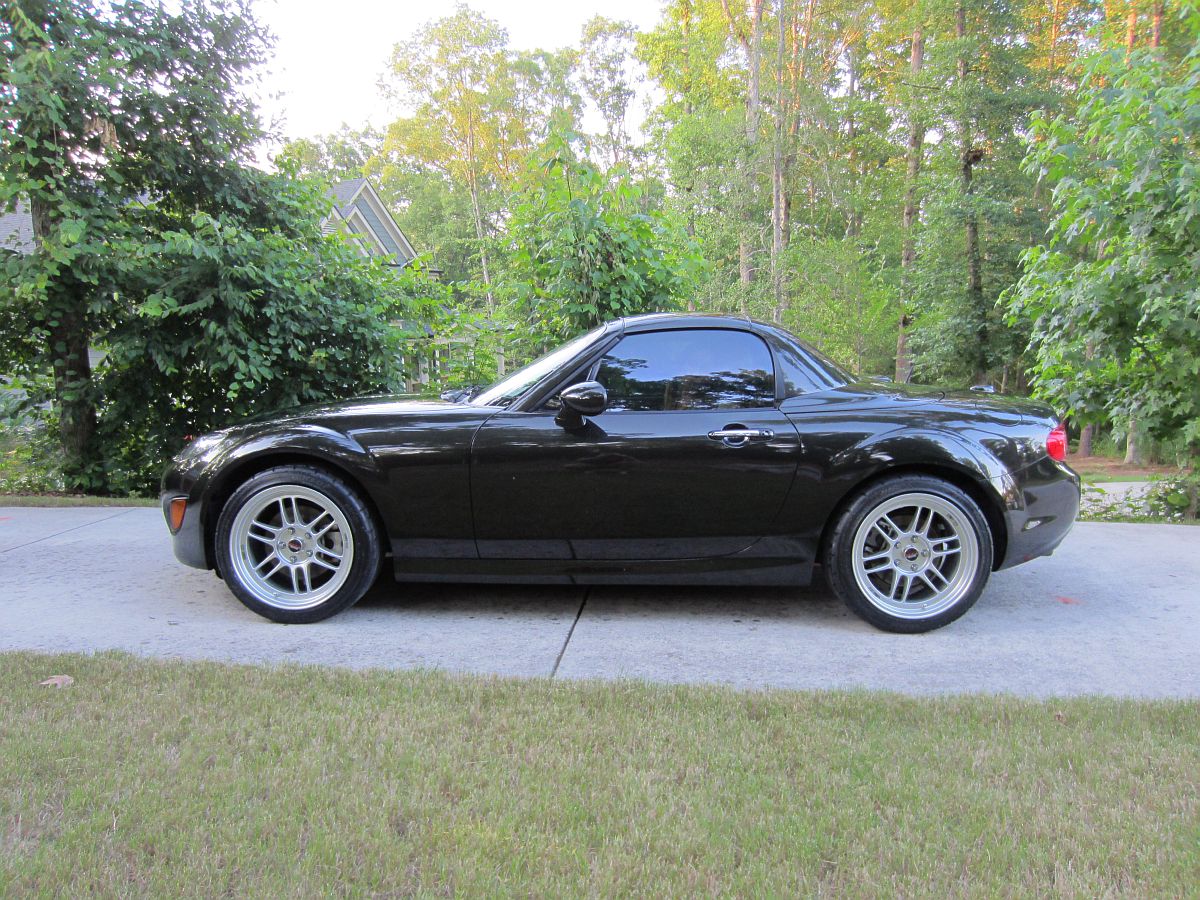
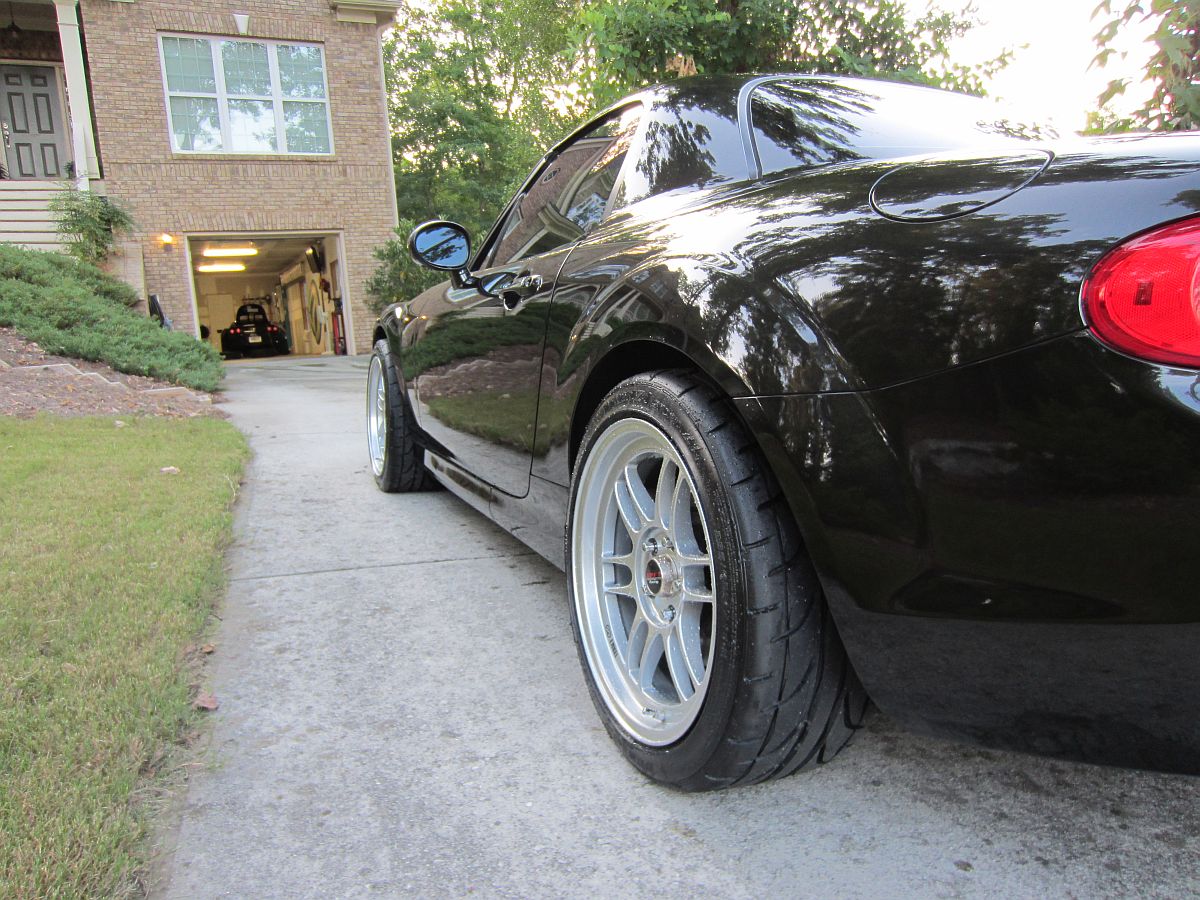
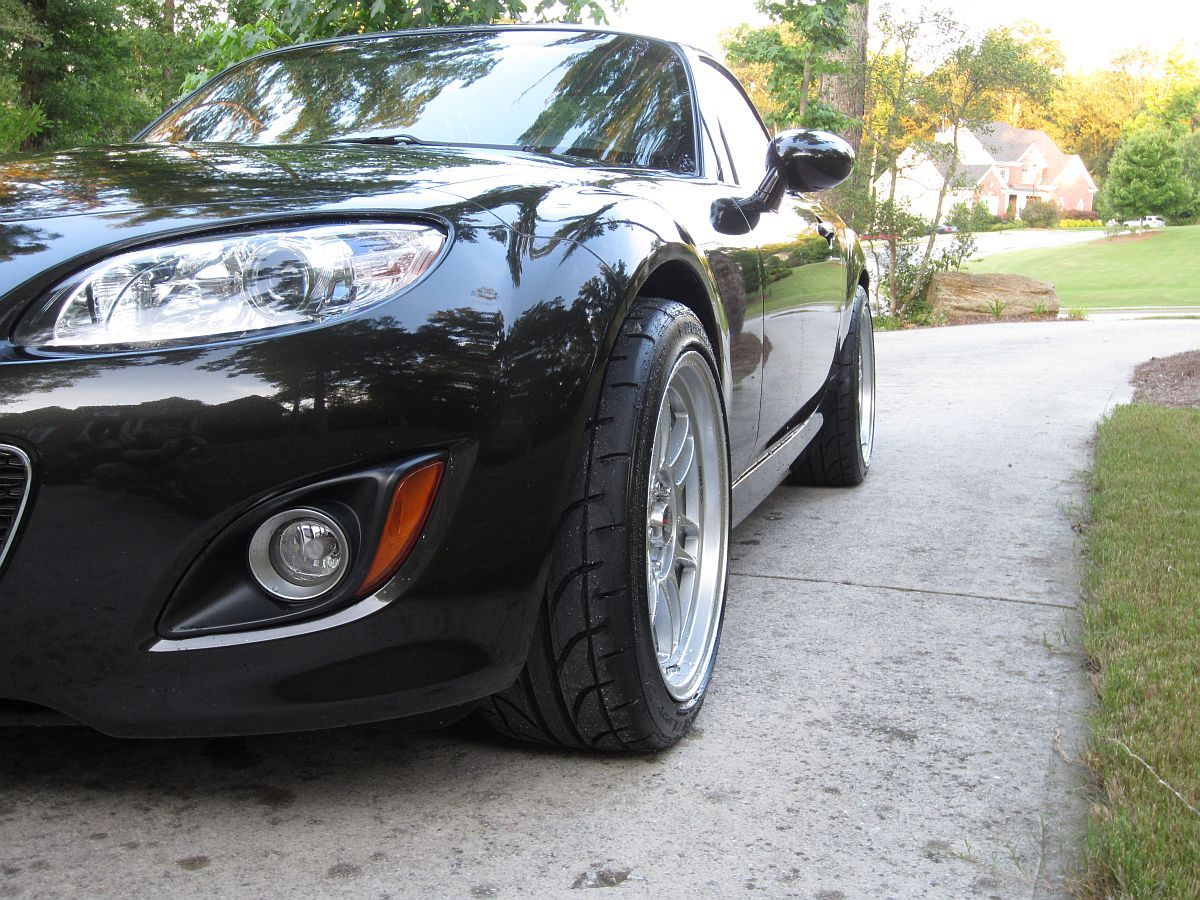
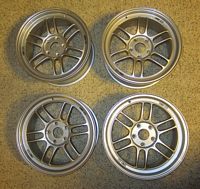
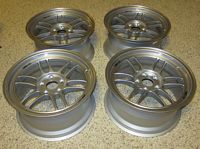
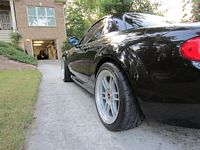
Decided I was tired of OE wheels. Enkei RPF1 17x9 wheels with the optional Enkei center caps were chosen with wider 235/40/17 Dunlop Star Spec tires- after running these on my Lotus Elise I decided this is what I needed on the Miata.
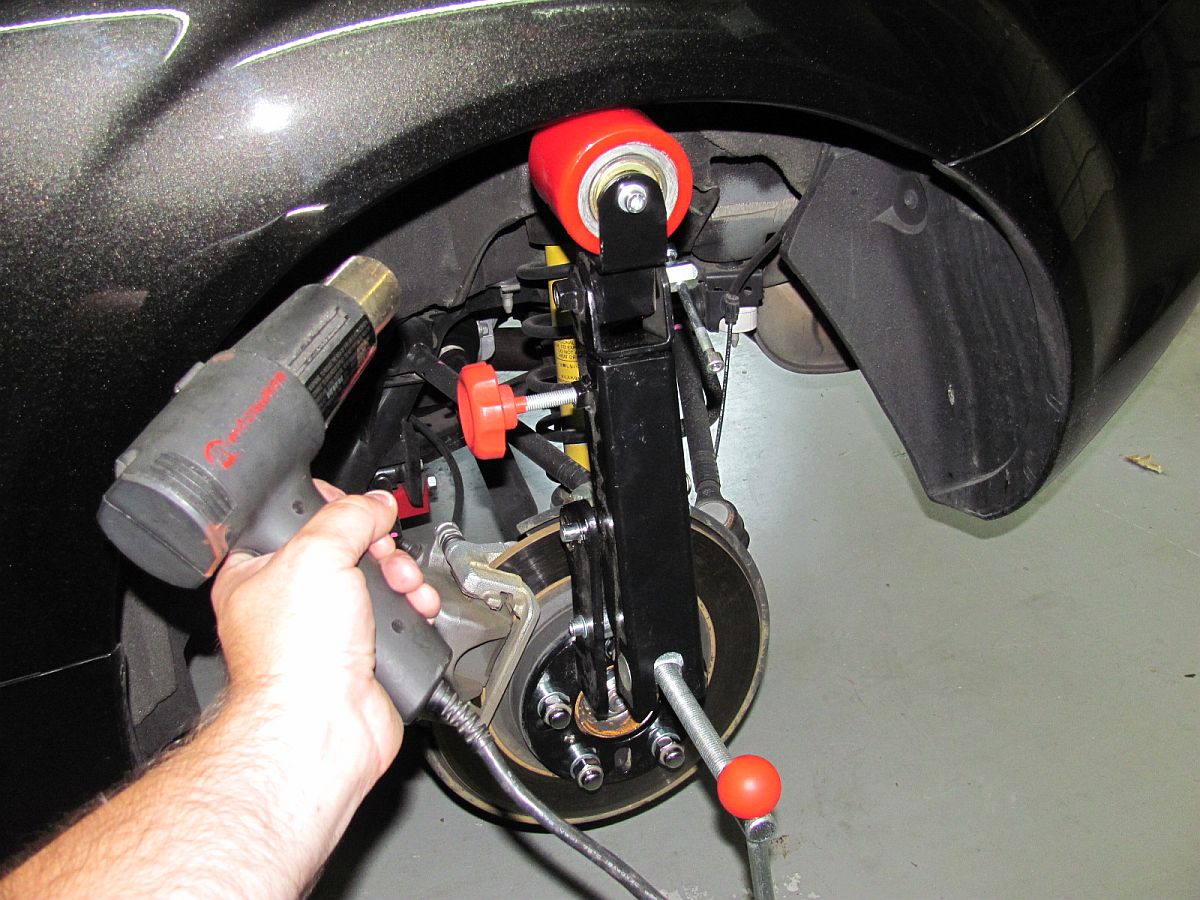
Using a heat gun and a fender roller, the rear fenders were rolled to prevent the wheels and inner fender lip from making contact and tearing each other up. I went ahead and rolled them all the way just in case I decide to go wider- keep the paint hot while using the roller and no cracking. The front does not have much of a lip and since I am not going super low, they may work as is.
The Enkei RPF1 17x9 were on back order so I ordered them from Goodwin Racing on the other coast. Everything I have ordered from Brian has always been shipped same day within hours of placing the order and these wheels were no different, they arrived in great shape with boxes reinforced with packing tape and FedEx-proof. I also sourced the McGard Spline Drive Lug Nuts and Hubcentric Ring Set (73/67) from Goodwin.
Brian Pitt at Kauffman Tire in Suwanee got me in and out quickly, he sourced the tires from TireRack on their corporate account since they are the only supplier for these tires and transferred the TPMS from the OE wheels while mounting/balancing the tires.
Aesthetics and performance are a plus, although they will look and perform better once the back-ordered suspension from Flyin Miata finally arrives and is installed.


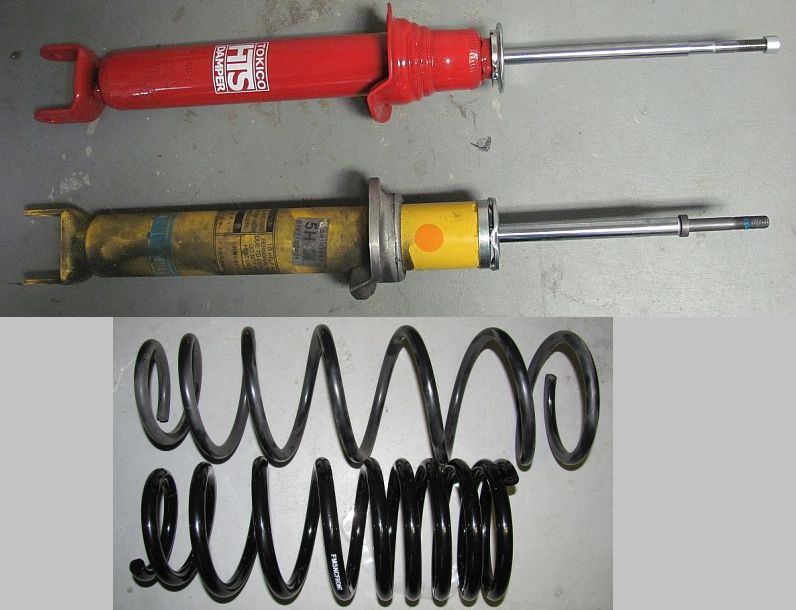
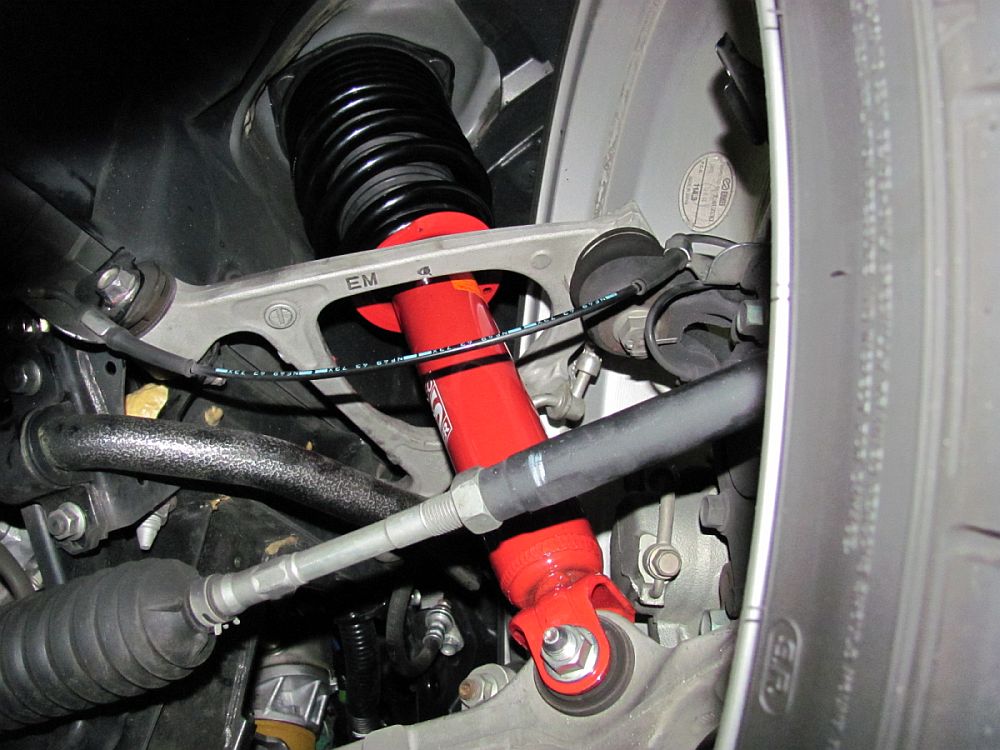
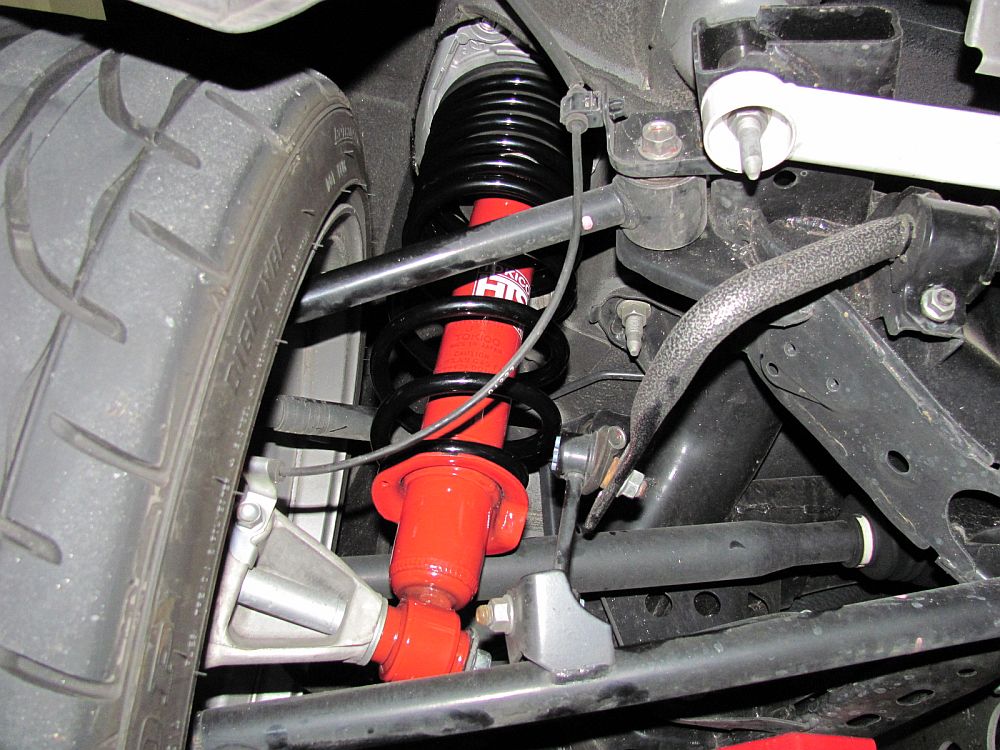
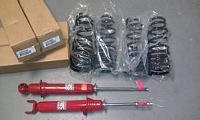
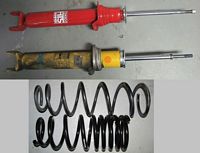
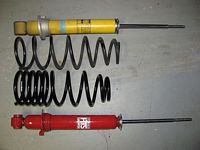
On Miata NC forums you will hear lots of complaints about the factory suspension. I'm sure it was designed for the masses who prefer comfort over performance but I am in that small percentage that prefers performance. I had already installed Flyin Miata sway bars and while they were a definite improvement, the nauseating underdamped OE suspension begs to be replaced with something more capable. I had looked into coilovers but felt that for my purposes (daily driver with some weekend mountain road trips) the Flyin Miata Stage 1 Suspension kit, comprised of Flyin Miata springs and adjustable Tokico HTS shocks (mono-tube for this application BTW), would work well. Since I already had the FM sway bars I effectively had their Stage 2 suspension package.
This suspension is the way the Miata should have come from the factory and actually rides BETTER than the OE wallowy setup. I started at 3 front, 4 rear on the shock adjustments and feel this is perfect. I did order the rear cable adjusters since the rear shocks are hard to access for adjustments but the adjusters came after I had completed the installation- I may not install them since I am not one to adjust between comfort and performance- I prefer performance all the time
After getting the car aligned to FM recommended specs, the center of wheel to fender measurement was 13.5" rear, 14" front. A little higher in front than expected but maintains the factory rake and looks fine, not a huge concern at this point for me when weighted against the big improvement in handling..Flyin Miata installation instructions are HERE with alignment specs, Tokico D-Spec Manual HERE
I have installation notes with pictures HERE.
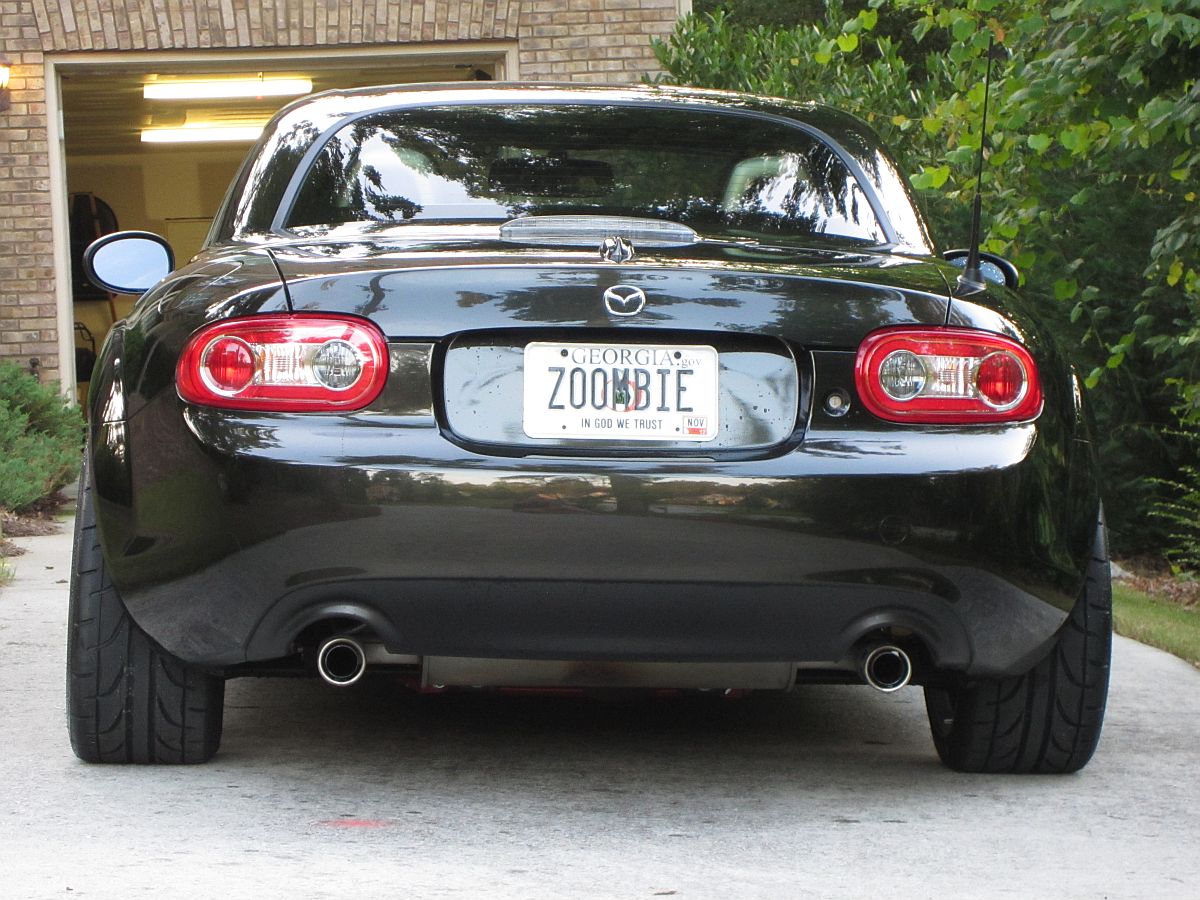
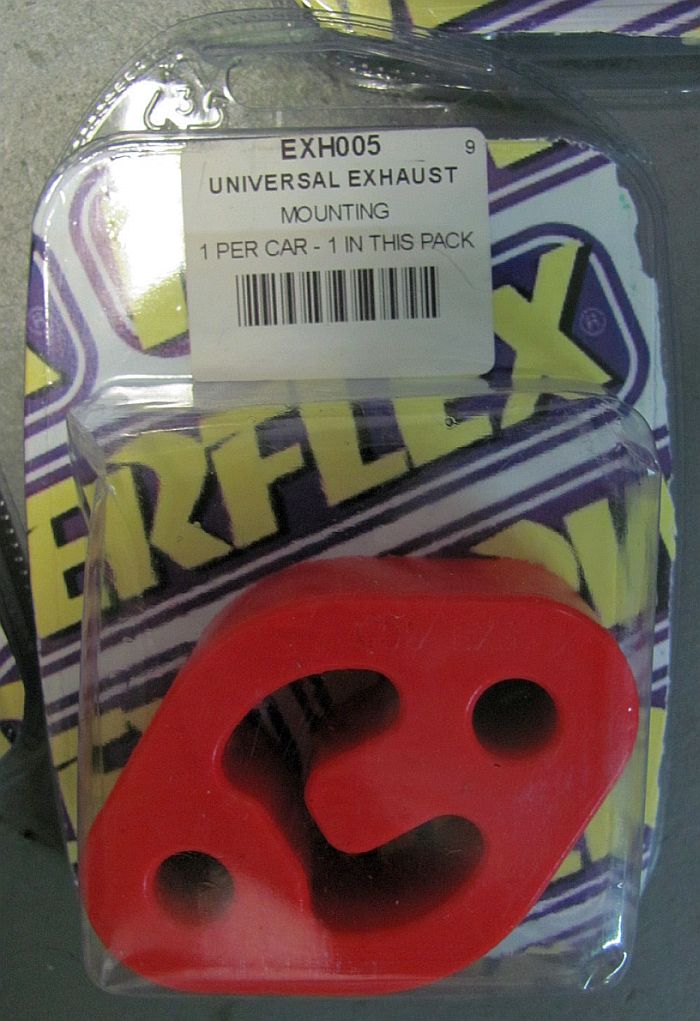
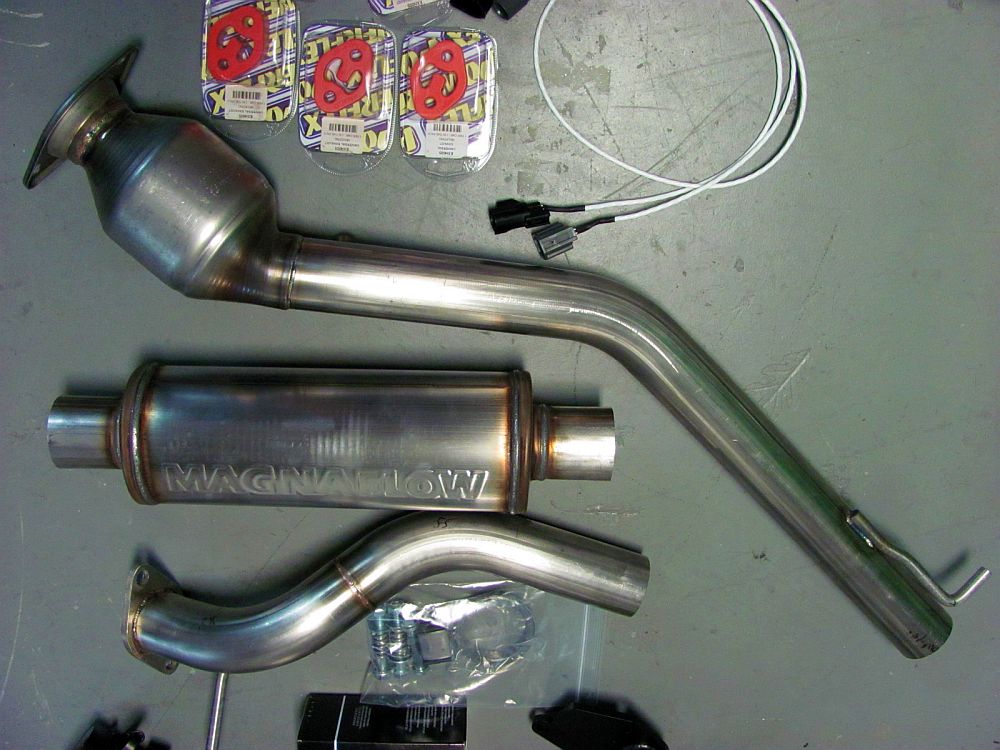
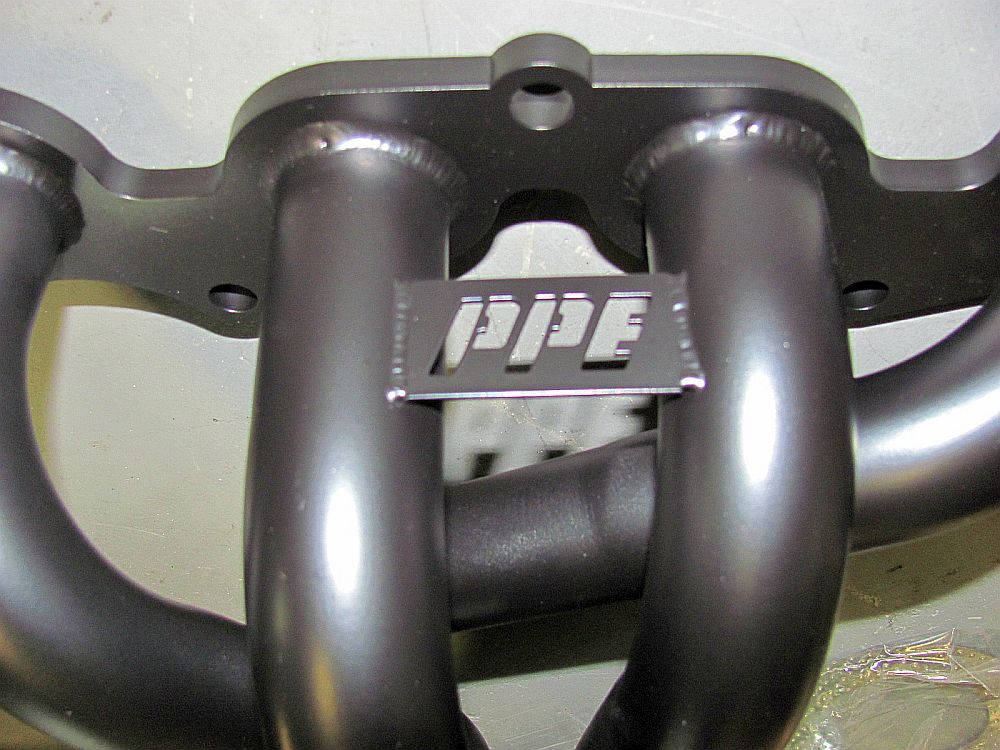
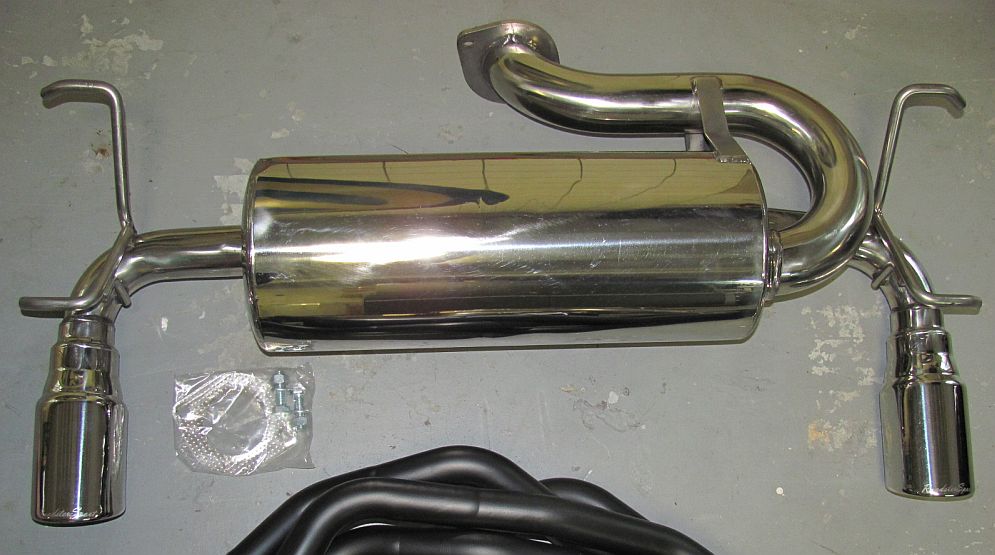
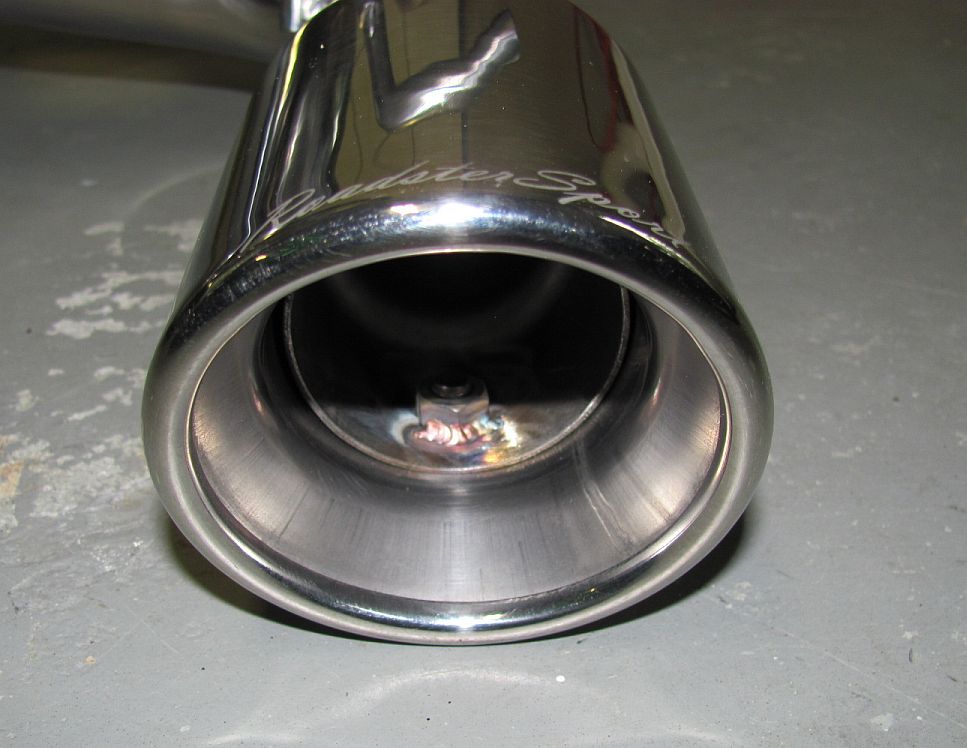
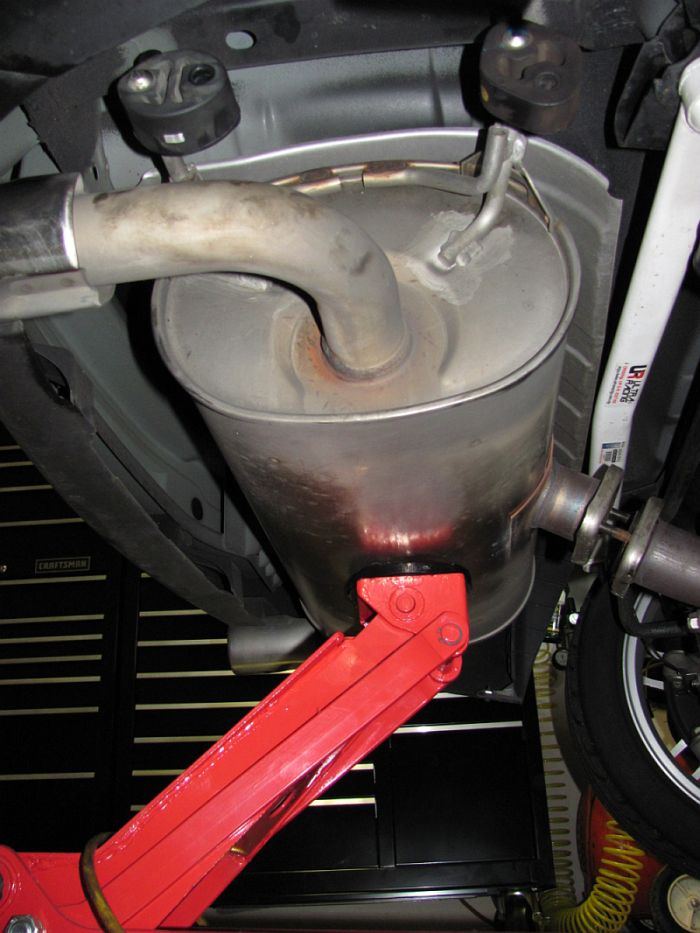
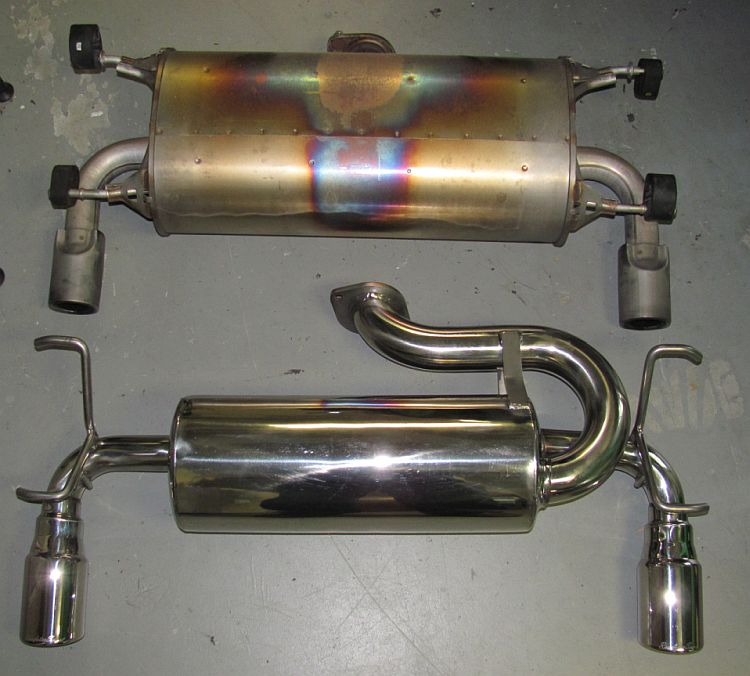
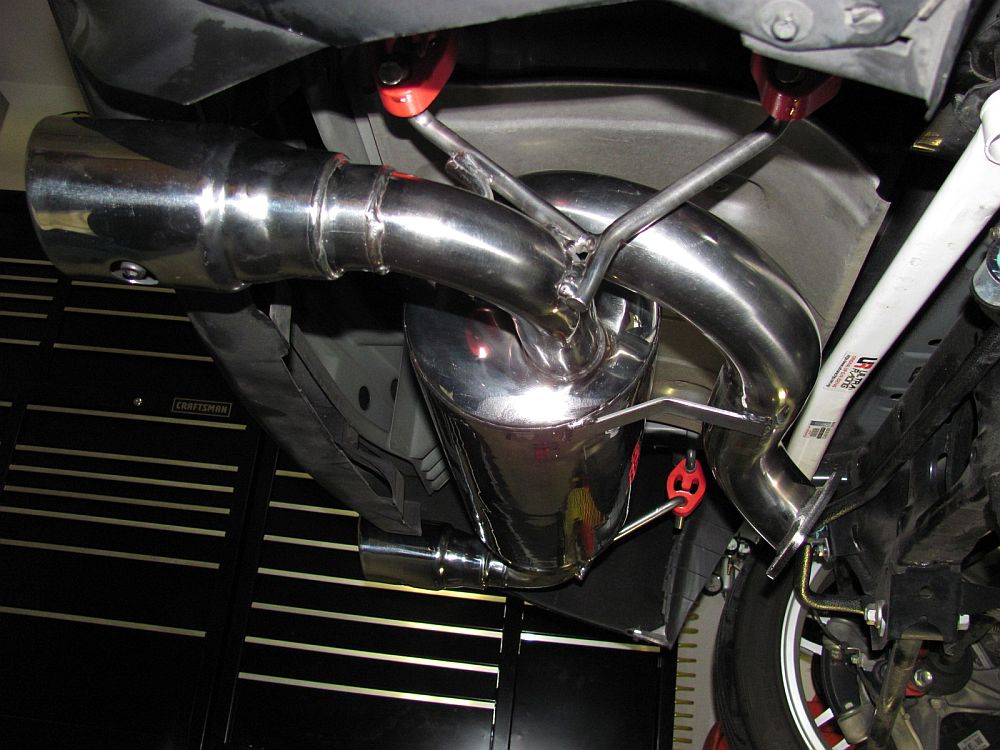
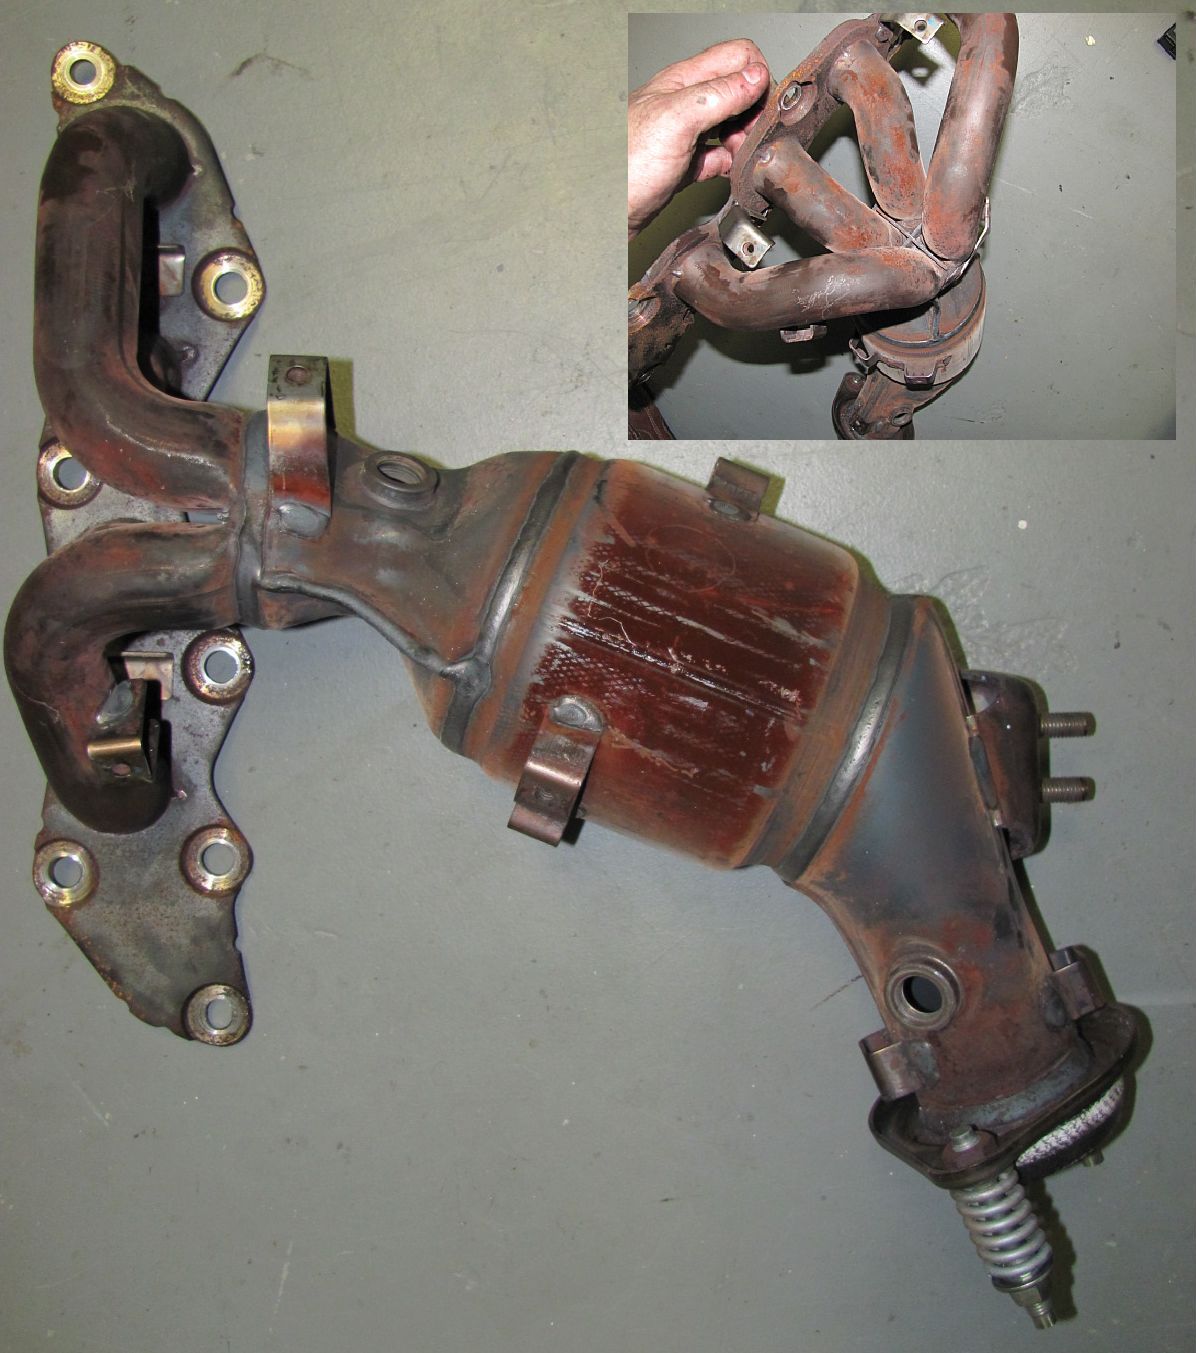
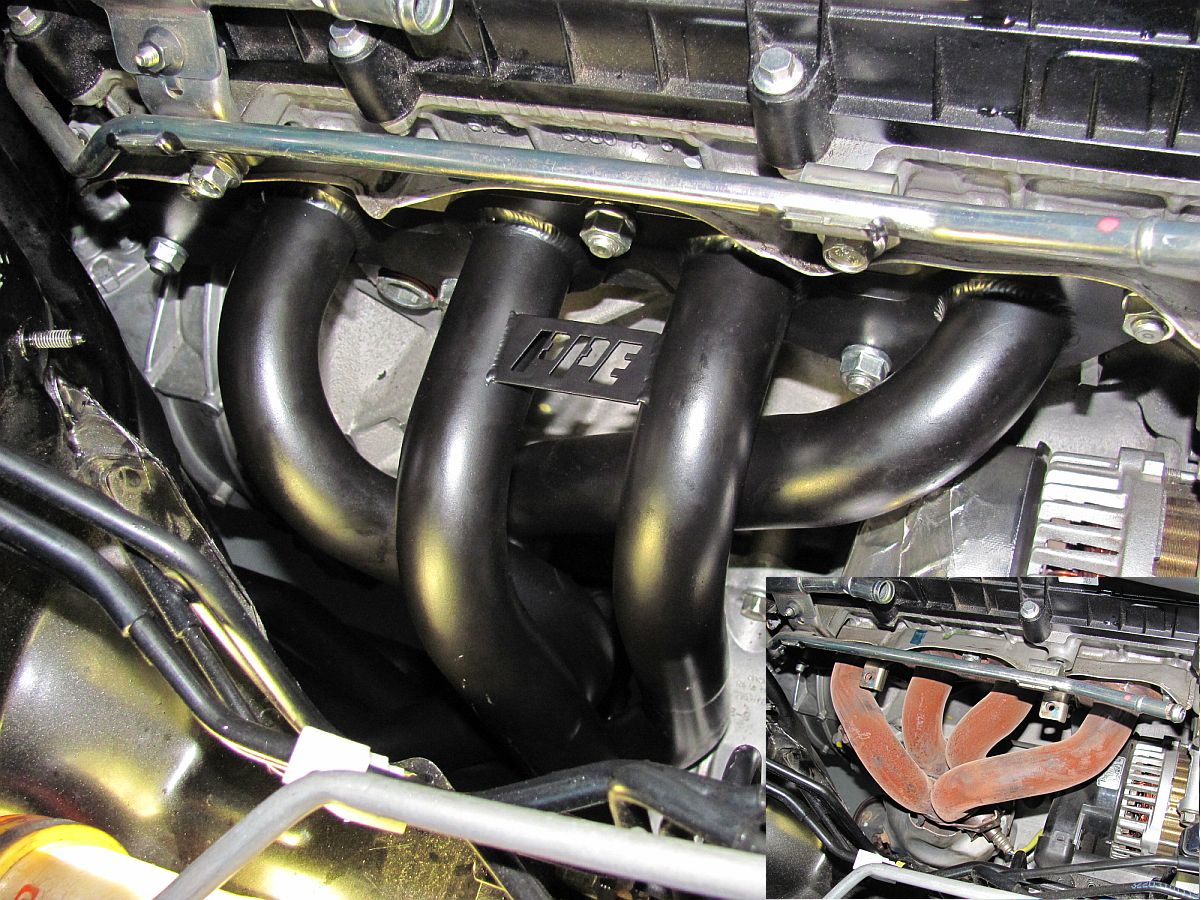
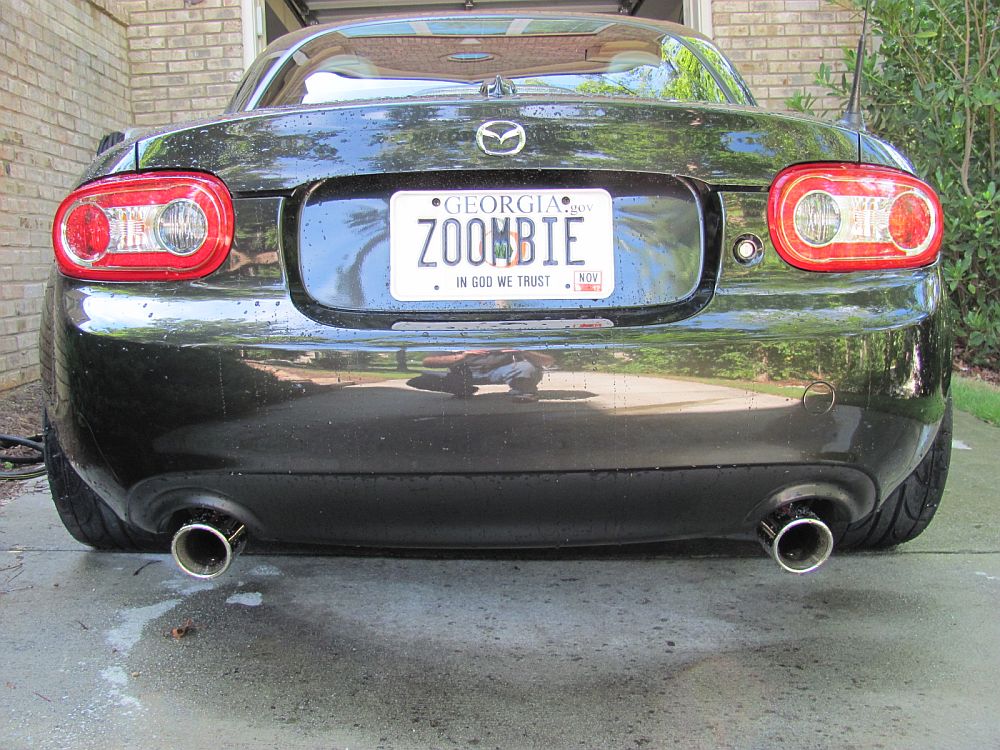
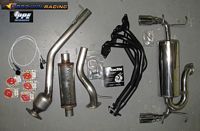
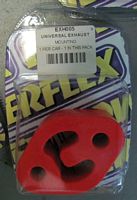
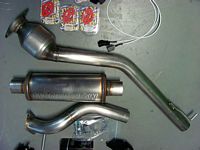
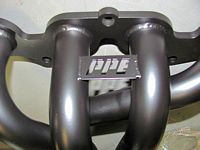
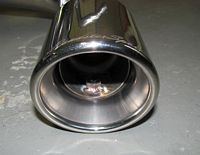
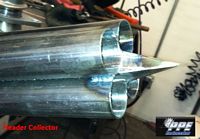
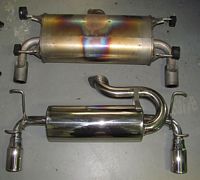
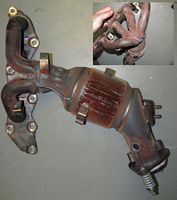
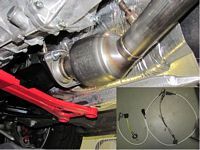
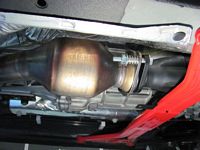
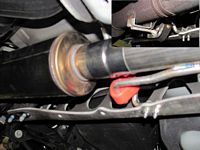
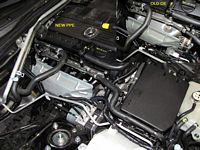
PPE Header and Midpipe ordered from Goodwin Racing along with Goodwin Racing Roadster Sport "Q" exhaust, Goodwin Racing Pre-Cat (#1) Wiring Extension, Goodwin Racing Post-Cat (#2) Wiring Extension, and some PowerFlex High temp poly exhaust hangers.
There is a forum thread HERE that discusses this header, Brian's header installation thread HERE (archived HERE), and msstavros thread on Miata.net for the entire header/exhaust installation HERE (archived HERE).
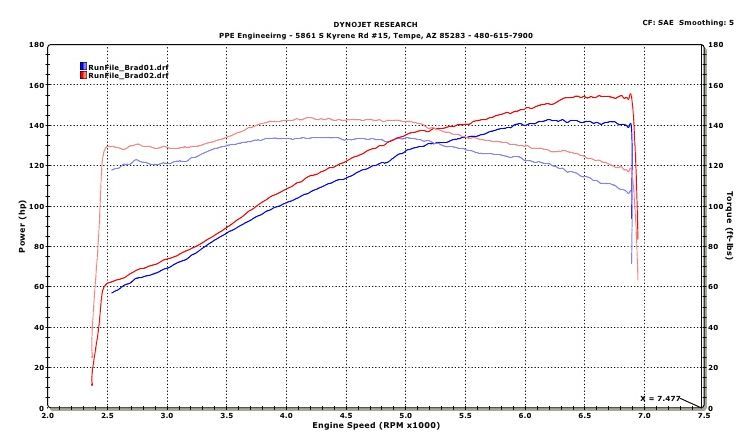
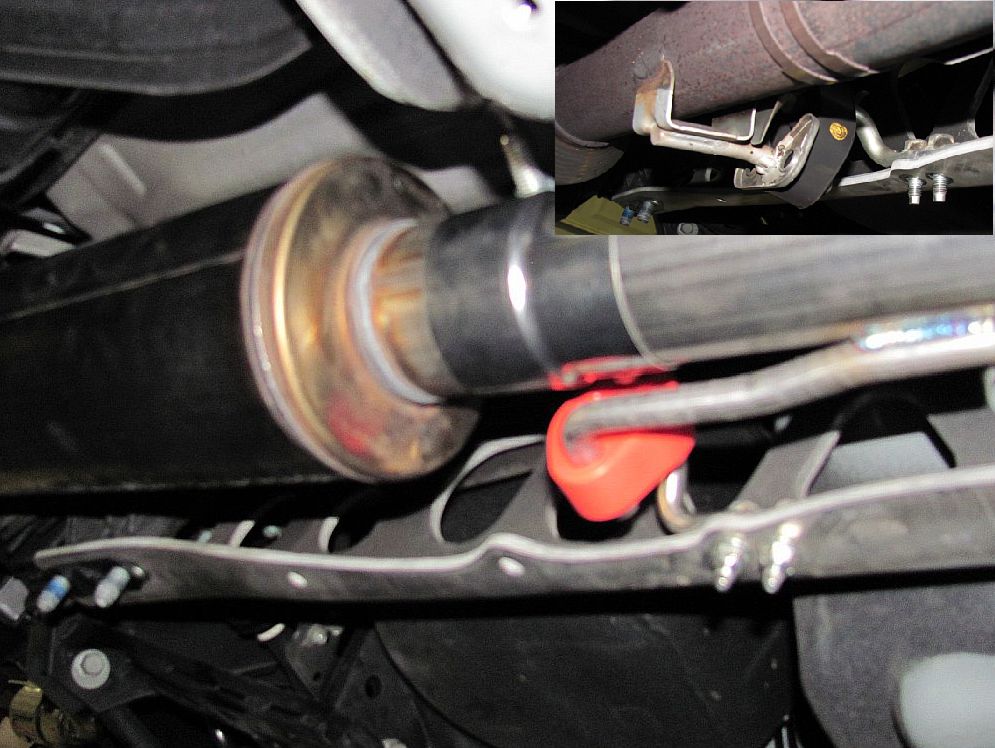
I imagine the PPE system was designed for stock cars that run SCCA or other club racing where braces are not allowed because the PPE mid-pipe does NOT clear the ILM butterfly or PPF braces- I used a ball-peen hammer to make allowances. This did not appear to change the sound or functionality, and I am not overly concerned with the aesthetics. The midpipe clamps are not great and I will probably get the midpipe welded and dump the clamps. This header/midpipe/exhaust combo has made a BIG difference in perceived power, car is a lot more fun now......and the sound is great too (included baffles were removed)


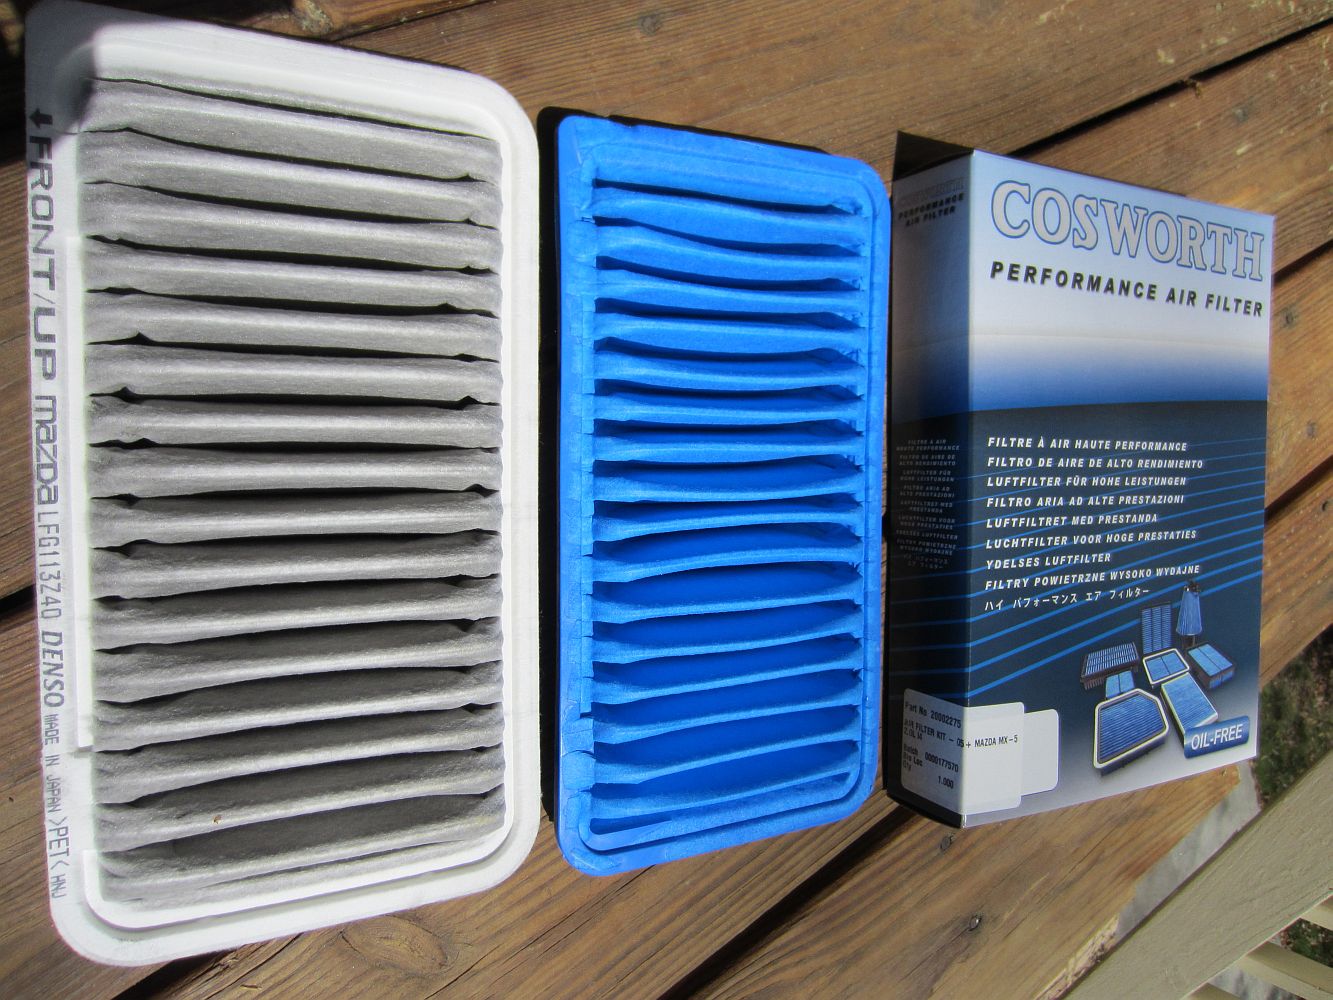
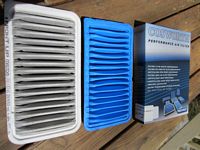
Cosworth Performance Air Filter (P/N 20002275) replaced OE filter at ~50k miles. The OE air filter did not look super dirty but I figured it was time. These filters were on closeout and actually came out cheaper than the Mazda OE filter.
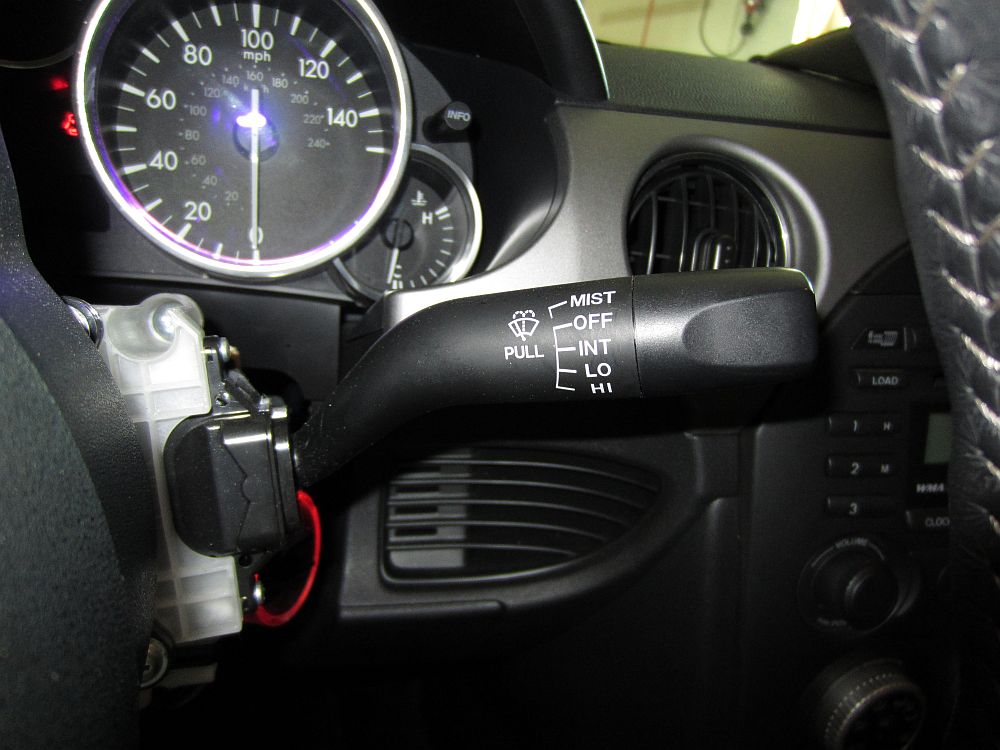
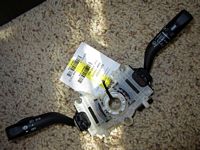
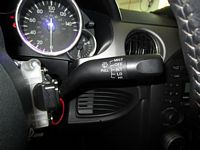
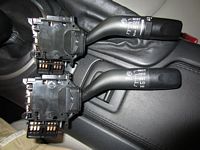
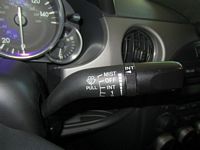
Finally got around to doing the variable delay wiper switch mod, documented by Miata.net's msrecant HERE (archived HERE)- Thanks, great write-up

The entire assembly with both the headlight stalk and wiper stalk was ~$40 on eBay, new the variable delay wiper stalk/switch (P/N GJ6A66128) is ~$120. This P/N comes on the non-rain-sensor RX8 and 2003-2008 Mazda6 models but works perfectly in our Miatas. Easy 10 minute swap and now you have variable delay wipers.
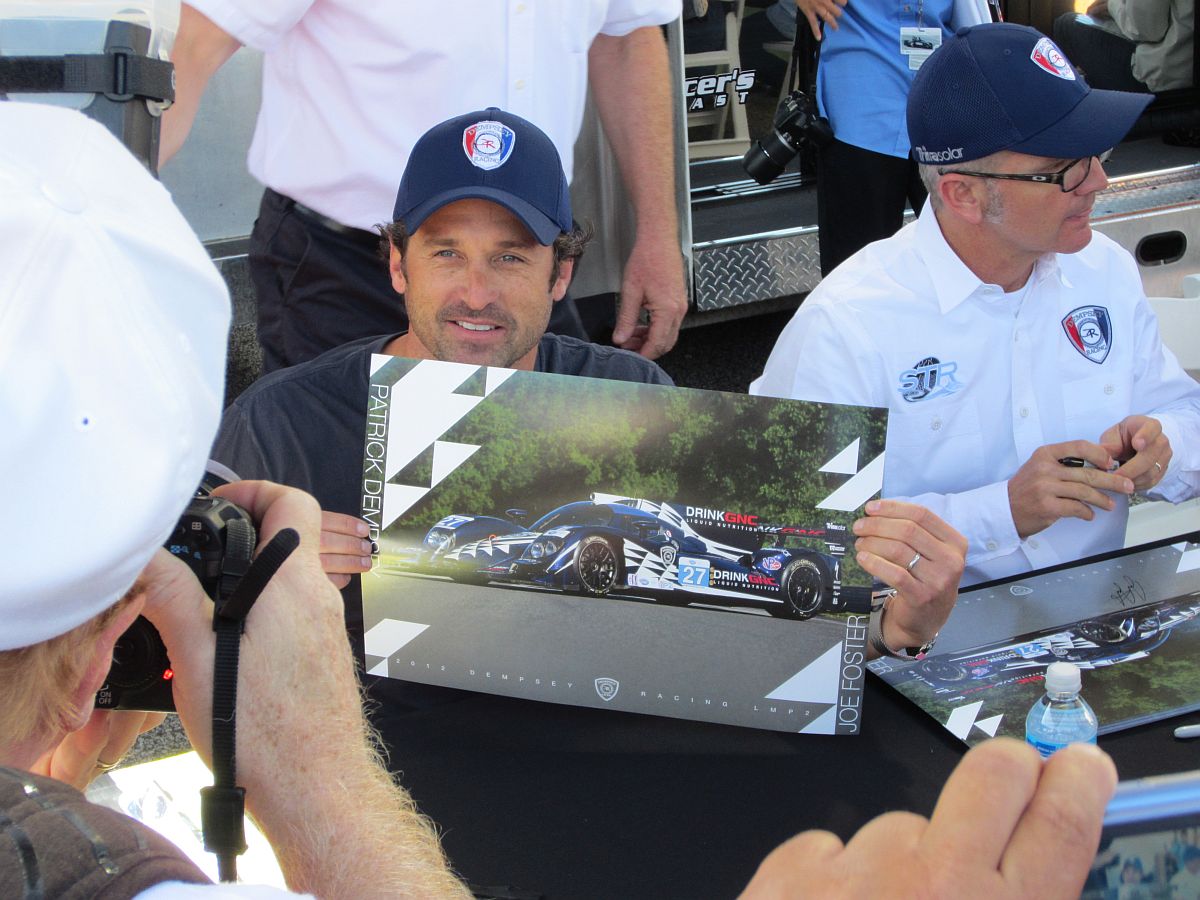
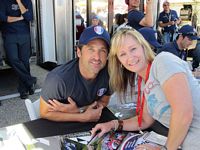
Petit Le Mans 2012 at Road Atlanta, my wife had the opportunity to see Patrick Dempsey who had been racing Mazda RX8s and moved on to a Lola this year.....another guy turned racer with a little help from Mazda


UPDATE: This car was sold and replaced with a Jeep Rubicon, Miatas are great and this one will be missed. I needed a travel car that will go anywhere and one I didn't have to worry about getting dinged in hotel parking lots or at client sites.
Oil Analysis performed by Blackstone Laboratories
Engine Oil Analysis at 22,500 miles- Factory 0w20 Synthetic Motor Oil
Transmission Oil Analysis at 22,500 miles- Factory Transmission Oil
Differential Oil Analysis at 22,500 miles- Factory Differential Oil
Engine Oil Analysis at 30,000 miles- Amsoil Signature Series 0w20 Synthetic Motor Oil
Engine Oil Analysis at 37,300 miles- Amsoil Signature Series 0w20 Synthetic Motor Oil
Engine Oil Analysis at 45,028 miles- Amsoil Signature Series 0w20 Synthetic Motor Oil
Miata Reviews:
AutoBlog: 2011 Mazda MX-5 Miata Special Edition
Road and Track: 2010 Mazda MX-5 Miata PRHT Introduction
Motor Trend: 2010 Mazda MX-5 Miata PRHT First Test
Motor Trend: 2011 Mazda MX-5 Miata Special Edition
Motor Trend: 2012 Mazda MX-5 Miata Special Edition
Car and Driver: 2011 Mazda MX-5 Miata Special Edition Official Photos and Info
Car and Driver: 2011 Best Handling Car for less than $40k
Car and Driver: 2009 Mazda MX-5 Miata Short Take Road Test
AutoWeek: 2010 Mazda MX-5 Miata Drivers Log
AutoWeek: 2011 Mazda MX-5 Miata Special Edition Drivers Log
Automobile Magazine: 2011 Mazda MX-5 Miata Special Edition
Automobile Magazine: 2011 Mazda MX-5 Miata Sport- Miata Summer
Automobile Magazine: 2011 Mazda MX-5 Miata Sport- Miata Summer Ann Arbor to Chicago
Automobile Magazine: 2011 Mazda MX-5 Miata Sport- Miata Summer One Wedding and Campus Tour
Automobile Magazine: 2011 Mazda MX-5 Miata Sport- Miata Summer Autocross Belle Isle
Automobile Magazine: 2011 Mazda MX-5 Miata Sport- Miata Summer 1400 Mile Mix Tape
Automobile Magazine: 2011 Mazda MX-5 Miata Sport- Miata Summer Shifting Gears, Shifting Plans
Automobile Magazine: 2011 Mazda MX-5 Miata Sport- Miata Summer Second Chances
Automobile Magazine: 2011 Mazda MX-5 Miata Sport- Miata Summer Bare Bones
Automobile Magazine: 2011 Mazda MX-5 Miata Sport- Miata Summer Shoe Shopping
Automobile Magazine: 2011 Mazda MX-5 Miata Sport- Miata Summer Trip Down Memory Lane
WindingRoad.com: 2010 Mazda MX-5 Miata PRHT Driven
Left Lane News: 2011 Mazda MX-5 Miata Special Edition
Subcompact Culture: 2010 Mazda MX-5 Miata PRHT
Automobile.com: 2011 Mazda MX-5 Miata
Cars.com: 2011 Mazda MX-5 Miata
Mazda Miata Video: *High Speed Connection Recommended*
Mazda MX-5 Best Drivers Car 2009- Randy Pobst at Laguna Seca
Fifth Gear: New NC vs Old NA Miata (MX5)
Car and Driver: Tested - 1967 Lotus Elan and Mazda MX-5 Super 20
AutoSavant: 2013 Mazda MX-5 PRHT Club Miata Manual - In Depth Test Drive
Mazda Miata Documents/Files:
2011 Mazda Miata Special Edition MicroSite
2011 Mazda Miata Maintenance Schedule
2011 Mazda Miata Quick Start Guide
2011 Mazda Miata Owners Manual
2011 Mazda Miata Specifications
2011 Mazda Miata Specifications Brochure
Mazda Miata Certified Pre-Owned (CPO) Brochure
2006 Mazda Miata Introduction/Release Detailed Pictures
Mazda Miata PRHT Technical Training Manual
Mazda Miata Service Bulletin: PRHT Rattle
Mazda P66M-D Transmission Workshop Manual
DIY Guides/Mazda Miata Installation Instructions:
The Ultimate Guide to Raising Your Miata by Timothy M Metzinger
BillsWebSpace:Miata NC2 Engine Oil, Transmission Oil, Differential Oil Change
BillsWebSpace:Miata NC2 Center Console Removal (and Shift/Parking Brake Boot Replacement)
BillsWebSpace:Miata NC2 Radar Detector Hardwire Installation
BillsWebSpace:Miata NC2 Brace Installation
BillsWebSpace:Miata NC2 Motor Mounts Installation
BillsWebSpace:Flyin Miata NC2 Suspension (Springs and Shocks) Installation
BillsWebSpace:Miata NC2 AKE Key Battery Replacement
Miata NC iPod Integration (console R&R)
Miata NC Clutch Adjustment: Mazda and Miata.net
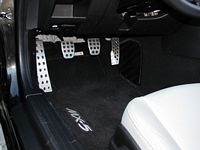
Miata Aluminum Gas Pedal Installation
Miata Aluminum Brake/Clutch Pedal Installation
Miata Aluminum Footrest Installation
Miata NC Kuda Mount (P/N 284240) Installation
Flyin Miata NC Sway Bar Installation
Cobalt Miata NC Sway Bar Installation
MazdaSpeed Miata NC Sway Bar Installation with Torque specs
Miata Front Shock Tower Brace (FSTB) Cowl Mounting Bracket Installation by Miata.net's mbj2w
Cobalt Miata NC Front Shock Tower Brace Installation
Miata NC 6-Speed Transmission Adjustment Procedure for 3/4 Throw
Adding Lumbar Support to Miata NC by Miata.net's jrprich
Brian Goodwin's Miata NC Header Installation (archived HERE)
Miata NC Header/Exhaust Installation by Miata.net's msstavros (archived HERE)
Miata NC Cosworth SuperCharger Installation
Mazda Miata NC Top Latch Noise TSB
Forums and Clubs: