


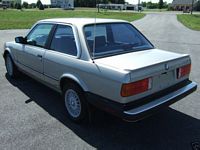
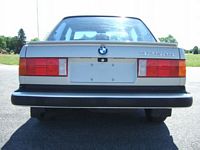
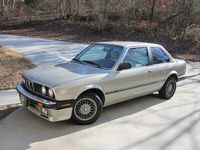
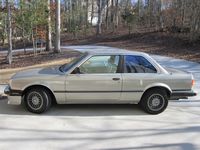
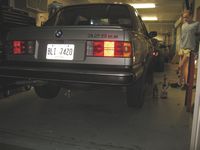
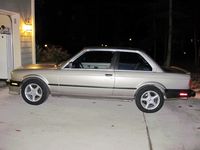
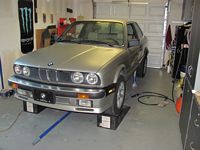
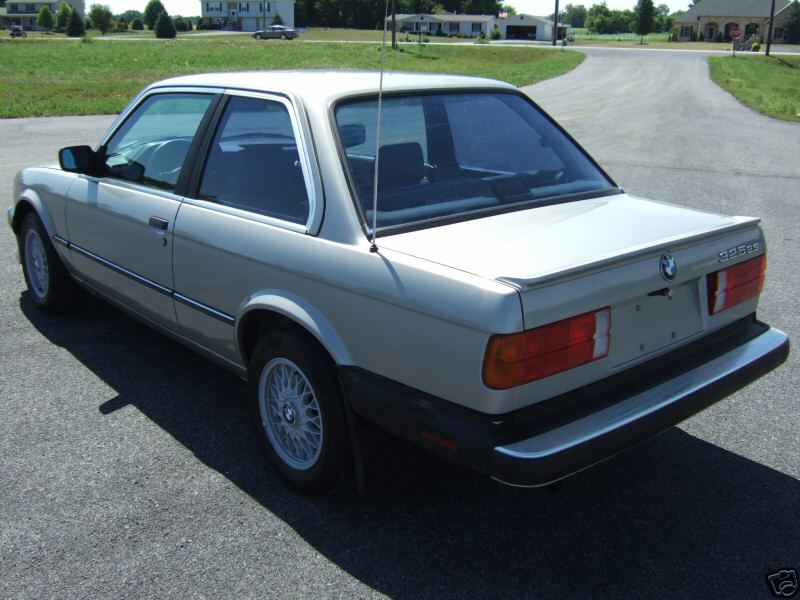
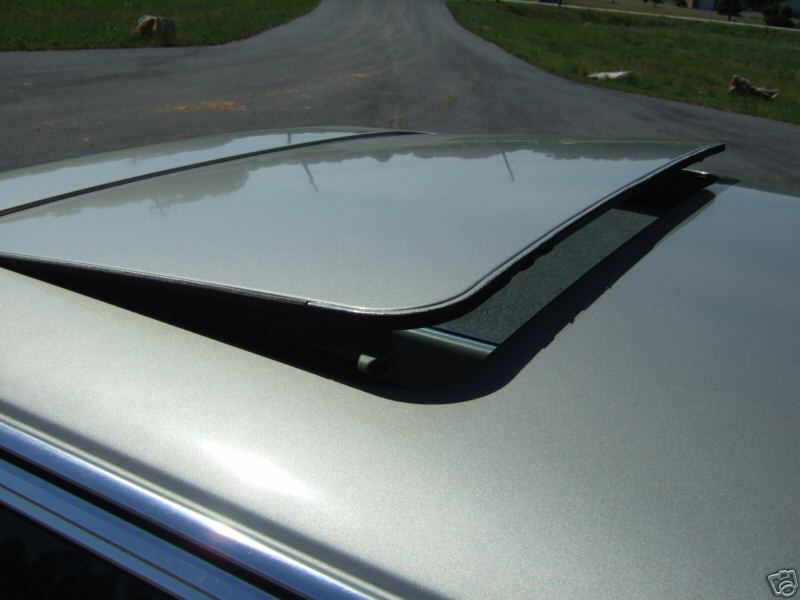
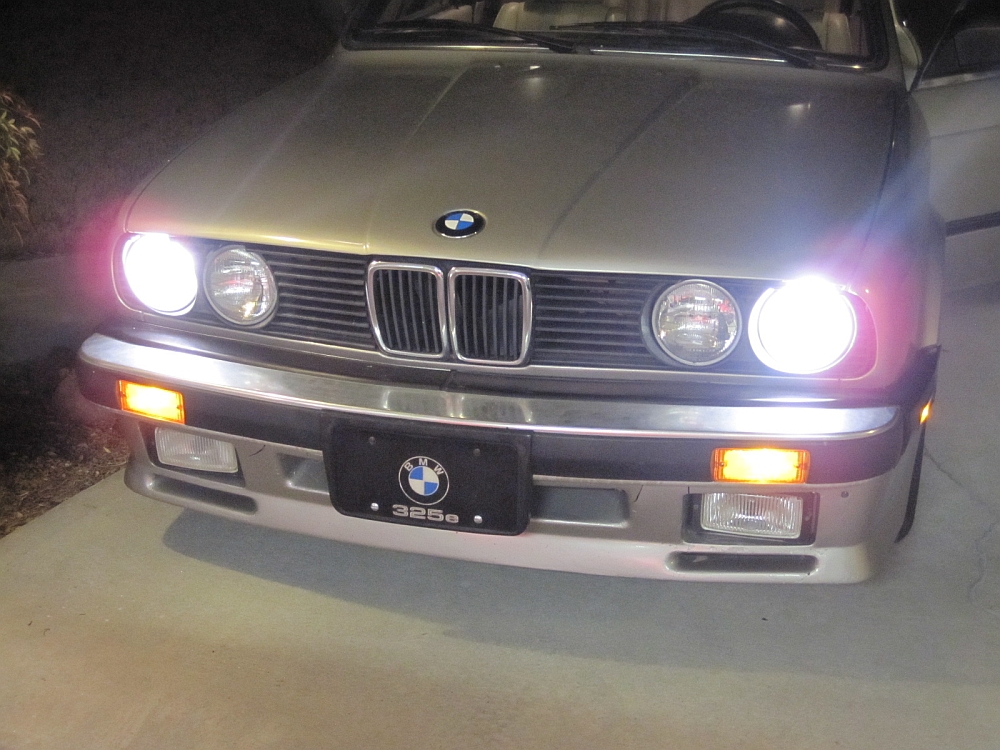
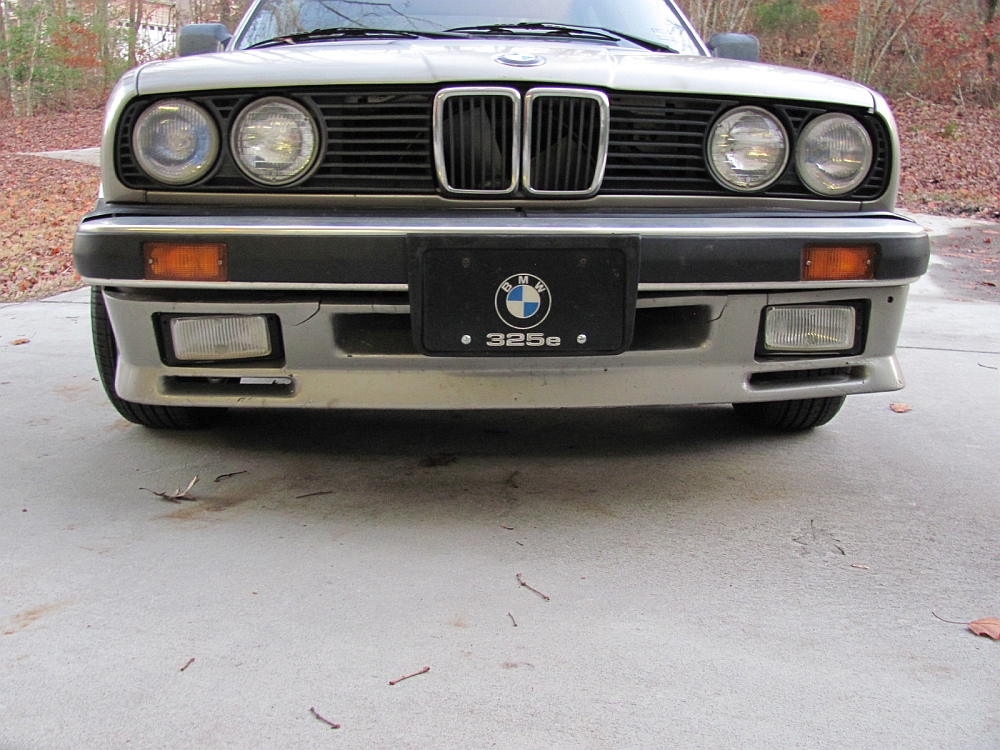
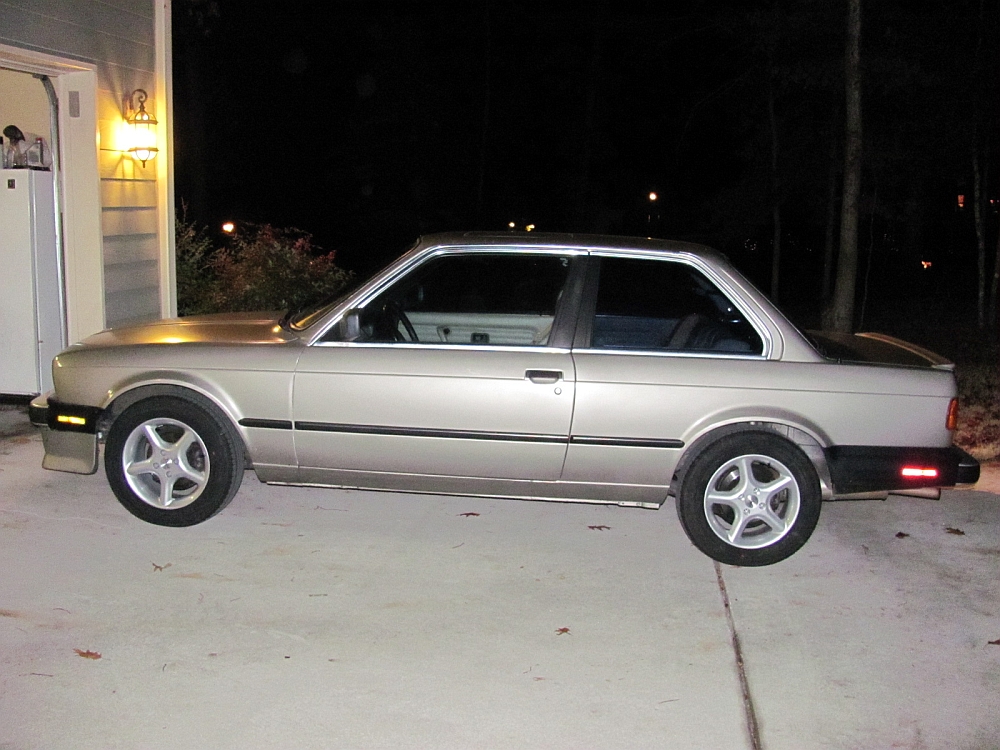
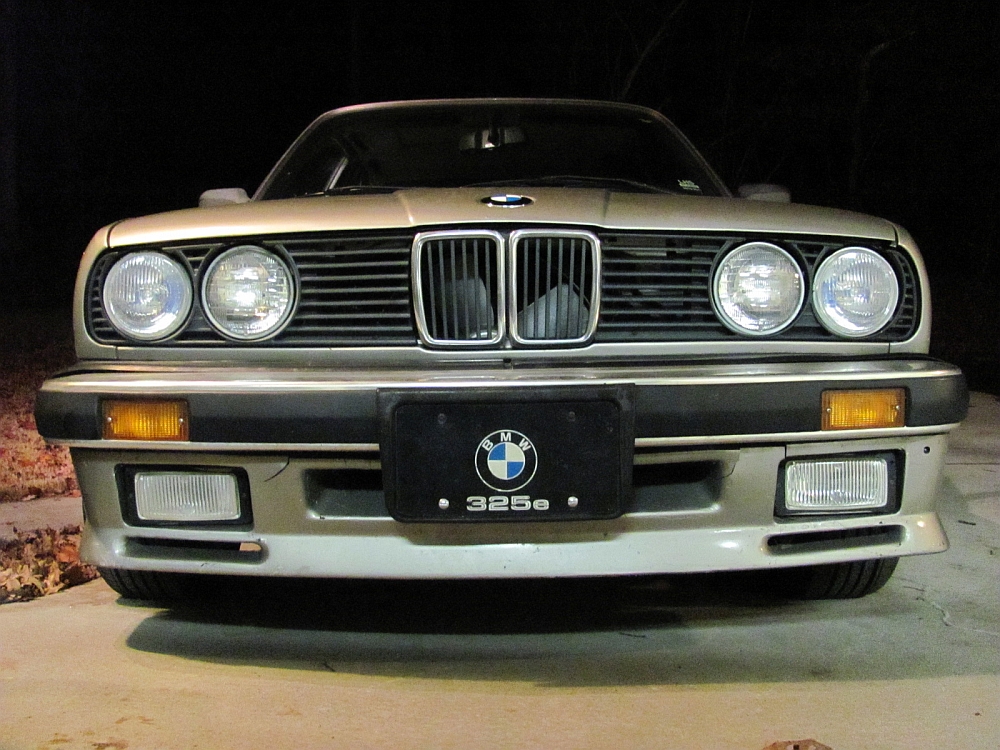
 1986 BMW 325es
I decided to help my brother bring this BMW back to life (help meaning most of the work
).
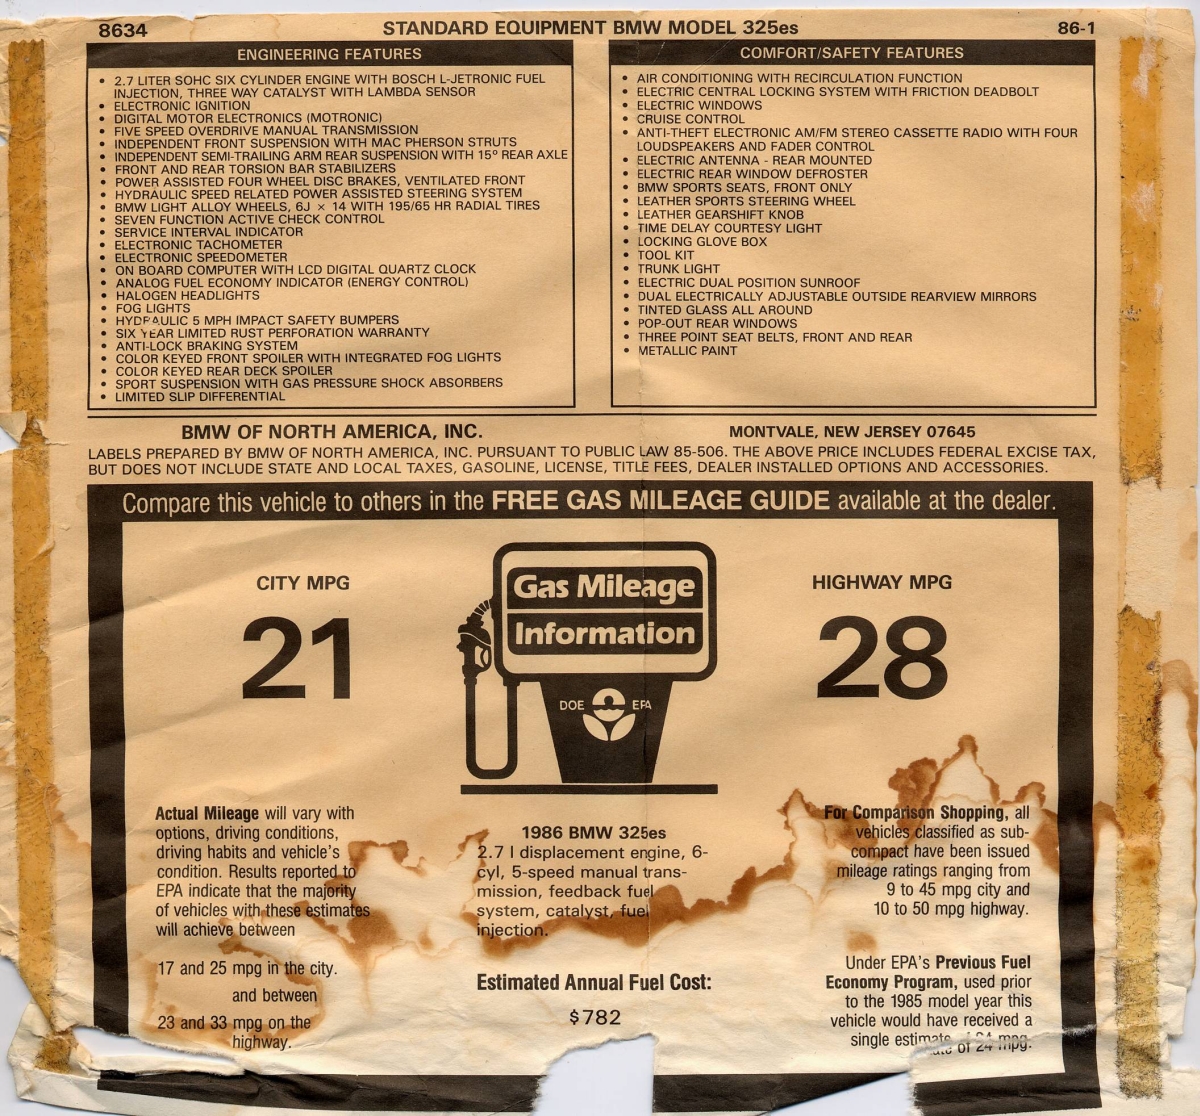
The eBay ad that attracted him is HERE. A 325ES Standard Equipment and Gas Estimates sticker example is HERE.
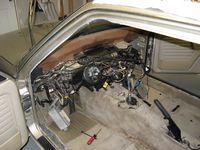
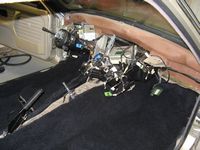
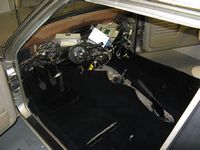
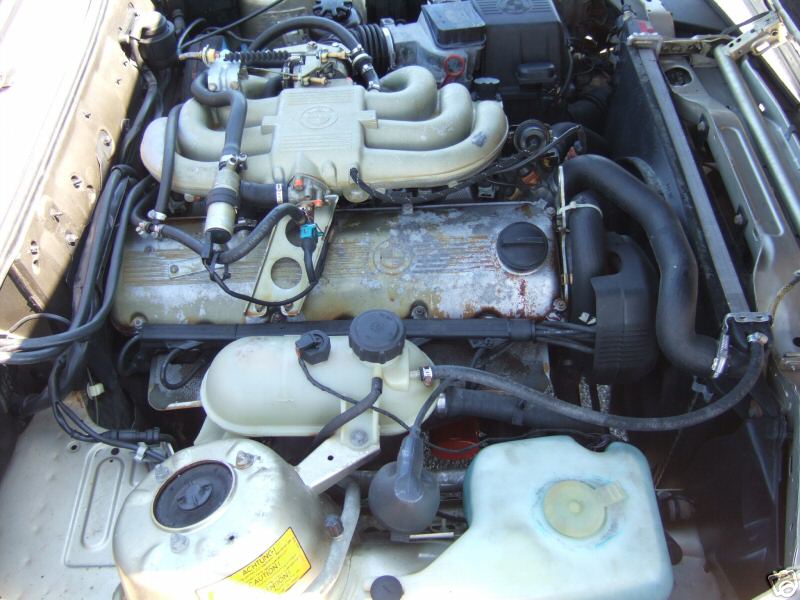
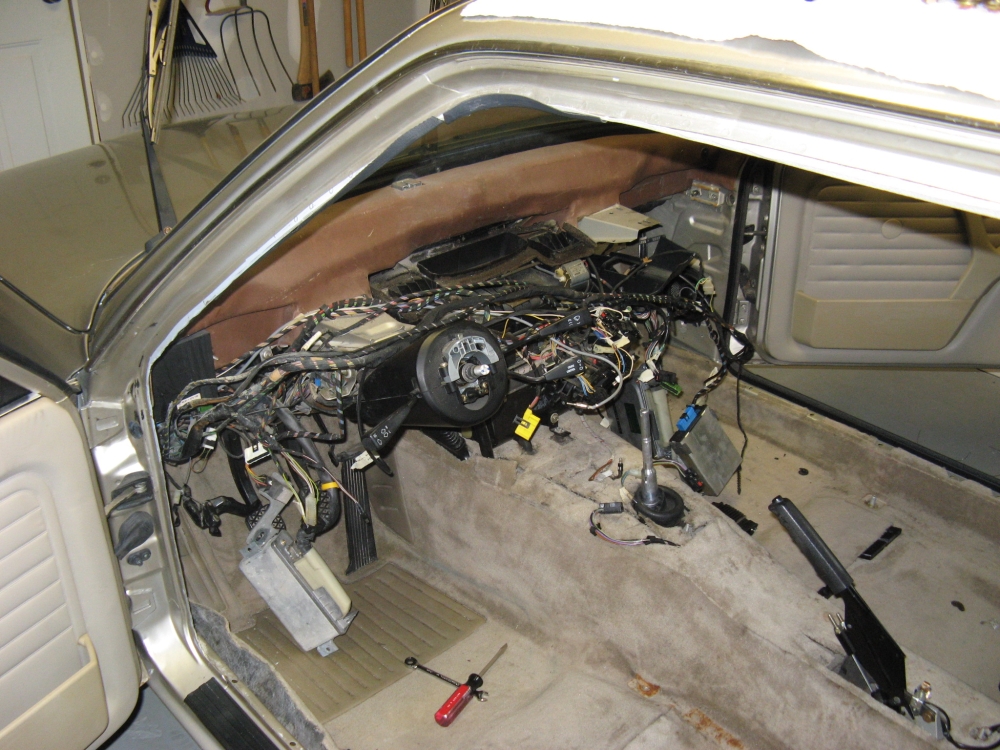
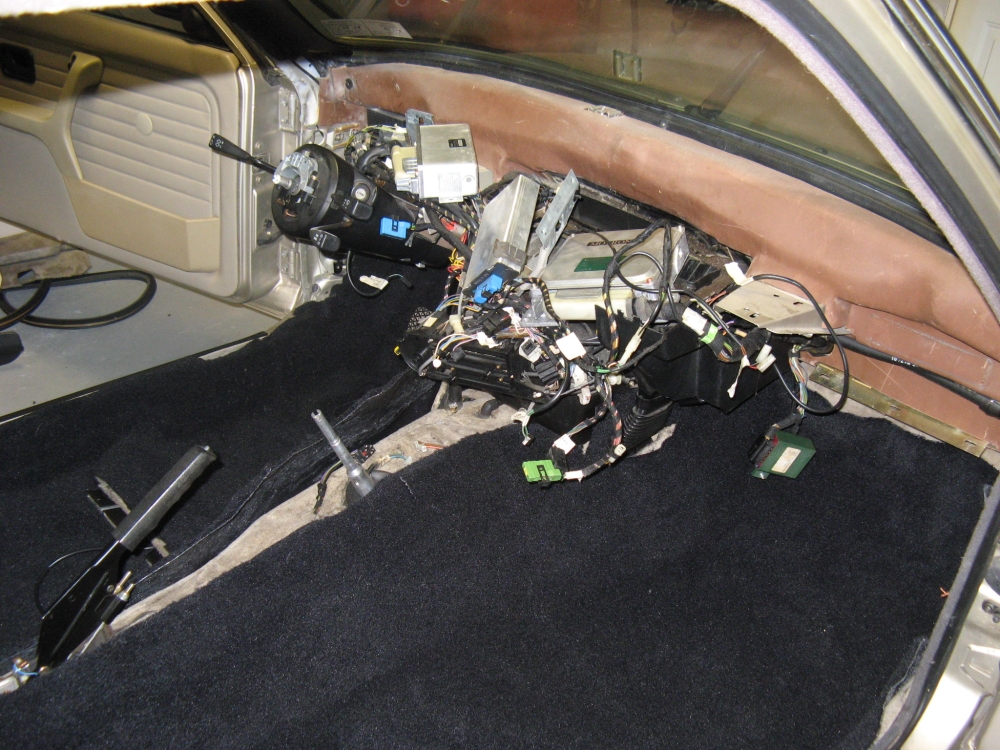
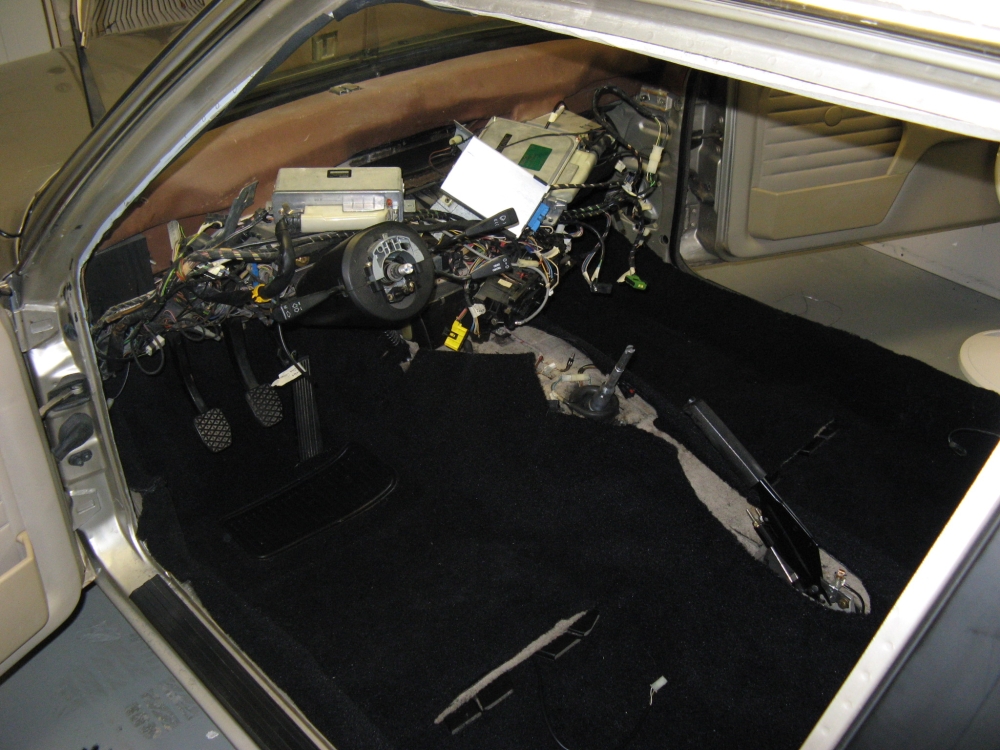
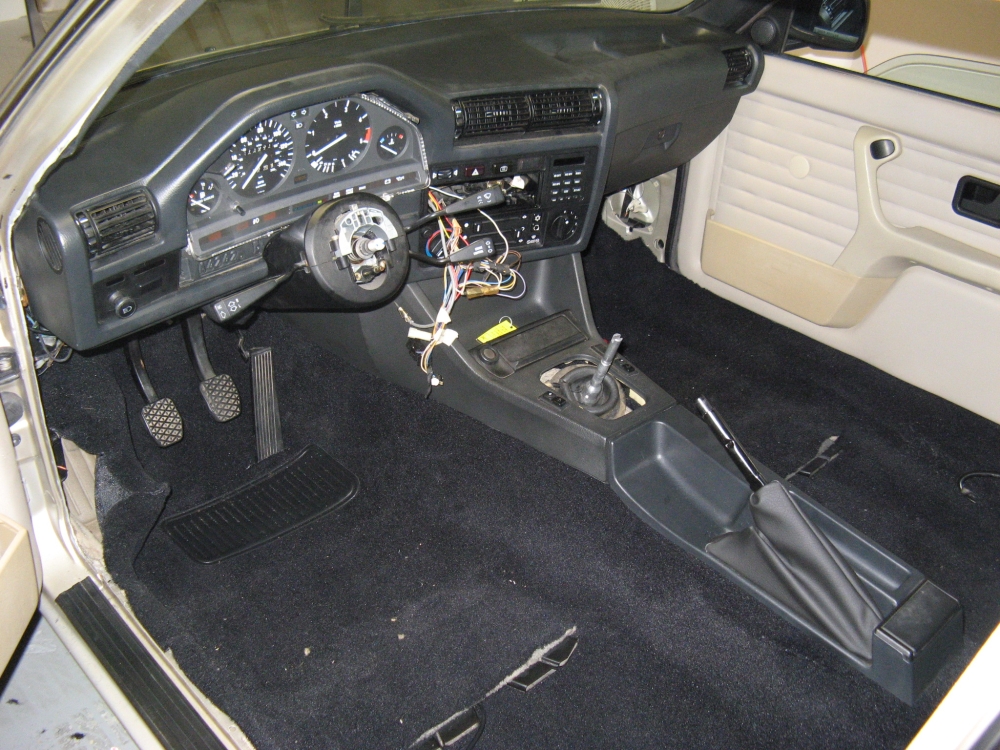
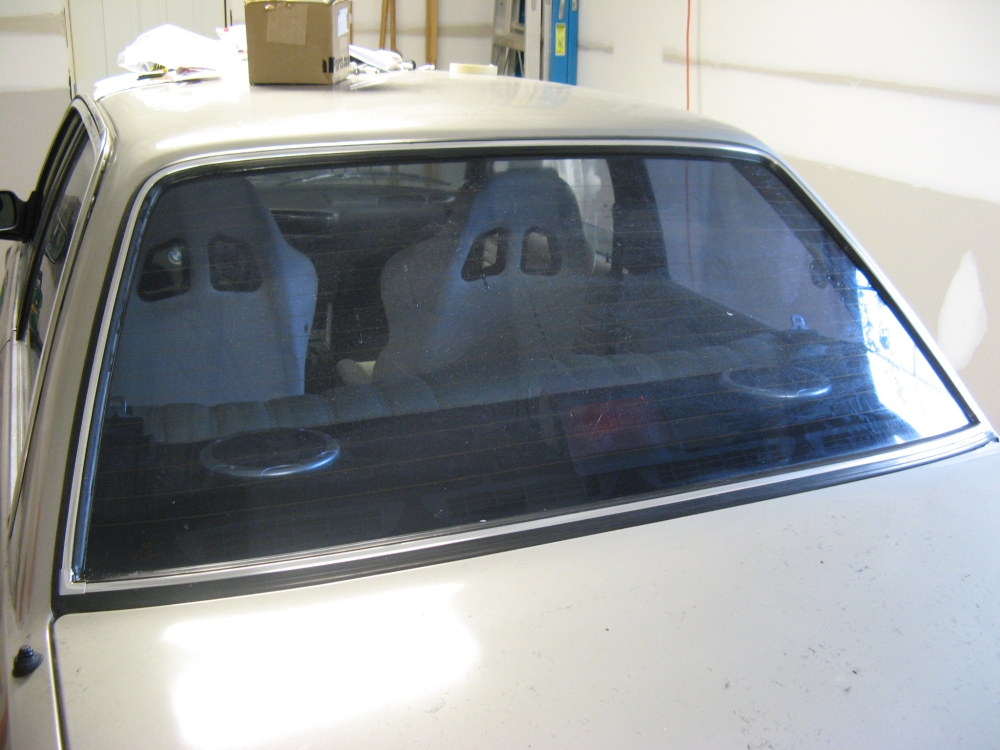
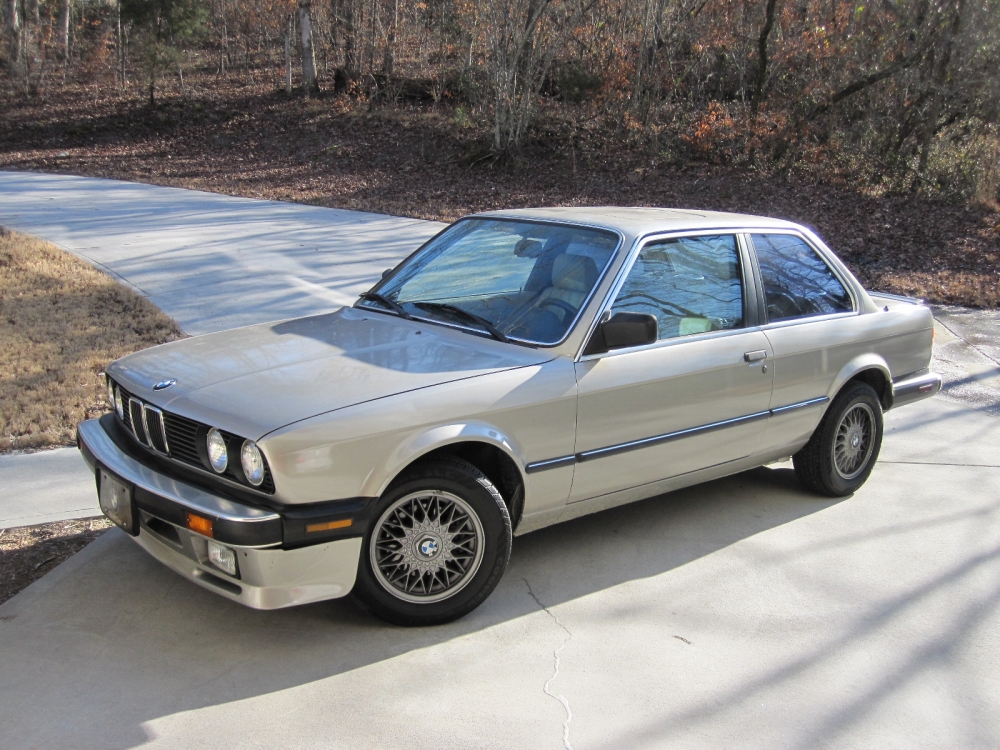
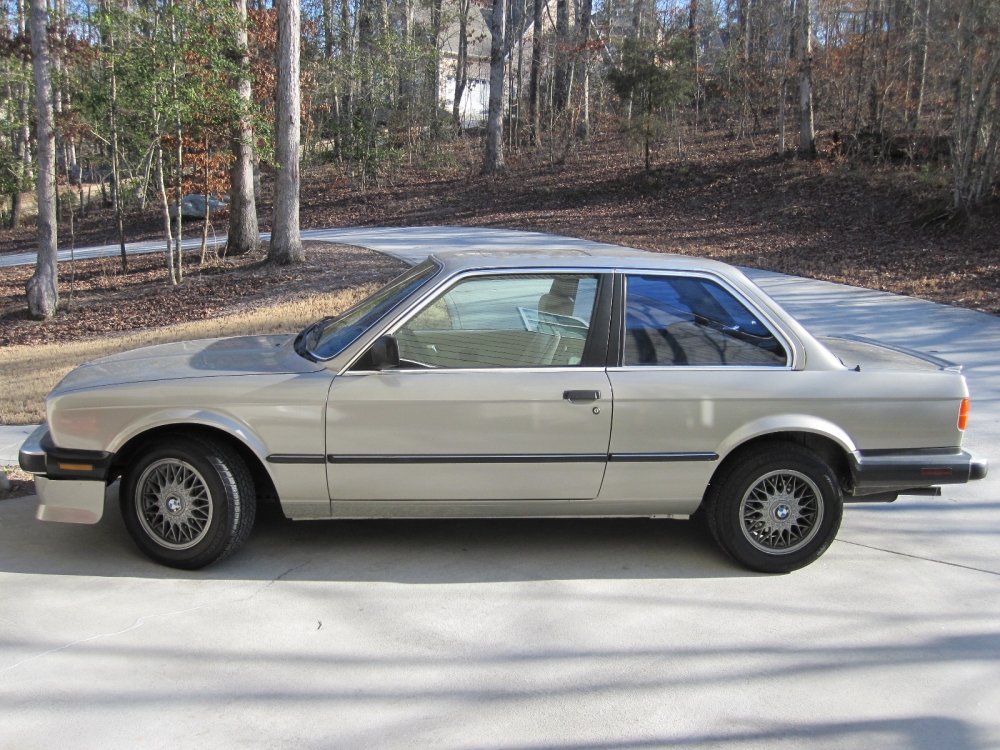
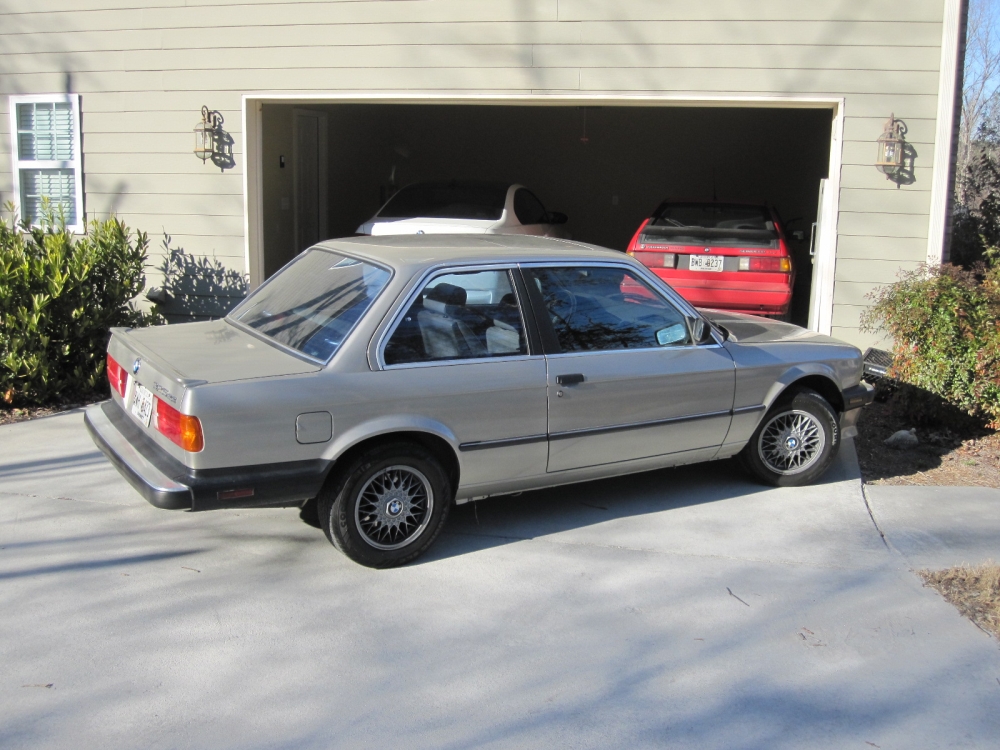
Before Pics: PA Seller took these prior to auction listing (I snapped a few before pics as I was replacing things too)-


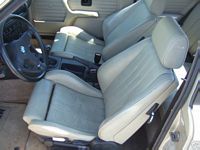
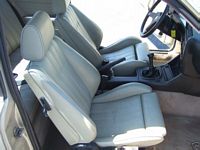
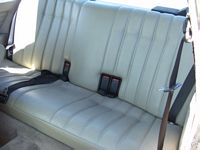

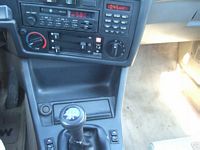

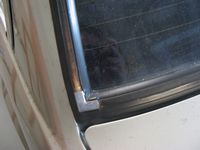
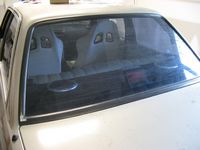
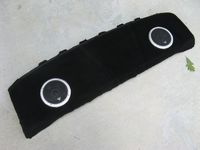
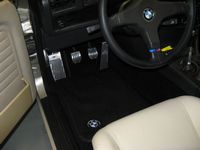
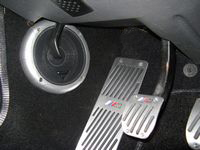
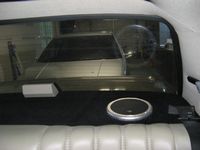
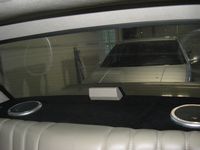
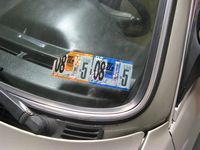
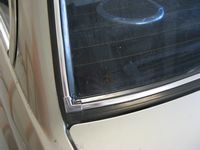
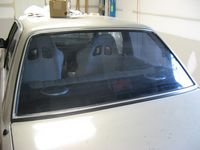
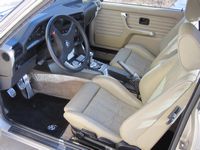
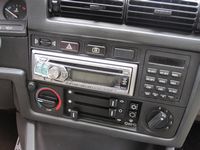
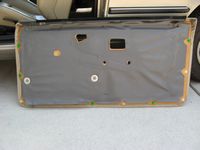
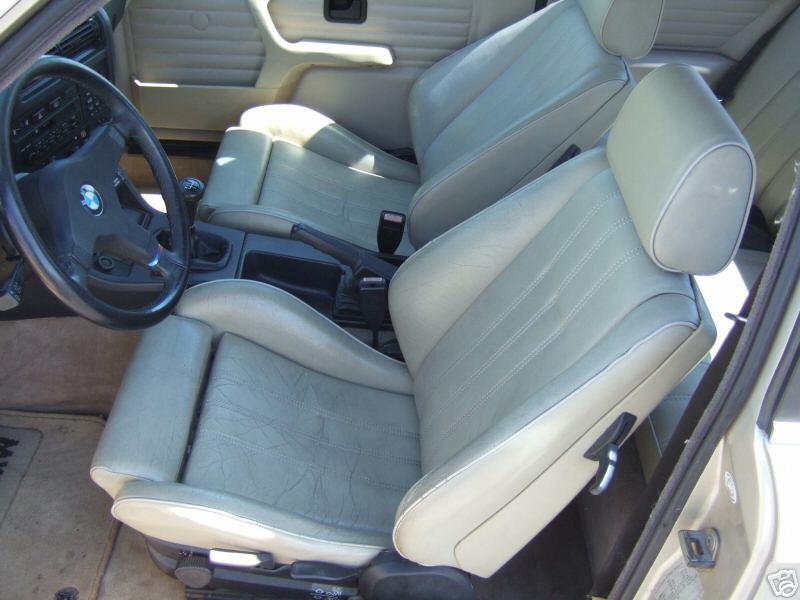
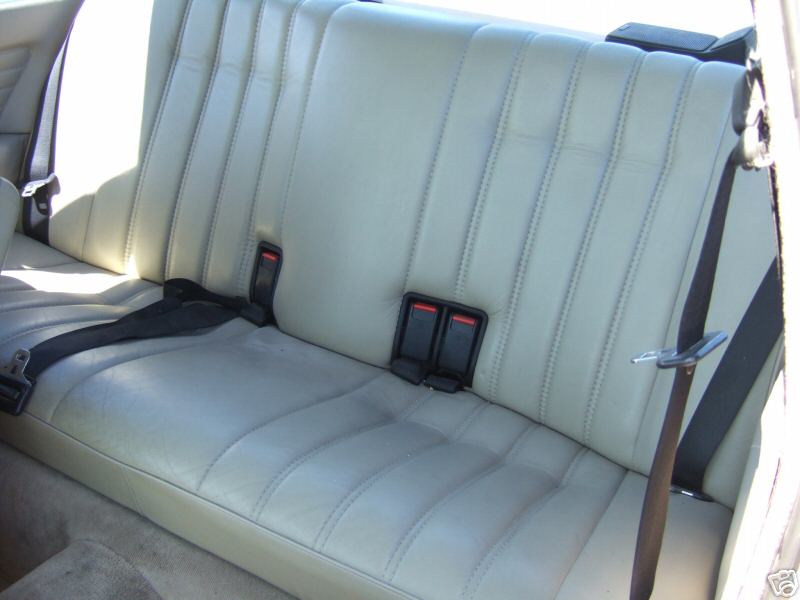
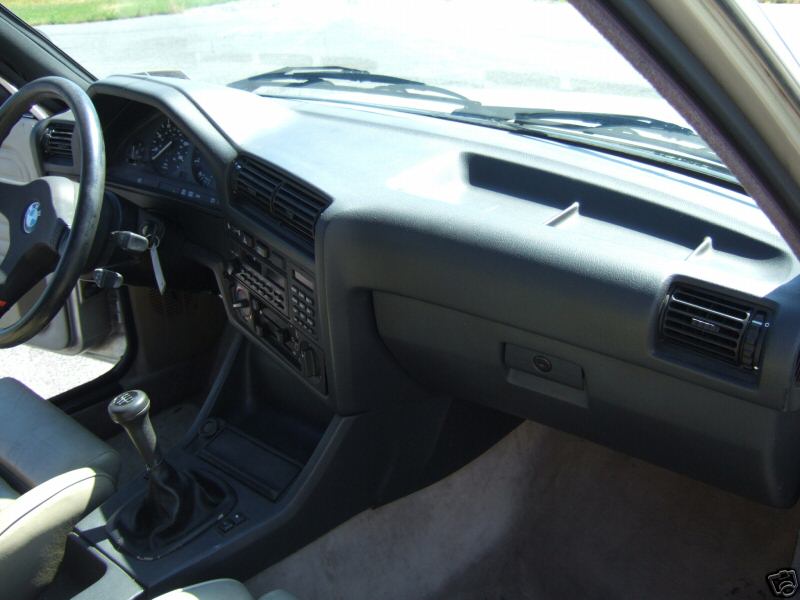
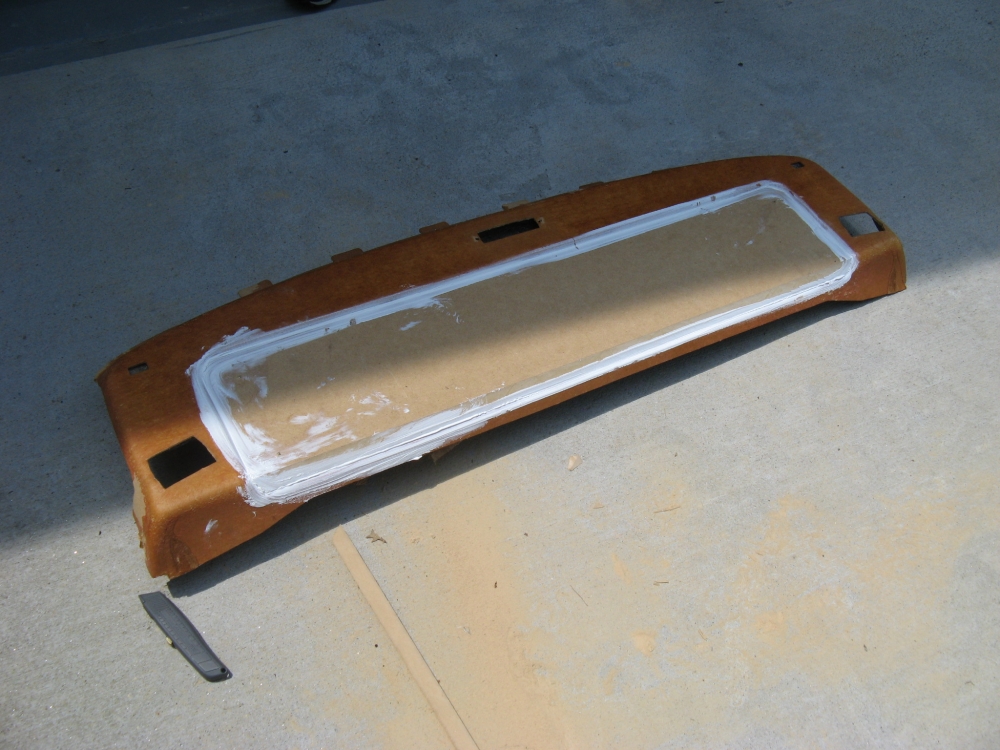
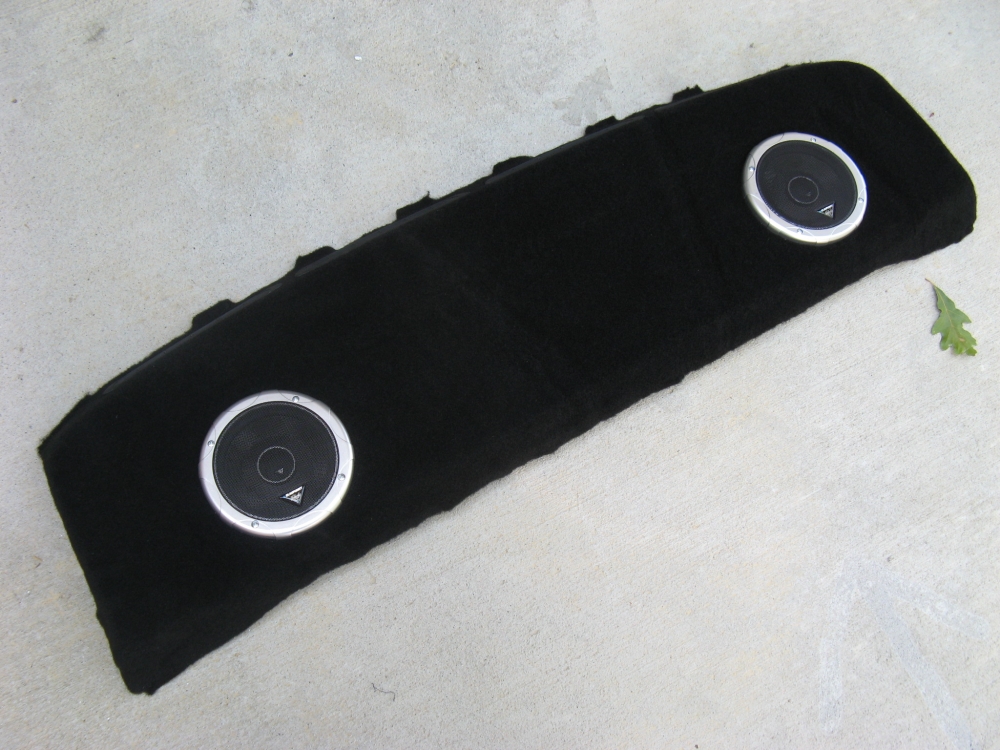
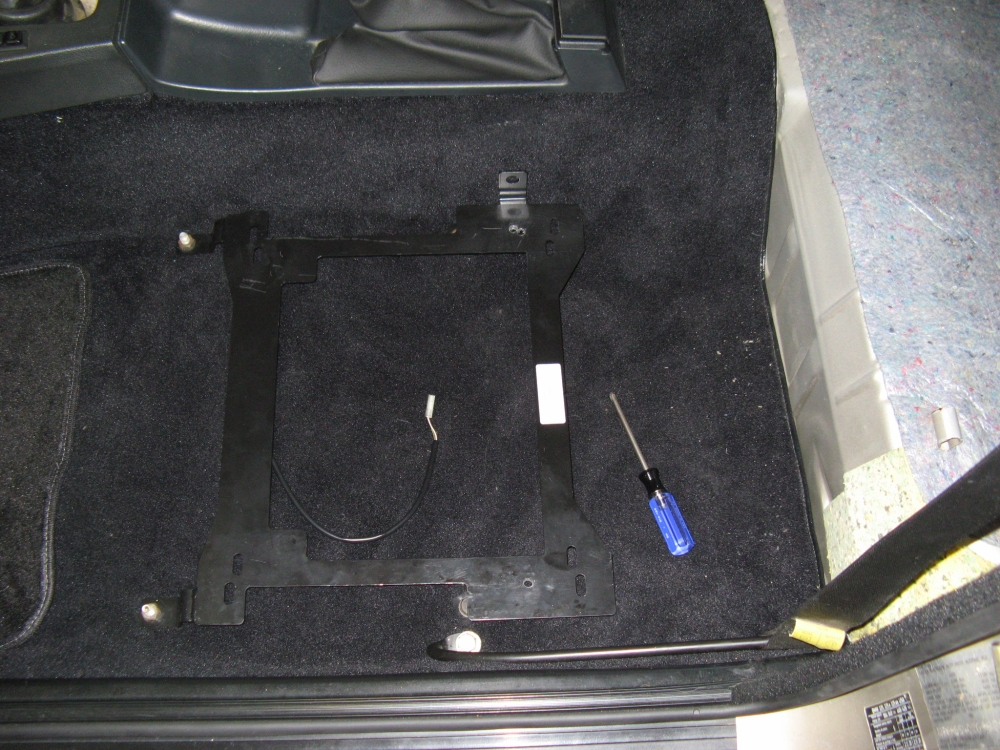
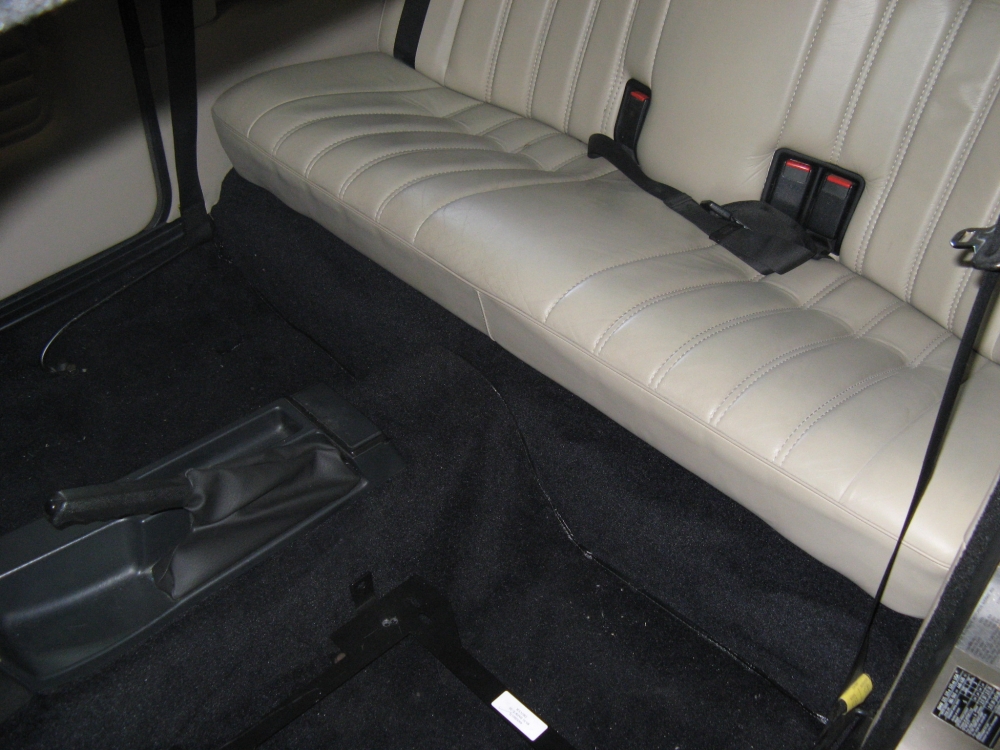
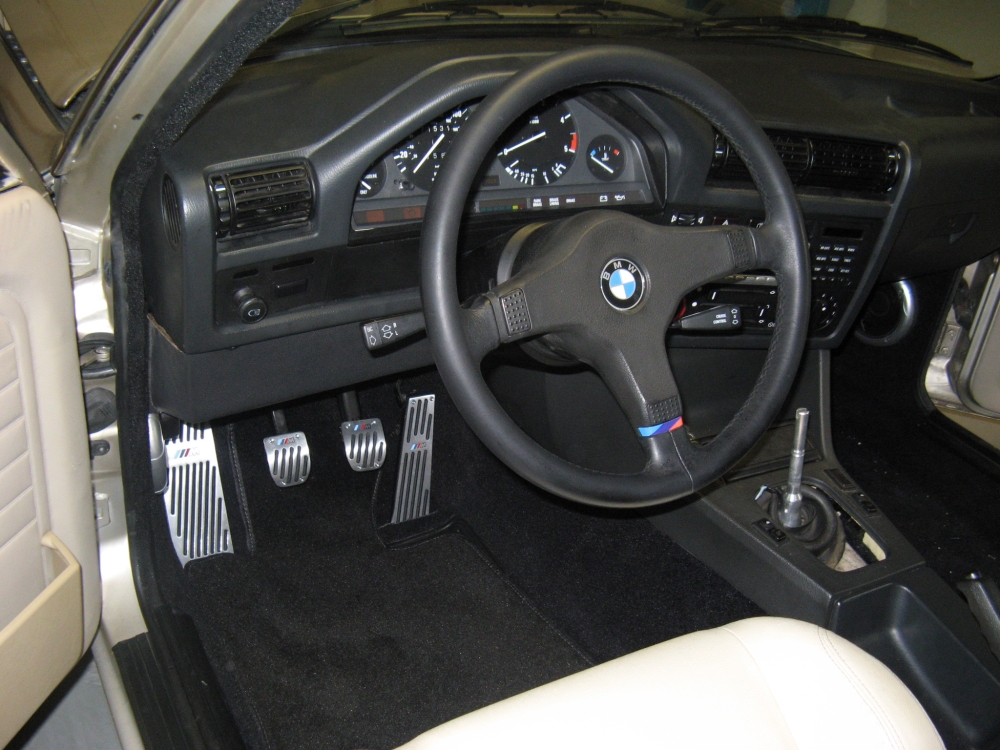
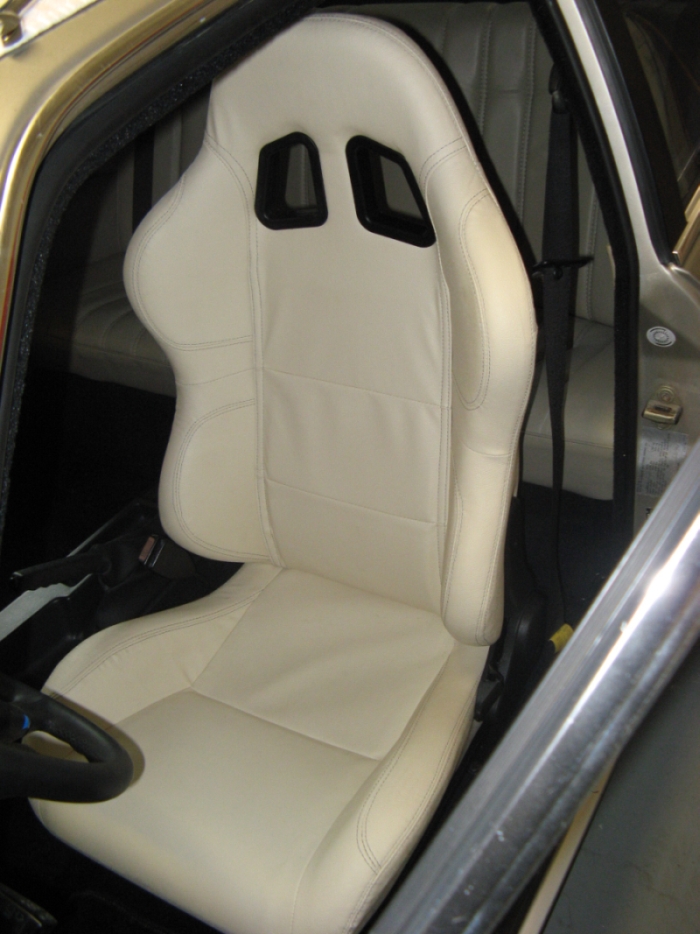
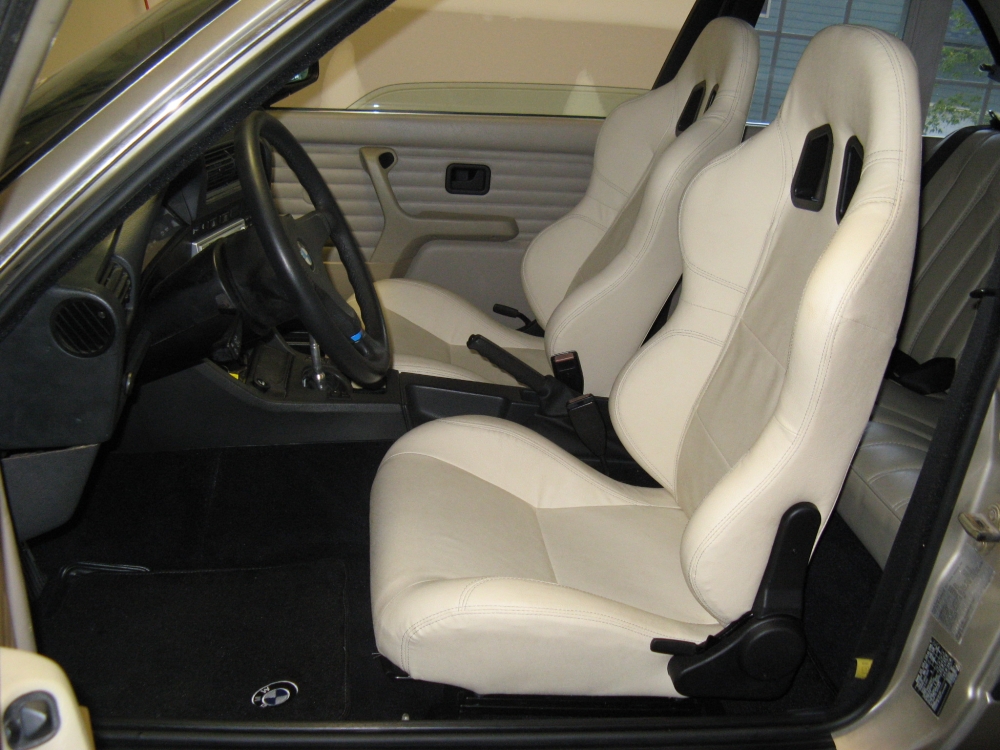
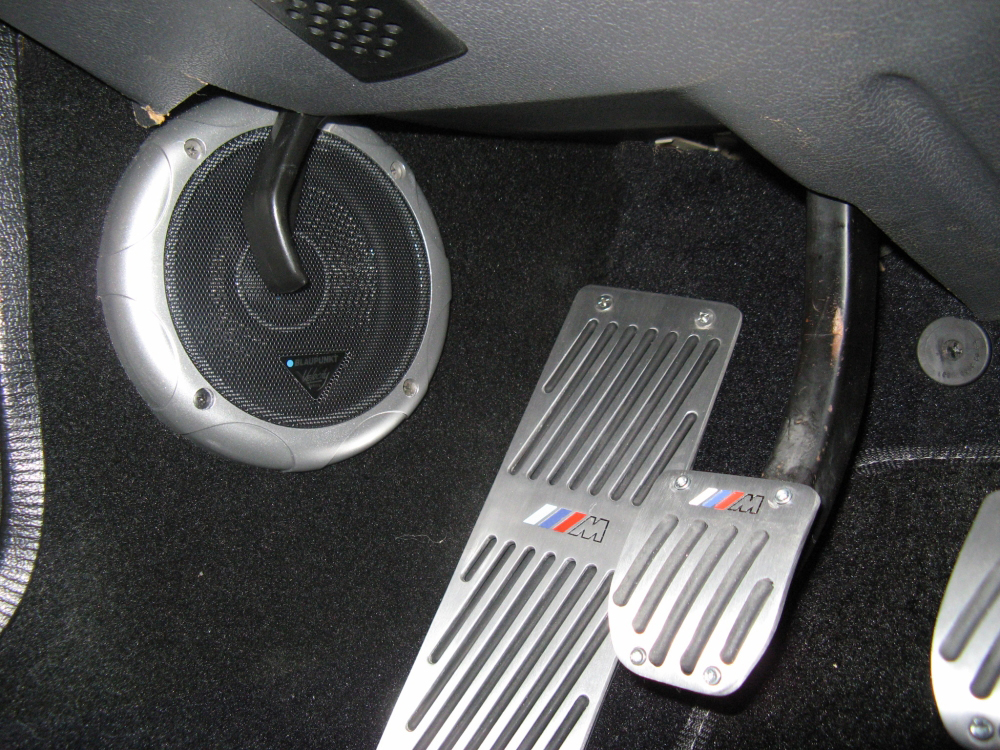
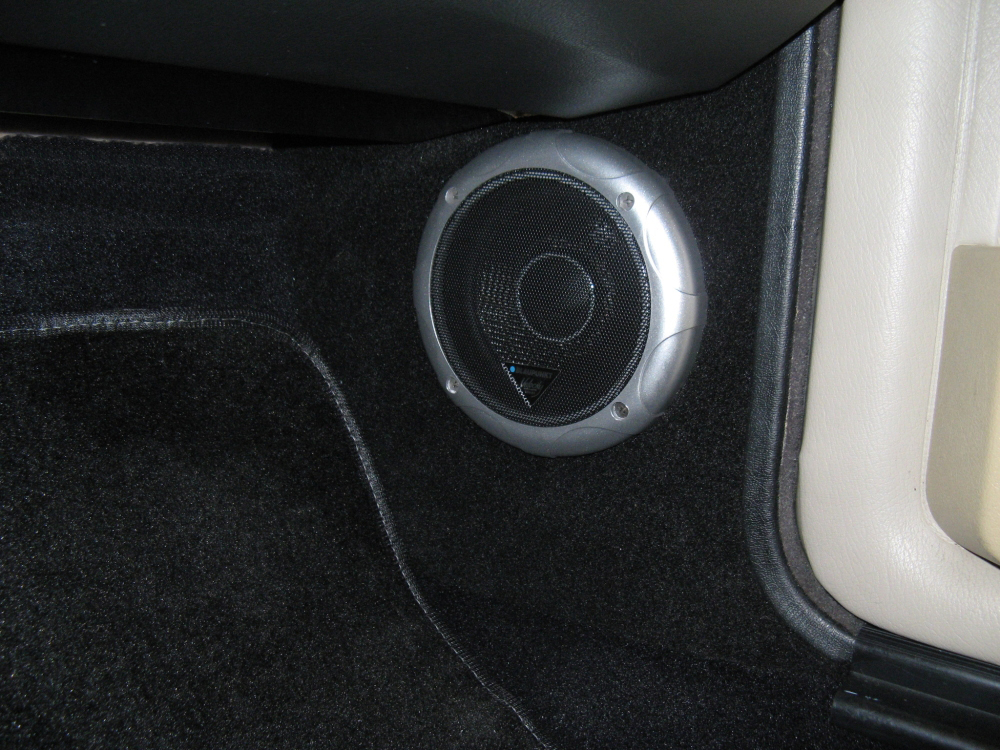
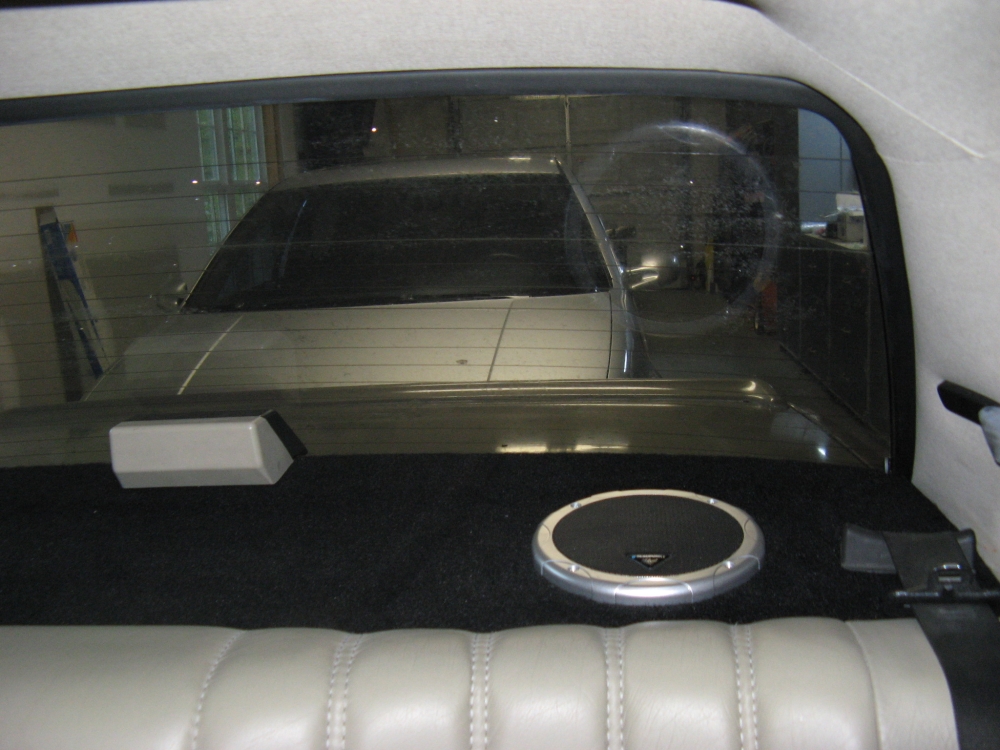
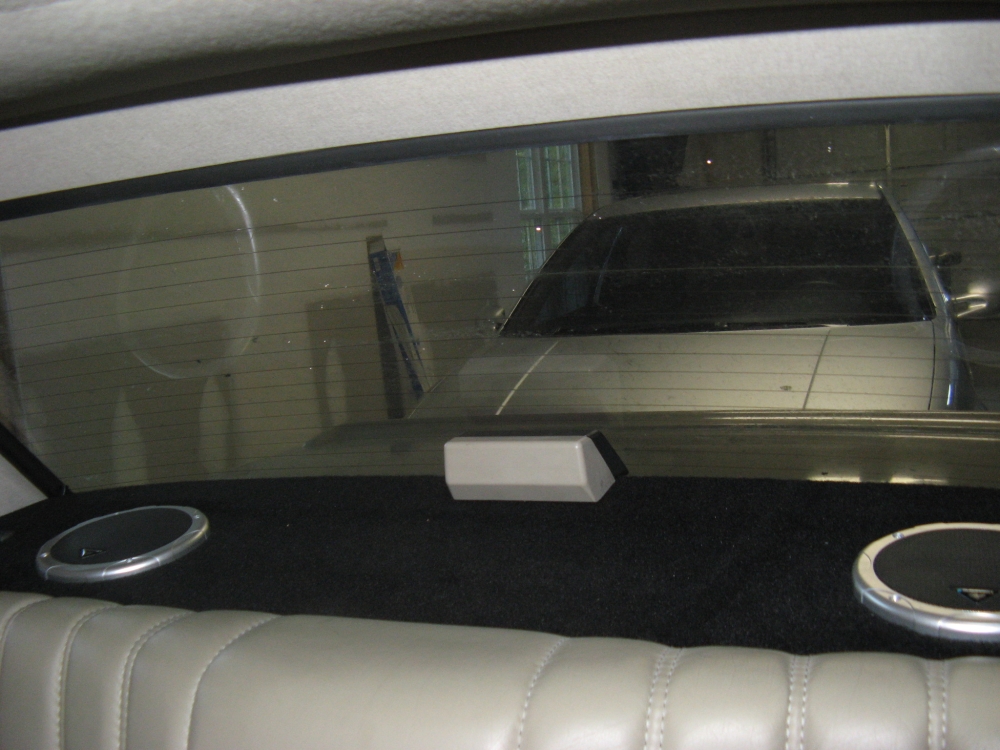
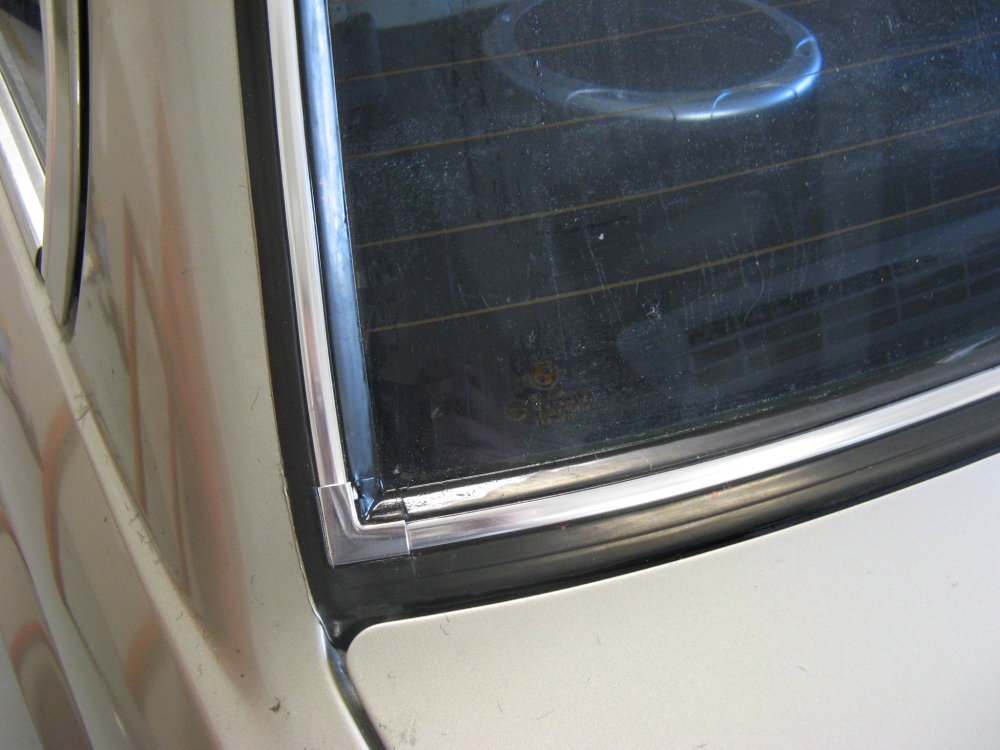
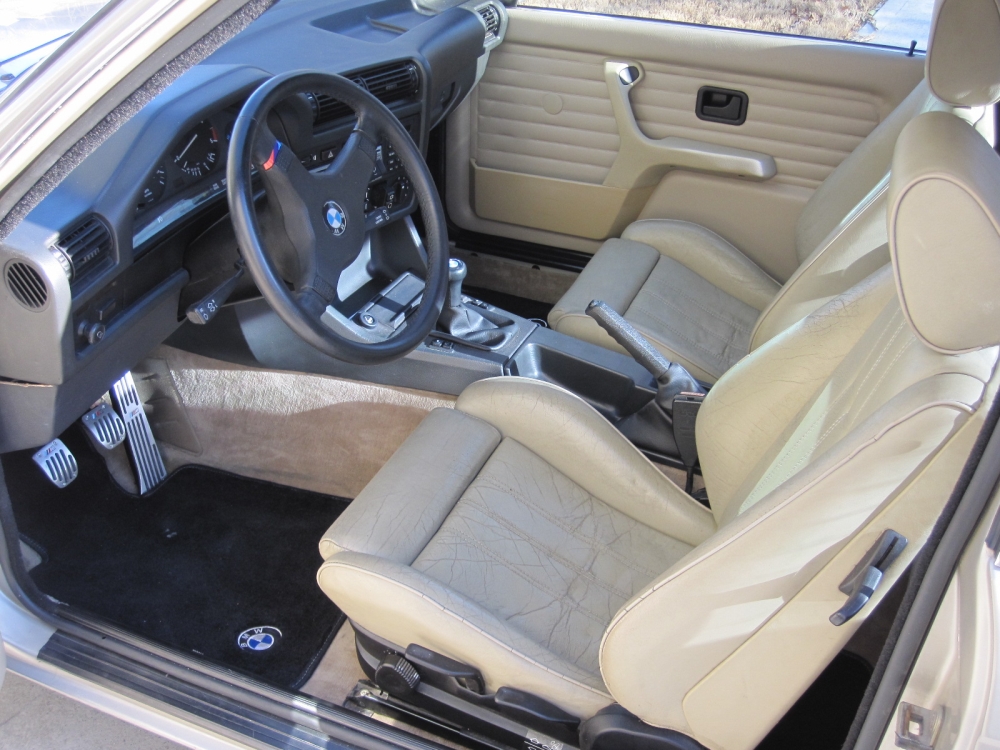
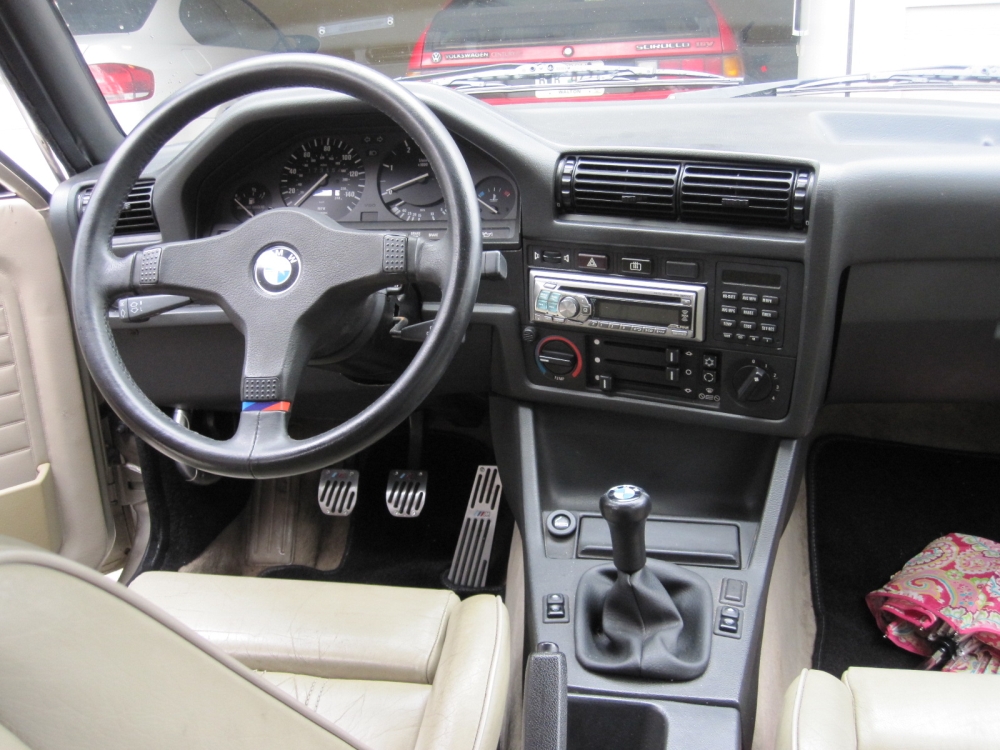
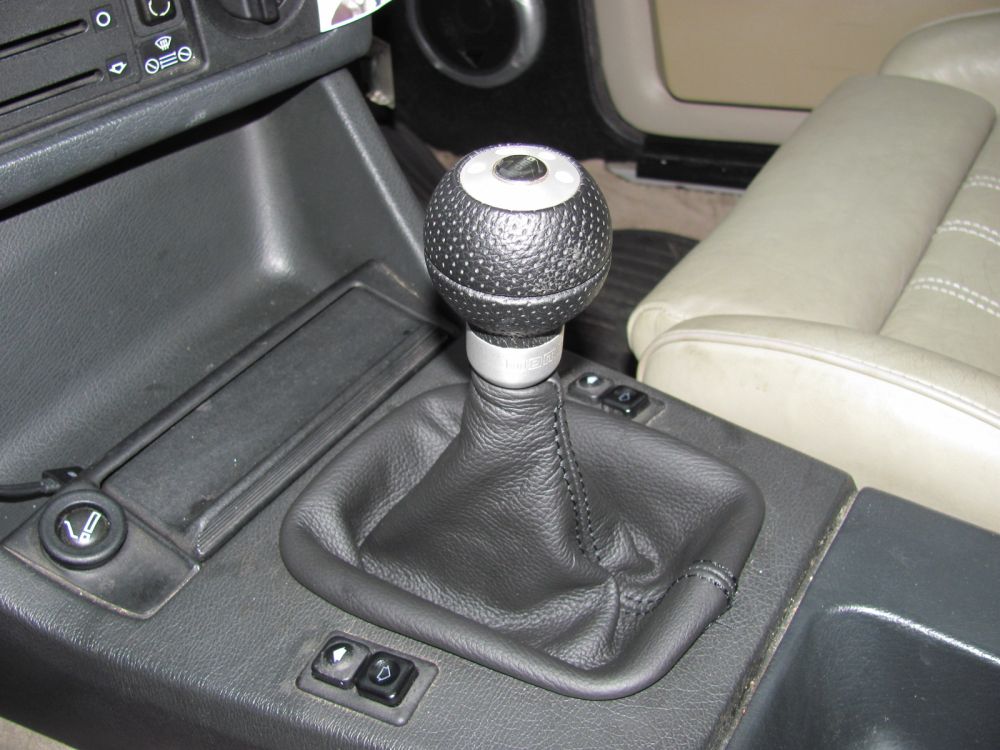
After Pics: New Dash, Center Console pieces, Carpet, Seats (with Sparco seat mounts/adapters sourced from Livermore Performance, two rear holes had to be drilled in the adapter), Pedals, Parking Brake Handle, Shift and Parking Brake Boots, Short Shifter, all shifter bushings (sourced from Pelican Parts), Rockford Fosgate stereo, Blaupunkt Velocity speakers (5.25" Front, 6.5" Rear) with carpeted kick panels and built/carpeted rear deck, new trim around windshield and rear window, and other misc. things-


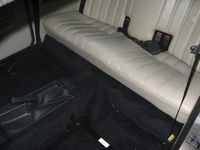
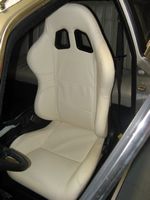
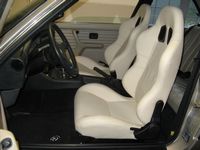

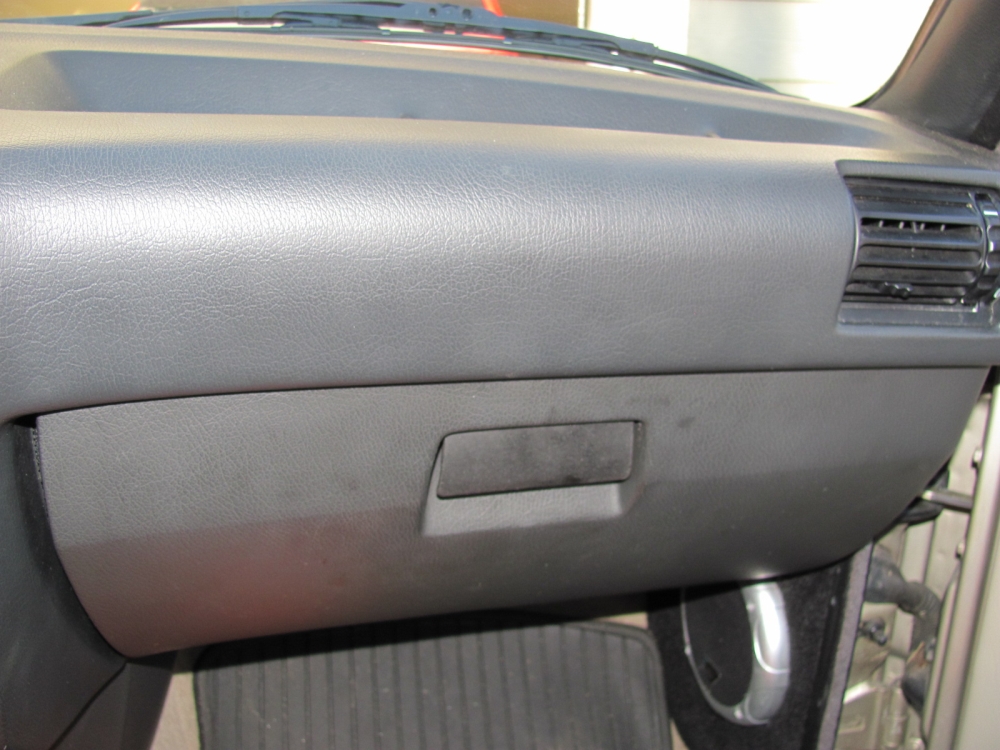
**UPDATE- NEW Owner** After owning the car almost three years and not even driving through a full tank of gas, my brother decided to sell this car to me and buy a cheap automatic car that his wife could also drive if needed. In the time period he owned the car and since I had helped him make it his, he had had the AC recharged with dye to find a leak (but not identified the source or replaced the seals) and had the head rebuilt when the headgasket was replaced to correct a leak. Since I decided to keep my Scirocco that my daughter learned to drive in and I decided this would be her car as soon as she found a job and got her driver license. The first thing I did was rip out the black carpet over the factory carpet and remove the eBay seats and replace them with the OE Sport seats. The original carpet was scrubbed with 409 and vacuumed and came out pretty clean, I forgot we had to cut the carpet at the sill plates to make room for the "over" carpet so I will have to figure out a way to repair that OR buy some used OE carpet later. I also fixed the glove box (it was hitting the speaker in the kick panel) using a Dremel and a sander to make it more accomodating. The old stereo I had given my brother was removed and replaced with an Alpine CDA-9820XM head unit from a past project that I installed along with the Alpine KCA-420I for iPod control- iPod located in glovebox.

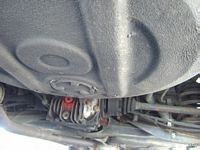
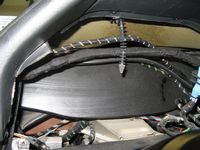
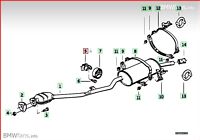
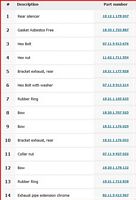
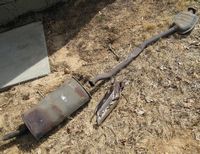
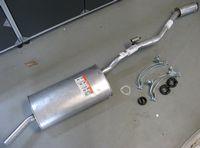
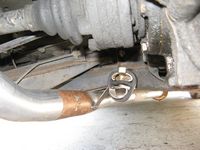
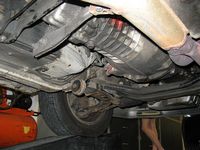
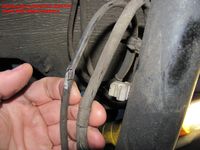
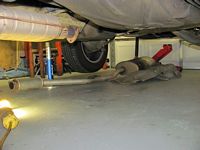
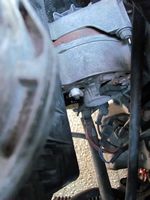
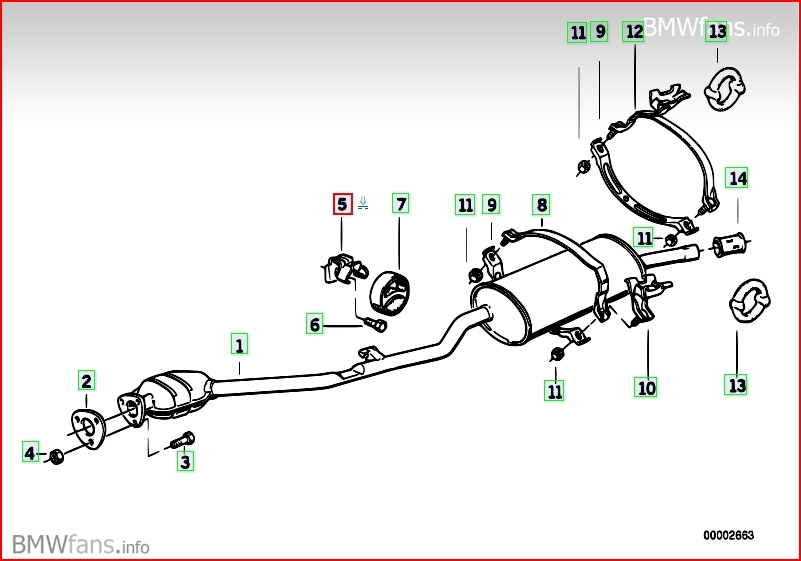
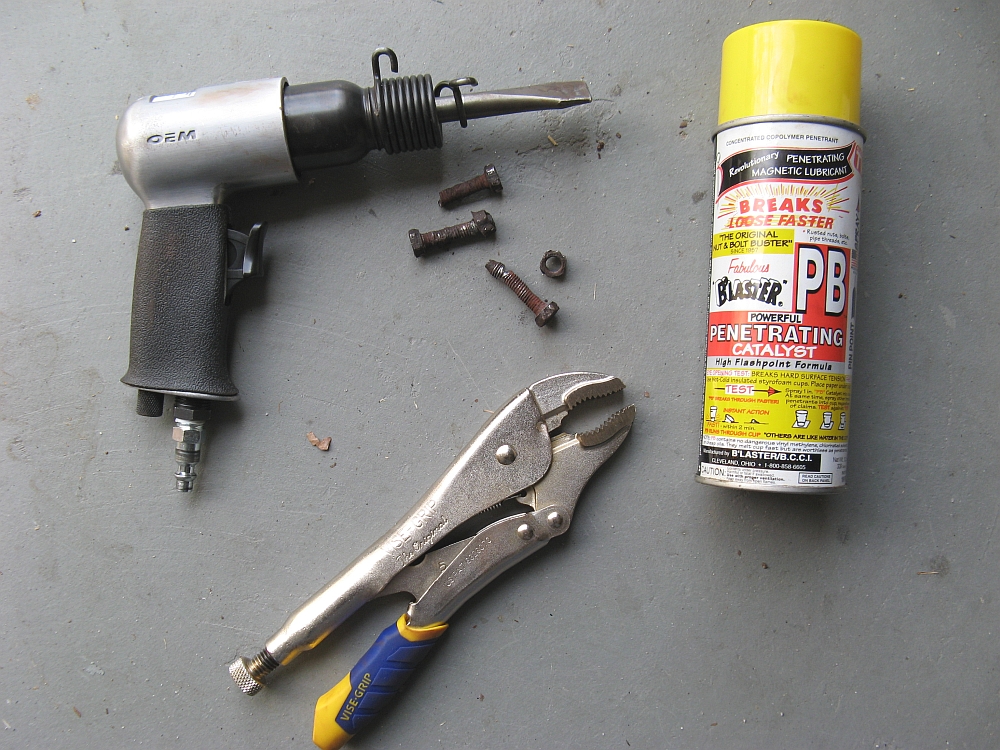
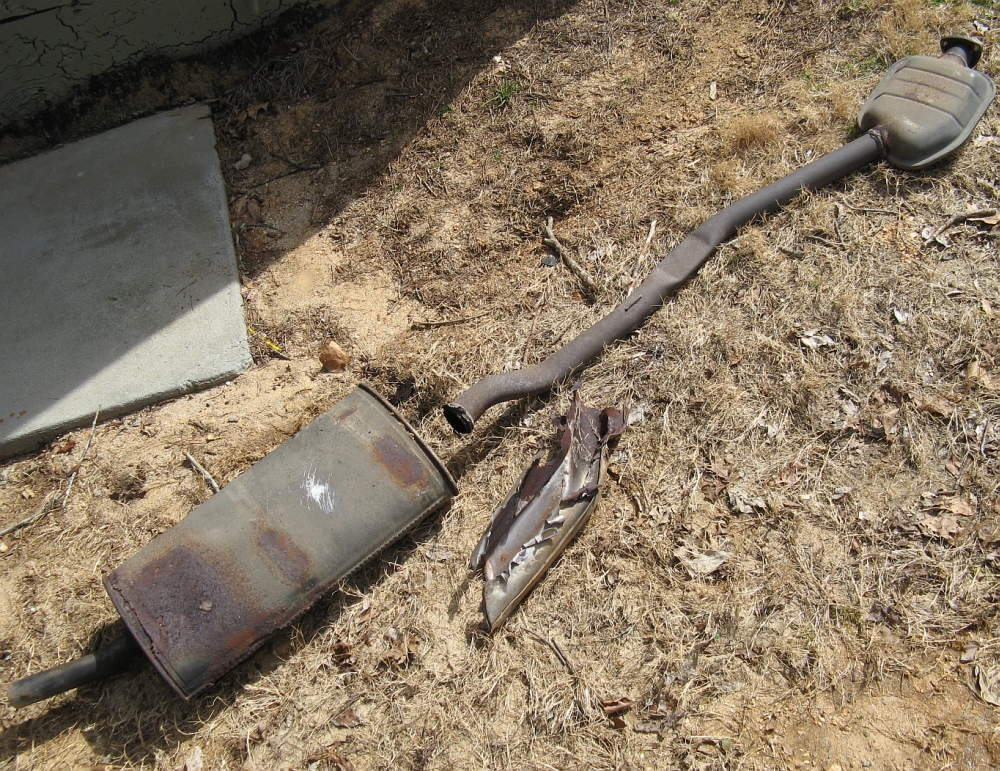
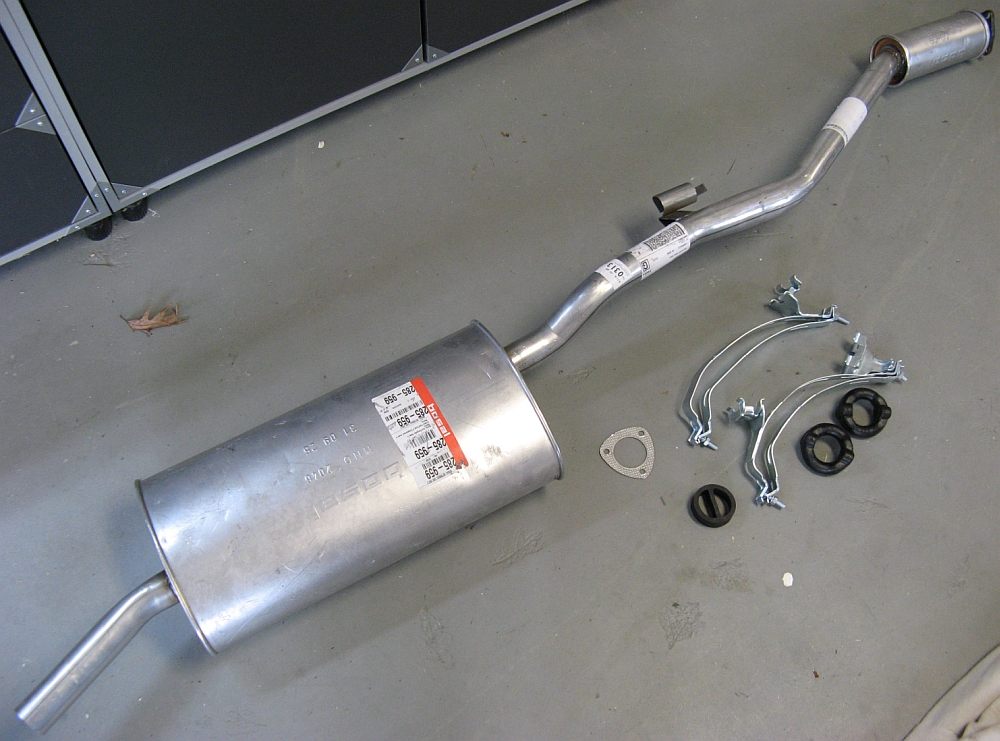
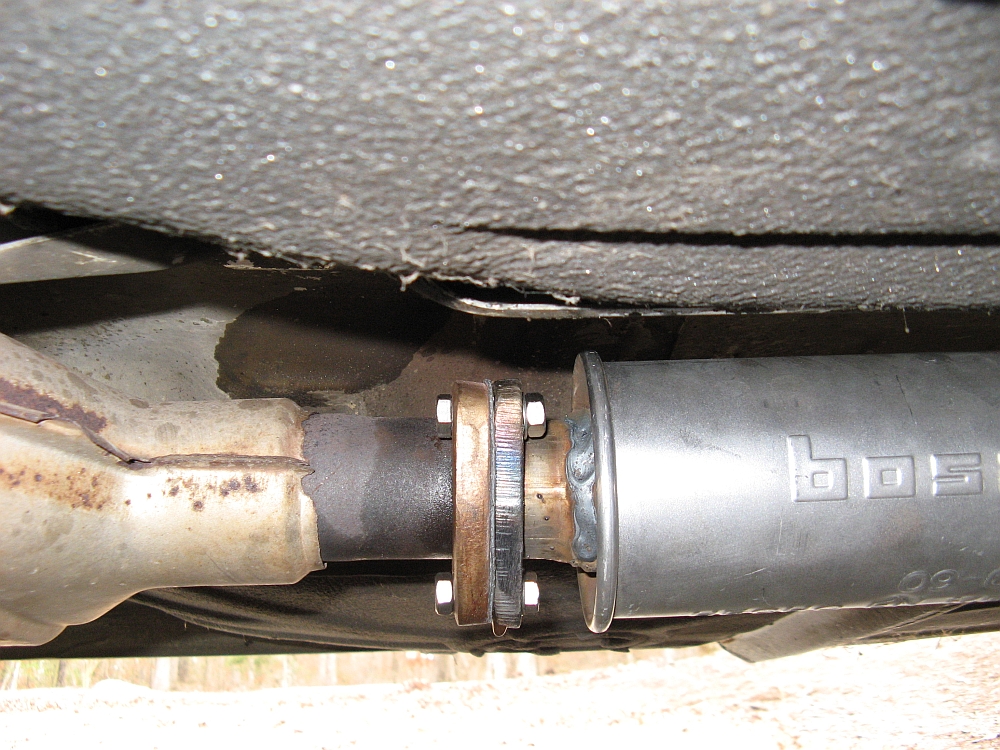
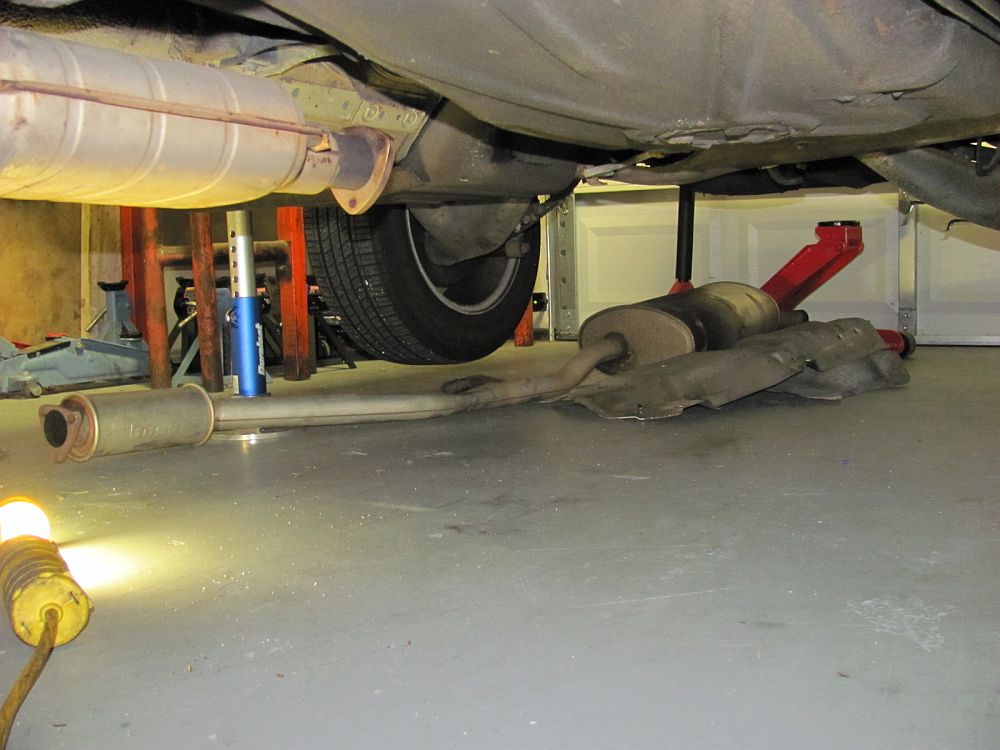
The immediate concern to address was the sagging exhaust, I corrected this short term by using some baling wire to support it where the hangers had rusted off. I ordered the Bosal OE replacement cat-back exhaust (P/N 285-959), sourced from Car-Stuff.com who had the best shipped price after price matching. I also ordered the Eberspaecher Exhaust Mounting Kit (P/N W0133-1623526) that included new hanger mounts and gaskets, it was cheaper than the Bosal kit and included more.
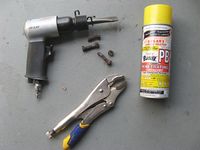
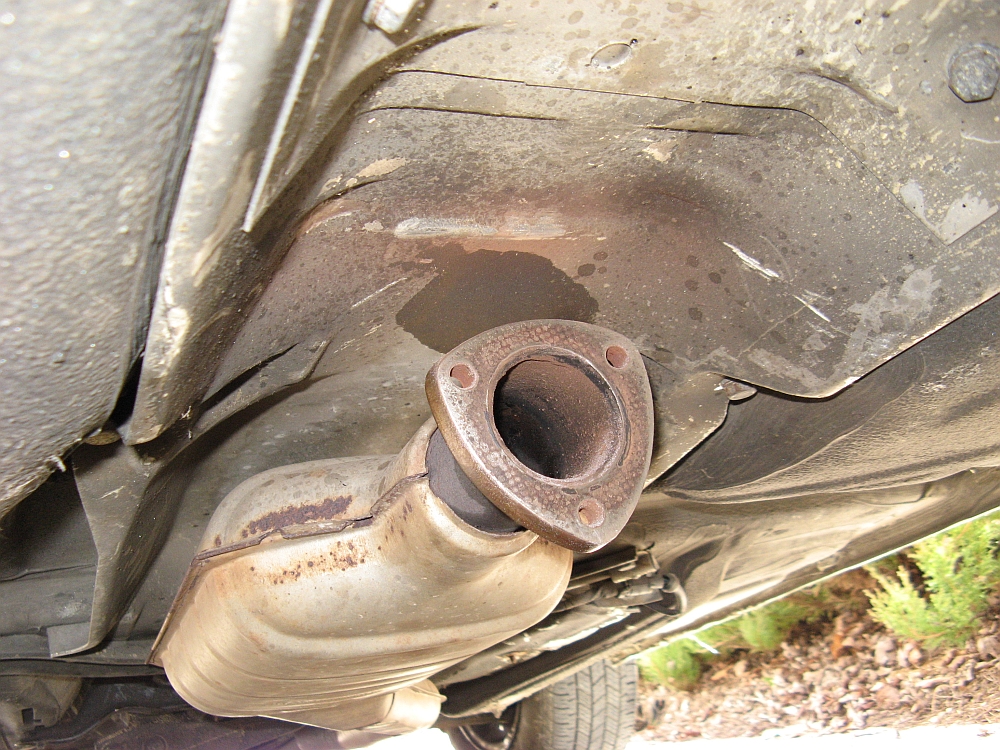
I knew this car from PA would have some rust and started by liberally soaking everything down with PB Blaster. I was able to get ONE nut/bolt loose out of the three at the cat>exhaust juncture, and at that time had an excuse to go buy an air hammer/chisel to remove the remaining rust-welded ones. I also found a heat shield on the exhaust manifold rusted through/loose and cut it off- seemed kind of redundant with the heat shield on the floor pan.
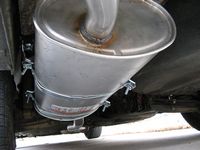
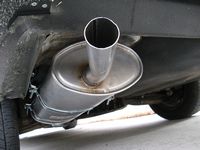
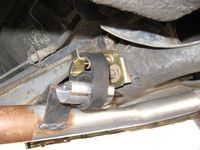
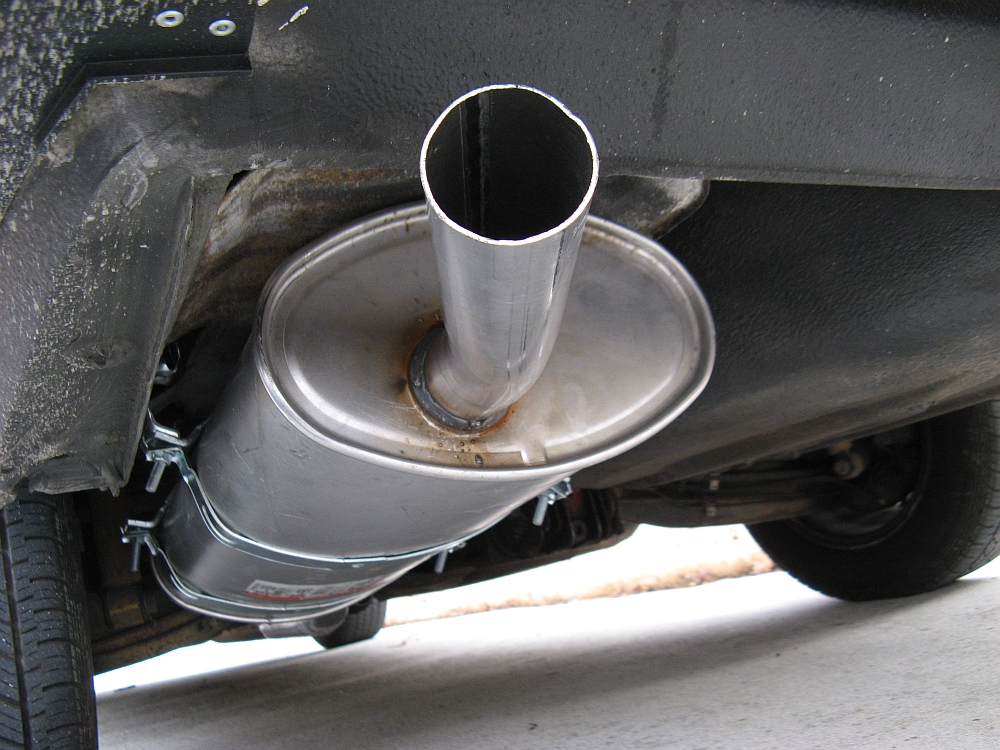
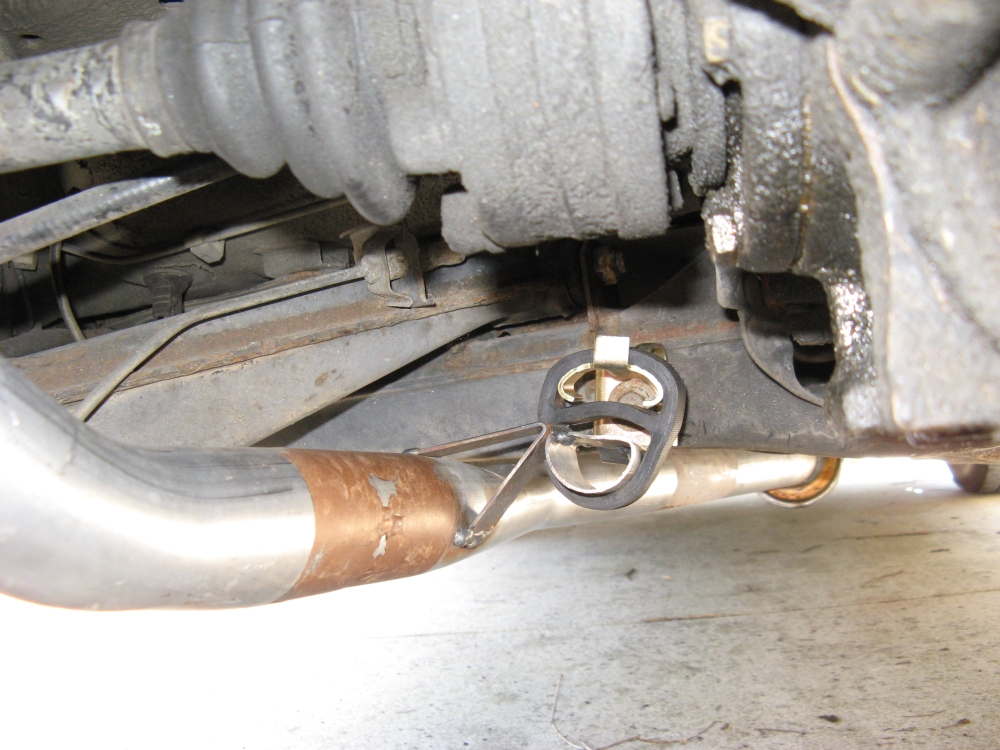
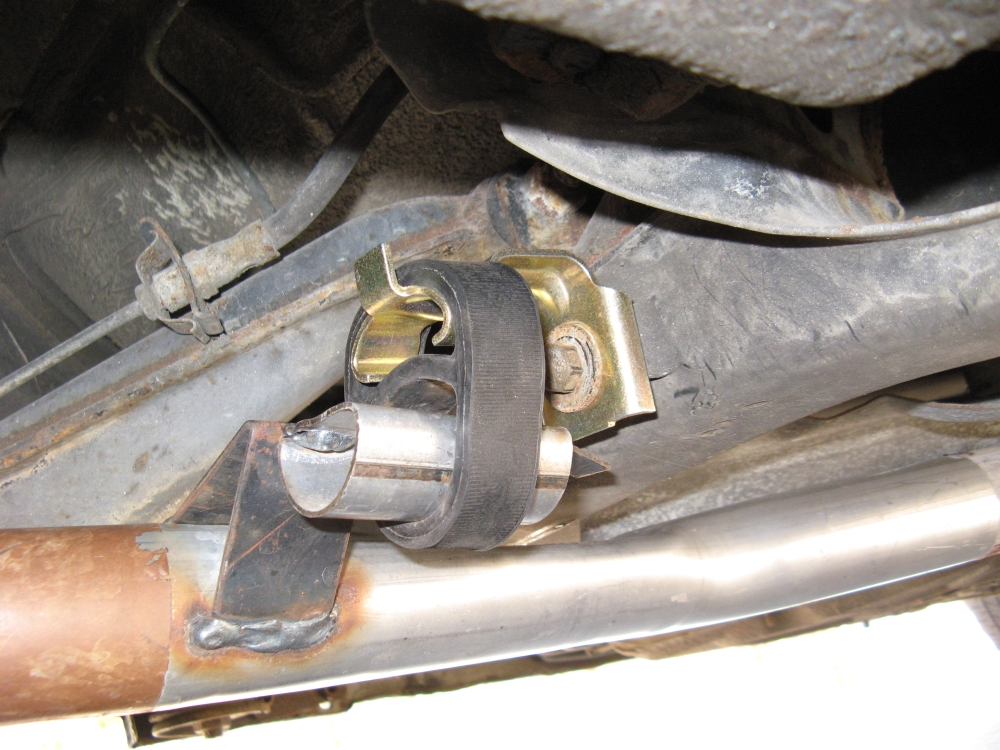
After cleaning the old gasket material off of the flange and sourcing some new stainless steel M8 bolts/nuts/washers at the hardware store, the new exhaust was installed. Having a helper is not required but speeds things up, they can hold one end while you work on the other to get it bolted up. I found that attaching the rubber donuts to the car first, then the rubber donuts to the top mount worked well. I loosely put one bolt in the flange joint, and then loosely installed the muffler in the rear mounts. After installing and tightening the flange joint bolts, I checked the alignment in the back and tightened those mount bolts until the clamps were bottomed out. The new Bosal exhaust fit great with the new mounting kit and sounds/looks OE.
[EDIT] I finally ordered and installed the missing middle mount.

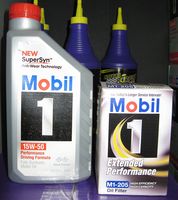
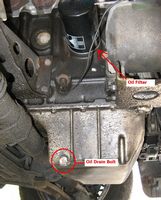
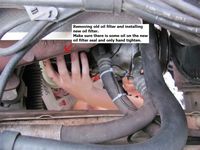
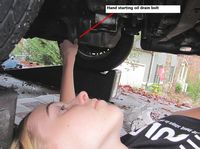
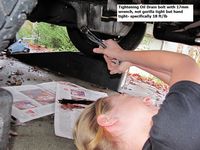
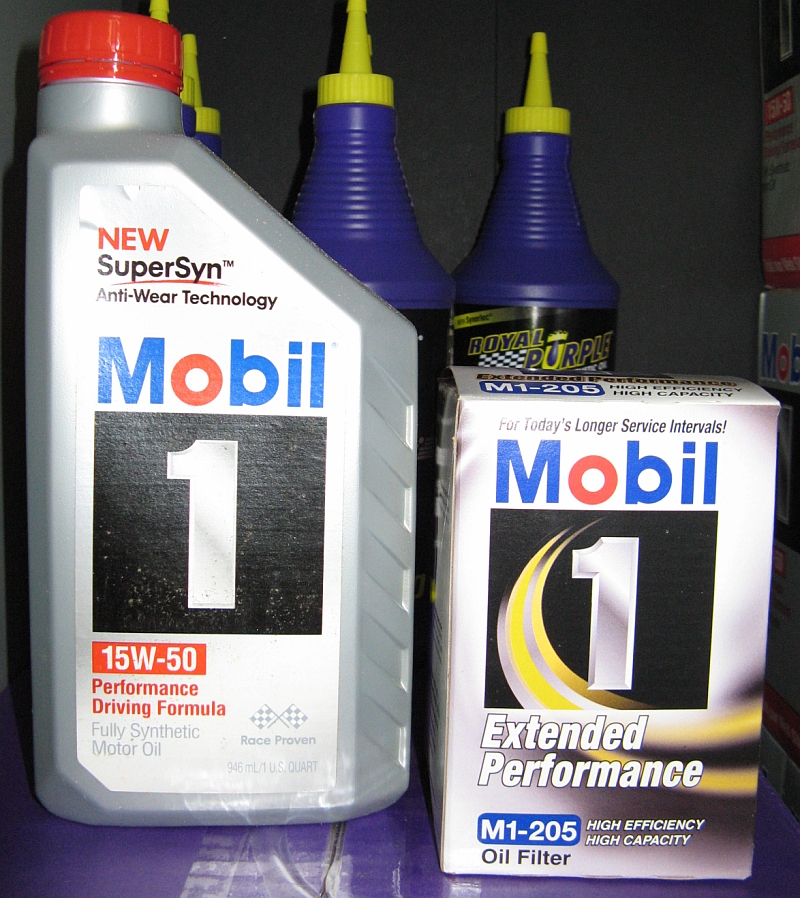
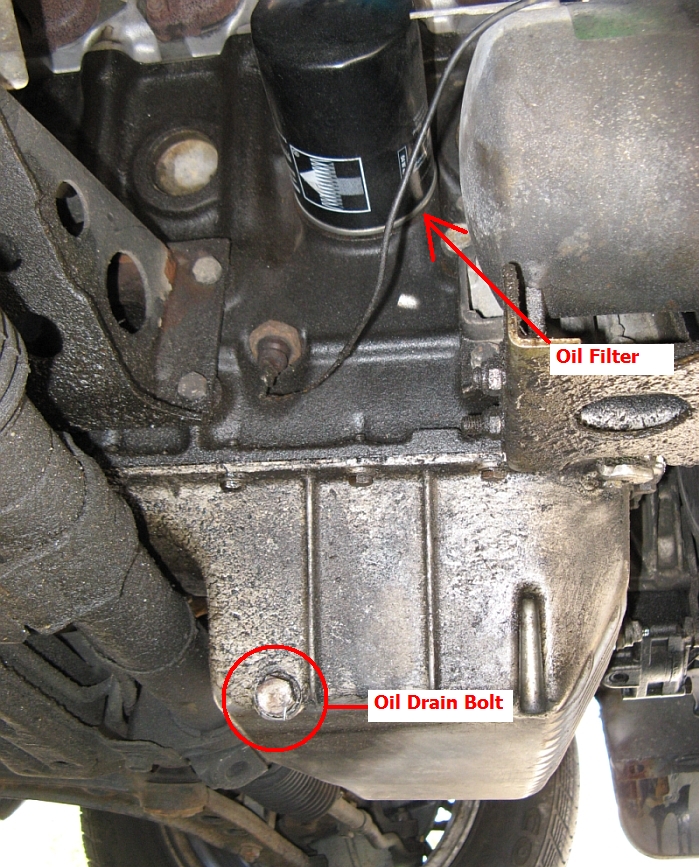
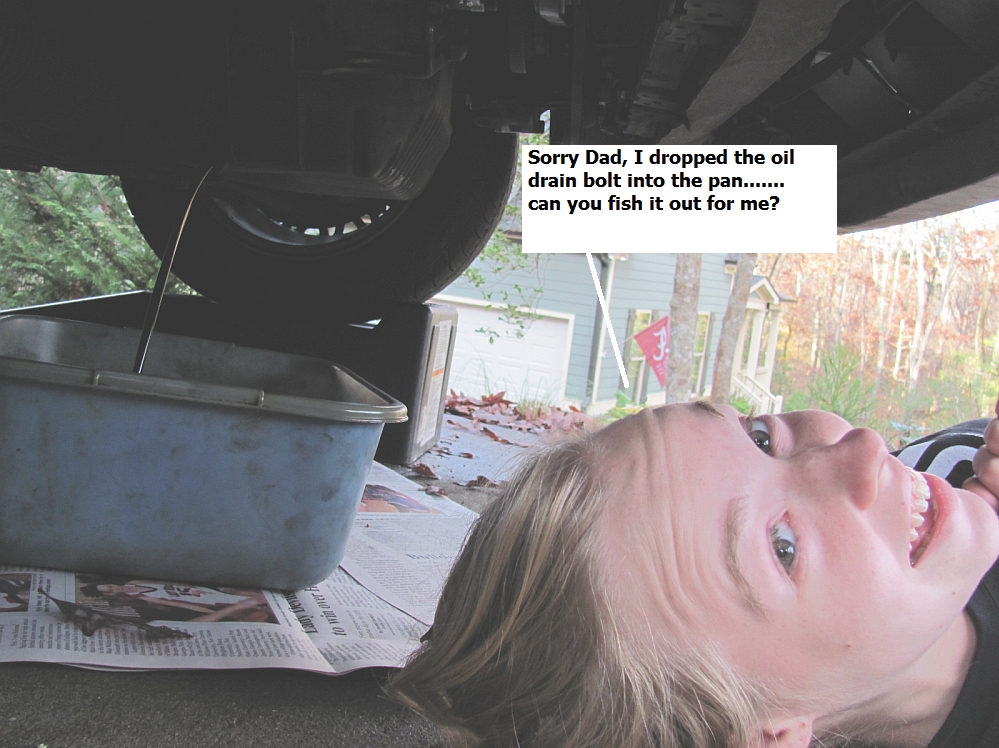
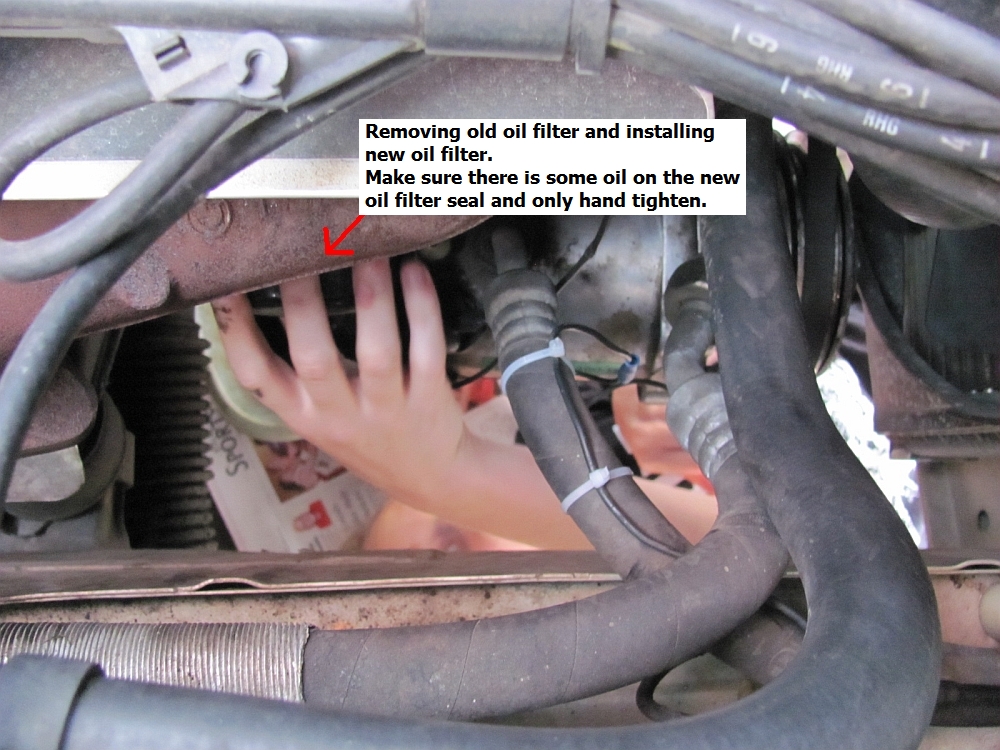
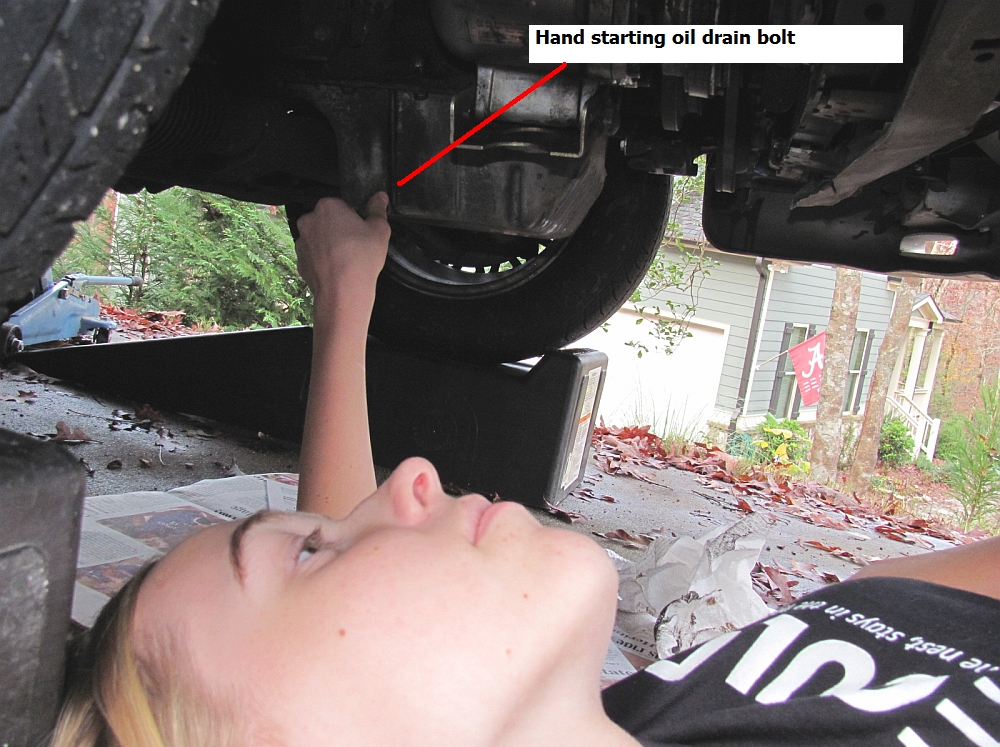
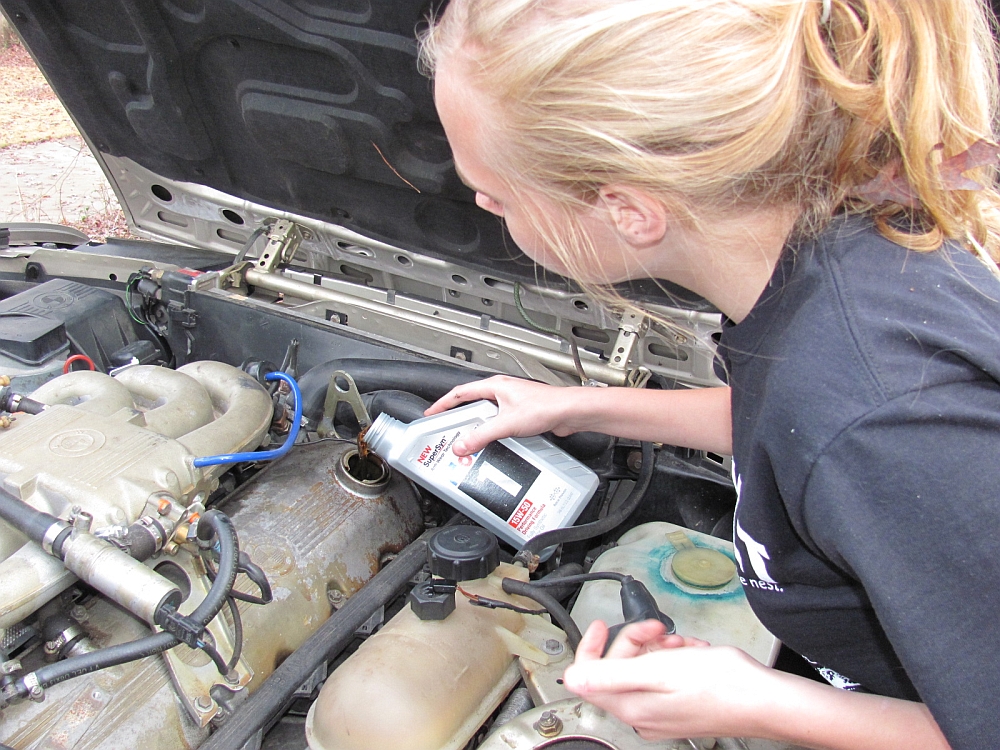
The next thing up was an oil and filter change using Mobil1 15w50 and a Mobil1 Oil Filter (P/N M1-205) . I will source some OE filters (Mahle OC49) going forward, but Mobil1 is one of the better McParts brands. The oil filter and drain plug are conveniently located on the same side of the motor and easy to change with minimal mess/cleanup. With filter change, about 4.5 quarts of oil is required.
There is a good write-up on the oil change process at Pelican Parts.
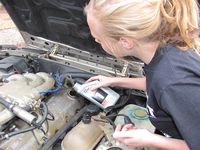
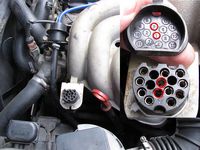
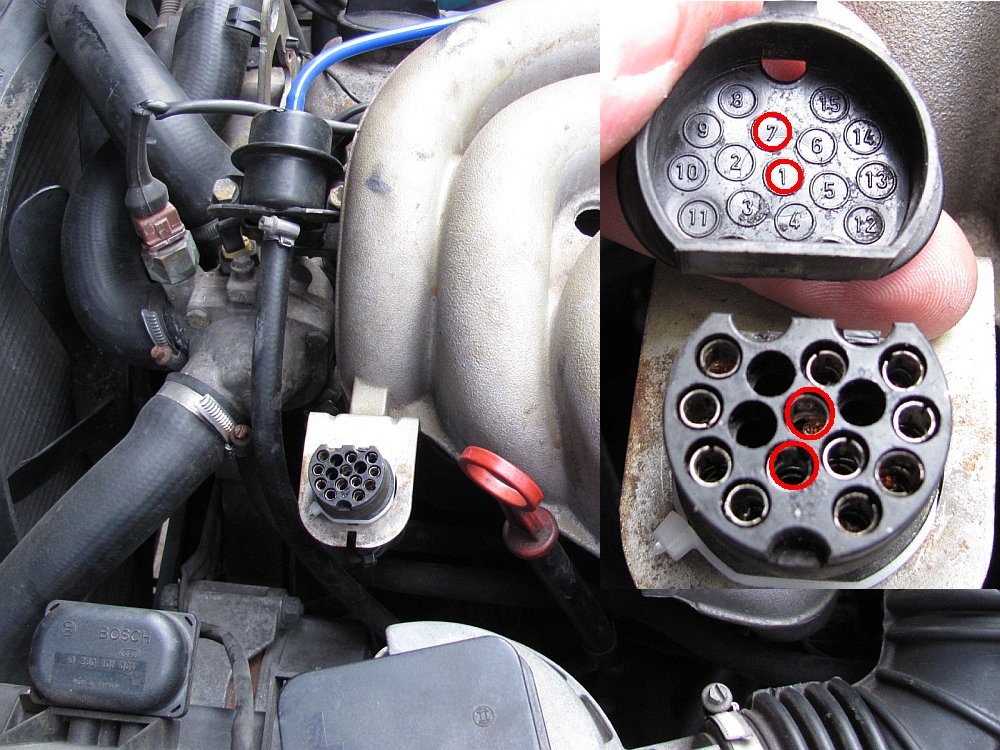
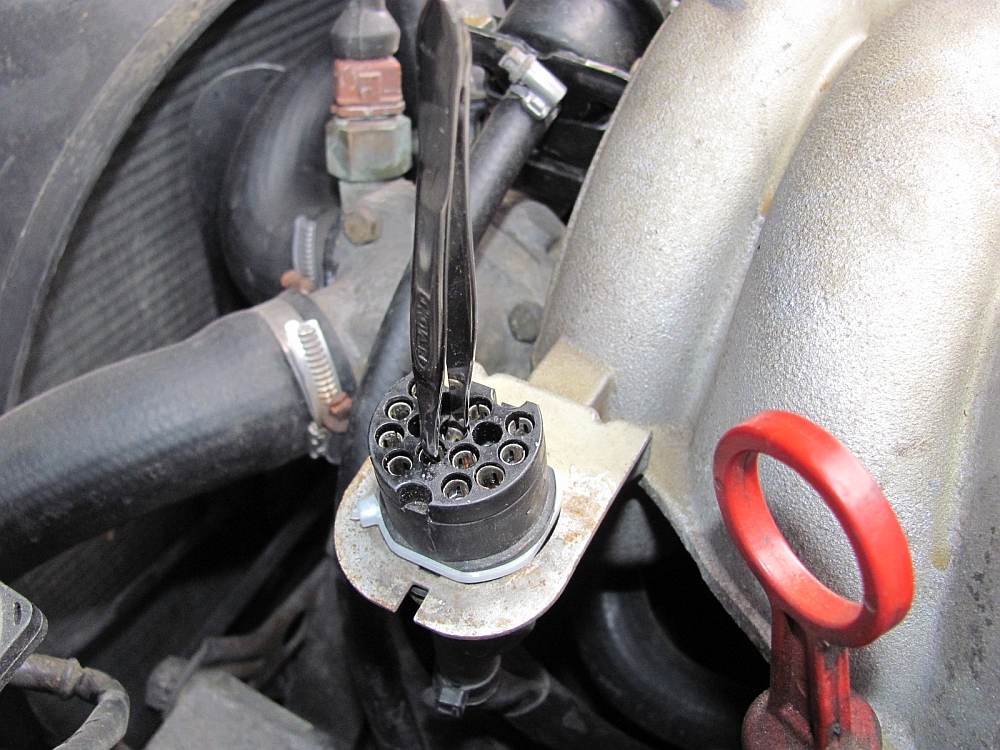
The Oil Service light reset process is detailed HERE. I used some tweezers as my reset tool, inserted in the correct pins on the service connector and had my daughter turn the key to on (not start the car) and count to 4 or 5 while watching for the service lights to come on- any longer and the service indicator is reset as well.


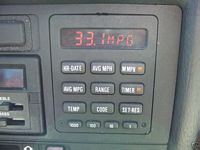
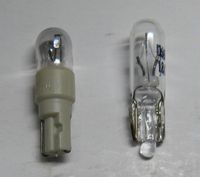
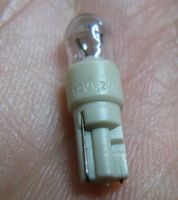
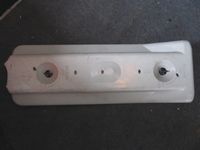
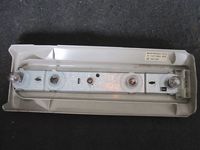
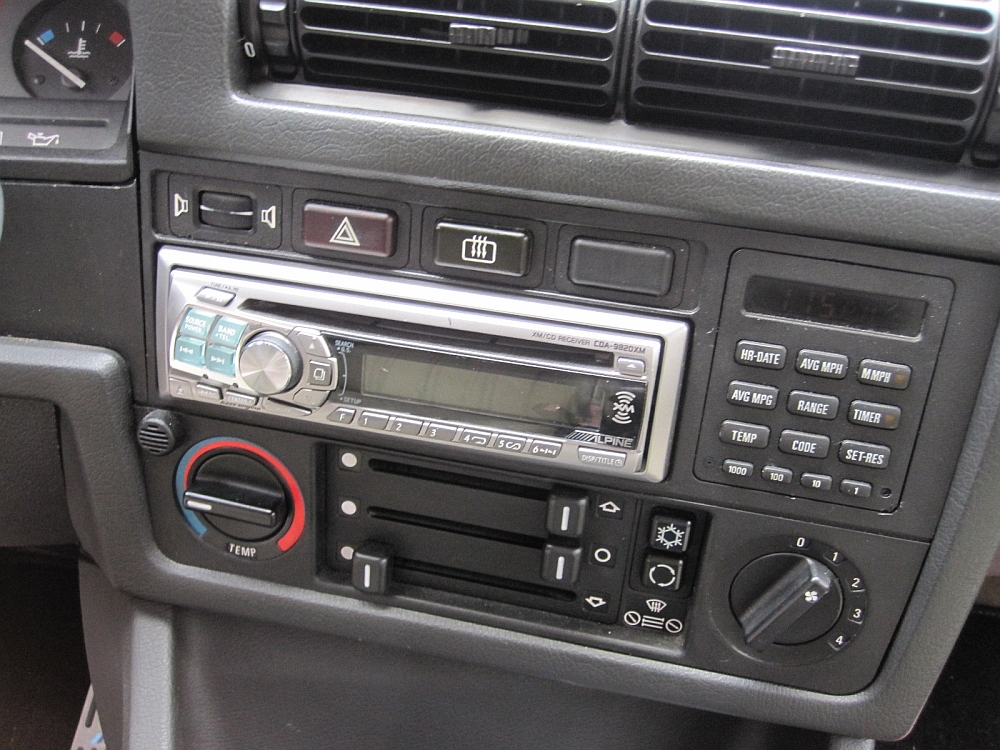
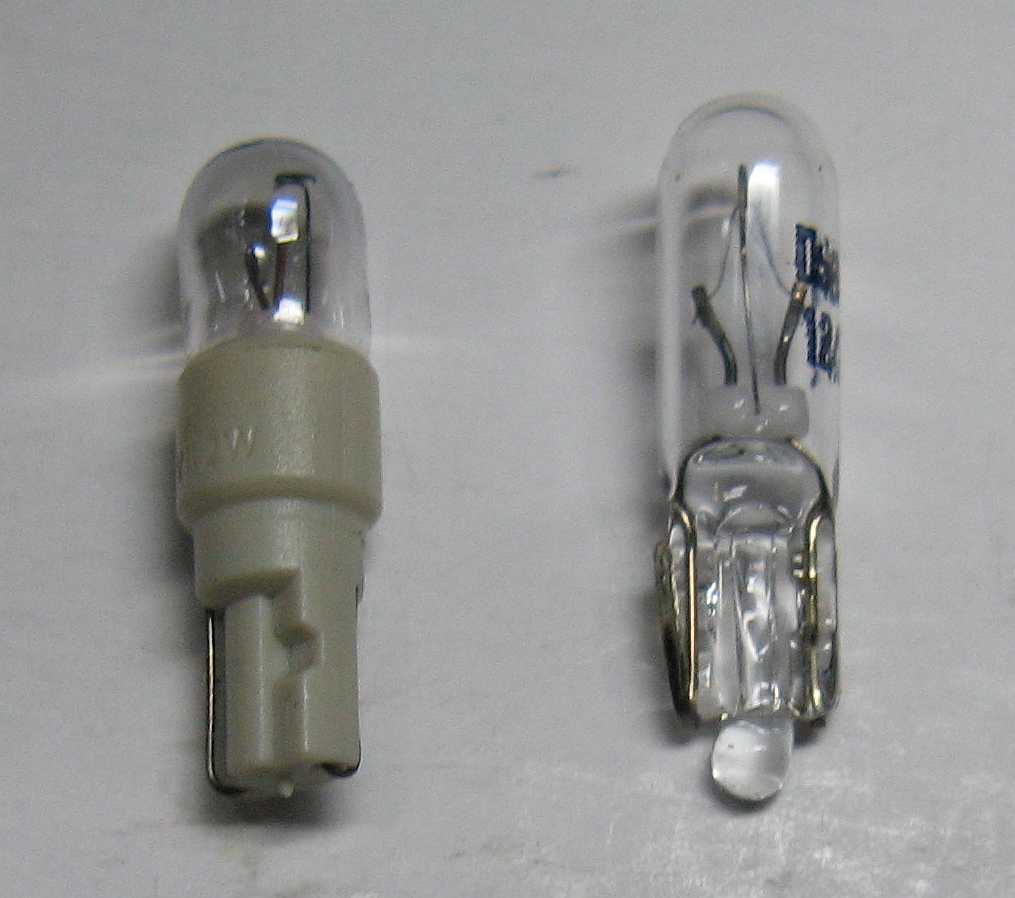
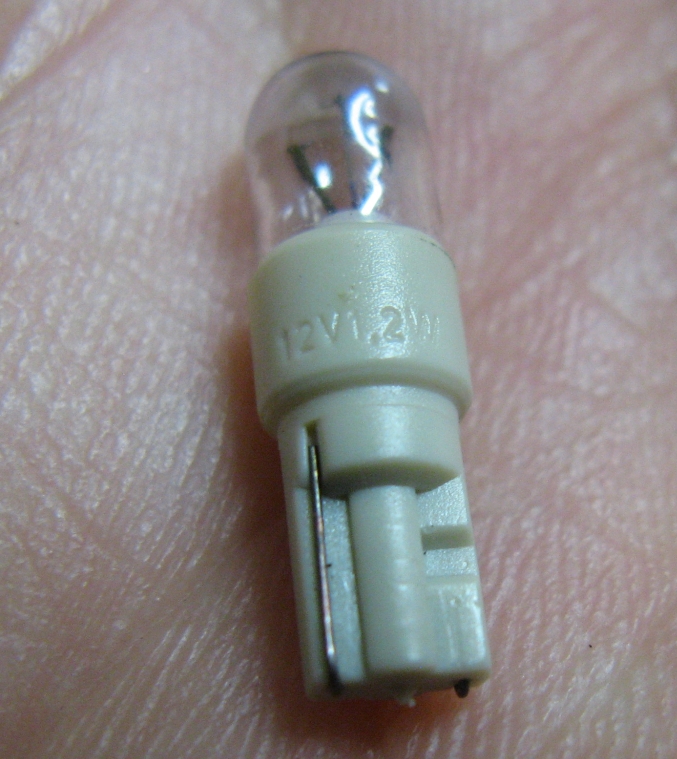
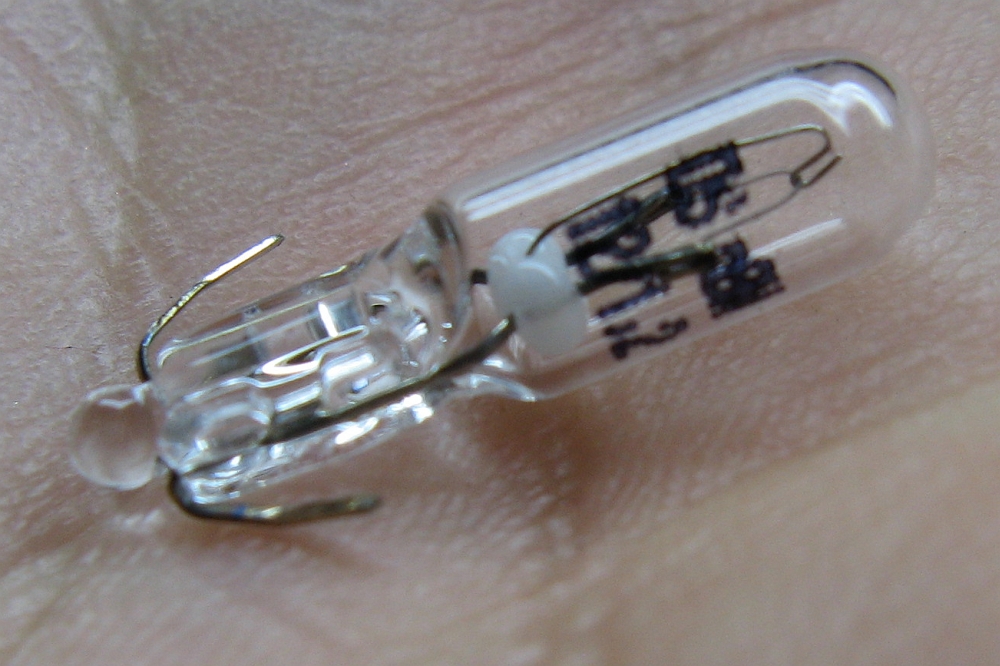
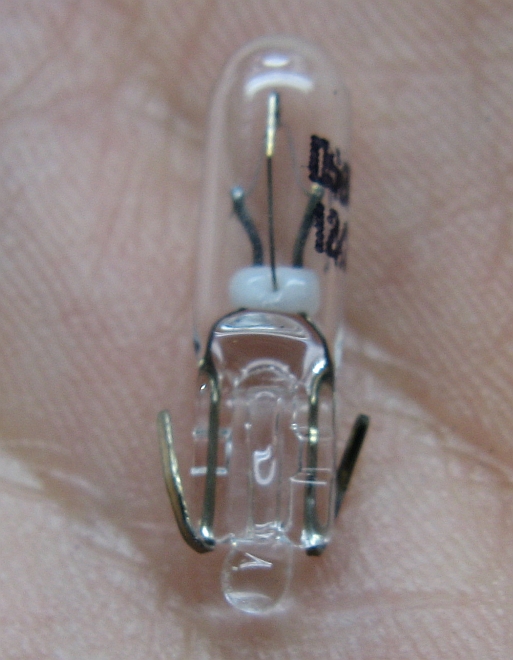
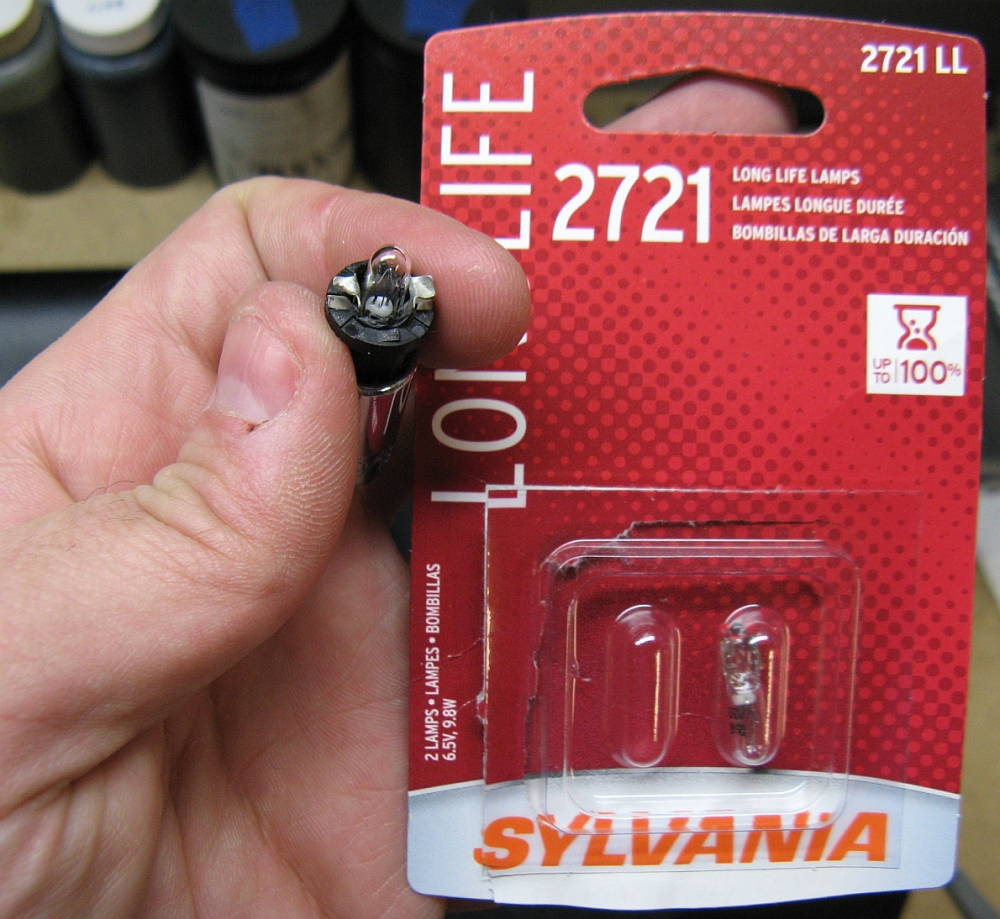
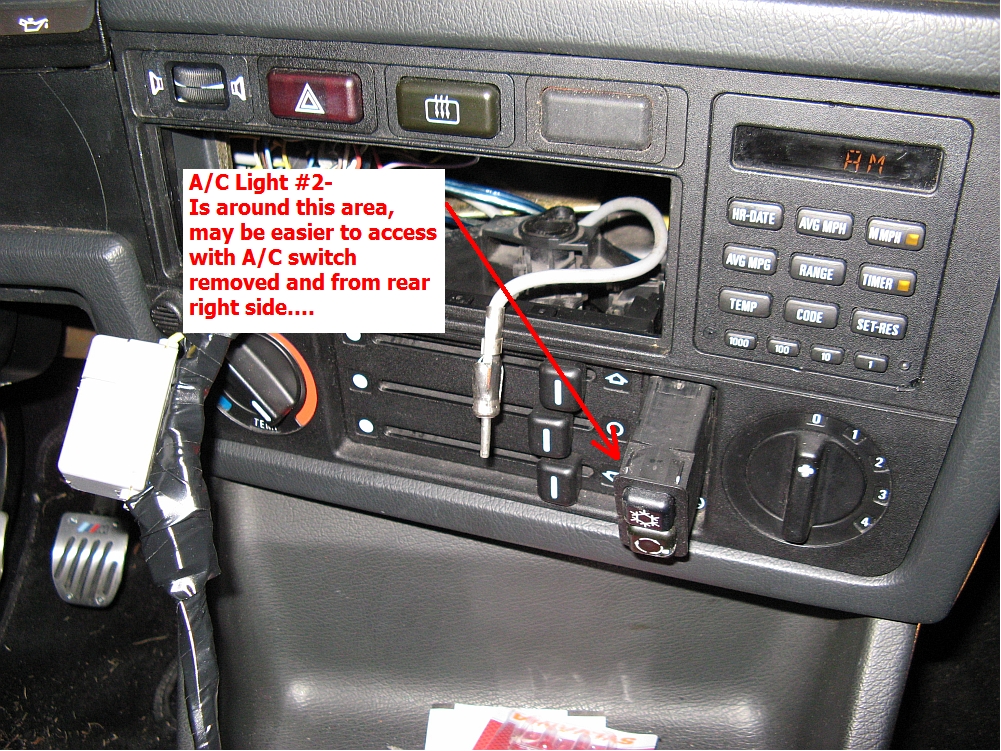
I noticed on the drive home when picking the car up that the A/C controls and the OBC had no backlights. I assumed the bulbs were bad and tried to track down the required 12v/1.2w bulbs and ended up with Sylvania 2721-LL from Autozone- the package is marked 6.5v/9.8w but on the bulb itself is marked 12v/1.2w.
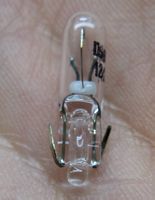
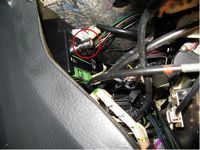
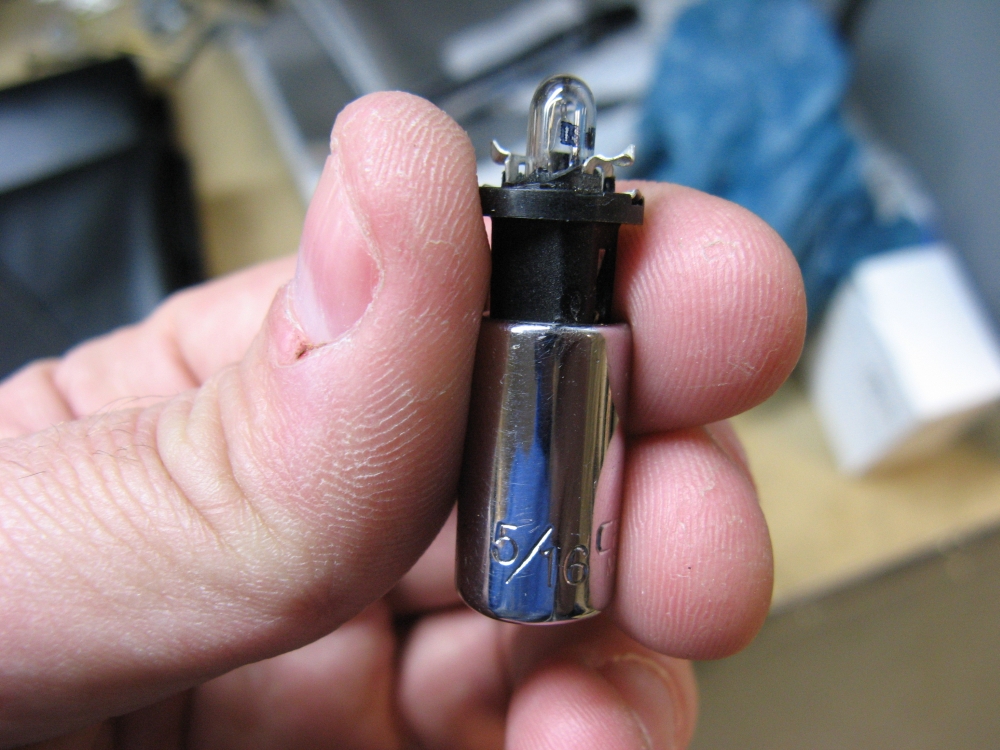
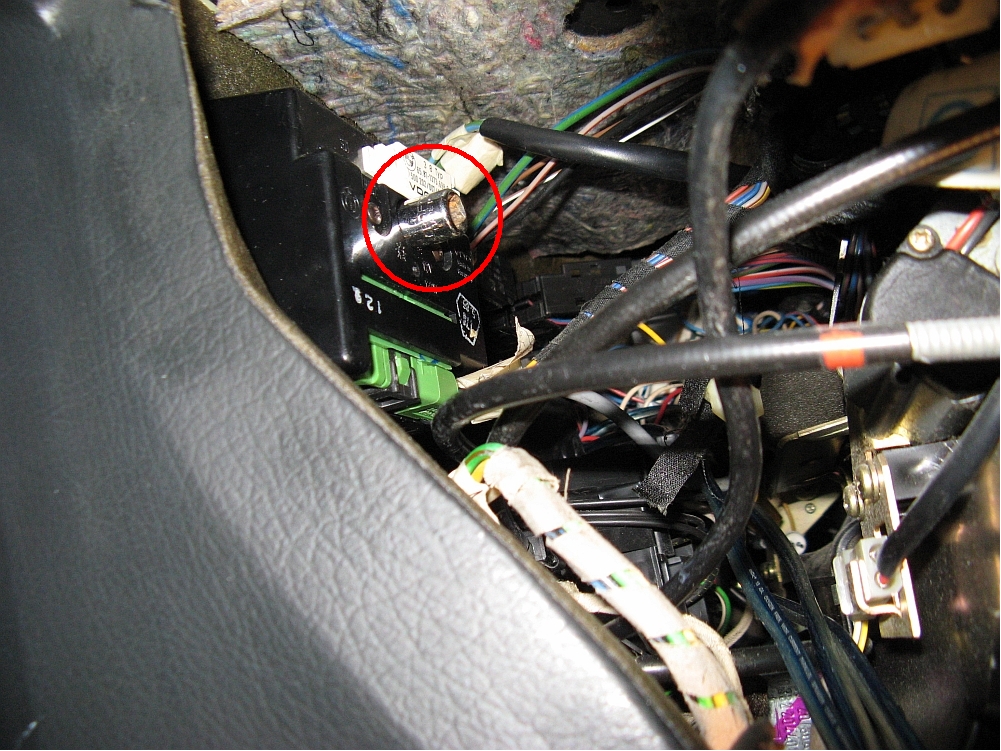
The OBC has one backlight bulb buried in the back of the OBC module. The console side pieces were easy to remove since the glovebox was out of the car for repair and modification to work with the speakers, I found this to be the best way to access the OBC light and the other A/C light. To get the OBC light and socket assembly out, a small socket was press fit tightly over the light socket and used to remove it. Since the light and socket are an assembly, I decided to use a pick to break the bulb out of the socket. I then modifed one of the 2721-LL bulbs to have the contact wires to either side instead of front/back so that it could be press fit into the now-cleaned-out light socket between the two contacts- works great, reinstalled using the same small socket that was used to remove it.
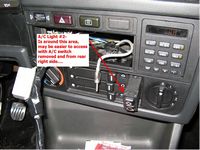
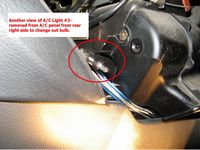
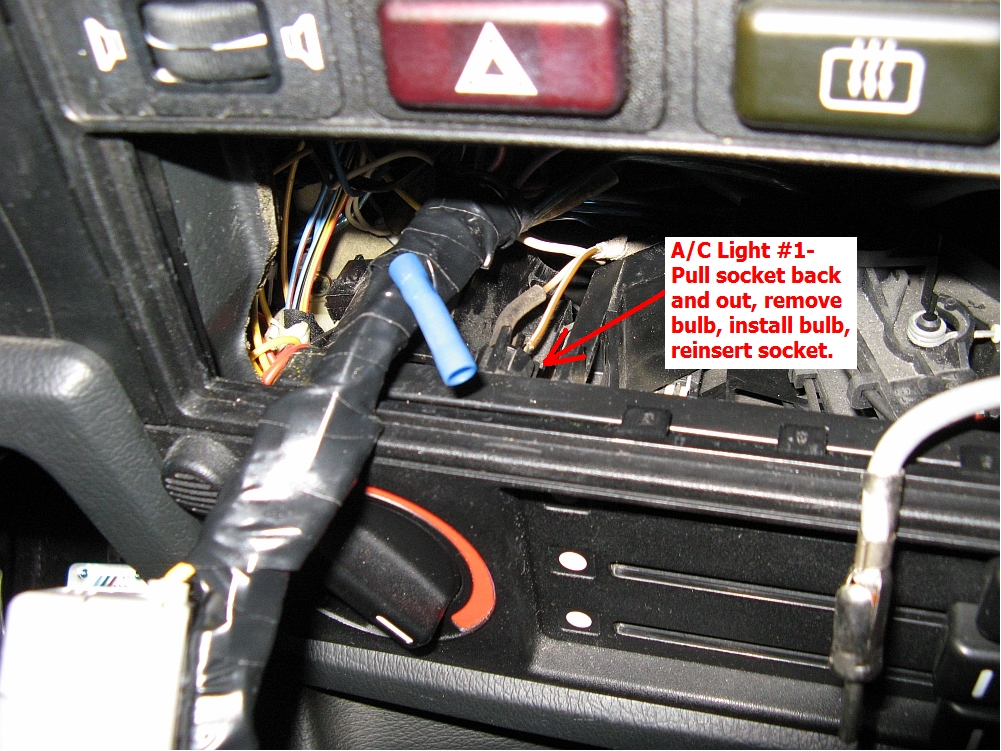
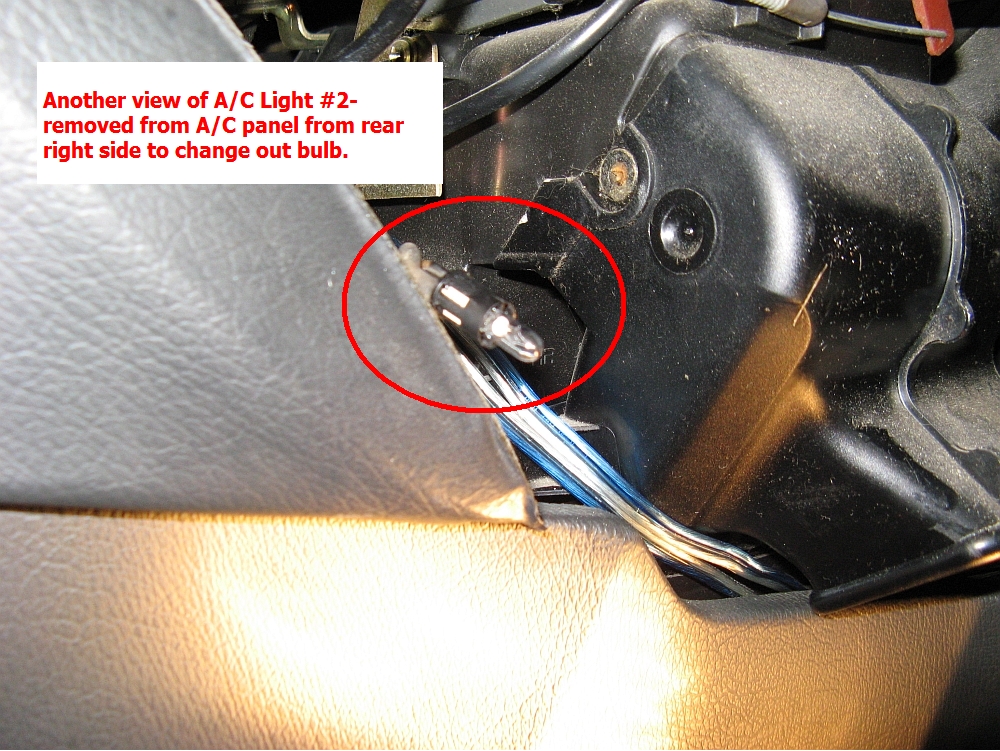
There are 2 bulbs for the A/C controls, one on either side and they are plug and play replacement using the factory light socket. Since the radio was not yet installed, the A/C light socket on the left was easy to get to, located behind and near the top right of the temperature control. The other A/C light is located towards the lower right corner of the vent sliders.
We now have all lights functional again.....


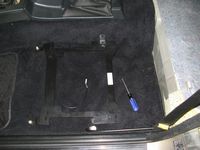
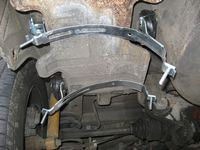
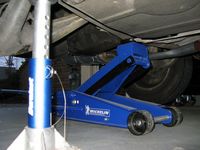
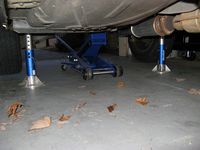
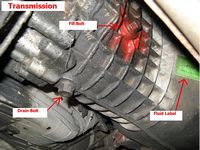
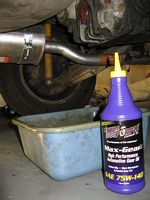
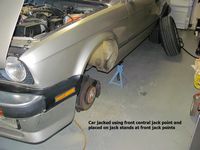
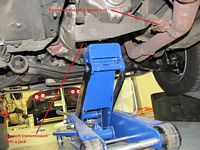
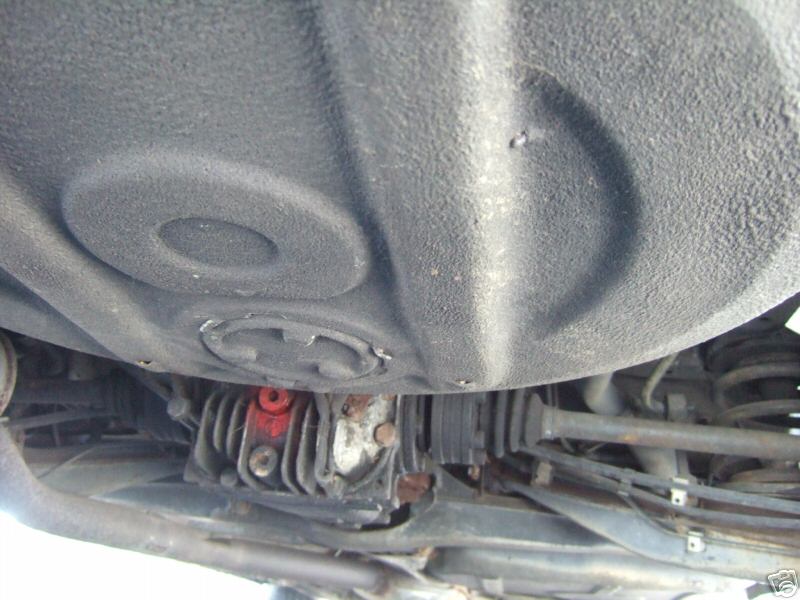
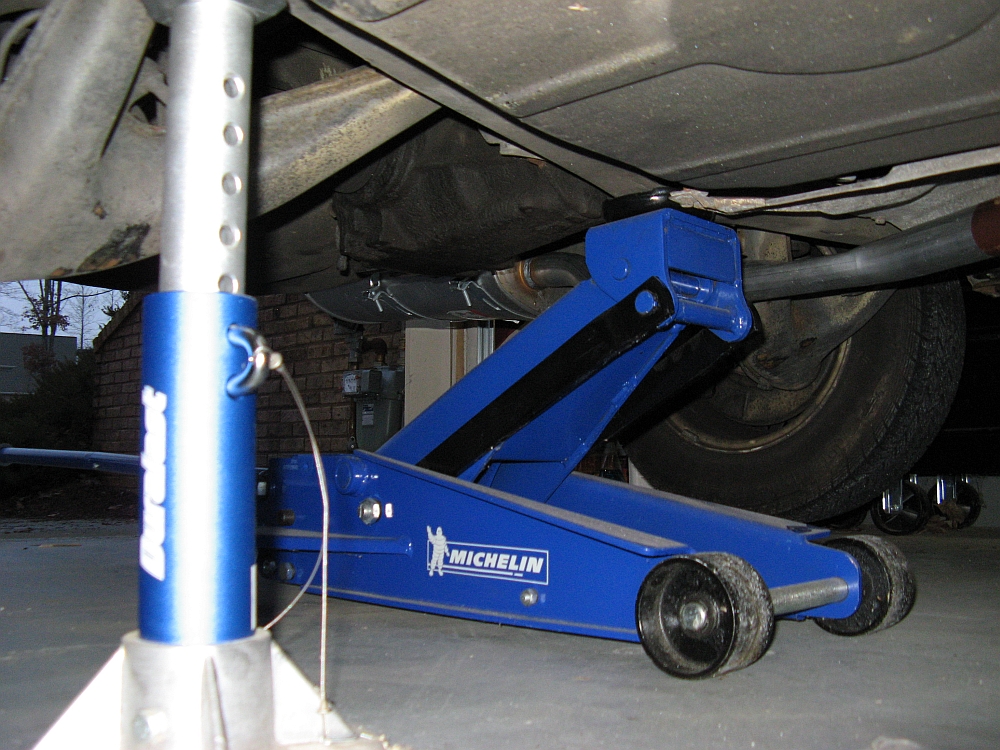
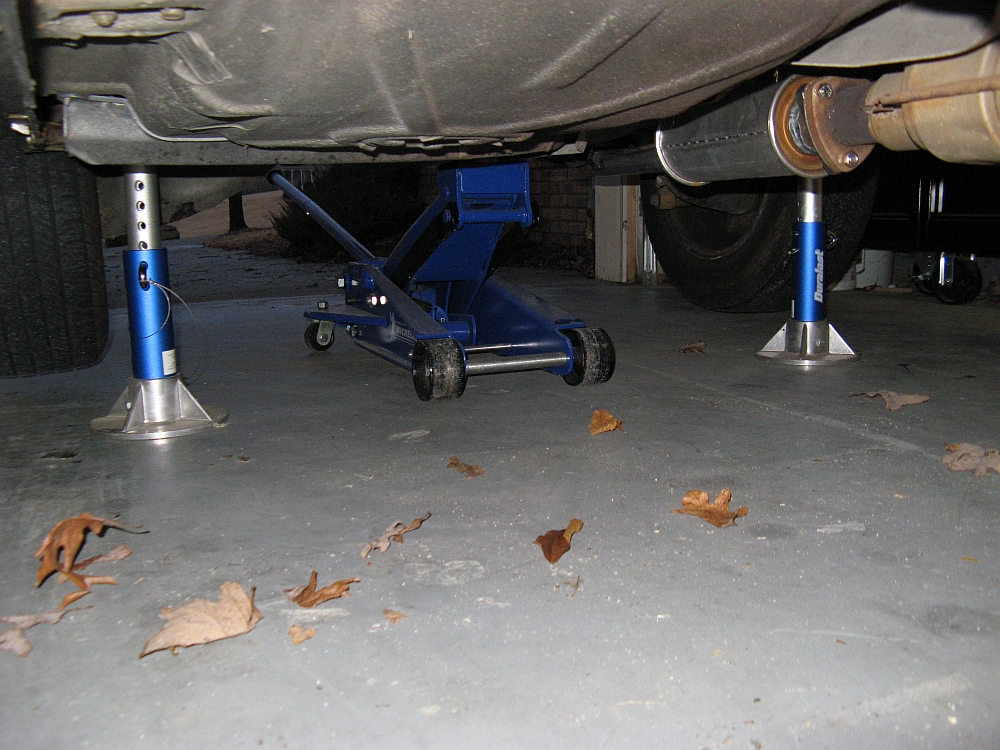
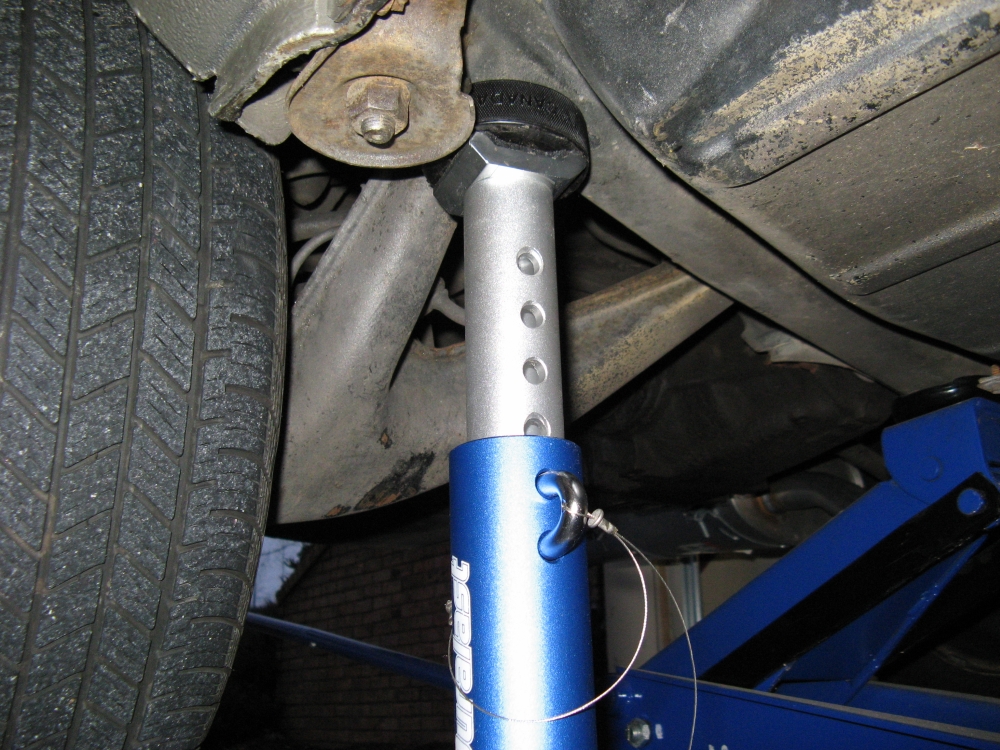
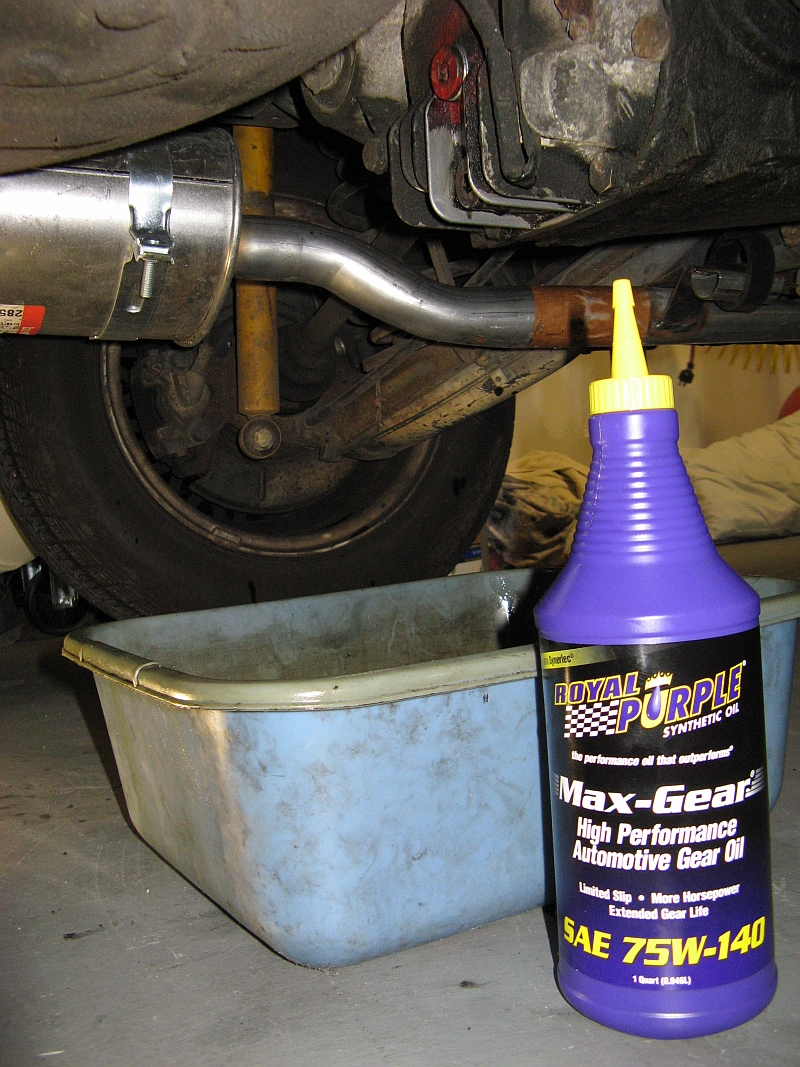
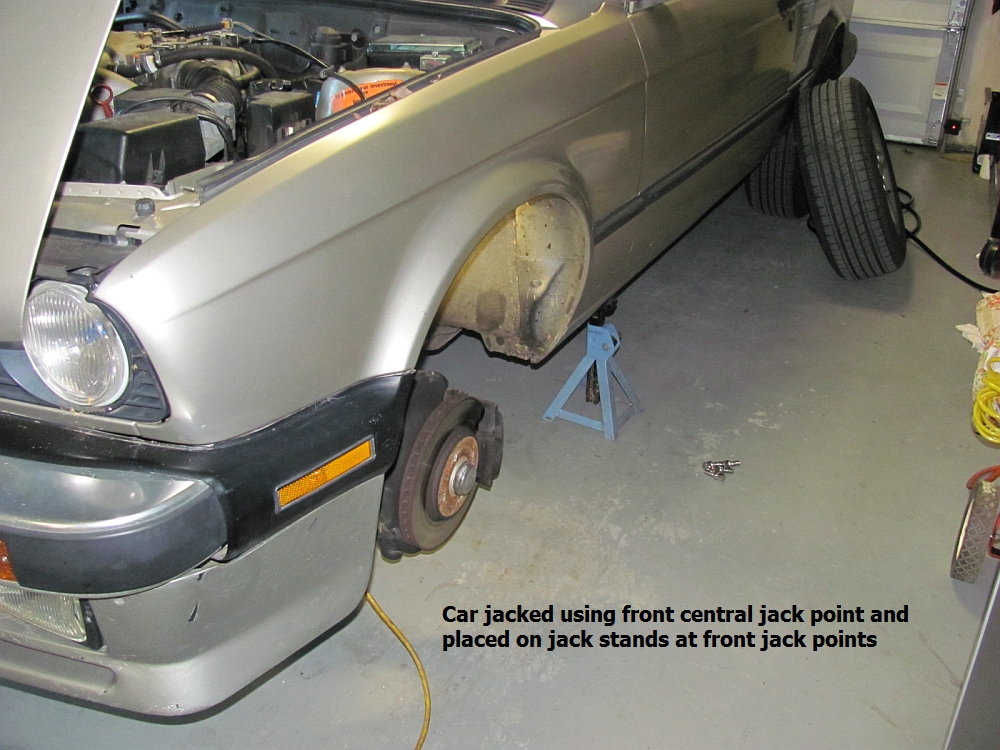
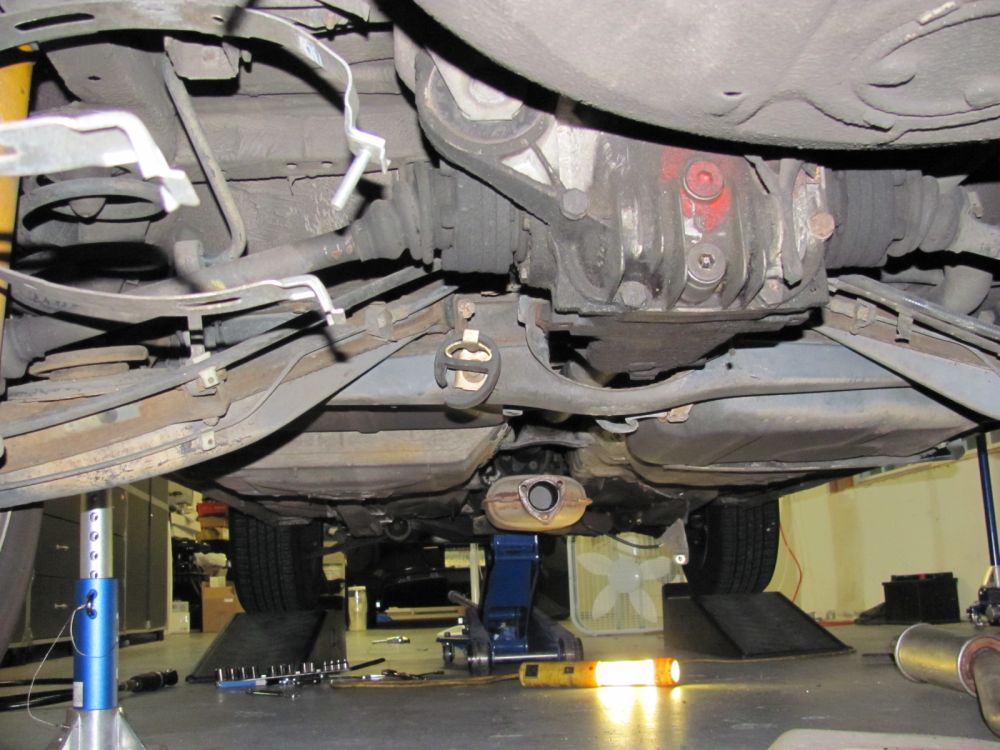
Now back to fluids, specifically the transmission and rear differential. To start the car was driven for 10-15 minutes to get everything warmed up, to me this equals better draining with more particulate suspended in the fluid. I either use jack stands all around or a ramp/jack stand combination to get the car level (not as safe) for the purpose of changing these fluids. I use the crossmembers to jack up either end and then place jack stands under the appropriately reinforced areas- see picture HERE from one of the forum members.
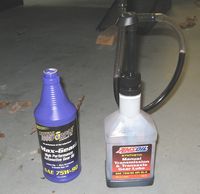
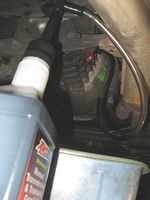
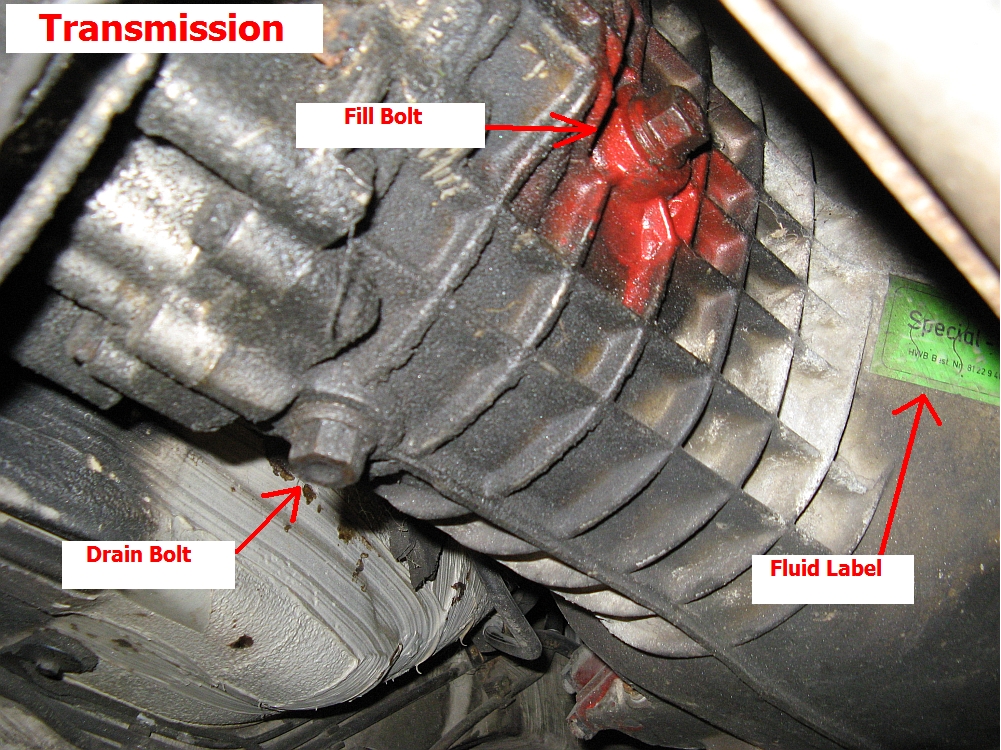
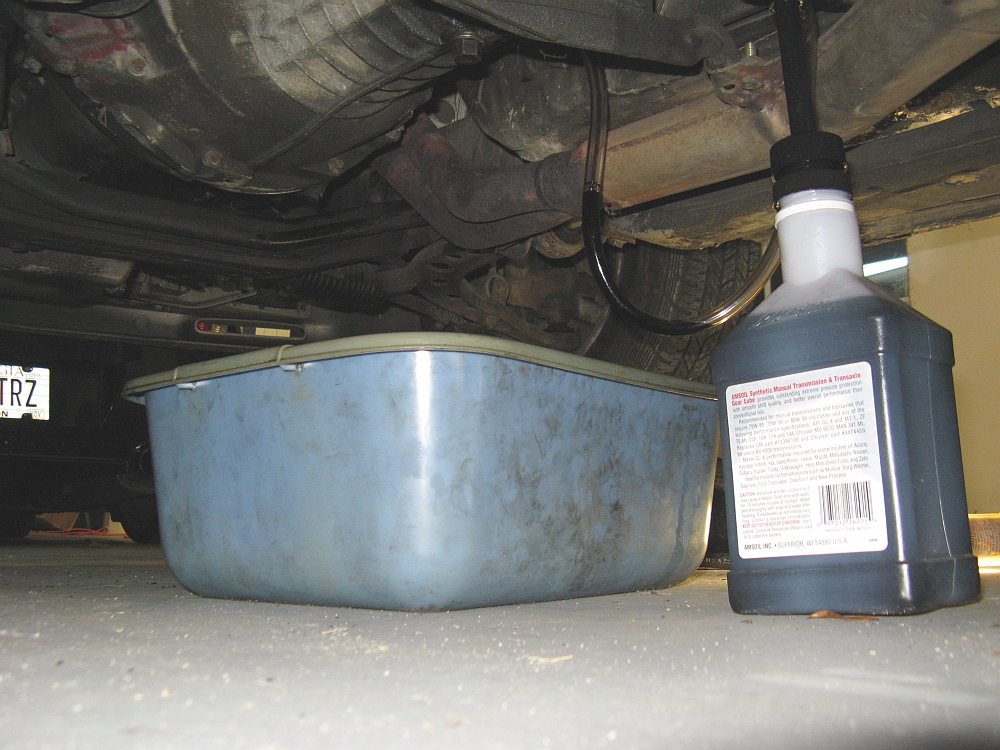
The transmission in our 325es was a green label model, according to the Amsoil site there was no recommendation for this label type and the Royal Purple site recommended their 75w90 MaxGear. I knew the transmission held 1.3 quarts and went to purchase the RP while the transmission was draining. ALWAYS make sure you can remove the fill bolt BEFORE removing the drain bolt
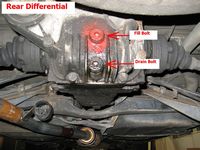
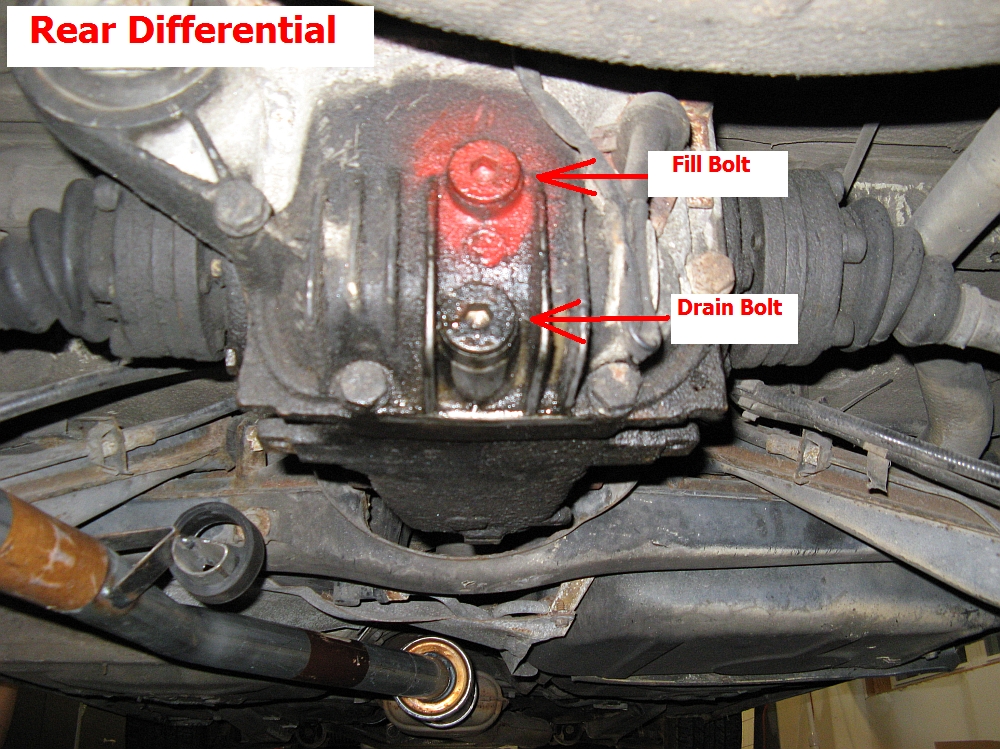
Since the rear differential in this s model is an LSD and current BMW LSD fluid recommendations are 75w140 with friction modifier, I went with Royal Purple 75w140 MaxGear for the differential, it already contains the friction modifier required. The differential holds 1.8 quarts. ALWAYS make sure you can remove the fill bolt BEFORE removing the drain bolt
Taking the car out for a test drive, the transmission shifted a little smoother and less notchy than before and I noticed no chattering from the rear differential which seems to suggest the RP fluid contains enough friction modifier for this application. The transmission fluid looked to have been recently changed, the rear differential fluid not so recently. Now I have peace of mind knowing that it has been changed and at what time/mileage.....and my daughter got to help so she could learn some maintenance skills- it's going to be her car afterall and even daughters need to know basic maintenance skills.

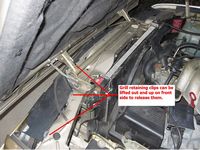
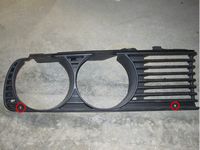
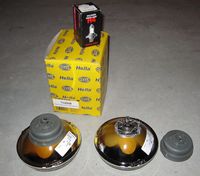
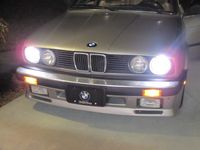
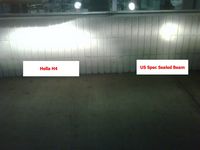
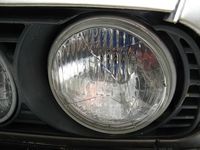
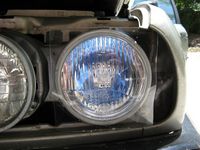
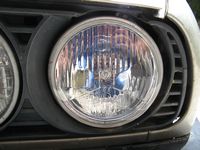
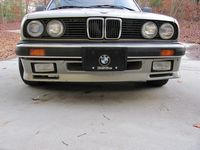
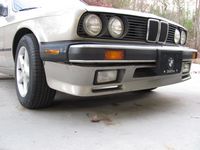
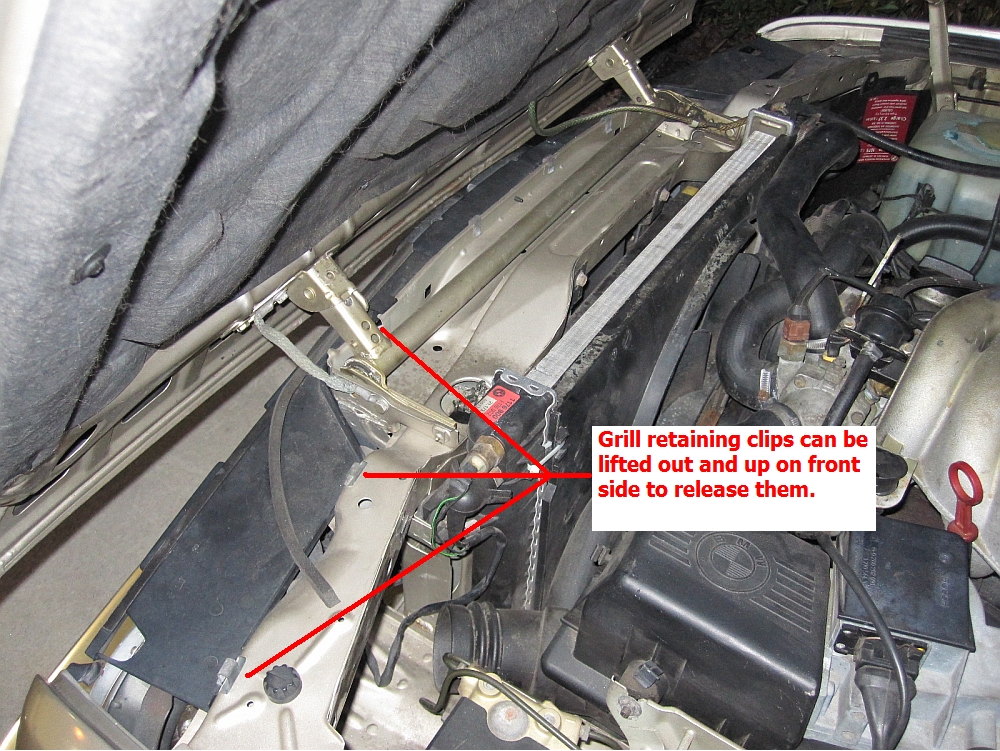
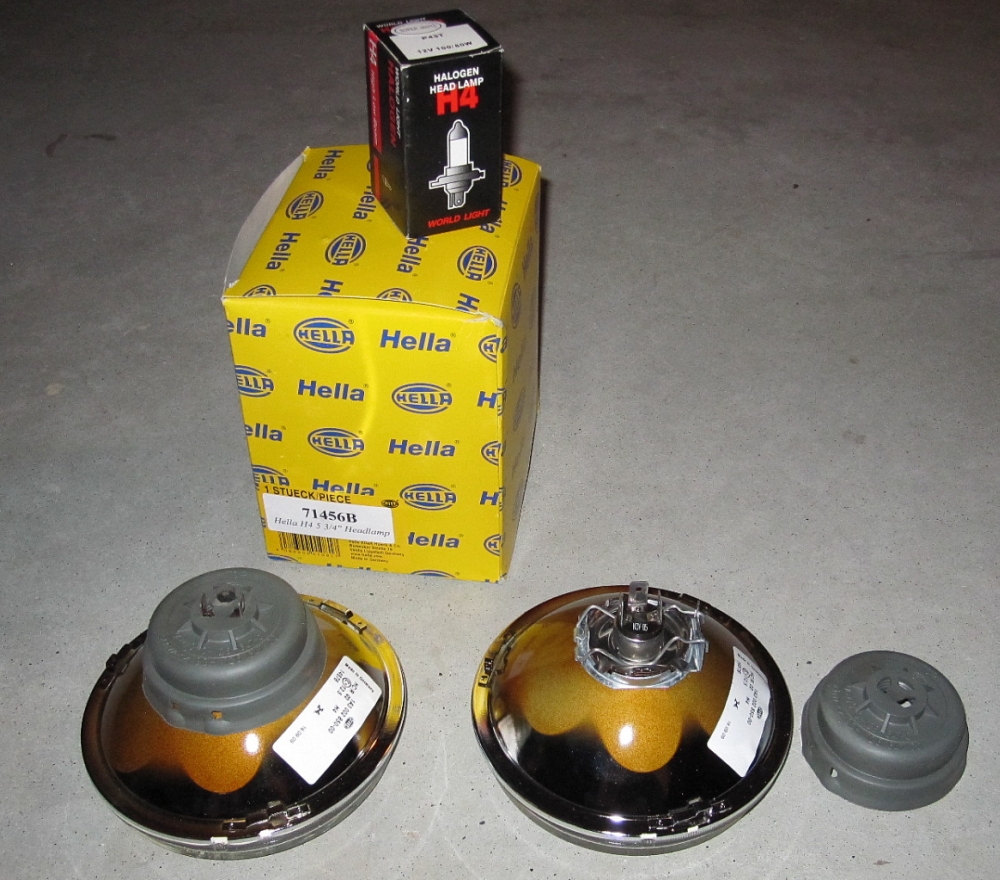
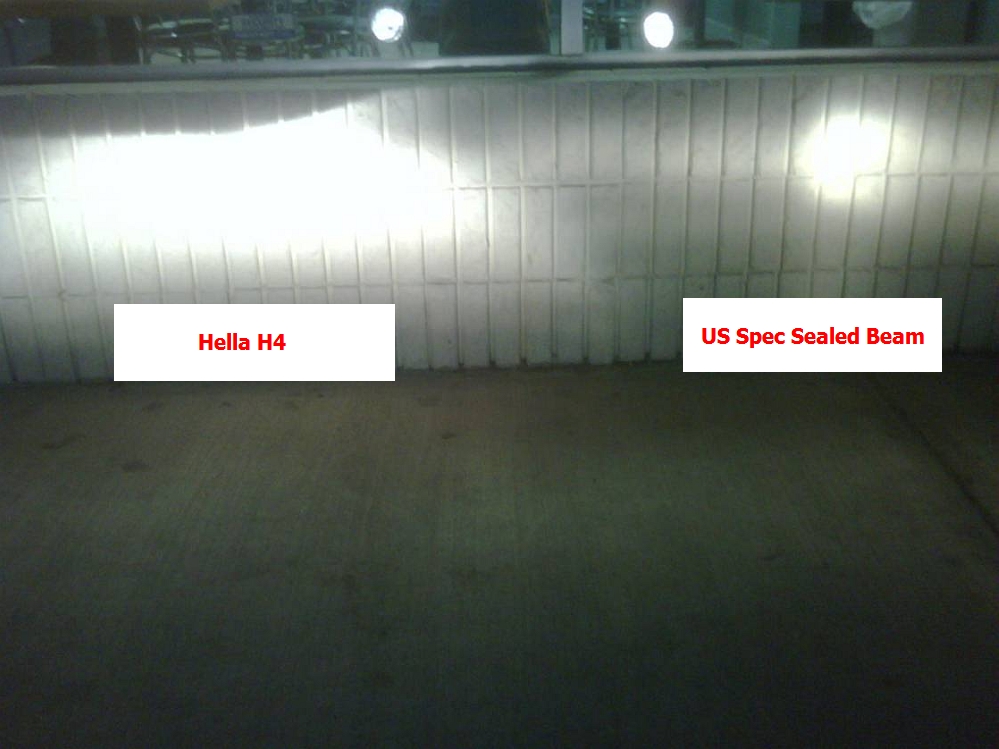
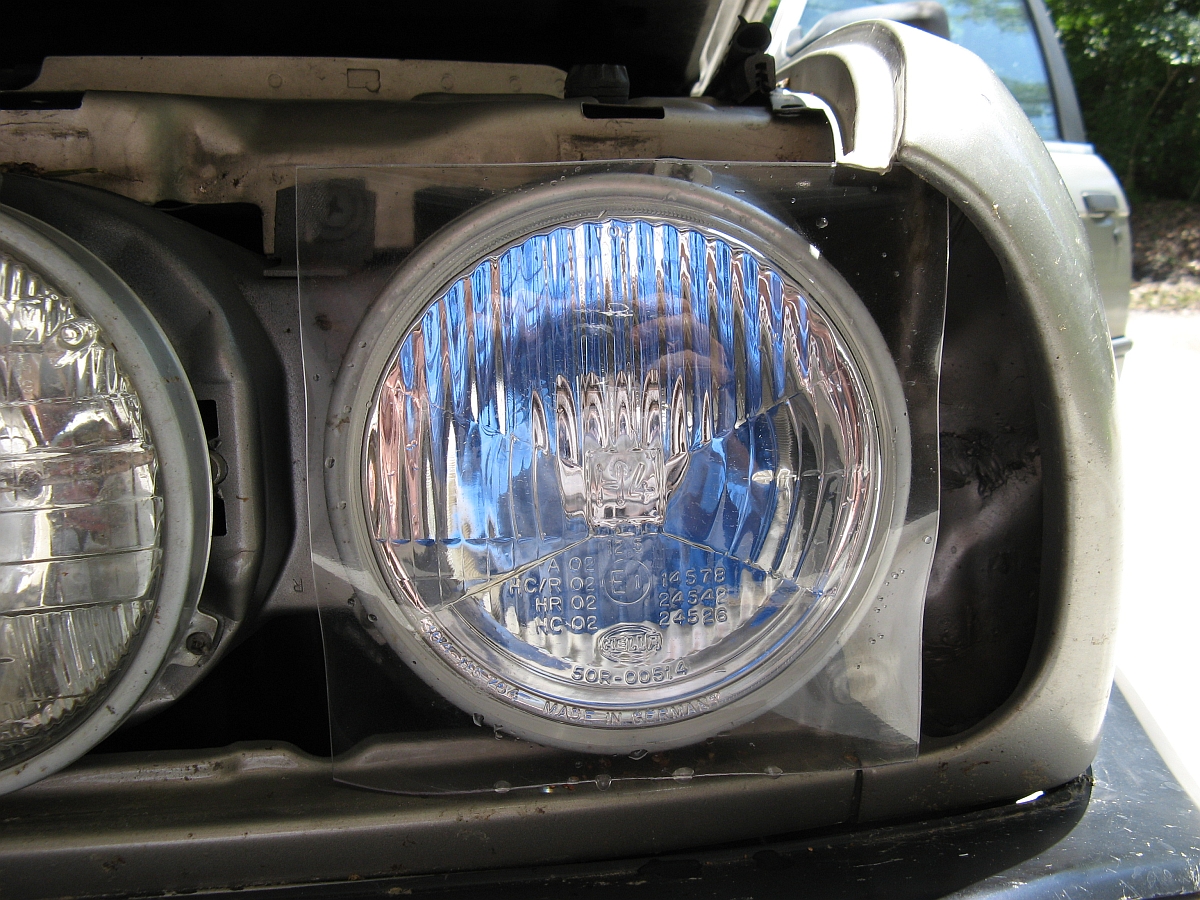
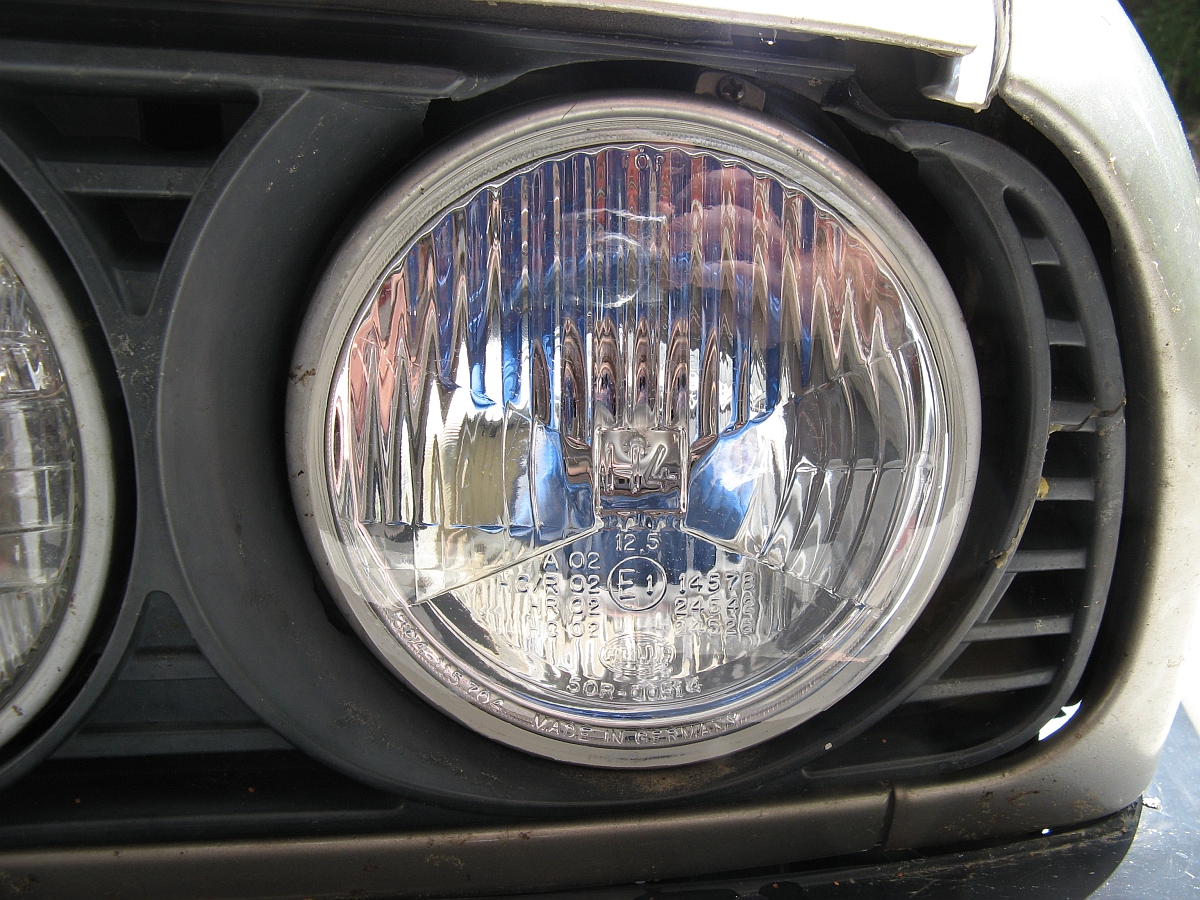
Prior to HID headlights, US spec headlights could not compare to their European counterparts. I have always upgraded my European cars with European headlight assemblies for this reason- a better, more usable and focused beam pattern with less glare to oncoming drivers. This BMW did not disappoint with its dismal US spec sealed beams, I had forgotten how bad these are. I decided on the Hella H4 European 5 1/4" low beam replacements with a 80w/100w bulb, sourced from Classic Garage. They had a good selection and great prices, these are the guys a lot of the forum users order from.
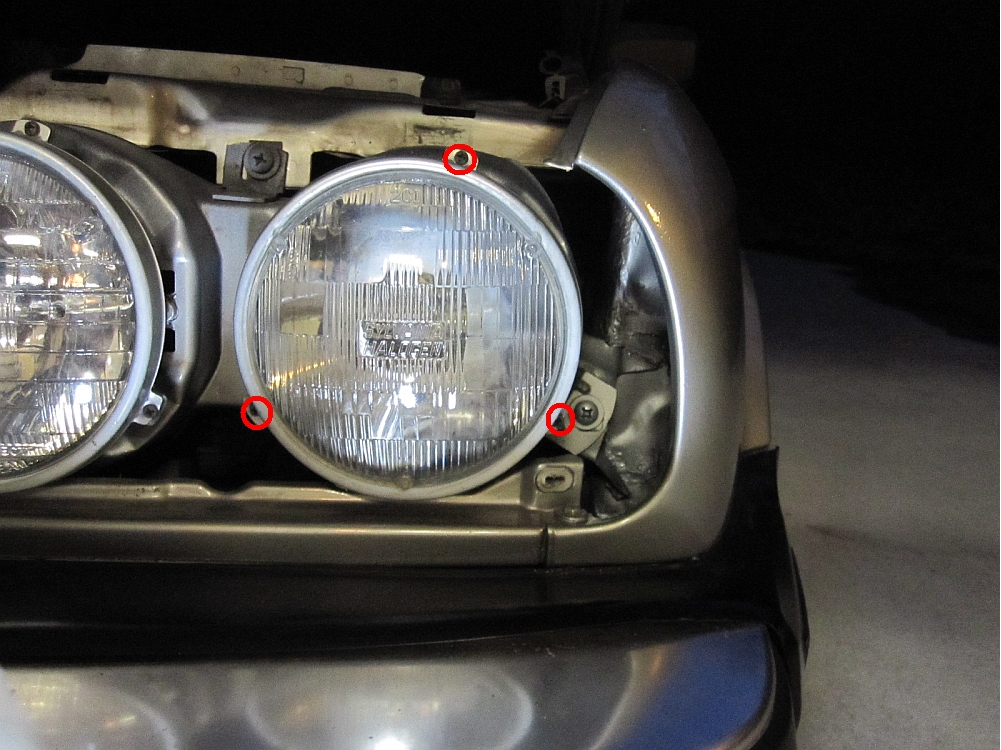
The headlight grills on either side have to be removed for installation, three clips on top and two screws on the bottom. Three screws are removed from the headlight retainer rings and the headlight can be unplugged for removal. The Hella H4 assemblies can then be installed, be sure not to touch the H4 bulbs while installing them in the headlights, gloves can be used. Installation is reverse of removal. MUCH better, I can see now.
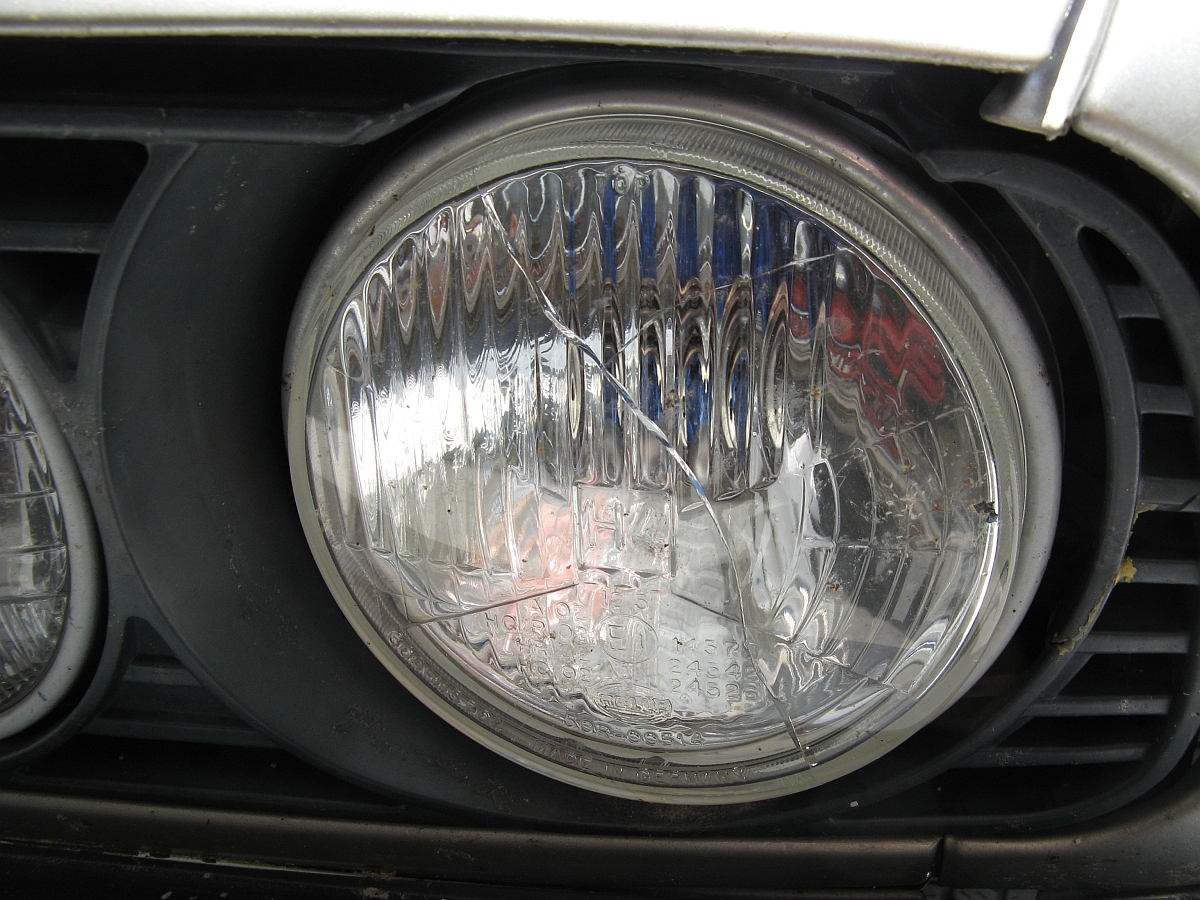
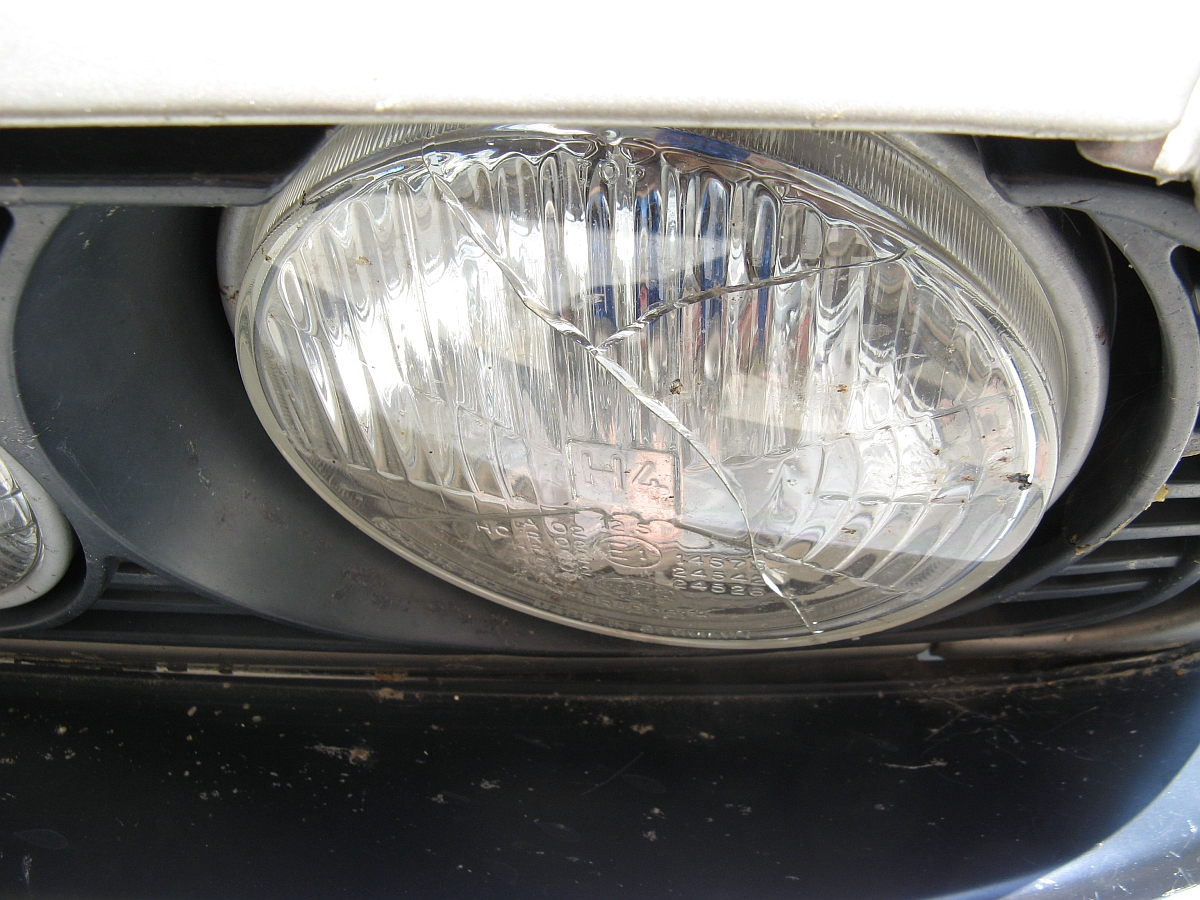
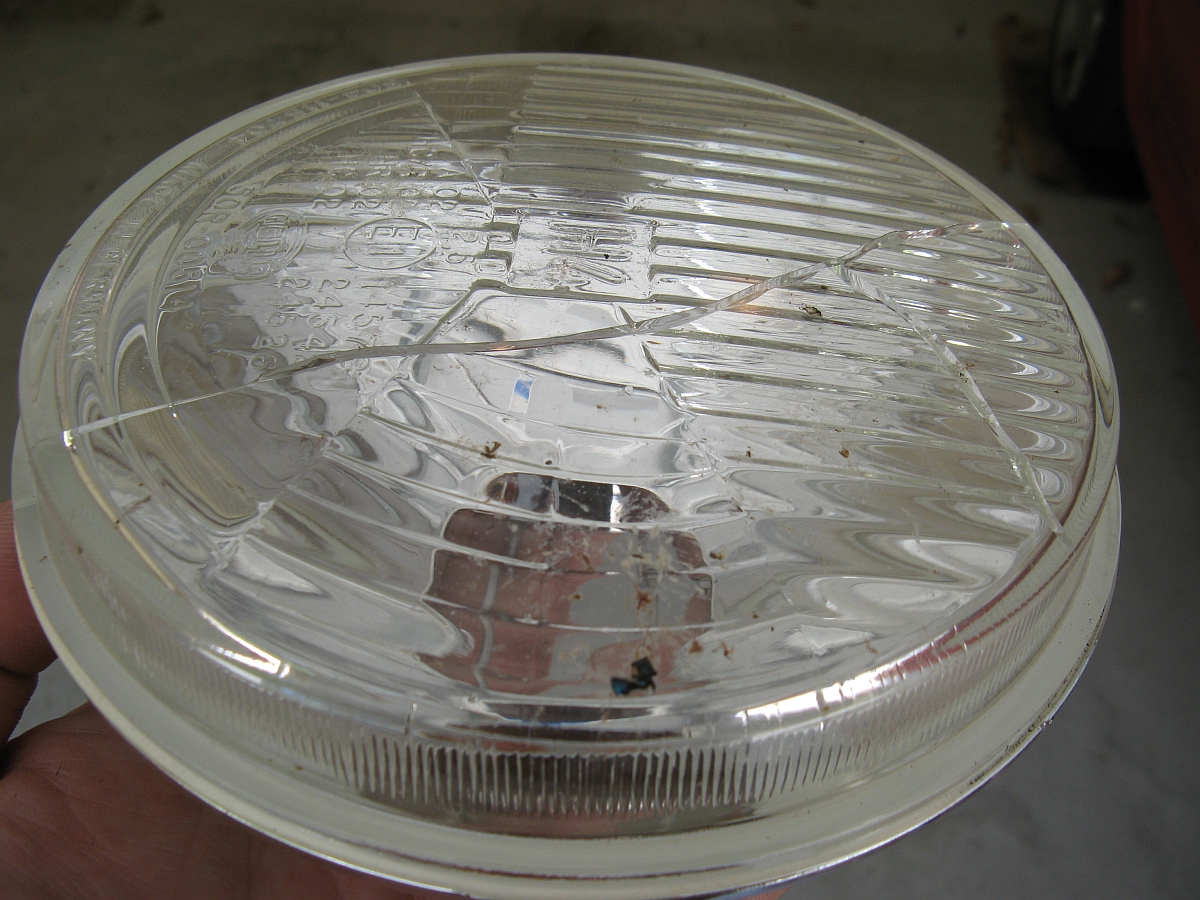
I usually install headlight protective film as soon as I install new headlights but decided this time to wait......and as you would know one of the headlights got cracked by a rock, not even sure when it happened but discovered it when washing the car a few weeks ago. Replaced with same Hella H4 light but ordered 40 mil Headlight bulk film (6" x 12") from Lamin-X Protective Films and installed. The standard film is 20 mil and supposed to withstand rocks at 95 MPH, but for the flat/dead on approach these headlights on this car take, I figured 40 mil would be even better.
The installation instructions provided (HERE) worked great (video installation guide HERE), I installed it dry with no water misted on the lens. The 40 mil is thick but these headlights are flat, I cut the 6" x 12" piece in half and applied one half to each lens. After misting water on the LaminX, I squeegeed the film down working my way from the center out several times until no bubbles were present. I then used a new/sharp razor to zip around the outside edge of the headlight and remove the excess LaminX. Hopefully this will be the last headlight replacement for a while....


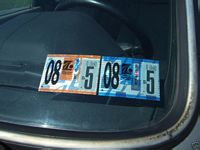
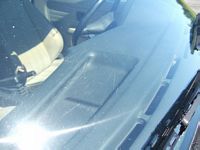
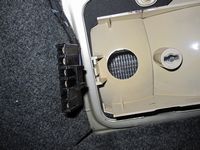
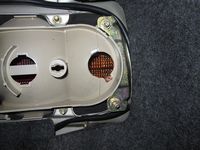
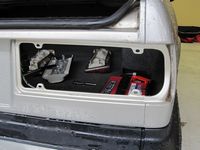
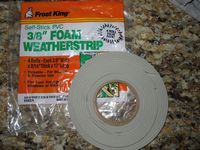
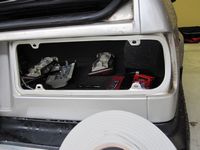
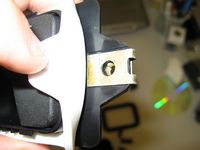
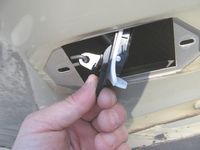
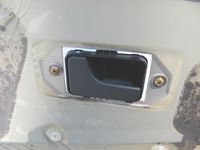
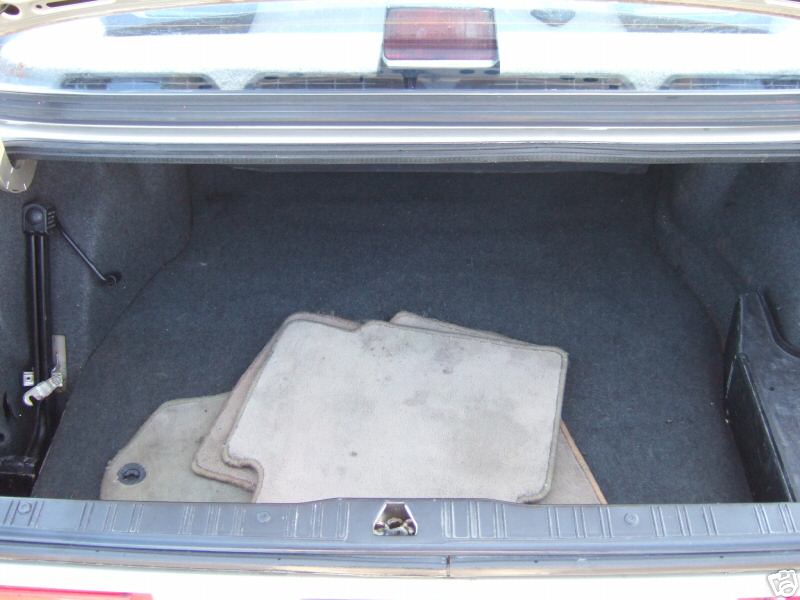
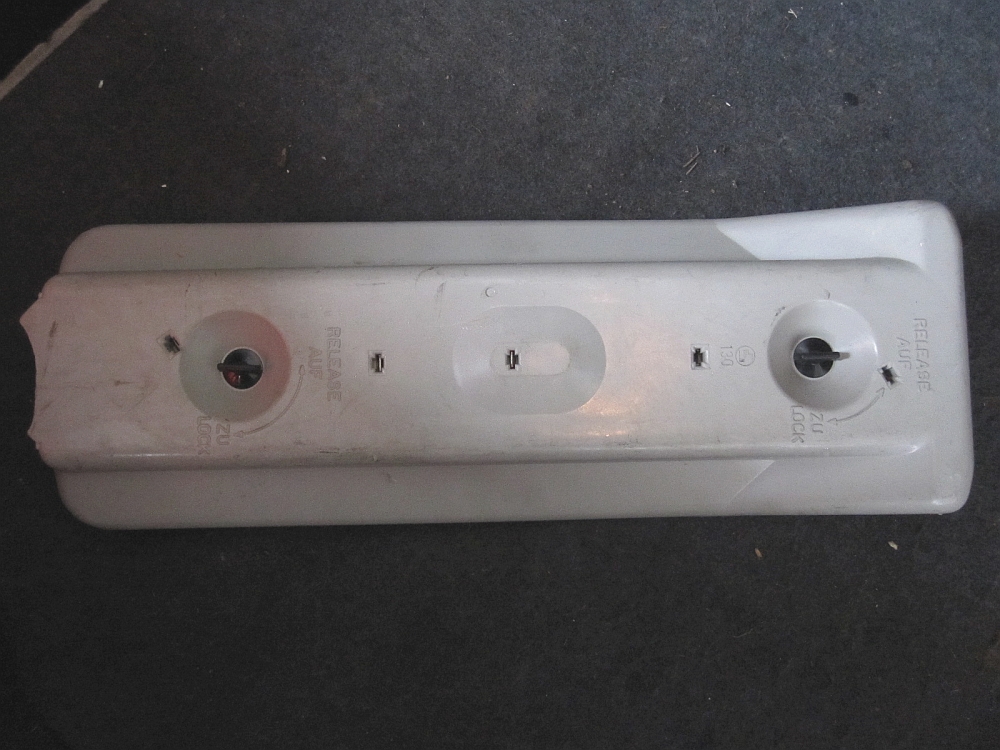
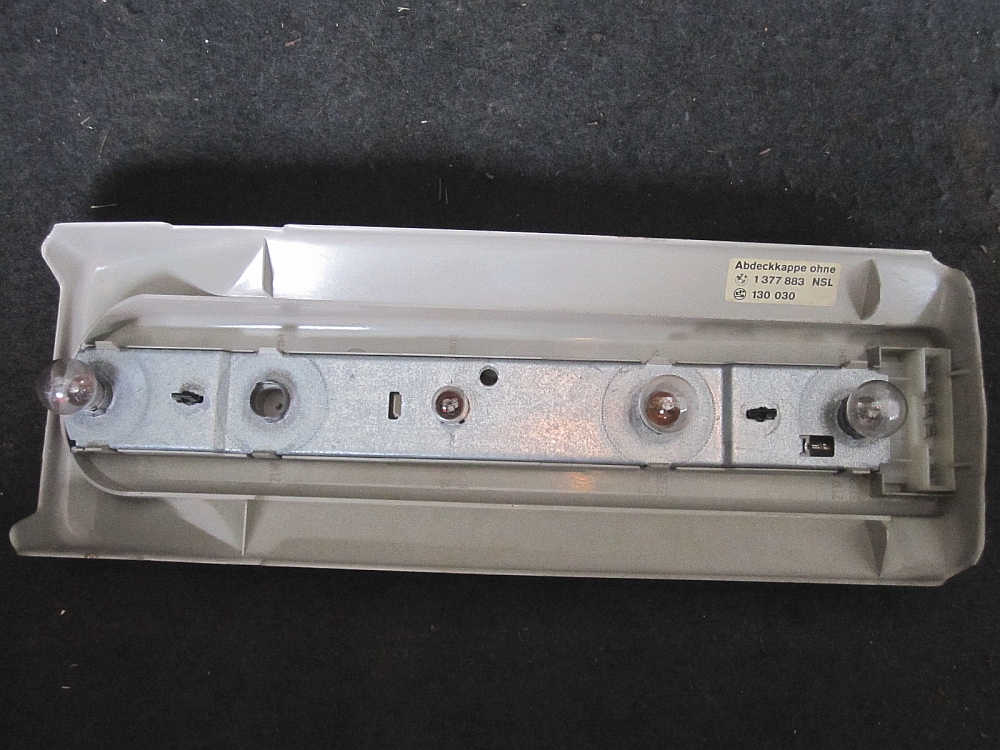
With older cars, you can always count on the occasional surprise. Today I found the plastic battery cover holding a small puddle of water. It did not appear to be coming from the trunk seal, but after looking around carefully I found that the tail light gasket was allowing a SMALL trickle of water in on the passenger side and the driver side was starting to weep a bit too- leaking tail lights. The tail light gaskets are not expensive but would have to be ordered, as a short term (maybe long term?) fix I found some weather stripping to supplement the OE gasket and seal up the tail lights.
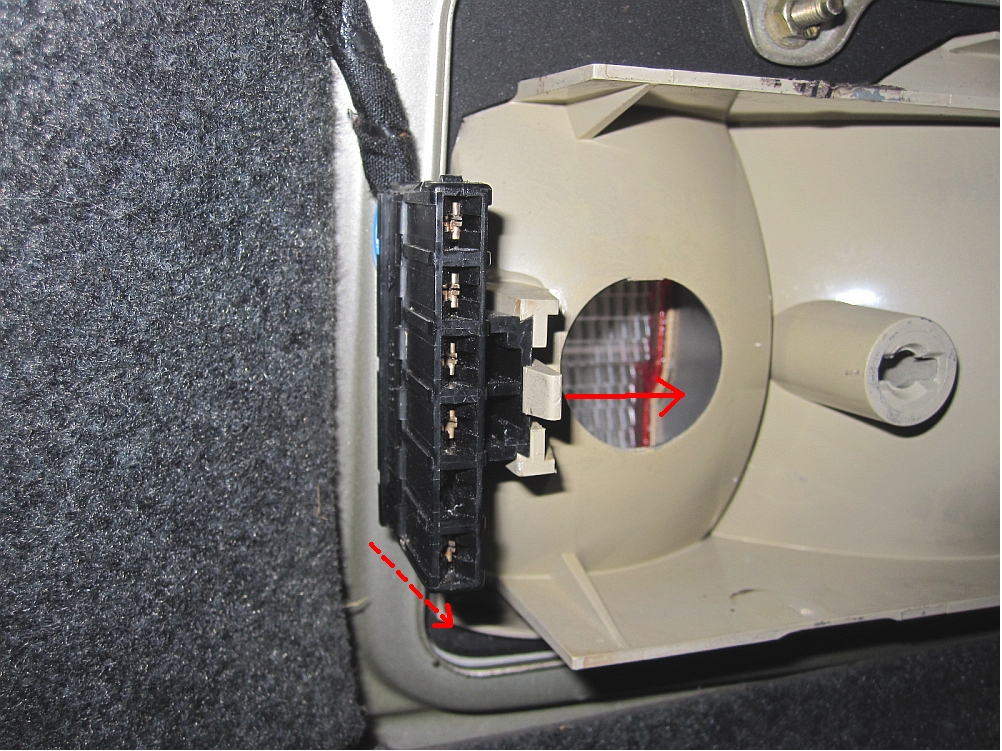
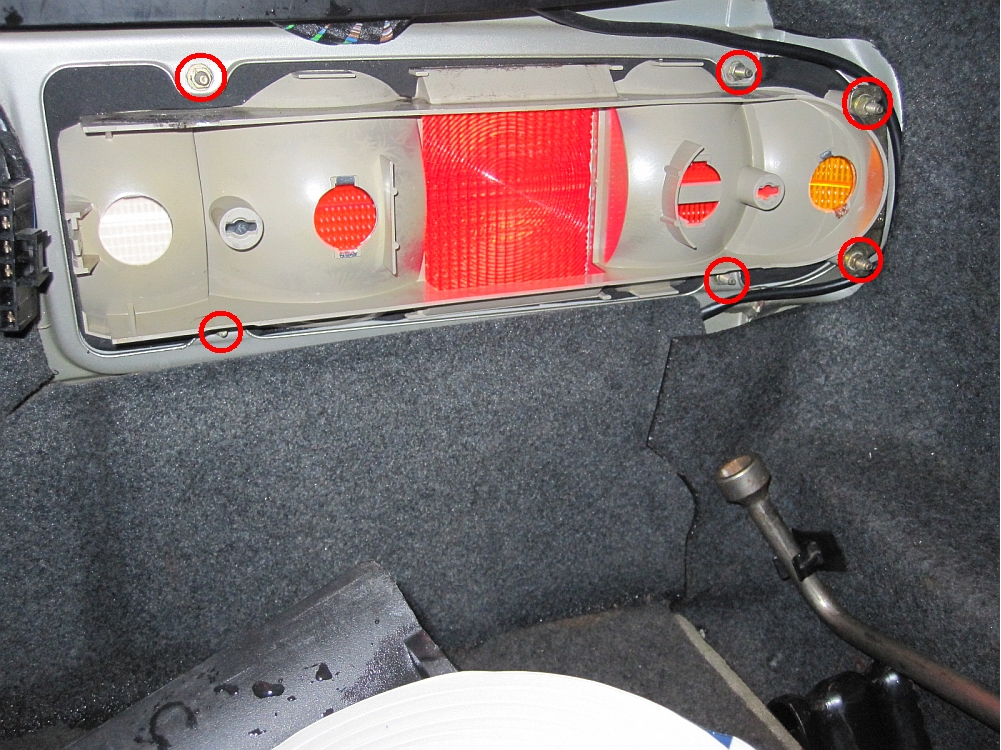
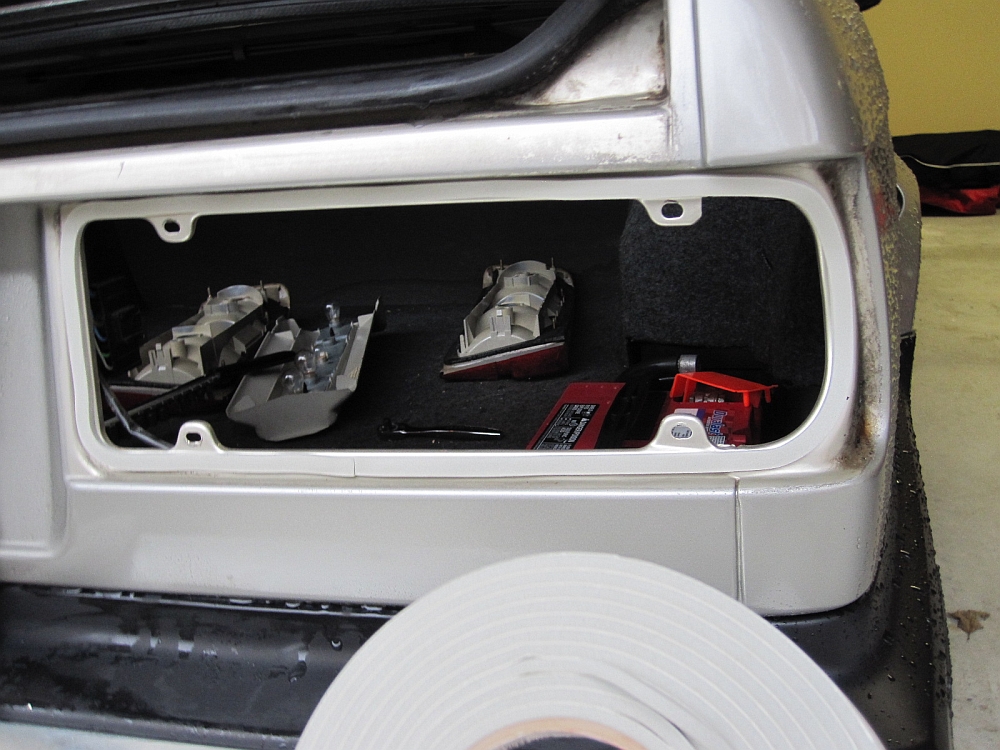
Two releases are turned on the tail light bulb holder so they can be removed/unplugged. Once they are out of the way you can access the screws holding the tail light to the car, the two outboard screws work with a metal clamp that is loose after the screws are removed. The electrical connector can be removed by pushing the release clip in and sliding the plug out. Once the tail lights are carefully removed, the area where the gasket resides can be wiped clean with a towel. Next the weather stripping is applied around the perimeter, I used weatherstripping that compressed to almost nothing and had light adhesive on one side- so light that I kept having to push it down until the tail light was reinstalled on top of it. I tried to apply the weatherstripping so that it would allow water to flow out and not puddle up, I also placed the joining seam at the bottom center of the opening. When reinstalling be sure to hand tighten the screws, I found some of these to be a little loose when i was removing them.
This fix has worked so well, I don't see any reason to order the OE gaskets at this point.

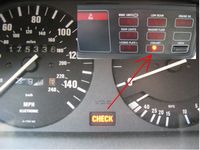
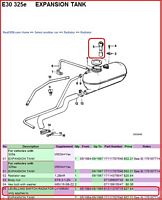
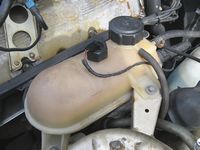
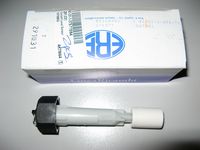
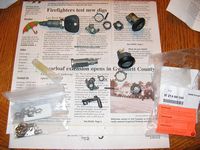
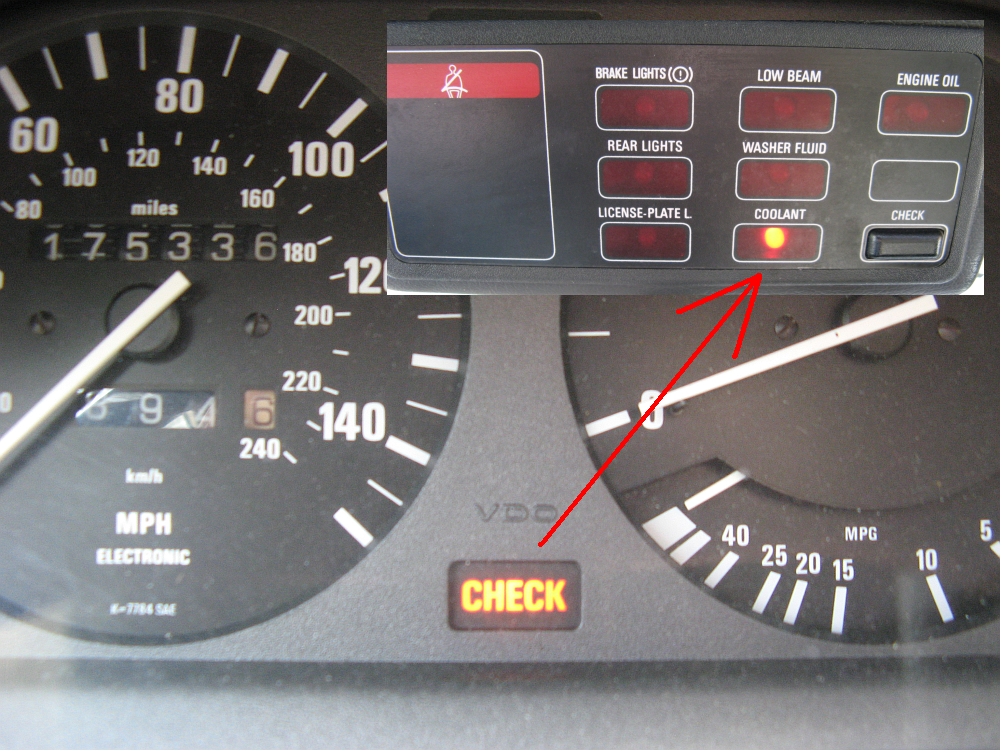
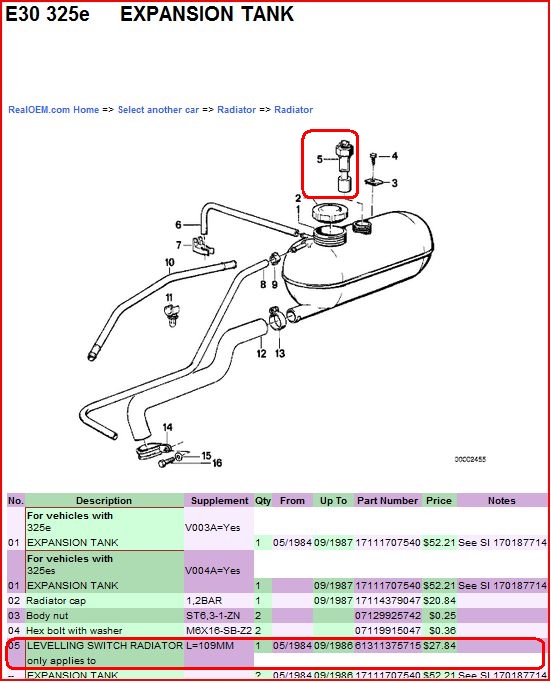
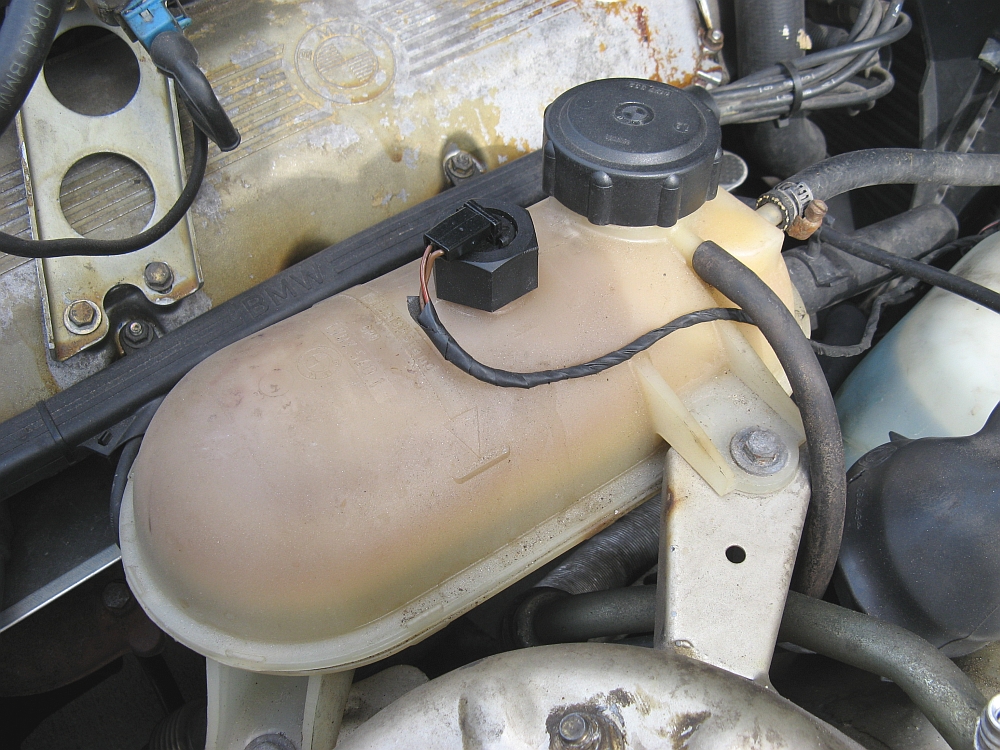
Coming back from a business trip, the CHECK light started flashing and the coolant light came on. I quickly pulled over and the coolant level was........fine. My guess was the coolant level sensor in the radiator expansion tank had gone bad. It initially would only light up after it got warm but eventually lit up as soon as the car was turned on. The BMW part was not in stock and was about $35, after calling all of the local McParts stores I found a replacement part at Advance Auto Parts. It looks the same as the part removed and the BMW P/N is referenced on the bag. Time will tell if this $15 part that only took a few days to arrive after ordering is as good as BMW OE.
Replacement is simple, unplug the connector by simply pulling off (no release to push/pull) and unscrew by turning cap counter-clockwise and removing from reservoir- Be careful not to get antifreeze on the car. Installation is reverse of removal.
[EDIT] The cheap switch lasted for about 500 miles before it started flashing the CHECK COOLANT lights so back it went. I ordered and installed an OEM switch from Pelican Parts, so far so good.

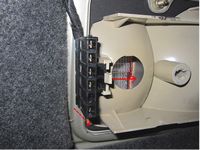
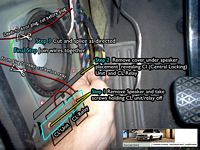
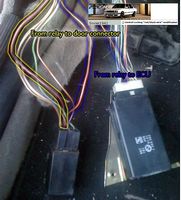
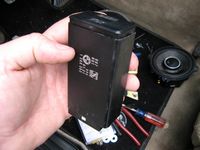
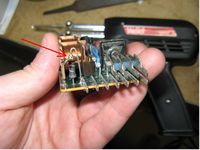
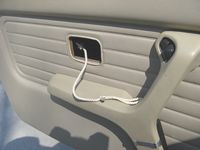
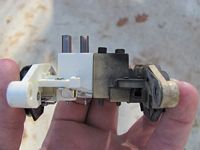
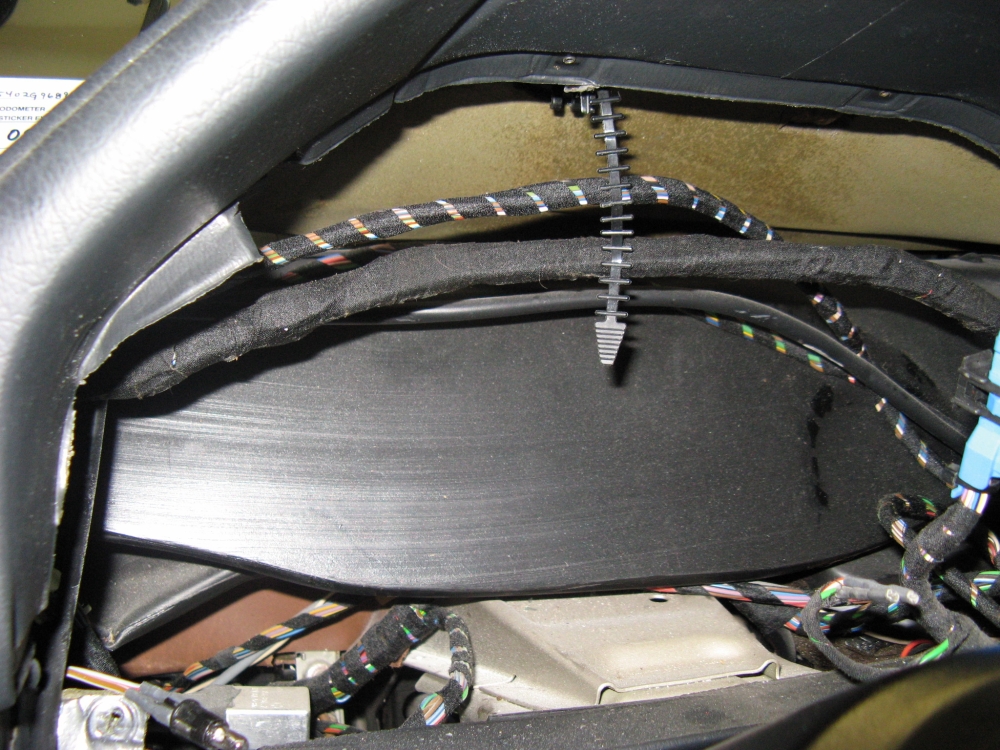
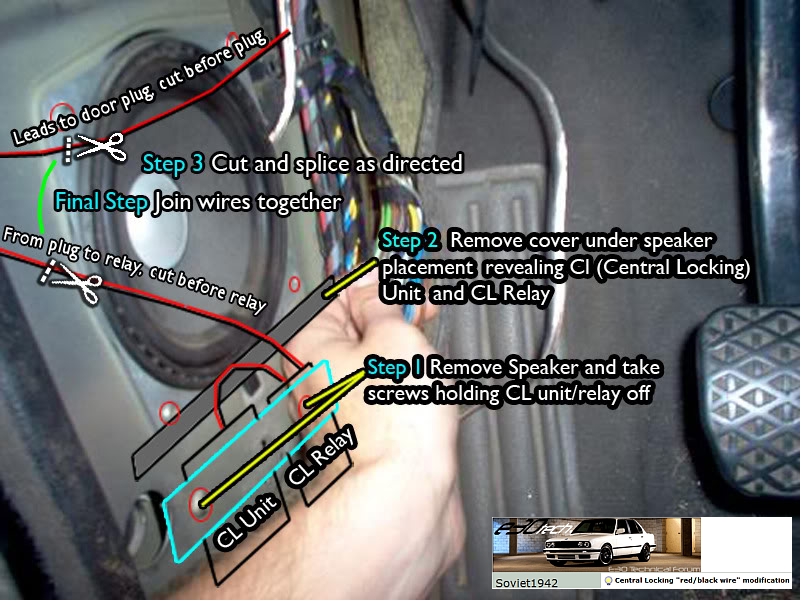
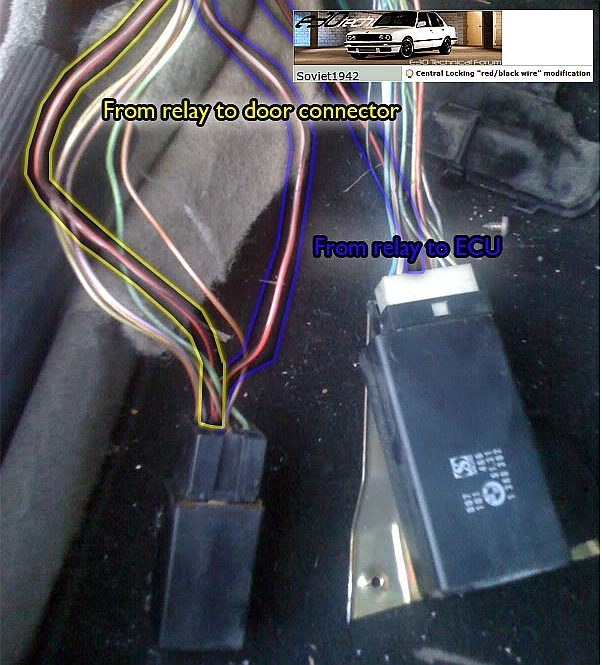
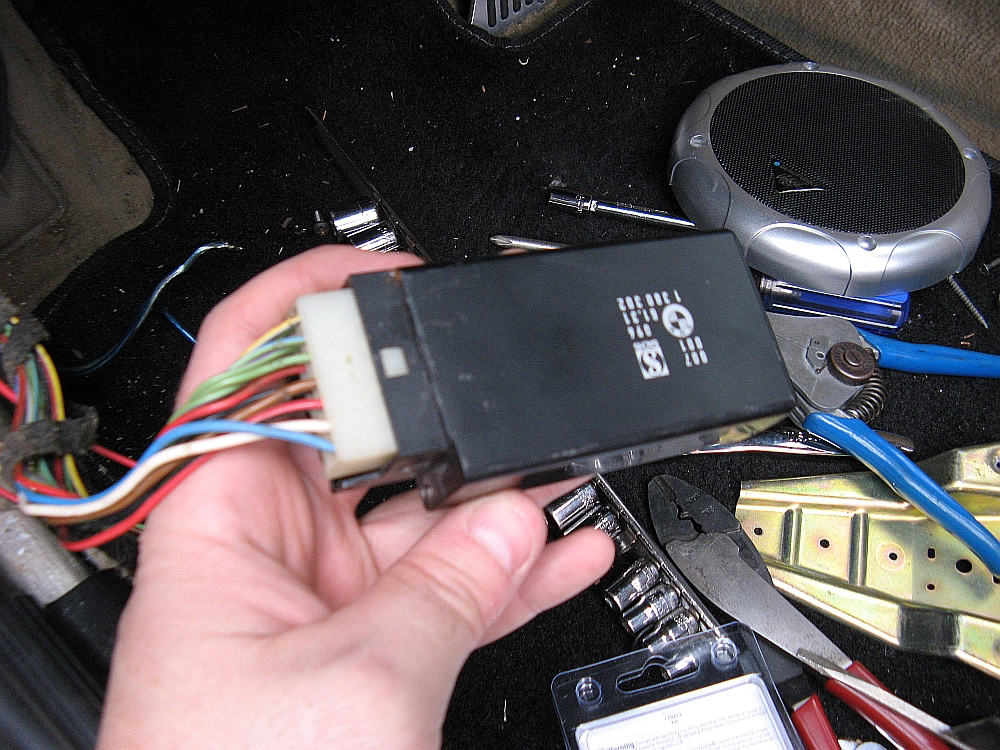
The central locking system had not worked since my brother purchased the car. I found a few suggestions on the internet as possible problems. One, detailed HERE, explains how a power wire for the cental locking relay runs into the door to an optional lock heater (which is rare to be found installed) and then back to the relay. I decided to fix this even if it was not the problem, picture with details below shows how the wire is cut to the door and to the relay and spliced together to eliminate any complications. The second fix, detailed HERE, showed how the central locking module can fail by one of the pieces becoming unsoldered- this was definitely my issue. After a few minutes with a soldering gun all was well.
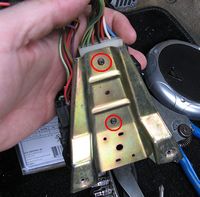
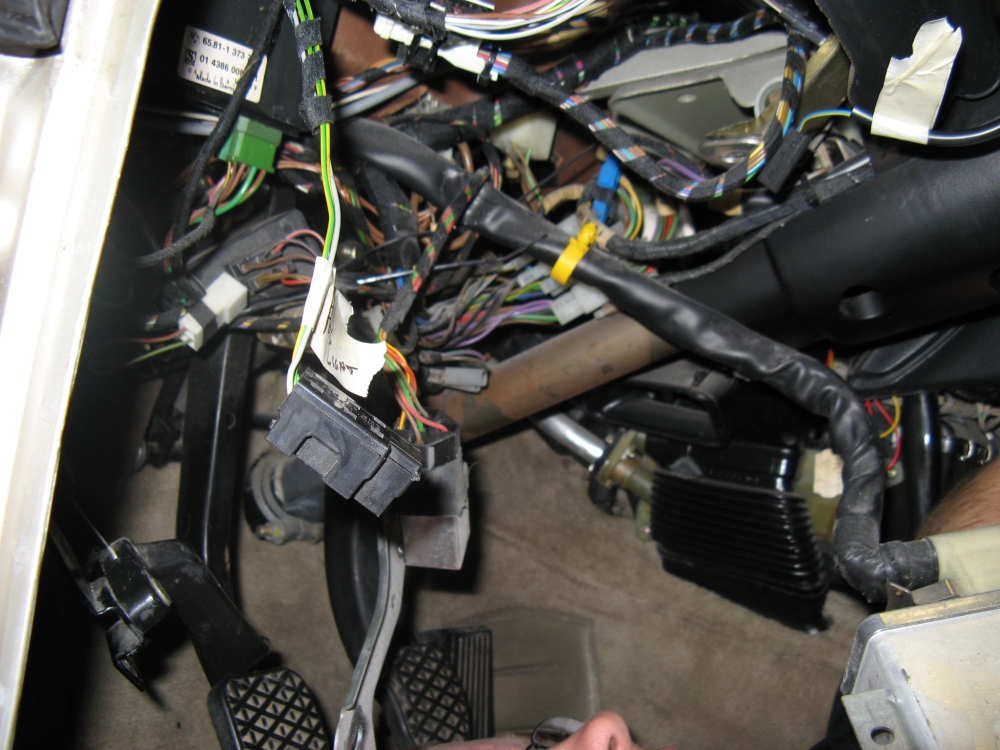
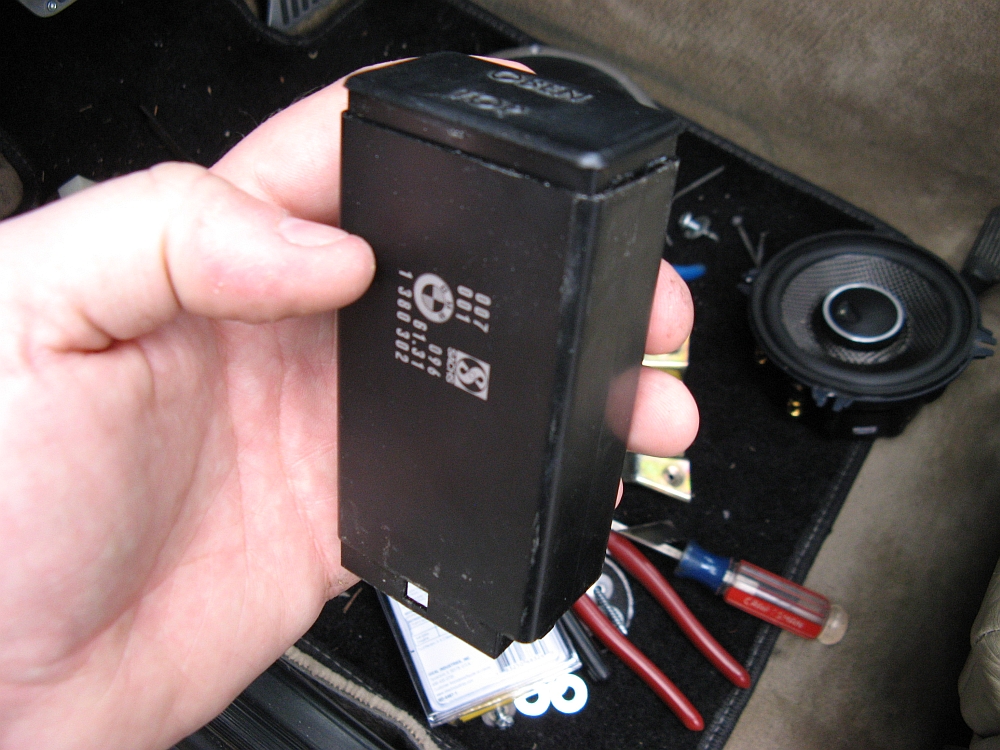
To access the cental locking module, the left side speaker and kick plate have to be removed. Two screws under the speaker hold the central lock module in, after these are removed the module assembly can be pulled up and out- somewhat difficult due to the wiring harness. Once removed there are two screws that hold the relay and module to the mounting bracket, they are removed to access the central lock module- Note how this is assembled so that you can reassemble the same way. The central locking module can be removed from the casing by unplugging the wiring harness, using a small flat blade screwdriver to remove the plastic end cap (side opposite plug), and sliding the circuit board out of the case.

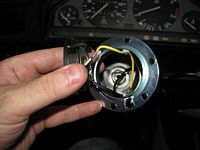
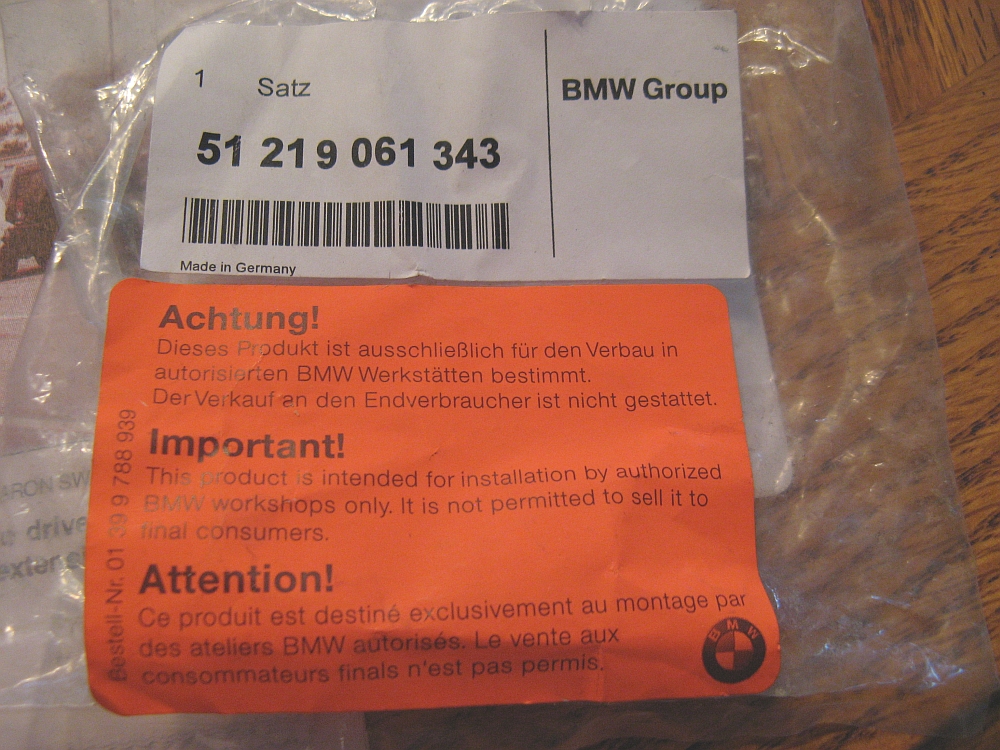
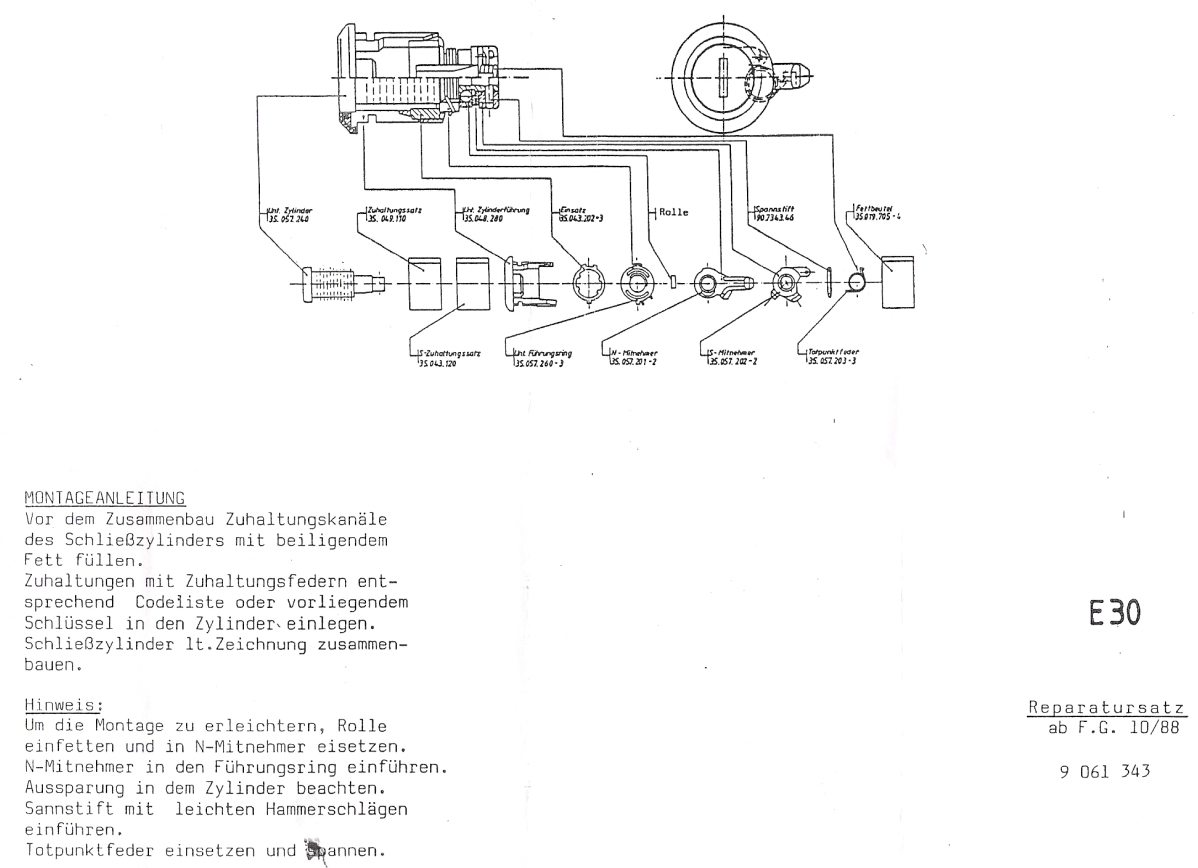
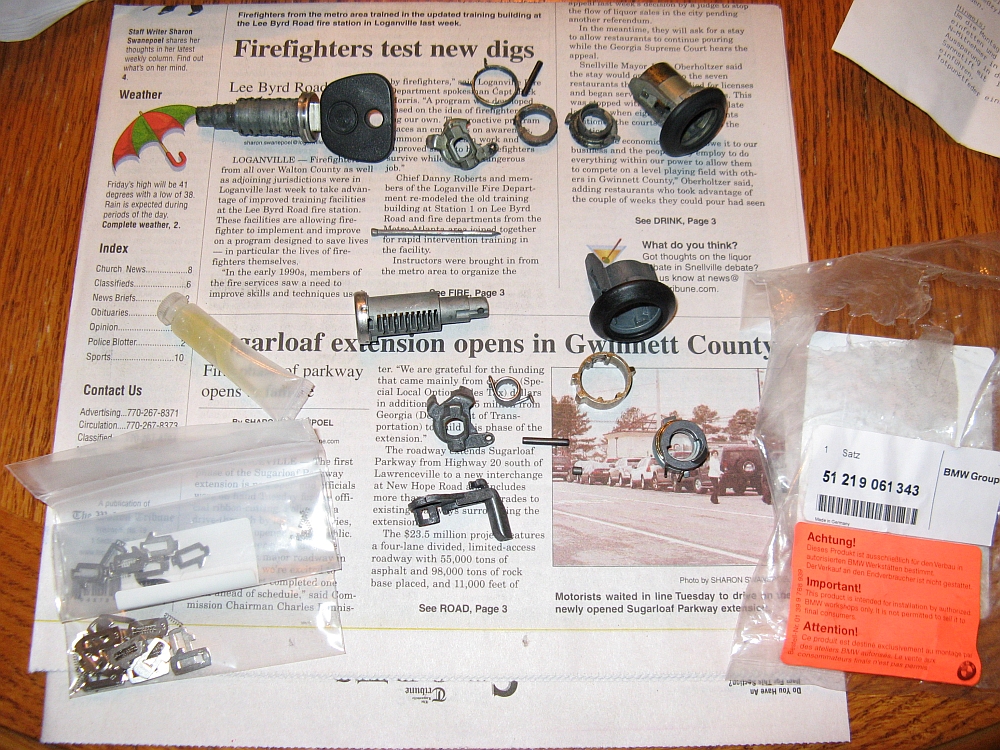
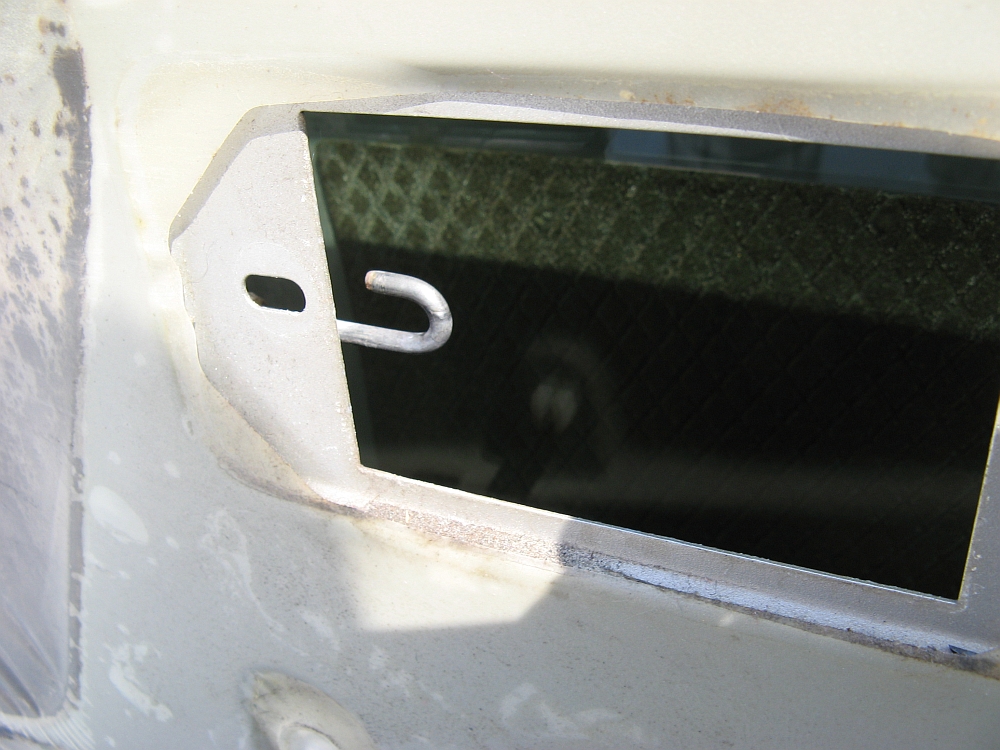
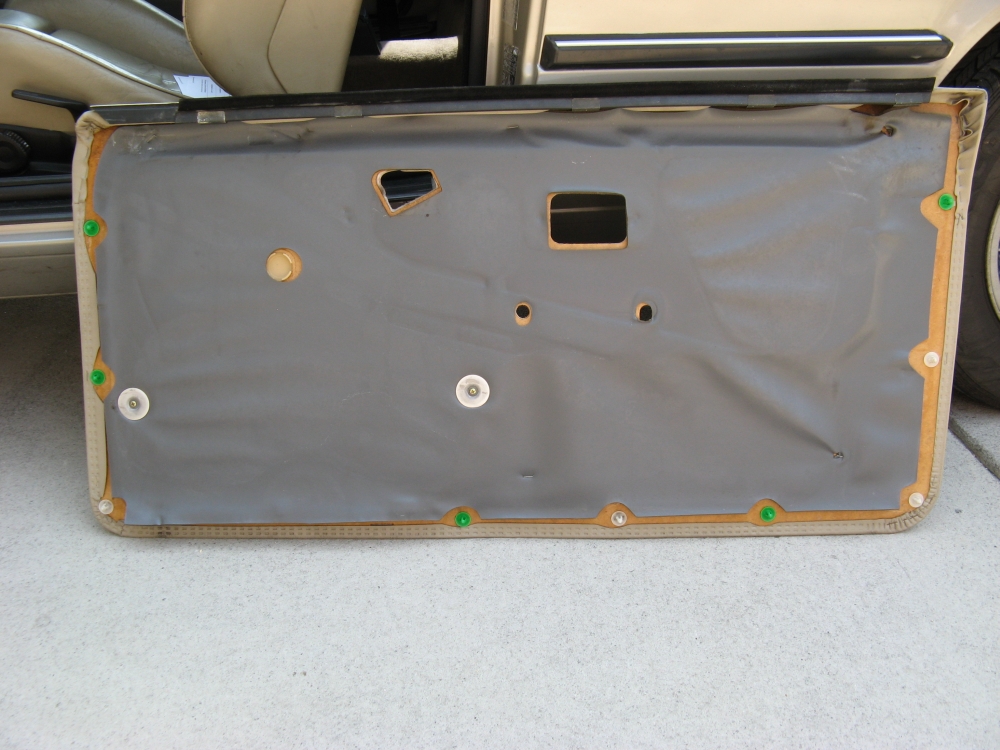
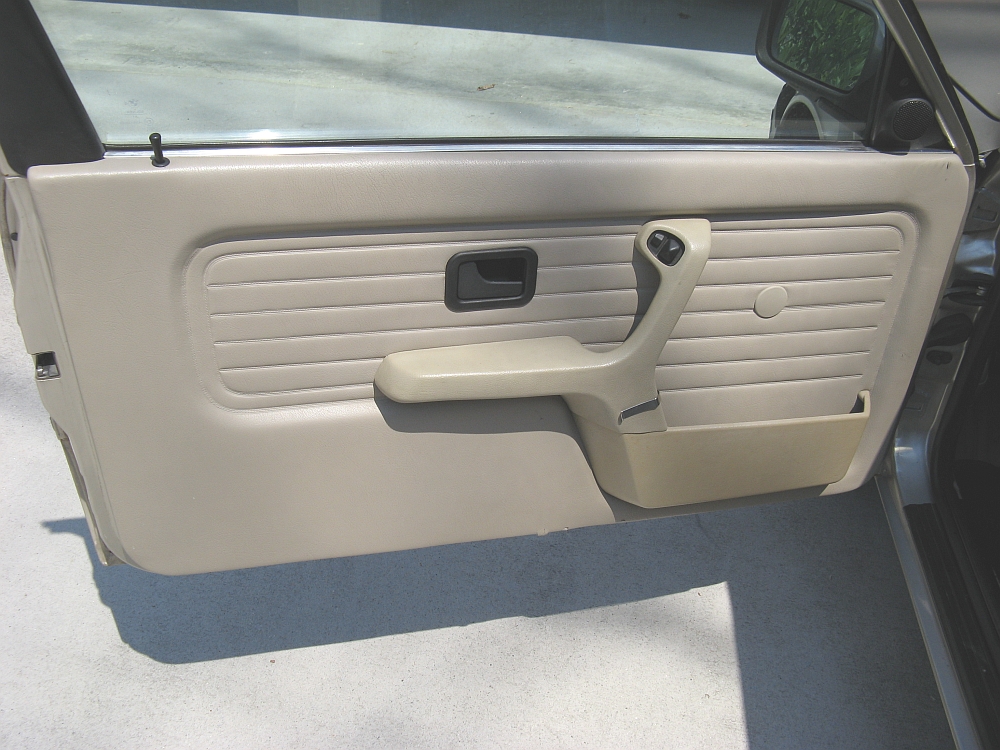
The outside door lock on the left (driver) side of the car would work rarely so I found myself using the trunk lock/central locking system to lock the car. This got old (especially in the rain) so I decided to buy the BMW lock cylinder rebuild kit (P/N 51219061343), essentially a new lock with no key. I assembled a DIY guide HERE that outlines the steps to remove the inside door panel and lock and how I rebuilt it using this kit. Now the single lock/unlock and double lock/unlock features work.
Two guides I found when researching this issue are HERE (e30World) and HERE (Unofficial BMW).


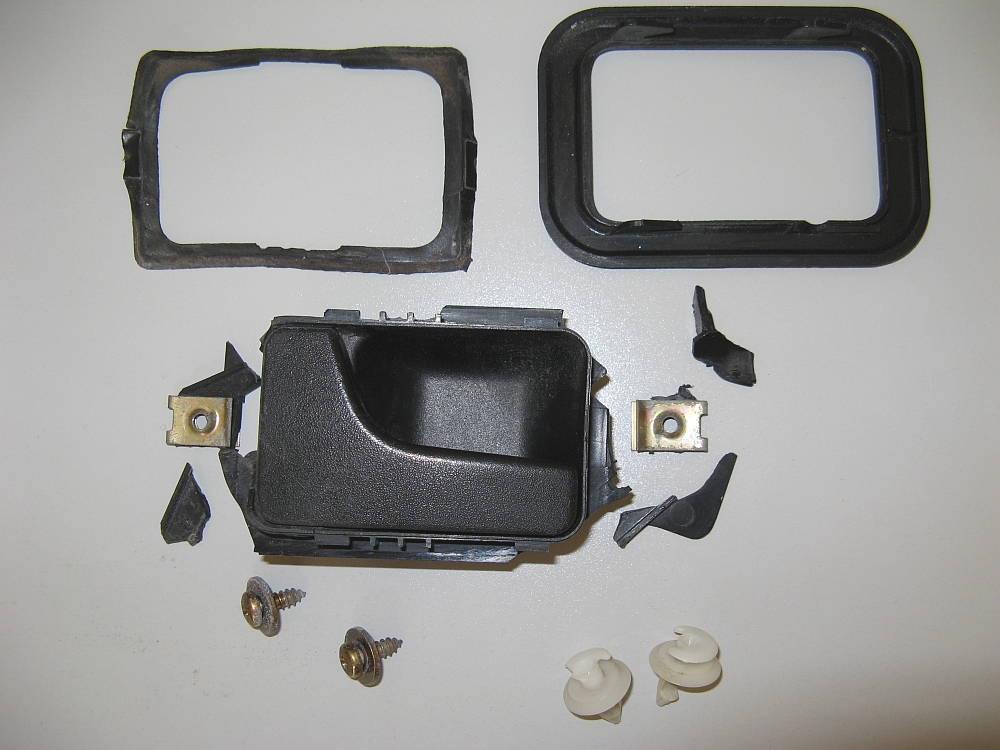
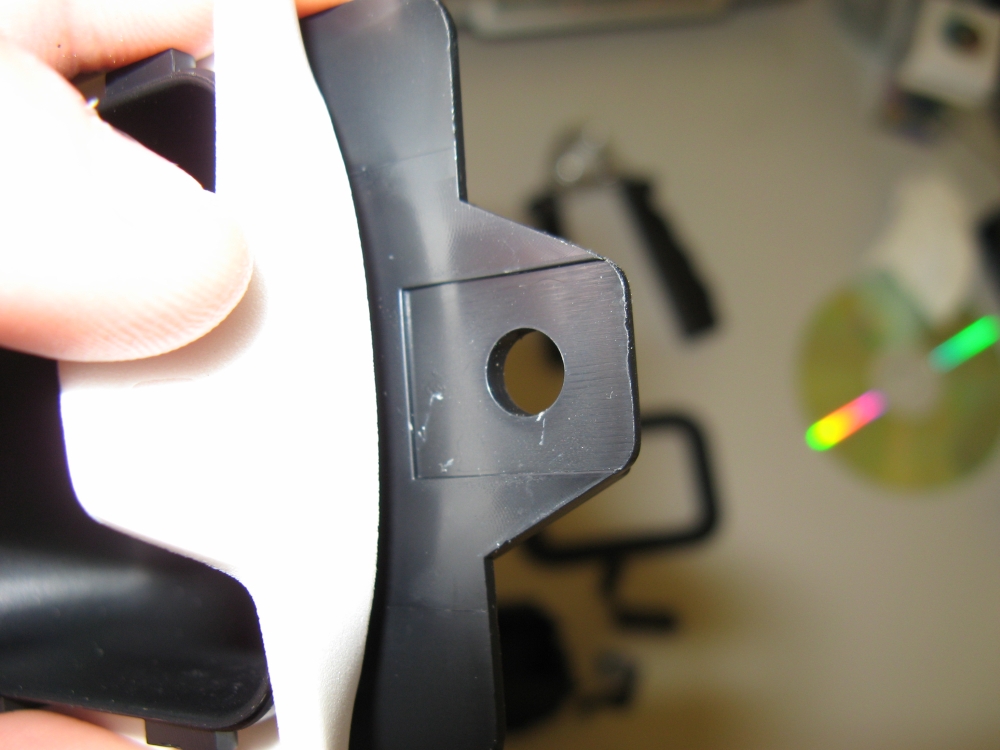
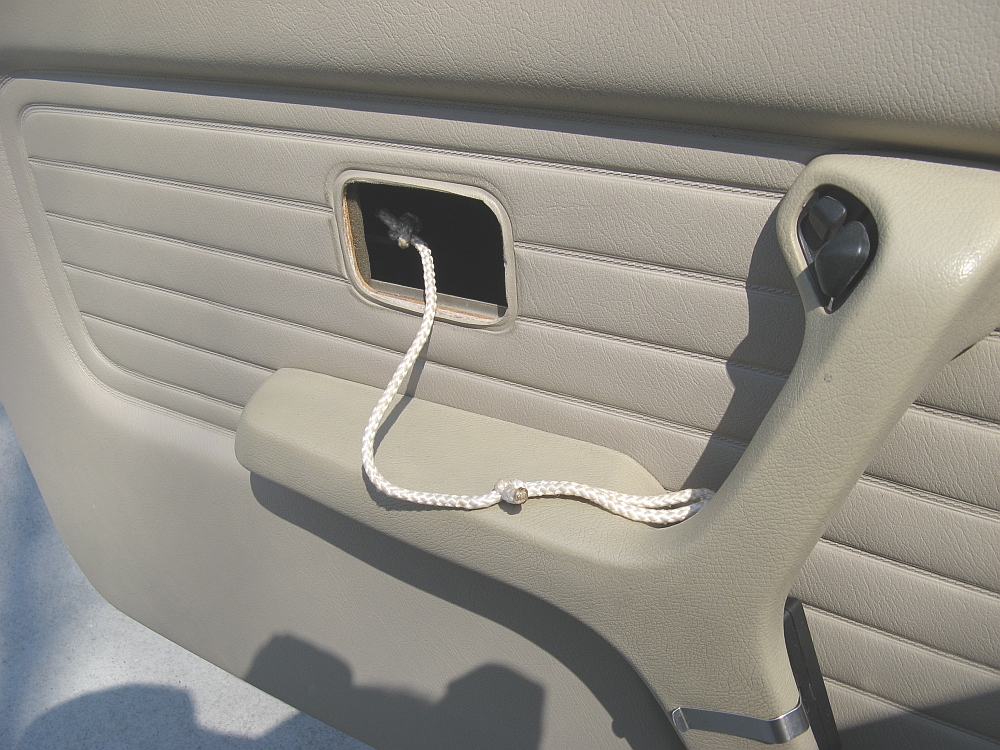
While disassembling the door panel for the above lock rebuild, the interior door handle that opens the door disintegrated. I also found several of the door panel clips missing or broken. Pelican Parts to the rescue again, they source several remanufactured parts cheaper than the dealer. I ordered a new interior door handle, door handle trim, and some new door clips. My temporary door handle was some rope, I thought it slightly resembled the door pulls in the Porsche Club Sport


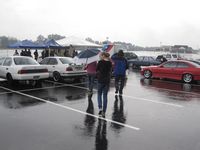
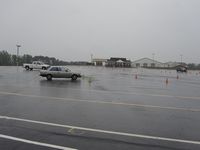
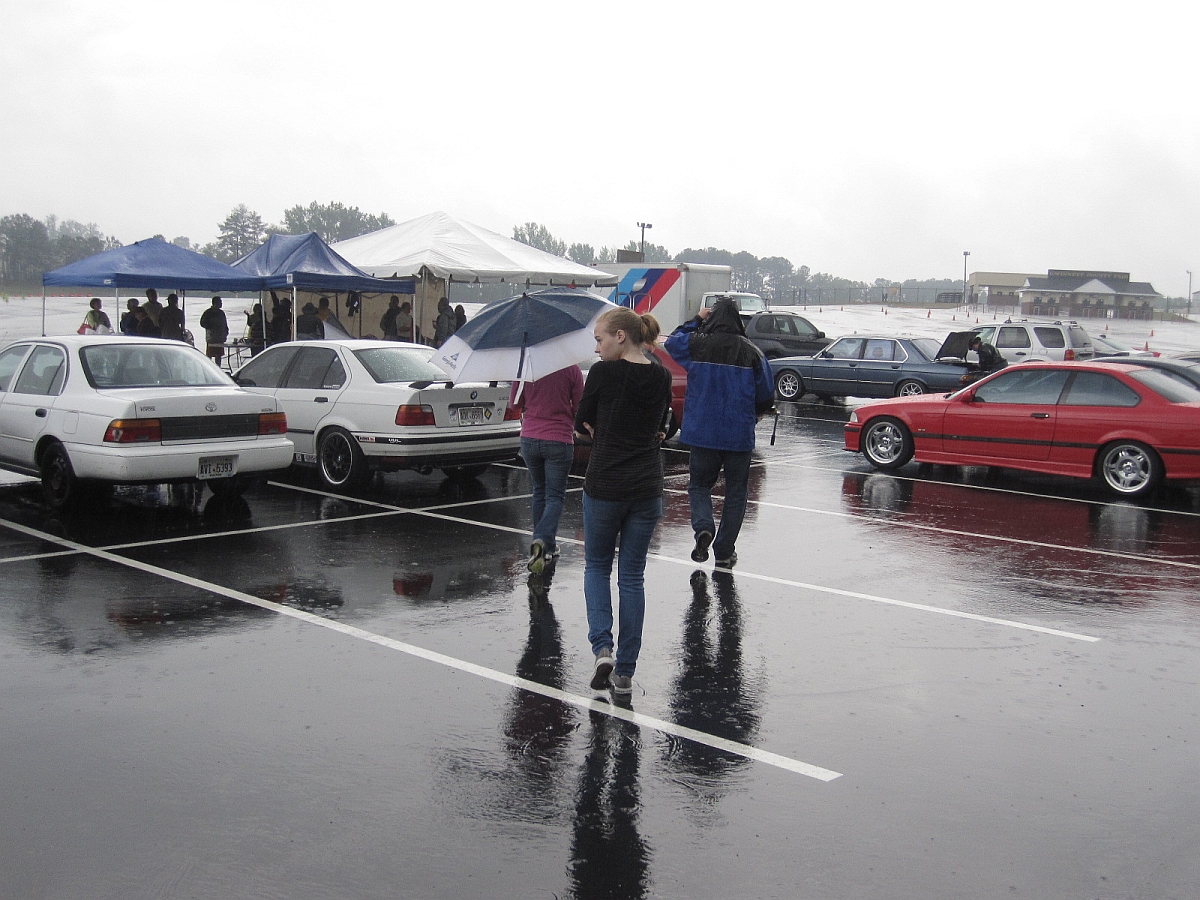
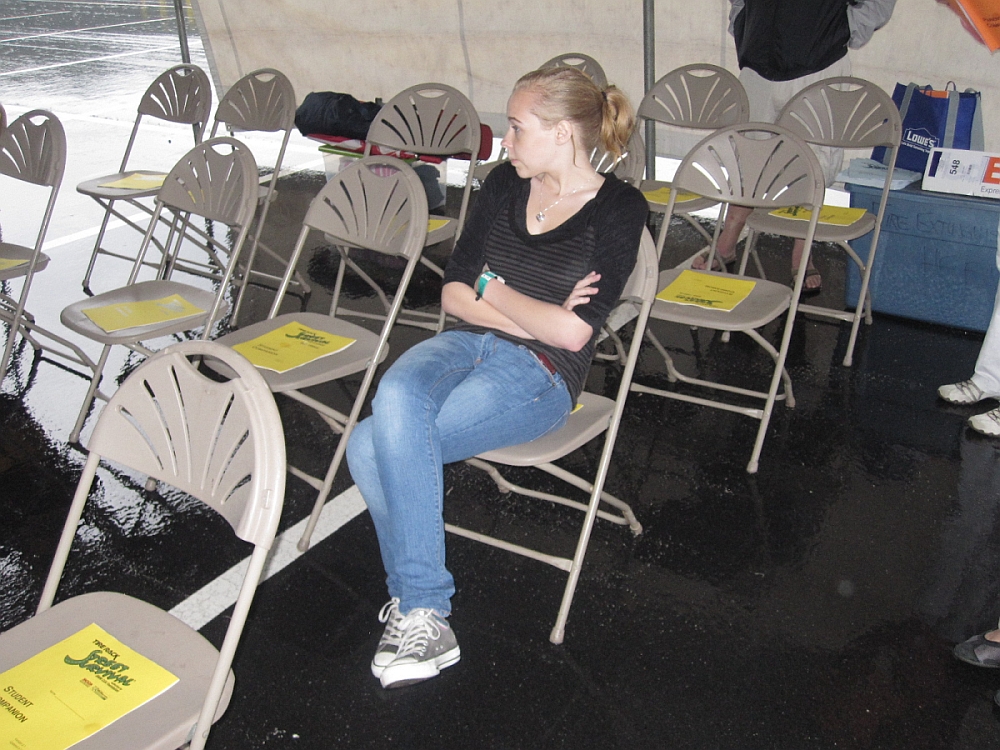
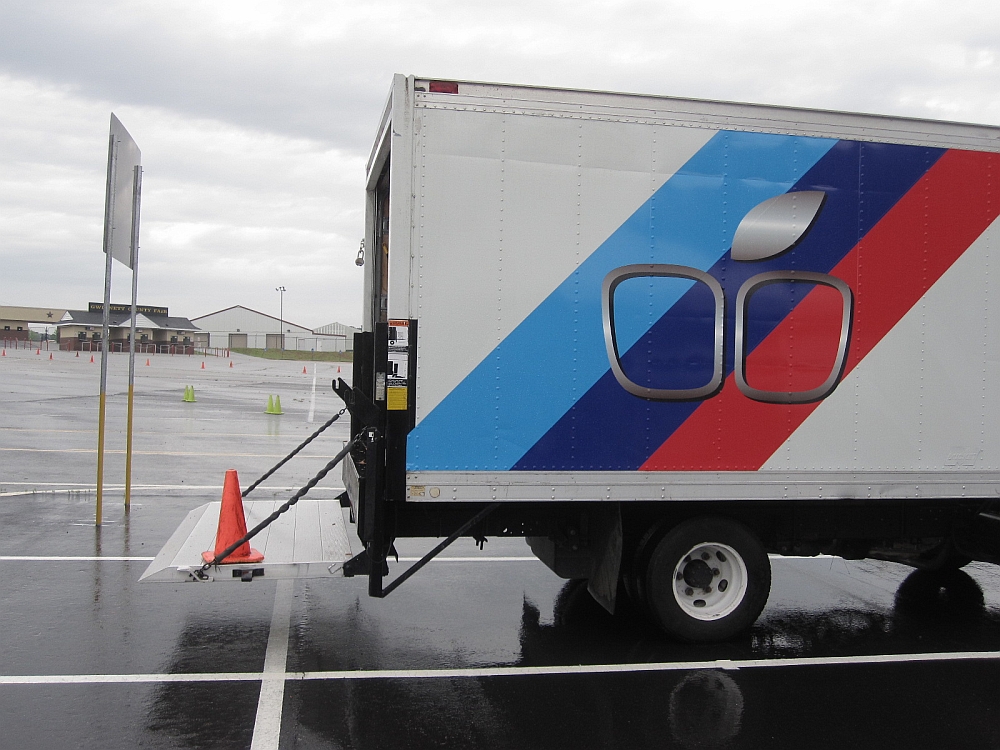
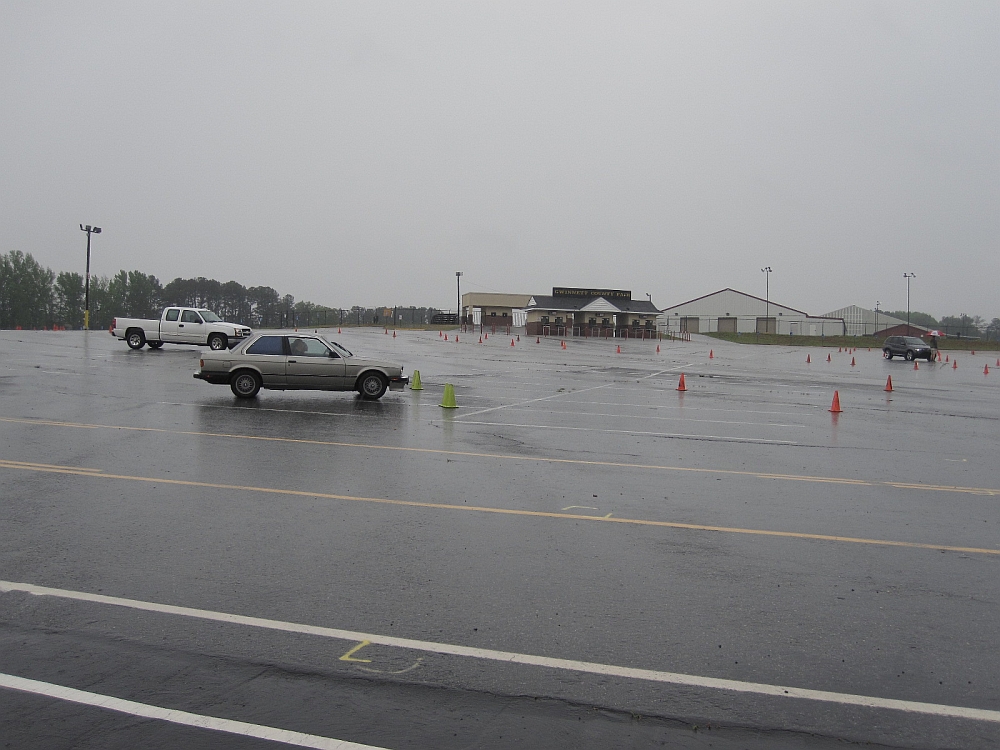
Finally had an opportunity for my daughter to drive her car in the Tire Rack Street Survival program, staffed by volunteers from the BMWCCA- Peachtree chapter. Volunteer drivers co-pilot the kids through some road courses setup to present some real world situations they can get into while driving and show them how to maintain control of the car. On the day we went it rained 90% of the time so the water truck went home early. You can see that my daughter was super thrilled to get up early on a Saturday to go do this but she really did have a great time while learning some things about car control- BIG THANKS to the volunteer instructors and other volunteers from the chapter for staffing this event. For the $75 fee both she and I got breakfast and lunch, and she got a lot of drive/instruction time both in the car and in a classroom setting....and a years membership in the BMWCCA, what a DEAL


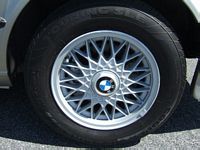
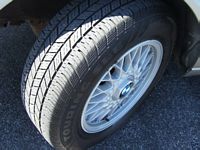
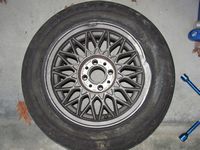
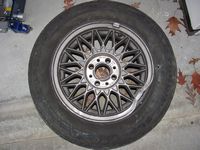
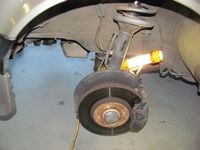
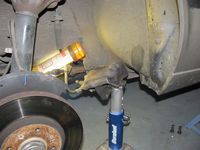
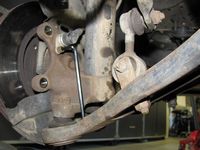
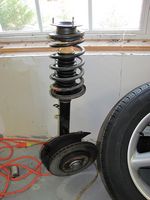
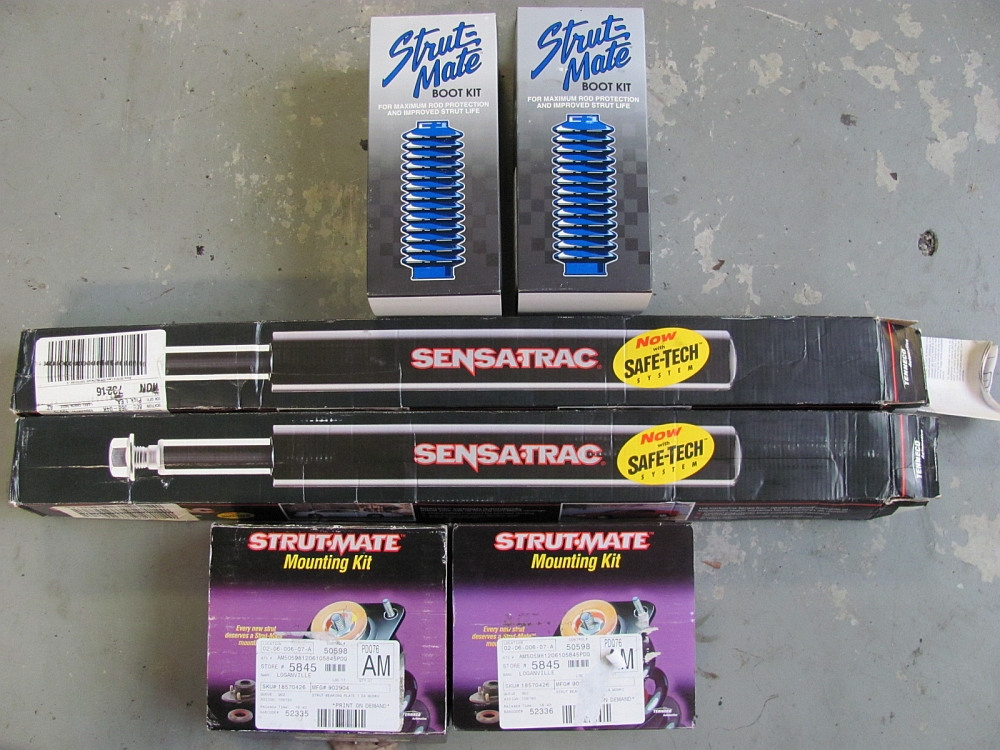
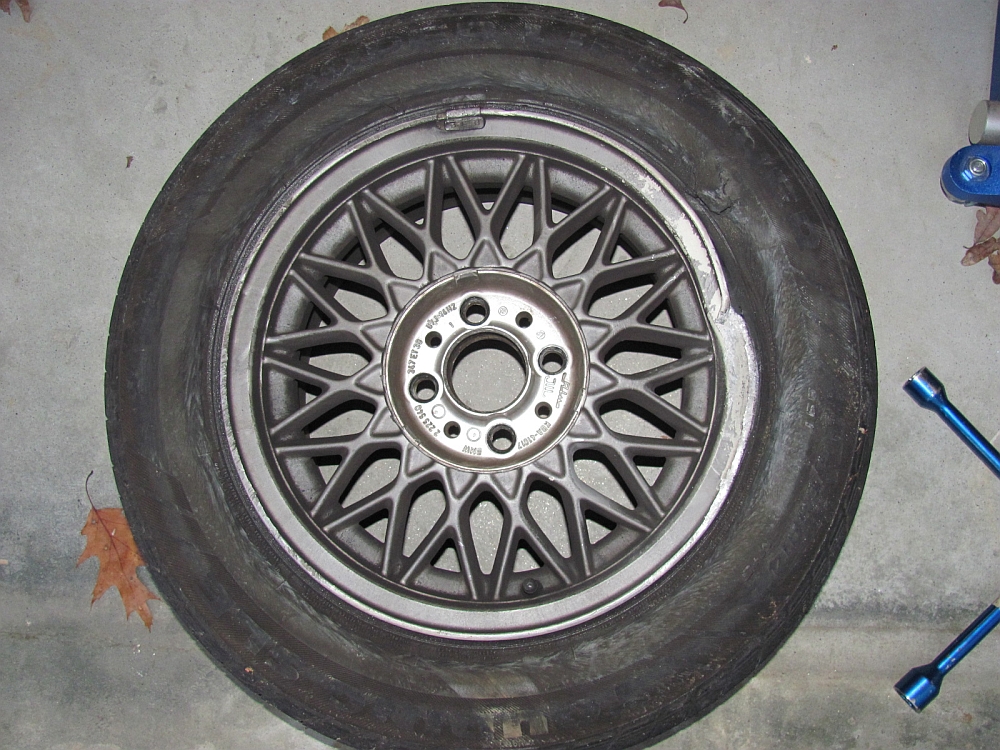
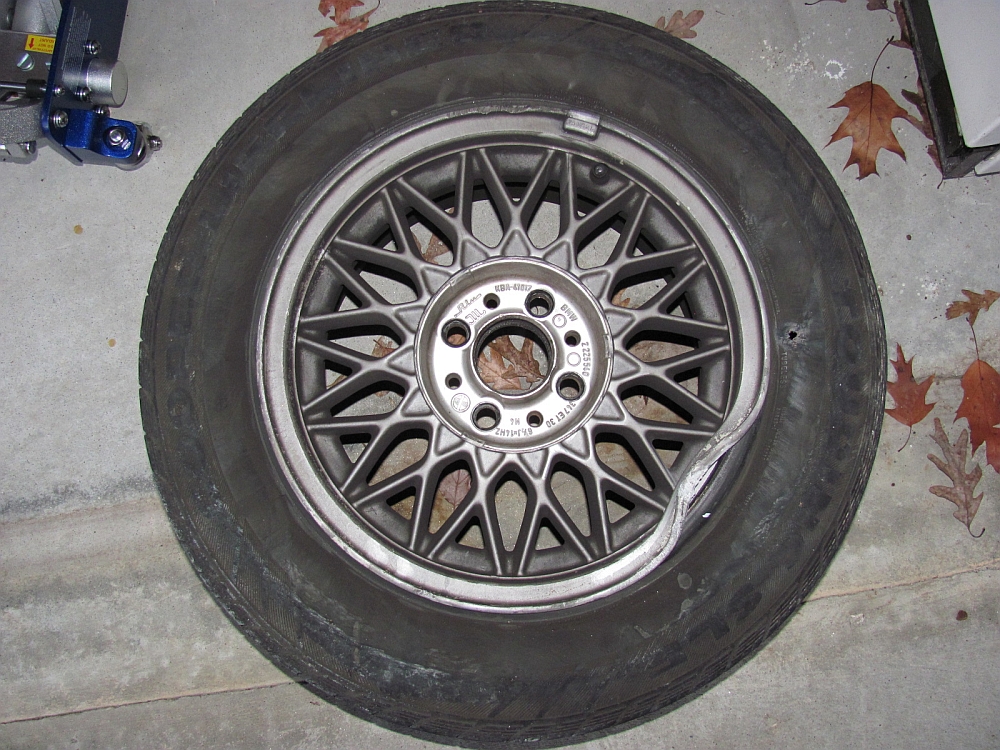
New Struts and Strut Mounts Installed- This is one that could have waited, but was necessitated by my daughter trying to drive her E30 over a curb. Both passenger side wheels broken, right front A-Arm bent, and possibly bent strut tube/steering knuckle. Used A-Arm and Strut Assembly from Strictly German, Monroe Sensa-Trac (P/N 73216) struts from O'Reilly Auto Parts for their lifetime warranty and cost, Monroe Strut Mounts (P/N 902904, lifetime warranty) and Boot Kit (P/N 63619) purchased from Advance Auto Parts. New 15"x7" wheels and Kumho Solus KH16 (205/60/15) tires were also purchased at Kauffman Tire, Brian Pitt took great care of me there and his guys also installed the a-arm and did the alignment.
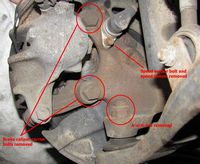
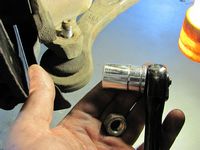
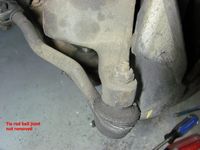
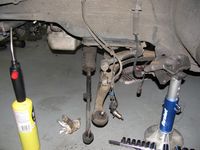
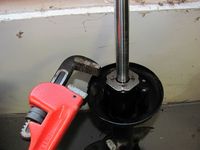
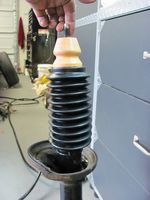
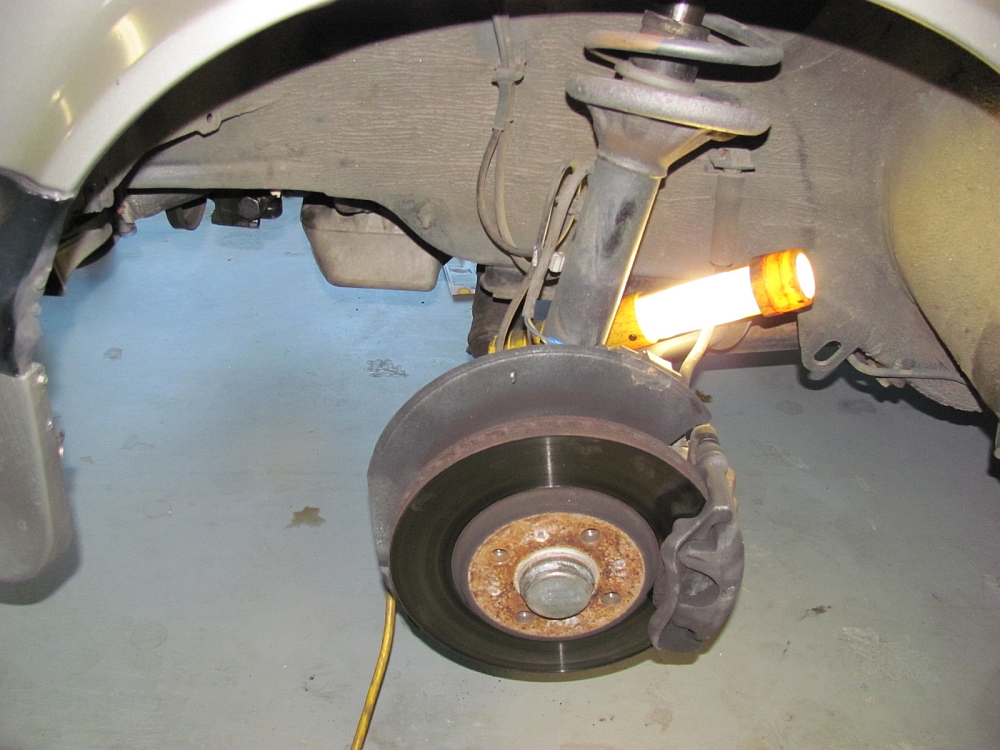
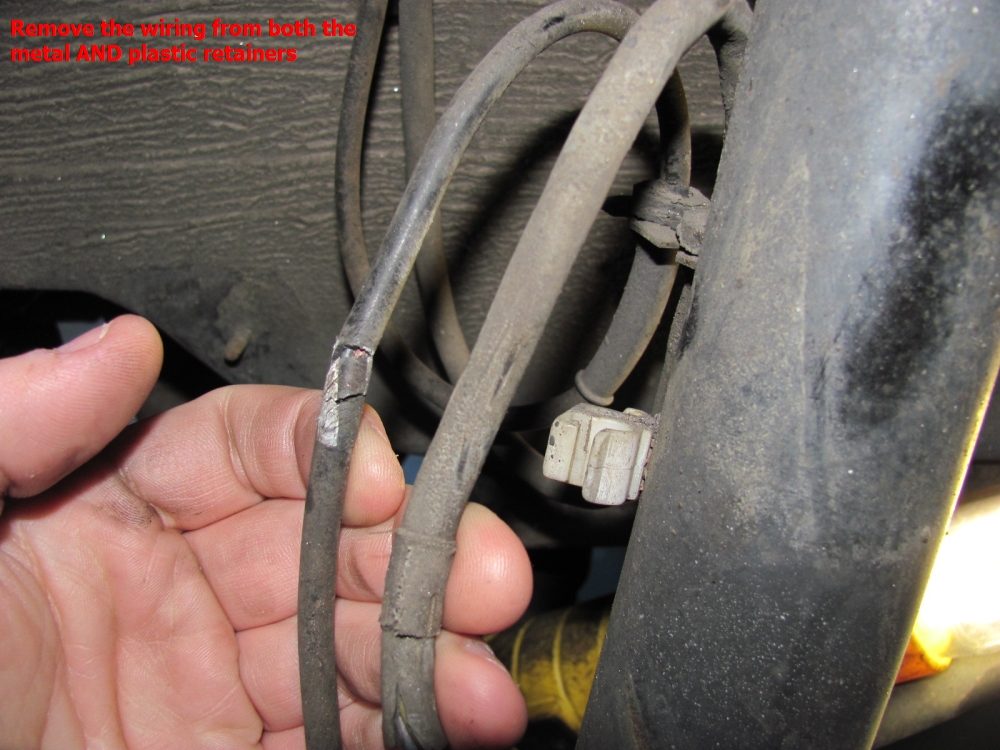
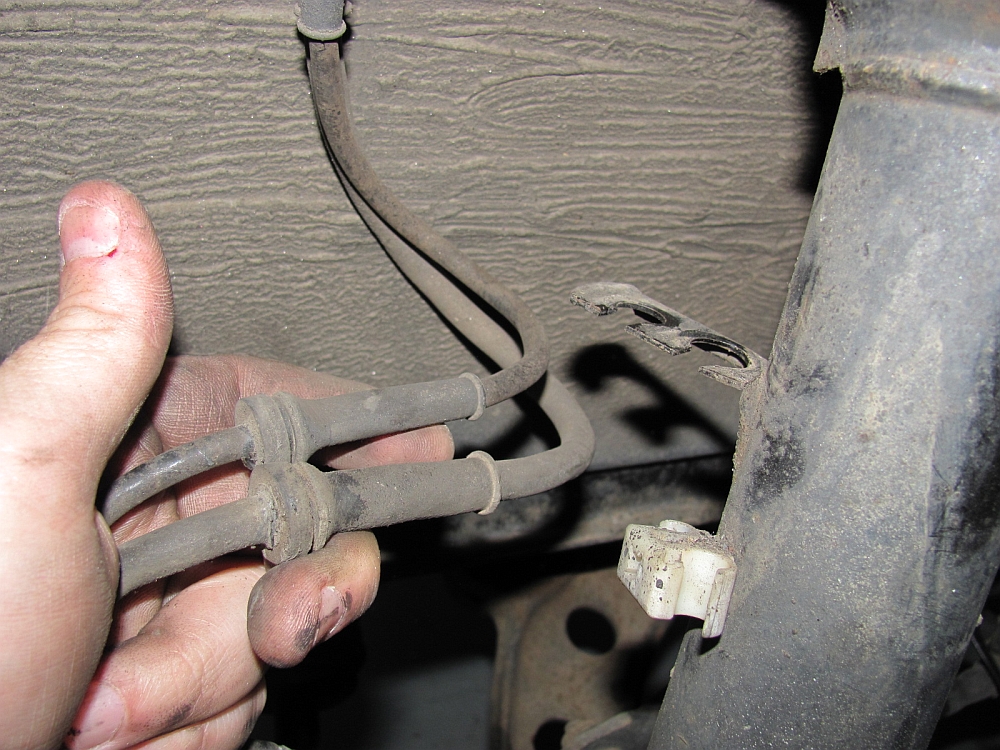
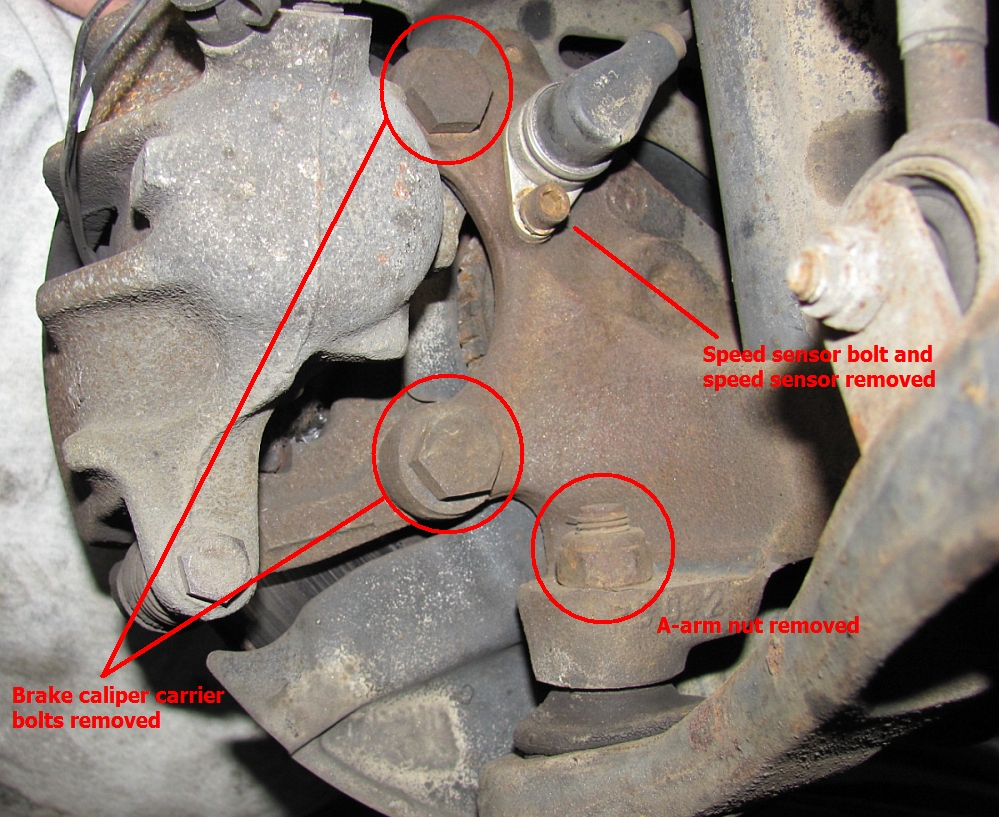
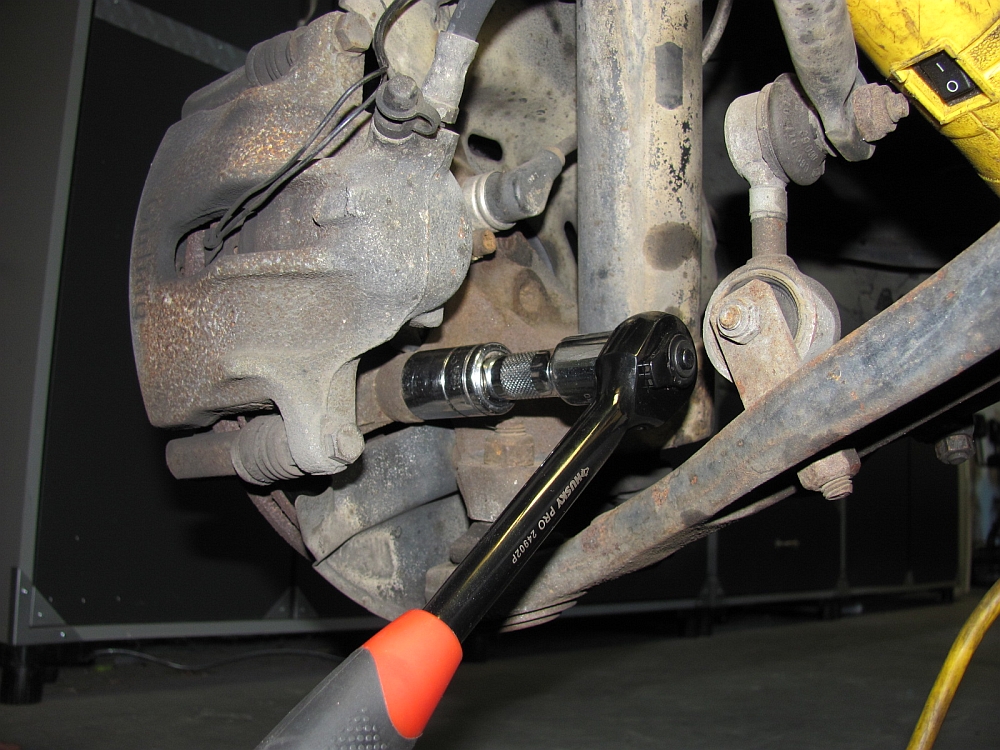
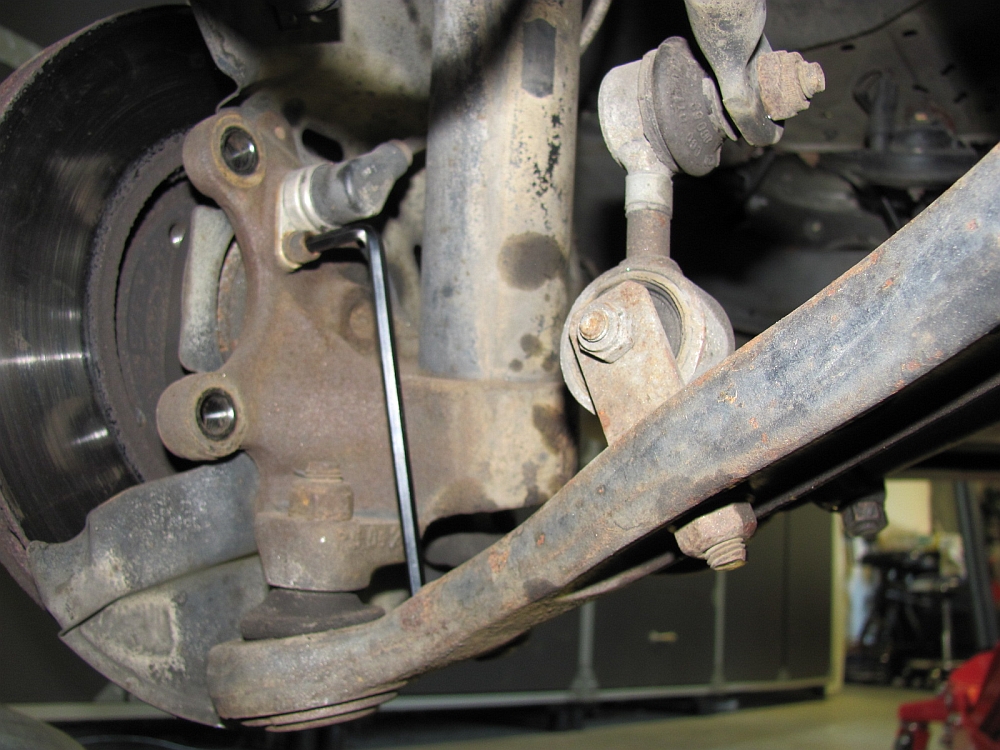
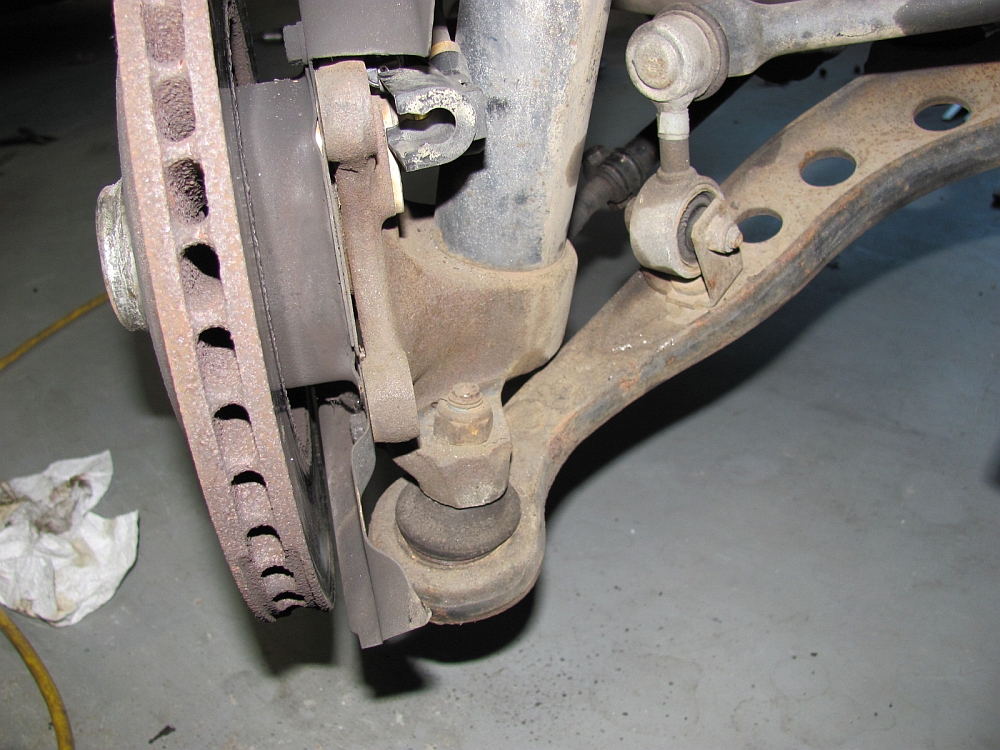
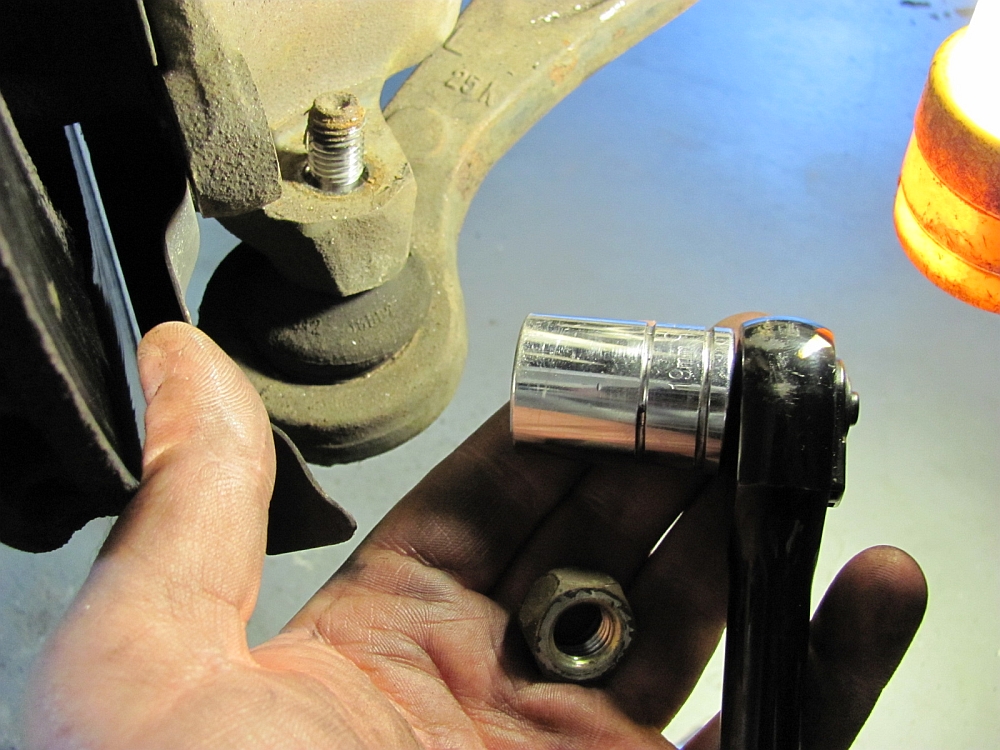
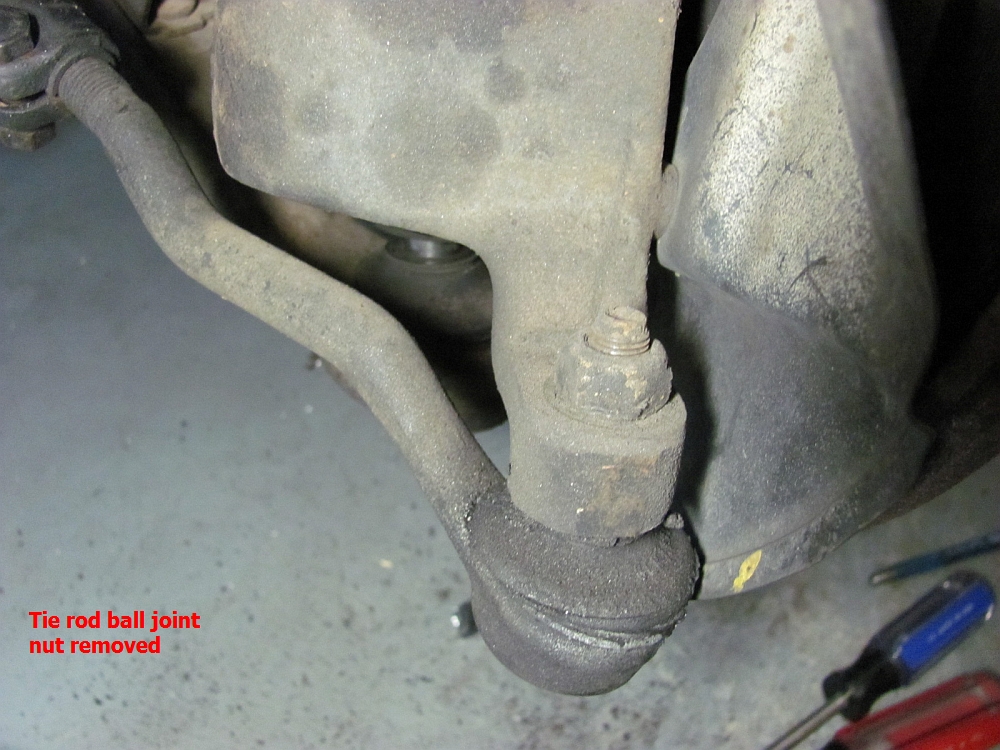
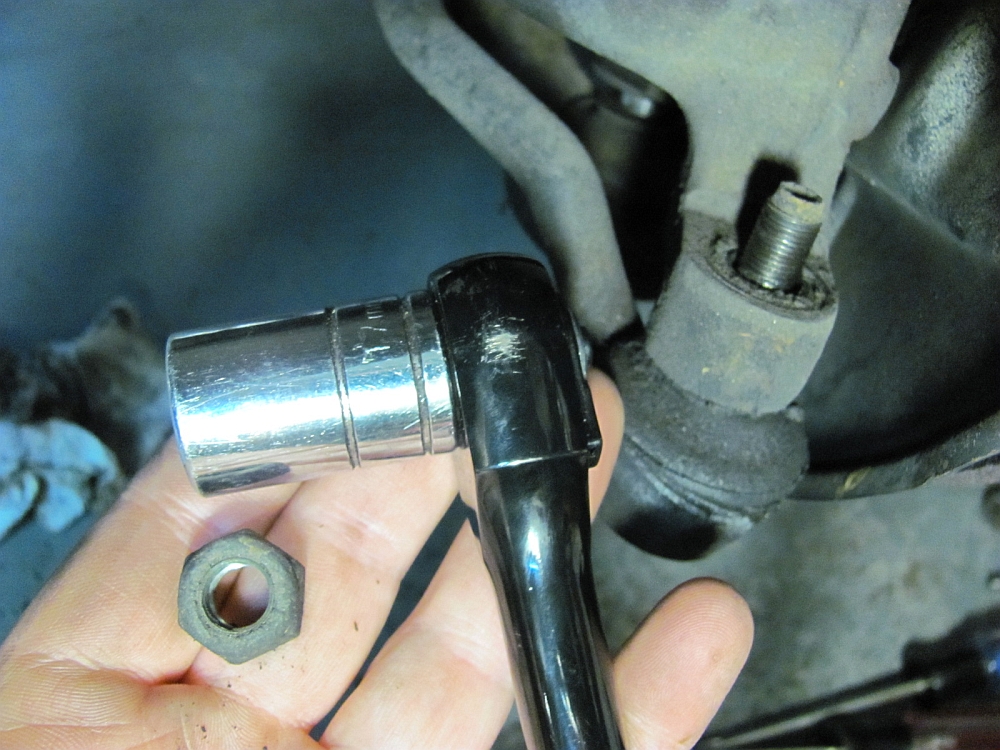
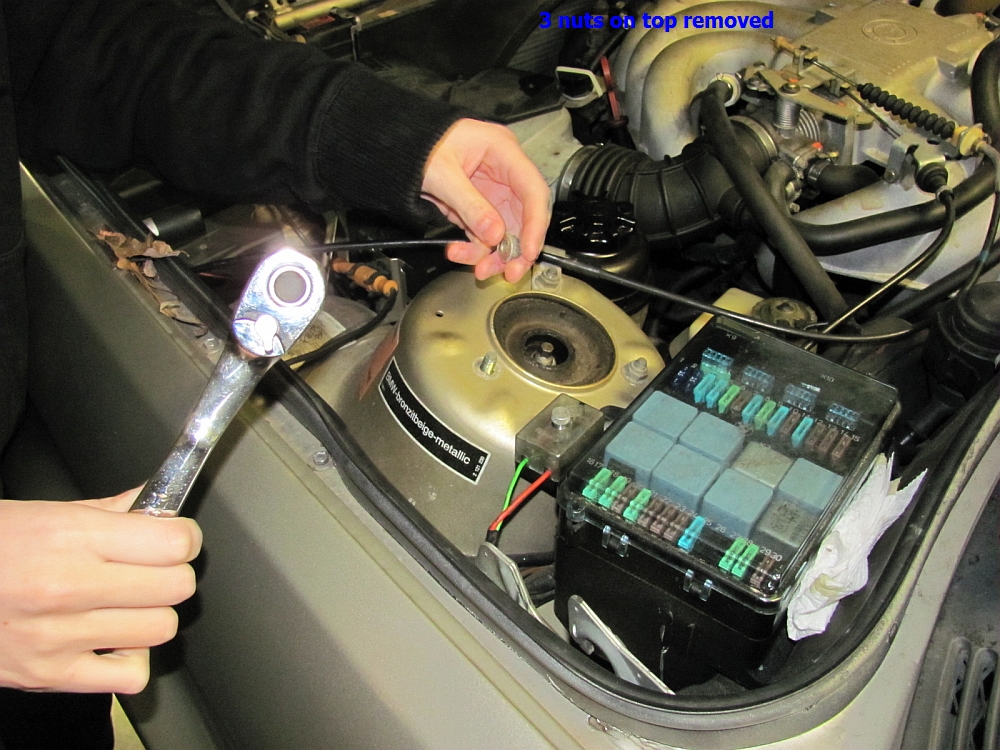
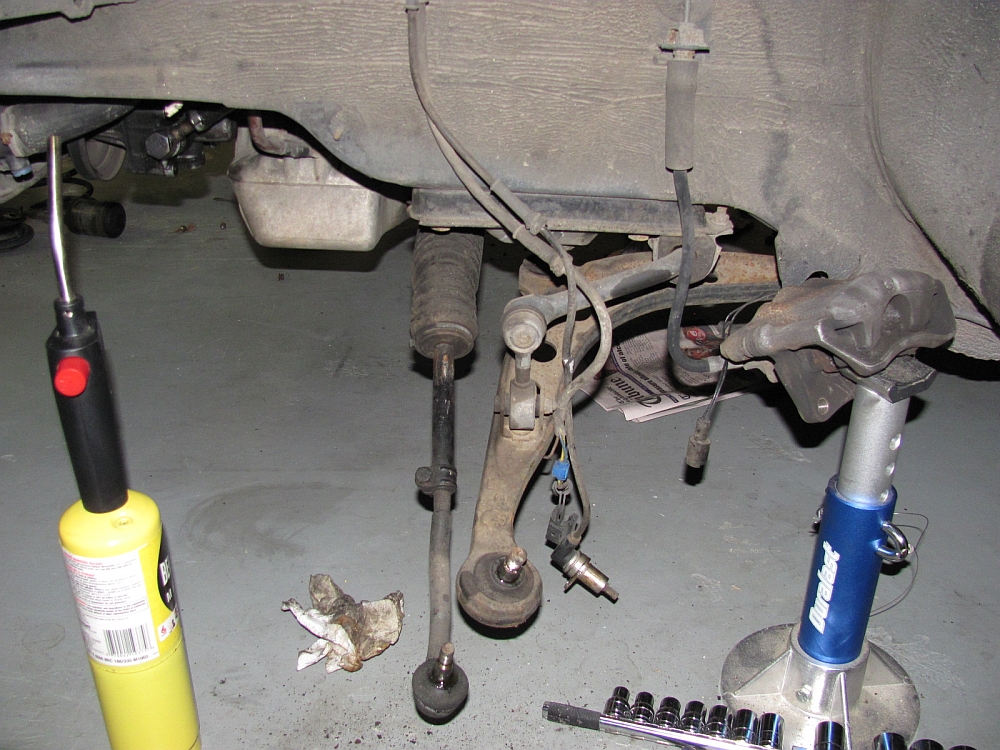
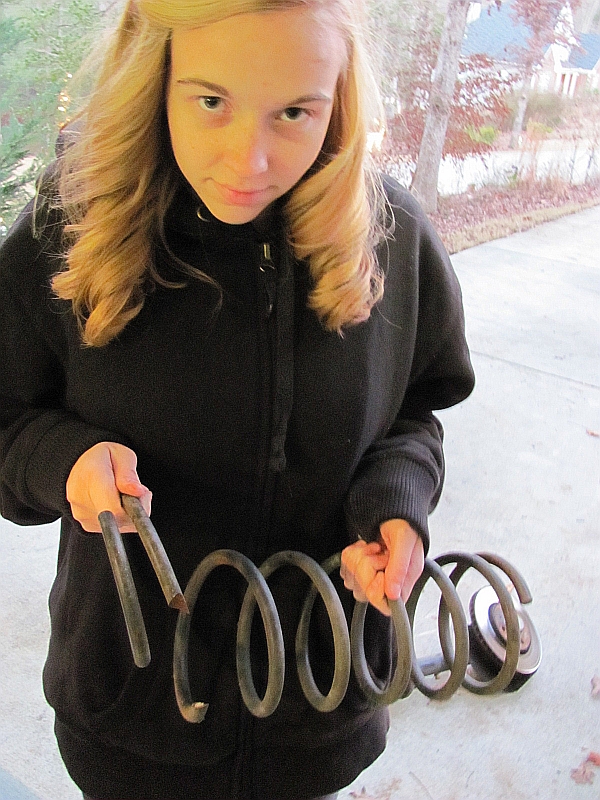
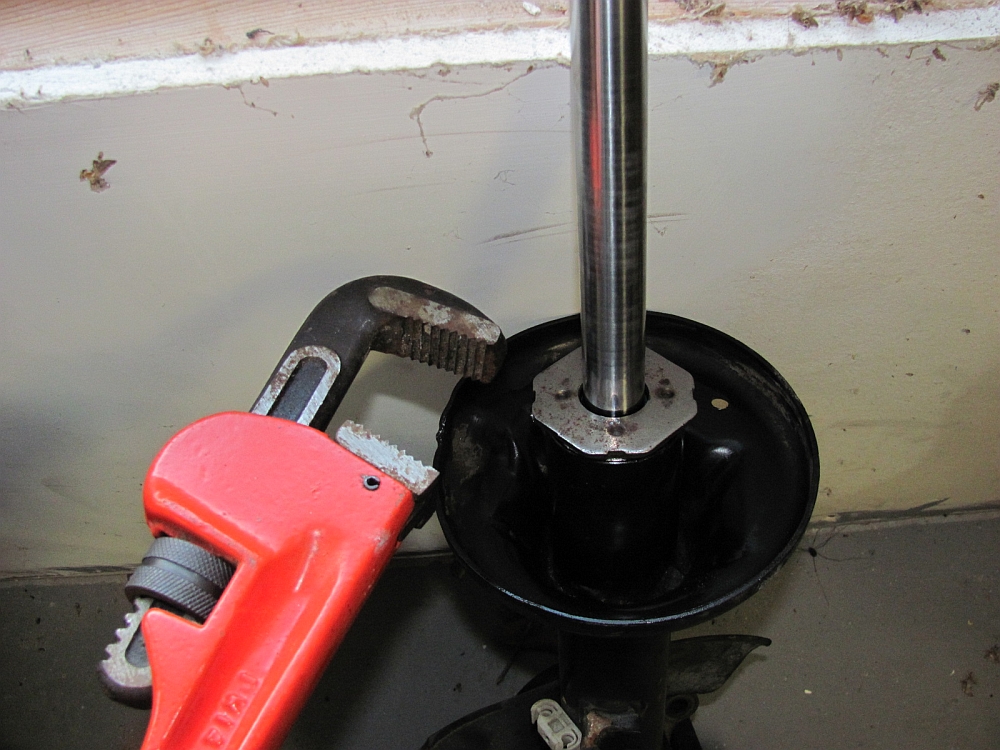
Strut replacement involves removing the strut assembly after: disconnecting the tie rod (17mm socket) and a-arm (19mm socket), removing the speed sensor and brake sensor wiring, removing the speed sensor (5mm HEX), and removing the brake caliper with carrier (19mm socket) and supporting. Once these are all removed the 3 nuts on the strut tower are removed while holding the strut assembly (10mm socket). You may have to disconnect the swaybar to remove/install the assembly, two 13mm wrenches are used to remove the sway bar link bolt. Once removed a spring compressor is used to compress the spring and an air impact wrench (19mm socket) is used to remove the nut at the top of the strut. There is a type of spanner wrench that is used to remove the strut retaining nut but I found a pipe wrench works well and precludes buying another "special tool". The old strut is removed and the new strut is installed. Assembly is strut>strut retainer nut>boot>bump stop>spring>upper spring plate>big washer>strut mount>small washer>strut nut. The only issue I ran into was the tie rod and a-arm ball joint separation from the strut assembly. I ended up using PB Blaster, heating around each hole with a propane torch careful not to heat the ball joint bolts or boots, and using a hammer to free the ball joint.....but careful with the hammer, it will deform the ball joint bolts and I had to carefully file mine down so the nuts would start- if I had it to do over I would have found some sacrificial nuts to screw on before the hammer was used which should have prevented thread deformation. We also found a surprise on the good side of the car, a broken spring. It was replaced with the used spring on the strut assembly purchased for a good passenger side strut tube/steering knuckle, nothing wasted. The air wrench came in handy when reinstalling the balljoint bolts after they were tightened as much as they could be with a ratchet.
Other than replacing above I also had to reattach the lower front airdam to the bumper, fortunately it had already been damaged by the prior owner so it really couldn't get much worse.


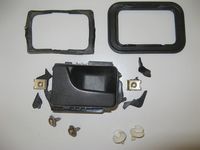
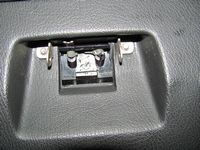
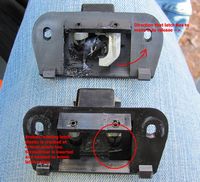
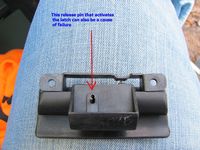
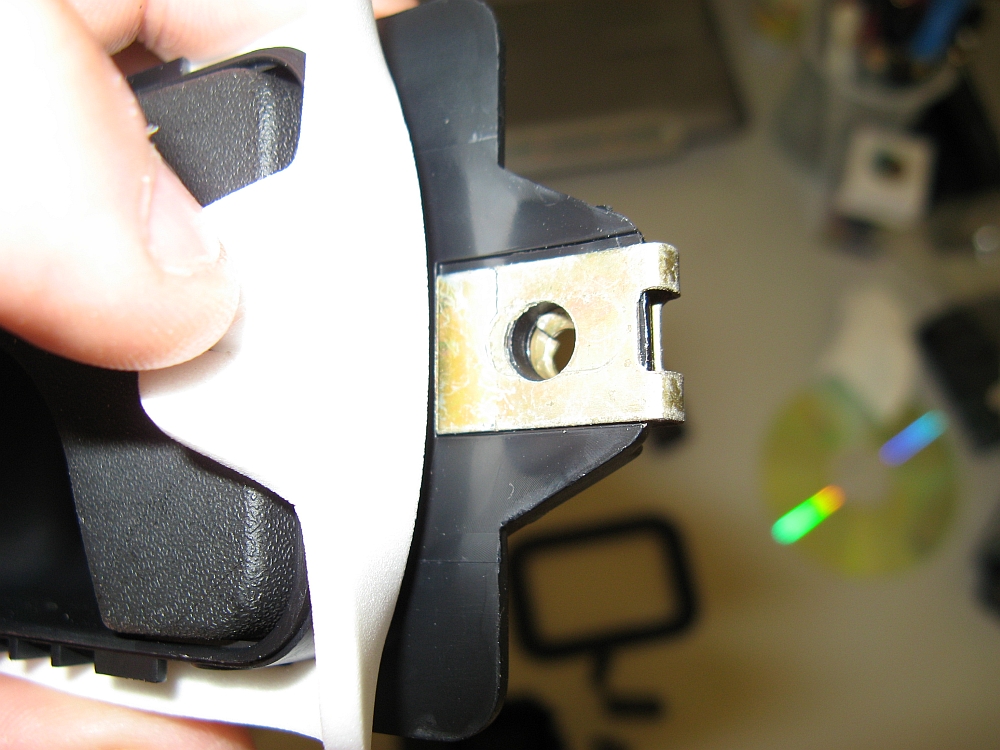
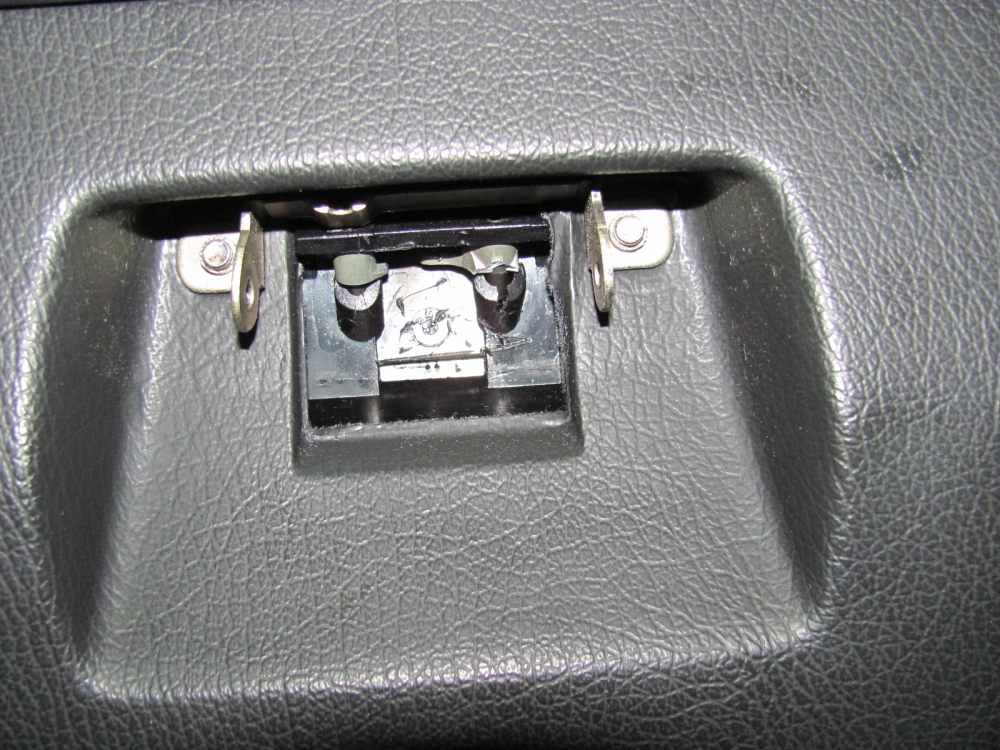
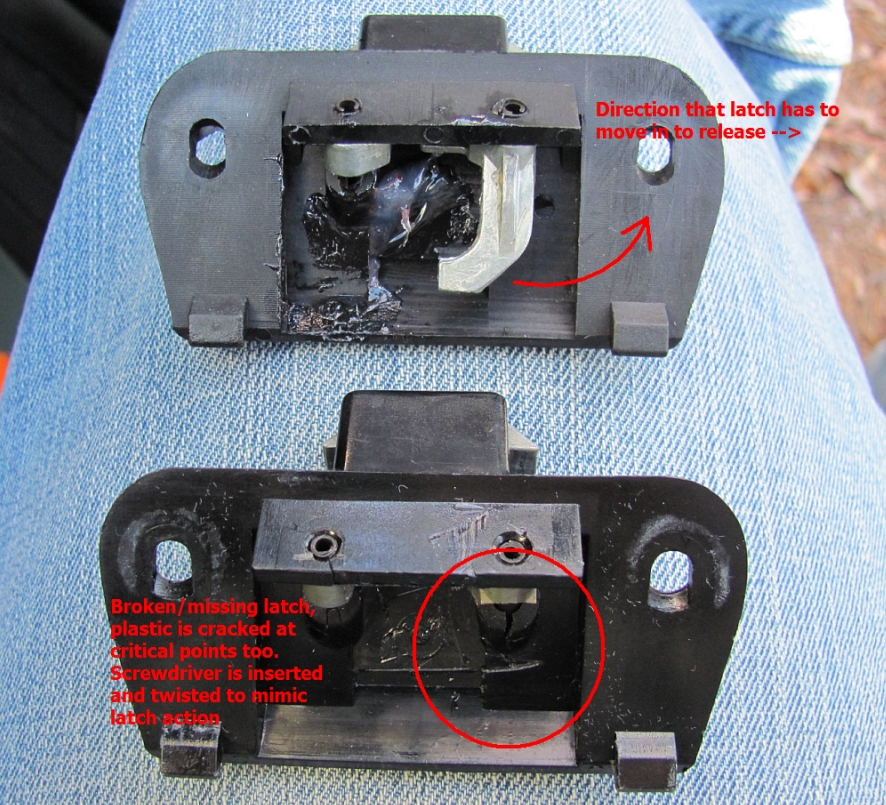
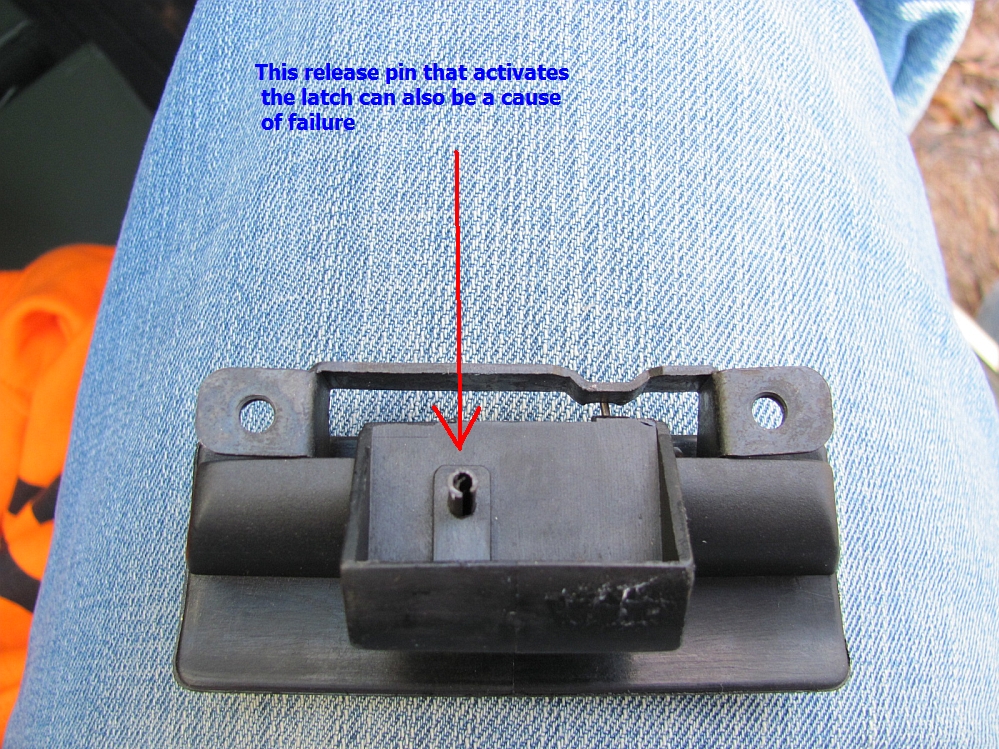
Glove box latch broken so a cheaper alternative was ordered from Pelican Parts, $26 as opposed to BMW locking latch for $84. The plastic in these latches fails over time, and the hook in the release mechanism had broken on mine. By carefully breaking the handle off (don't want to damage the glove box) I was able to access the release mechanism with a flat head screwdriver and open the box to remove the broken piece and replace- two phillips head screws. If the screws are too tight the latch will not work smoothly and may require some fine tuning.

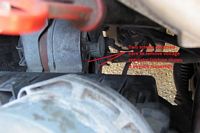
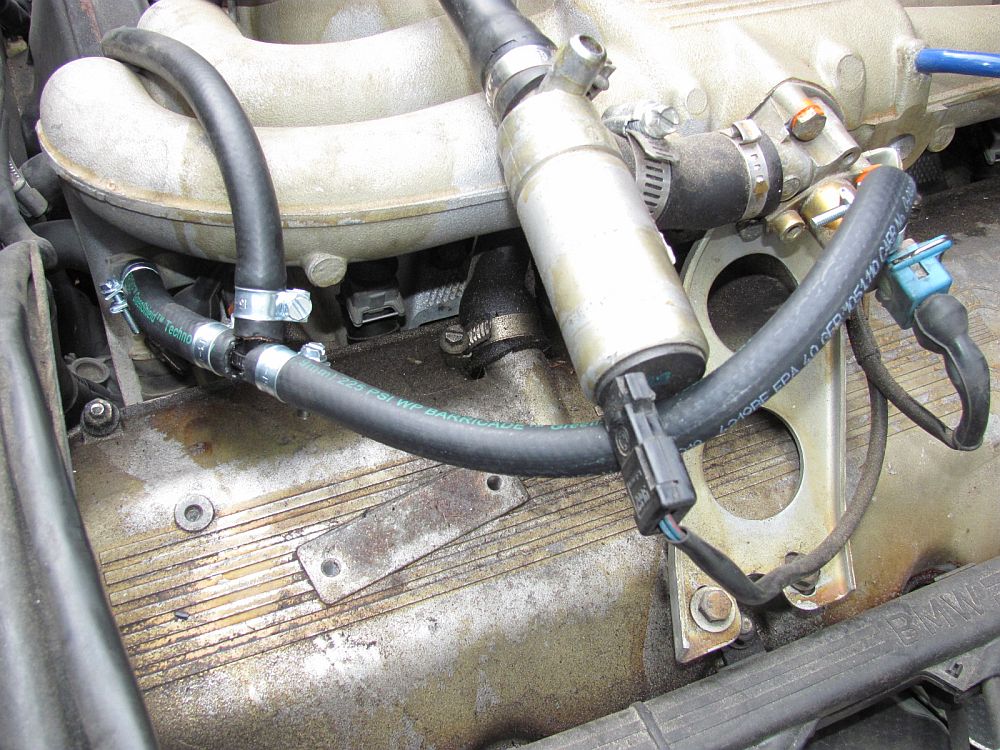
What is that smell? Gas?!
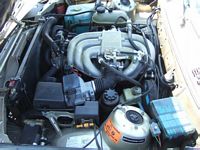
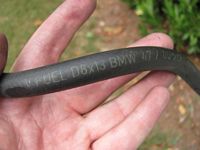
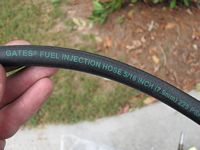
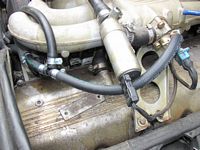
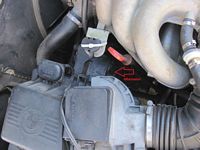
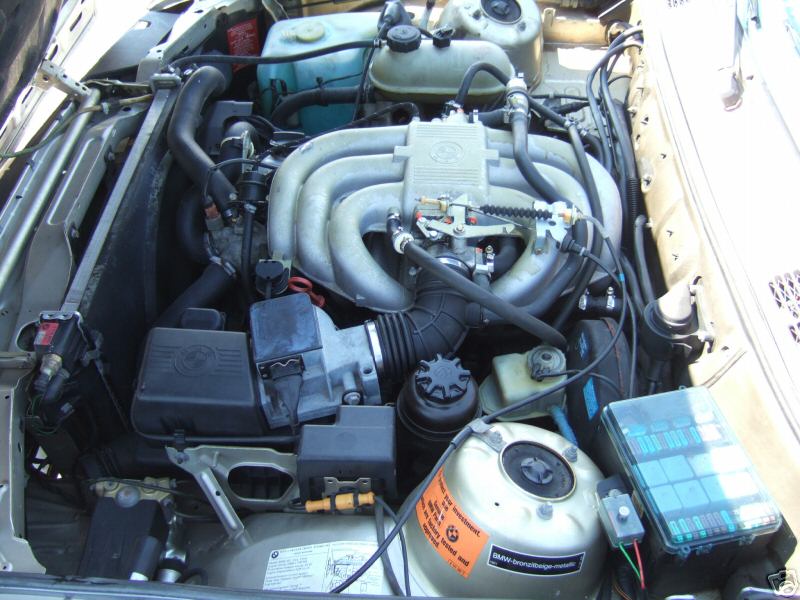
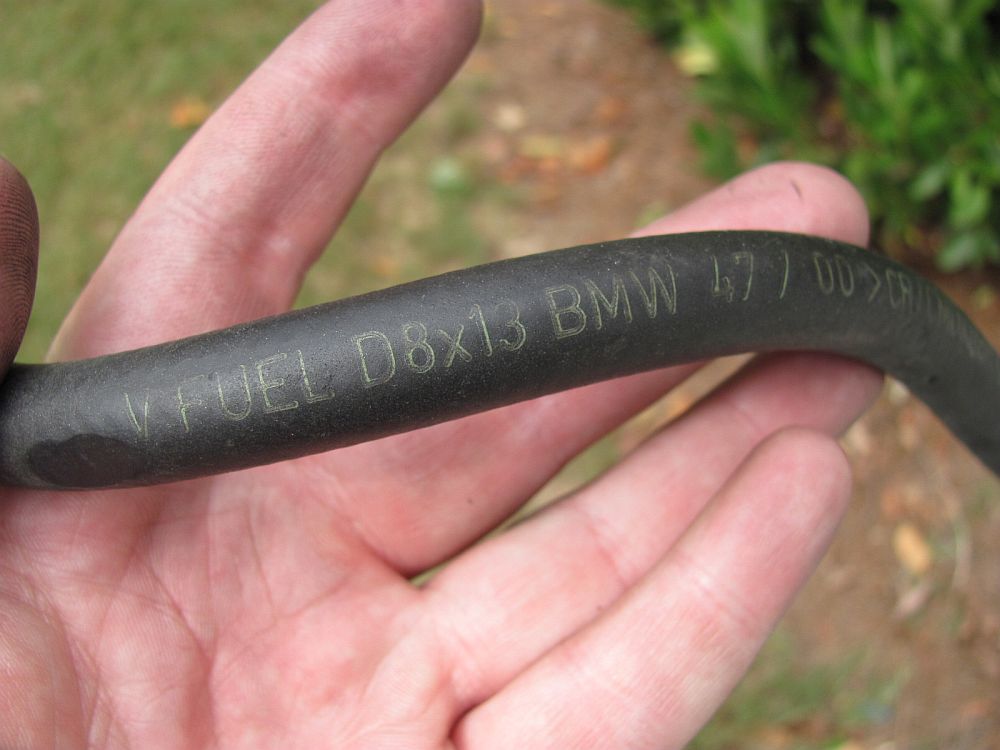
I found the fuel injector hose leaking in a few places, mainly at the 3 way split that feeds the fuel rail. At first look it appeared to be a leaking injector (closest to the firewall) but was leaking at the three way split and running down the hose and down the injector to make it look that way. Not a small leak by any means, more like a pour (my daughter swears it just started smelling?) so it may be a good idea if you don't know the age of your fuel line to proactively replace it and avoid fire.
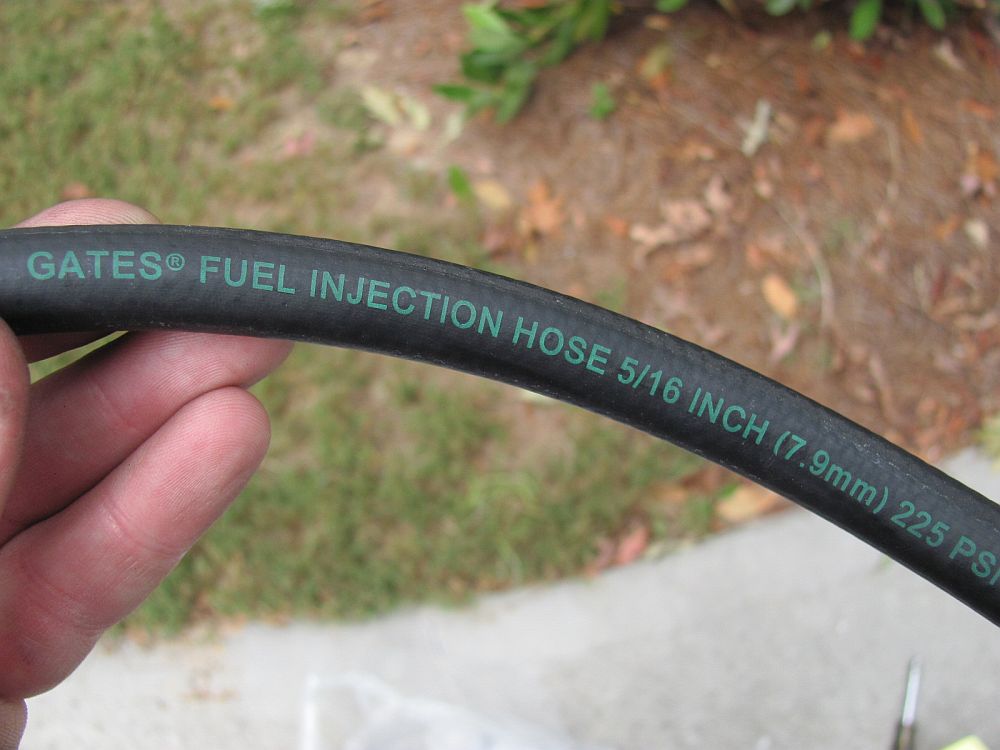
The OE BMW part is 8mm diameter fuel injection hose, local McParts stores do not carry metric so I was able to source some 5/16" fuel injection hose (Gates brand from Oreilly Auto Parts) that is 7.9mm- you won't even notice the difference other than the $$$ you will save. Also a good time to get fuel injection hose clamps if yours have been replaced at some point with the worm style, the worm clamps are not smooth like the fuel injection hose clamps and bite into the hose. VERY IMPORTANT to specify fuel injection hose and not just fuel hose, VERY different pressure ratings.
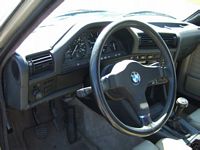
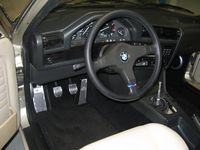
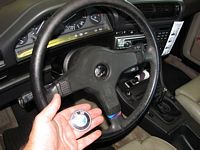
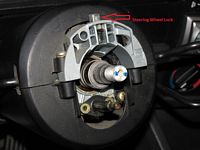
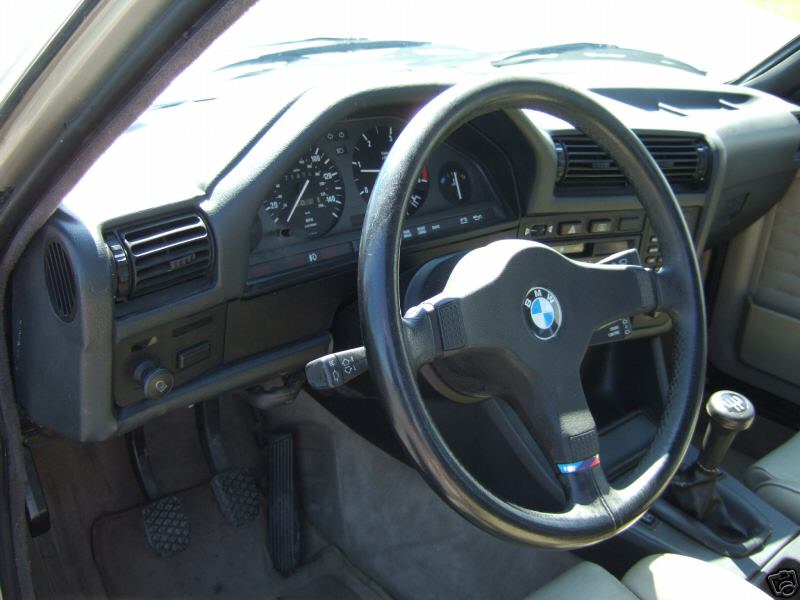
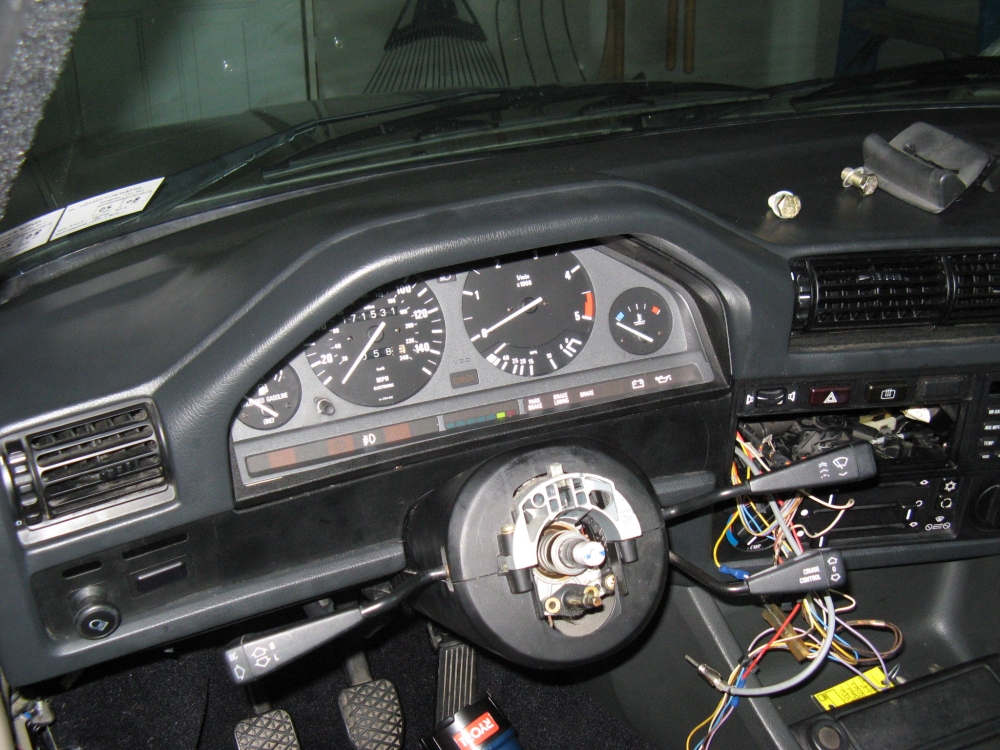
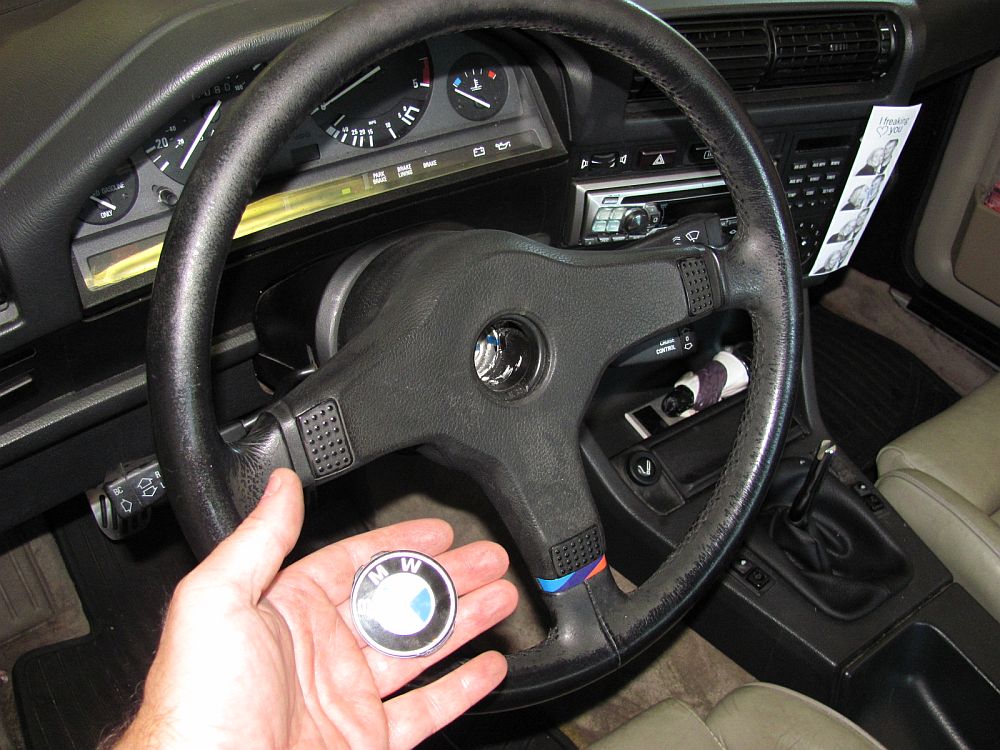
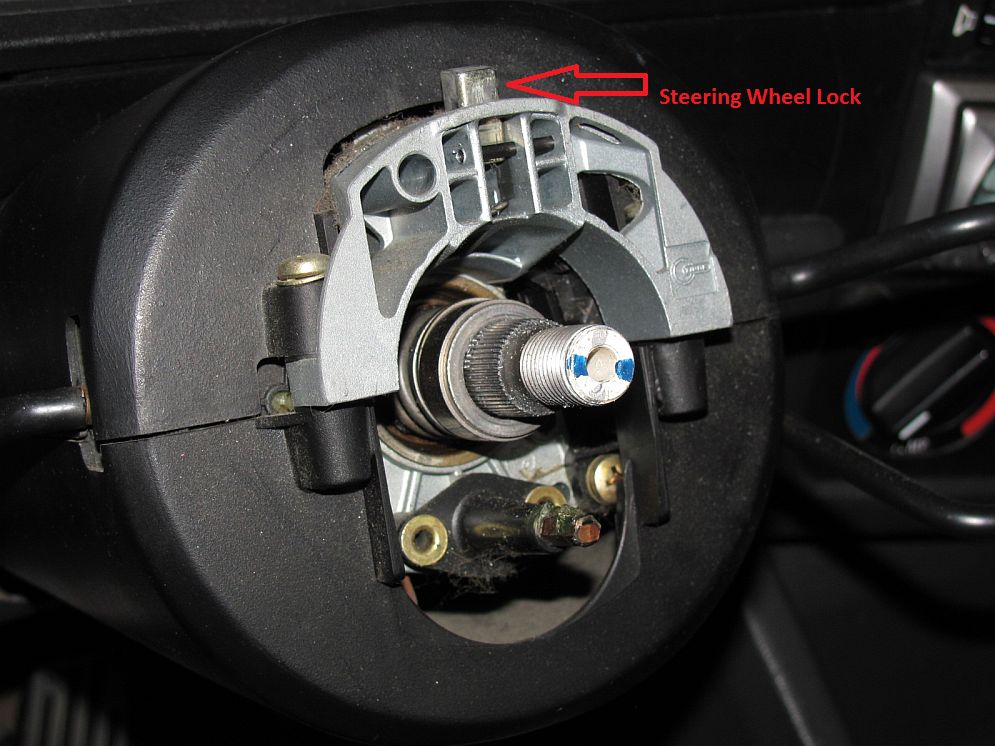
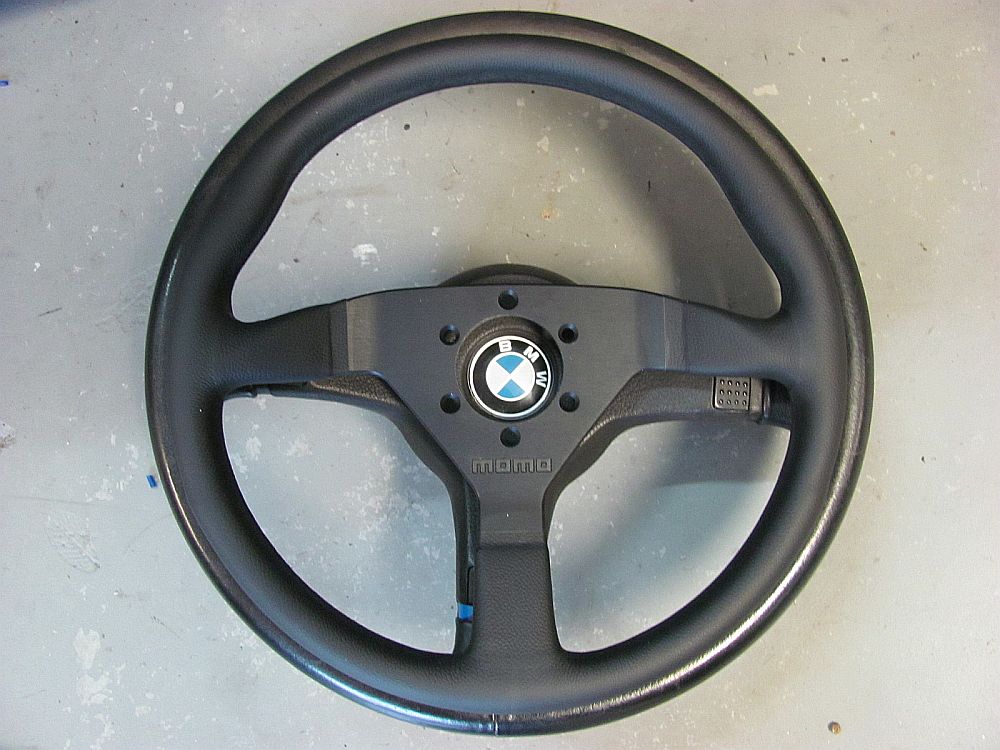
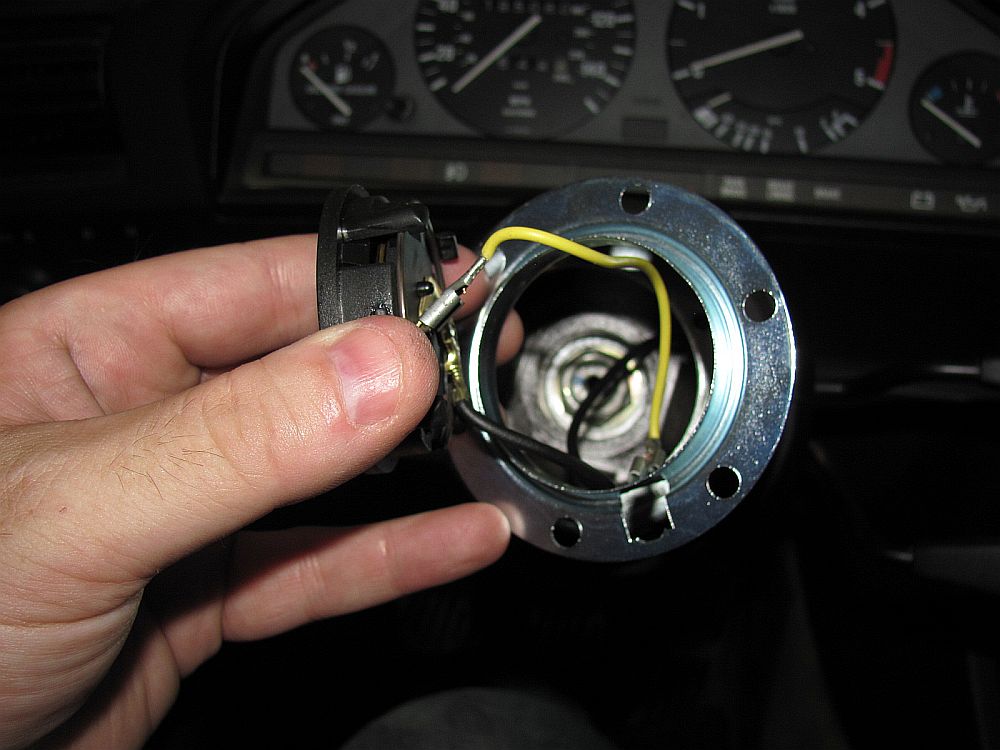
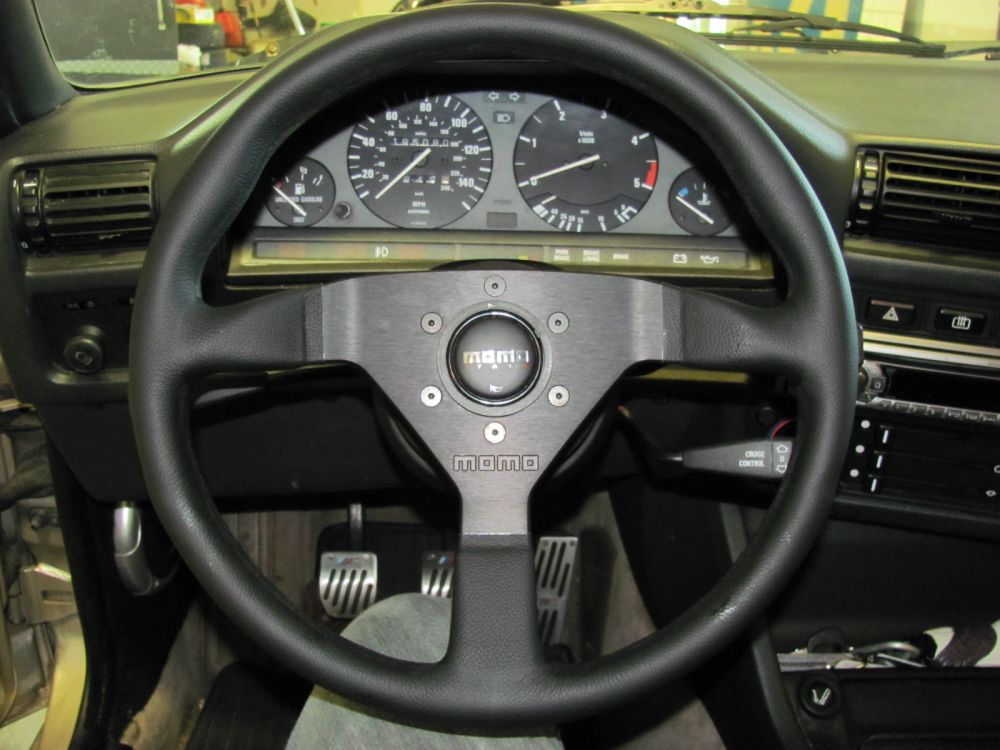
The old OE steering wheel had seen better days so it was replaced with a Momo Monte Carlo 350mm (13.8") diameter wheel. Also required was a year/model specific Momo hub to mount. The center badge was removed from the OE wheel using a small flat blade screwdriver to pry out. This allows access to the steering wheel nut that is removed with a 22mm socket and breaker bar. BEFORE pulling the wheel off: MARK THE TOP center of the steering wheel on the splined shaft using a paint pen (so you have a reference point when installing the new hub) and then insert the key and turn to iginition position to RELEASE THE STEERING LOCK. At this point it should be easy to free with a few good pulls. Once removed the Momo hub can be installed first (torque the nut to spec) and then the horn ring is placed in position to bolt the wheel to the hub using the supplied HEX head screws- you may also find it easier to plug in the horn at this point and feed the button through the steering wheel hole. after using a stadard criss-cross tightening method on the screws for the steering wheel, the horn button can be pushed into the retainer. If you go for a drive and the sterring wheel is off center, mark the current position on the splines and remove wheel/hub as an assembly and adjust one spline at a time until satisfied.


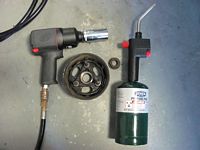
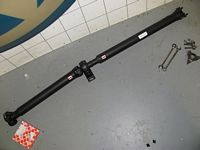
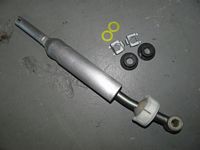
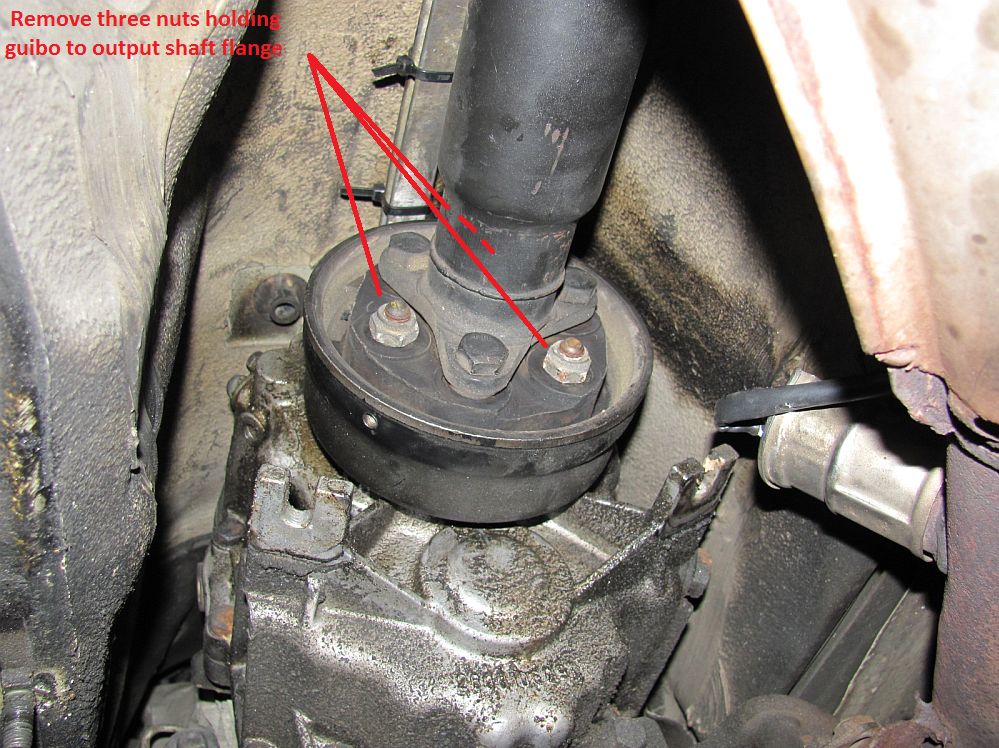
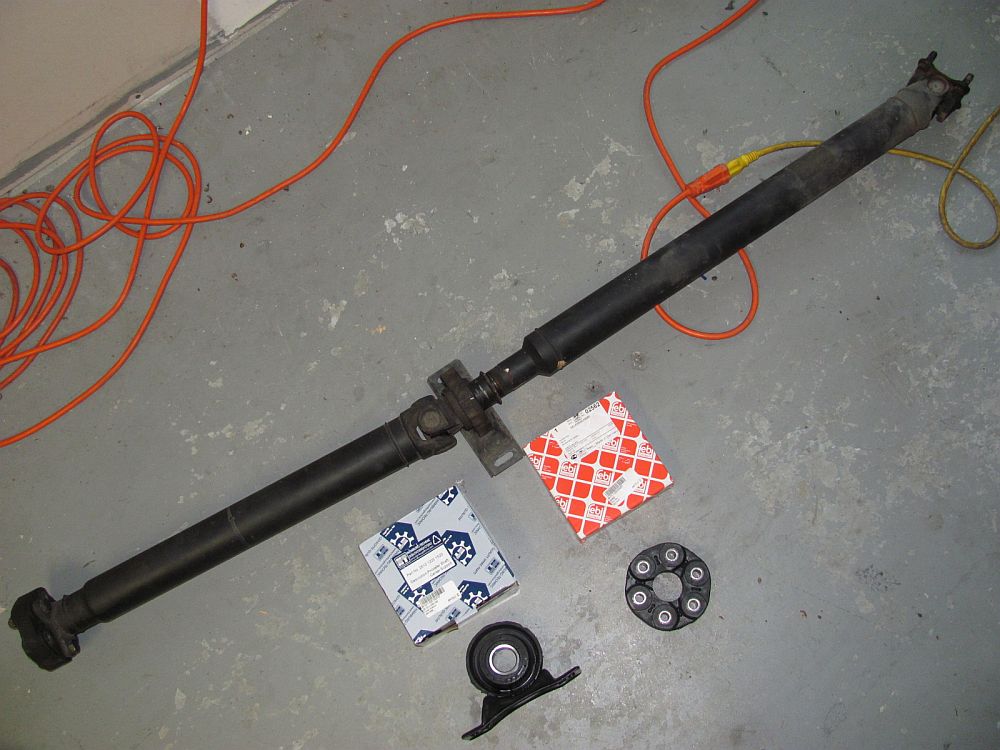
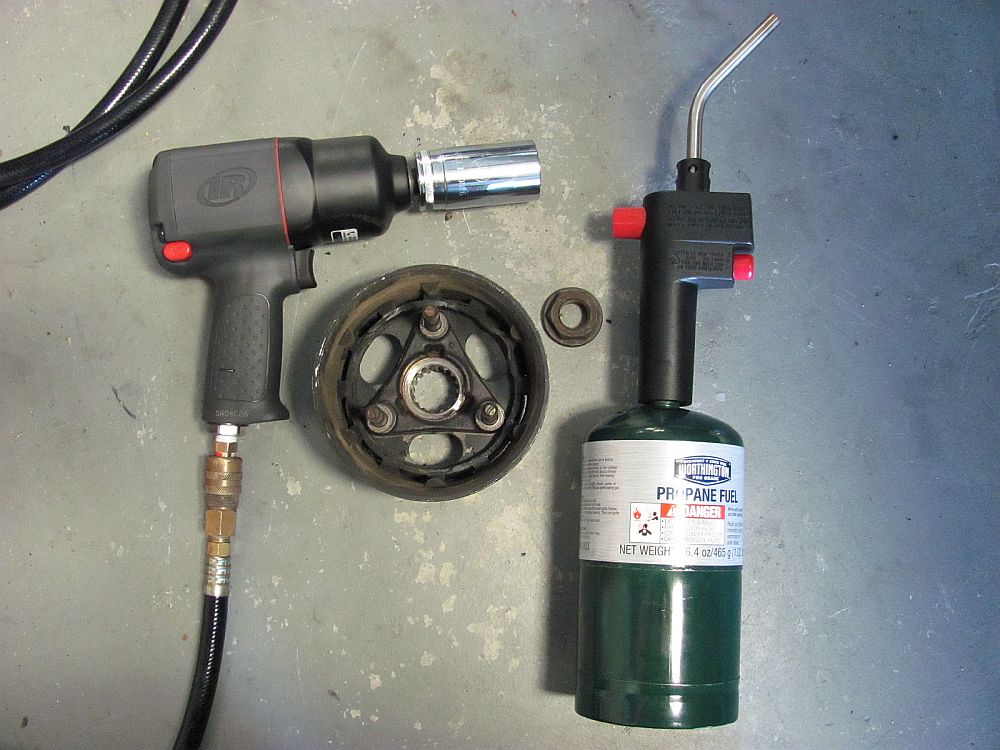
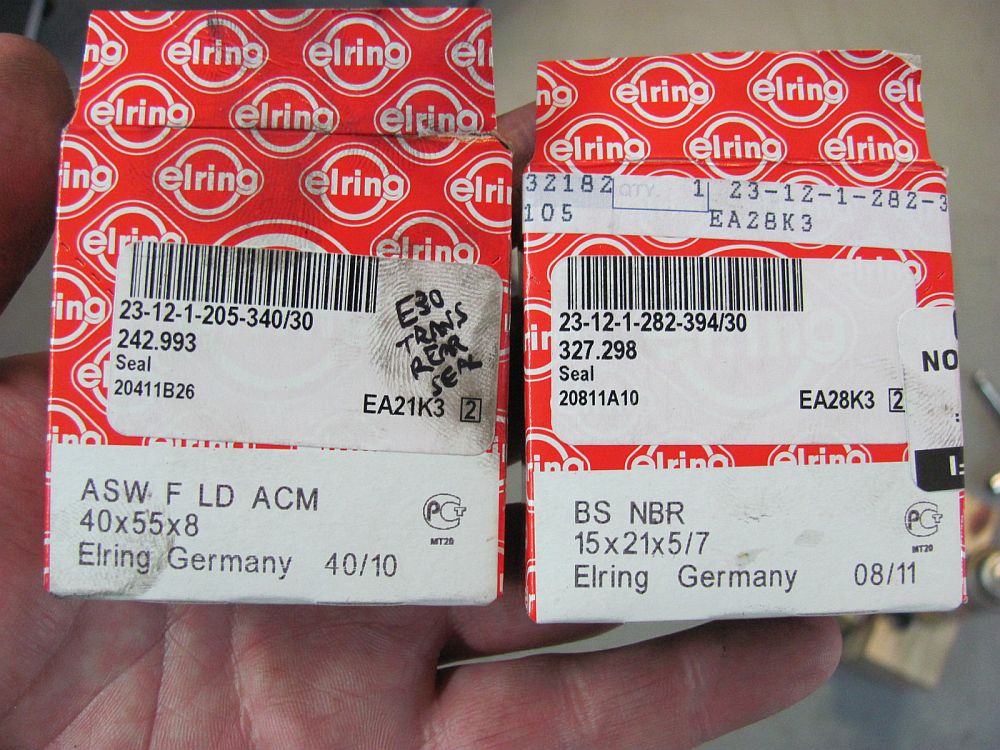
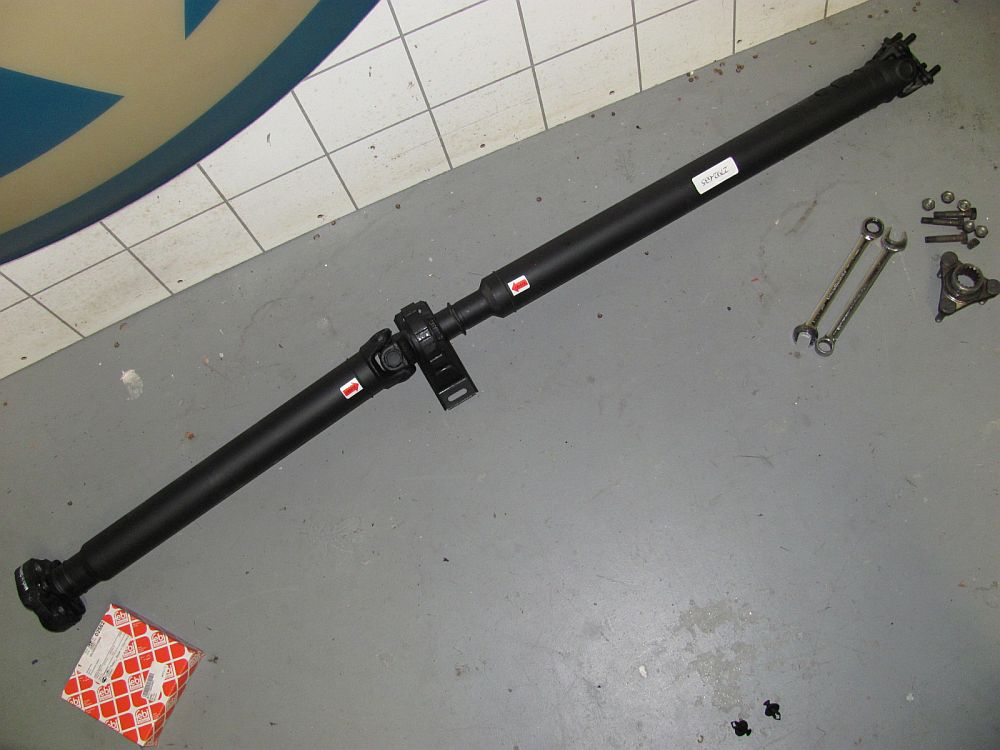
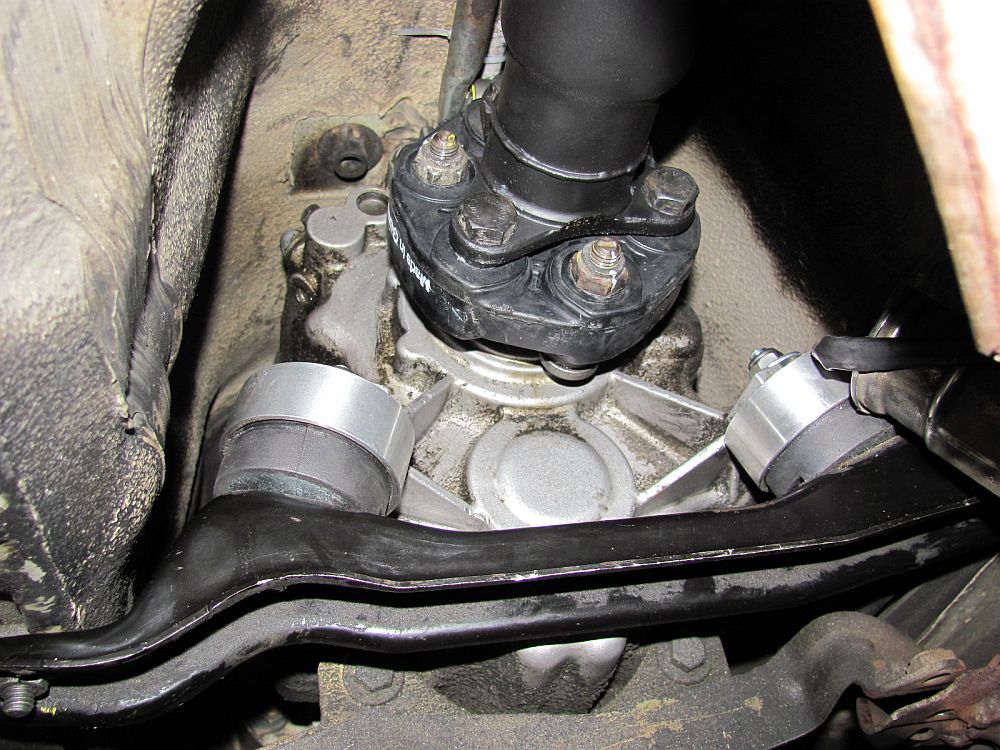
Noise precluded driveshaft removal and new center support bearing and guibo at a minimum. While the driveshaft is out it is also a great time to replace the rear transmission seals and shifter if you are so inclined. Elring seals and Febi guibo all sourced from Pelican Parts. You may also want to source new lock nuts, they are compression locking so I reused mine as some others have. As it turned out, the u-joints were shot (video HERE) so a rebuilt driveshaft was sourced from Wholesale Import Parts based on positive feedback from forum members- I had the same great experience.
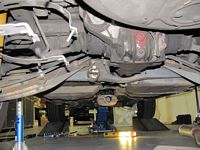
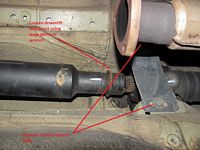
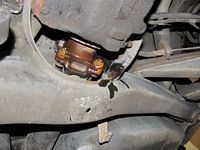
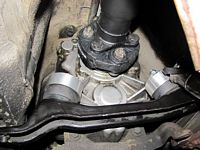
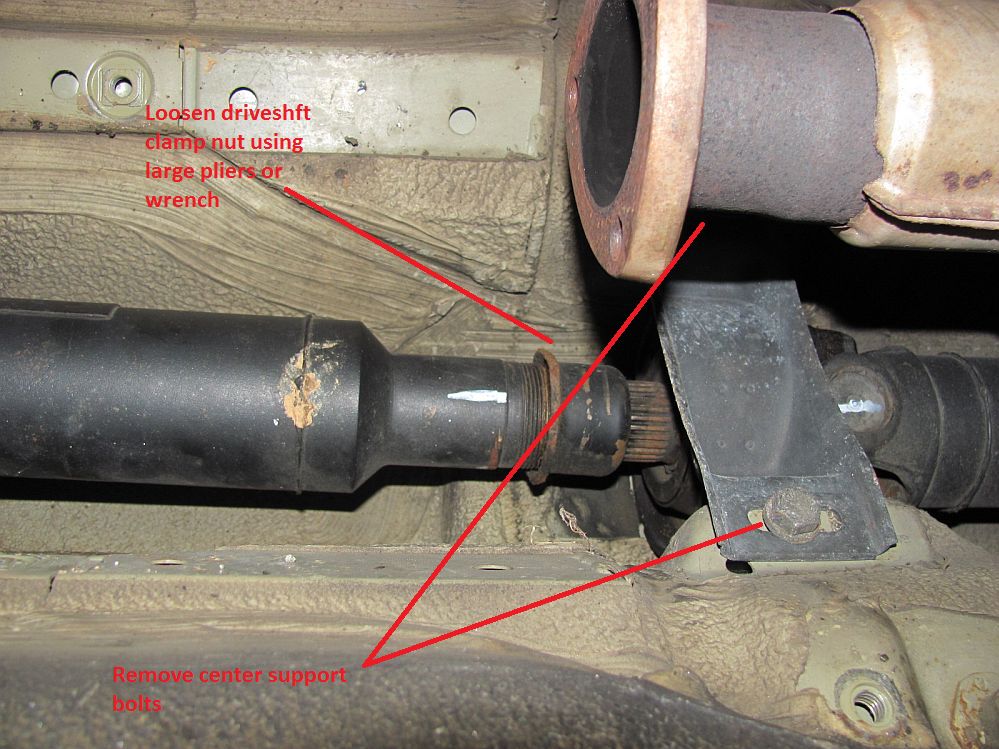
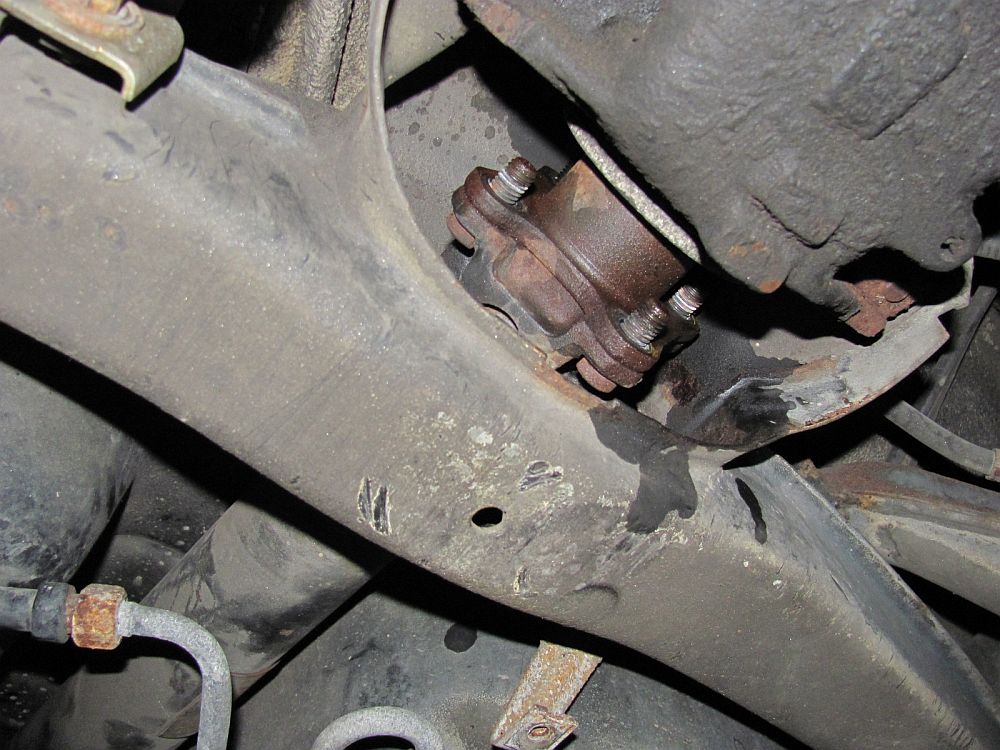
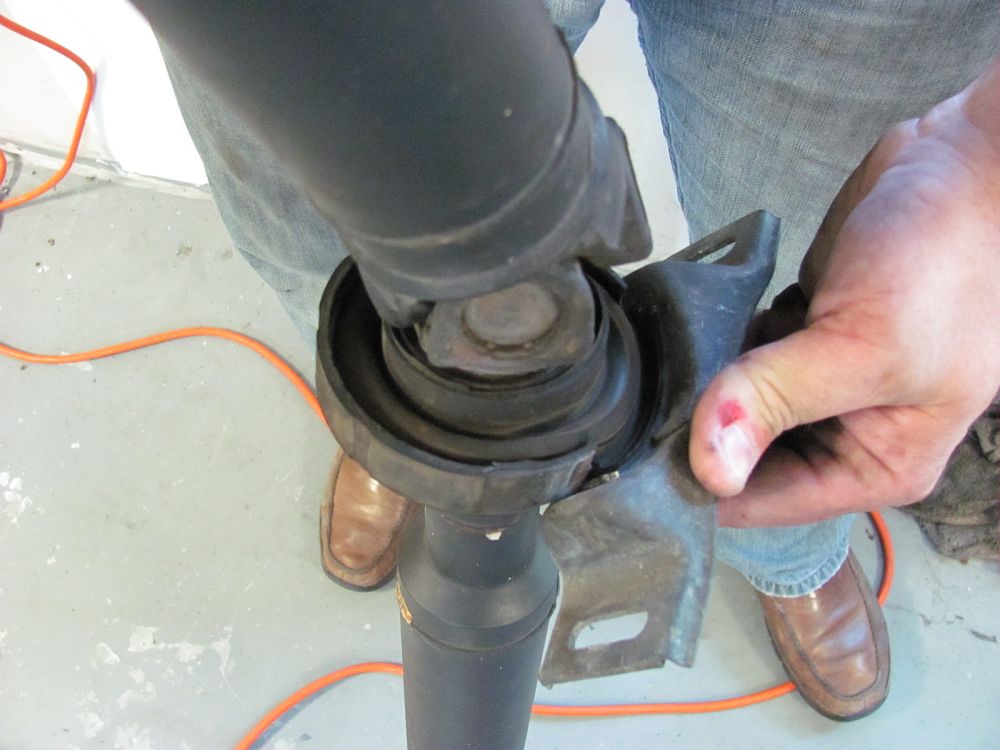
There are many E30 driveshaft DIY guides on the web, in addition to the Bentley manual, so I won't try and reinvent the wheel but will provide some supplemental pics and provide some input to the process. Cliff's notes for process: remove cat-back exhaust, remove ALL heat shields around driveshaft, support transmission with jack, remove transmission support, loosen driveshaft clamp nut at center support, remove three guibo>tranmission flange nuts, remove rear driveshaft>differential bolts/nuts, remove center support bolts, compress driveshaft to pull guibo off the flange, drop driveshaft on the driver side by pulling transmission and exhaust down for clearance. One thing I did not do was remove the section 1 exhaust, the manifold to the cat was left intact but was allowed to drop. After dropping the driveshaft I could really see how bad the center support was, rubber was OK but the support surrounding the rubber was broken. The guibo was OK but I could see where it was starting to get old and develop cracks.
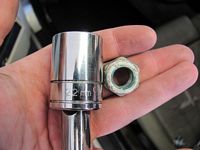
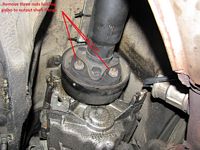
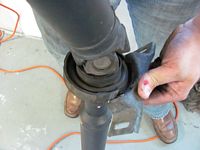
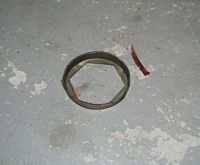
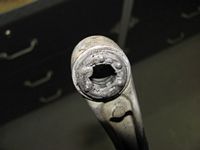
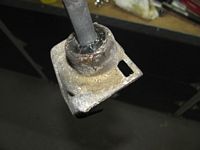
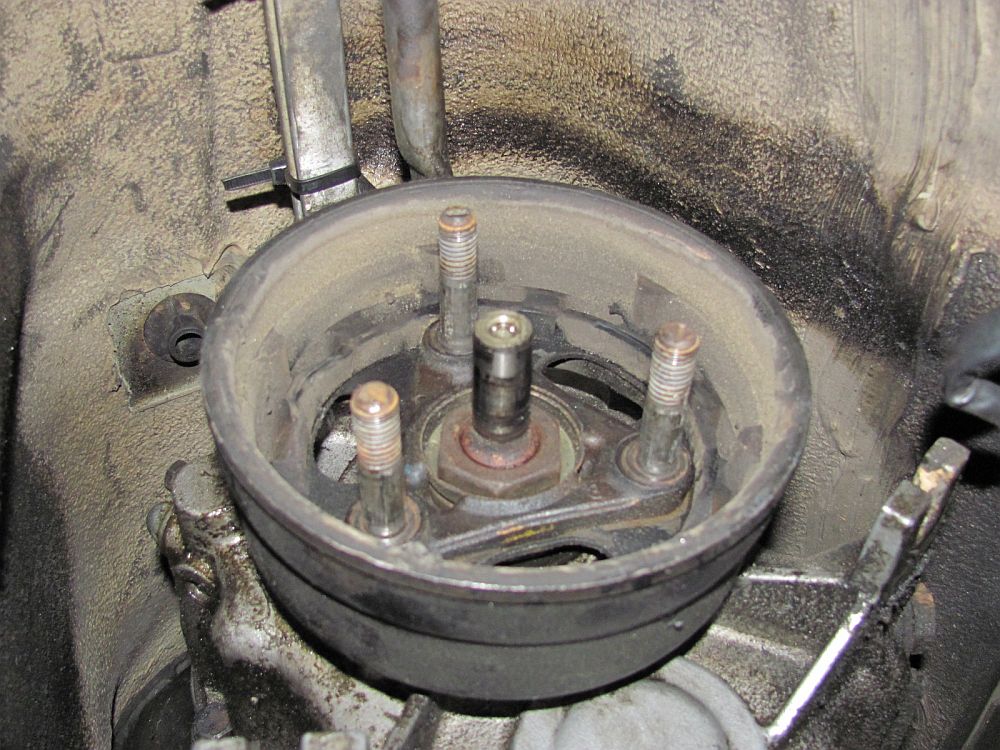
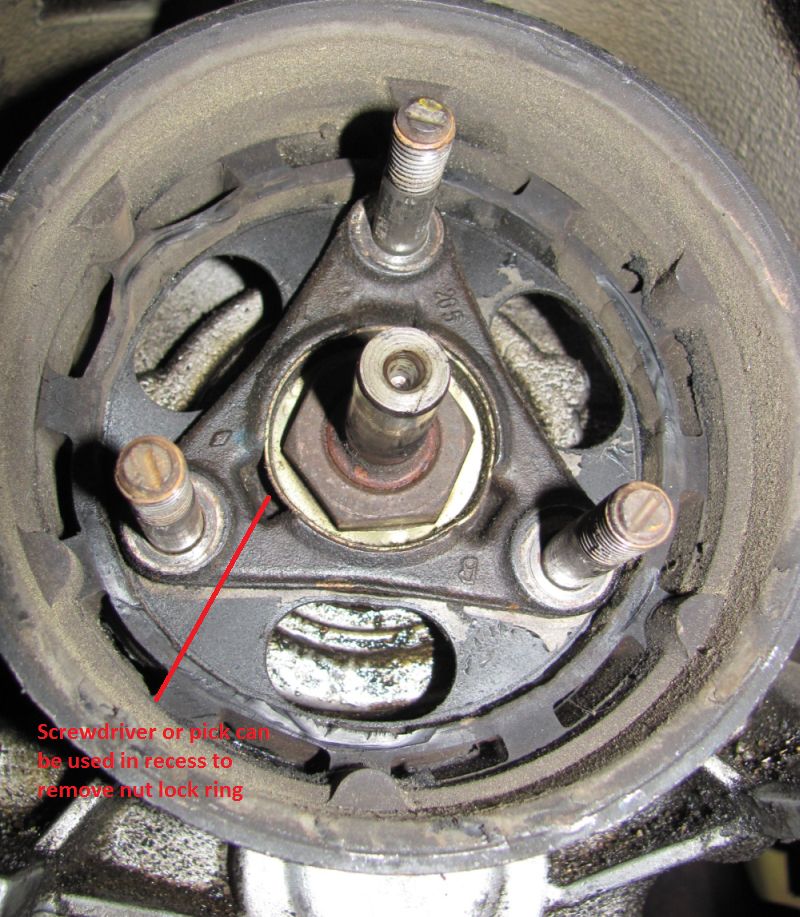
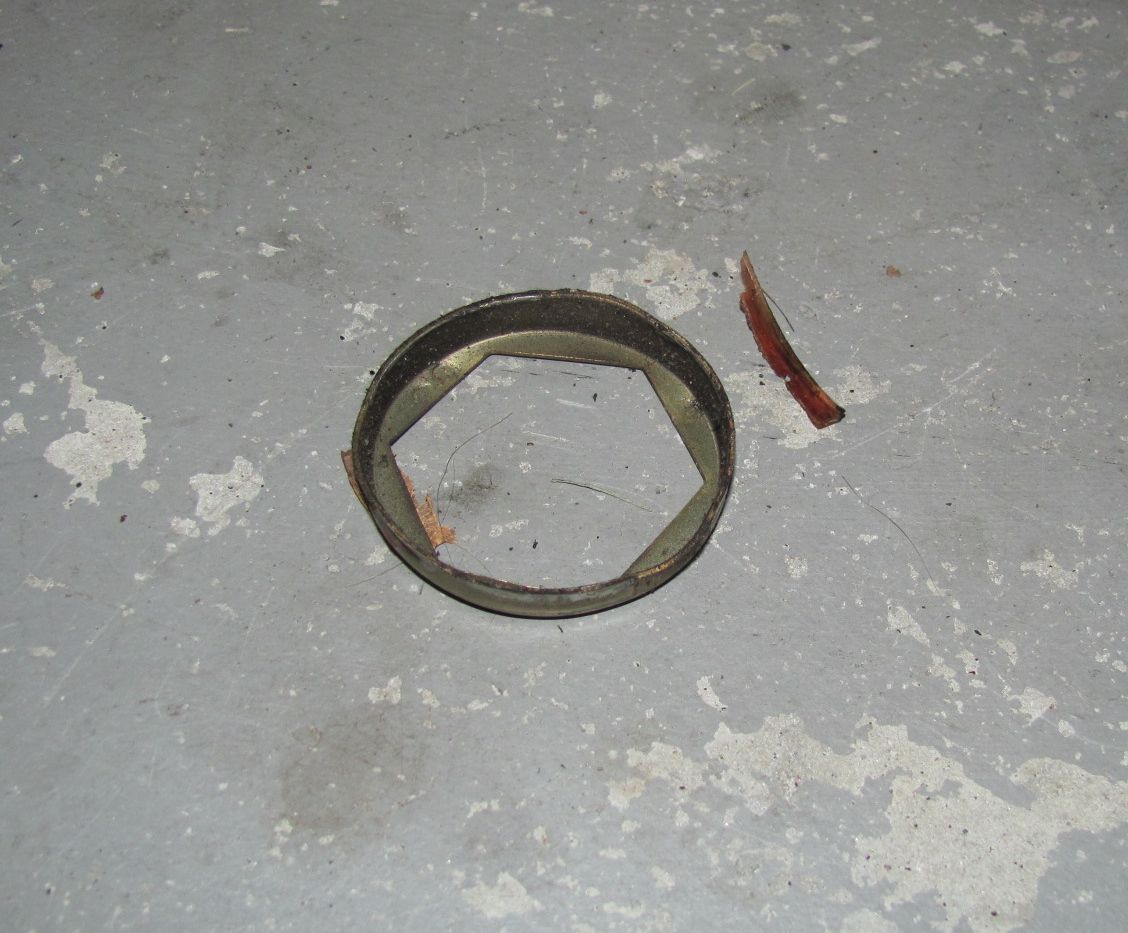
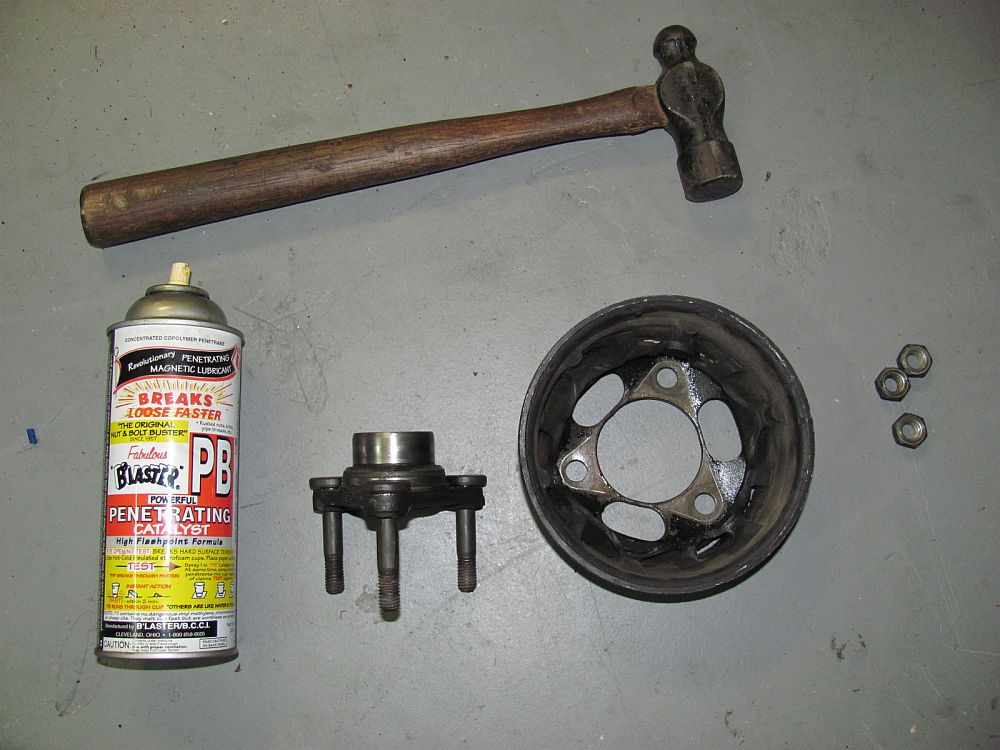
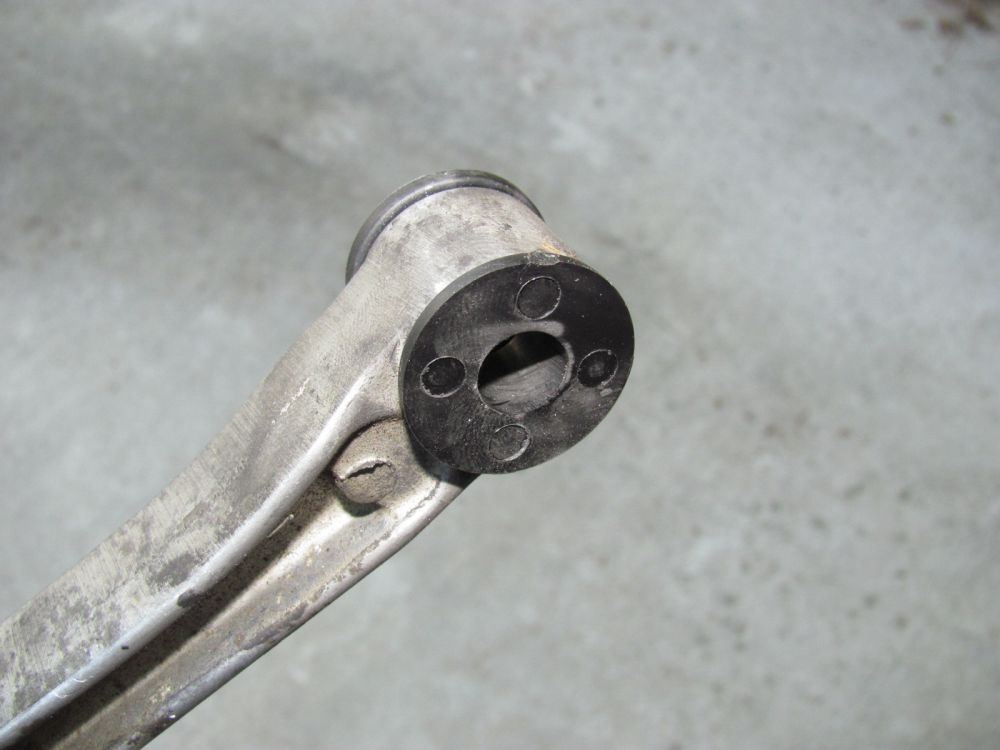
IF you plan to remove the flange and replace the seal as I did, you will need a propane torch to heat the bolt and an impact wrench with 30mm deep socket to remove the nut- this particular job emphasizes how GREAT air tools are. Prior to removing the nut the locking ring will need to be pulled out, it is just press fit and easily removed with a small screwdriver or pick. Once the nut is removed you may have to pull pretty hard on the flange to get it off due to the sealer used on the splines.
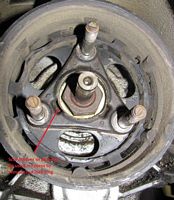
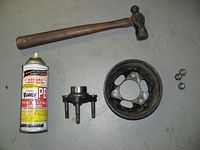
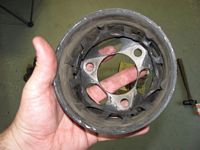
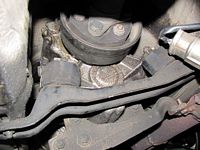
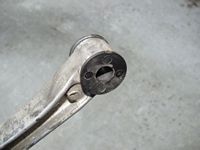
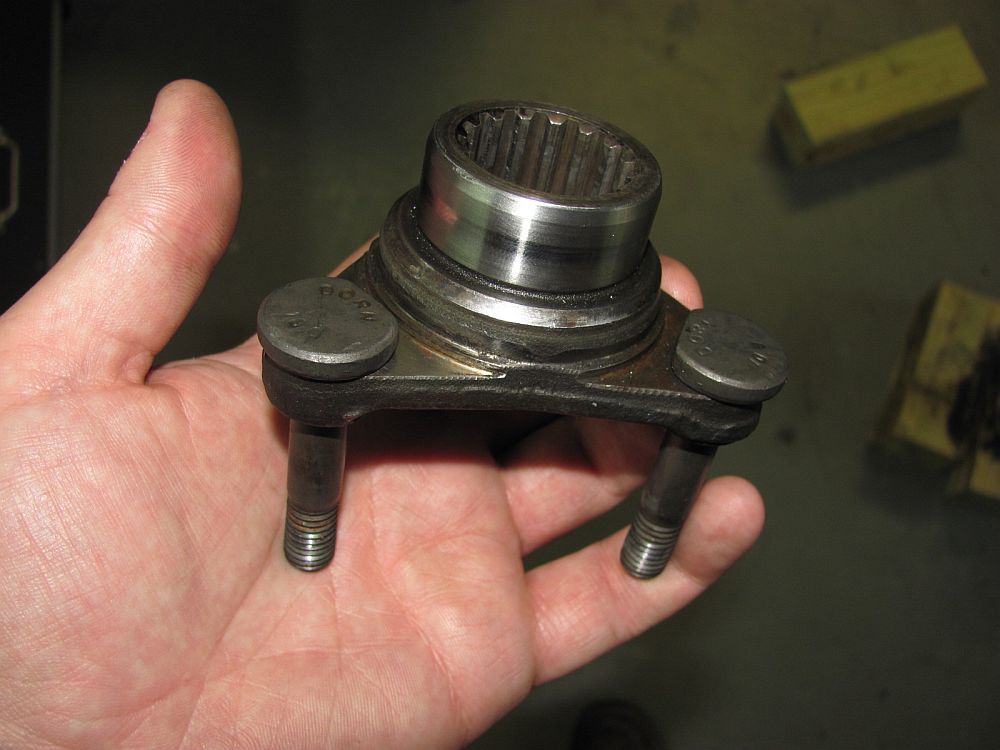
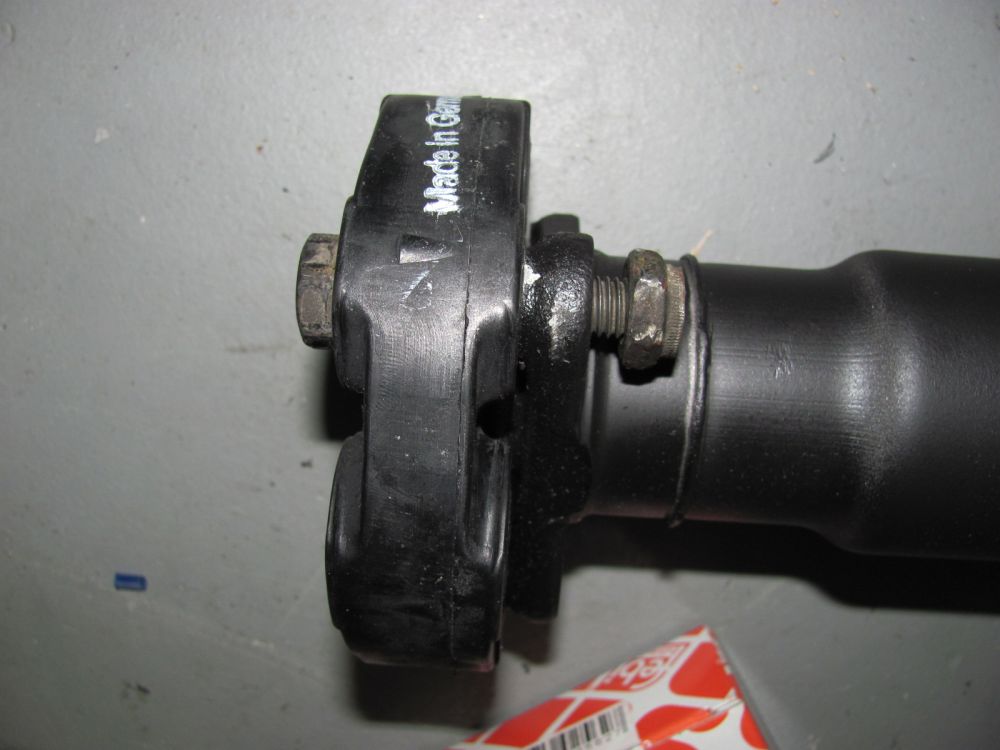
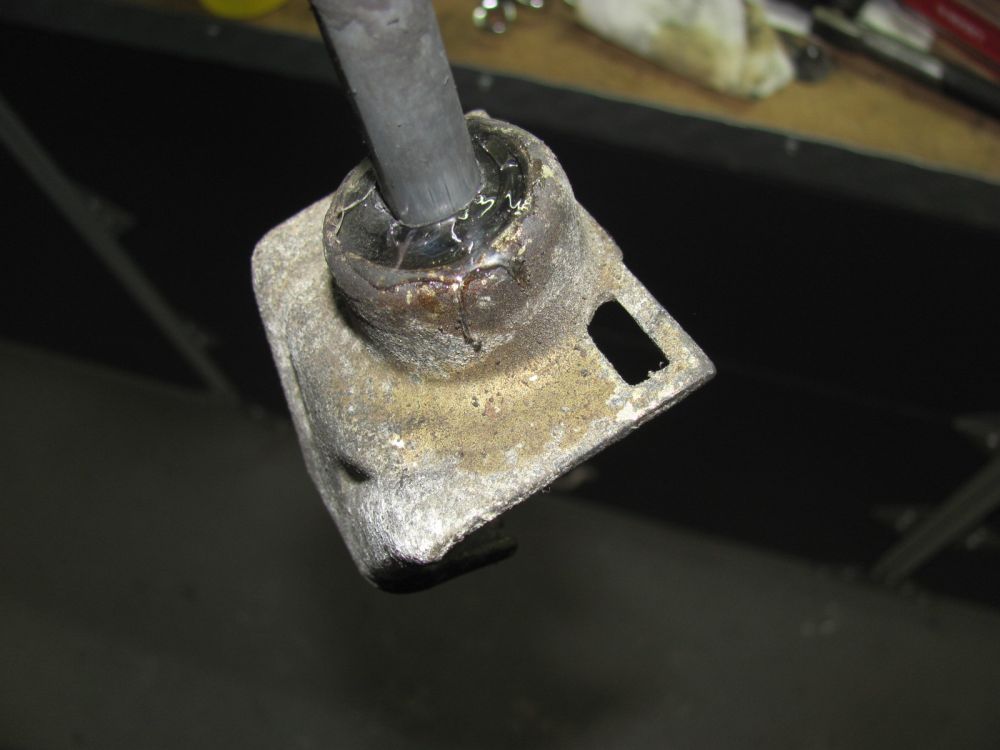
After removing the flange I noticed that the rubber around the vibration damper was starting to show some age as it was cracked and soft in places- so I removed it by hammering out the studs. Be sure to use nuts on the studs when hammering so that the threads do not get deformed. PB Blaster helps when used around where the studs are press fit through the damper. After the studs are removed the damper and flange are separated and the studs are pressed or hammered back into the flange.
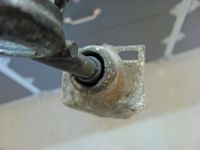
The rear seals, output shaft and selector rod shaft, can be carefully removed with a seal puller, screwdriver, and/or pick. Be careful not to damage the soft transmission case during removal. I used deep sockets the same OD as the seals to drive the new seals into place using a small hammer- Not deep but flush with the case surface.
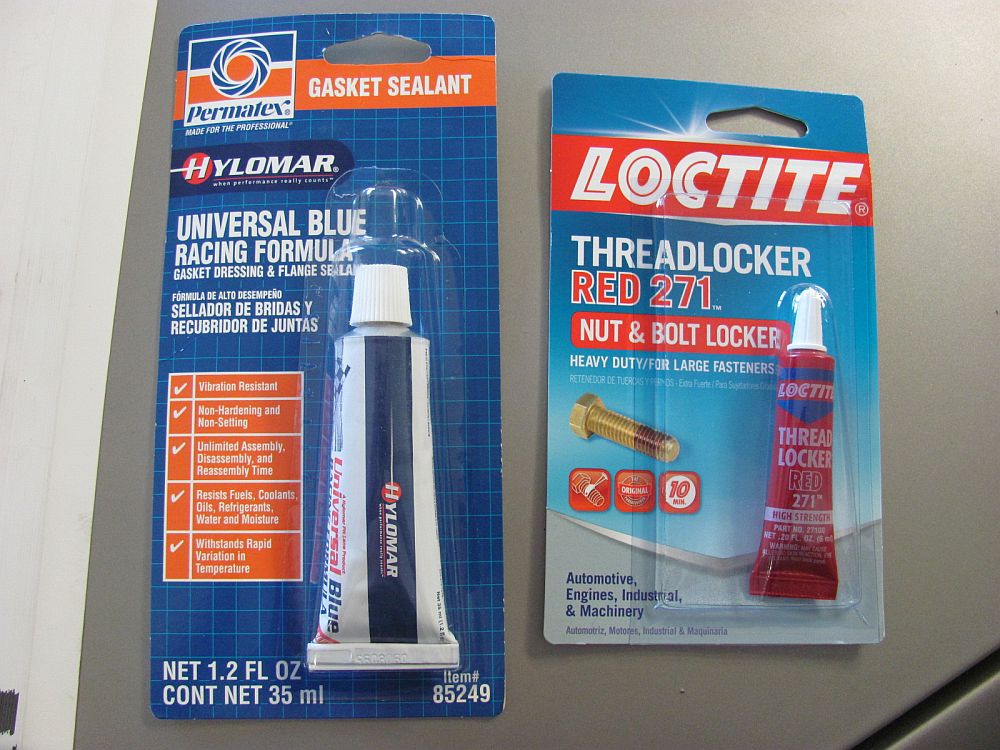
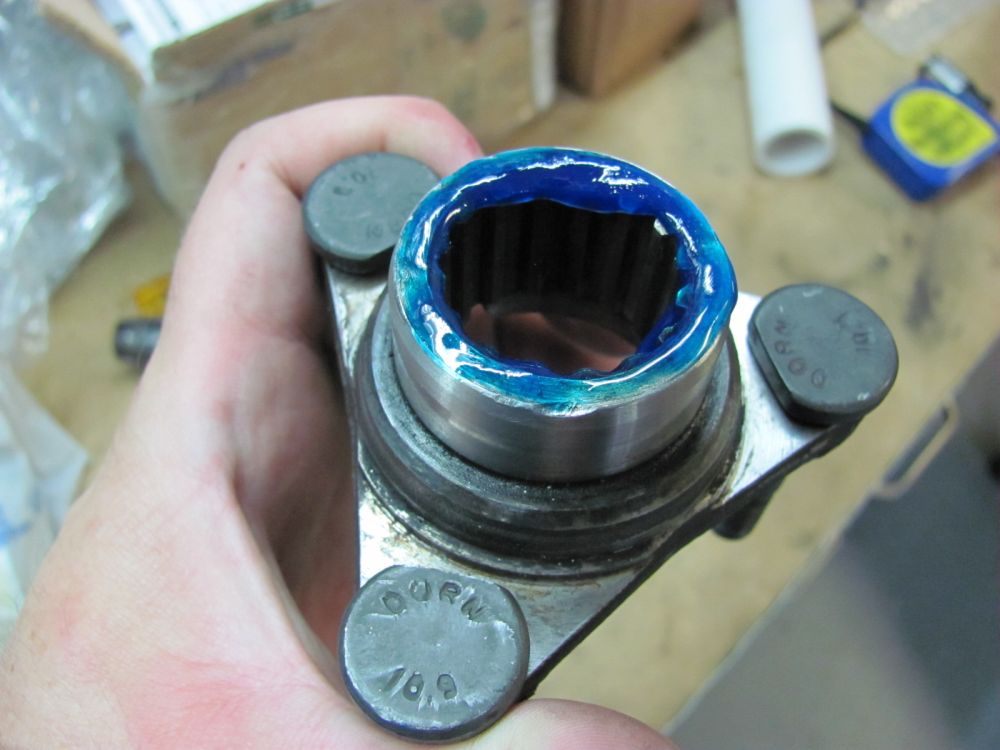
The Hylomar flange sealant was used to lightly coat the flange splines and bearing contact surface, the LocTite 271 was used on the flange nut threads and base. These items were both found at the local McParts stores. I again used the impact wrench on the flange nut, this time to reinstall. Not as exact as a torque wrench but I did not have the tool to hold the flange while tightening the nut.
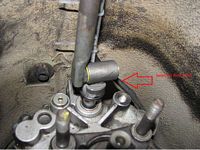
Driveshaft was reinstalled the same as it was removed. I installed the guibo before reinstalling- the arrows at each hole should point towards the flange that bolt is for. [Don't mind the uninstalled pic of the guibo arrow, the driveshaft was installed correctly and this pic is just to illustrate the arrow and flange relationship] When tightening the center support bolts the center support should be pushed forward to obtain preload as specified by the Bentley manual. After this step don't forget to tighten the driveshaft clamp nut.
Car is now leak free (from the transmission anyway) and smooth/quiet


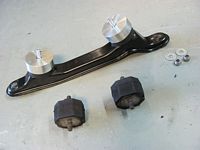
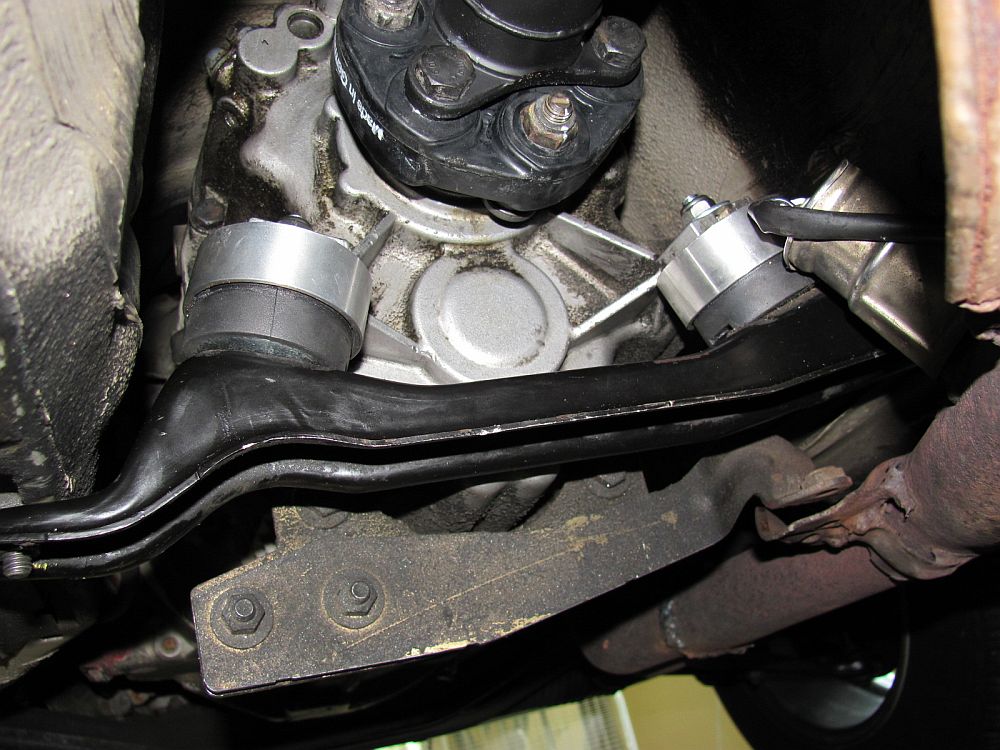
While the drivershaft was down and out, it was a great time to replace the transmission mounts. Mine were covered in trans fluid that had been leaking and I had some leftover UUC black mounts with enforcer cups from my Z4M so it was a no-brainer for me to go ahead and do this.

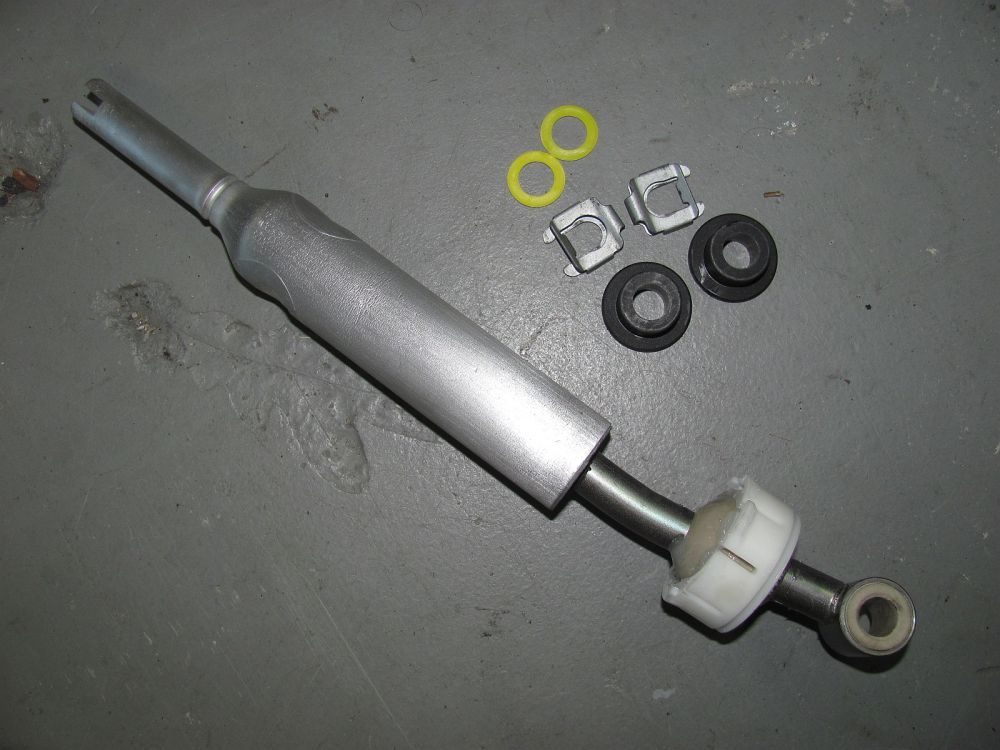
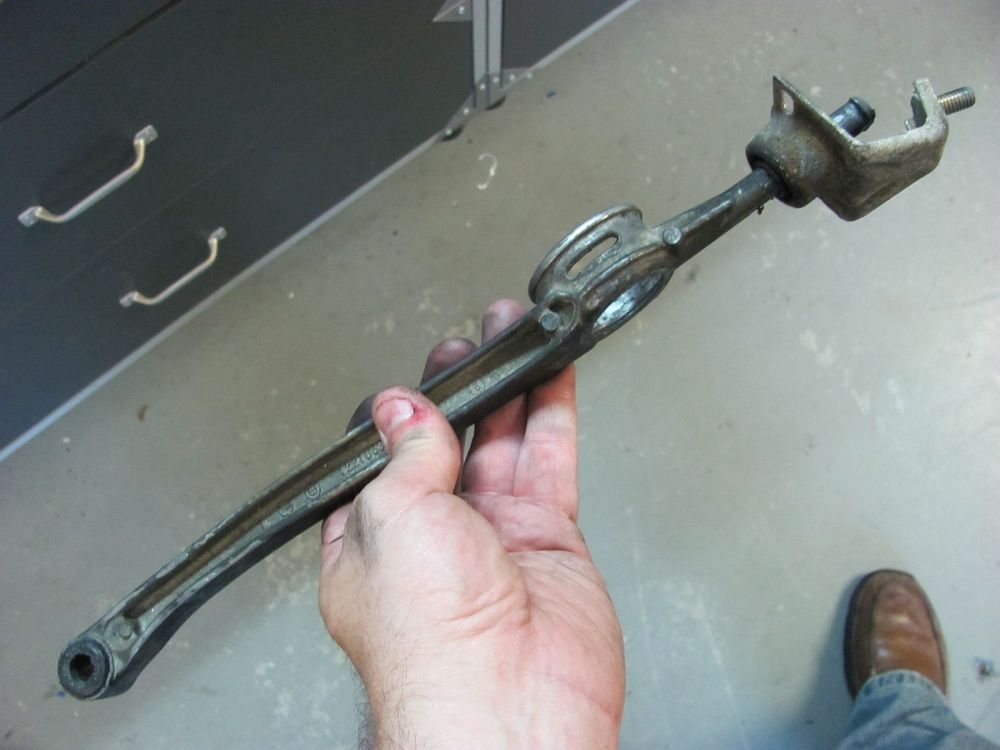
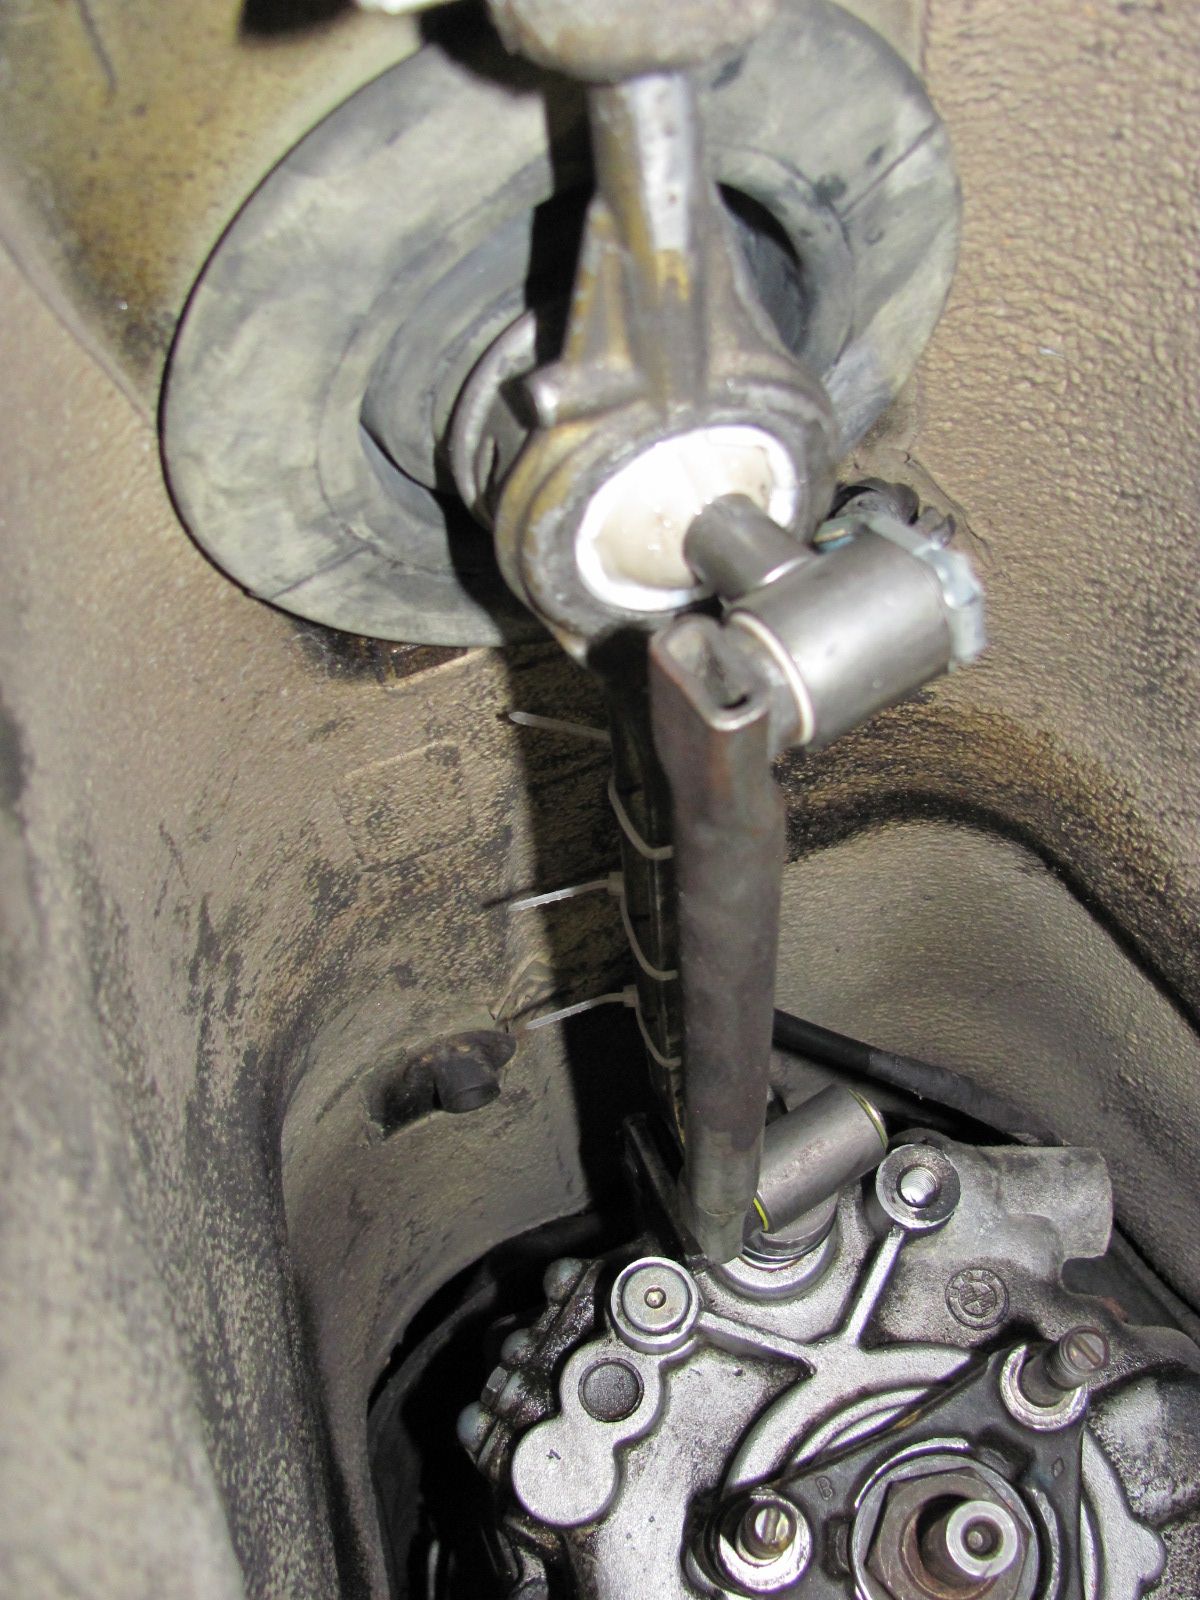
Another "While the driveshaft was down and out" opportunity: replace the eBay copy of the B&M shifter garbage. This shifter felt great initially but developed some serious slop. Video taken while installed can be seen HERE and after removal HERE. After some ordering problems with UUC, I decided to go with the Ireland Engineering Short Shifer with the harder urethane shift carrier bushings.
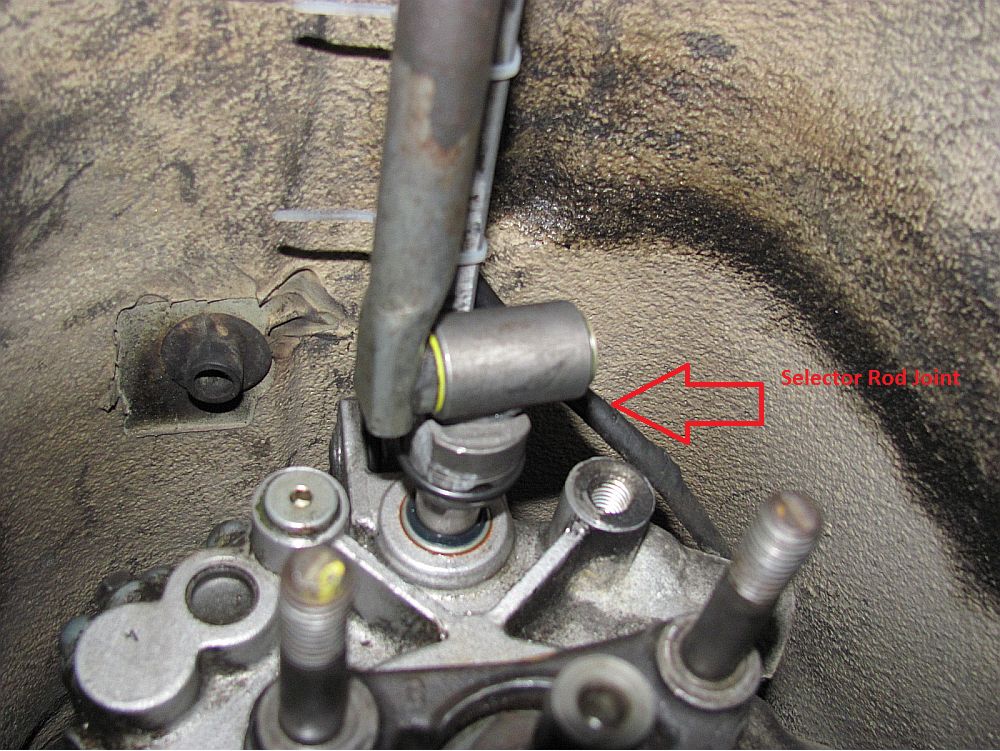
The entire shifter carrier was removed and I installed the harder urethane front bushings after removing the OE rubber bushing and also filled in the rear bushing voids with some E6000 to make it a little stiffer but still have some flexibility. The selector rod seal was also replaced while everything was out and easy to get to. After reassembling everything there was still some play in the shifter, all because of the gearshift selector rod joint (the joint that has a single pin connecting the shift selector rod to the transmission input rod). After replacing this joint there is zero slop.
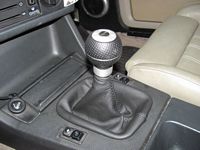
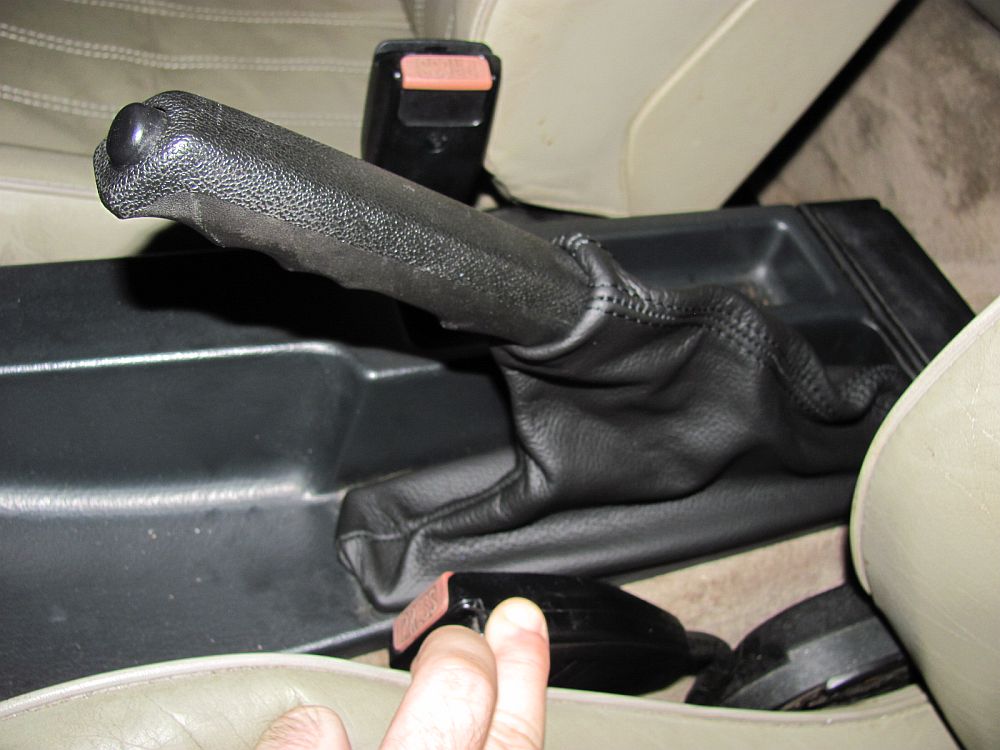
The shift and parking brake pleather boots were replaced with real leather boots from Top Gaiters- GREAT quality/fit and CHEAP. I had a Momo Race leather shift knob from an old car that I installed to complete the Momo and leather theme.


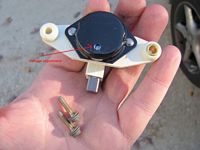
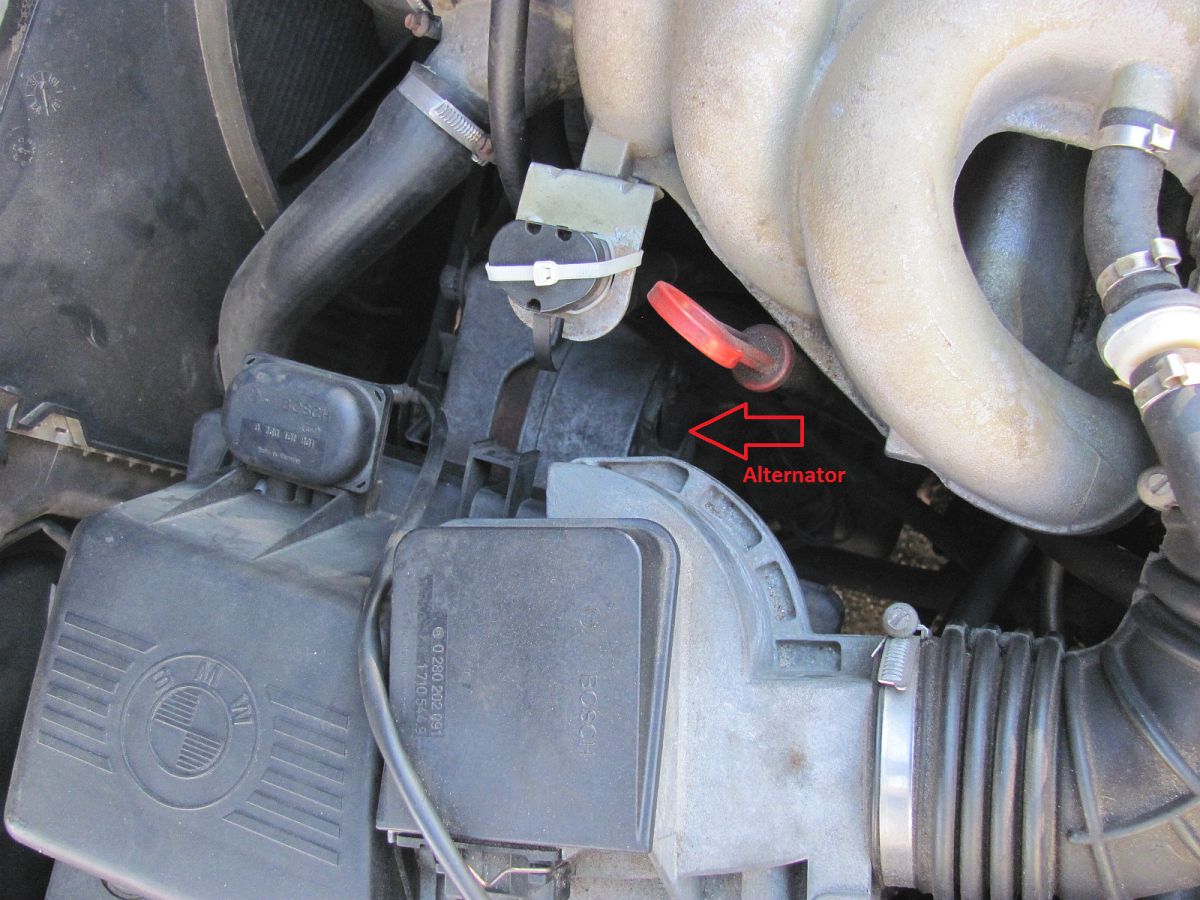
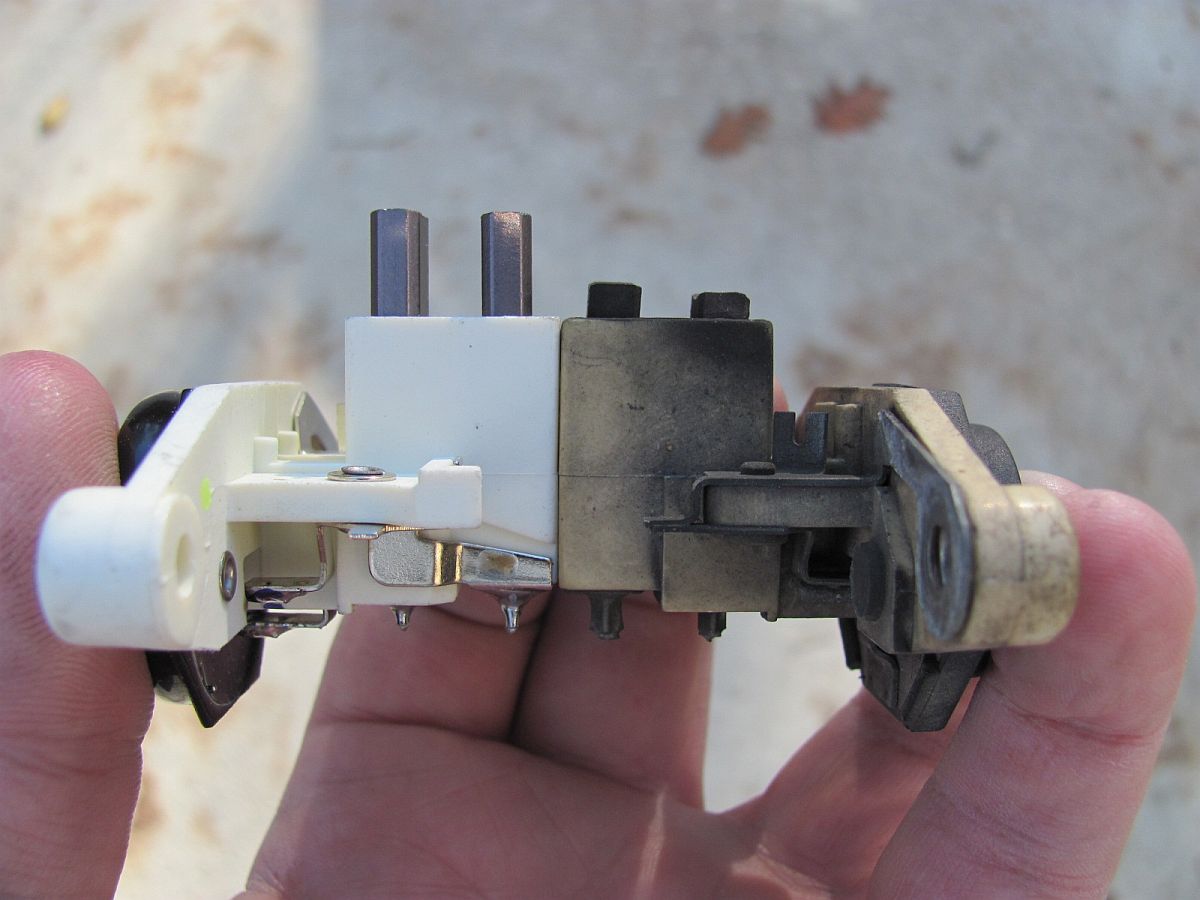
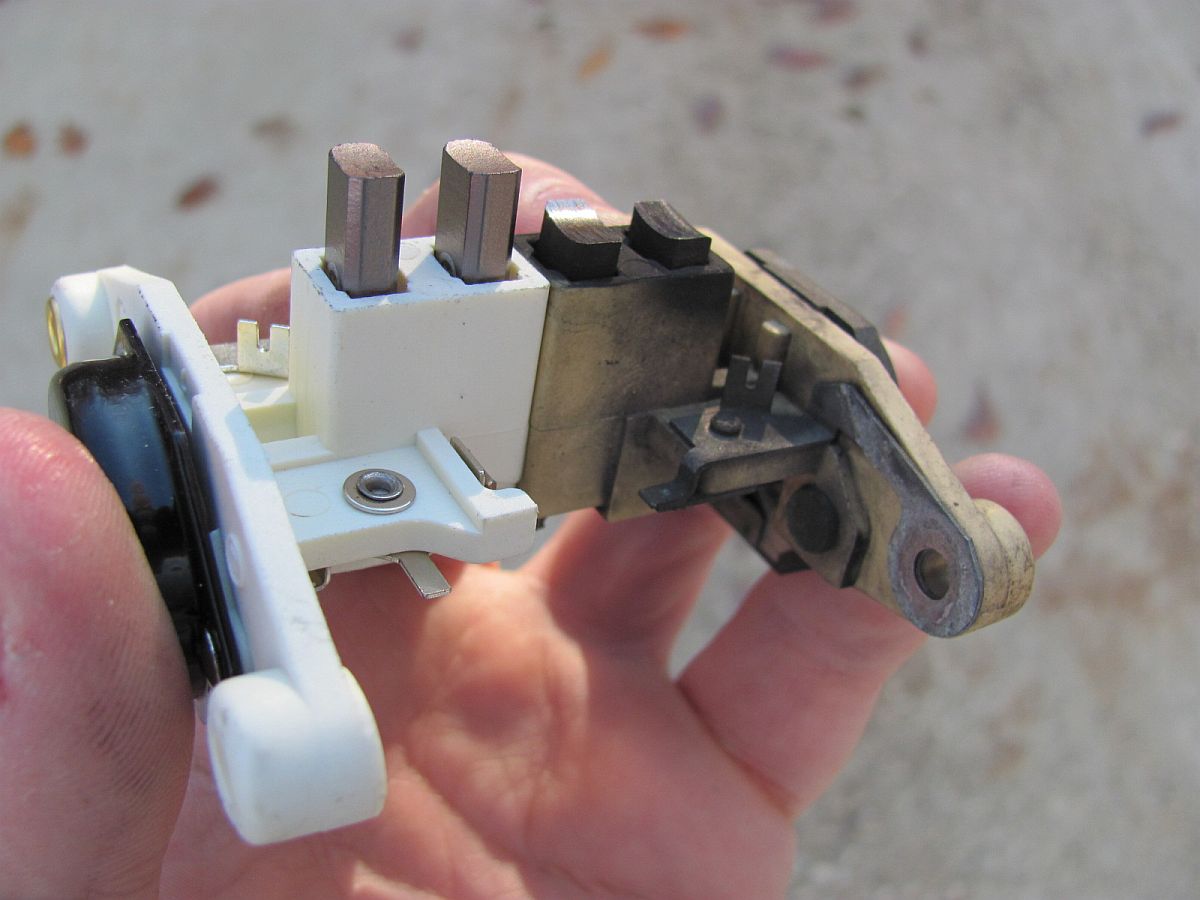
Always something to do on an older car- I get a call when I'm out of town that my daughter's car has died while enroute to school and will not start, feels like a dead battery she says. Call road service and get it towed home until I can troubleshoot. Battery was replaced recently before we bought the car so my first thought is alternator, specifically the voltage regulator. I get home and remove the voltage regulator to find the brushes well below spec, I'm surprised there were no early warning signs. I had proactively ordered a new adjustable voltage regulator from Dave Barton, I had used these before on the old Volvo and VW we had/have with good results and it was waiting for me when I returned home.
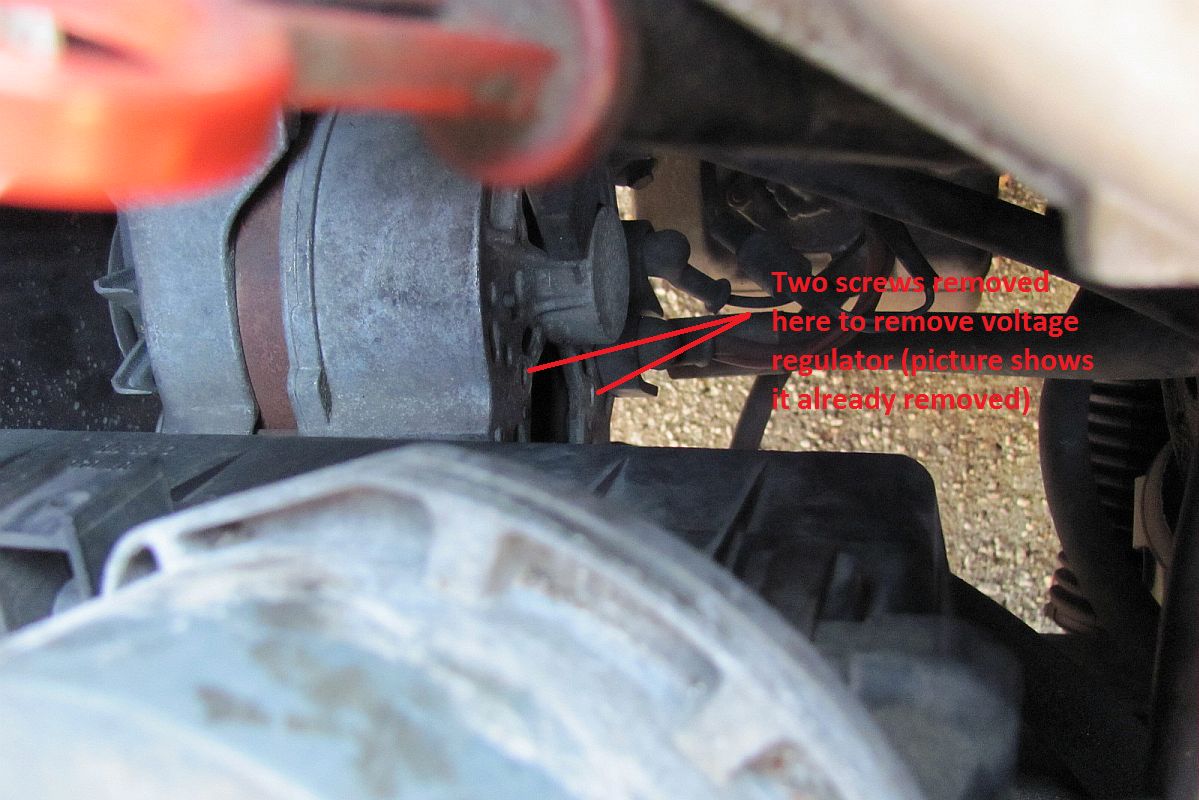
Old voltage regulator was pulled out after removing two screws, probably a good idea to disconnect the ground terminal at the battery first just in case. The new regulator was a little harder to install with the longer brushes and spring tension, to make it easier to use both hands the air intake and plumbing could be removed for access. After installation, charge the battery with a charger if it is not at ~12v to avoid putting a heavy load on the alternator. I start the car and using a volt meter at the battery and a helper, turn the small adjustment screw if needed to see 14.4v and DONE.

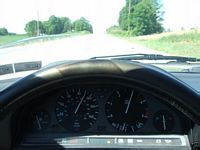
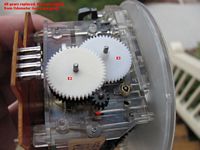
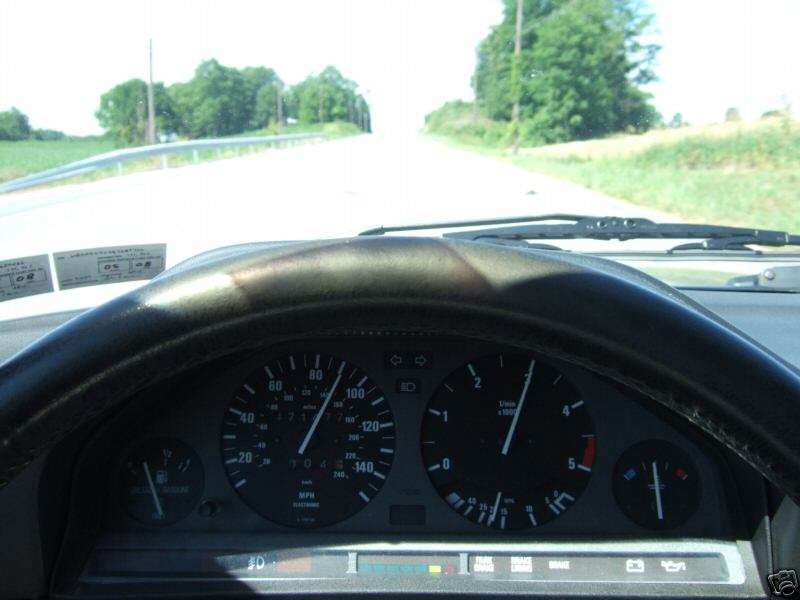
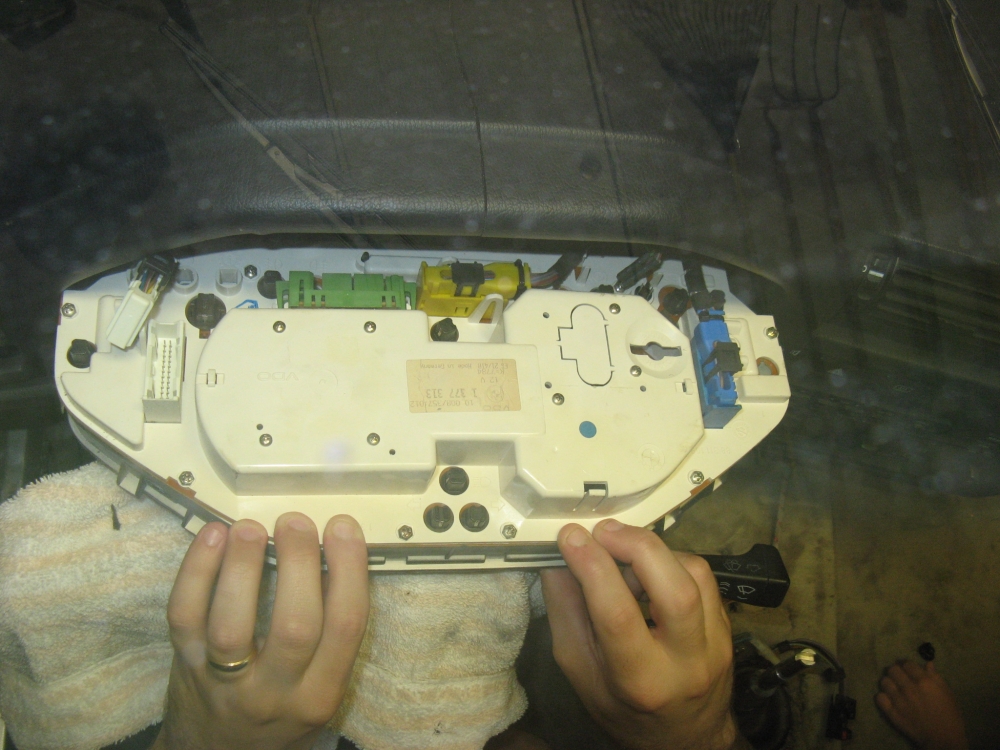
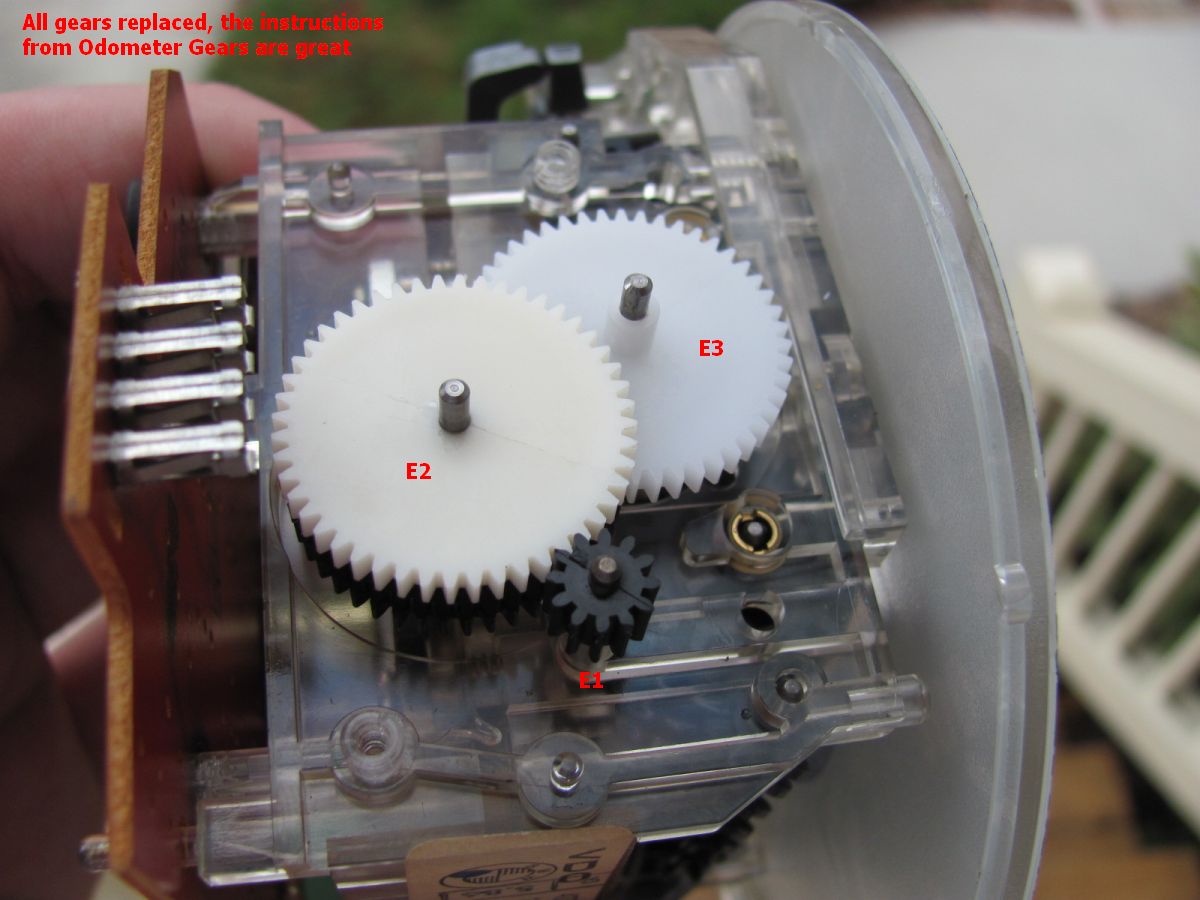
"Dad, the odometer stopped working" Great! After some quick Google review, it seems that the plastic gears get brittle over time and need to be replaced. The trick is identifying what gears you need: VDO or Motometer and if VDO what tooth count on the E3 gear. So, you will get good at R&Ring the gauge cluster since you have to do it once when trying to identify gears and once when the gear arrives (unless you have another car to drive). Ours was VDO and the first broken gear (one outside tooth missing) was the E2 gear, ordered from Odometer Gears- shipping was quick and they have a gear replacement guide HERE. I used the guide HERE to remove the instrument cluster and disassemble. I also used the opportunity to polish up the lens cover for the cluster using 3M Finesse and some wax before reinstalling.
[UPDATE] Advice- Don't cheap out like my daughter and buy the single gear that is broken, if one is broken they are all ready to go. The E3 gear was the next to go a few weeks later (ours was the 14 tooth). Buy the set and only take the dash apart once.
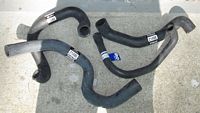
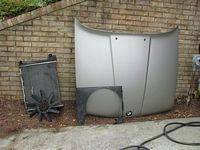
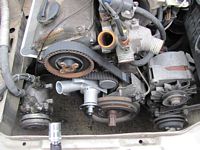
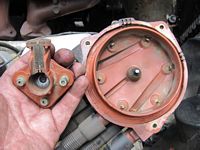
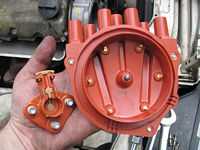
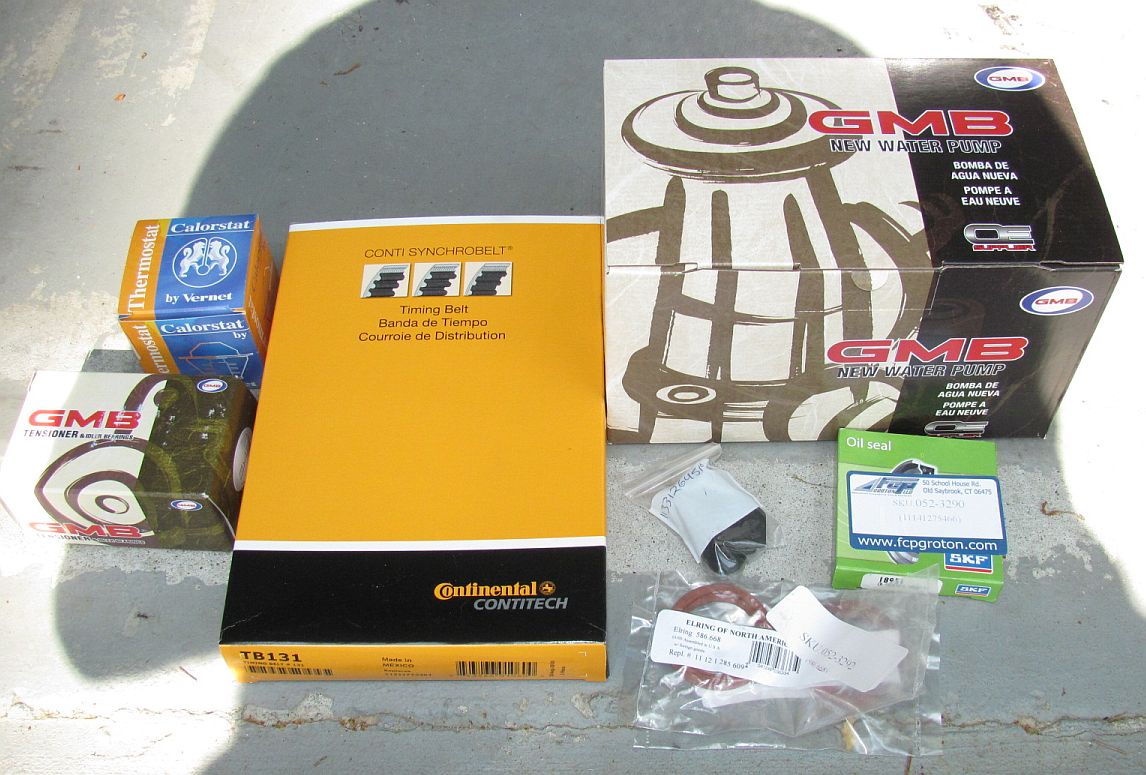
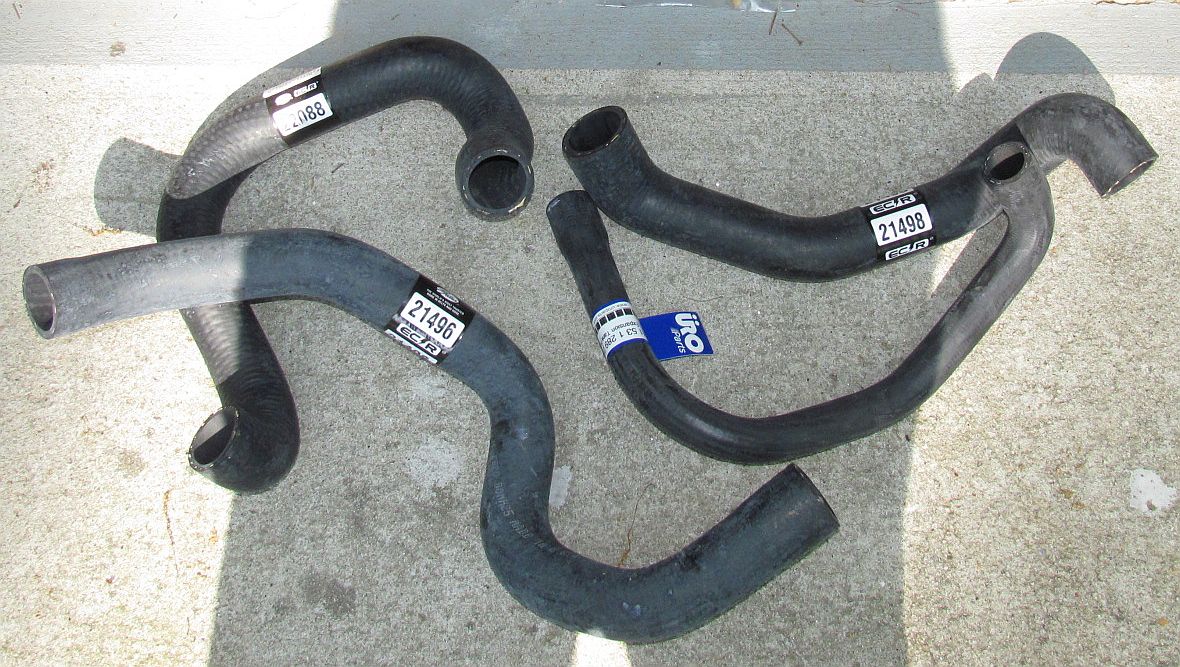
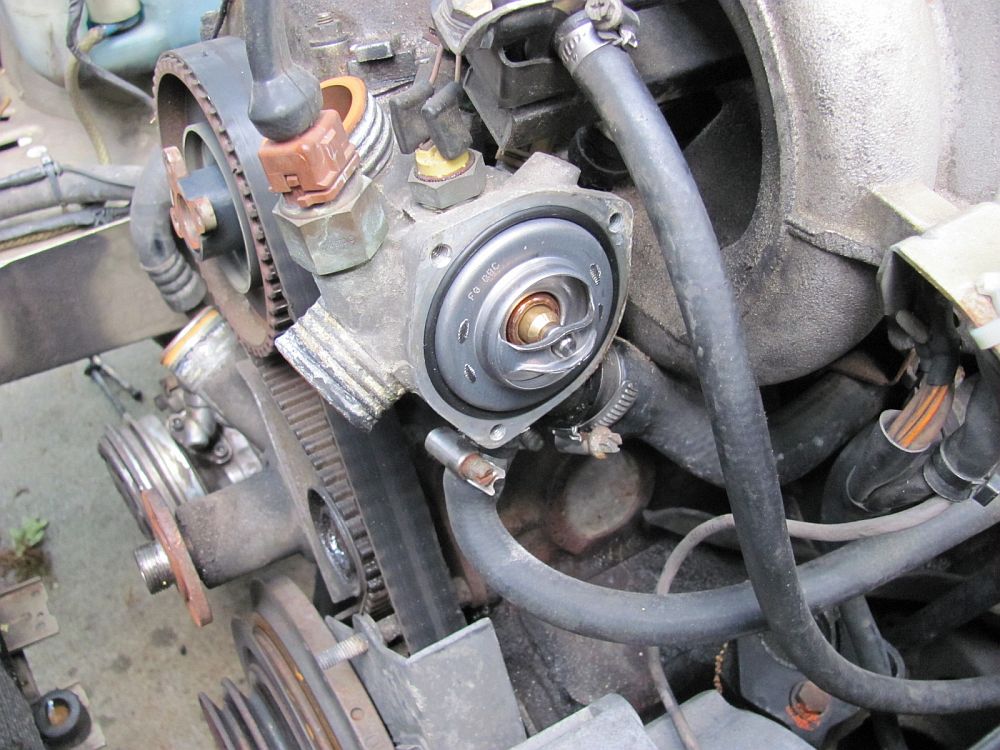
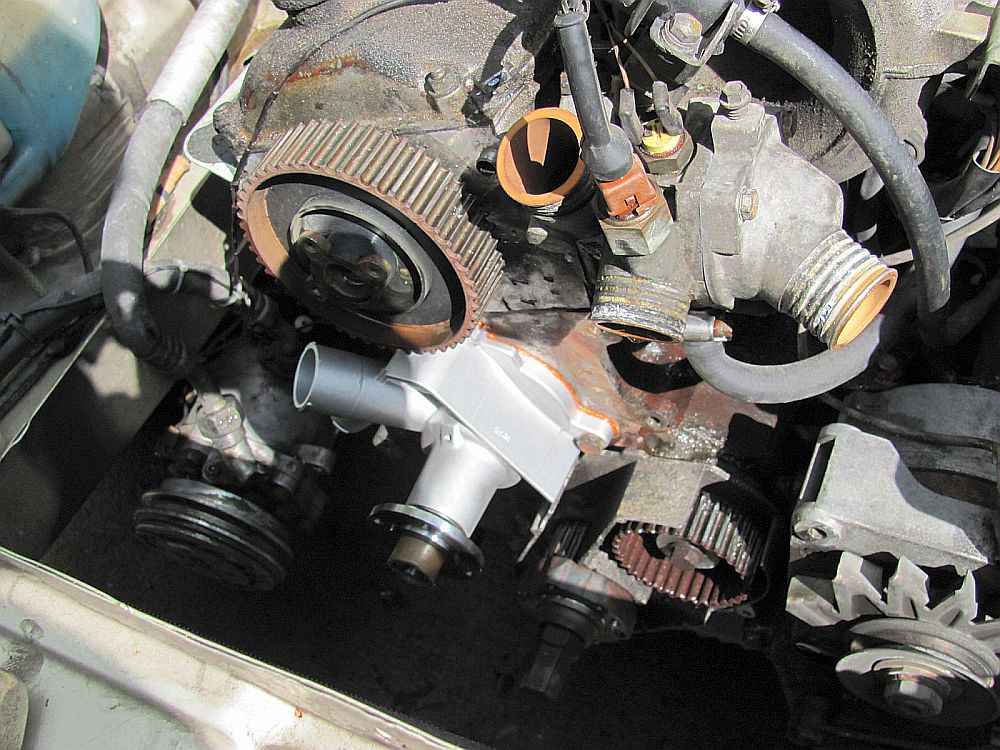
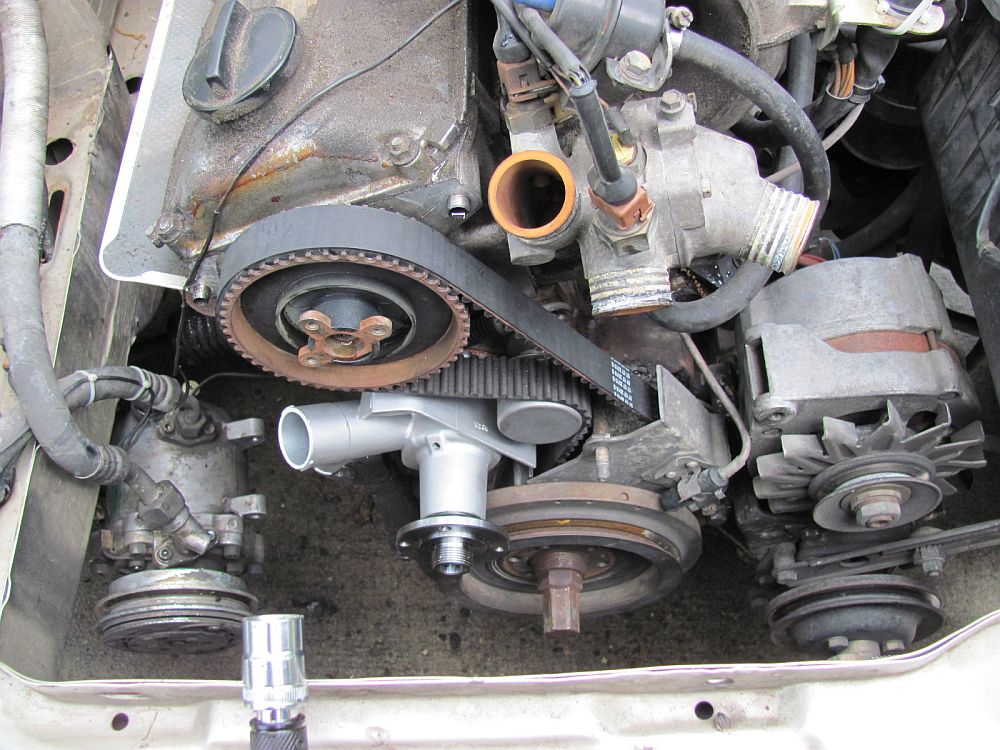
Having never really known when the last timing belt change occurred, we felt like we were living on borrowed time. The shop that rebuilt the head when my brother first bought it said it looked fine, but I went ahead and bought a timing belt/water pump/tensioner/seal kit off eBay (brand name parts, some OEM) and finally had the chance to install it today. I also decided to replace all of the coolant hoses.
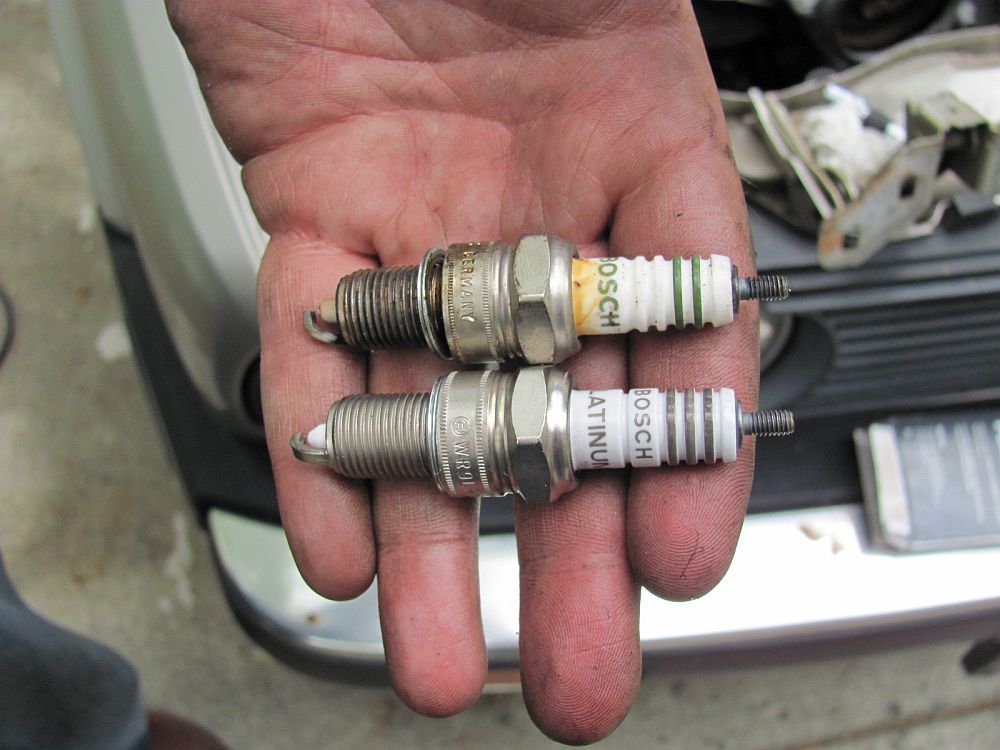
I used the DIY guides on e30 World and Pelican Parts to figure out the best approach(s). It was an entire afternoon event, I also ended up buying and replacing plugs/distributor cap/rotor since those looked sad when we removed them. I did not do any of the seals- they were not leaking OR not leaking bad so I decided against it, we were pressed for time. This job is not tough but IS time consuming, a lot of disassembly is involved to get to the timing belt and water pump.UPDATE: This car was sold and replaced with a Miata, these E30 cars are great and this one will be missed.


DIY Guides:
BMW E30 Dashboard Swap: Removal and Replacement - DIY by Chris
BMW E30 Common Cluster Complications - by e30tech.com Ablice
BMW E30 Lighting Conversion Information - by X Mon
Replacing BMW Shift Bushings- Pelican Parts Tech Article
Installing a BMW Short Shift Kit- Pelican Parts Tech Article
Replacing BMW E30 Instrument Cluster Lights
BMW E30 OBC Light Replacement for LED Display
r3vlimited.com: BMW E30- Installing a BMW E36 Steering Rack
r3vlimited.com: BMW E30 Timing Belt and Water Pump DIY Guide
e30 World.com: BMW E30 Timing Belt and Water Pump Replacement
Chris's E30 Page: BMW E30 Timing Belt and Water Pump Replacement
Author unknown: BMW E30 Timing Belt and Water Pump Replacement
BMW E30 Timing Belt Installation Trick/Tip
Converting your Glovebox Flashlight to LED
Emergency Hood Release (when cable is broken)
On Board Computer (OBC) Functions
BillsWebSpace: BMW E30 Door Panel Removal and Door Lock Rebuild
e30 World.com: BMW E30 Door Lock Cylinder Replacement
Unofficial BMW: BMW E30 Door Lock Cylinder Replacement
e30 World.com: BMW E30 Power Door Lock Repair
r3vLimited: Central Locking Diagnostic
r3vLimited: Central Locking Module Fix
e30tech: Central Locking Module Red/Black Wire Mod/Fix
MESA Performance Parts: BMW E30 Central Locking FAQ
BimmerBoard.com: BMW E30 Central Locking FAQ
Repairing and Refreshing a Broken BMW E30 Sport Seat
BMW Nut: BMW Differentials Part II- Diagnosing, Repairing, Removing, Replacing, Fluid Changes
Reviews:
EuroTuner Feb 2009: 1986 BMW 325e - Beige Beast
Related Documents/Pics/Files/Links:
Real OEM: OEM Part Numbers and Diagrams Online
BMW Fans: OEM Part Numbers and Diagrams Online
Bennington Motorsports E30 Fuse and Relay Layout
BMW Product Knowledge on Demand
BMW E30 (325i/325is) Owners Manual
e30World.com: Lots of DIY guides and tech articles
Video: *High Speed Connection Recommended*
BMW/E30 Forums/Links:


