![]()
BMW E30 Door Panel Removal and Door
Lock Rebuild
We bought
the 1986 325es from my brother for our daughter to drive, the driver’s side
exterior lock would sometimes lock/unlock the door but those occasions were far
and few between. After doing some internet research I found the following two
write-ups about rebuilding door locks with revised parts using a BMW kit for
~$30:
http://e30world.com/body/BMW-E30-lock-cylinder-repair
http://www.unofficialbmw.com/e30/interior/door_locks/e30_lock_cylinder_replacement.html
Standard
Disclaimer: ANY USE OF THIS INFORMATION
BY YOU IS AT YOUR OWN RISK.
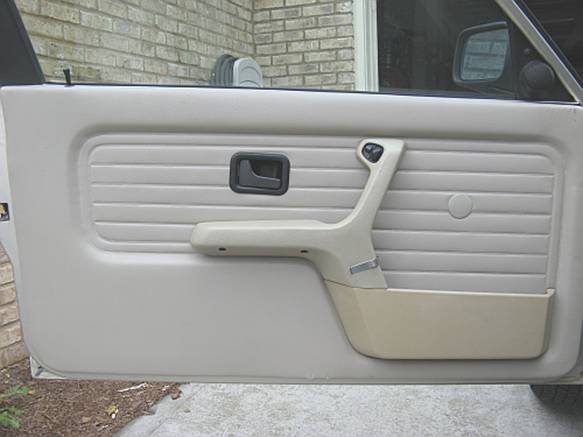
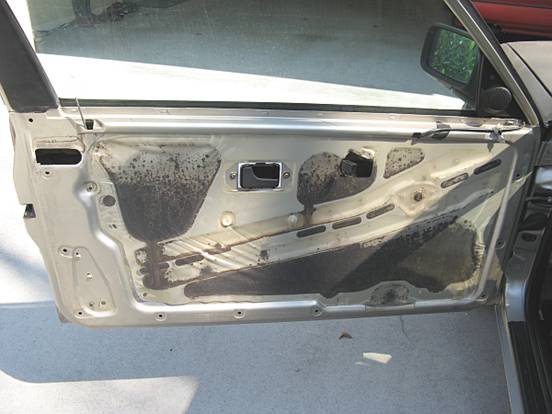
Door Panel Removal
The door
panel will have to be removed to access the door lock. The first step is to
remove the interior lock knob by unscrewing:
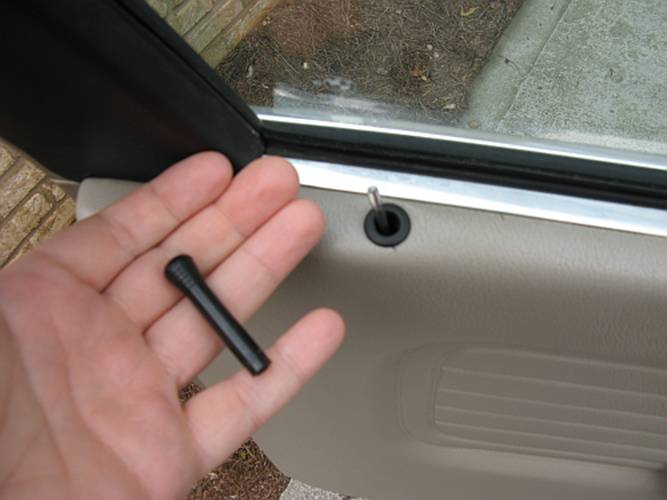
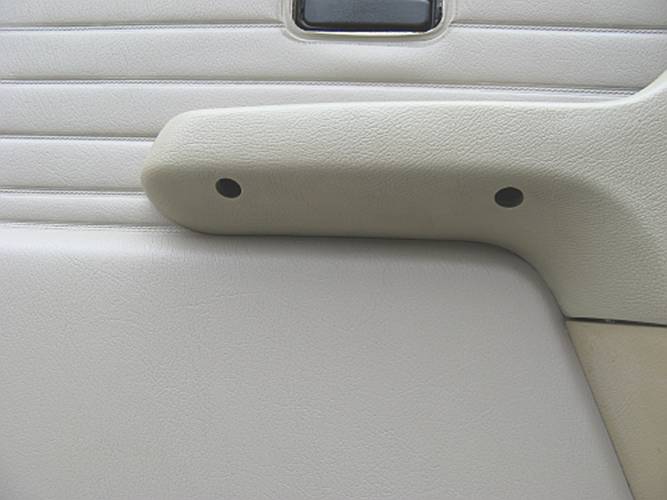
Remove the
door handle trim by sliding the piece towards the rear of the door, it will unhook
from the door handle and release:
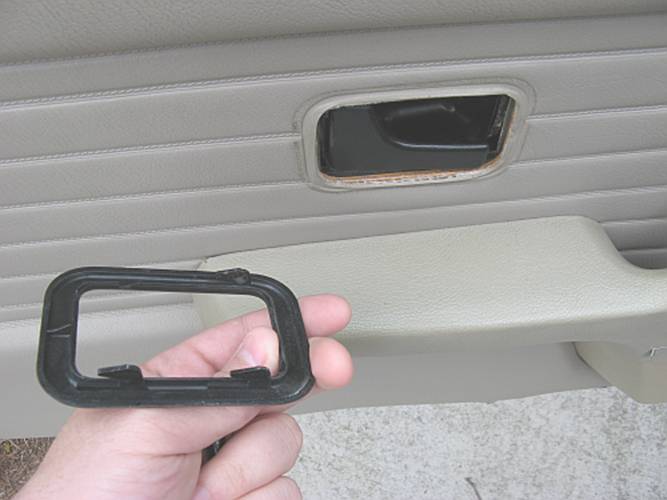
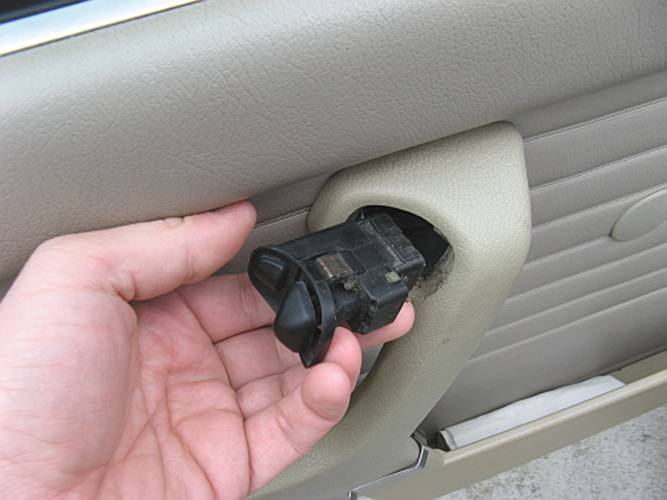
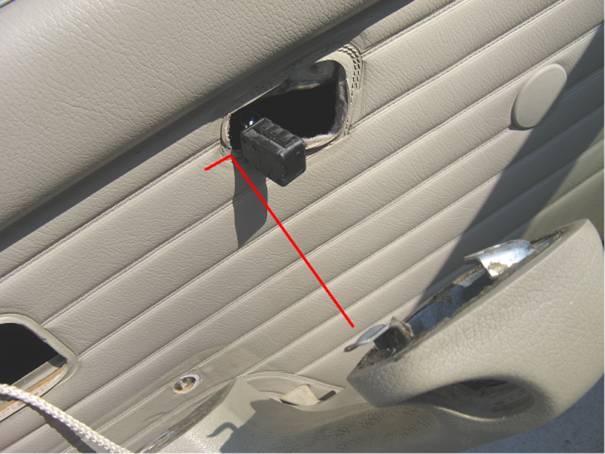
Remove the
plastic blank or mirror remote switch carefully using a flat blade screwdriver
at the top to pry out, there are clips at the top and bottom that hold it in.
Unplug it and remove the switch:
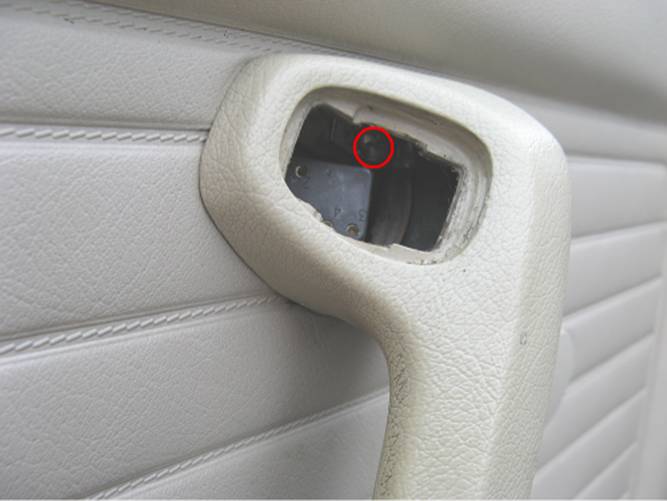
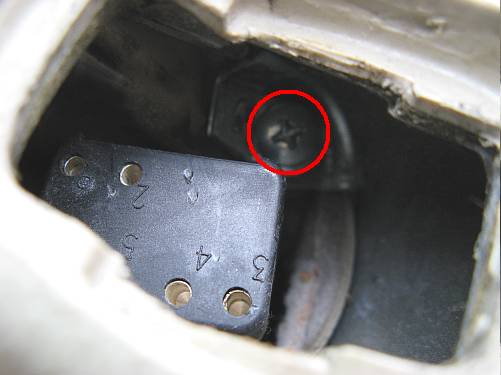
There is
one screw hiding behind where the switch was located, remove it:
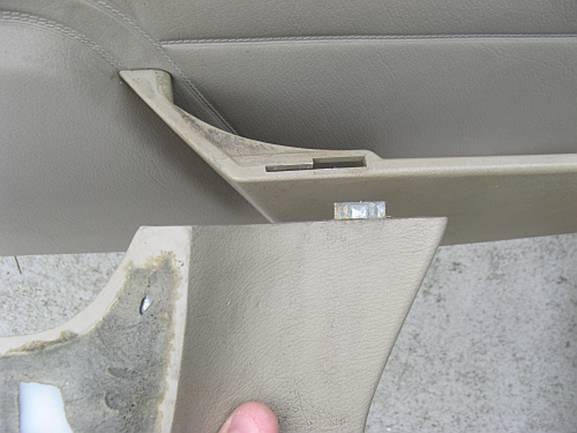
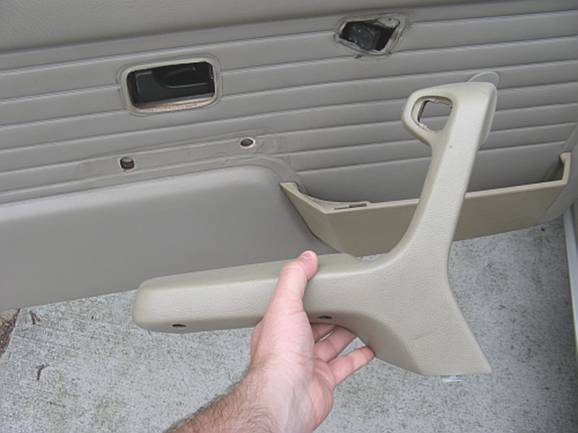
Remove the two screws on the bottom of the armrest (where the holes are):
Unhook the armrest from the door pocket and upper screw area,
slide the armrest towards the front of the door and lift up to separate:
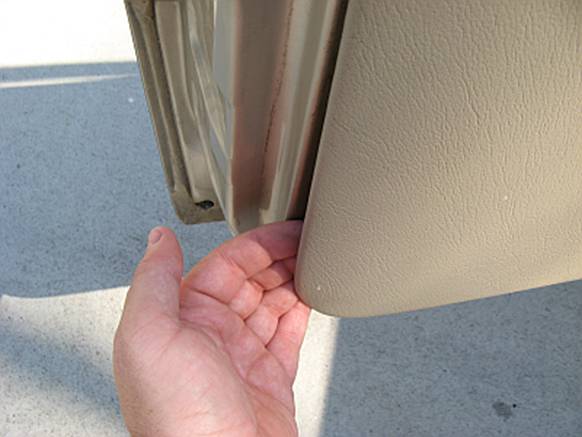
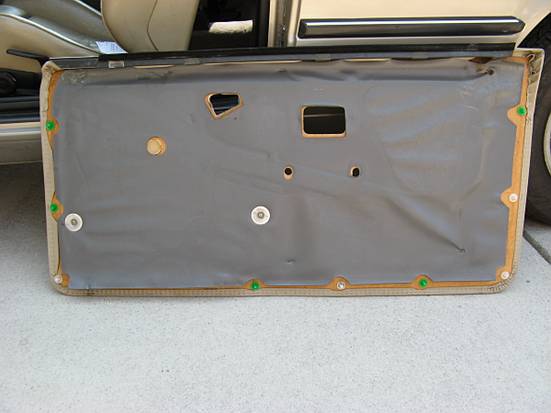
There are
several snaps around the perimeter of the door panel, I start at the front
corner using my hand to pull out and unsnap the panel one snap at a time
working my way around the panel. After all the snaps are undone the door panel
is lifted and up and off, the window can be rolled down for easier removal. It
is press fit on the door edge next to the window.
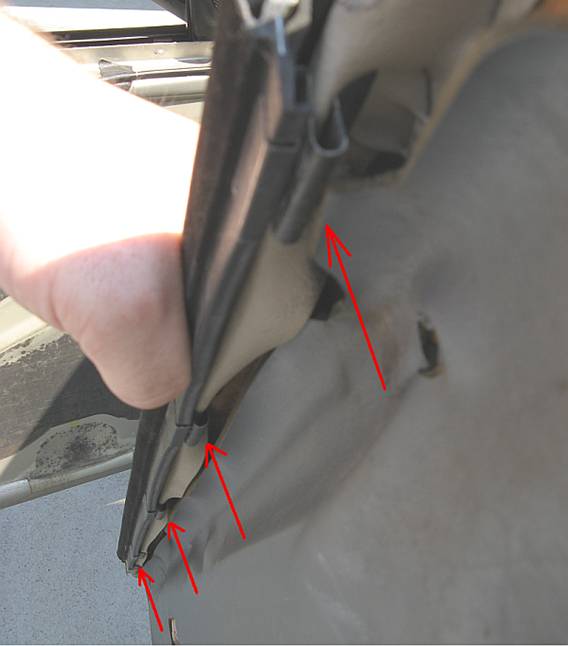
I found it easiest to make room for two hands so I carefully peeled back the
moisture barrier plastic (windows should be rolled up):
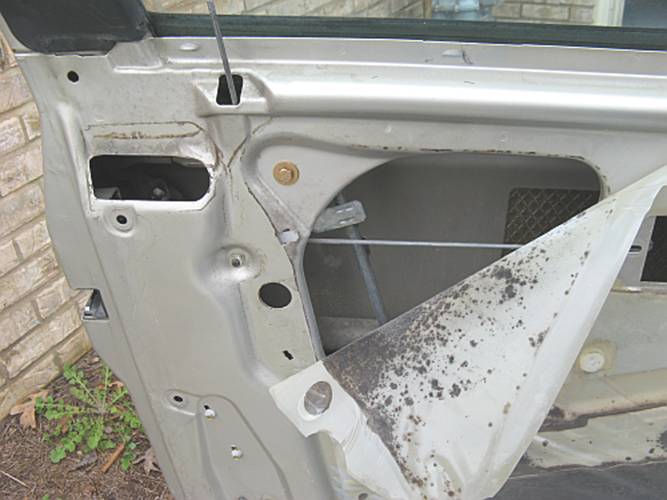
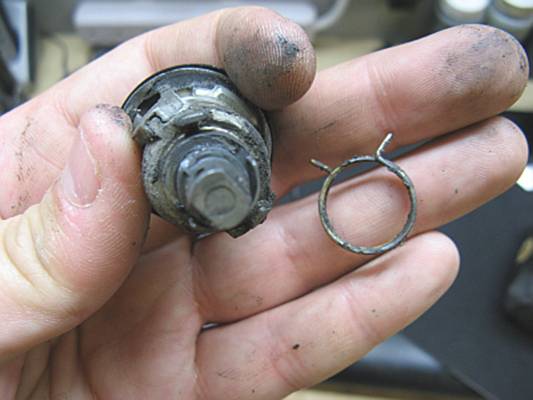
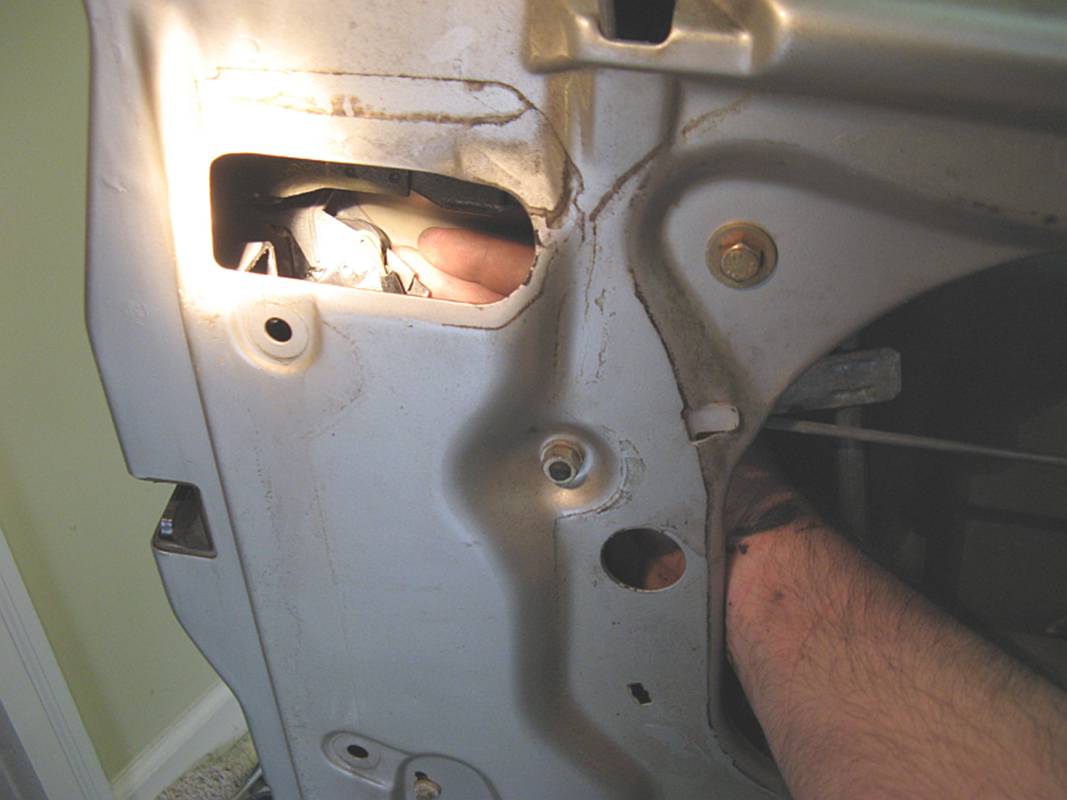
The lock
and switch are held in to the door by a sliding lock clip, can be hard to see
when looking through the small opening on the left but easy to see looking
through the larger opening behind the moisture barrier:
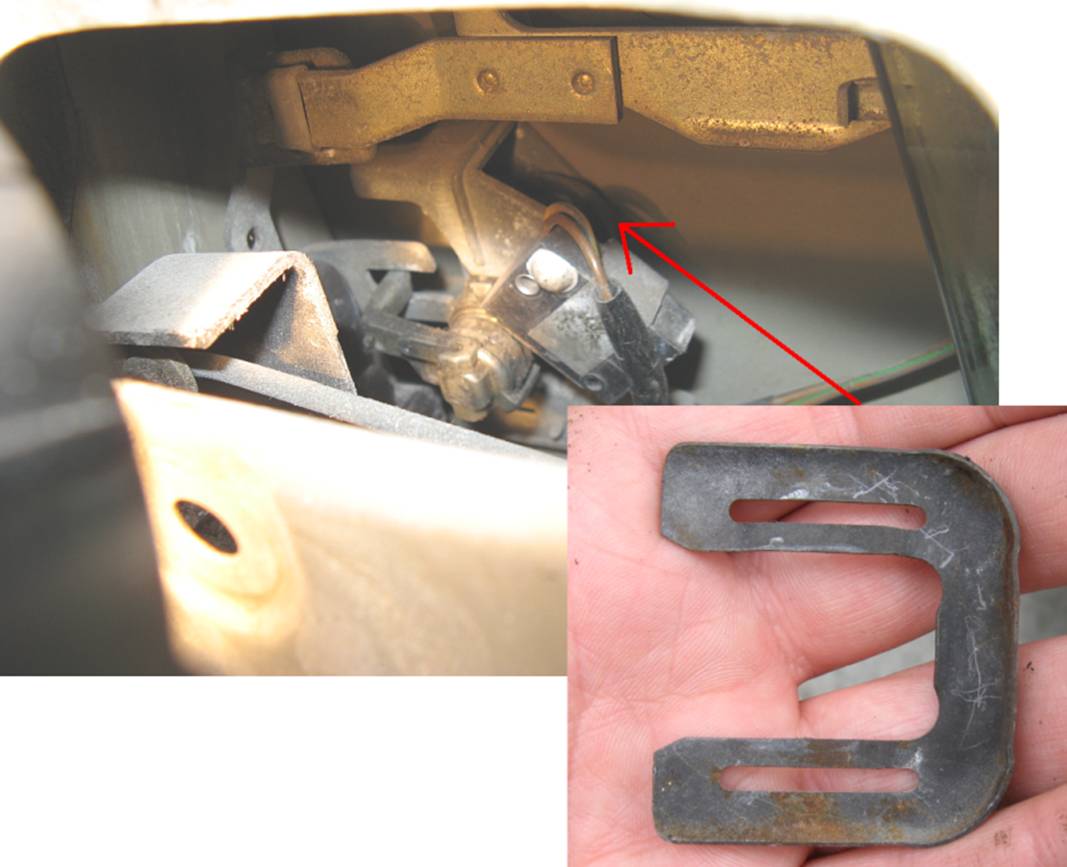
The clip can be carefully removed using a long flat blade screwdriver,
it is easily fished out of the door bottom if you drop it. Be careful not to
damage the switch or bend the metal plate it is attached to while using the
screwdriver to remove the clip:

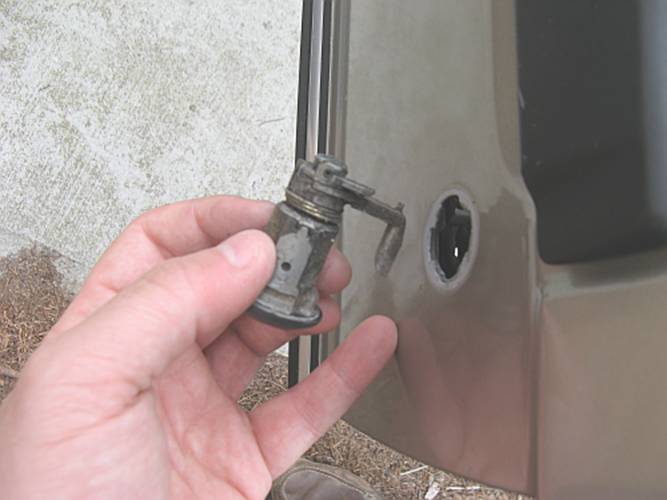
The lock
is removed by pulling out and hooking around and out of the hole:
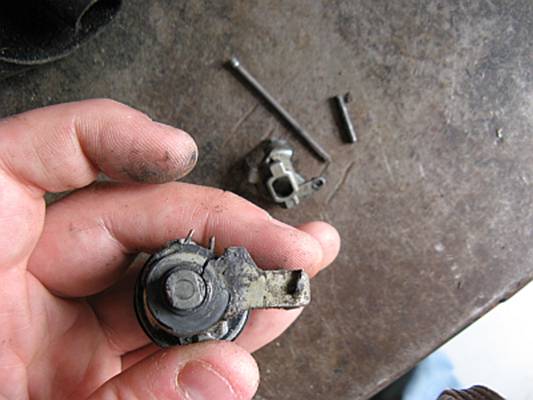
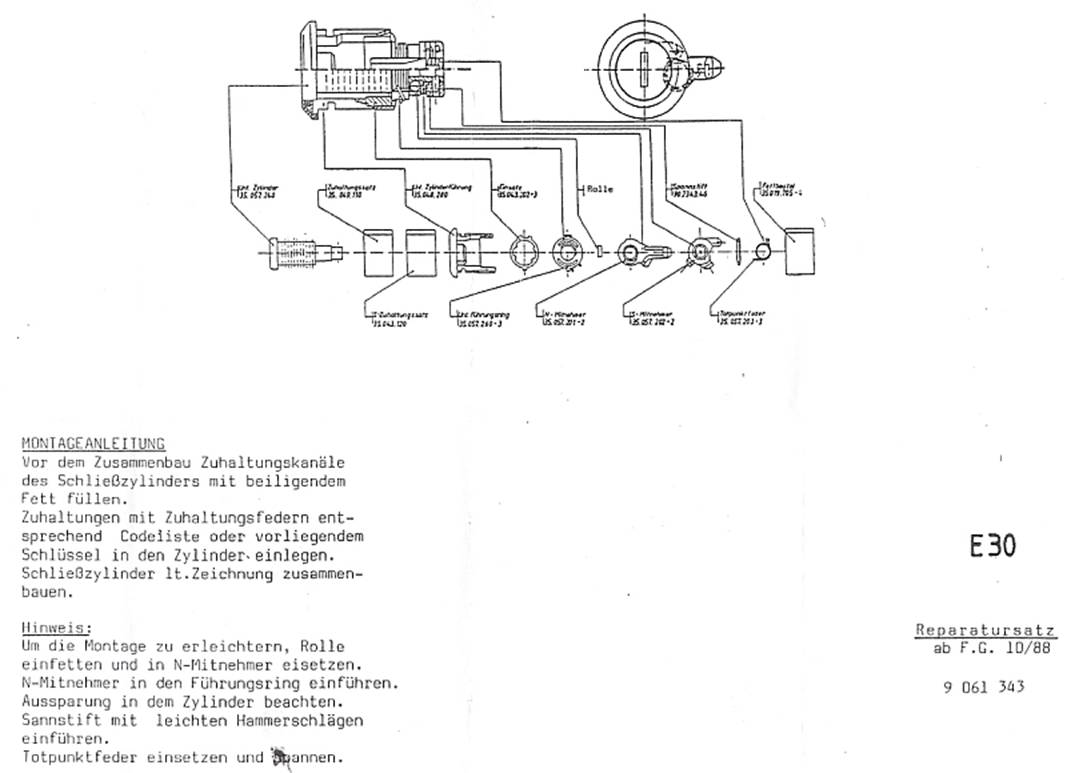
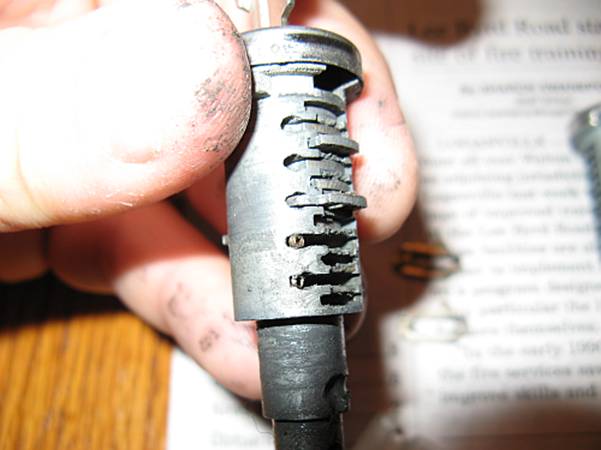
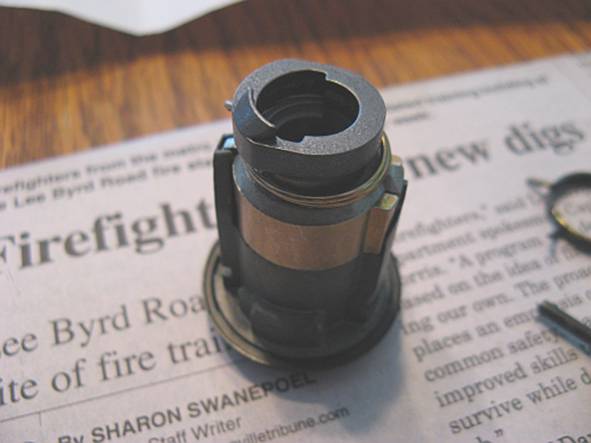
Rebuilding the Lock Cylinder:
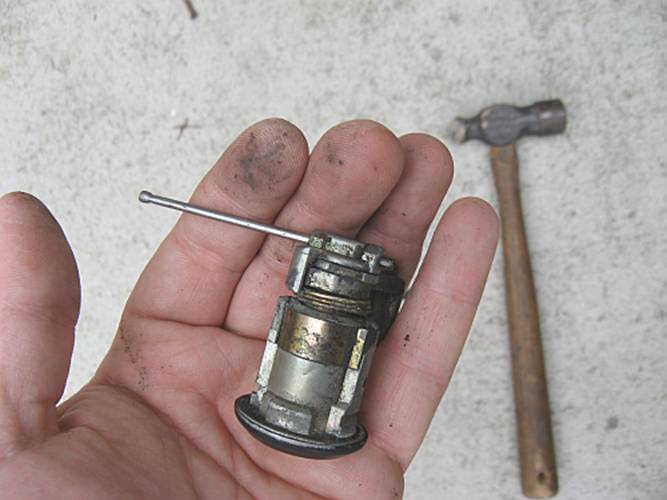
The lock
cylinder is held together by a dowel/pin that is press fit in the double lock
actuator. I found a nail of the right size and used that and a hammer to remove
the pin and disassemble the lock:
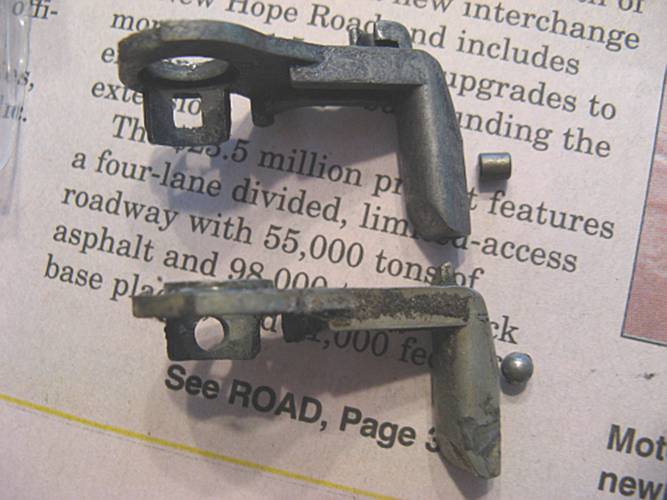
The
following are some pics of disassembly and the problem areas where the double
lock ball had rubbed away the metal on the cylinder and the lock actuator
itself was broken- no need to focus on the disassembly, the lock kit includes
all new pieces with some slight differences and that will be covered in detail:


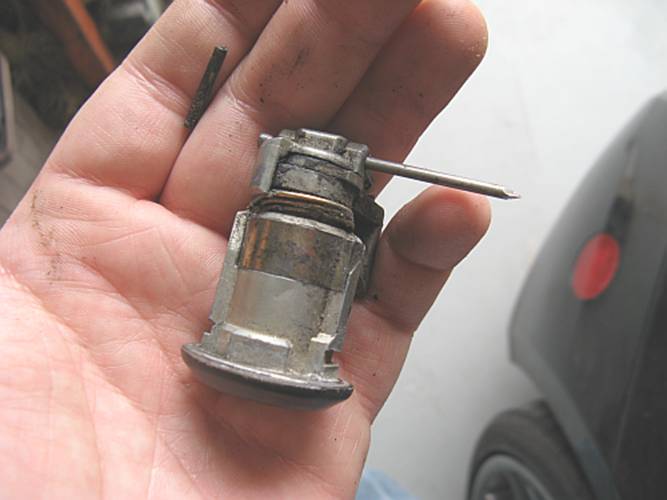
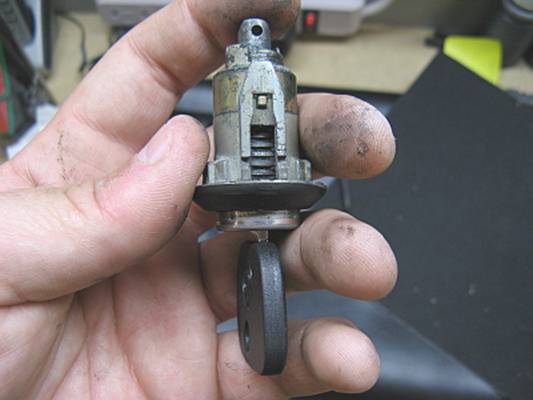
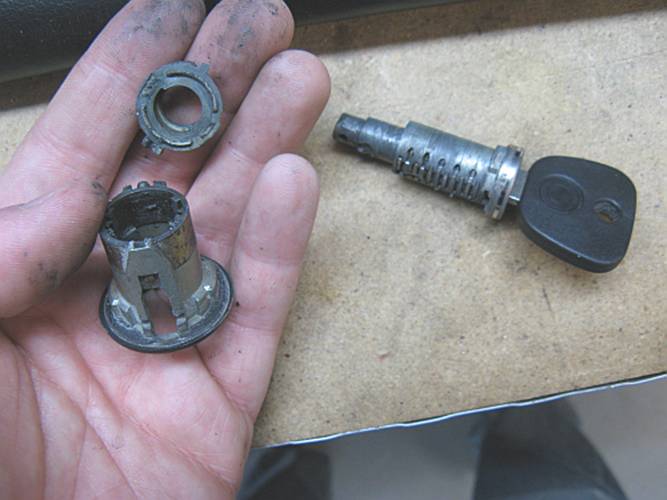
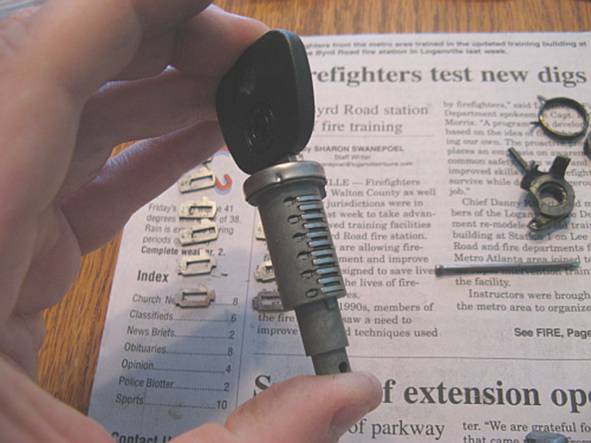
The last
step for disassembly is to insert the key and pull the cylinder out, be careful
NOT to remove the key yet:
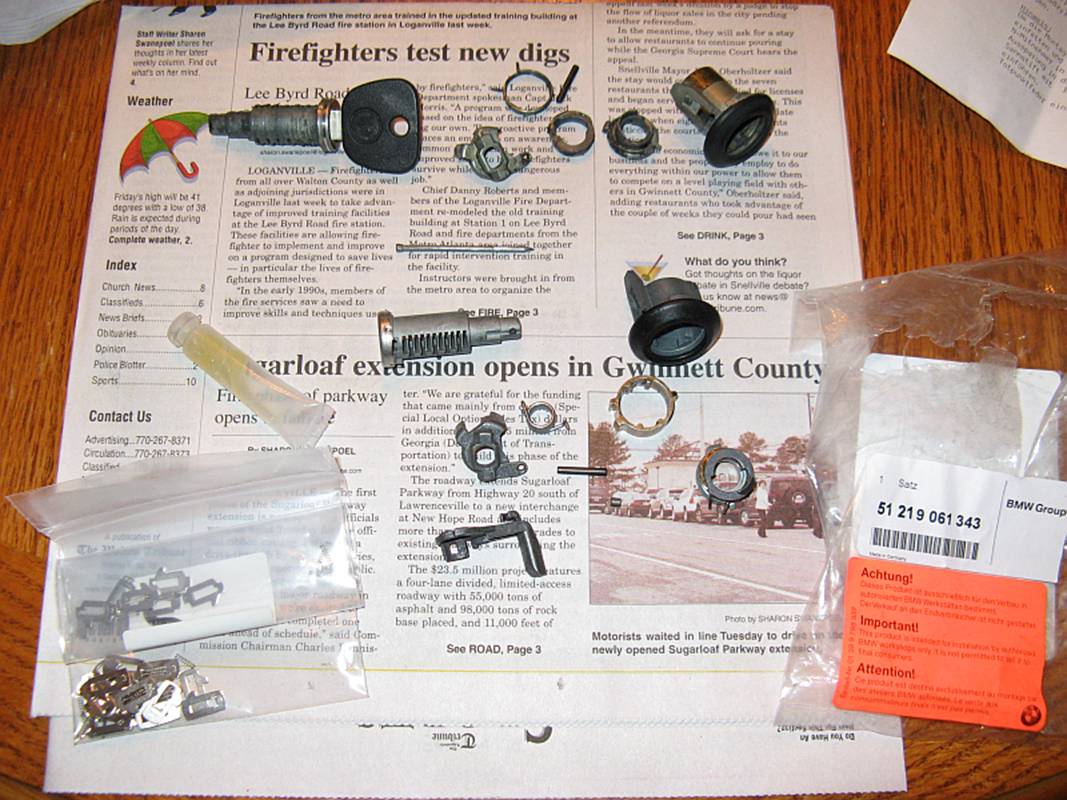
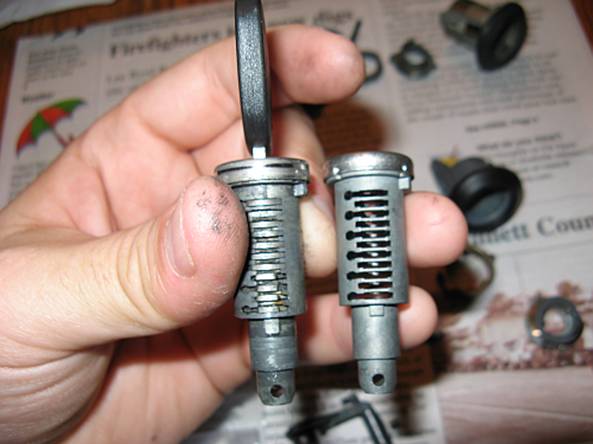
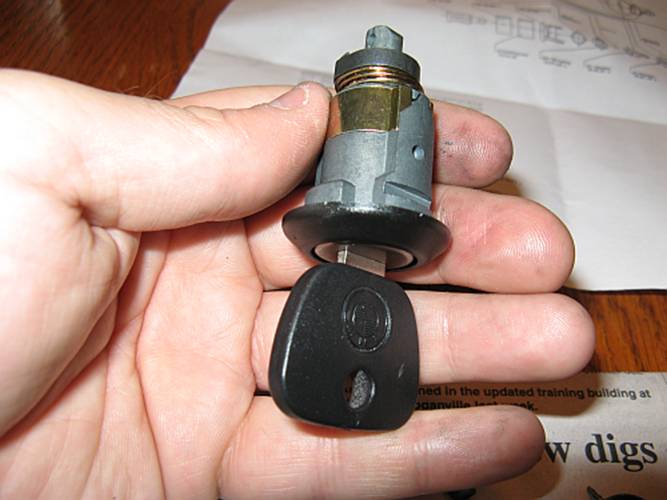
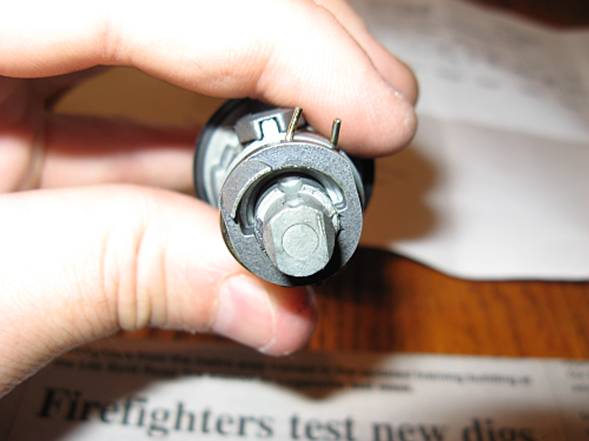
OK, it is
best to do the rebuild part with some light and on a table where you can lay
things out- I used newspaper so that my wife would not yell at me for using the
kitchen table. You will see that the rebuild kit includes ALL the pieces to
make a new lock:
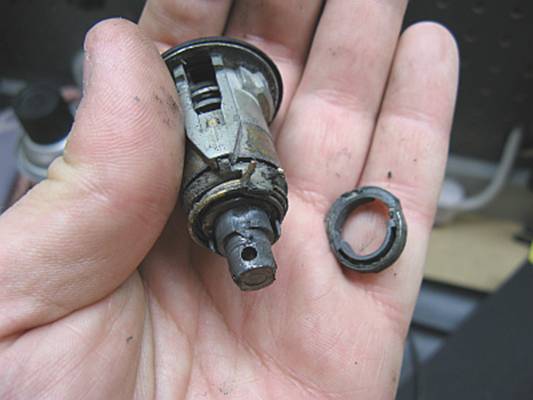
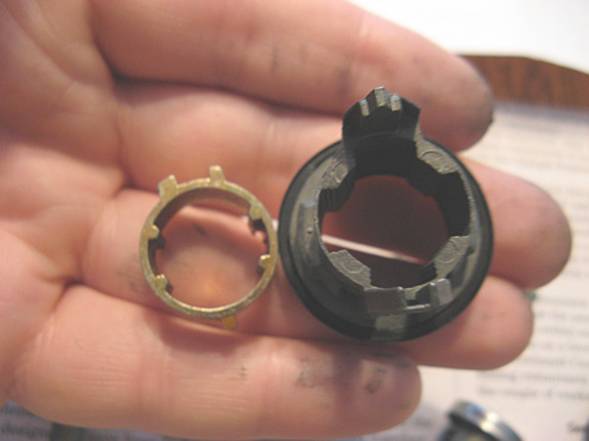
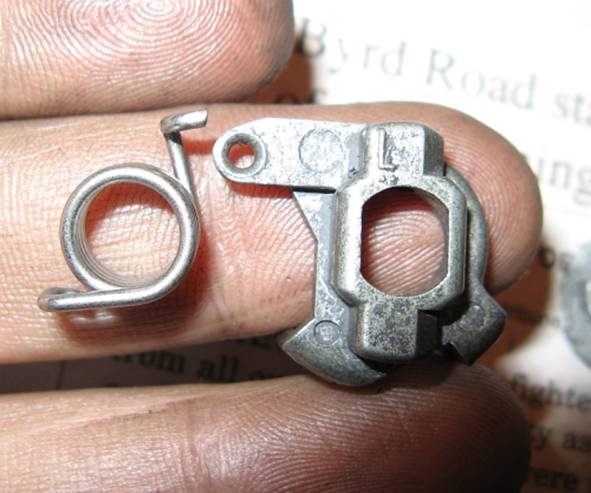
Note the
design change was from a ball bearing (bottom) to a roller bearing (top):
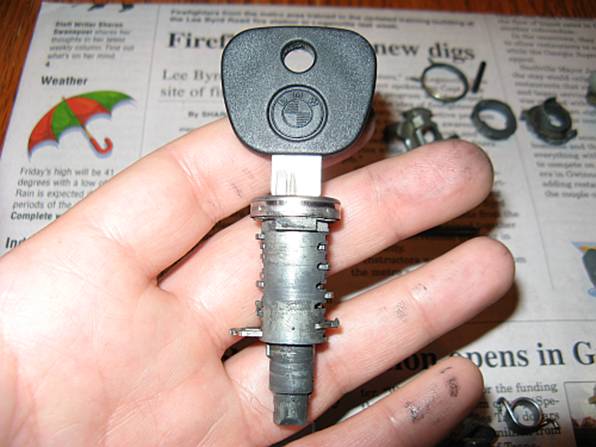
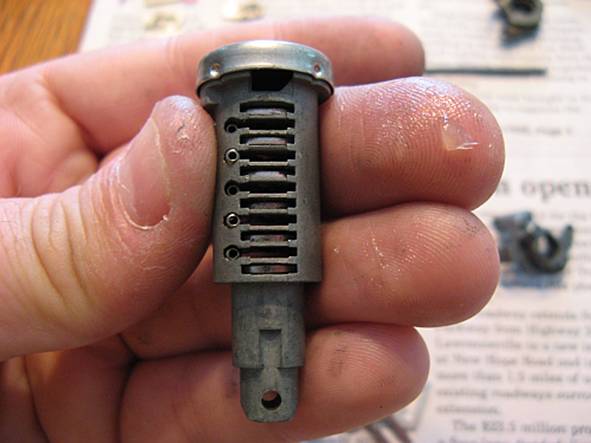
You will
want to remove your key slowly from the lock cylinder and make sure to keep the
individual tumblers in order as you remove them for each side- one side has six
and the other five. Each tumbler is under pressure from a small spring, mine
did not have a lot of spring left so no worries about shooting the tumblers
across the room….but you may have a different scenario so be careful. It is
CRITICAL that you keep the position of each tumbler noted so that you can
select new tumblers and place in the correct slot. The way I did this was to
note the side with the ridge (and the side with 6 tumblers) and put all those
to the left of the new cylinder and tumblers from the other side (5) to the
right. As you remove the key, one tumbler will be released on each side. Note
the springs still in place after the tumblers have been removed:

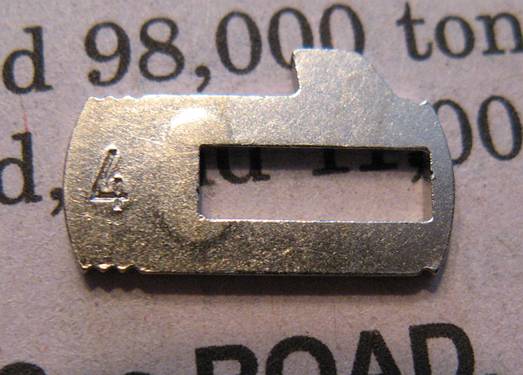
After all
tumblers have been removed, you can wipe the grease off of them. You will
notice each one is stamped with a number 1-4. Select a new tumbler with the
same number from the bag and lay them out beside the new lock cylinder in the
same order as the ones removed, again this is CRITICAL. You may be tempted to
reuse the old tumblers but they are most likely worn- mine were, it was easy to see the difference between the old and new
when the key was inserted.

Start by assembling the lock, first two pieces:

Having
assembled what we can, it is time to move back to the lock cylinder and
tumblers. In the bag with the tumblers are new springs, I placed these in the
lock cylinder first, and then added the tumblers in the correct position. Note
the grease on my finger tip, before inserting each tumbler it was greased with
the new supplied grease in the kit. After that tumbler was in, a new dab of
grease and the next tumbler was greased and inserted, I repeated this process
until complete. When the entire side was done, the lock cylinder was rotated in
my hand so that my hand held the tumblers in place for the completed side while
I added the springs and tumblers to the other side (as seen in first pic
below). When all tumblers and springs were installed, the key was inserted as I
compressed both sides of tumblers with my hand to make it easier:
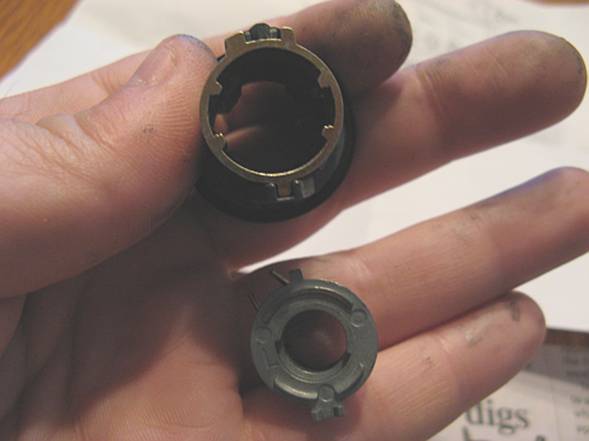
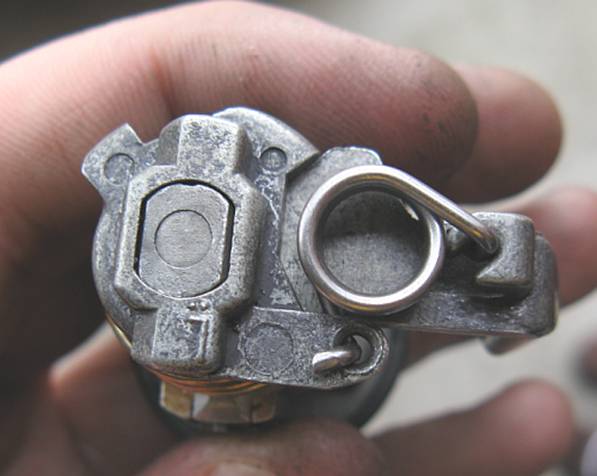
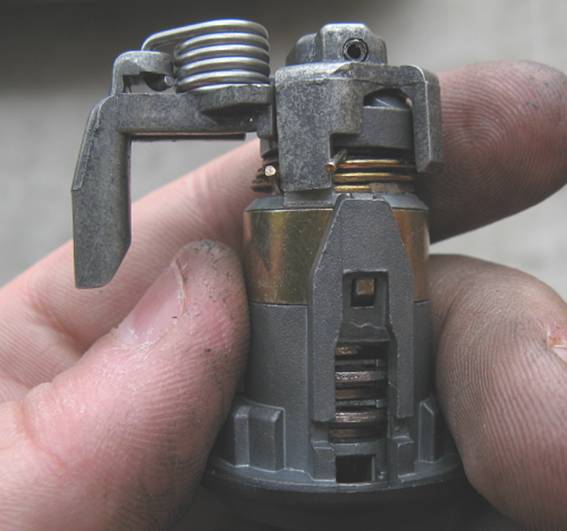
The lock
cylinder is now inserted into the lock assembly after greasing it:
The lock
cylinder has to be turned to a position where the lock actuator can be installed
with the roller bearing in place:
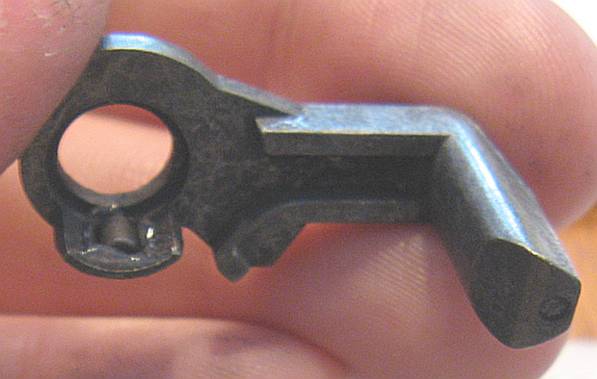
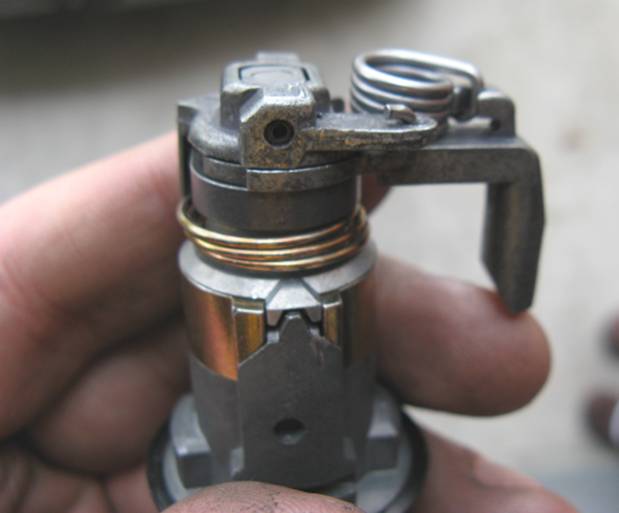
The last
piece is the double lock mechanism and spring. The spring has two ends, note
which end goes where in the picture. It can be a little tricky installing the
spring and then trying to line up the piece and install on the lock cylinder
while also holding the entire assembly together- it may take a few tries but be
persistent:
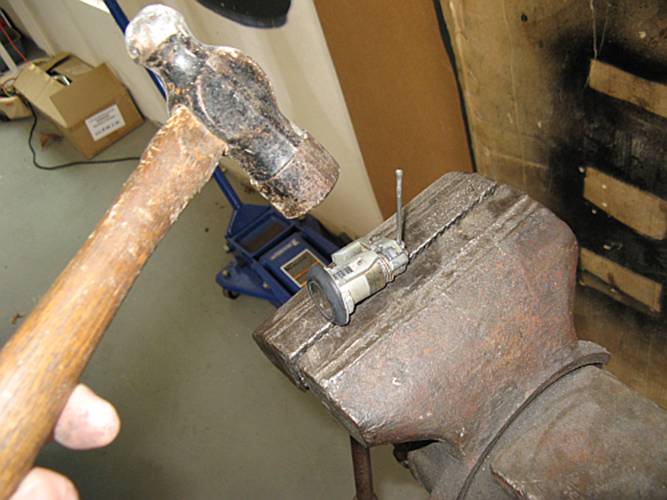
Here are a
few more pics of the lock cylinder assembly after the dowel was pushed through the
end- I used the same nail and hammer to install the dowel as when removed:
Reinstalling Lock:
Getting
the lock back in requires the same hook/twist method as when removed,
complicated a little by having to get through both the door and the switch
plate. Once this is accomplished the locking clip has to be pushed back on,
again easier to see though the larger hole behind the moisture barrier looking
up, this may take a few tires and some persistence as well- having a helper to
push/hold the lock in from the outside (maybe even holding a light at the same
time with their other hand so you can see) while you are installing the clip
makes it even easier:
If you are like me, you can now
enjoy locking/unlocking the drivers door without
having to walk to the trunk or passenger door and use the central locking
system (or reaching through the passenger side as I had to do before the
central locking system was working).