![]()
BMW E92
CDV (Clutch Delay Valve) Modification/Replacement
DIYs
that helped me: http://www.e90post.com/forums/showthread.php?t=29828
, http://www.e90post.com/forums/showthread.php?t=73844
, http://forums.bimmerforums.com/forum/showthread.php?t=794424
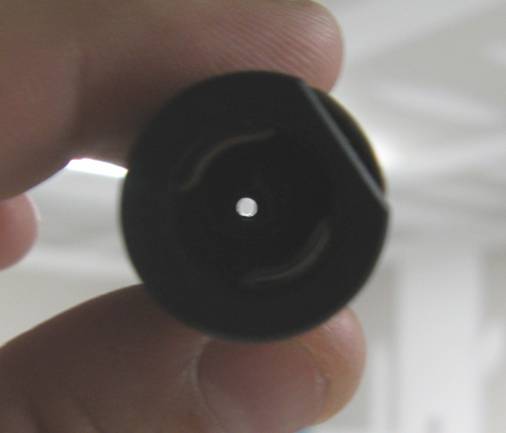
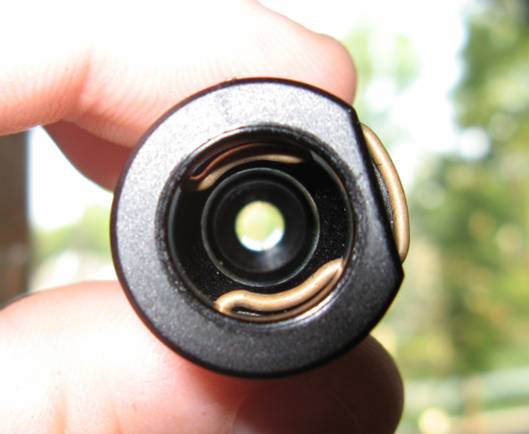
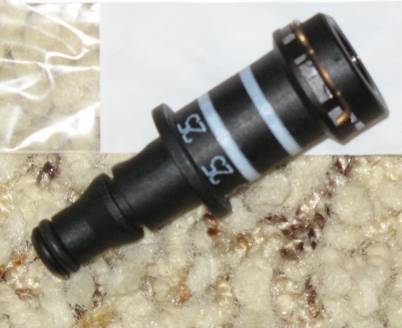
I am new to BMW and when researching common upgrades on the forums, the CDV (Clutch Delay Valve) kept coming up. Basically the CDV has a small orifice that slows down the flow of the clutch fluid so that the clutch engages slower; great for new drivers that cannot be smooth shifting but not so good for drivers that know how to drive a manual transmission. When I initially drove the 335i Coupe that we ended up buying, it did feel kind of jerky on the 1-2 shift so I thought maybe there was room for improvement. In the interest of less jerky shifts and extending the life of my clutch, I ended up ordering the modified CDV from Zeckhausen Racing and when comparing it to the OEM CDV, it is easy to see how restrictive the CDV really is (OEM on the left, Zeckhausen on the right):
I read through several DIYs to see how the CDV R&R was to be performed and decided to go ahead and do it on a Sunday night- nothing like the pressure of having the car ready for my wife to drive Monday for motivation. I decided to assemble the following DIY based on my experience.
NOTE: The following is provided for information only and any use of this information by you is at your own risk.
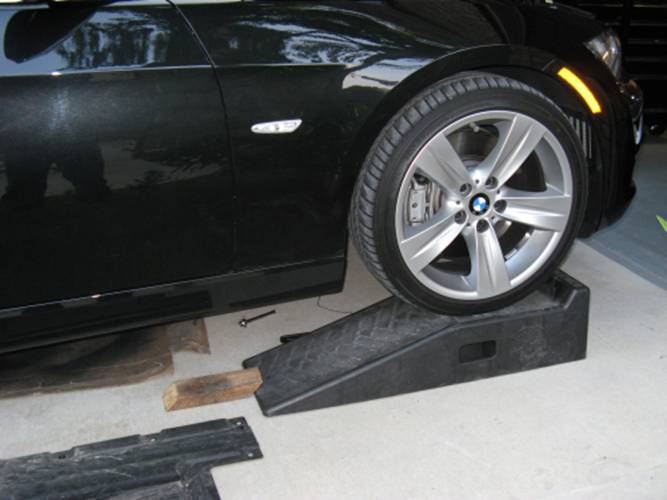
To start I drove the car up on Rhino Ramps using my 2”x4” helper ramps to clear the front spoiler. Once on the ramps the rear wheels were chocked, parking brake on, car in 1st gear. The car should be cool in order to proceed, the transmission gets hot and WILL burn you.
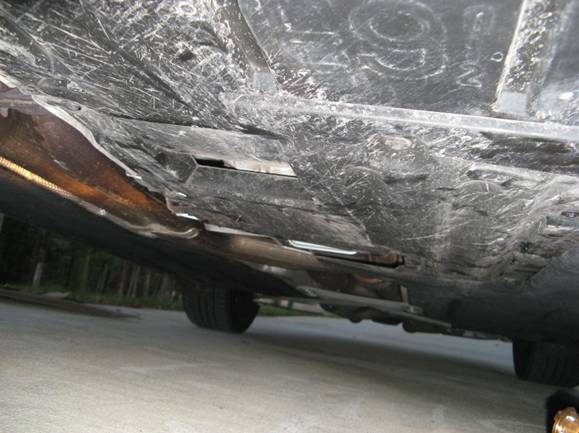
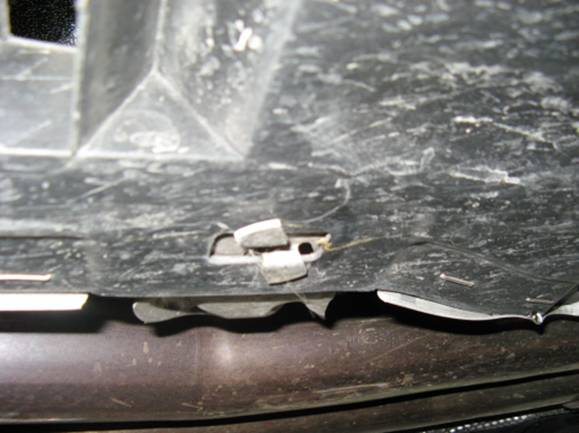
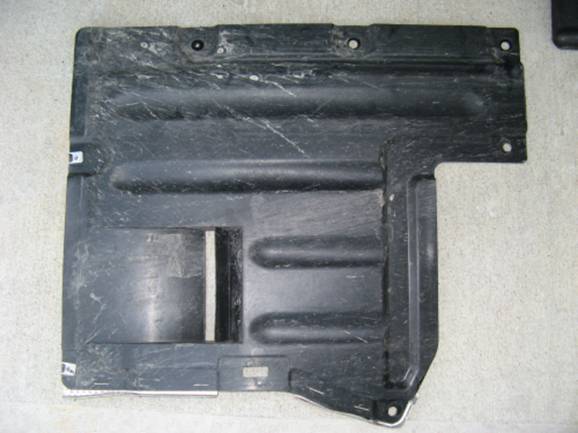
Next the underbody plastic panel was removed, this is held to the bottom of the car by (7) 8mm bolts and a retainer. Once the seven bolts are removed the panel has to be rotated so that the retainer will go through the panel cutout:
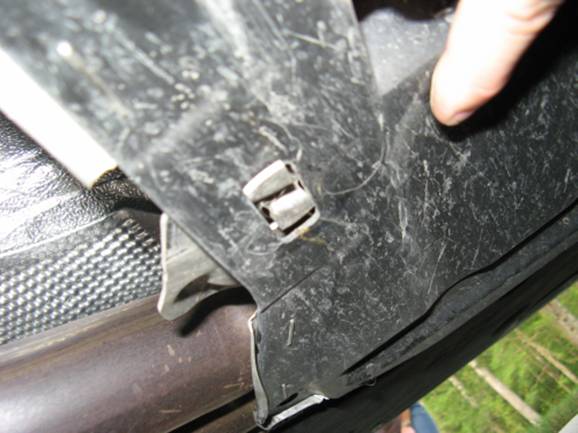
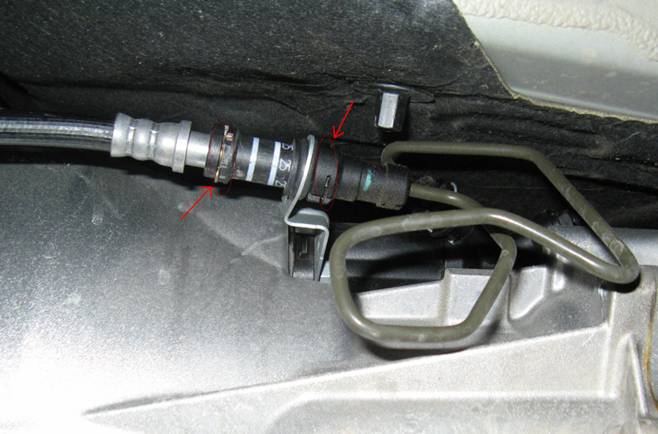
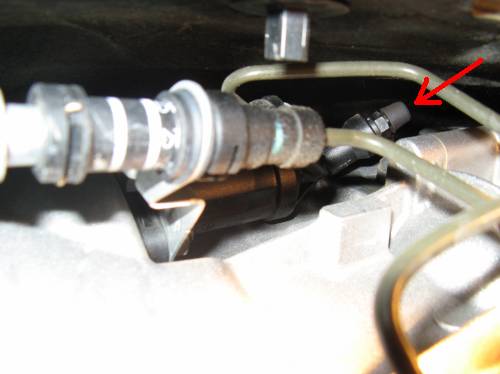
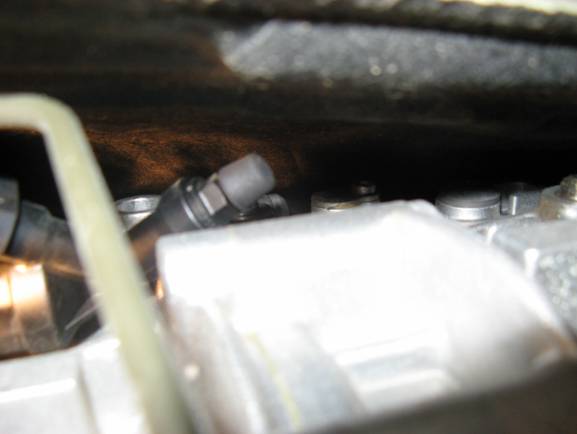
Now that the bottom panel is out of the way, it is time for the real fun. First, locate the CDV, it should be to the left of the transmission looking up:
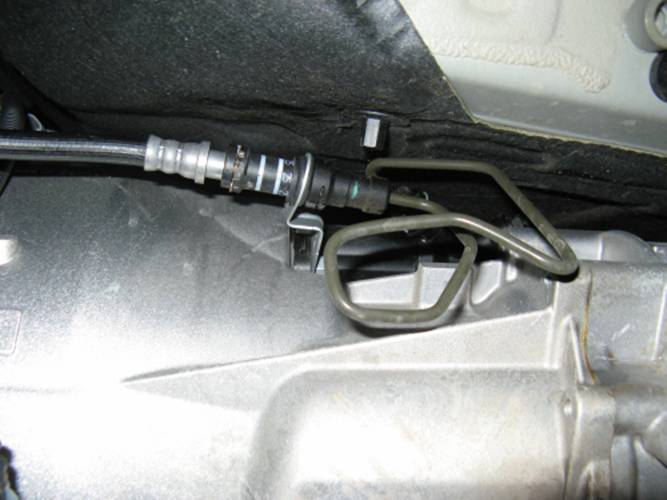
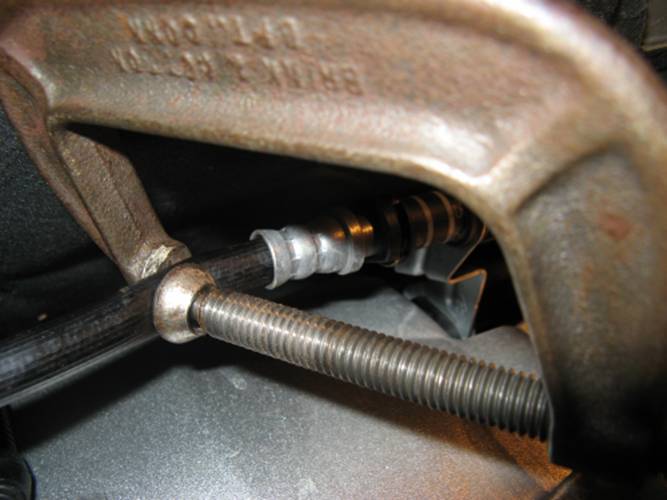
The next thing I did was clamp the flexible line going to the CDV to minimize fluid loss when removing and replacing. Some of the DIYs I read suggested ViceGrip pliers padded with something but I decided to use a C-Clamp (but was careful not to get it too tight):
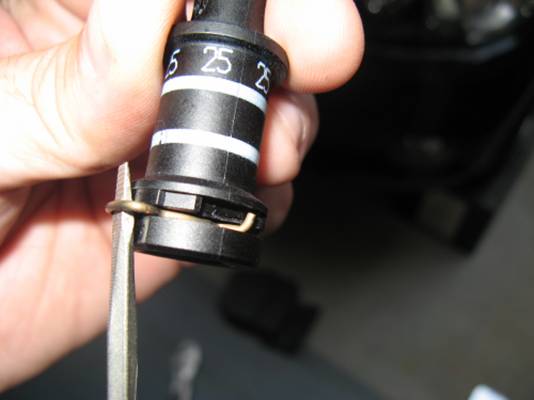
Next there are metal clips that retain the CDV, these clips need to be removed so that the CDV can be removed. An example picture below shows the clip on the new CDV and the screwdriver technique to remove it. The CDV can be rotated to a position for easiest access to the clips and a small screwdriver can be used to pull the clips out from the top or to push the clip out from below (arrows show the top of each clip for the screwdriver method illustrated in the first pic, but the bottom is easier to get to on the hard line side):
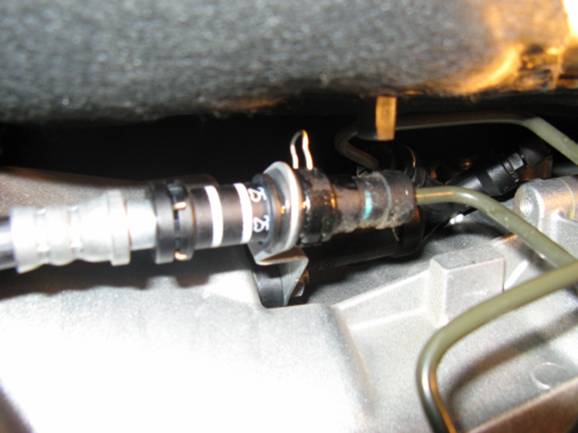
After the CDV is removed, I found it easier to push the clips back in to their respective fittings and then the pieces will snap together. You can see in the pic below how the nose of the pieces taper to the channel where the clip locks in place:
Once everything is back together, I decided to bleed the brakes. Not a lot of fluid was lost but any time you open a closed system you introduce air. My wife found the clutch pedal a little lower than where it had been before so bleeding the air out of the system was the next step. In my E92 this was not so easy because the bleeder screw does not allow for a lot of movement with a wrench and the plastic bleeder nipple has to be loosened a little over a full turn before any fluid comes out. Here is the bleeder screw (pictured with the rubber cover in place):
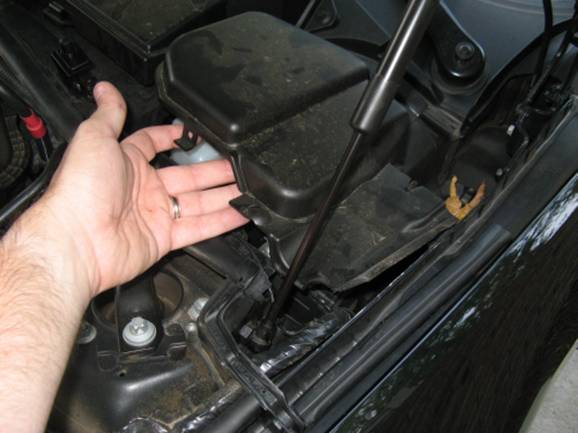
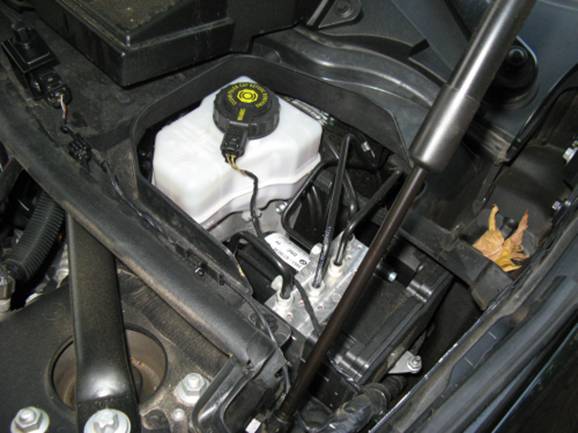
The easiest way to bleed the clutch is with a pressure bleeder. To use the pressure bleeder I had to access the brake/clutch fluid reservoir which is located beneath a cover on the driver’s side of the car. The rubber trim has to be removed and two small release tabs have to be pressed and the cover can be removed:
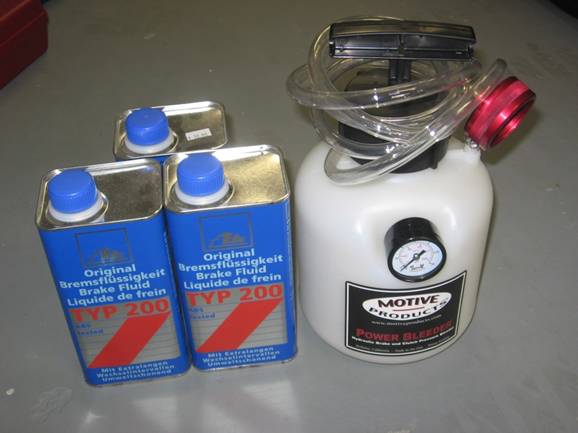
I used a Motive pressure
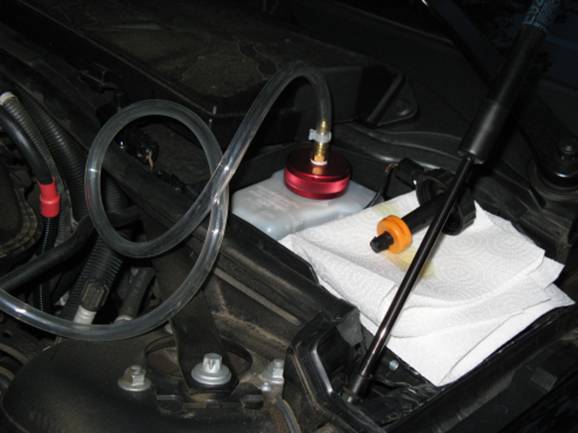
bleeder filled with 1 liter (1 can) of ATE TYP 200 brake fluid. The reservoir
cap can be removed and placed on top of a few paper towels to prevent brake
fluid from dripping on to the engine compartment and the pressure bleeder cap
is then screwed on. Once the pressure bleeder was connected to the reservoir I
pressurized the bleeder to 20 PSI and went back under the car. The rubber
bleeder cap was removed and a short piece of tubing was connected to the
bleeder valve and run to an empty ATE brake fluid can. I used an 11mm open end
wrench to loosen the bleeder valve and after a little more than one complete
turn was able to see fluid coming out. I let it run for a few seconds and after
the air bubbles no longer showed up closed the valve. The plastic valve does
not require a lot of pressure to loosen and that is why I was OK with an open
end wrench as opposed to the flare nut wrench I would have used with a metal
bleeder valve……and on the flip side they do not have to be tightened as much as
I was used to with metal valves either so be careful NOT to over tighten. Also,
EXERCISE CAUTION
WITH BRAKE FLUID, IT WILL EAT PAINT.
After bleeding you will most likely need to remove some
fluid from the reservoir since the pressure bleeder fills it past the max line,
easily performed with a turkey baster from the
grocery store. It is also a good idea to make sure the clutch feels/looks good
before re-assembling everything just in case you have some more air to bleed
out of the system. After putting it all back together and going for a drive I think
this is a VERY worthwhile mod, not overly dramatic improvement but no more jerky 1-2 shifts ![]()