![]()
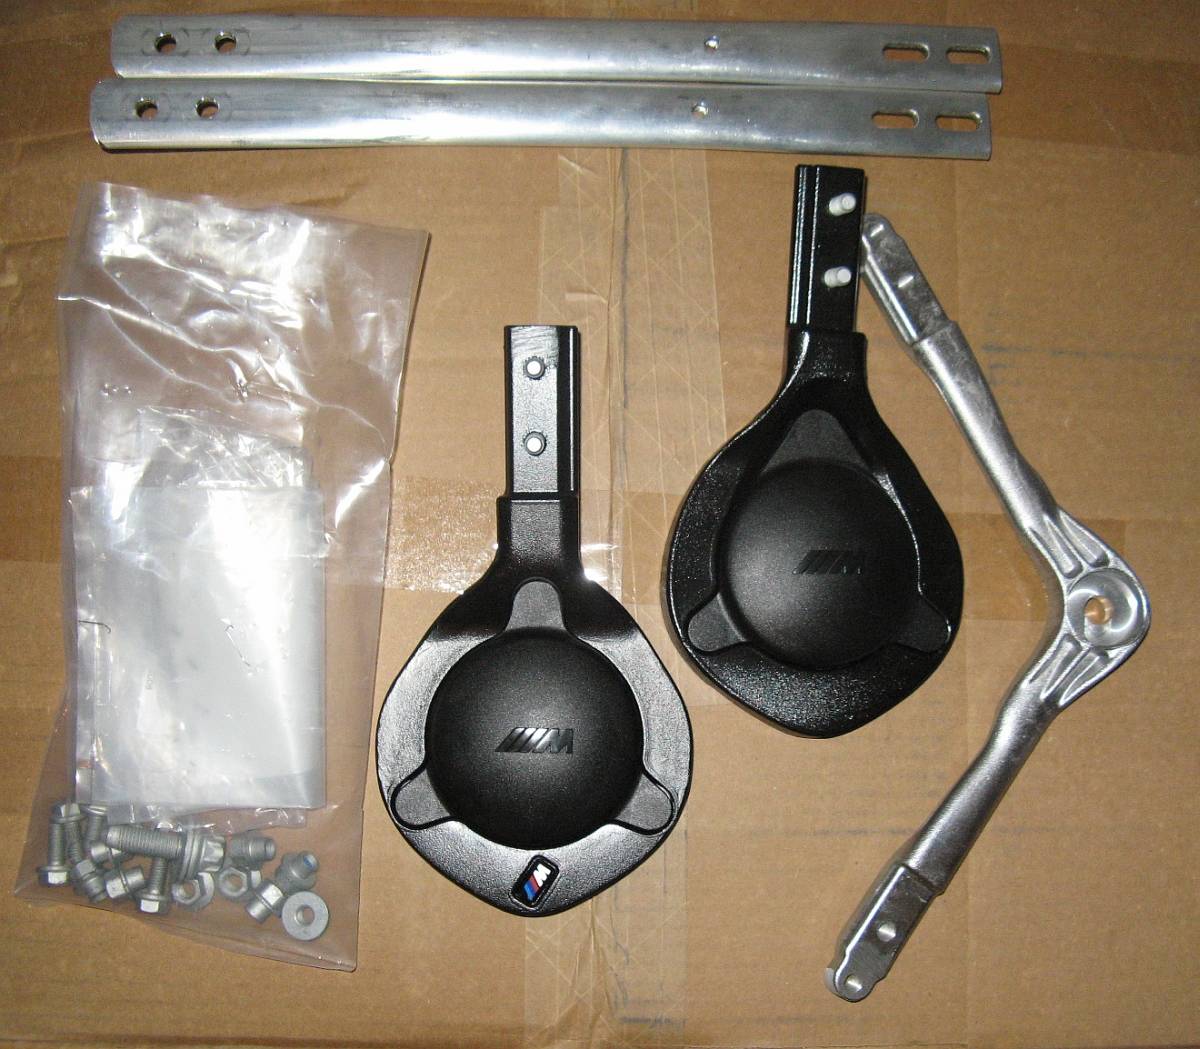
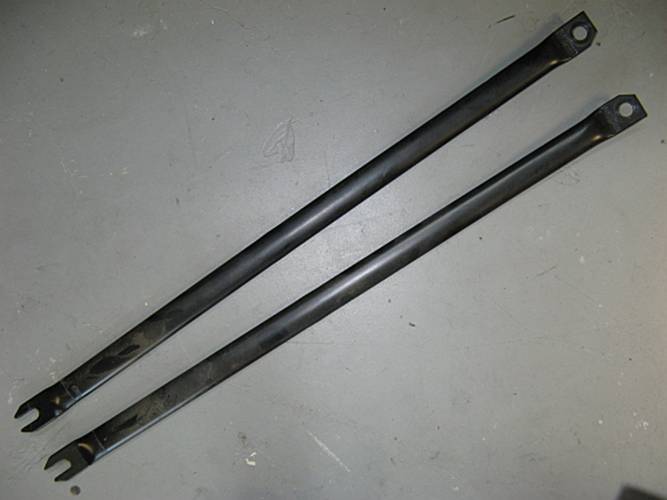
BMW E92 M3 Strut Brace
Installation on 335i
I
originally had the BMW Performance Strut Brace but didn’t feel it added a lot,
so when the M3 parts were released the BMW Performance brace was sold and the
M3 brace purchased.
My car is
an E92 335i so your mileage may vary regarding installation notes:
NOTE: The following is provided for information only and any use of
this information by you is at your own risk. Please read the ENTIRE
process/results.
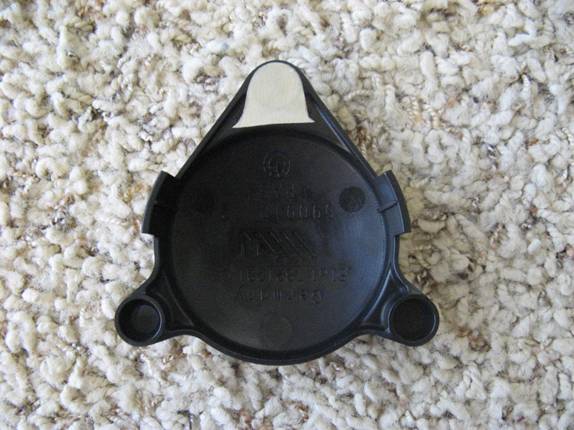
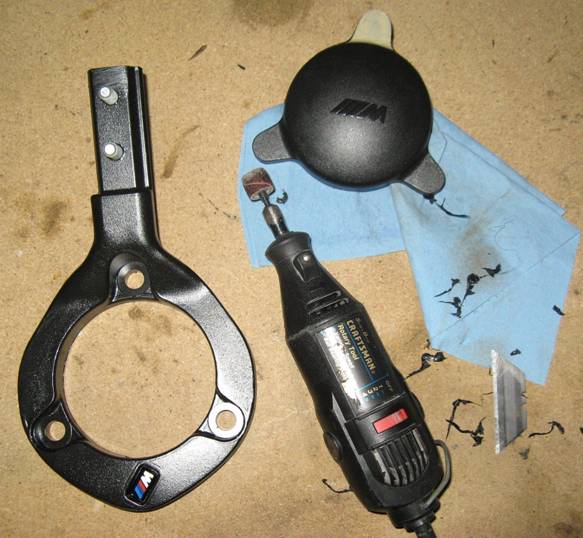
The first
thing I did was to Dremel the passenger side cover so it would fit the
passenger side brace mount, the part number was the same for both sides for the
cap but the base was decidedly different. I traced one of the smaller
extensions on to masking tape and made templates for both sides for reference.
I then used a Dremel with sanding disk attachment to carefully remove material
until the shape was the same, looks OE and works now:
I
initially thought this was going to be a pretty straight-forward installation,
remove OE brace and install M3 brace. The cowl area was already disassembled
for another project so it was the ideal time to install this brace (the cowl
disassembly is covered in a lot of the ECU access threads for chip
installation/O2 Sim installation so I am not going to rehash that here but will
hint that you can find it as part of this DIY: http://www.billswebspace.com/RissRacingO2SimInstall.htm
).
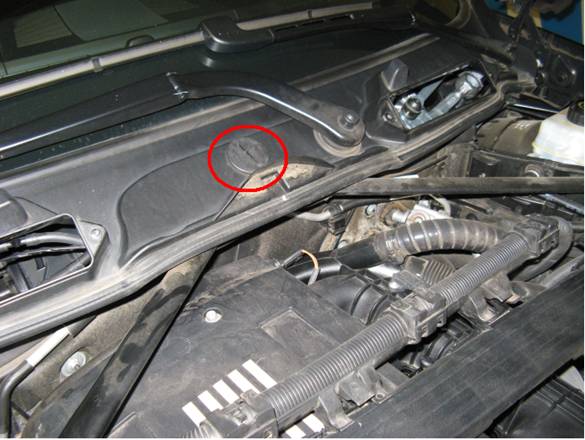
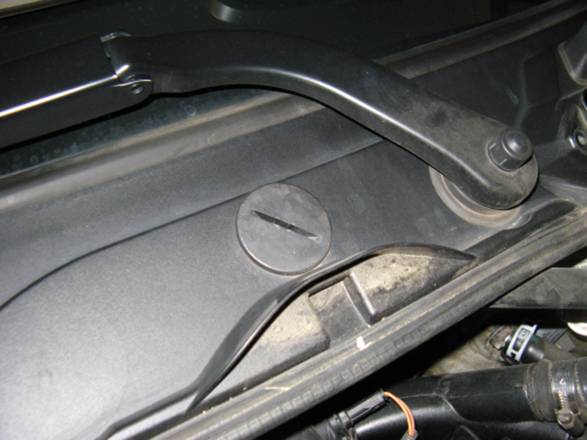
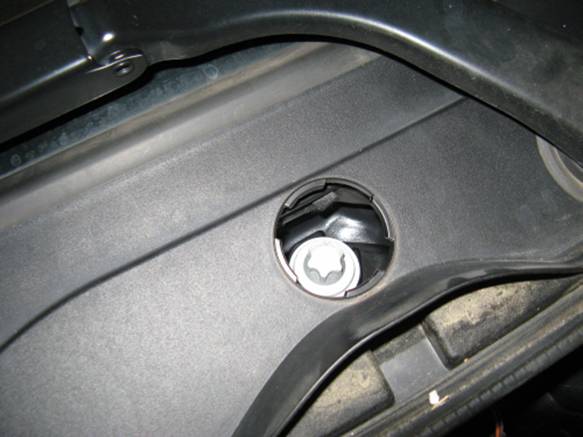
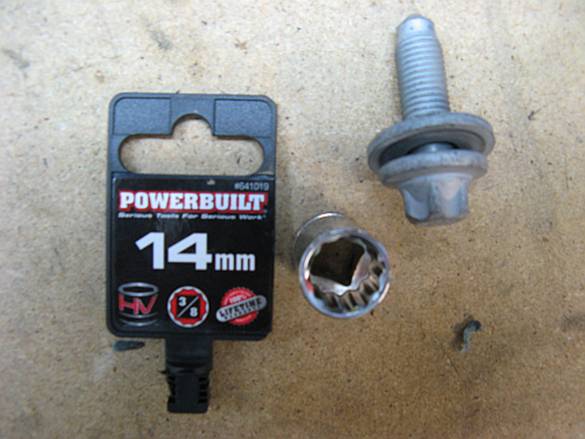
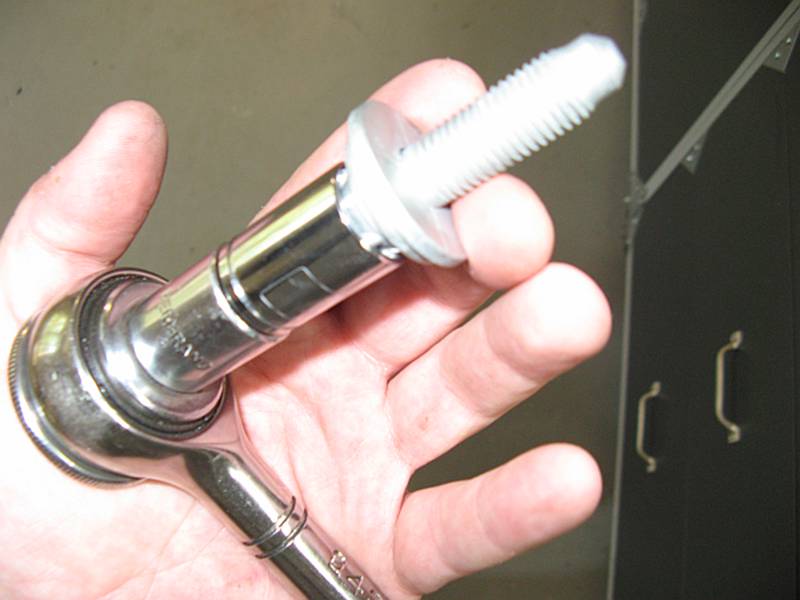
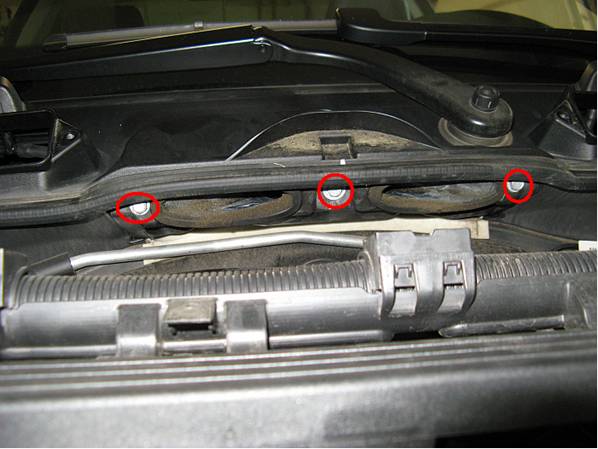
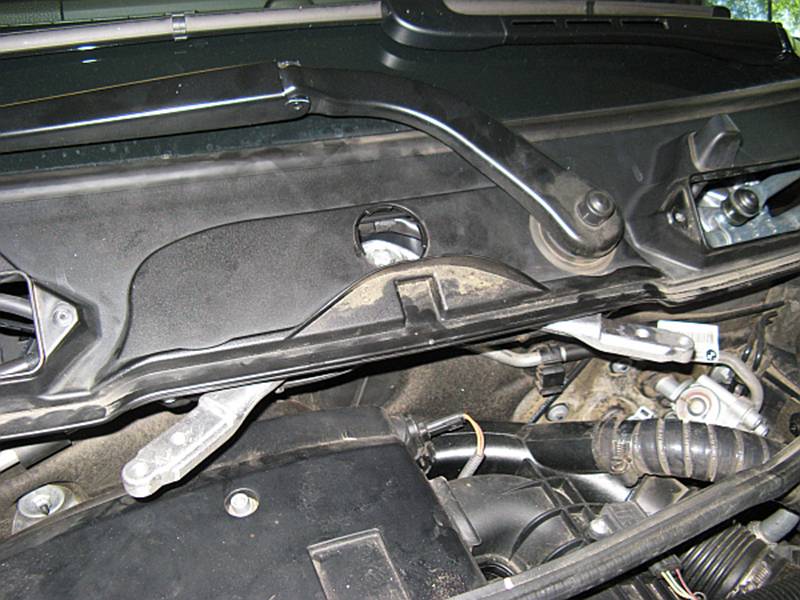
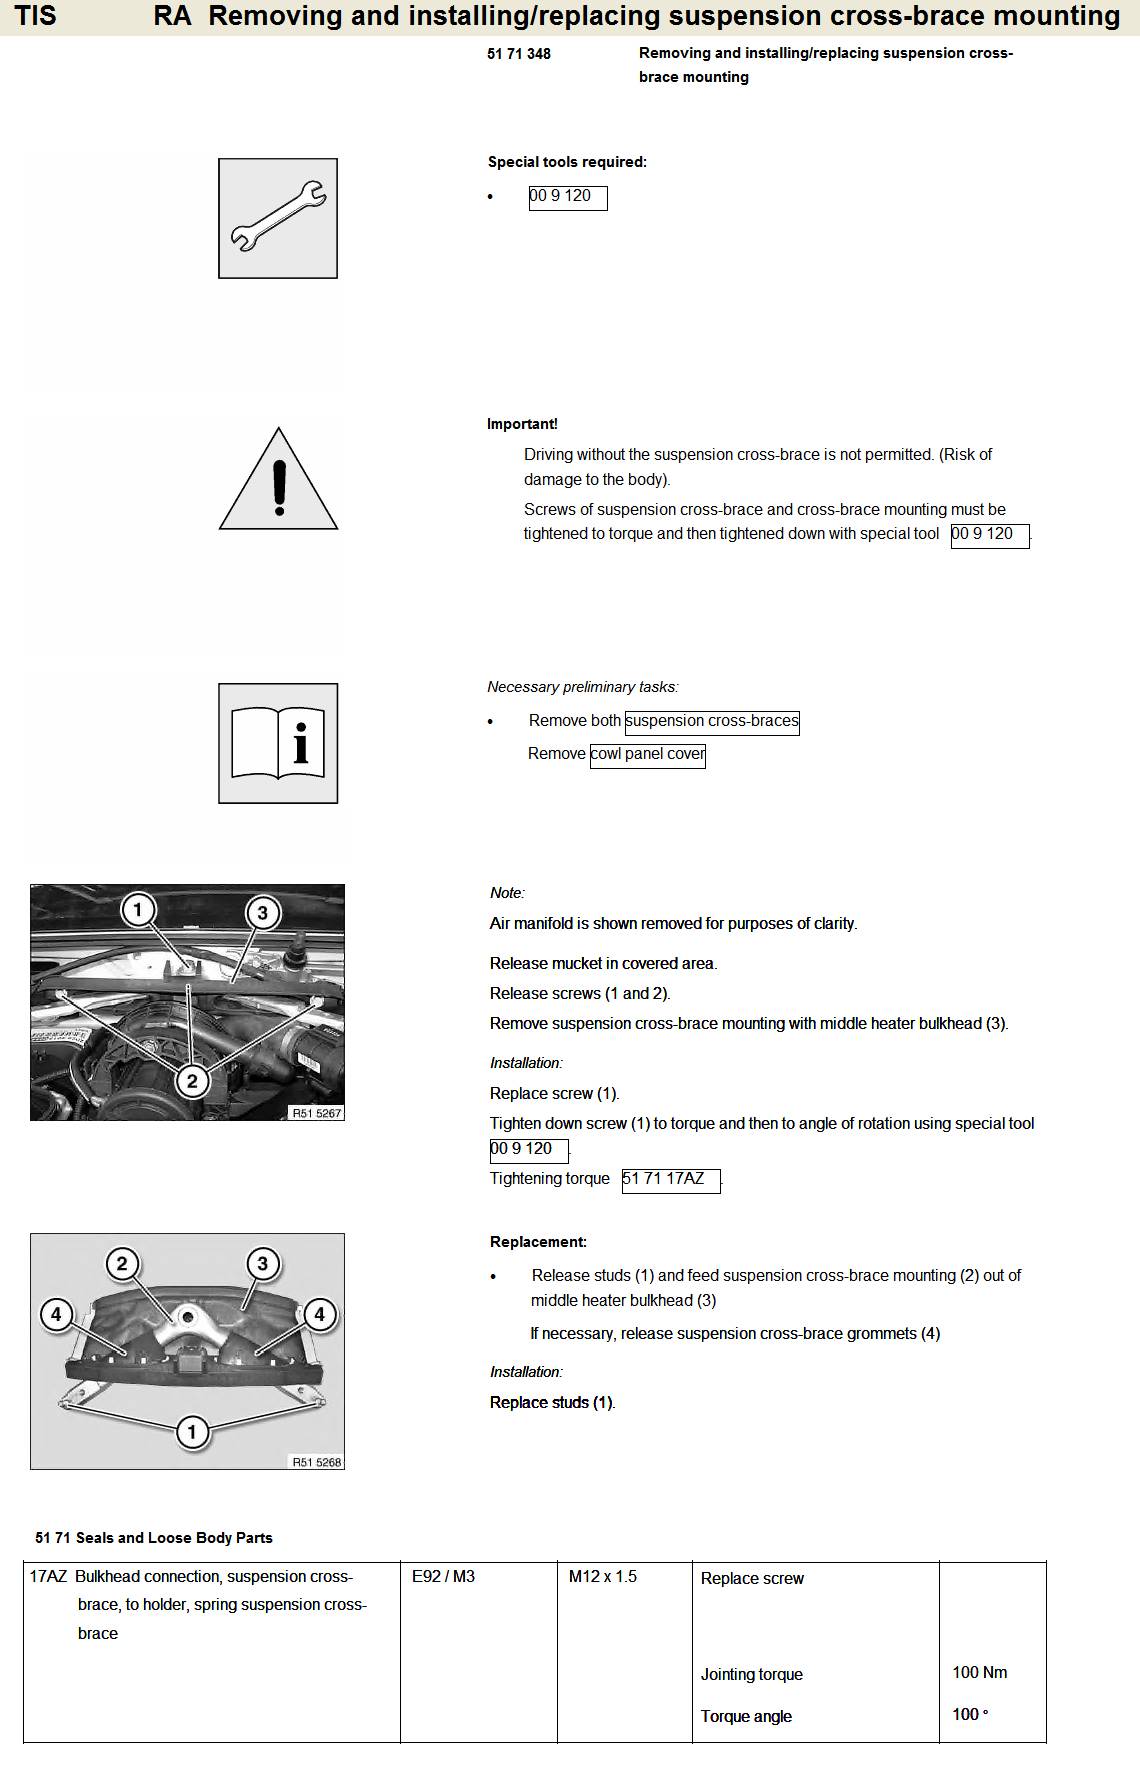
There is a
plug in the center of the cowl that is turned counter clockwise to release it
and pulled out to expose a large Torx bolt for the OE brace central mounting
point to the firewall. Challenge #1 was finding an external Torx socket large
enough to remove and install this bolt, my set went to E16 and this was at
least a few sizes bigger. After going to a few parts places and not having any
luck, I looked to twelve point sockets to see if anything came close and the
14mm socket for this particular brand fit perfect and tight with no slack, my
12 point Craftsman socket did not fit at all so it was just my good fortune
that the place where I gave up had a manufacturer that did work.
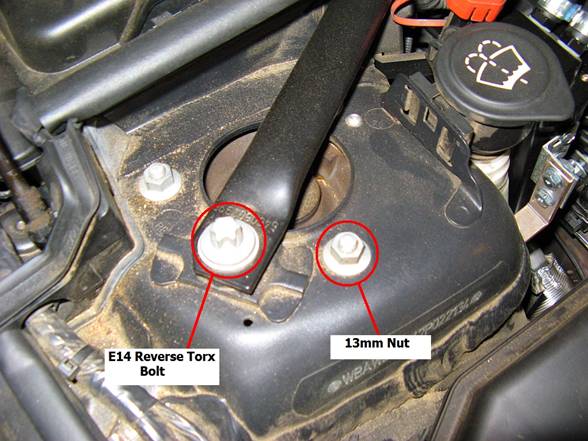
After this
bolt is removed, the outer two bolts at each strut tower are removed using an
E14 External Torx socket and the OE 335 bars are free to slide out and remove:
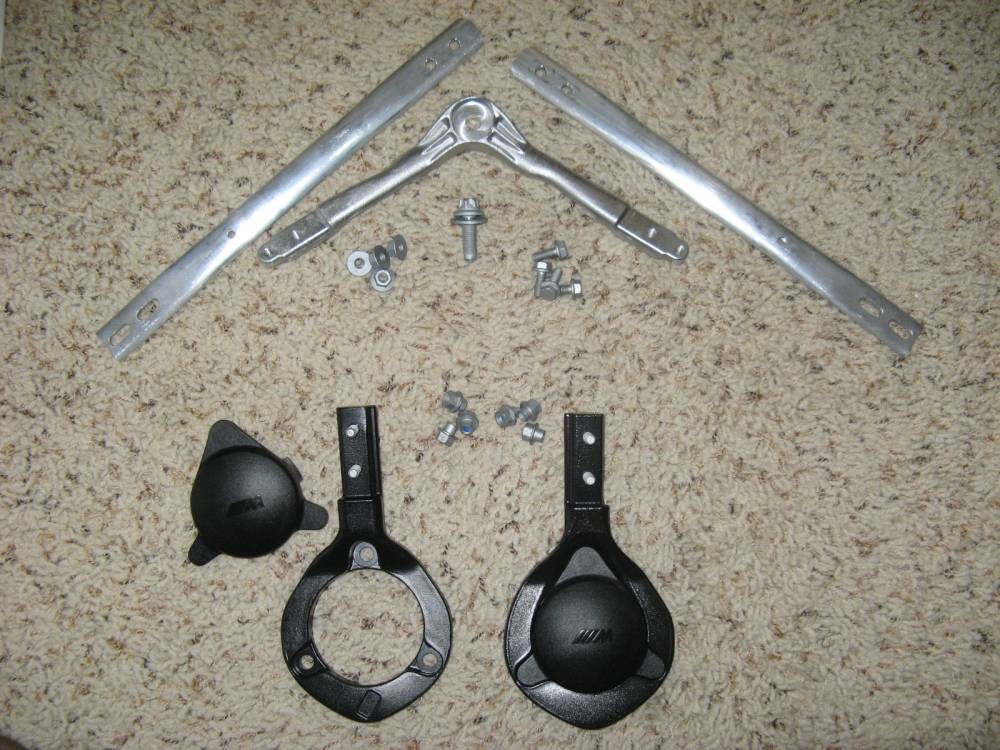
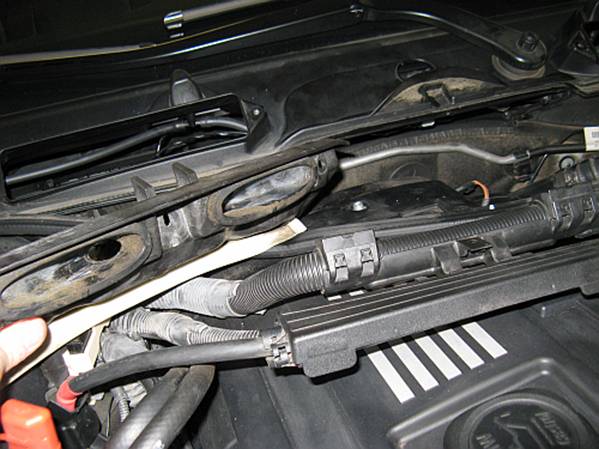
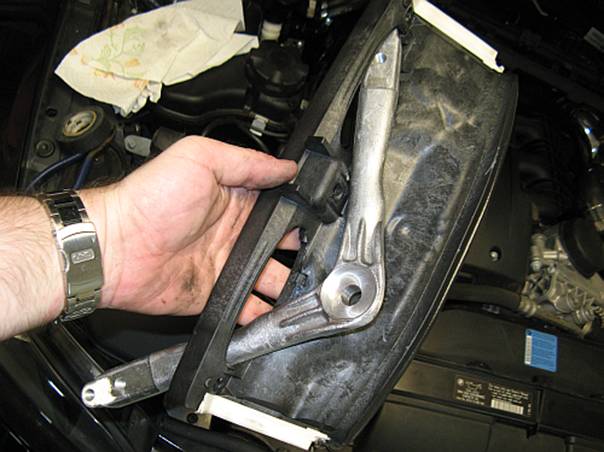
Now its time to install the M3 strut brace. Start by removing the three bolts
at the front edge of the cowl trim using a 10mm socket and pulling the plastic
piece forward, down, and out- it hooks at the bottom:
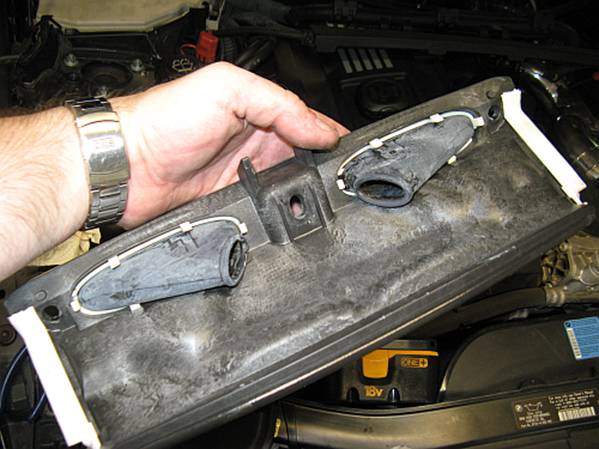
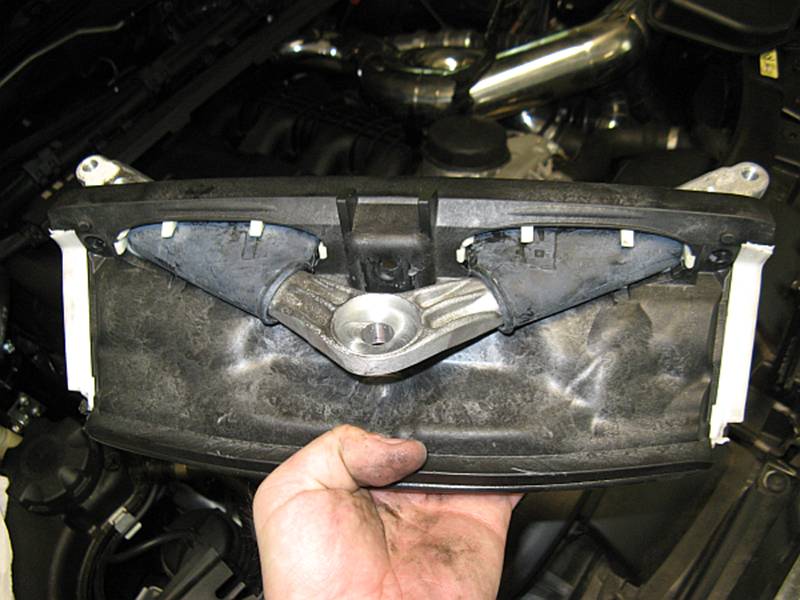
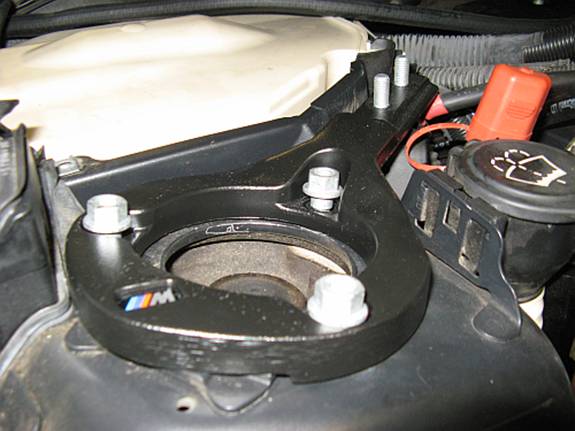
Next, the
removed piece is disassembled so that we can add the new M3 brace firewall
mount to the assembly. The rubber inserts are released by a combination of
pressure while releasing the clips around the perimeter. The M3 firewall brace
mount has to be forcibly pushed through the plastic piece and then the inserts
are reinstalled (note the L and R markings on each piece for left and right).
The brace mount should be oriented with the recess for the center bolt facing
up:
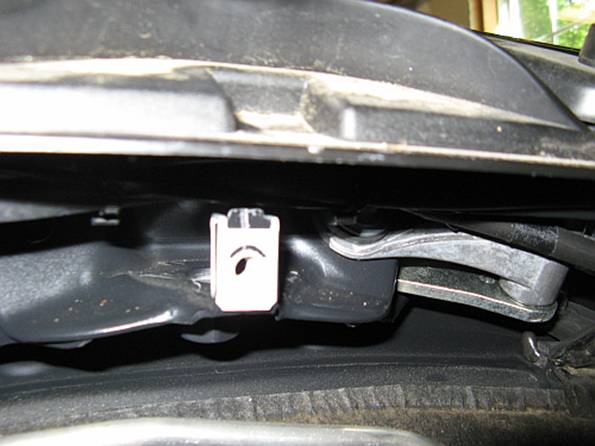
The part
that is the most fun is getting the new assembly reinstalled. The piece that
the brace mount is installed in bolts to a plastic piece in the center of the
cowl cover- which is in the way. I first thought I could just lift the cowl
cover up enough to where the center of the mount would fit through. I ended up
cutting the plastic tie on one side of the screw hole
that holds the wiper fluid lines so that I could maneuver them out of the way
and it went in pretty easy at that point. Install and tighten only the cowl
piece screws FIRST (3 total using 10mm socket), then loosely tighten the large
external Torx bolt in the center of the mount.
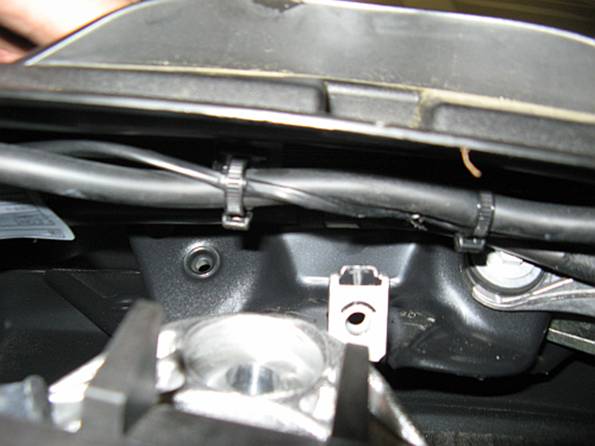
With the
car on the ground, remove the 3 bolts holding the strut to the tower using a
13mm socket. Loosely install the new well nuts that came with the M3 brace,
also using a 13mm socket. Repeat for other side:

Loosely
install the braces and two nuts per side at the strut tower mount, and then two
bolts per side at the firewall mount:
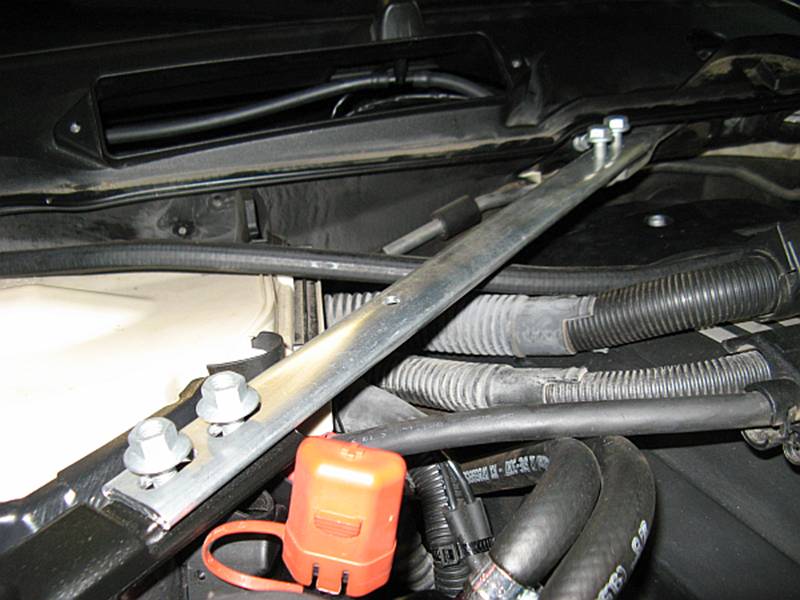
Everything
is still loose at this point, right? When tightening, I found hand tight with a
3/8” ratchet worked for the smaller bolts and hand tight with a ½” ratchet
worked for the large external Torx- don’t turn into the Hulk and strip or break
something (The closest thing I had access to is an older TIS document, those
specs are at the bottom of this document). Start at the strut mounts by
tightening 3 well nuts per side (10 mm socket), then the 2 nuts per side for
the strut side of the brace, then the 2 bolts at the firewall side of the
brace, then finally the large external Torx bolt in the center of the firewall
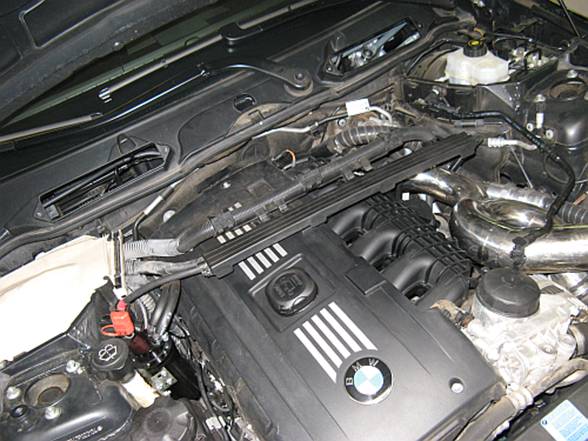
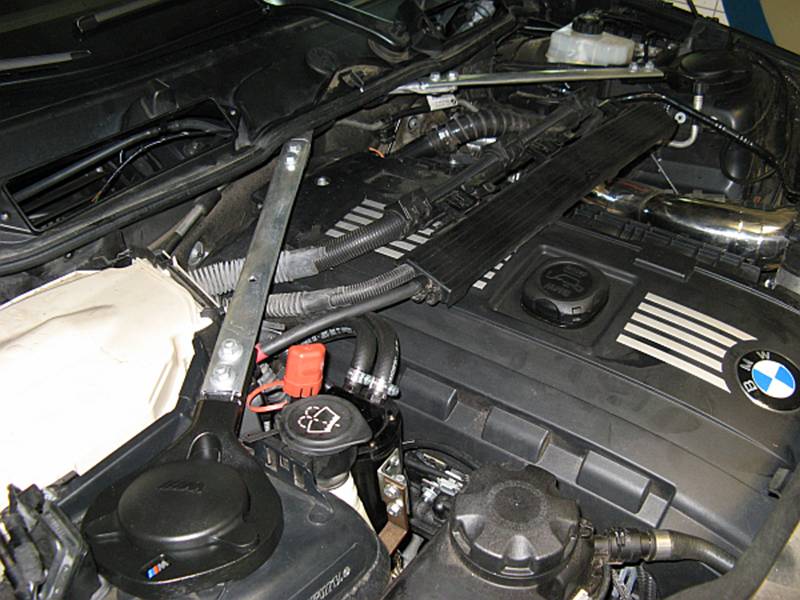
mount. Install the plastic strut caps and admire your finished installation
after reassembling the cowl area (I know the car is dirty, maybe next week it will
get washed).
[NOTE: The cowl piece that is
hooked into the cowl base plate and secured with (2) 8mm bolts might be a
little tight as it makes slight contact with the two rear bolts on either side
for the brace bars you can see. No worries, just use a
little more force to get it slid into place and then bolt it down- no noise or
other problem was noticed after I installed mine but YMMV]:

![]()
TIS Instructions and Torque Specifications:

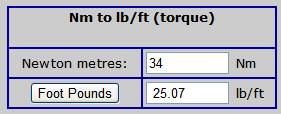
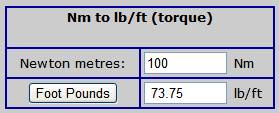
(Don’t forget to angle torque after jointing torque is
achieved)